


Latest & Greatest
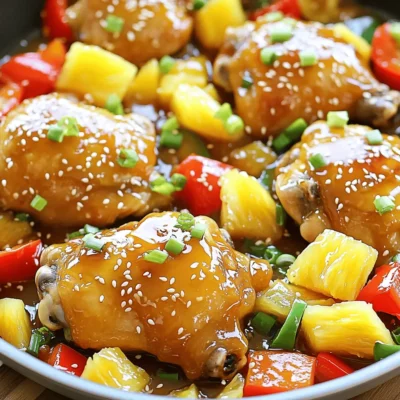
One-Pan Honey Pineapple Chicken Flavorful Delight
Looking for a simple yet tasty dinner idea? One-Pan Honey Pineapple Chicken brings sweet and savory together in one dish!
Read more…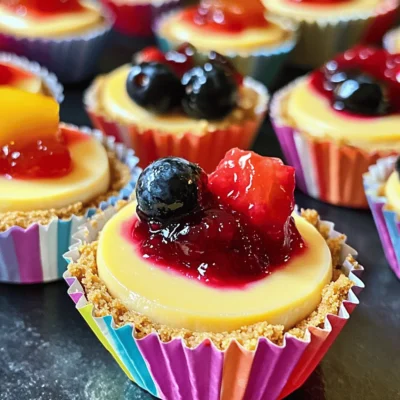
Mini Cheesecake Desserts Delightful and Easy Recipe
If you love cheesecakes but want a bite-sized treat, you’re in the right place! I’ll show you how to make
Read more…
Savory Louisiana Gumbo with Sausage & Shrimp Recipe
Welcome to a taste of Louisiana! In this blog post, you’ll discover how to make a spicy and savory gumbo
Read more…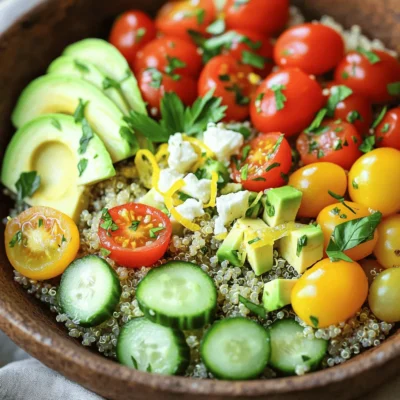
Easy Dinner Recipe Zesty Lemon Herb Quinoa Bowl
Tired of the same old dinner routine? I have a fresh and vibrant solution for you: the Zesty Lemon Herb
Read more…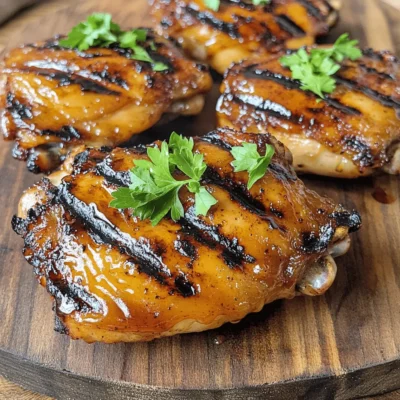
BBQ Grilled Chicken Thighs Flavorful and Juicy Meal
If you want a meal that bursts with flavor, BBQ grilled chicken thighs are the way to go! With their
Read more…
Quick Curry Noodles Tasty and Easy Weeknight Meal
Craving a fast and tasty dinner? My Quick Curry Noodles are here to save your weeknight! You’ll whip up this
Read more…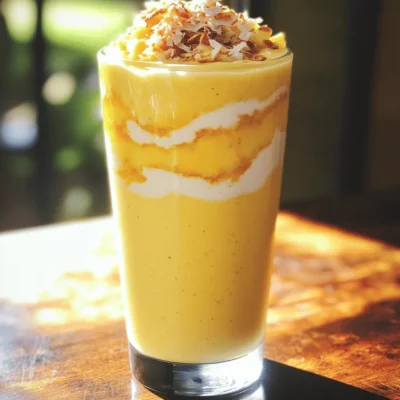
Pineapple Coconut Smoothie Refreshing and Creamy Treat
Are you ready to dive into a tropical escape with just one sip? My Pineapple Coconut Smoothie is both refreshing
Read more…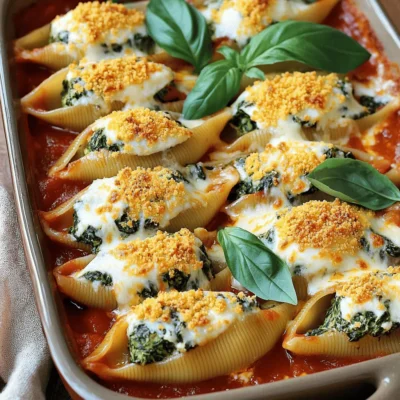
Cheesy Spinach Stuffed Shells Comforting Dinner Idea
Looking for a cozy dinner that’s both simple and delicious? Cheesy Spinach Stuffed Shells are the perfect choice! This dish
Read more…browse recipes

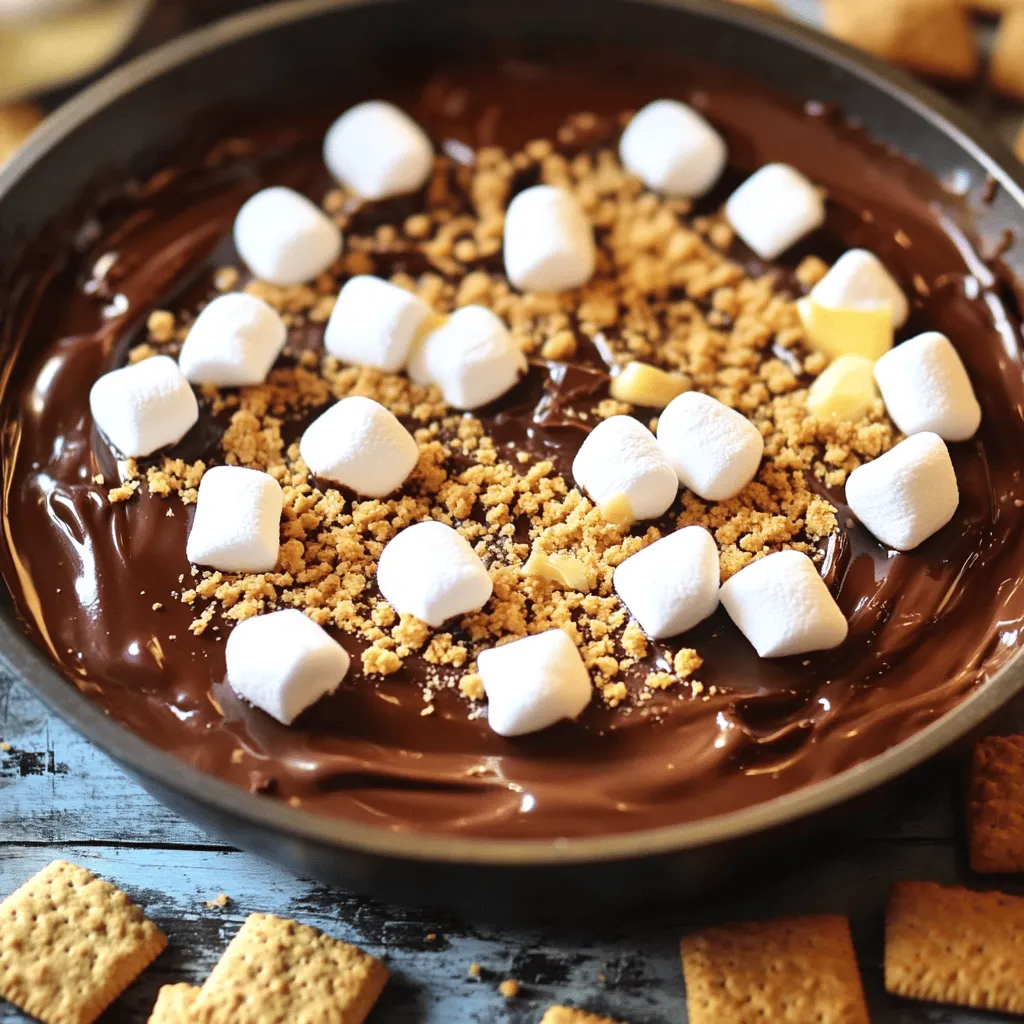
S’mores Dip in the Oven Easy and Fun Dessert Recipe
Who doesn’t love the classic taste of s’mores? Now, you can enjoy that yummy flavor in a fun baked dip! In just a few…
My Latest Desserts

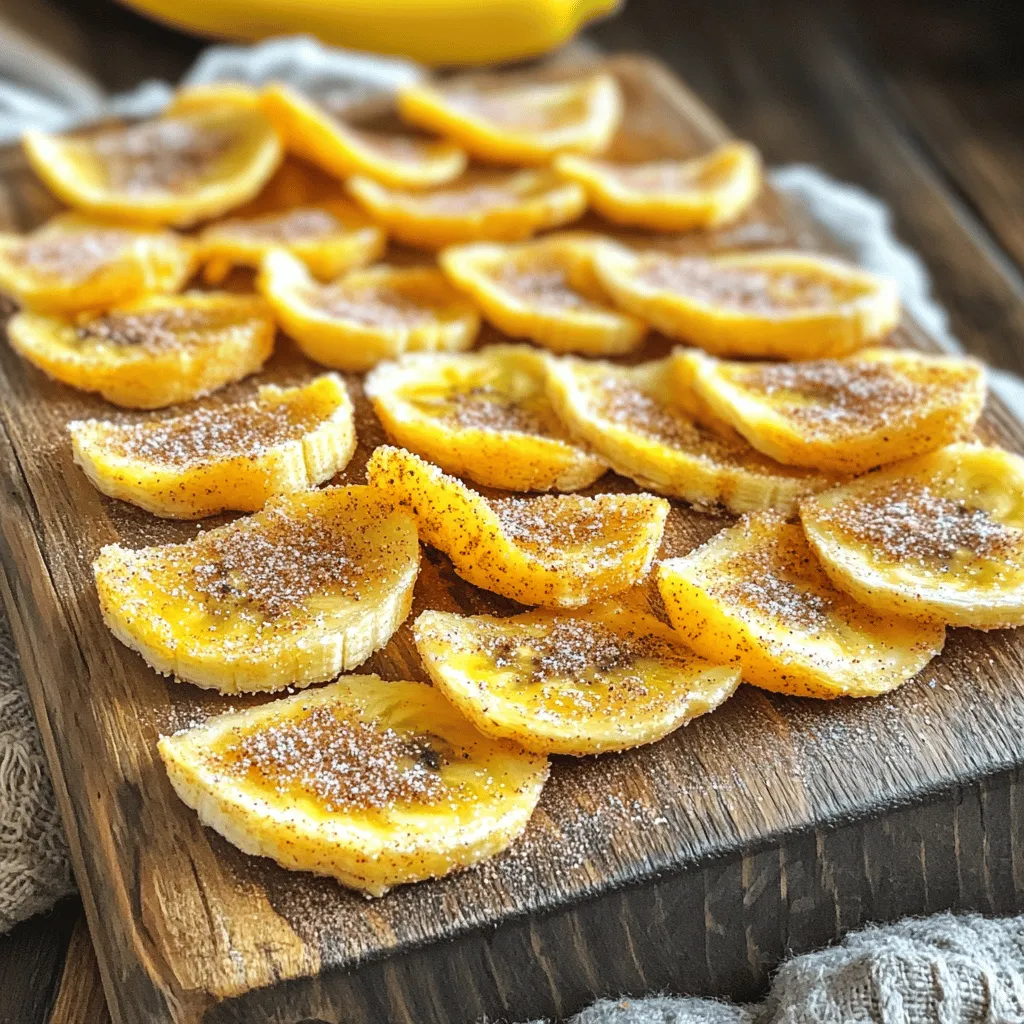
Crispy Cinnamon Sugar Air Fryer Banana Chips Delight
Are you ready for a snack that’s both crunchy and sweet? I’m excited to share my Crispy Cinnamon Sugar Air Read Full Recipe-
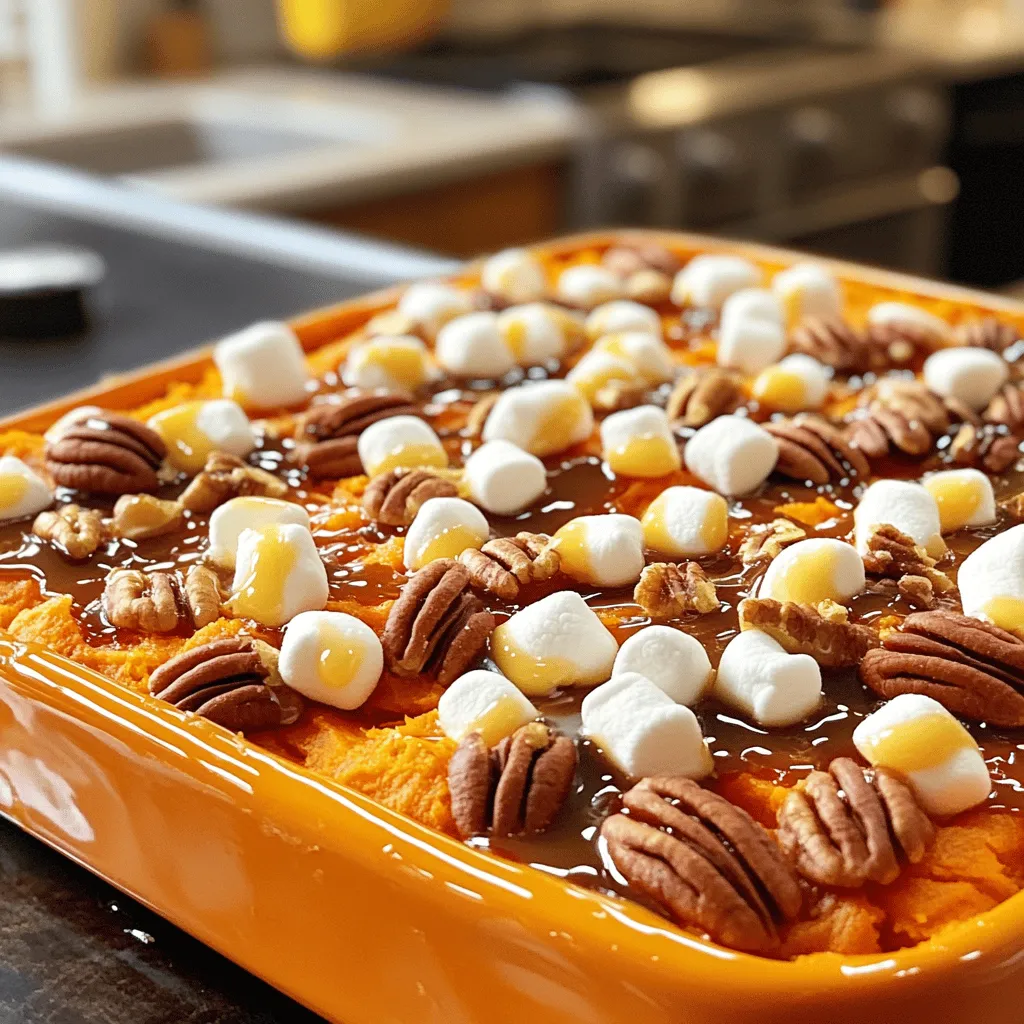
Easy Sweet Potato Casserole Simple and Tasty Recipe
Looking for a sweet, easy dish that steals the show? My Easy Sweet Potato Casserole is just what you need! Read Full Recipe -
Peppermint Chocolate Chip Cookies Festive and Delightful
Get ready to celebrate the season with my Peppermint Chocolate Chip Cookies! These festive treats combine the rich taste of Read Full Recipe -
Chocolate Thumbprint Cookies Irresistible Treat Recipe
If you’re craving a sweet treat, you’ll love chocolate thumbprint cookies! These soft, chewy cookies are easy to make and Read Full Recipe -
Easy Stained Glass Cookies Simple and Fun Recipe
Get ready to create some beautiful treats with my Easy Stained Glass Cookies! This simple recipe is perfect for kids Read Full Recipe -
Halloween Chex Mix Fun and Festive Snack Idea
Get ready for a sweet and spooky delight with my Halloween Chex Mix! This fun snack combines crispy Chex cereal, Read Full Recipe -
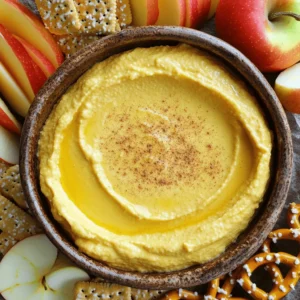
Pumpkin Cheesecake Dip Delightful and Easy Recipe
Fall is here, and nothing screams comfort like my Pumpkin Cheesecake Dip! This delightful treat is easy to make, packed Read Full Recipe -
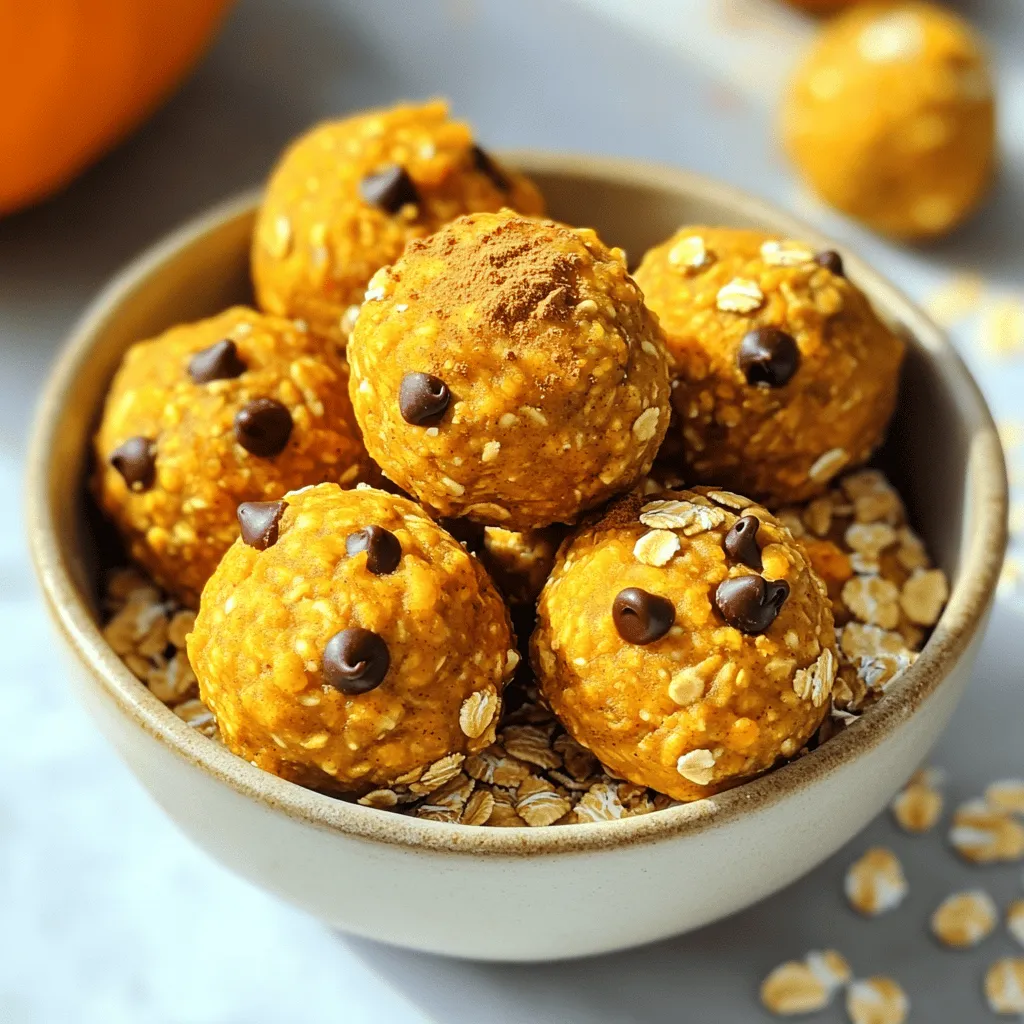
Pumpkin Spice Energy Bites Healthy Power Snack
Looking for a delicious and healthy snack? Pumpkin Spice Energy Bites are the answer! These tasty treats blend fiber-rich oats, Read Full Recipe -
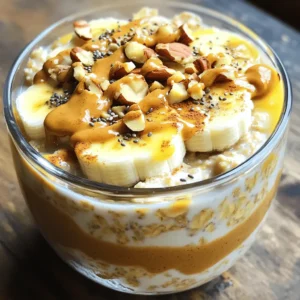
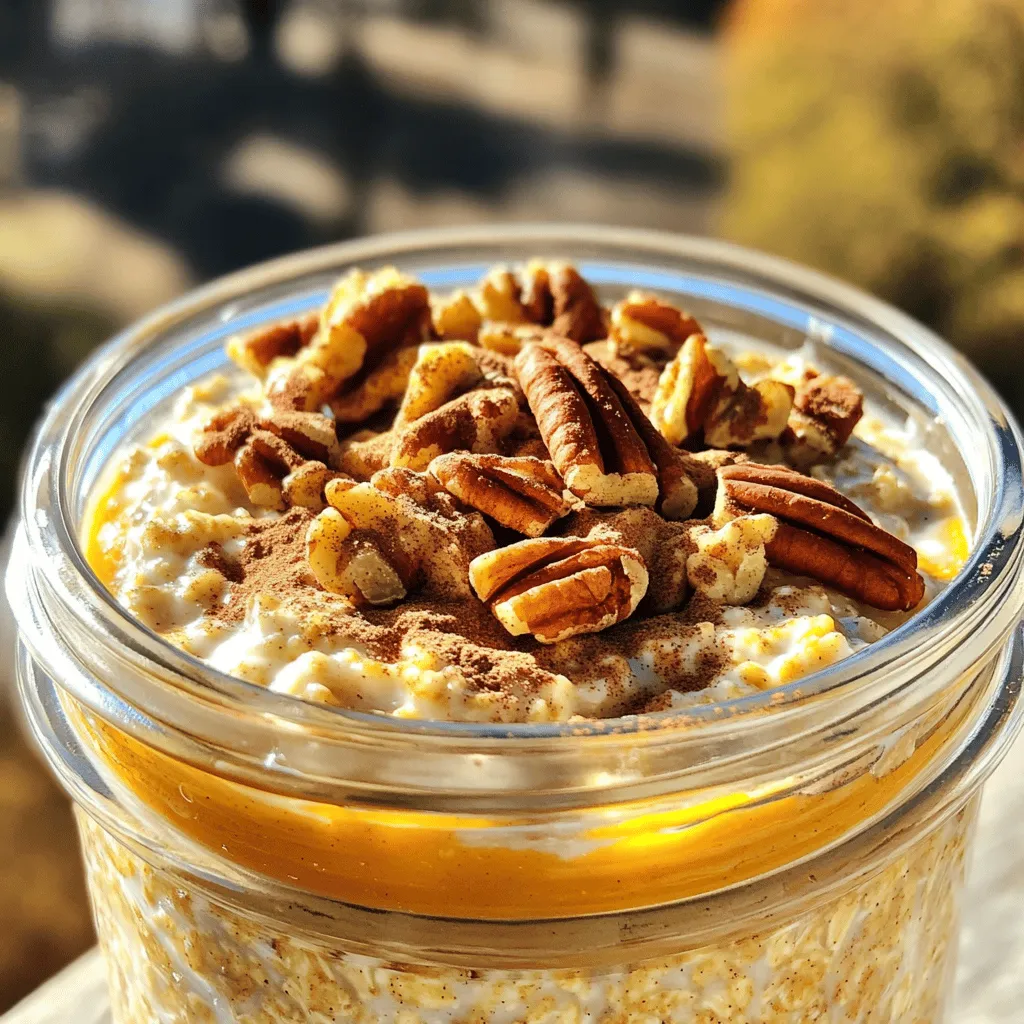
Pumpkin Pie Overnight Oats Flavorful and Nutritious Meal
Looking for a healthy yet tasty breakfast? Pumpkin Pie Overnight Oats combine rich pumpkin flavor with creamy oats. Packed with Read Full Recipe -
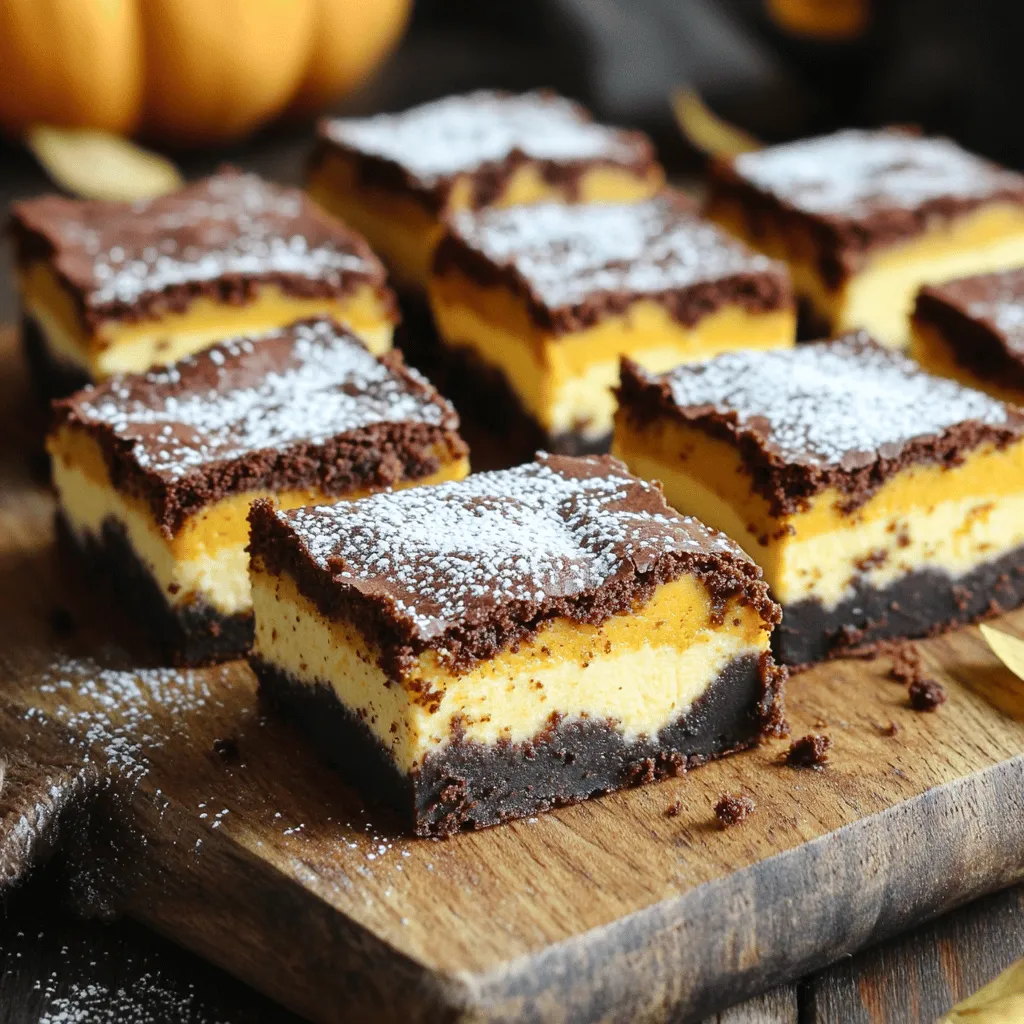
Pumpkin Cheesecake Brownies Delightful Dessert Recipe
Ready to treat yourself? Let’s dive into these Pumpkin Cheesecake Brownies. This recipe blends rich brownies with creamy pumpkin cheesecake, Read Full Recipe

My Latest Recipes

hey,
i’m !
I’m so happy you’re here!
Food is my passion, and perfecting each dish is my craft. I can’t wait for you to try them let’s dive into this delicious journey side by side.
![- 1 cup Biscoff cookie crumbs - 4 tablespoons unsalted butter, melted - 16 oz cream cheese, softened - 1 cup powdered sugar - 1 teaspoon vanilla extract - 1 cup heavy whipping cream - 1/2 cup Biscoff spread - Whipped cream for topping - Extra Biscoff cookies for garnish When making Biscoff cheesecake, the ingredients matter. Each one plays a key role in flavor and texture. - Alternatives for cream cheese: You can use mascarpone or a thick dairy-free cream cheese. Both will work well and keep your cheesecake creamy. - Vegan options for the crust: Swap unsalted butter for coconut oil or a vegan butter. Use vegan cookies to keep it plant-based. - Using gluten-free cookies: Look for gluten-free cookies that have a similar taste to Biscoff. They make a great base for the crust. These options help you customize the cheesecake to fit your needs. Whether you're vegan or gluten-free, you can enjoy this treat! For the full recipe, check out the Biscoff Bliss Cheesecake . To start, gather your ingredients. You need Biscoff cookie crumbs and melted butter. In a medium bowl, mix the crumbs with the butter. Stir until every crumb is coated. This step is key to a tasty crust. Next, take a 9-inch springform pan. Press the crumb mixture firmly into the bottom. Make sure it is even and packed tightly. This helps the crust hold together. Place the pan in the refrigerator. Let it chill while you prepare the filling. Now, let's make the filling. In a large bowl, add softened cream cheese. Use an electric mixer to beat it until smooth. This step is important for a creamy texture. Gradually, add the powdered sugar. Keep mixing until it is fully combined. Then, mix in the vanilla extract and Biscoff spread. This adds great flavor and makes it silky. In a separate bowl, whip the heavy cream. Beat it until stiff peaks form. This means it should hold its shape well. Now, gently fold the whipped cream into the cream cheese mixture. Be careful! You want to keep the air in the whipped cream. This gives the cheesecake a light texture. Once combined, pour the cheesecake filling over your chilled crust. Smooth the top with a spatula. Cover the pan and place it in the refrigerator. Chill for at least 4 hours, or overnight if you can wait. When it’s set, carefully remove the cheesecake from the springform pan. Top with whipped cream and sprinkle crushed Biscoff cookies on top. For the full recipe, check here: [Full Recipe]. Enjoy your delicious Biscoff cheesecake! To get the best Biscoff cheesecake, use room temperature ingredients. This helps everything mix well and makes your filling smooth. Cream cheese that is too cold can cause lumps. Always let your cream cheese sit out for about an hour before using it. Next, whip your cream carefully. Use a clean bowl and beaters for the best results. Whip the cream until it forms stiff peaks, but don’t overdo it. If you whip too much, it can turn grainy. Gently fold the whipped cream into the cream cheese mixture. This keeps the filling light and airy. For a lovely presentation, top your cheesecake with whipped cream. Use a piping bag to create swirls for a nice touch. You can also crush extra Biscoff cookies and sprinkle them on top. This adds texture and flavor. Drizzle warm Biscoff spread over the cheesecake for an appealing look. It creates a beautiful pattern and tastes great too. You can place whole Biscoff cookies around the edge of the cheesecake. This makes it look even more tempting. One common mistake is overmixing the batter. Once you fold the whipped cream in, stop mixing right away. Overmixing can make the cheesecake dense instead of creamy. Another mistake is not chilling long enough. Always chill your cheesecake for at least four hours. For the best results, chill it overnight. This helps the flavors meld together and improves the texture. Trust me, it’s worth the wait! {{image_2}} For a quick no-bake version, start with the same crust. Use 1 cup of Biscoff cookie crumbs and 4 tablespoons of melted unsalted butter. Press this mixture into the bottom of a 9-inch springform pan. For the filling, beat 16 oz of softened cream cheese with 1 cup of powdered sugar until smooth. Add 1 teaspoon of vanilla extract and 1/2 cup of Biscoff spread. Mix until well combined. Then, whip 1 cup of heavy cream until stiff peaks form. Gently fold the whipped cream into the cream cheese mixture. Spread the filling over the crust and chill for at least 4 hours. This method saves time while still delivering amazing taste. You can make mini Biscoff cheesecakes using muffin tins. Line each muffin cup with cupcake liners. Prepare the same crust as before and divide it among the cups. For the filling, simply follow the steps from the full recipe. Pour the filling over the crusts and smooth the tops. Chill them in the fridge for about 4 hours. These mini treats are perfect for parties or for a single serving. They also make great gifts! To create a vegan version, substitute the cream cheese with vegan cream cheese. Use coconut cream in place of heavy whipping cream. For the crust, check that your Biscoff cookies are dairy-free or replace them with vegan cookies. The rest of the process remains the same. This version keeps the rich flavor while being friendly for those avoiding animal products. Enjoy all the delight of Biscoff cheesecake without compromising your diet! To keep your Biscoff cheesecake fresh, refrigerate it right after serving. Use an airtight container or cover it well with plastic wrap. This method helps keep moisture in and prevents drying out. If you want to save leftovers, you can freeze slices. Wrap each slice in plastic wrap and place them in a freezer-safe bag. This way, you can enjoy it later! Stored in the fridge, your cheesecake lasts about 5 to 7 days. If frozen, it can stay good for up to 3 months. Always check for signs of spoilage before eating. If you see any discoloration or bad odor, it’s best to throw it out. Freshness is key! If you froze the cheesecake, thaw it in the fridge overnight for the best texture. Avoid the microwave as it can make it soggy. Instead, let it come to room temperature before serving. This way, you can enjoy every creamy bite just like fresh! Yes, you can use a store-bought cookie crust. This saves time and effort. Just make sure it fits a 9-inch springform pan. The Biscoff flavor will still shine through. The cheesecake needs at least 4 hours to set. For the best results, chill it overnight. This allows the flavors to meld and the texture to firm up nicely. If you can’t find Biscoff spread, use Nutella or cookie butter. Both options give a similar flavor profile. You can also try almond butter for a different taste. This cheesecake is not naturally gluten-free or vegan. However, you can adjust it easily. Use gluten-free cookies for the crust and vegan cream cheese for a dairy-free option. Absolutely! You can make this cheesecake a day or two in advance. It keeps well in the fridge. Just cover it tightly to keep it fresh. Check out the Full Recipe for detailed steps. This blog post covered how to make a delicious Biscoff cheesecake. You learned about the key ingredients, including cream cheese and Biscoff spread. I shared easy steps for making the crust and filling. Remember to avoid common mistakes, like overmixing. You can also explore variations to fit your taste or diet. Enjoy experimenting with this recipe and impressing your friends and family! Happy baking!](https://mysavedrecipe.com/wp-content/uploads/2025/06/f6457499-a16a-4d24-8499-87287a5d879d-300x300.webp)
![- 4 chicken thighs, skin-on or skinless - 1 cup fresh parsley, chopped - 1/2 cup fresh cilantro, chopped - 4 cloves garlic, minced - 1/4 cup olive oil - 2 tablespoons red wine vinegar (or apple cider vinegar for a twist) Chimichurri chicken thighs are all about fresh ingredients. Chicken thighs bring rich flavor and juiciness. I prefer skin-on thighs for extra crispiness. Fresh parsley and cilantro add brightness to the dish. Garlic gives a robust taste that pairs well with the herbs. Olive oil helps bind the sauce and adds richness. Vinegar brings a tangy kick that balances the flavors. - 1 teaspoon red pepper flakes - 1 teaspoon smoked paprika - Salt and pepper to taste - Juice of 1 lime Spices are key to making this dish stand out. Red pepper flakes add a gentle heat, while smoked paprika adds a deep, smoky flavor. Salt and pepper are essential for seasoning the chicken. Lime juice enhances freshness and ties all the flavors together. - Olive oil for skillet - Optional garnish (lime wedges, fresh herbs) Using olive oil in the skillet helps the chicken cook evenly. I always keep some extra olive oil on hand for drizzling later. Garnishes like lime wedges and fresh herbs make the dish look as good as it tastes. They can elevate the meal and add vibrant color to your plate. For the full recipe, check the [Full Recipe]. First, gather your ingredients for the chimichurri sauce. In a bowl, whisk together: - 1 cup fresh parsley, chopped - 1/2 cup fresh cilantro, chopped - 4 cloves garlic, minced - 1/4 cup olive oil - 2 tablespoons red wine vinegar - 1 teaspoon red pepper flakes - 1 teaspoon smoked paprika - Juice of 1 lime - Salt and pepper to taste Mix until it looks nice and green. Set aside a portion for serving later. This sauce brings a bright flavor to the chicken. Now, let’s cook the chicken. Pat the thighs dry with paper towels. This helps them get crispy. Season both sides with salt and pepper. Heat a little olive oil in a large skillet over medium heat. Add the chicken thighs skin-side down. Cook for about 6-7 minutes until the skin is golden brown and crispy. Next, flip the chicken thighs. Pour half of the chimichurri sauce over them. Cover the skillet with a lid and cook for 10-12 minutes. The chicken should reach an internal temperature of 165°F (75°C). Once done, remove the skillet from heat. Let the chicken rest for 5 minutes. This keeps it juicy. Drizzle the reserved chimichurri sauce on top before serving. Enjoy your tasty chimichurri chicken thighs! For the full recipe, check [Full Recipe]. To ensure your chicken thighs are juicy, check the internal temperature. Use a meat thermometer. The safe temperature is 165°F (75°C). This keeps the chicken moist and safe to eat. After cooking, let the chicken rest for five minutes. Resting helps keep the juices inside. Chimichurri sauce needs a good balance of flavors. The acid from vinegar brightens the sauce. You can use red wine vinegar or apple cider vinegar. Add spices like red pepper flakes for a kick. Store chimichurri in the fridge for up to a week. Just keep it in a sealed jar to keep it fresh. Serve the chicken on a nice wooden board or a colorful plate. This adds a rustic touch. Garnish with lime wedges and fresh herbs. A sprinkle of parsley or cilantro makes it look great. The bright colors will make your dish pop and impress your guests. {{image_2}} You can change the flavor by using apple cider vinegar instead of red wine vinegar. This gives a sweet and tangy taste. You can also add herbs like oregano or spices like cumin for a new flavor. Mixing these can make each bite exciting. Grilling chicken thighs gives them a smoky flavor. This method creates great grill marks and a tasty crust. Alternatively, you can pan-sear them on the stove. This method keeps them juicy and tender. If you want a healthier choice, try oven-baking the thighs. This will keep the chicken moist while cutting extra fat. Serve chimichurri chicken thighs with sides that balance their bold flavor. A fresh salad with mixed greens and tomatoes works well. You can also try quinoa or rice for a hearty option. These sides round out the meal and make it more filling. For more ideas, check out the Full Recipe for perfect pairings. After cooking, let your chimichurri chicken thighs cool down. Place them in an airtight container. This keeps the chicken juicy and flavorful. Store it in the fridge for up to four days. If you want to enjoy them later, make sure to keep the sauce separate. You can freeze chimichurri chicken thighs for longer storage. First, let them cool completely. Wrap each thigh tightly in plastic wrap, then place them in a freezer bag. This helps to avoid freezer burn. They will stay good for about three months. When you want to eat them, thaw the chicken overnight in the fridge. Reheat in the oven or on the stove until hot. Don’t toss that leftover chimichurri sauce! It adds great flavor to many dishes. You can use it on grilled vegetables, in pasta, or even on sandwiches. Store the sauce in a sealed container in the fridge for up to one week. If you want to keep it longer, freeze it in ice cube trays. Then you can pop out a cube whenever you need some flavor. Cooking chimichurri chicken thighs takes about 30 minutes. This includes prep and cooking time. The size of the thighs can change cooking time. Thicker thighs may need a few extra minutes. Always check the internal temperature. It should reach 165°F (75°C) for safe eating. Yes, you can make chimichurri sauce ahead of time. It keeps well in the fridge for up to a week. Store it in an airtight container to keep it fresh. The flavors will deepen as it sits. Just give it a good stir before using it. If you want a different protein, chicken breasts work well. They cook faster but can be drier. You can also use pork chops or even firm tofu for a meatless option. Each choice will change the flavor and texture slightly. Adjust cooking times based on what you choose. Chimichurri chicken thighs are simple yet delicious. We explored the main ingredients, key flavors, and cooking techniques. You learned how to prepare the chimichurri sauce and ensure perfectly cooked chicken. We also covered variations, storage tips, and answers to common questions. Overall, this dish is flexible and easy to make. Whether grilling or pan-searing, you can customize the flavors to your liking. Enjoy your cooking adventure and share this tasty dish with others!](https://mysavedrecipe.com/wp-content/uploads/2025/06/ea5ef63b-525c-474b-89c2-afadb369c364-300x300.webp)
 in the next section. 1. Preheat the oven and prepare cake pans Heat your oven to 350°F (175°C). Grease and flour two 9-inch round cake pans. This helps the cakes come out easily. 2. Creaming the butter and sugar In a mixing bowl, beat the softened butter with granulated sugar. Mix until it becomes light and fluffy. This step adds air to your cake. 3. Adding eggs and vanilla Add the eggs to the butter and sugar mix, one at a time. Mix well after each addition. Then stir in the vanilla extract. This gives your cake great flavor. 1. Whisking together flour, baking powder, and salt In a separate bowl, whisk the flour, baking powder, and salt together. This ensures even mixing of dry ingredients. 2. Incorporating dry ingredients with wet mixture Gradually add the dry mix to the wet ingredients, alternating with the milk. Start and end with the flour mix. Stir until just combined. This keeps your cake light. 1. Gently folding in strawberries Carefully fold in the diced strawberries. Make sure they are evenly spread in the batter. This adds a fresh taste and color. 2. Baking time and testing for doneness Pour the batter into the prepared pans. Bake for 25-30 minutes. Use a toothpick to check if it comes out clean. This means your cakes are done. 1. Preparing the cream cheese frosting In a small bowl, beat the cream cheese, powdered sugar, and heavy cream together. Mix until smooth. This creates a rich frosting. 2. Layering the cake and frosting Once the cakes cool completely, place one layer on a plate. Spread frosting on top, then add the second layer. Frost the top and sides with the remaining frosting. Decorate with fresh strawberries. This makes your cake look beautiful. For a full recipe, check out the [Full Recipe]. To ensure a moist cake, use room-temperature eggs and butter. This helps the batter mix well. Also, do not overbake the cake. Check for doneness around 25 minutes. A toothpick inserted in the center should come out clean. For even baking, rotate your cake pans halfway through the baking time. This helps the heat circulate evenly. If your oven has hot spots, this step is key. Achieving the perfect frosting consistency requires the right ratio of cream cheese to heavy cream. Start with softened cream cheese and mix until smooth. Then, slowly add the powdered sugar. If it’s too thick, add more cream. For decorating, use fresh strawberries on top of the cake. Slice them and arrange them in a pretty pattern. You can also use whole strawberries for a stunning look. To avoid overmixing the batter, mix just until combined. Overmixing can make the cake tough. If you want to prevent a soggy cake, make sure your strawberries are well-drained. Excess moisture can affect the cake’s texture. You can also toss them in a bit of flour before folding them into the batter. Check the [Full Recipe] for more details. {{image_2}} You can make your old-fashioned strawberry cake even more exciting. One fun twist is to add lemon zest. This gives the cake a fresh and zesty flavor. Just a tablespoon of lemon zest can brighten the taste. It pairs well with strawberries. Feel free to experiment with other berries too. Raspberries, blueberries, or blackberries can change the flavor profile. Use the same amount as strawberries for a berry mix. Each berry brings its own unique taste to the cake. If you need gluten-free options, you can use alternative flours. Almond flour or coconut flour works great. Just keep in mind that these flours may change the texture. You might need to adjust the liquid in the recipe as well. For a dairy-free version, replace butter with coconut oil. Use almond milk or oat milk instead of regular milk. You can also use dairy-free cream cheese for the frosting. These swaps help everyone enjoy this treat. Making mini strawberry cakes is simple and fun. Start by using a muffin tin. Fill each cup with batter and bake for about 15-20 minutes. Once they cool, frost each mini cake with cream cheese frosting. Layered cakes are also a classic choice. Bake two or more layers and stack them. Spread frosting between layers for a tasty surprise. Decorate the top with fresh strawberries for a stunning look. These variations keep your cake fresh and exciting. You can find the full recipe at the beginning of this article. Enjoy these variations on your old-fashioned strawberry cake! To store leftovers, wrap the cake well in plastic wrap. This helps keep it moist. Place it in an airtight container to avoid any odors from the fridge. The best practice is to keep the cake in a cool spot. Enjoy your cake within four to five days for the best taste. You can freeze the cake layers for later use. First, let the layers cool completely. Wrap each layer in plastic wrap tightly, then in aluminum foil. This double wrapping keeps the cake fresh. To thaw, move the layers to the fridge overnight. For serving, let them sit at room temperature for a bit before frosting. The cake lasts about five days in the fridge. After that, it may start to spoil. Look for signs like a change in smell or a dry texture. If the strawberries start to look mushy, it's time to toss the cake. Enjoy your Old Fashioned Strawberry Cake while it’s fresh for the best flavor! Can I use frozen strawberries? Yes, you can use frozen strawberries. Just thaw them first. Drain any extra juice to avoid a soggy cake. This keeps the flavor strong and the texture nice. How can I make this cake in advance? You can bake the cake a day ahead. Let it cool, then wrap it well. Store it in the fridge. Frost it just before serving to keep it fresh. What type of frosting pairs best with strawberry cake? Cream cheese frosting is a great choice. It adds a rich flavor that complements the strawberries. You can also use whipped cream for a lighter touch. Can I make the cake without eggs? Yes, you can make this cake without eggs. Use unsweetened applesauce or mashed bananas instead. This makes it moist and keeps the right texture. How to adjust baking time for different pan sizes? For smaller pans, check the cake 5-10 minutes earlier. For larger pans, add about 5-10 minutes. Always test with a toothpick for doneness. What should I do if the cake sinks in the middle? If the cake sinks, it may be underbaked or overmixed. Ensure you mix just until combined. Also, check your oven temperature with a thermometer. What drinks pair well with strawberry cake? I love serving strawberry cake with iced tea or lemonade. Sparkling water adds a nice touch too. For adults, a light rosé or prosecco works well. How do I serve the cake for a gathering? Slice the cake into equal pieces. Place on a large platter. Garnish with fresh strawberries for a pretty look. This makes it inviting and delicious. For the [Full Recipe], check out the step-by-step guide above! This blog post covered everything you need for a delicious strawberry cake. We explored the key ingredients, step-by-step instructions, baking tips, and creative variations. I shared ways to store your cake and answered common questions. Now, you’re ready to bake a tasty treat that impresses friends and family. Whether you stick with classic strawberries or try something new, enjoy the process. Baking should be fun and rewarding. Dive in and create something delicious today!](https://mysavedrecipe.com/wp-content/uploads/2025/06/7eb2042e-eb47-41f8-81ad-8abf66a47019-300x300.webp)
Cinnamon Roll Pancakes Irresistible Morning Treat
Imagine waking up to the sweet, warm aroma of cinnamon rolls but in pancake form! Cinnamon Roll Pancakes are an easy way to enjoy…
![To make delicious cinnamon roll pancakes, you need some pantry staples. Here’s what you need: - 1 cup all-purpose flour - 2 tablespoons granulated sugar - 1 teaspoon baking powder - 1/2 teaspoon baking soda - 1/2 teaspoon salt - 1 cup buttermilk (or 1 cup milk + 1 tablespoon vinegar) - 1 large egg - 2 tablespoons unsalted butter, melted For the cinnamon filling, gather these optional ingredients: - 2 tablespoons ground cinnamon - 1/4 cup brown sugar To top your pancakes, use these recommended ingredients for icing: - 1/4 cup cream cheese, softened - 1/2 cup powdered sugar - 1 tablespoon milk (for icing) - 1 teaspoon vanilla extract These ingredients come together to create a warm, sweet, and creamy breakfast treat. You can find the full recipe above to guide you through the process of making these tasty pancakes. Enjoy! To start, we need to prep our dry ingredients. In a big bowl, mix together: - 1 cup all-purpose flour - 2 tablespoons granulated sugar - 1 teaspoon baking powder - 1/2 teaspoon baking soda - 1/2 teaspoon salt Whisk them until they blend well. This step is key for fluffy pancakes. Next, let's combine our wet ingredients. Grab another bowl and mix: - 1 cup buttermilk (or 1 cup milk + 1 tablespoon vinegar) - 1 large egg - 2 tablespoons unsalted butter, melted Stir these together until they're smooth. Pour the wet mix into the dry mix. Stir gently. Don’t overmix; a few lumps are okay. Now, we make the cinnamon-brown sugar mixture. In a small bowl, mix: - 2 tablespoons ground cinnamon - 1/4 cup brown sugar This mix will add a sweet swirl to your pancakes. For cooking, the right heat is crucial. Heat your non-stick skillet or griddle over medium heat. Lightly grease it with butter or oil to prevent sticking. Pour about 1/4 cup of batter onto the skillet. Before it sets, sprinkle a teaspoon of the cinnamon-brown sugar mix on top. This creates that delicious cinnamon roll swirl. When you see bubbles form on the surface, it’s time to flip the pancake. Cook for another 1-2 minutes until it's golden brown. This ensures even cooking on both sides. Repeat with the rest of the batter. Now, let’s make the icing to top off our pancakes. You’ll need: - 1/4 cup cream cheese, softened - 1/2 cup powdered sugar - 1 tablespoon milk - 1 teaspoon vanilla extract In a small bowl, mix these ingredients until smooth. You want a creamy texture for drizzling. For a nice presentation, use a spoon to drizzle the icing over the stacked pancakes. This will make your dish look as good as it tastes. Enjoy your cinnamon roll pancakes! For the complete recipe, check out the Full Recipe. To make your pancakes fluffy, start by using fresh baking powder. Old baking powder can ruin your rise. Measure your ingredients accurately. A little too much flour can make pancakes dense. Mix wet and dry ingredients separately first. Then, combine them gently. Overmixing leads to tough pancakes. Just stir until you see a few lumps. One big mistake is overmixing the batter. This can make your pancakes chewy instead of fluffy. Another common issue is burning the pancakes. Keep your heat at medium, and check regularly. If the edges brown too fast, turn down the heat. A non-stick skillet helps prevent sticking and burning. For the icing, start with cream cheese and powdered sugar. If it's too sweet, add a bit more milk to balance it. You can also try yogurt or maple syrup for a twist. Drizzle your icing over warm pancakes for the best effect. A light hand with the icing makes for a beautiful presentation. {{image_2}} You can easily boost the flavor of your cinnamon roll pancakes. Adding a splash of vanilla makes them taste richer. Try mixing in a pinch of nutmeg for a warm spice kick. Fruits also work great. Thinly sliced apples add sweetness and texture. Bananas bring a soft and creamy element. Both options make your pancakes extra special. If you need a gluten-free version, swap the all-purpose flour for gluten-free flour. Many blends work well, so pick one you like. This simple change keeps the taste while being friendly for those with gluten sensitivities. Consider other dietary needs too. You can use dairy-free milk instead of buttermilk for a vegan option. This way, everyone can enjoy these delicious pancakes. When it comes to toppings, the sky's the limit! Chopped nuts add crunch and flavor. Fresh berries like strawberries or blueberries can brighten up your plate. Don’t forget about syrups! Maple syrup is a classic choice, but other flavors can shine too. Try caramel or chocolate syrup for a sweet twist. Each of these ideas can make your breakfast even more fun and inviting. For the full recipe, check out the [Full Recipe]. To keep your cinnamon roll pancakes fresh, let them cool completely at room temperature. Place them in an airtight container. This keeps the moisture in. You can also use plastic wrap to cover them tightly. Store the container in the fridge for up to three days. When you're ready to enjoy leftovers, reheat them in a non-stick skillet over low heat. This warms them gently and keeps them soft. You can also use a microwave, but cover the pancakes with a damp paper towel. This prevents them from drying out. If you're serving a crowd, keep the pancakes warm in a low oven while you finish cooking. To freeze pancakes, stack them with parchment paper between each one. This stops them from sticking together. Place the stack in a freezer bag or a tight container. They last for up to two months. When you're ready to eat, thaw them in the fridge overnight. Reheat as mentioned before, and enjoy your tasty treat again! For a full experience, check out the full recipe. Yes, you can make these pancakes ahead. To prepare, cook the pancakes and let them cool. Place the pancakes in a single layer, separated by parchment paper, in an airtight container. Store them in the fridge for up to three days. If you want to keep them longer, freeze the pancakes for up to three months. To reheat, just pop them in the toaster or microwave until warm. This way, you have a tasty breakfast ready in no time! If you don’t have buttermilk, you can easily replace it. Mix one cup of milk with one tablespoon of vinegar or lemon juice. Let it sit for five minutes, and it will thicken. You can also use plain yogurt or sour cream, thinning them with a bit of water or milk. These substitutes work well in the recipe and keep the pancakes tasty and fluffy. To make the pancakes vegan, swap the egg for one tablespoon of ground flaxseed mixed with three tablespoons of water. Let it sit for five minutes to thicken. Use plant-based milk, like almond or soy, instead of buttermilk. Replace the melted butter with coconut oil or a vegan butter substitute. These changes keep the flavor rich and the texture light. Yes, there is a big difference! Regular pancakes are light and fluffy. They have a simple taste. On the other hand, cinnamon roll pancakes have a swirl of cinnamon and sugar in the batter. This gives them a sweet, warm flavor. The texture is slightly denser, richer, and more indulgent, making them a special treat. You’ll enjoy the sweet icing drizzled on top, which adds even more flavor! You learned how to make delicious cinnamon roll pancakes from scratch. We covered essential ingredients, step-by-step cooking, and tips for perfect results. Variations, storage, and common questions helped you gain confidence in the kitchen. Remember, measure well, and don’t rush the cooking. The right heat is key to fluffy pancakes. Experiment with flavors and have fun serving them. Enjoy these pancakes with your favorite toppings or as a cozy treat any time. Happy cooking!](https://mysavedrecipe.com/wp-content/uploads/2025/05/15d49b2f-1417-4d84-9e18-0f72e1961af0.webp)
