Latest & Greatest

Perfect Philly Cheesesteak Stromboli Easy Recipe Guide
Looking for an easy way to enjoy a classic Philly cheesesteak? My Perfect Philly Cheesesteak Stromboli recipe has you covered!
Read more…
Cheesy Philly Cheesesteak Egg Rolls Bold and Tasty Treat
Are you ready for a bold bite that packs serious flavor? Let’s dive into making Cheesy Philly Cheesesteak Egg Rolls—an
Read more…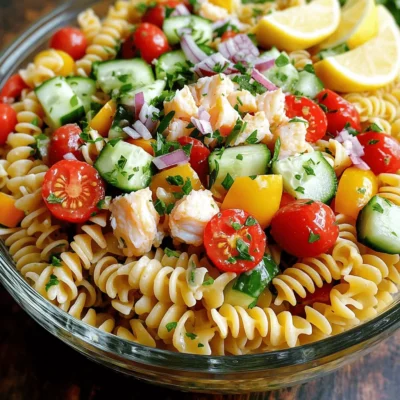
Crab Pasta Salad Delicious and Easy Summer Dish
Summer is here, and it’s the perfect time to whip up a Crab Pasta Salad! This dish is not only
Read more…
Creamy Pierogi and Turkey Sausage Skillet Delight
If you’re looking for a quick, tasty meal that feels like a hug in a bowl, this Creamy Pierogi and
Read more…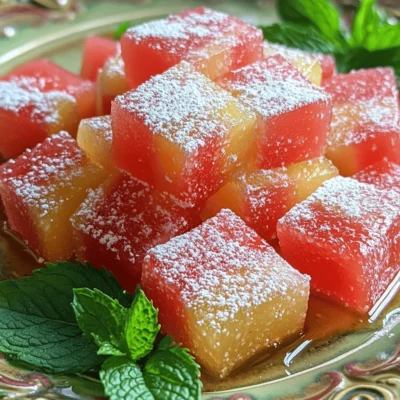
Candied Watermelon Rind Delightful and Sweet Treat
Are you ready to transform a humble watermelon rind into a sweet, crunchy delight? Candied watermelon rind is not just
Read more…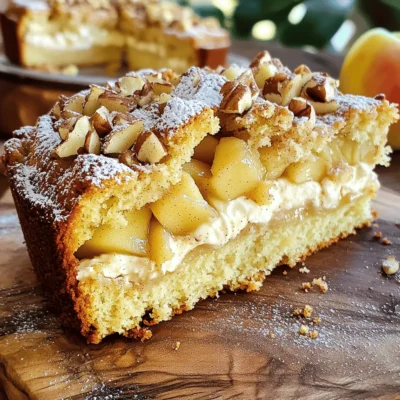
Delicious Apple Coffee Cake with Cream Cheese Filling
Are you ready to whip up a treat that impresses? This Delicious Apple Coffee Cake with Cream Cheese Filling is
Read more…
Parmesan Chicken Pasta Bake Tasty Family Dinner
Are you looking for a quick, tasty dinner that the whole family will love? This Parmesan Chicken Pasta Bake is
Read more…
Hawaiian Rice Pudding Delightful and Simple Recipe
If you’re craving a sweet treat that captures the essence of Hawaii, look no further than Hawaiian rice pudding. This
Read more…browse recipes


![- 1 pre-made pie crust (9-inch) - 4 large ripe tomatoes, sliced - 1 cup shredded mozzarella cheese - 1 cup ricotta cheese - 1/2 cup grated Parmesan cheese - 1/4 cup fresh basil, chopped - 2 cloves garlic, minced - 1 tablespoon olive oil - 1 teaspoon dried oregano - Salt and pepper to taste - 1 egg (beaten, for egg wash) For this cheesy delight, precise measurements make a big difference. Use one pre-made pie crust, which saves time. Slice four large ripe tomatoes for the best flavor. I like to use one cup each of shredded mozzarella and ricotta cheeses. You will need half a cup of grated Parmesan for that extra kick. Add a quarter cup of fresh basil to brighten the dish. Two cloves of minced garlic will add depth. Use one tablespoon of olive oil for a rich taste. One teaspoon of dried oregano complements the tomatoes well. Don’t forget salt and pepper to taste. Finally, beat one egg to brush on the crust for a golden finish. You can swap ingredients based on what you have. For the pie crust, you can use a homemade version if you prefer. If fresh tomatoes aren’t available, canned tomatoes work too. Instead of ricotta, you can try cottage cheese for a lighter option. Feel free to mix different cheeses, like cheddar or fontina, for unique flavors. If you don’t have fresh basil, dried basil or Italian seasoning makes a good substitute. You can also add a bit of heat by including red pepper flakes or jalapeños. Adjust the recipe to fit your taste and pantry! First, take your pre-made pie crust out of the package. Roll it out gently on a clean surface. Place the crust in a 9-inch pie dish. Press it into the dish and trim any extra crust. Make sure the crust fits snugly. This helps hold all the yummy filling inside. Next, slice your ripe tomatoes into thin rounds. Lay the tomato slices evenly in the pie crust. Make sure to slightly overlap them for a nice look. In a bowl, mix the ricotta cheese, half of the mozzarella, and Parmesan. Add basil, garlic, oregano, salt, and pepper. Stir until everything is well blended. Spread this mixture over the tomatoes. Top with the rest of the mozzarella for extra cheesiness. Now, drizzle olive oil over the top. Brush the edges of the pie crust with a beaten egg. This gives a golden color when baked. Preheat your oven to 400°F (200°C). Bake the pie for 30-35 minutes. The cheese should be bubbly, and the crust should be golden brown. Once done, let it cool for about 10 minutes before slicing. This step helps the filling set. Enjoy your Cheesy Tomato Pie! For the full recipe, check out the complete list above. To get that golden crust, you must preheat your oven to 400°F (200°C). This heat makes the crust crisp and brown. Brush the edges with a beaten egg. It gives a nice shine and color. Bake for 30-35 minutes. Watch closely. You want it bubbly and golden, not burnt. One common mistake is not slicing the tomatoes correctly. Slice them too thick, and they won't cook well. Also, don't skip the salt. It draws out moisture from the tomatoes. Too much moisture can make your pie soggy. Lastly, avoid using cold ingredients. Room temperature cheese blends better. Use a good pie dish. A metal dish gives the best heat. A rolling pin helps roll the crust evenly. A sharp knife is key for slicing tomatoes. You might also want a pastry brush. It makes egg washing easy. A nice cutting board helps with prep too. Check out the Full Recipe for more details! {{image_2}} You can mix and match cheeses for your Cheesy Tomato Pie. I love using mozzarella for its meltiness. Try adding provolone for a sharper taste. You could also use feta for a tangy twist. Remember, the cheese you pick shapes the pie's flavor. Experimenting with different cheeses can surprise your taste buds. Adding protein makes this dish even heartier. Crispy bacon bits bring a smoky flavor. You can also use cooked ham for a nice saltiness. If you prefer, try cooked sausage for a spicy kick. Just sprinkle your chosen protein over the cheese layers. This step adds flavor while making your pie more filling. Feel free to add seasonal vegetables to your pie. Fresh spinach works well for a pop of color and nutrition. Zucchini slices or bell peppers add crunch and sweetness. You could also add roasted red peppers for a smoky taste. Just make sure to slice them thinly to ensure they cook through. These veggies not only boost flavor but also make the dish more colorful and vibrant. For the full recipe, check out the complete instructions above. After you enjoy your Cheesy Tomato Pie, let it cool. Place any leftover pie in an airtight container. You can also cover it tightly with plastic wrap. This keeps it fresh and tasty for later. Store it in the fridge for up to three days. To reheat the pie, preheat your oven to 350°F (175°C). Place the pie on a baking sheet. Cover it with foil to keep the top from burning. Heat for about 15-20 minutes, or until it is warm all the way through. You can also use a microwave, but it may make the crust soft. You can freeze Cheesy Tomato Pie for up to three months. First, let it cool completely. Wrap it tightly in plastic wrap and then in foil. This keeps out air and prevents freezer burn. When you are ready to eat, thaw it in the fridge overnight. Reheat as mentioned above. Enjoy this delicious dish whenever you like! For the full recipe, click here: [Full Recipe]. Cheesy Tomato Pie pairs well with a fresh salad. A simple green salad adds crunch. You can also serve it with garlic bread for a hearty meal. Try pairing it with roasted veggies for a colorful plate. A light soup, like tomato basil, complements the flavors too. For drinks, a glass of chilled lemonade or iced tea works great. Yes, you can make Cheesy Tomato Pie ahead of time. Prepare it a day in advance. Once you assemble the pie, cover it and store it in the fridge. Bake it the next day for a quick dinner. If you want to store leftovers, keep them in an airtight container. Reheat slices in the oven to keep the crust crispy. To make Cheesy Tomato Pie gluten-free, choose a gluten-free pie crust. Many stores offer good options now. You can also make your own crust using almond flour or oats. Ensure that any cheese you use is gluten-free. Check labels for hidden gluten in other ingredients. This way, you can enjoy a tasty, gluten-free meal! For the full recipe, please refer to the detailed instructions provided above. In this post, we explored how to make Cheesy Tomato Pie. We covered the full ingredient list, step-by-step instructions, and helpful tips. You learned variations, storage methods, and even answered common questions. Remember, this dish is versatile. You can change the cheese and add meats or veggies. Keep these tips in mind for a perfect pie. Enjoy your cooking and share your delicious results with others!](https://mysavedrecipe.com/wp-content/uploads/2025/06/a28c5c3a-6d33-44fc-b5eb-3891f7932589.webp)
Cheesy Tomato Pie Flavorful and Simple Recipe
Craving a delicious and easy dish? You’ve found it! My Cheesy Tomato Pie is the perfect blend of fresh tomatoes and melted cheese. It’s…
My Latest Desserts

Pancake Donuts with Maple Glaze Simple and Delicious
Do you love pancakes and donuts? With my pancake donuts topped with maple glaze, you can enjoy both! This simple Read Full Recipe-
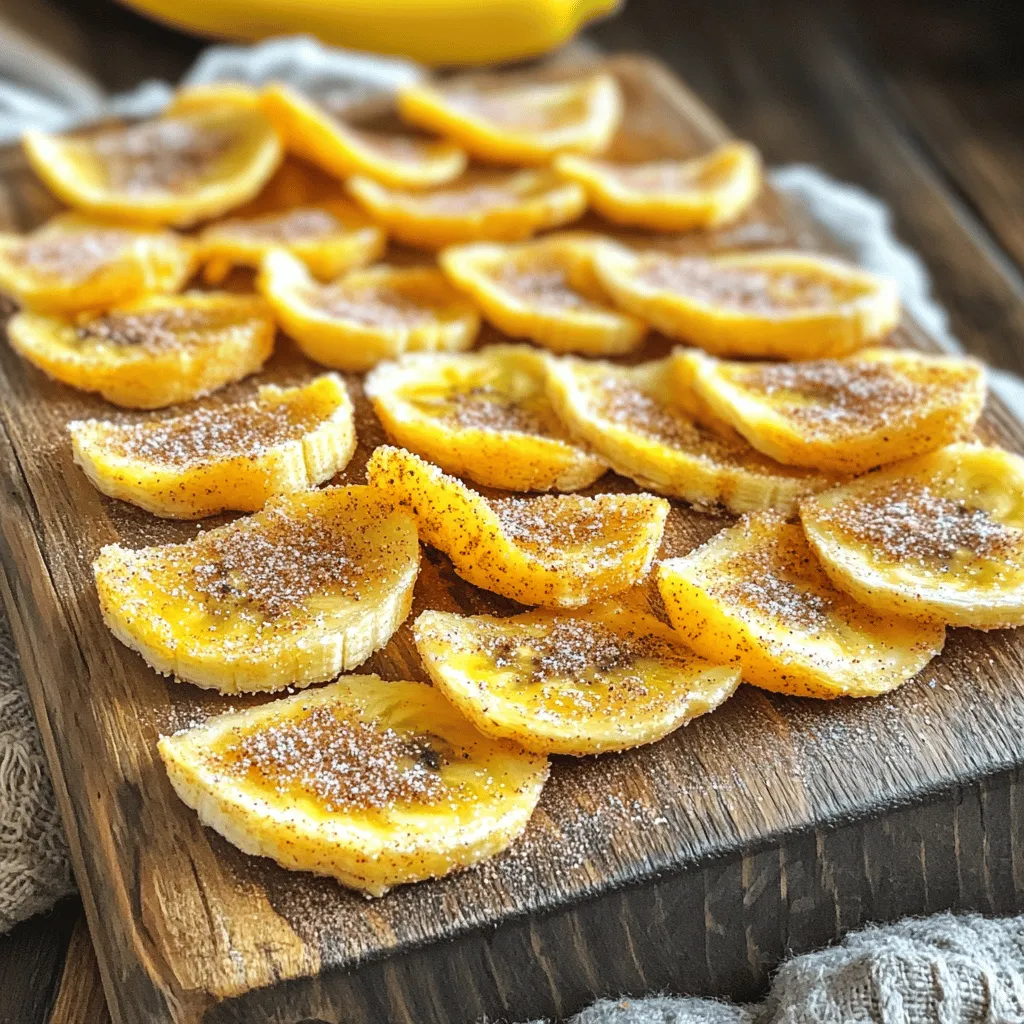
Crispy Cinnamon Sugar Air Fryer Banana Chips Delight
Are you ready for a snack that’s both crunchy and sweet? I’m excited to share my Crispy Cinnamon Sugar Air Read Full Recipe -
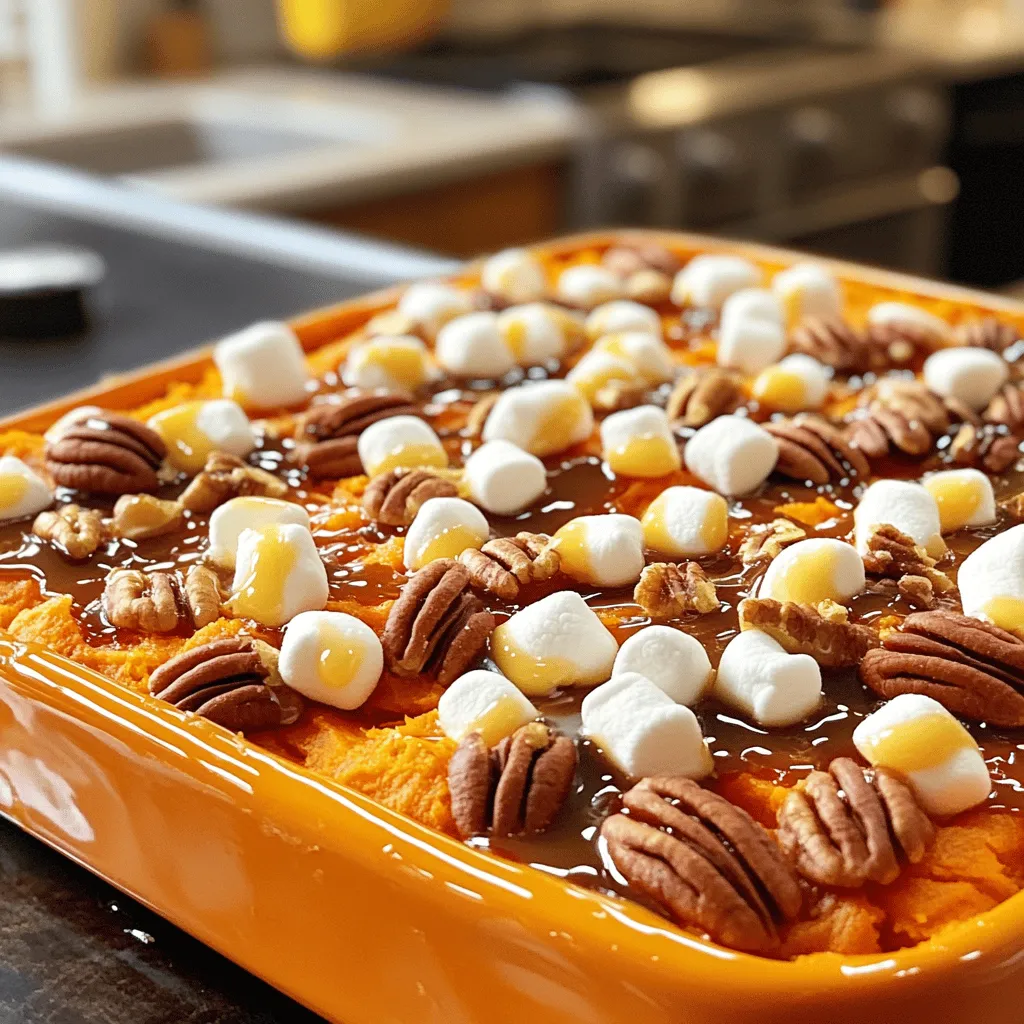
Easy Sweet Potato Casserole Simple and Tasty Recipe
Looking for a sweet, easy dish that steals the show? My Easy Sweet Potato Casserole is just what you need! Read Full Recipe -
Peppermint Chocolate Chip Cookies Festive and Delightful
Get ready to celebrate the season with my Peppermint Chocolate Chip Cookies! These festive treats combine the rich taste of Read Full Recipe -
Chocolate Thumbprint Cookies Irresistible Treat Recipe
If you’re craving a sweet treat, you’ll love chocolate thumbprint cookies! These soft, chewy cookies are easy to make and Read Full Recipe -
Easy Stained Glass Cookies Simple and Fun Recipe
Get ready to create some beautiful treats with my Easy Stained Glass Cookies! This simple recipe is perfect for kids Read Full Recipe -
Halloween Chex Mix Fun and Festive Snack Idea
Get ready for a sweet and spooky delight with my Halloween Chex Mix! This fun snack combines crispy Chex cereal, Read Full Recipe -
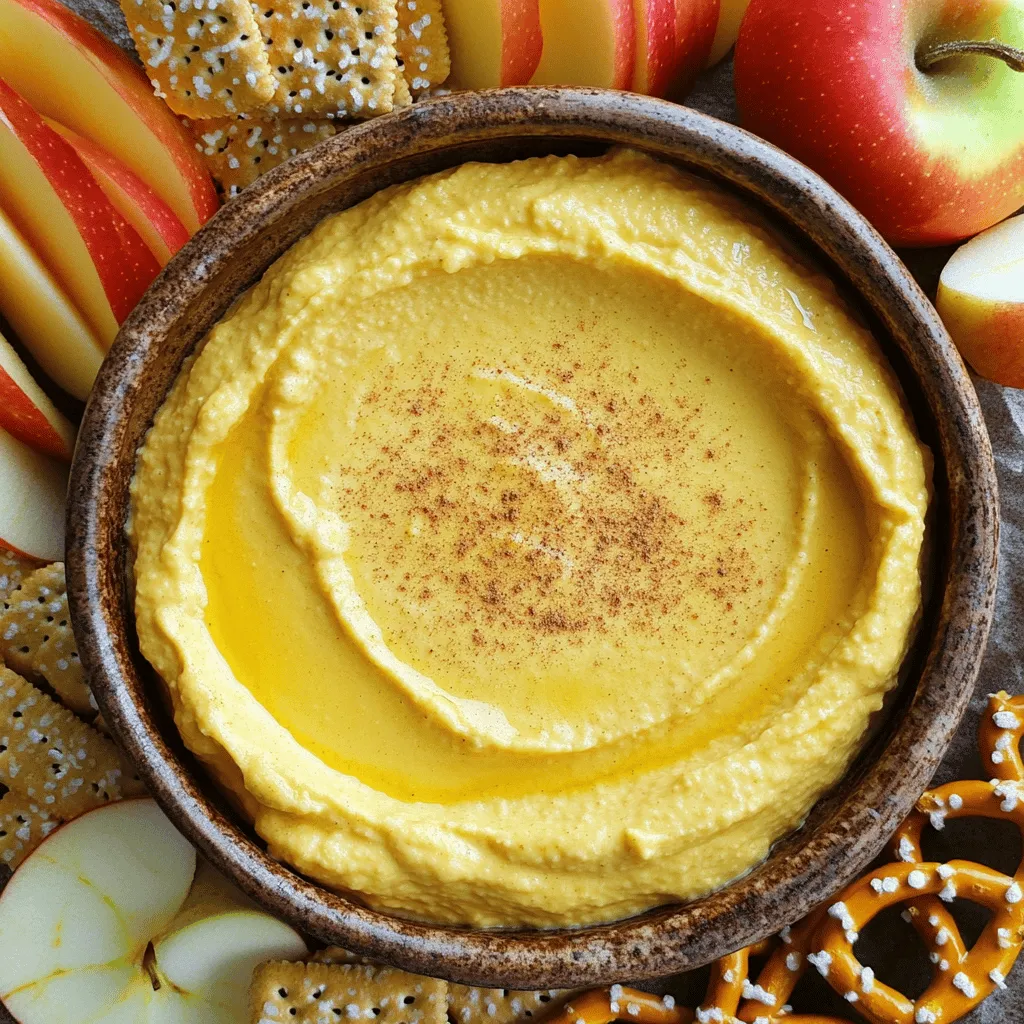
Pumpkin Cheesecake Dip Delightful and Easy Recipe
Fall is here, and nothing screams comfort like my Pumpkin Cheesecake Dip! This delightful treat is easy to make, packed Read Full Recipe -
Pumpkin Spice Energy Bites Healthy Power Snack
Looking for a delicious and healthy snack? Pumpkin Spice Energy Bites are the answer! These tasty treats blend fiber-rich oats, Read Full Recipe -
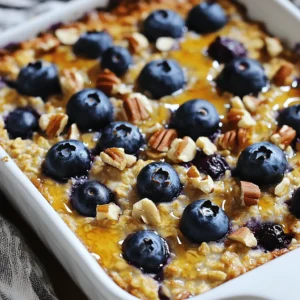
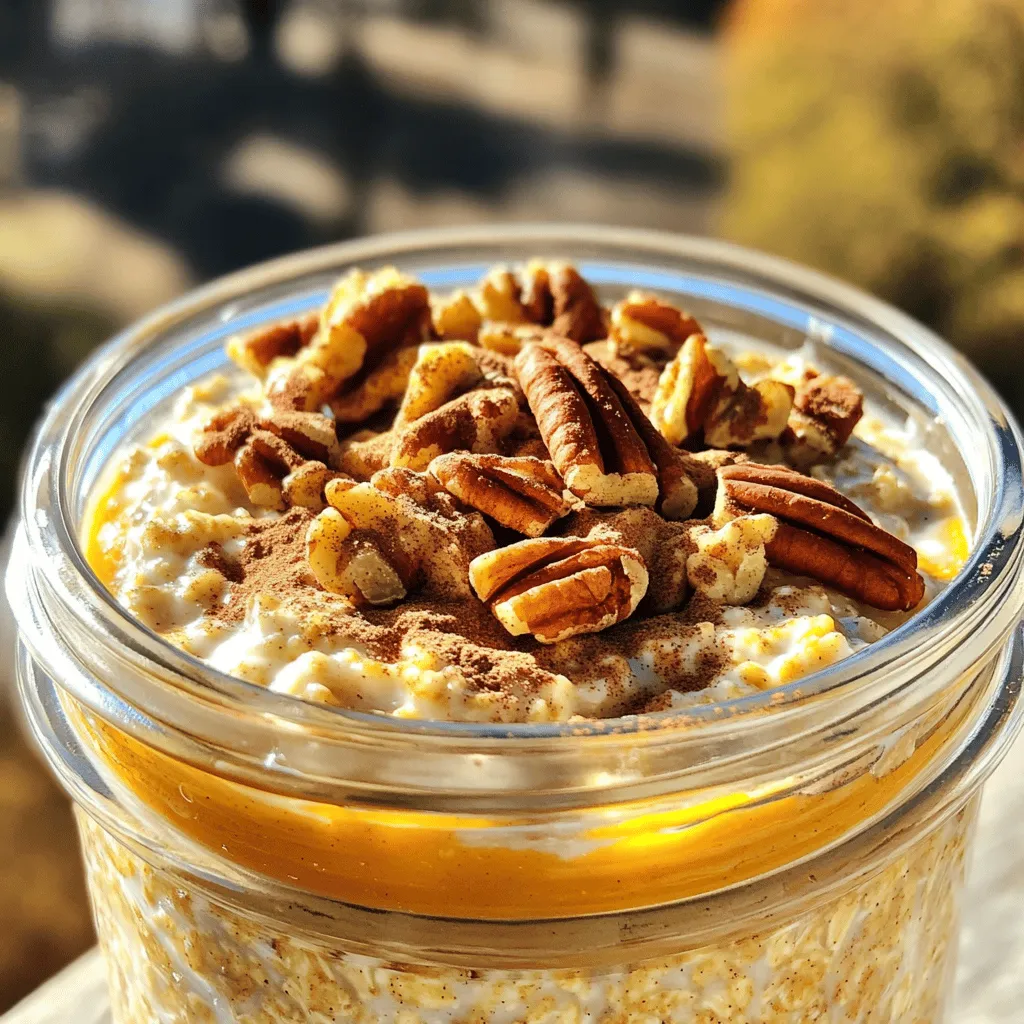
Pumpkin Pie Overnight Oats Flavorful and Nutritious Meal
Looking for a healthy yet tasty breakfast? Pumpkin Pie Overnight Oats combine rich pumpkin flavor with creamy oats. Packed with Read Full Recipe


My Latest Recipes

hey,
i’m !
I’m so happy you’re here!
Food is my passion, and perfecting each dish is my craft. I can’t wait for you to try them let’s dive into this delicious journey side by side.
![- 3 medium yellow squash, sliced into thin rounds - 1 cup sugar - 1 cup apple cider vinegar - 1/2 cup water - 1 tablespoon salt - 1 teaspoon mustard seeds - 1 teaspoon black peppercorns - 1 teaspoon turmeric powder - 1 teaspoon crushed red pepper flakes - 1 teaspoon garlic powder - 1 small onion, thinly sliced - Fresh herbs like dill or cilantro Gathering the right ingredients is key to making great sweet yellow squash pickles. Start with fresh yellow squash. Look for ones that are firm and bright in color. The sugar and apple cider vinegar are what give this recipe its sweet and tangy kick. The water helps balance the brine. The spices add depth. Salt draws moisture from the squash, making them crisp. Mustard seeds, black peppercorns, and turmeric bring unique flavors. Crushed red pepper adds a touch of heat, while garlic powder gives a savory note. Sliced onions make the pickles even better. For garnishes, fresh herbs like dill or cilantro can add a lovely touch. These herbs boost flavor and look pretty too. Using high-quality ingredients ensures your pickles taste amazing. You can find the full recipe above if you want to dive right into making these delicious pickles! - Combine 3 medium yellow squash slices with 1 tablespoon of salt. - Let the squash sit for 1 hour to draw out moisture. - After an hour, rinse the squash slices under cold water. - Drain the slices well to remove excess salt. - In a medium saucepan, combine: - 1 cup sugar - 1 cup apple cider vinegar - 1/2 cup water - 1 teaspoon mustard seeds - 1 teaspoon black peppercorns - 1 teaspoon turmeric powder - 1 teaspoon crushed red pepper flakes - 1 teaspoon garlic powder - Bring this mix to a gentle boil over medium heat. - Stir until the sugar dissolves completely. - Reduce the heat and add 1 small thinly sliced onion. - Let it simmer for about 5 minutes to blend the flavors. - Remove the saucepan from heat and add the drained squash slices. - Mix well to coat all the squash with the hot brine. - Pack the mixture into clean, sterilized jars. - Make sure to include onions and spices in each jar. - Pour the hot brine over the squash until fully submerged. - Leave 1/2 inch of headspace at the top of each jar. - Seal the jars with lids and cool to room temperature. - Refrigerate the jars and let the pickles sit for at least 24 hours before serving. For the complete recipe, refer to the [Full Recipe]. - Ensure jars are sterilized properly. This keeps your pickles fresh and safe. - Use fresh, high-quality ingredients. Fresh squash gives the best flavor and crunch. - Adjust sugar for sweetness level. Taste the brine, and add more sugar if needed. - Modify spice amounts to taste. If you love heat, add more crushed red pepper flakes. - Serve pickles in decorative jars. A pretty jar makes your pickles look even better. - Garnish with fresh herbs for visual appeal. Fresh dill or cilantro adds color and flavor. These tips will help you create the best sweet yellow squash pickles. For more details, check out the Full Recipe. {{image_2}} For a sweet and spicy twist, consider adding more crushed red pepper flakes. This simple addition ramps up the heat. If you want even more fire, toss in some jalapeños. Slice them thin and mix them into the squash before packing the jars. This variation creates a fun kick that pairs well with rich meats. Another delightful option is to infuse your pickles with herbs. Fresh dill or rosemary adds a fresh taste to the brine. You can toss in a few sprigs during the cooking process. Don’t be afraid to experiment with other herbs too! Thyme, tarragon, or even basil can bring new flavors to your pickles. You can also try pickling different vegetables. Other summer squashes work great, and cucumbers are a classic choice. Consider blending the squash with colorful carrots or sweet bell peppers. This adds a beautiful look and varied taste to your jars. Mixing vegetables lets you create unique flavors that are fun and delicious. For more ideas, check out the Full Recipe. To keep your sweet yellow squash pickles fresh, store them in the fridge. This helps maintain their crunch and flavor. After making them, let your pickles sit for at least 24 hours. This resting time allows the flavors to blend nicely. Homemade pickles usually last about 2 to 3 weeks in the fridge. Look for signs of spoilage, such as off smells or mold. If the pickles seem slimy or the liquid looks cloudy, it's best to toss them. If you want to keep your pickles longer, consider canning. Use proper canning methods for safe long-term storage. Before canning, make sure your jars are clean and sterilized. This helps prevent bacteria growth and keeps your pickles safe to eat. Sweet yellow squash pickles last about 2 months in the fridge. If you can them properly, they can last up to a year on the shelf. Always check for signs of spoilage before eating. Yes, you can use other types of vinegar. White vinegar works well and gives a clean taste. Red wine vinegar adds a bit of depth and color. Experiment and see what you like best. You can serve these pickles in many ways. They pair nicely with sandwiches, burgers, or as a side for grilled meats. For a fun twist, add them to tacos or salads. A good serving size is about 1/4 cup per person. These pickles are great for picnics and parties. You can adjust the sweetness easily. Add more sugar for a sweeter taste or cut back for less sweetness. If you want a sugar substitute, try honey or agave syrup. Just remember to adjust the liquid in the brine. In this guide, we covered how to make sweet yellow squash pickles. We discussed the key ingredients, flavor tips, and the step-by-step process to pickle squash properly. Remember, adjusting sweetness and spice makes the pickles uniquely yours. Don't forget to store them safely for the best flavor. Enjoy your pickles as a tasty side or snack. Making them adds fun to your kitchen, and you can share them with friends! Happy pickling!](https://mysavedrecipe.com/wp-content/uploads/2025/06/afd8ad7d-43bb-4028-a14f-8632236d1c09-300x300.webp)


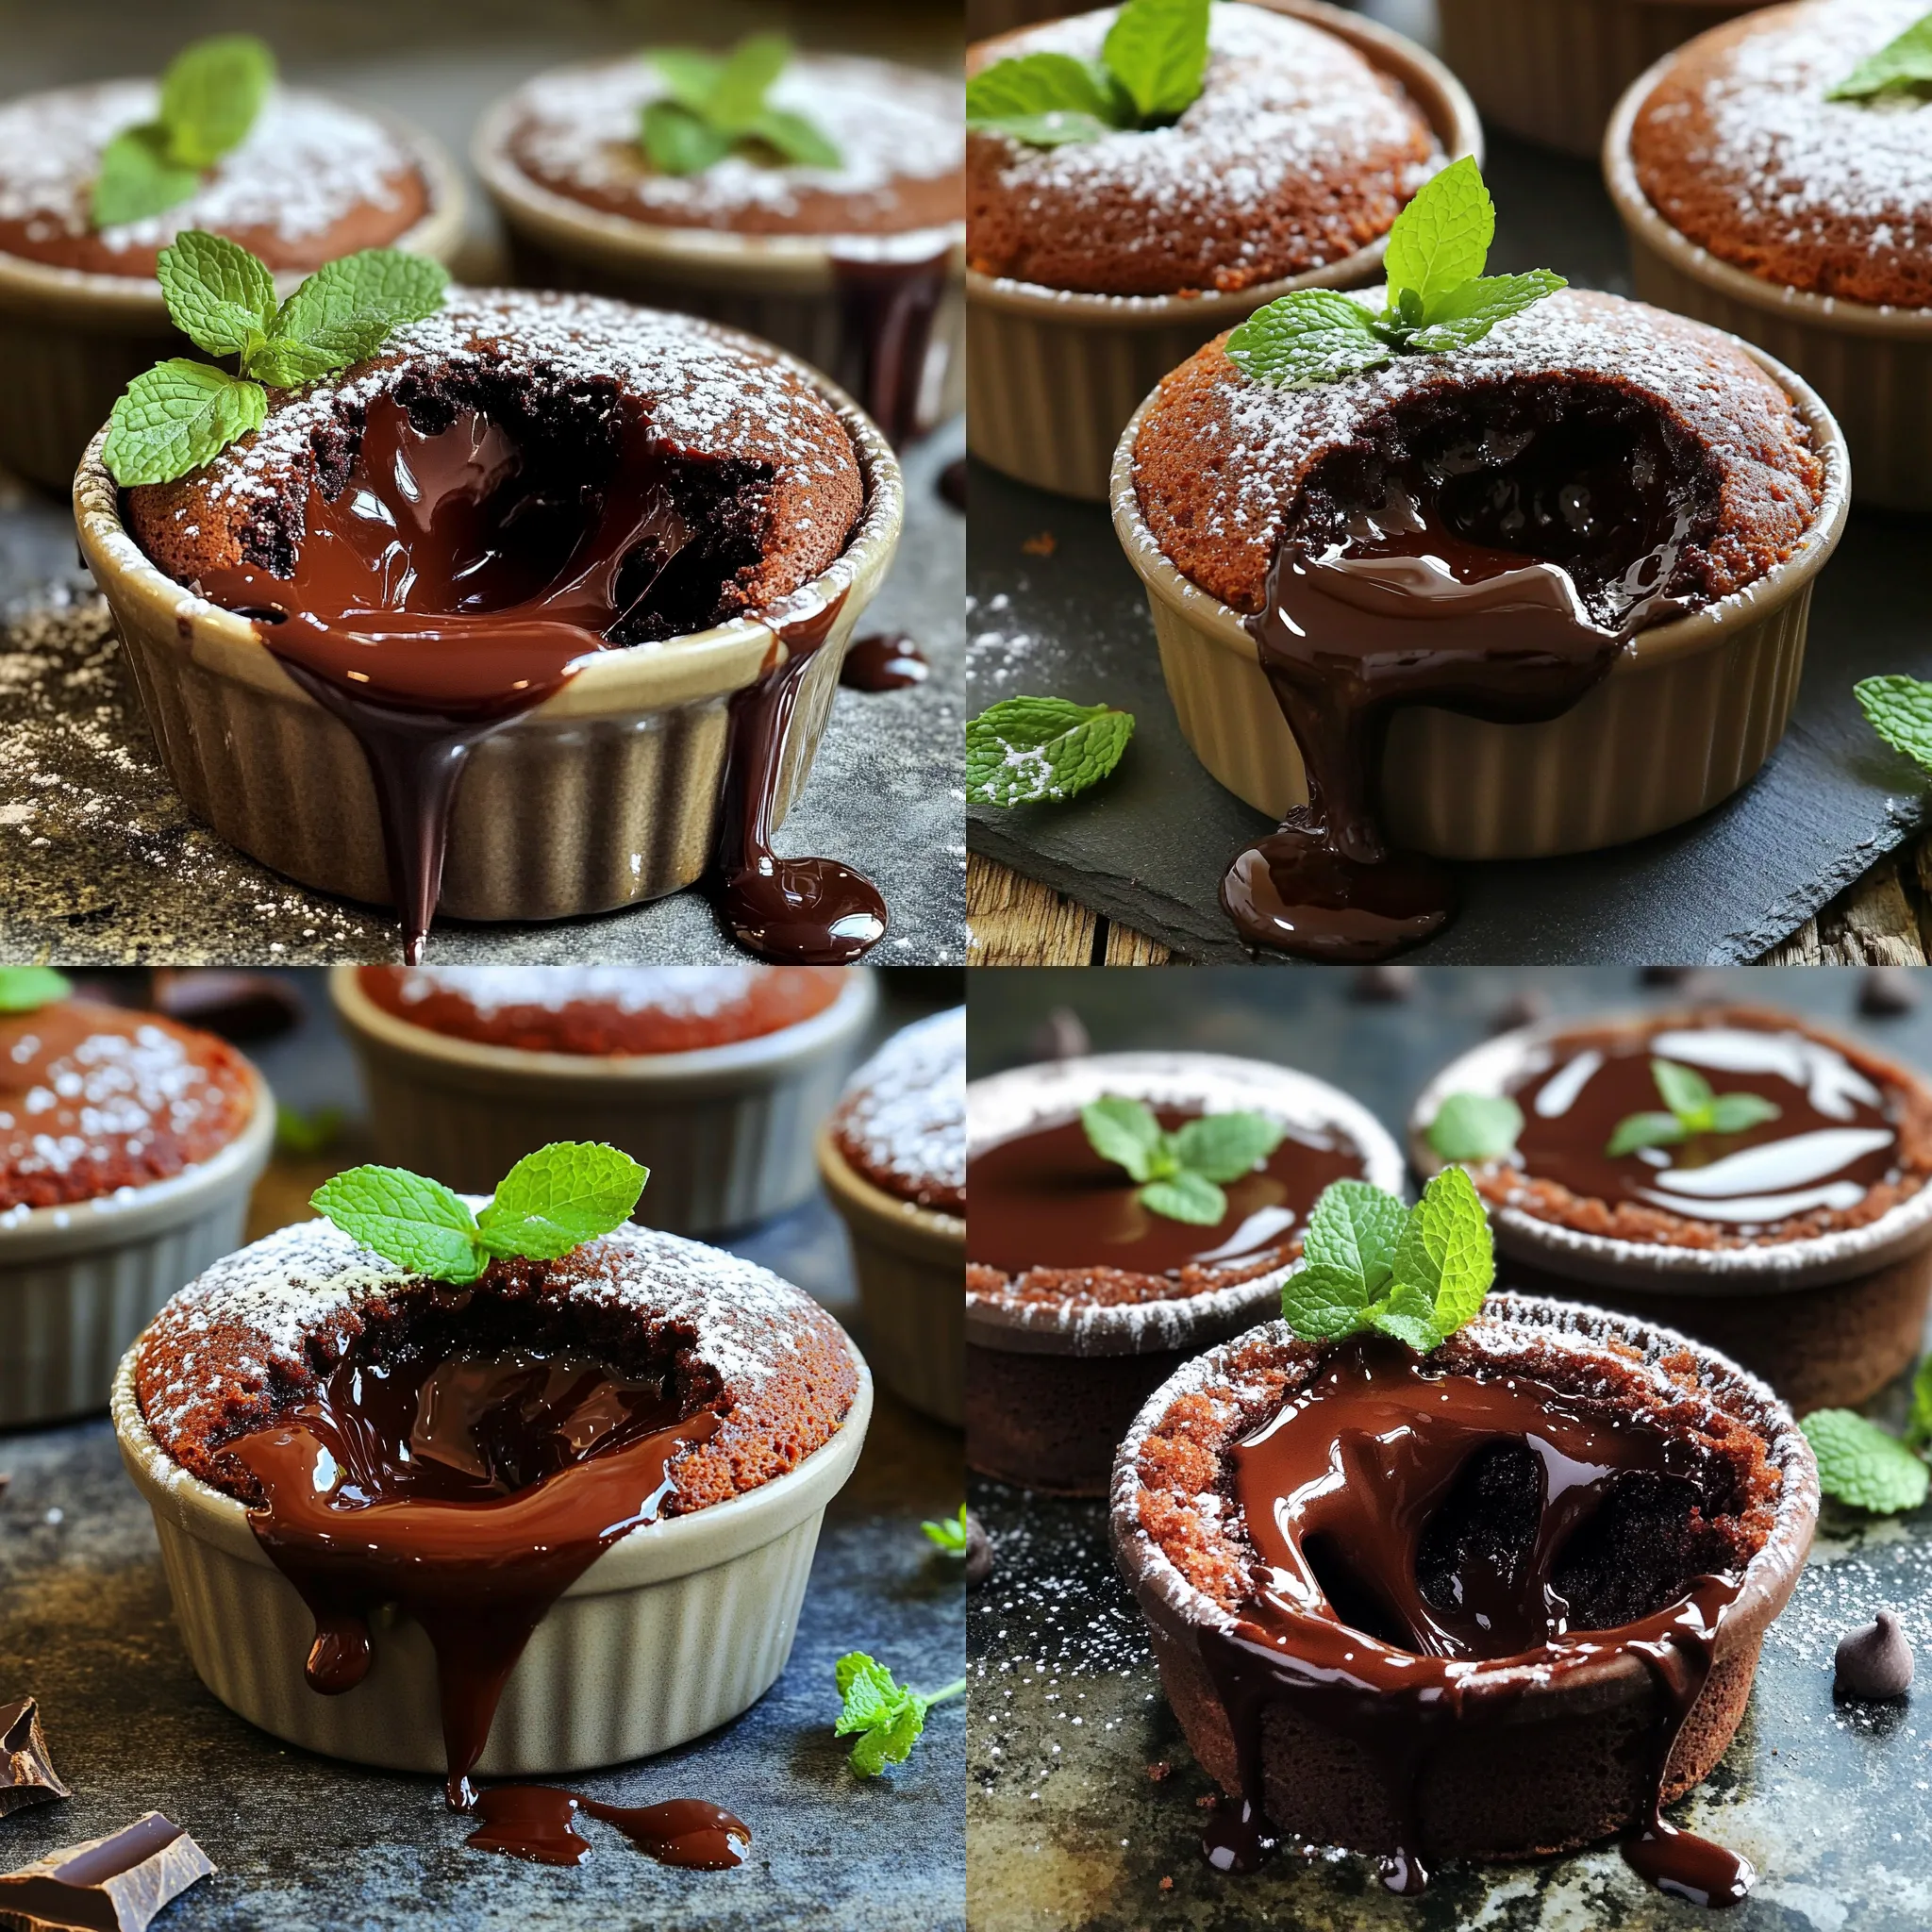
Easiest Chocolate Lava Cake Simple Sweet Indulgence
Craving a rich, gooey dessert that’s quick and easy to make? You’re in the right place! This Easiest Chocolate Lava Cake is a simple…