


Latest & Greatest
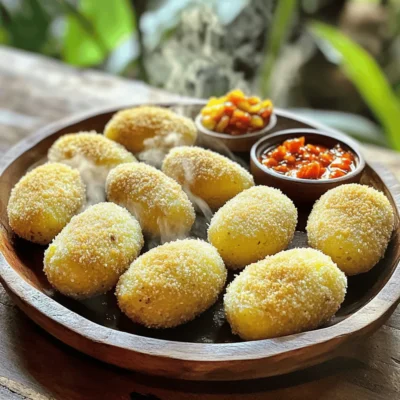
Easy Indonesian Beef Potato Croquettes Simple Recipe
Craving a tasty treat that’s easy to make? Try my Easy Indonesian Beef Potato Croquettes! This simple recipe combines savory
Read more…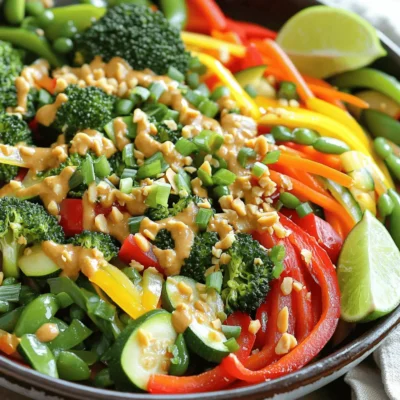
Vegetable Stir-Fry with Peanut Sauce Simple and Fresh
Are you ready to enjoy a quick, tasty meal? This Vegetable Stir-Fry with Peanut Sauce is just what you need.
Read more…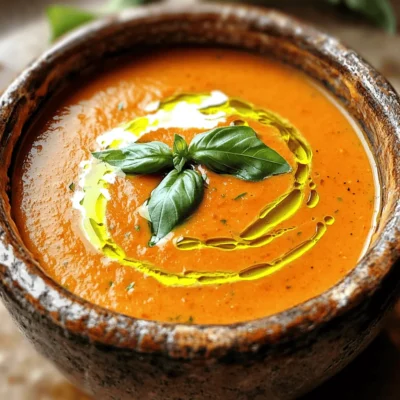
Creamy Tomato Basil Soup Comforting and Easy Recipe
There’s nothing quite like a warm bowl of creamy tomato basil soup to lift your spirits. This easy recipe combines
Read more…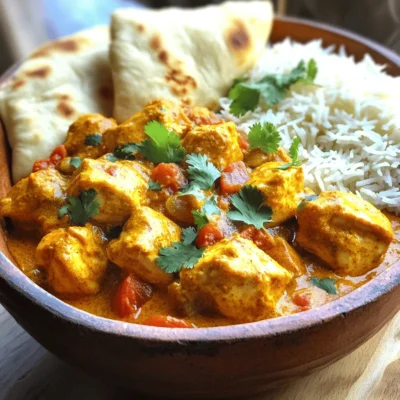
Instant Pot Chicken Tikka Masala Flavorful Delight
Are you ready to make a delicious Chicken Tikka Masala in your Instant Pot? This flavorful delight is simple to
Read more…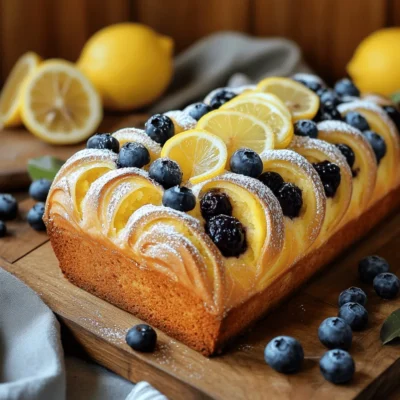
Lemon Blueberry Bread Flavorful and Easy Recipe
If you’re craving a sweet treat that’s fresh and easy to make, this Lemon Blueberry Bread recipe is for you!
Read more…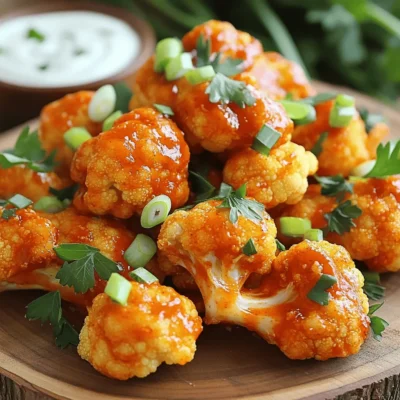
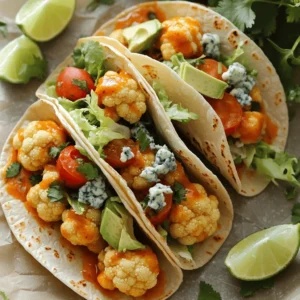
Vegan Cauliflower Buffalo Wings Crispy and Flavorful
Are you craving a tasty, guilt-free snack? Look no further than these Vegan Cauliflower Buffalo Wings! They are crispy, flavorful,
Read more…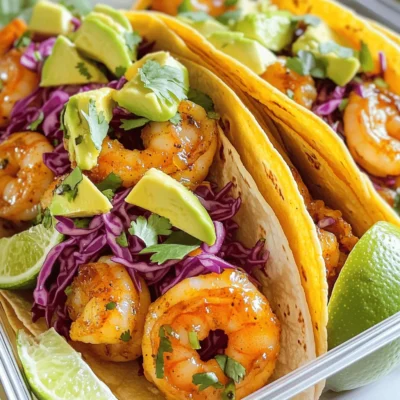
Spicy Garlic Shrimp Tacos Flavorful and Easy Recipe
Craving a meal that packs both flavor and ease? Let me introduce you to Spicy Garlic Shrimp Tacos! This quick
Read more…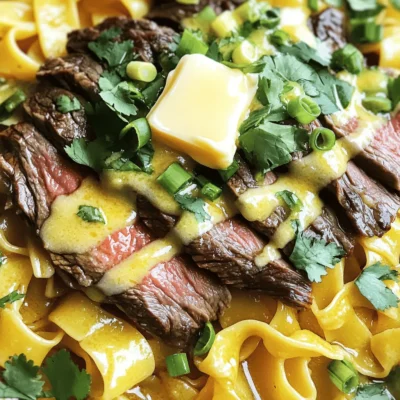
Garlic Butter Steak Noodles Flavorful and Simple Dish
Looking for a dish that’s both tasty and easy to make? Garlic Butter Steak Noodles are your answer! In this
Read more…browse recipes


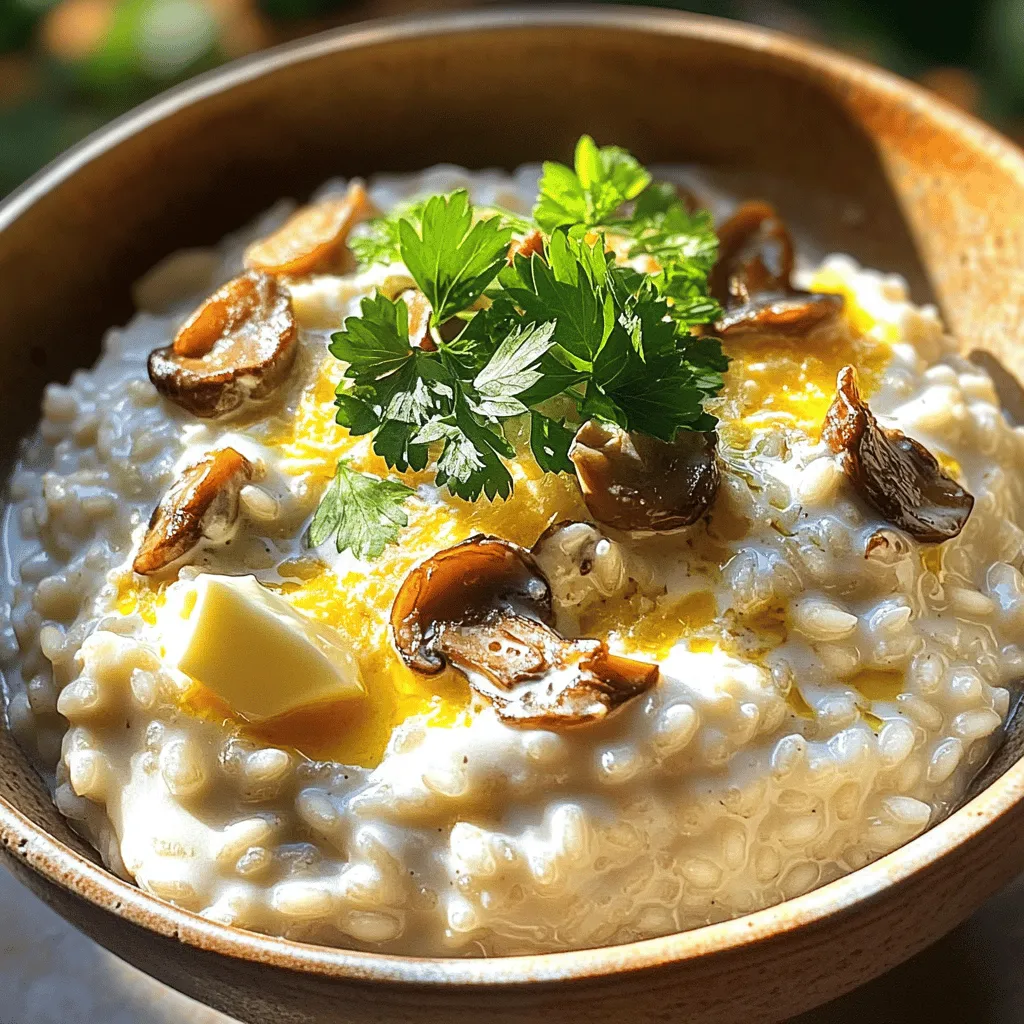
Creamy Mushroom Risotto Simple and Satisfying Dish
Welcome to my kitchen! Today, we are diving into the world of creamy mushroom risotto. This dish is easy to make and oh-so-satisfying! You’ll…
My Latest Desserts

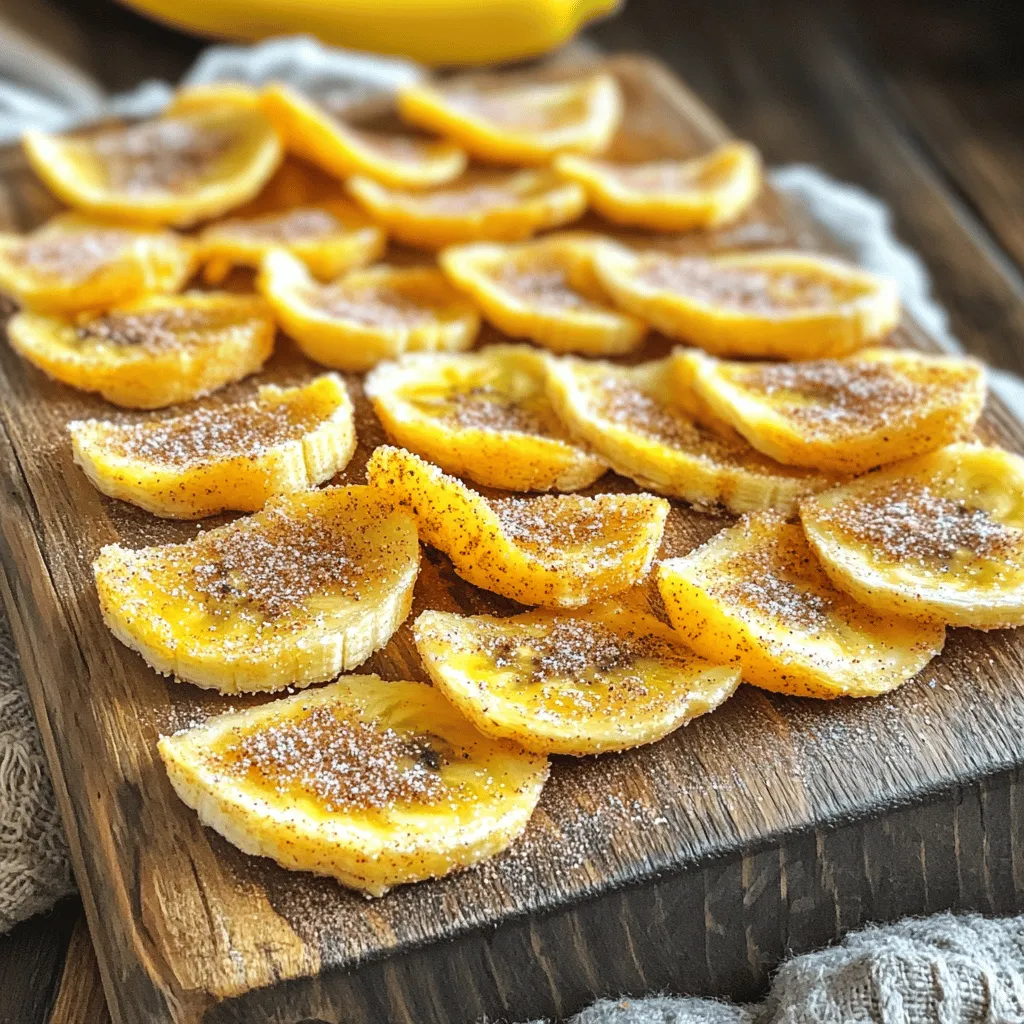
Crispy Cinnamon Sugar Air Fryer Banana Chips Delight
Are you ready for a snack that’s both crunchy and sweet? I’m excited to share my Crispy Cinnamon Sugar Air Read Full Recipe-
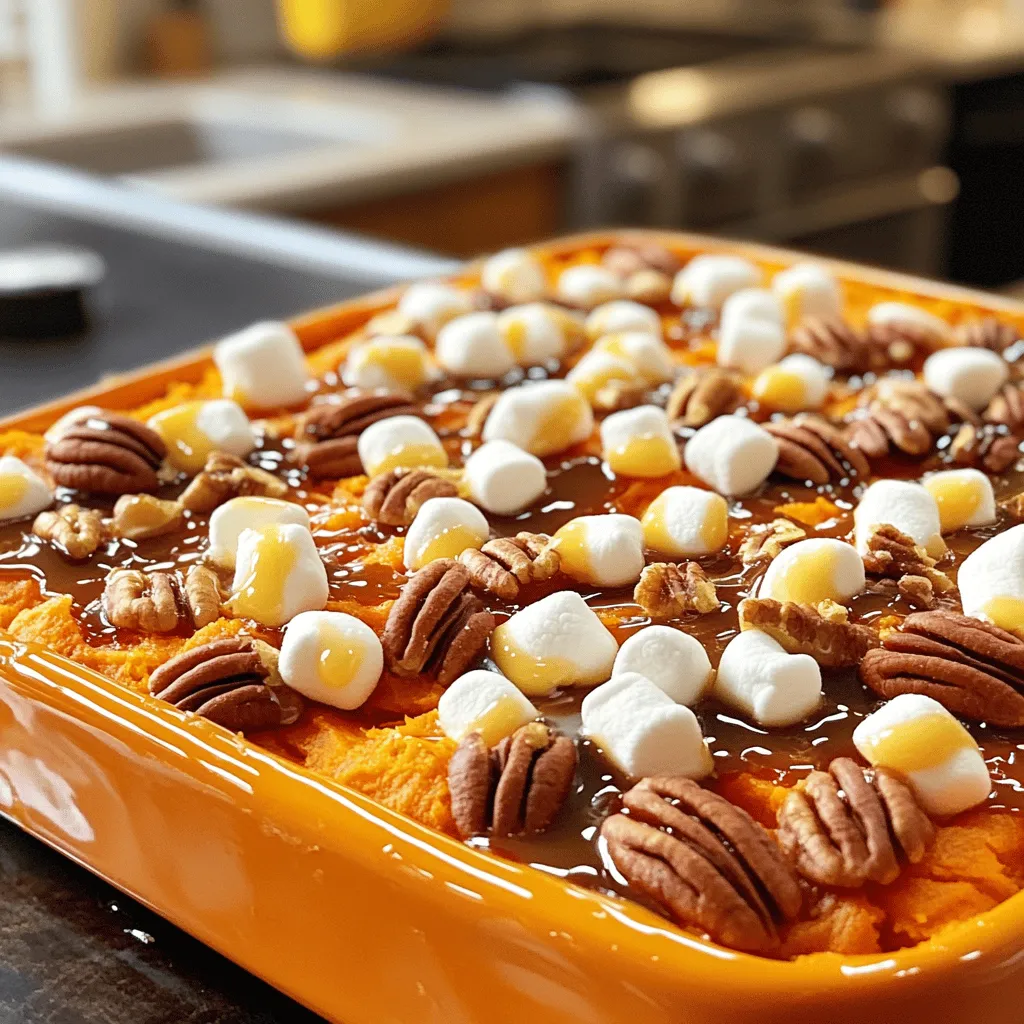
Easy Sweet Potato Casserole Simple and Tasty Recipe
Looking for a sweet, easy dish that steals the show? My Easy Sweet Potato Casserole is just what you need! Read Full Recipe -
Peppermint Chocolate Chip Cookies Festive and Delightful
Get ready to celebrate the season with my Peppermint Chocolate Chip Cookies! These festive treats combine the rich taste of Read Full Recipe -
Chocolate Thumbprint Cookies Irresistible Treat Recipe
If you’re craving a sweet treat, you’ll love chocolate thumbprint cookies! These soft, chewy cookies are easy to make and Read Full Recipe -
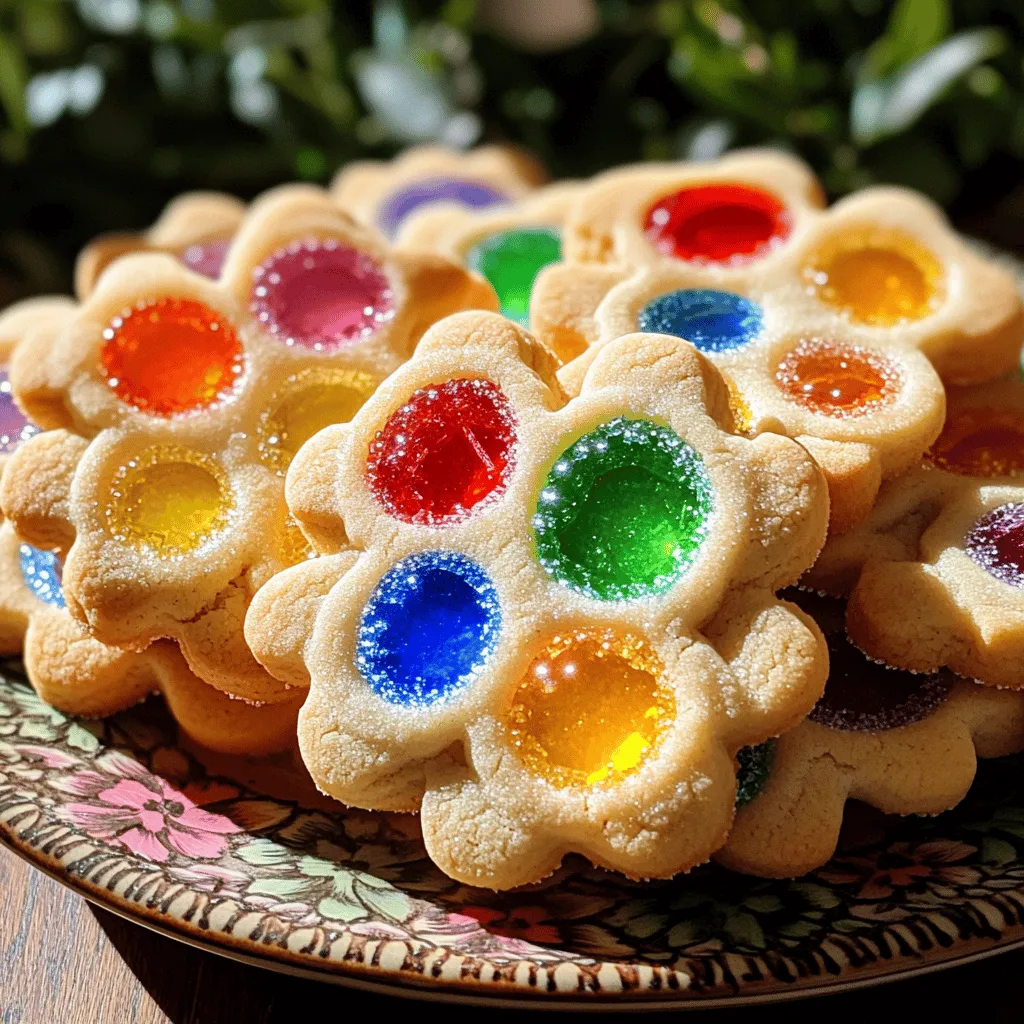
Easy Stained Glass Cookies Simple and Fun Recipe
Get ready to create some beautiful treats with my Easy Stained Glass Cookies! This simple recipe is perfect for kids Read Full Recipe -
Halloween Chex Mix Fun and Festive Snack Idea
Get ready for a sweet and spooky delight with my Halloween Chex Mix! This fun snack combines crispy Chex cereal, Read Full Recipe -
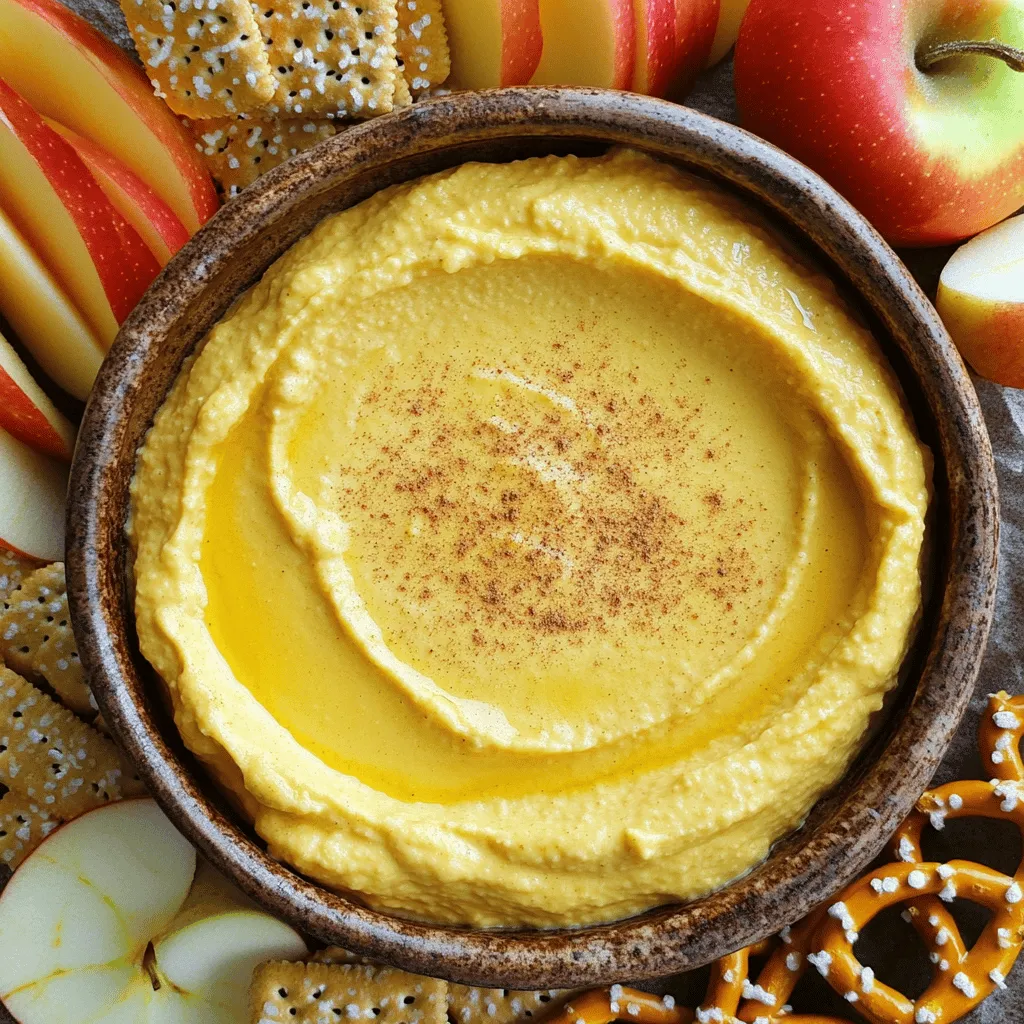
Pumpkin Cheesecake Dip Delightful and Easy Recipe
Fall is here, and nothing screams comfort like my Pumpkin Cheesecake Dip! This delightful treat is easy to make, packed Read Full Recipe -
Pumpkin Spice Energy Bites Healthy Power Snack
Looking for a delicious and healthy snack? Pumpkin Spice Energy Bites are the answer! These tasty treats blend fiber-rich oats, Read Full Recipe -
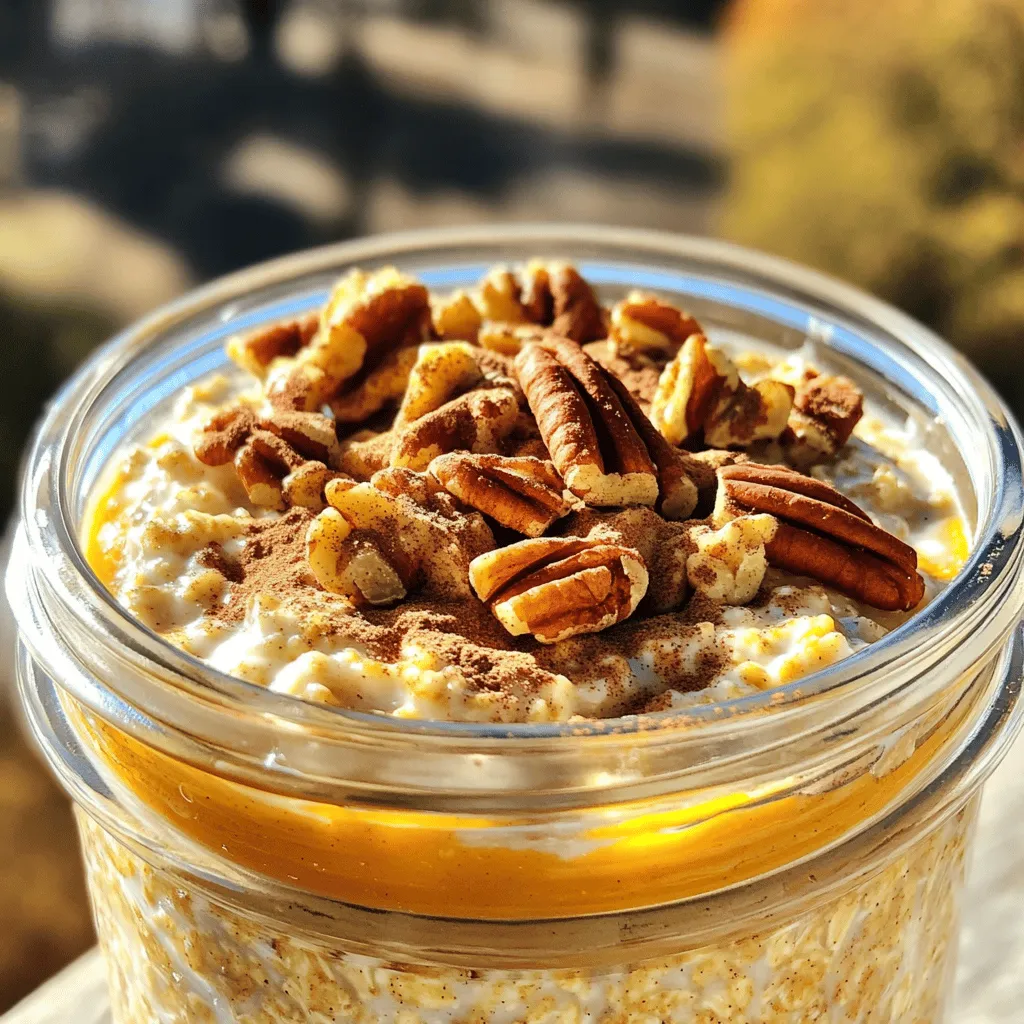
Pumpkin Pie Overnight Oats Flavorful and Nutritious Meal
Looking for a healthy yet tasty breakfast? Pumpkin Pie Overnight Oats combine rich pumpkin flavor with creamy oats. Packed with Read Full Recipe -
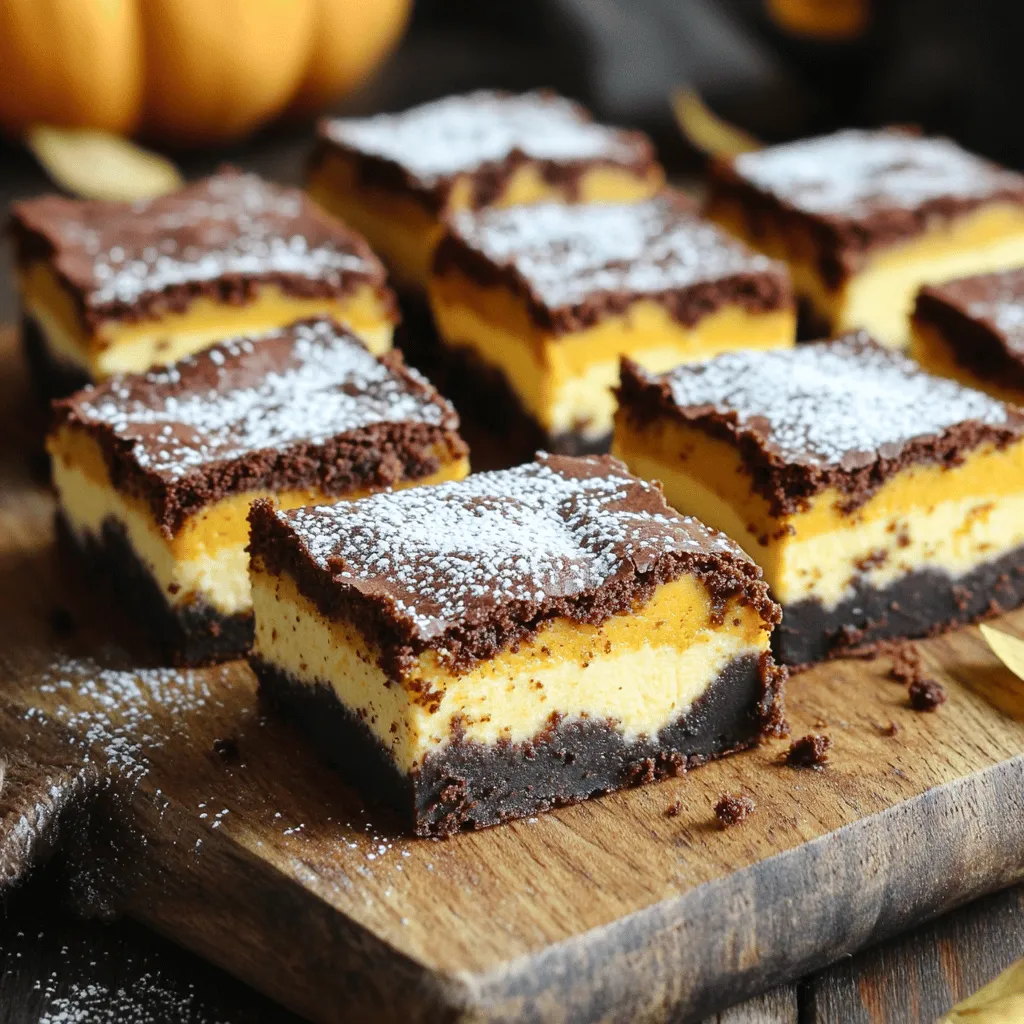
Pumpkin Cheesecake Brownies Delightful Dessert Recipe
Ready to treat yourself? Let’s dive into these Pumpkin Cheesecake Brownies. This recipe blends rich brownies with creamy pumpkin cheesecake, Read Full Recipe


My Latest Recipes

hey,
i’m !
I’m so happy you’re here!
Food is my passion, and perfecting each dish is my craft. I can’t wait for you to try them let’s dive into this delicious journey side by side.


Oven-Baked Chicken Fajitas Flavorful and Simple Recipe
If you’re craving a flavorful meal that’s easy to make, try these Oven-Baked Chicken Fajitas. This recipe brings together juicy chicken, colorful bell peppers,…
. Preheat the Oven Start by preheating your oven to 400°F (200°C). This step is very important. A hot oven helps cook the chicken and veggies just right. Prepare the Vegetables and Chicken Next, gather your fresh ingredients. Slice the chicken breast into thin strips. Cut the red, yellow, and green bell peppers into pieces. Make sure the onion is also sliced thin. This way, all the pieces cook evenly. Place everything in a large bowl. Combine Ingredients Pour 3 tablespoons of olive oil over the chicken and veggies. Then, sprinkle the spices: 2 teaspoons of chili powder, 1 teaspoon each of cumin, smoked paprika, garlic powder, onion powder, plus salt and pepper to taste. Toss everything well. You want all the pieces to be coated in the yummy seasoning. Spread on Baking Sheet Now, take a large baking sheet and line it with parchment paper or grease it lightly. Spread the chicken and veggie mixture evenly on the sheet. This helps them cook evenly and get nice and golden. Bake the Mixture Place the baking sheet in the oven. Bake for 25-30 minutes. Halfway through, give everything a good stir. This ensures even cooking. The chicken should be cooked through, and the vegetables will be tender. Warm Tortillas and Serve While the fajitas bake, you can warm the tortillas. Use a dry skillet over medium heat for about 30 seconds on each side. Alternatively, wrap them in foil and heat in the oven for the last 5 minutes of cooking. Once the fajitas are ready, squeeze fresh lime juice over them. Serve the fajitas on warm tortillas. Garnish with chopped cilantro and lime wedges. Enjoy every bite! For the full recipe, check above. Choosing the Right Chicken For the best fajitas, I recommend using boneless, skinless chicken breasts. They cook evenly and stay juicy. Aim for chicken strips about half an inch thick. This size helps them cook well and absorb all those tasty spices. How to Cut Vegetables for Even Cooking Slice your bell peppers and onion into similar sizes. I like to cut them into thin strips, about a quarter-inch thick. This ensures they cook evenly in the oven. If you want more crunch, cut them slightly thicker. Just remember to keep them uniform for the best results. Marinating Tips for Extra Flavor For an extra flavor boost, marinate your chicken. Mix olive oil, lime juice, and spices in a bowl. Let the chicken soak for at least 30 minutes. This step makes a big difference! It adds depth and richness to your fajitas. Adding Extra Toppings and Sides Don’t forget about toppings! Fresh cilantro, diced tomatoes, and avocado can elevate your dish. You can also serve your fajitas with sides like rice or beans. They add color and nutrition. Explore different options to make each meal unique. For the full recipe, check out the complete guide! {{image_2}} You can switch things up by using different proteins in your fajitas. If you prefer beef, choose flank steak or sirloin. Slice the meat thin for quick cooking. Simply follow the same steps as the chicken. Shrimp is another tasty option. It cooks faster than chicken. Add it to the mix for only 15 minutes, and you’ll have a delightful seafood fajita. For those who want a meatless meal, try using firm tofu or tempeh. Marinate them in the same spices to add flavor. Cook them until golden brown, and enjoy a veggie-packed dish. You can customize the heat level of your fajitas. For mild fajitas, stick to the recipe as is. The spices provide flavor without too much heat. If you like a medium kick, add a bit more chili powder. You could also mix in some diced bell peppers for added taste. For those who love spice, fresh jalapeños are a great choice. Chop them and toss them with the chicken and veggies before baking. You can also drizzle hot sauce on top before serving for an extra punch. Feel free to explore these variations in the full recipe for more ideas! After you enjoy those oven-baked chicken fajitas, store any leftovers properly. First, let them cool down. Then, place them in an airtight container. This keeps them fresh and tasty. You can store them in the fridge for up to three days. If you want to save them for later, consider freezing. To freeze, wrap the fajitas tightly in plastic wrap or foil. Then, place them in a freezer bag. They can last up to three months in the freezer. Just remember to label the bag with the date. When it's time to eat your leftovers, you have two good options: the microwave or the oven. Microwave Reheating: Place the fajitas on a microwave-safe plate. Cover them with a damp paper towel to keep them moist. Heat in short bursts of 30 seconds until they're warm throughout. Oven Reheating: Preheat your oven to 350°F (175°C). Spread the fajitas on a baking sheet. Heat for about 10-15 minutes, or until warm. This method helps keep the texture nice and crispy. To keep the fajitas fresh, avoid reheating them more than once. Enjoy the delicious flavors of your oven-baked chicken fajitas again! How do I know when the chicken is cooked through? You can check if the chicken is cooked by using a meat thermometer. Insert it into the thickest part of the chicken. It should read 165°F (75°C). If you don’t have a thermometer, you can also cut a piece of chicken in half. The meat should be white and no longer pink. Can I use frozen chicken for this recipe? Yes, you can use frozen chicken. However, it’s best to thaw it first. Thaw the chicken in the fridge overnight or use the defrost setting on your microwave. This way, it cooks evenly and absorbs the flavors well. What are the best sides to serve with chicken fajitas? I love serving chicken fajitas with: - Mexican rice - Black beans - Guacamole - Salsa - Corn salad These sides add color and flavor to your meal. They also balance the spices in the fajitas. How can I make this recipe dairy-free? To make chicken fajitas dairy-free, simply skip any cheese or sour cream. You can use avocado or guacamole instead. They add creaminess without dairy. Fresh lime juice adds a nice tang, too. How long do leftovers last in the fridge? Leftovers can last about 3 to 4 days in the fridge. Store them in an airtight container. This keeps the fajitas fresh and tasty. Can I prepare fajitas in advance? Yes, you can prep fajitas in advance. Slice the chicken and veggies, then store them in the fridge. Just mix and bake when you’re ready. This saves time on busy nights. For the full recipe, refer to the earlier section. To sum up, this article covered how to make tasty chicken fajitas. We discussed key ingredients like chicken, bell peppers, and spices. You learned about step-by-step preparation and cooking. I shared tips for perfecting your dish and options for different proteins and spice levels. Lastly, we addressed storage and reheating for leftovers. Enjoy making and sharing your delicious fajitas. With practice, you will master this easy and fun meal!](https://mysavedrecipe.com/wp-content/uploads/2025/06/8f12a0b8-0d21-45c5-a458-2fedd08aac6d.webp)
