Latest & Greatest
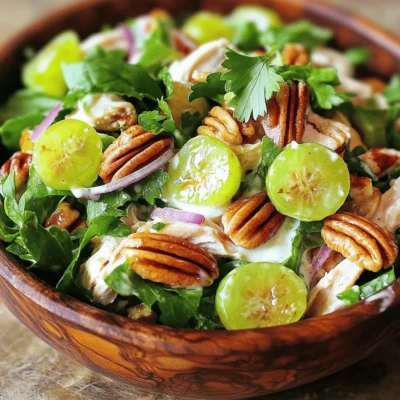
Pecan Chicken Salad Nutritious and Flavorful Dish
If you’re craving a meal that’s both tasty and healthy, look no further than pecan chicken salad! This dish packs
Read more…
Savory Buffalo Cauliflower Bites Easy and Flavorful Recipe
Are you ready for a tasty snack that’s both healthy and delicious? My Savory Buffalo Cauliflower Bites are easy to
Read more…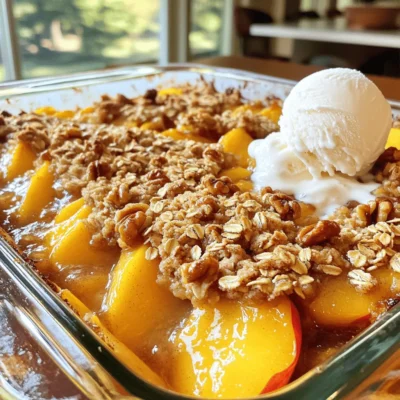
Peach Crisp with Oat Topping Delightful and Easy Dish
There’s nothing quite like a warm Peach Crisp with Oat Topping to satisfy your taste buds. This dish combines sweet,
Read more…
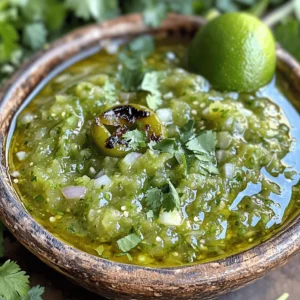
Vegan Cauliflower Tacos Yummy and Flavorful Delight
Looking for a tasty, plant-based meal that’ll wow your taste buds? Try my Vegan Cauliflower Tacos! This delightful recipe is
Read more…
Lemon Basil Chicken Skewers Tasty Grilled Delight
If you want a fun and tasty dish, look no further than my Lemon Basil Chicken Skewers! These skewers are
Read more…
Stuffed Bell Peppers with Quinoa Healthy and Filling
Are you looking for a healthy and filling dish that brings flavor to your table? Stuffed bell peppers with quinoa
Read more…
Cinnamon Roll Pancakes Irresistible Morning Treat
Imagine waking up to the sweet, warm aroma of cinnamon rolls but in pancake form! Cinnamon Roll Pancakes are an
Read more…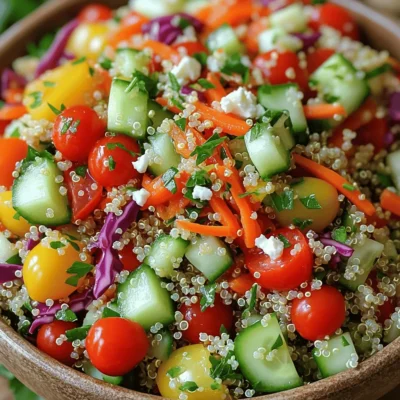
Rainbow Veggie Quinoa Salad Fresh and Flavorful Dish
Looking for a fresh and flavorful dish that packs a colorful punch? Today, I’ll show you how to make a
Read more…browse recipes


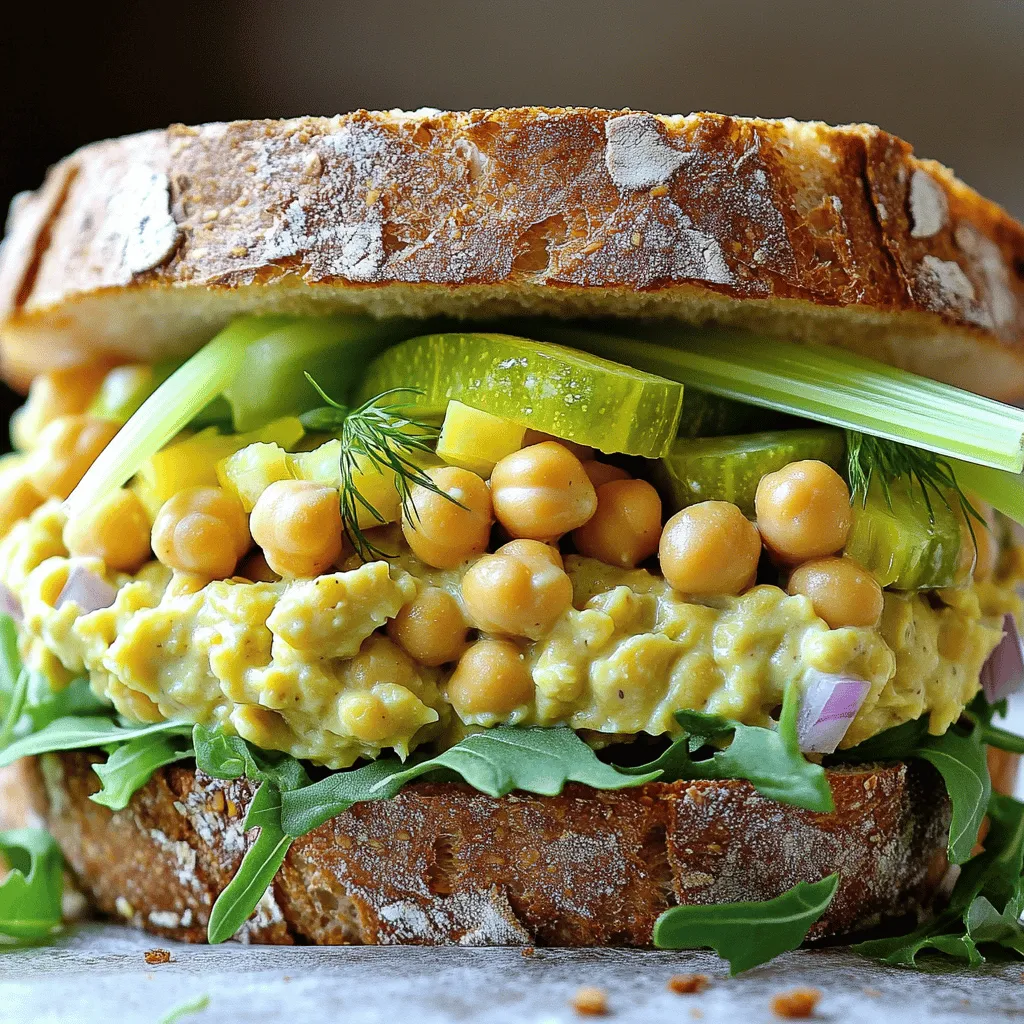
Vegan Chickpea Salad Sandwich Healthy and Tasty Meal
Looking for a healthy and tasty meal? The Vegan Chickpea Salad Sandwich is a perfect choice! Packed with protein and fiber, this simple recipe…
My Latest Desserts

Crispy Cinnamon Sugar Air Fryer Banana Chips Delight
Are you ready for a snack that’s both crunchy and sweet? I’m excited to share my Crispy Cinnamon Sugar Air Read Full Recipe-
Easy Sweet Potato Casserole Simple and Tasty Recipe
Looking for a sweet, easy dish that steals the show? My Easy Sweet Potato Casserole is just what you need! Read Full Recipe -
Peppermint Chocolate Chip Cookies Festive and Delightful
Get ready to celebrate the season with my Peppermint Chocolate Chip Cookies! These festive treats combine the rich taste of Read Full Recipe -
Chocolate Thumbprint Cookies Irresistible Treat Recipe
If you’re craving a sweet treat, you’ll love chocolate thumbprint cookies! These soft, chewy cookies are easy to make and Read Full Recipe -
Easy Stained Glass Cookies Simple and Fun Recipe
Get ready to create some beautiful treats with my Easy Stained Glass Cookies! This simple recipe is perfect for kids Read Full Recipe -
Halloween Chex Mix Fun and Festive Snack Idea
Get ready for a sweet and spooky delight with my Halloween Chex Mix! This fun snack combines crispy Chex cereal, Read Full Recipe -
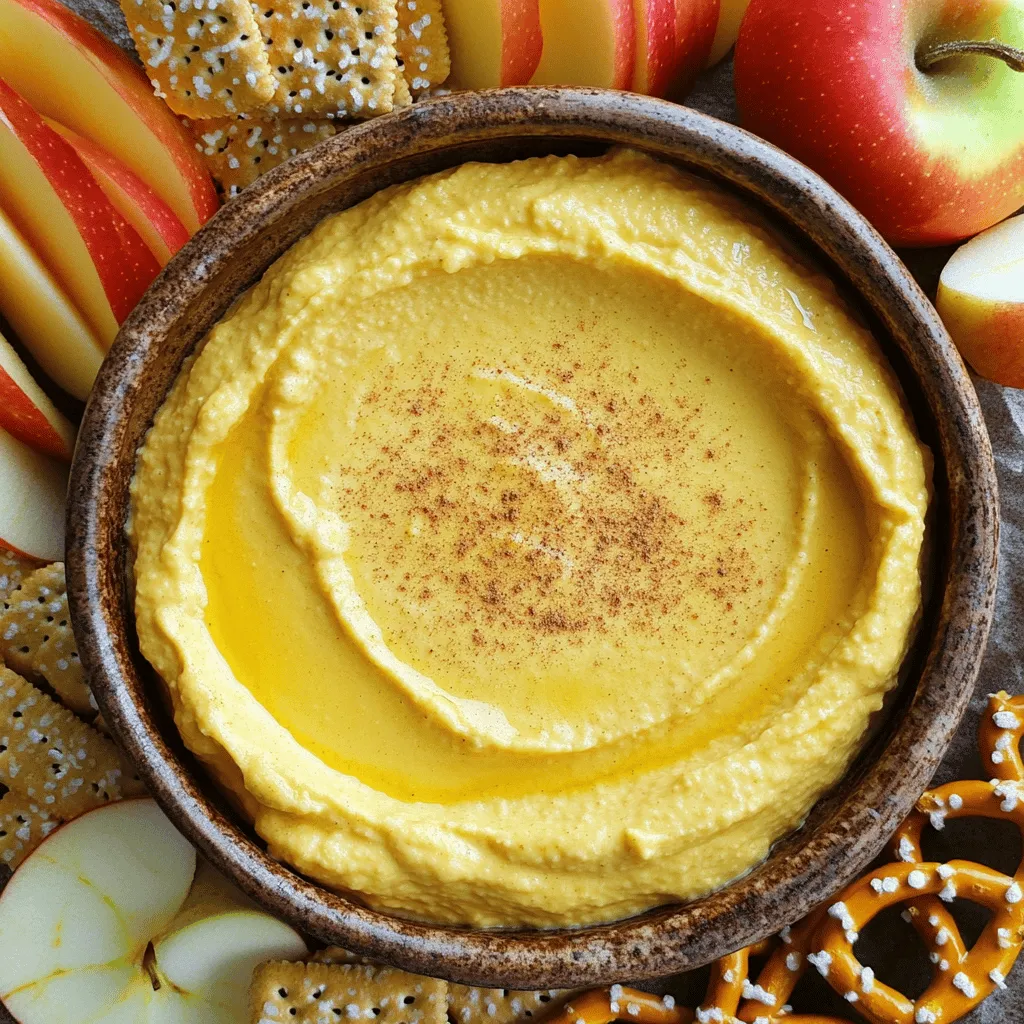
Pumpkin Cheesecake Dip Delightful and Easy Recipe
Fall is here, and nothing screams comfort like my Pumpkin Cheesecake Dip! This delightful treat is easy to make, packed Read Full Recipe -
Pumpkin Spice Energy Bites Healthy Power Snack
Looking for a delicious and healthy snack? Pumpkin Spice Energy Bites are the answer! These tasty treats blend fiber-rich oats, Read Full Recipe -
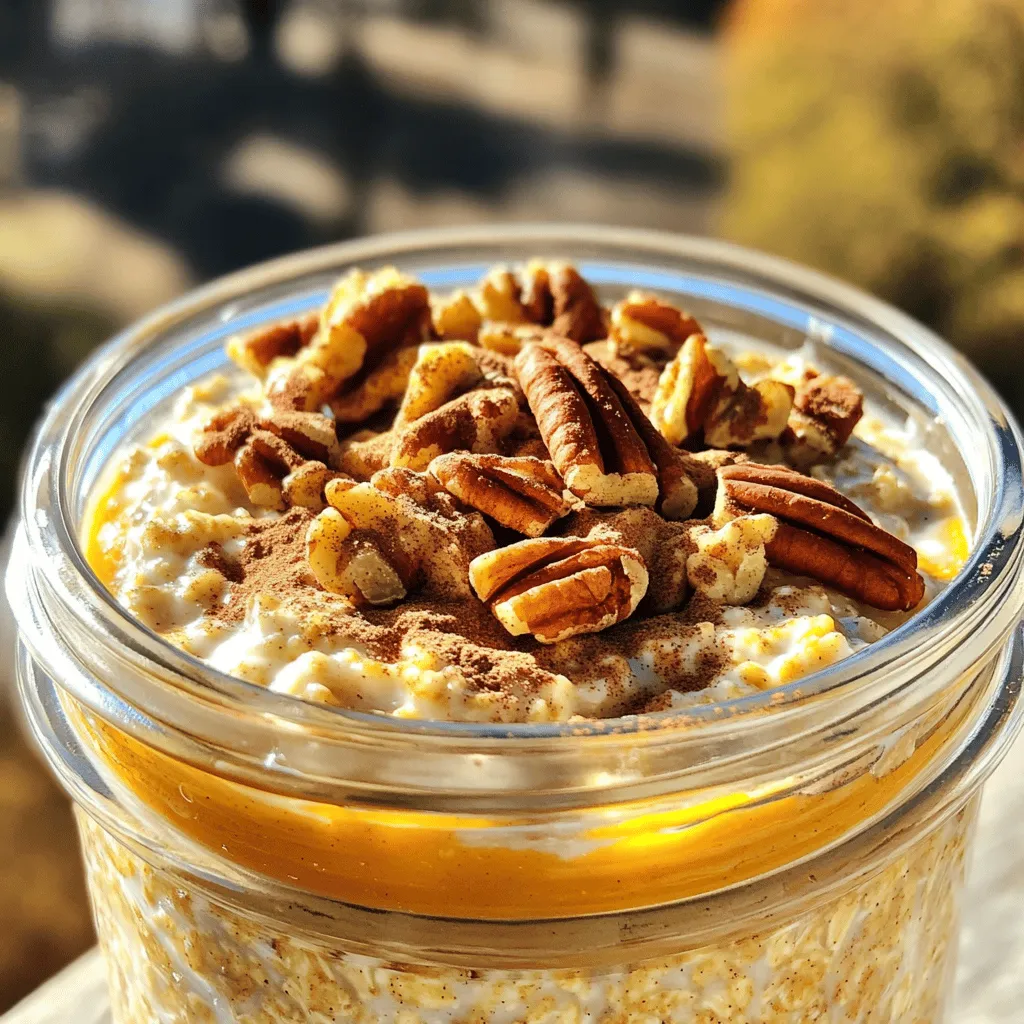
Pumpkin Pie Overnight Oats Flavorful and Nutritious Meal
Looking for a healthy yet tasty breakfast? Pumpkin Pie Overnight Oats combine rich pumpkin flavor with creamy oats. Packed with Read Full Recipe -
Pumpkin Cheesecake Brownies Delightful Dessert Recipe
Ready to treat yourself? Let’s dive into these Pumpkin Cheesecake Brownies. This recipe blends rich brownies with creamy pumpkin cheesecake, Read Full Recipe


My Latest Recipes

hey,
i’m !
I’m so happy you’re here!
Food is my passion, and perfecting each dish is my craft. I can’t wait for you to try them let’s dive into this delicious journey side by side.
![To make a tasty Cheesy Broccoli Rice Casserole, you need some key ingredients. Each one plays a big role in flavor and texture. Here’s what you will need: - 2 cups of cooked white or brown rice - 3 cups of fresh broccoli florets - 1 cup of shredded sharp cheddar cheese - 1 cup of cream of mushroom soup - 1/2 cup of milk - 1/2 teaspoon garlic powder - 1/2 teaspoon onion powder - 1/4 teaspoon black pepper - 1/2 teaspoon salt - 1/2 cup of breadcrumbs - 2 tablespoons melted butter - Optional: 1/4 cup grated Parmesan cheese for an extra cheesy topping Using the right amounts is key to a great casserole. Here are the suggested measurements for each ingredient: - Rice: Use 2 cups of cooked rice to form the base. - Broccoli: Three cups of broccoli adds color and nutrients. - Cheddar cheese: One cup gives that creamy, cheesy goodness. - Cream of mushroom soup: One cup adds moisture and flavor. - Milk: Half a cup helps blend everything together. - Spices: Use half a teaspoon of garlic powder and onion powder for depth. - Black pepper and salt: Add 1/4 teaspoon and 1/2 teaspoon, respectively, for seasoning. - Breadcrumbs and butter: Half a cup of breadcrumbs mixed with two tablespoons of butter creates a crispy topping. - Parmesan cheese: Add a quarter cup for extra flavor if you like. Sometimes, you might need to swap out ingredients. Here are some ideas: - Rice: Try quinoa or cauliflower rice for a low-carb option. - Cheese: Use dairy-free cheese for a vegan version. - Cream of mushroom soup: Swap with a homemade or store-bought vegan cream soup. - Milk: Almond or oat milk works well for dairy-free needs. - Breadcrumbs: Gluten-free breadcrumbs are great for those avoiding gluten. These substitutions can help you enjoy this dish no matter your dietary needs. For the full recipe, check the detailed instructions that follow. Start by gathering all your ingredients. You need cooked rice, broccoli, cheese, soup, and spices. In a large bowl, mix the cooked rice with the broccoli florets. Add the cheddar cheese, cream of mushroom soup, and milk next. Sprinkle in garlic powder, onion powder, black pepper, and salt. Stir everything well until it looks smooth. This step makes sure every bite is tasty. Now, pour the mixture into a greased baking dish. Spread it out evenly to avoid uneven cooking. This dish should be about 9x13 inches for the best results. Preheat your oven to 375°F (190°C). This ensures your casserole cooks evenly. Once the oven is ready, cover your baking dish with aluminum foil. Bake for 25 minutes to let all the flavors blend. After that, remove the foil to let the top brown. Bake for another 10-15 minutes until the top is golden and bubbly. This step gives the casserole a nice crunch on top. Once baked, take the casserole out and let it cool for a few minutes. This helps the dish set and makes it easier to serve. For a fun touch, you can add extra cheese or fresh parsley on top before serving. Serve it straight from the baking dish for a cozy feel. This cheesy broccoli rice casserole is sure to be a hit at your table. For the complete recipe, refer to the Full Recipe section. To boost the taste of your Cheesy Broccoli Rice Casserole, try adding spices. A pinch of cayenne can add warmth. A splash of lemon juice brings brightness. Fresh herbs like thyme or parsley can make it fresh. You can also use a mix of cheeses for more depth. If you have some garlic cloves, sauté them before adding to the mix. This can bring a rich, savory flavor to every bite. One common mistake is not cooking the rice fully. If it’s undercooked, the casserole can turn out hard. Overbaking is another issue; keep an eye on it after you remove the foil. You want the top golden, not burnt. Not seasoning enough can leave the dish bland. Always taste your mixture before baking. Lastly, don't skip the breadcrumbs. They add a nice crunch that balances the creamy texture. Serve this casserole hot from the oven. It pairs well with grilled chicken or fish. A fresh green salad can add a nice crunch. You can even serve it as a side dish for a holiday meal. For something simple, a slice of crusty bread works great too. If you want to make it special, drizzle some balsamic glaze on top. This will give the dish a sweet and tangy twist. For the full recipe, check out the [Full Recipe]. {{image_2}} You can make this dish gluten-free with a few simple swaps. Replace regular breadcrumbs with gluten-free breadcrumbs. You can find these in most grocery stores. Ensure your cream of mushroom soup is also gluten-free. Many brands offer this option. If you want to make your own soup, you can use cornstarch instead of flour as a thickener. This keeps your casserole creamy and delicious. Adding protein to your Cheesy Broccoli Rice Casserole boosts flavor and nutrition. You can use cooked chicken, tofu, or ham. If using chicken, shred or chop it into small pieces. For tofu, press it to remove water, then cube it. If you choose ham, diced pieces work best. Mix your protein choice into the casserole before baking. This makes it heartier and more filling. If you love spicy food, add some heat to your casserole. You can mix in diced jalapeños or red pepper flakes. Both add a nice kick. If you want a smoky flavor, try adding chipotle peppers in adobo sauce. Chop them finely and mix them in. This adds depth to the taste. Adjust the amount based on your heat preference. Enjoy exploring these spicy options! To keep your cheesy broccoli rice casserole fresh, let it cool first. Once cool, place it in an airtight container. This step helps stop moisture loss and keeps flavors locked in. Make sure to cover it well before storing it in the fridge. Leftovers can stay fresh for up to four days. If you want to save some for later, freezing is a great option. Divide the casserole into smaller portions. Use freezer-safe containers or bags for easy storage. You can freeze it for up to three months. When ready to eat, thaw it in the fridge overnight. Reheat in the oven at 350°F (175°C) until heated through, about 20-25 minutes. You can also microwave individual servings for quick meals. The shelf life of cheesy broccoli rice casserole depends on how you store it. In the fridge, it lasts about four days. If you freeze it, it can last up to three months. Always check for any off smells or changes in texture before eating. This way, you ensure your meal is both safe and delicious. You can prepare this casserole ahead of time. First, follow the recipe steps until you get to the baking part. Instead of baking, cover the dish and refrigerate it. You can store it for up to 24 hours. When ready to bake, heat your oven to 375°F (190°C). Bake the casserole for about 30-35 minutes, or until hot and bubbly. This makes it easy for busy nights. Yes, you can use frozen broccoli! It is a great option when fresh broccoli is not available. Just make sure to thaw and drain the frozen broccoli before mixing it into the casserole. You want to avoid excess water in the dish. This small step helps keep your casserole creamy and tasty. This casserole works well with many side dishes. Here are some ideas: - Grilled chicken or fish - A fresh garden salad - Roasted vegetables - Garlic bread These sides add variety and make your meal more complete. Yes, this casserole is vegetarian-friendly. It uses broccoli, rice, cheese, and soup, all of which are plant-based. If you want to keep it vegetarian, ensure your cream of mushroom soup does not contain meat products. This dish is a great choice for family dinners or potlucks. You can make a few simple swaps to make it healthier. Consider these options: - Use brown rice instead of white for more fiber. - Swap out regular cheese for low-fat cheese. - Use a low-sodium soup to cut down on salt. - Add more veggies like carrots or bell peppers for extra nutrients. These changes can help you enjoy this comfort food while keeping it nutritious. For the detailed recipe, check out the Full Recipe. This blog post shared all you need for a tasty Cheesy Broccoli Rice Casserole. We covered the must-have ingredients, helpful cooking steps, and fun tips to boost flavor. You learned about tasty variations like gluten-free or spicy options. Proper storage keeps your leftovers fresh and tasty. Remember, this dish is great for any meal. With these tips, you can enjoy a warm and comforting casserole any time. Keep experimenting and share your favorite twists!](https://mysavedrecipe.com/wp-content/uploads/2025/06/f9861f18-b882-4ceb-b632-9514e8ae1915-300x300.webp)
![To make a tasty sweet potato hash, you need key items. Here’s what to gather: - 2 medium sweet potatoes, peeled and diced - 1 red bell pepper, chopped - 1 yellow bell pepper, chopped - 1 small red onion, diced - 2 cloves garlic, minced - 1 teaspoon smoked paprika - 1 teaspoon ground cumin - ½ teaspoon cayenne pepper (optional, for heat) - 3 tablespoons olive oil - Salt and black pepper to taste - 1 cup kale, chopped (or spinach) - 4 large eggs (optional) - Fresh cilantro or parsley for garnish These ingredients blend well together to create a hearty meal. Sweet potatoes give a sweet taste. Bell peppers add crunch and color. Onions and garlic bring strong flavors. You can add more items for extra flavor and nutrition. Consider these options: - Chopped mushrooms for earthiness - Spinach instead of kale for a milder taste - Diced tomatoes for juiciness - Black beans for protein - Avocado slices for creaminess These extras make your hash even better. You can mix and match based on what you have. Sweet potato hash is not just tasty; it’s also good for you. Here’s a quick look at the nutrition: - High in fiber, which helps digestion - Packed with vitamins A and C from sweet potatoes and peppers - Contains healthy fats from olive oil - Provides protein from eggs, if added This dish can fit well into a balanced diet. Enjoy it as breakfast, lunch, or dinner. You can find the full recipe [here]. To start, gather all your ingredients. You need: - 2 medium sweet potatoes, peeled and diced - 1 red bell pepper, chopped - 1 yellow bell pepper, chopped - 1 small red onion, diced - 2 cloves garlic, minced - 1 teaspoon smoked paprika - 1 teaspoon ground cumin - ½ teaspoon cayenne pepper (optional, for heat) - 3 tablespoons olive oil - Salt and black pepper to taste - 1 cup kale, chopped (or spinach) - 4 large eggs (optional) - Fresh cilantro or parsley for garnish Make sure your sweet potatoes are cut into even pieces. This helps them cook at the same rate. Dice the onions and peppers small so they blend well in the hash. 1. Heat olive oil in a large skillet over medium heat. 2. Add the sweet potatoes and season them with salt and black pepper. Cook for about 10-12 minutes. Stir occasionally until they soften and turn golden. 3. Next, add the onions and garlic. Sauté for 3-4 minutes until the onion is clear. 4. Now, stir in the bell peppers, smoked paprika, ground cumin, and cayenne pepper if you like heat. Cook for another 5-7 minutes until the peppers are soft. 5. Add the kale and mix it in. It will wilt quickly, about 2 minutes. Taste and adjust seasoning as needed. 6. If you want eggs, make four wells in the hash. Crack an egg into each well. Cover the skillet and let them cook. Aim for about 5-6 minutes for runny yolks. 7. Once cooked, gently stir the hash. Be careful not to break the yolks if you cooked eggs. 8. Serve hot and garnish with chopped cilantro or parsley. Sweet potato hash is great for breakfast or brunch. You can serve it with toast or a side of fruit. For a heartier meal, add avocado slices on top. This dish is easy to share and looks colorful on your plate. For the full recipe, check out the main section. Enjoy every bite! To cook sweet potatoes just right, start by peeling and dicing them. Aim for small cubes, about half an inch. This size helps them cook evenly. Heat your skillet and add olive oil. When the oil is hot, toss in the sweet potatoes. Season them with salt and black pepper. Cook for 10 to 12 minutes, stirring often. Look for a golden color and softness. This method gives you that lovely texture and flavor. Seasoning can bring your sweet potato hash to life. Start with salt and black pepper to enhance the natural sweetness. Adding smoked paprika gives a nice smoky flavor. Ground cumin adds warmth and earthiness. If you like heat, sprinkle in some cayenne pepper. For a fresh touch, mix in chopped cilantro or parsley just before serving. Taste as you go, and adjust the spices to fit your palate. If you want eggs in your hash, it’s easy to cook them just how you like. After the sweet potatoes and veggies are ready, make little wells in the hash. Crack an egg into each well. Cover the skillet to keep the heat in. For runny yolks, cook for about 5 to 6 minutes. If you prefer firm yolks, let them cook a bit longer. This method makes the eggs part of the dish, adding creaminess and richness. Check the [Full Recipe] for more details and enjoy your cooking! {{image_2}} Sweet potato hash is great for vegetarians. You can make it meat-free by using more veggies. Try adding mushrooms, zucchini, or even some fresh corn for a nice crunch. Spinach is a fantastic green to mix in. It wilts quickly and adds flavor. For a cheesy touch, sprinkle some feta or goat cheese on top before serving. It melts just right. Want to add protein? Sausage and bacon both work well. They bring a savory taste. Cook them until crispy, then add them to the hash. If you prefer a plant-based option, use firm tofu. Dice it, season it, and pan-fry until golden. This adds a nice texture. You could also try tempeh for a nutty flavor. Any of these options make your meal heartier. Feel free to mix up the veggies! Broccoli, carrots, or even Brussels sprouts can add new flavors. Roasted vegetables can also add depth. If you have leftovers, chop those up. They make a great addition to your hash. You can even toss in some seasonal veggies like asparagus or butternut squash. The key is to experiment and find what you love best. Check the full recipe to see how to create your own unique twist! To store leftover sweet potato hash, let it cool first. Place it in an airtight container. It will stay fresh in the fridge for up to four days. Label the container with the date. This way, you won't forget when you made it. For the best taste, reheat your sweet potato hash on the stove. Heat a skillet over medium heat. Add a splash of olive oil to keep it moist. Stir the hash occasionally until it's hot. You can also use a microwave. Place the hash in a bowl, cover it, and heat it for 1-2 minutes. Yes, you can freeze sweet potato hash! It’s great for meal prep. Let it cool completely before freezing. Use a freezer-safe container or bag. It can last up to three months. To use, thaw it in the fridge overnight. Reheat it as mentioned above for the best flavor. For a full recipe, check out the hearty sweet potato hash. If you don't have sweet potatoes, try regular potatoes. Yukon gold or red potatoes work well. You can also use butternut squash for a sweet flavor. Other root veggies like carrots or parsnips are great too. Each choice brings its own taste and texture to your hash. Yes, you can make sweet potato hash ahead of time. Cook it fully, then cool it down. Store it in an airtight container in the fridge for up to three days. When you are ready, just reheat it on the stove. Add a splash of olive oil to revive the flavors. Sweet potato hash is healthy. Sweet potatoes are packed with vitamins A and C. They also have fiber for good digestion. Adding veggies like bell peppers and kale boosts nutrients even more. If you choose to add eggs, you get protein, too. This dish is colorful and good for your body. You can top your sweet potato hash in many ways. Avocado slices add creaminess and healthy fats. A dollop of sour cream or Greek yogurt gives tang. Crumbled feta cheese adds a nice salty touch. Fresh herbs like cilantro or parsley brighten the dish. You can even sprinkle hot sauce for a kick. For a full experience, check the Full Recipe. Sweet potato hash combines key ingredients, cooking tips, and variations. You can customize it to fit your taste. Remember, the right seasoning and cooking techniques can make a big difference. Store it properly for quick meals later. This dish is healthy and versatile, perfect for breakfast or dinner. Try different toppings to keep things exciting. With these steps, you can create a delicious hash every time. Enjoy exploring flavors and making this dish your own!](https://mysavedrecipe.com/wp-content/uploads/2025/05/776a96c5-351e-41c5-9219-adb8a2843724-300x300.webp)

Pumpkin Streusel Muffins Irresistible Fall Treat
Fall is here, and what better way to celebrate than with warm Pumpkin Streusel Muffins? These muffins are soft, spiced, and topped with a…