Latest & Greatest
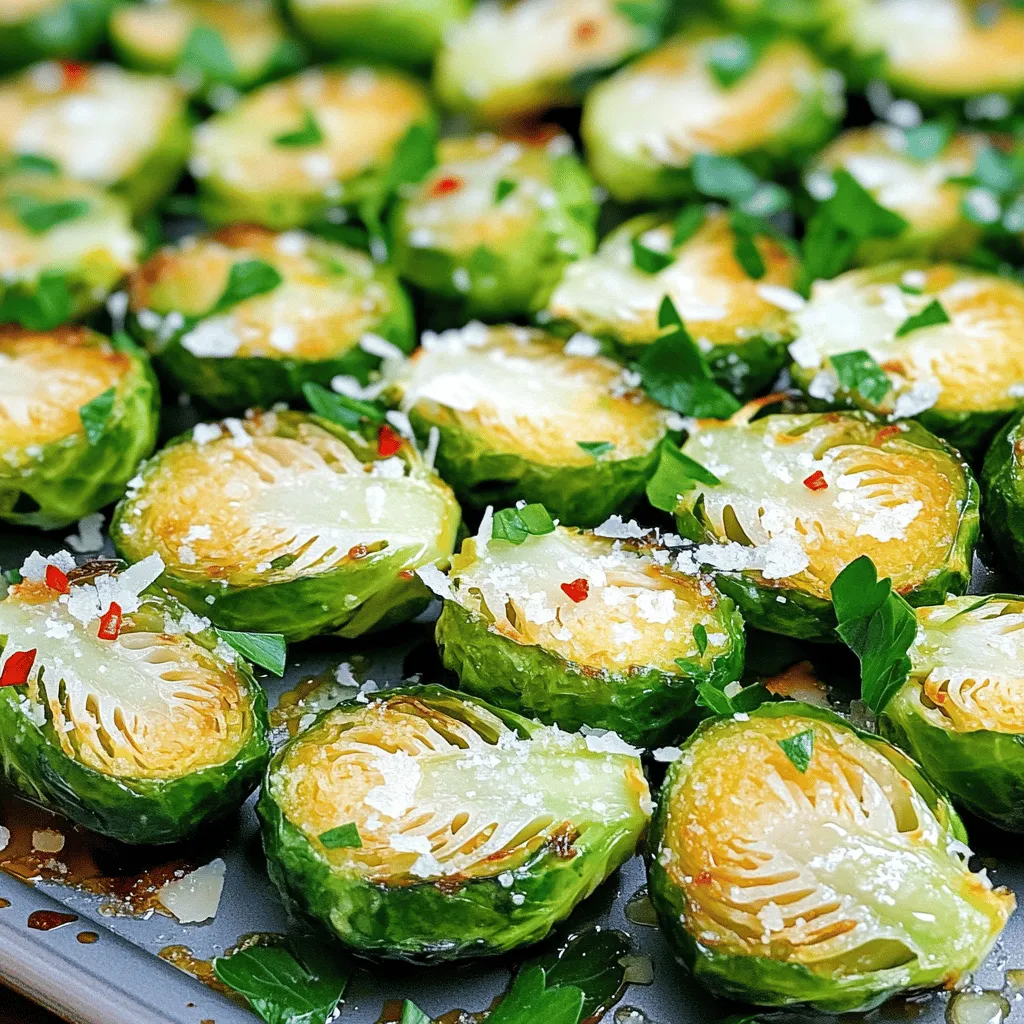
Garlic Parmesan Roasted Brussels Sprouts Delightful Dish
If you’re looking for a tasty and healthy side dish, Garlic Parmesan Roasted Brussels Sprouts are a winner! These sprouts
Read more…
Instant Pot Chicken Tikka Masala Flavorful Dish
Are you ready to dive into a world of flavor? This Instant Pot Chicken Tikka Masala is a quick, delicious
Read more…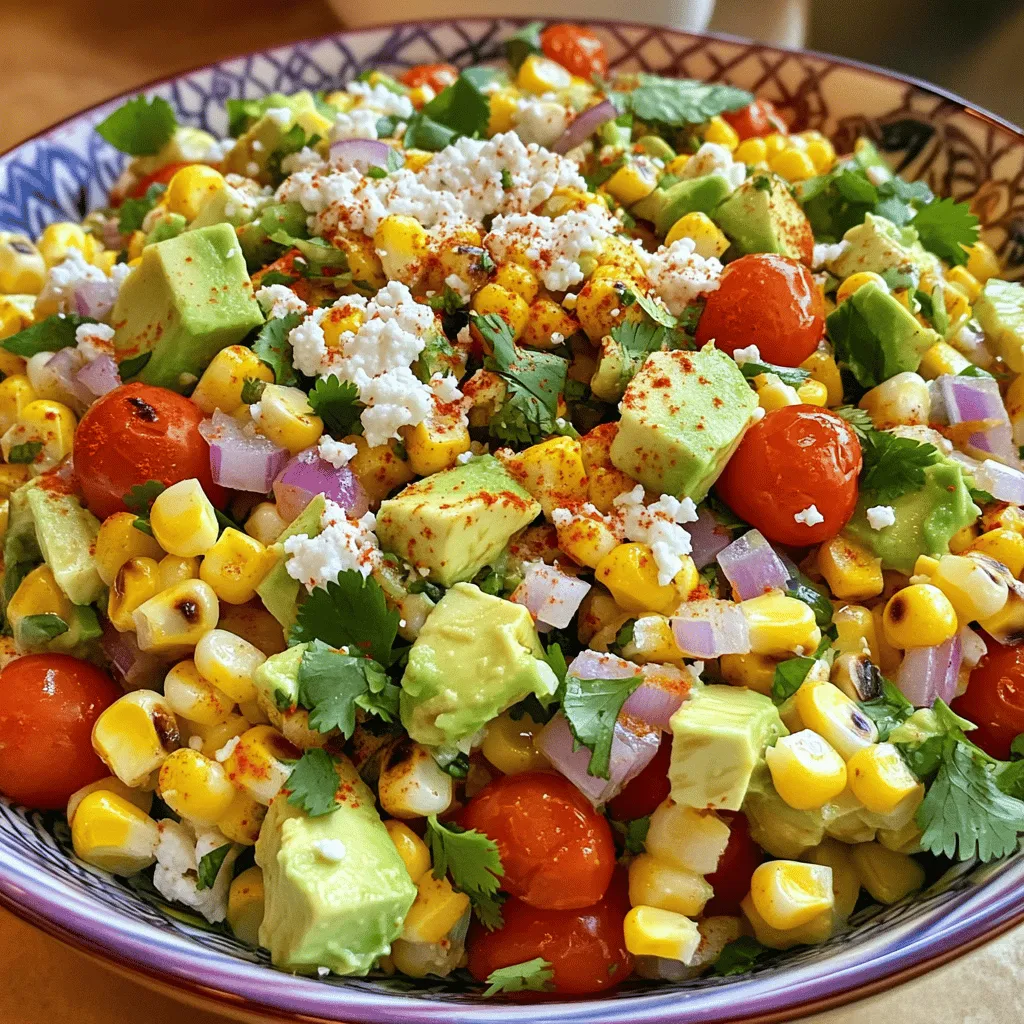
Mexican Street Corn Salad Bold and Flavorful Dish
Are you ready to spice up your meal plan? Mexican Street Corn Salad is a vibrant dish bursting with bold
Read more…
Lemon Basil Chicken Skewers Flavorful and Easy Recipe
If you’re looking for a quick and tasty dinner idea, you’ve come to the right place! My Lemon Basil Chicken
Read more…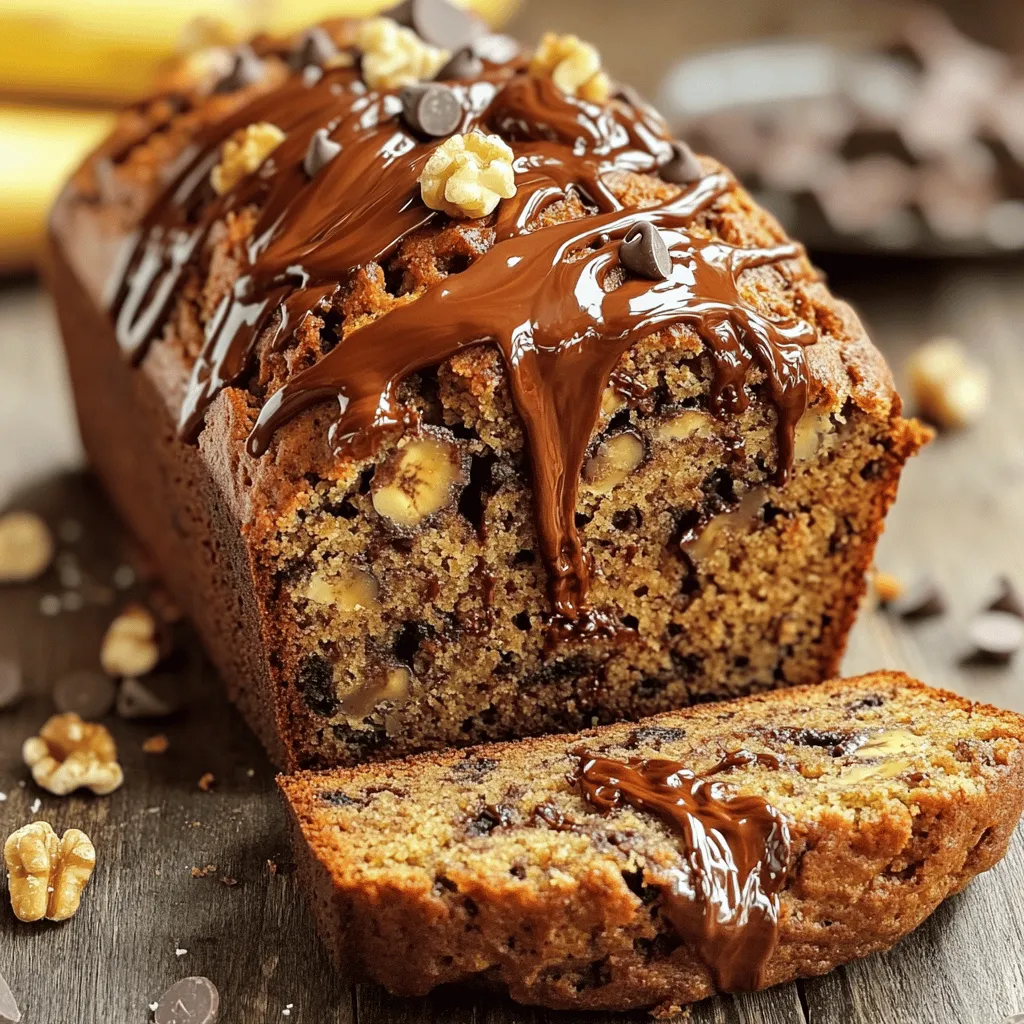
Nutella Banana Bread Irresistibly Moist and Easy
Get ready to indulge in a treat that balances rich Nutella with sweet, ripe bananas! This Nutella Banana Bread is
Read more…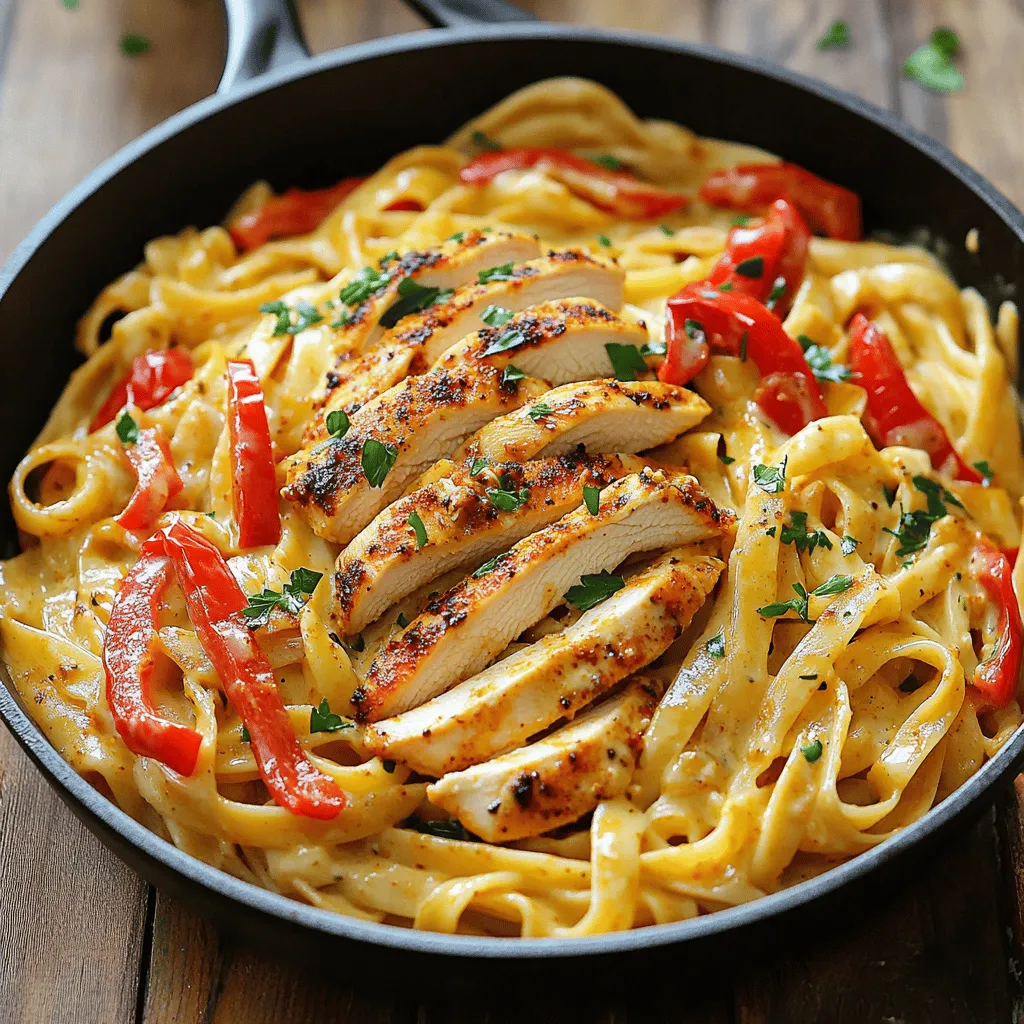
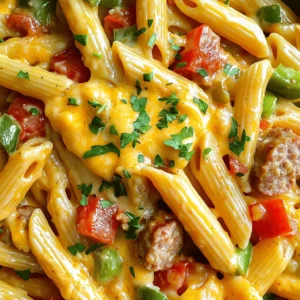
Creamy Cajun Chicken Pasta Delightful and Easy Meal
Are you ready to spice up your dinner routine? My Creamy Cajun Chicken Pasta combines rich flavors and easy prep
Read more…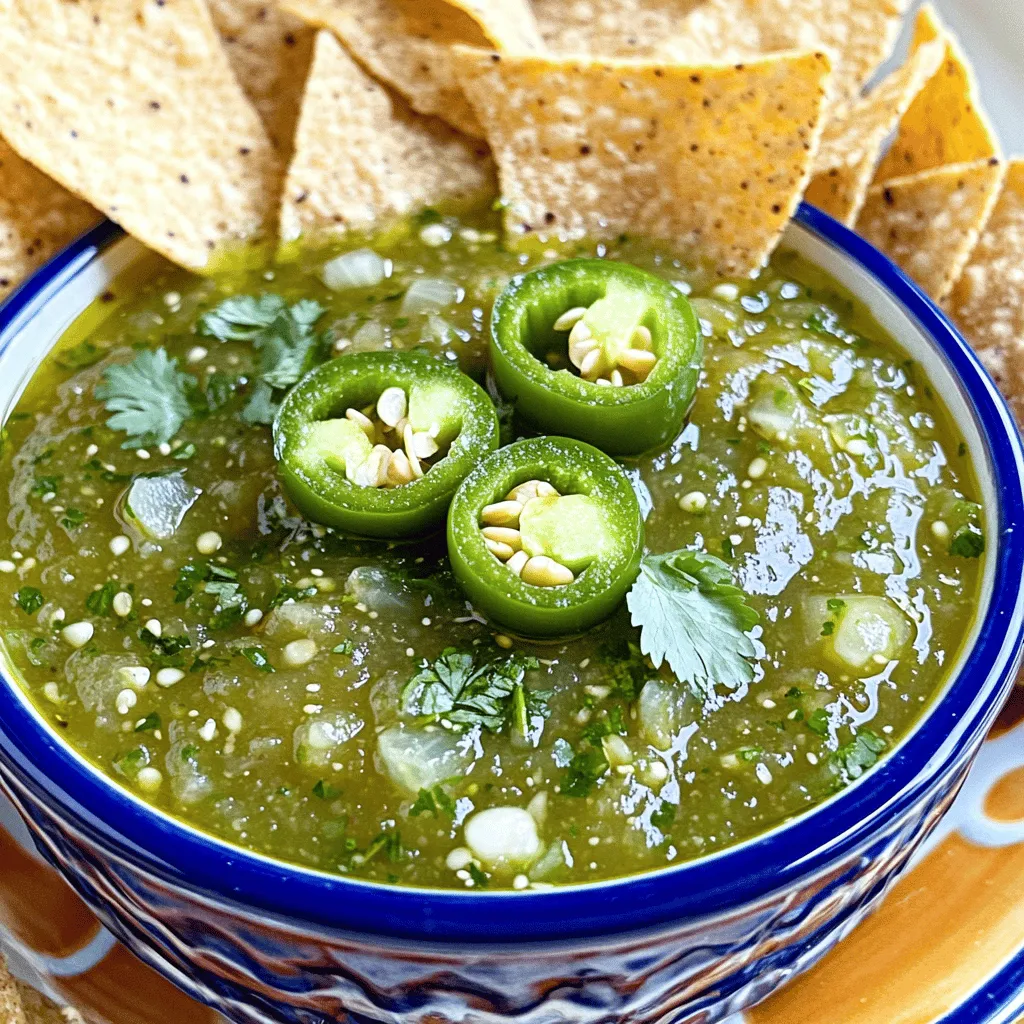
Homemade Salsa Verde Fresh and Flavorful Recipe
Are you ready to elevate your meals with a burst of fresh flavor? In this guide, I’ll show you how
Read more…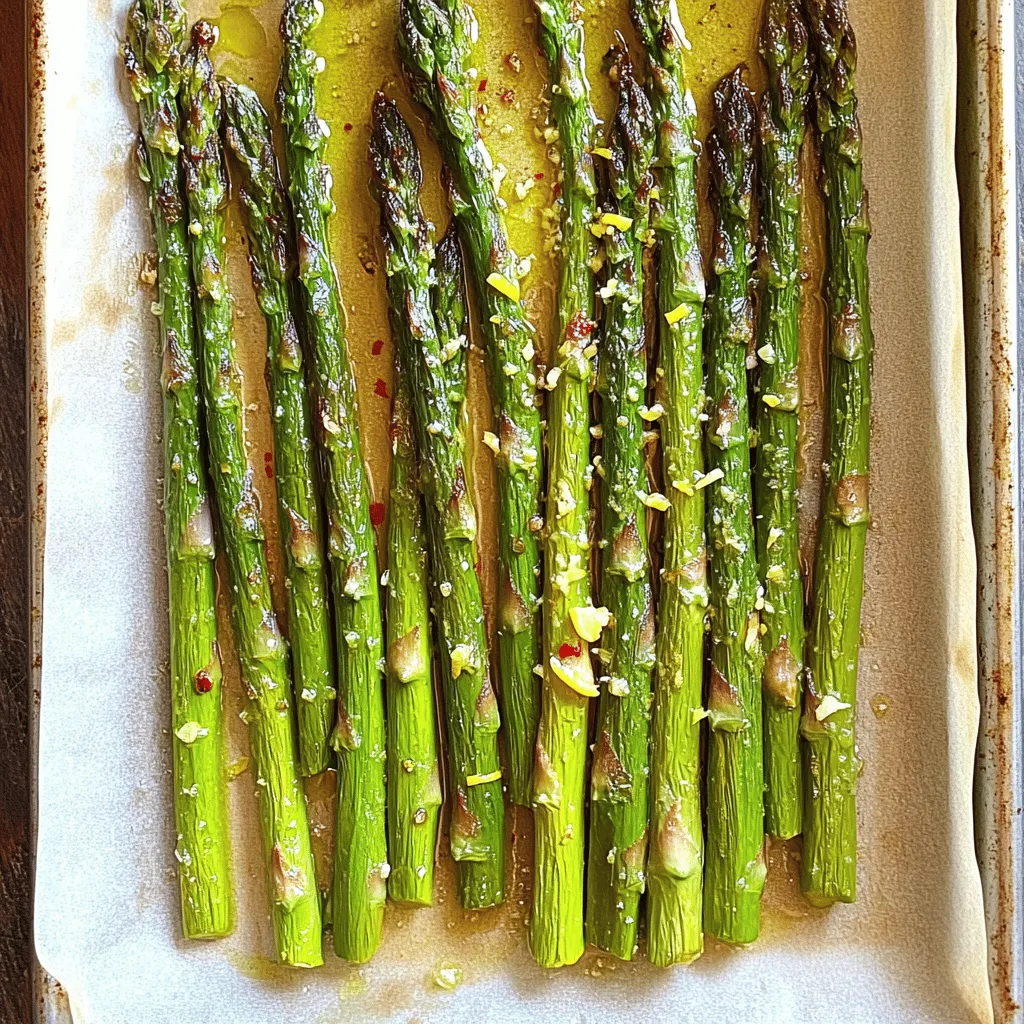
Lemon Garlic Roasted Asparagus Savory Side Dish
Looking for a delicious side dish that adds zing to your meals? Try my Lemon Garlic Roasted Asparagus! This recipe
Read more…browse recipes

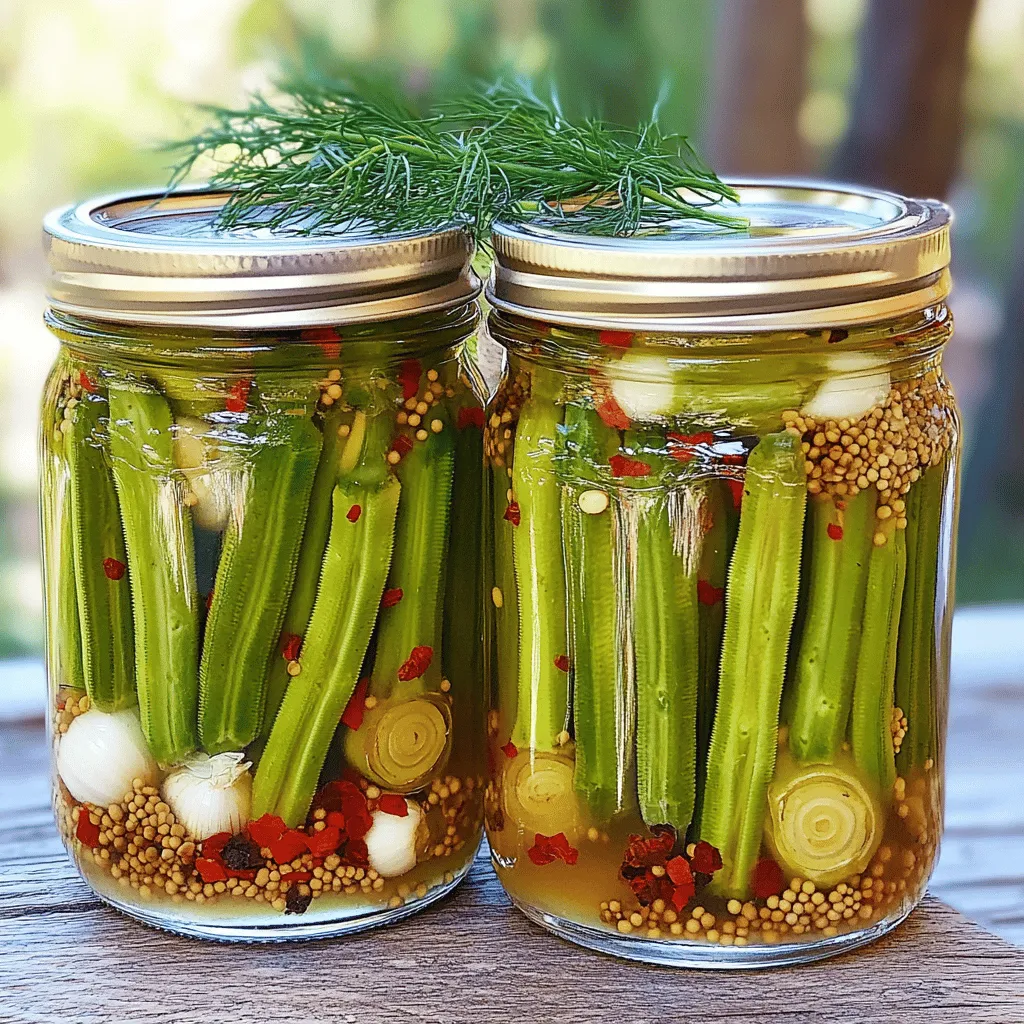
Quick Pickled Okra Flavorful and Simple Recipe
If you’re hungry for a crunchy snack with a zest, quick pickled okra is your answer. This easy recipe brings vibrant flavors and texture…
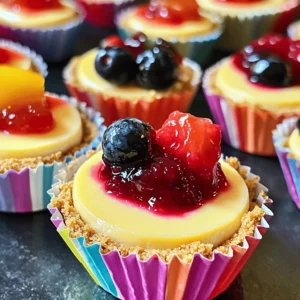
My Latest Desserts

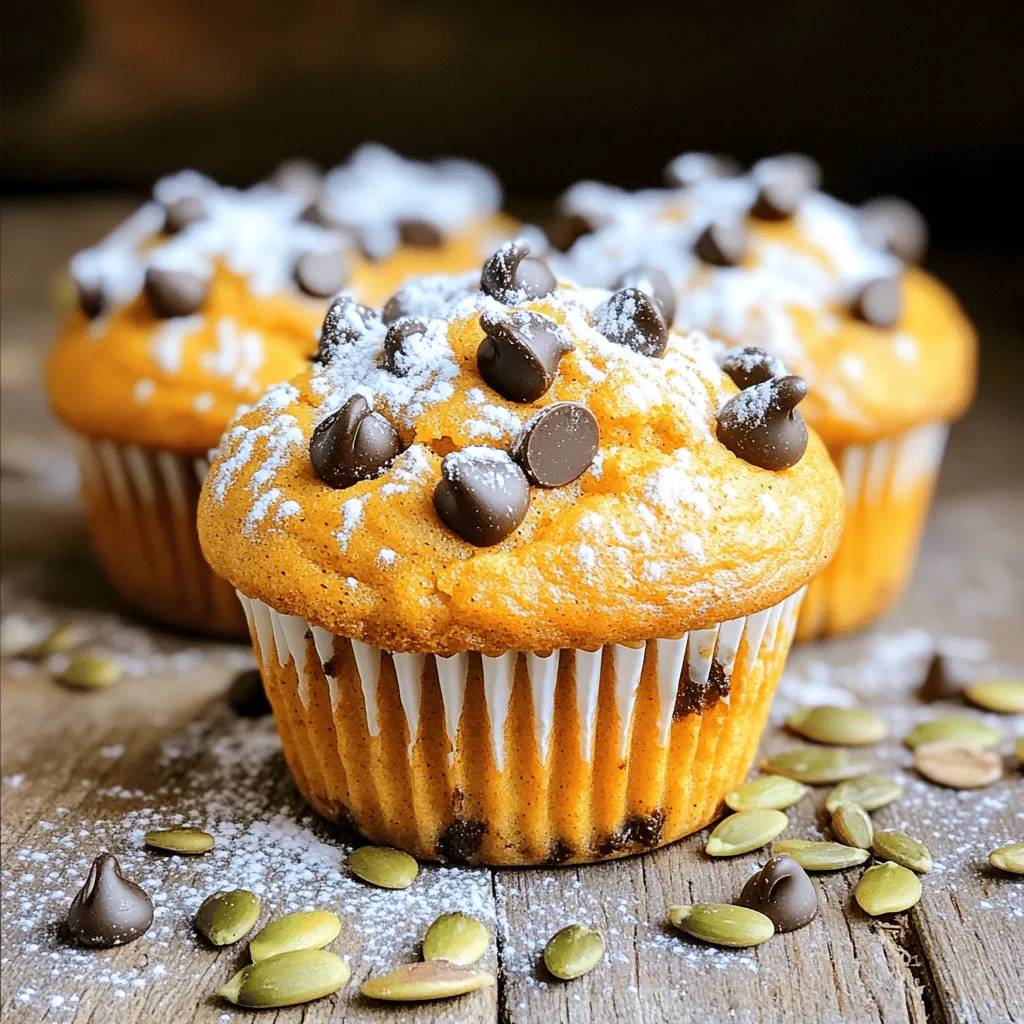
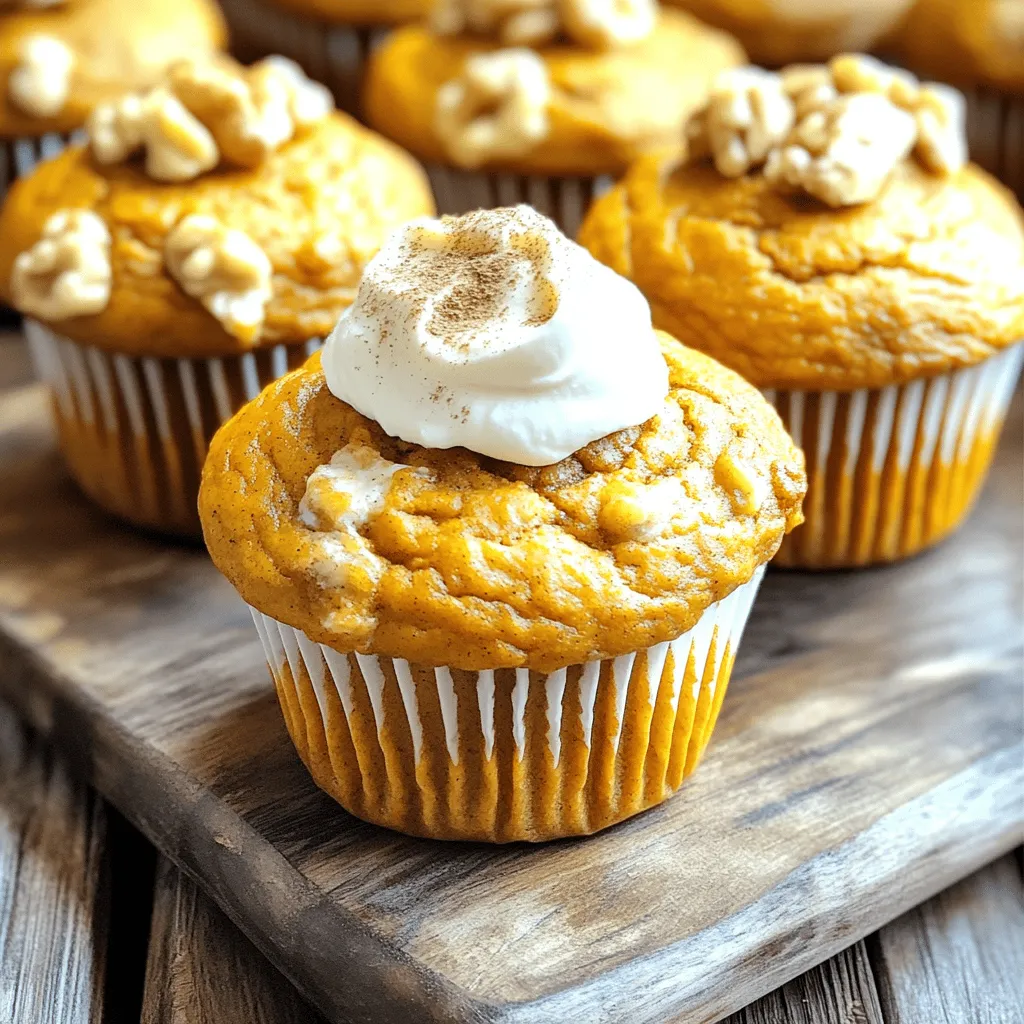
Chocolate Chip Pumpkin Cream Cheese Muffins Delight
If you love the cozy flavors of fall, you’re in for a real treat! Chocolate Chip Pumpkin Cream Cheese Muffins Read Full Recipe-
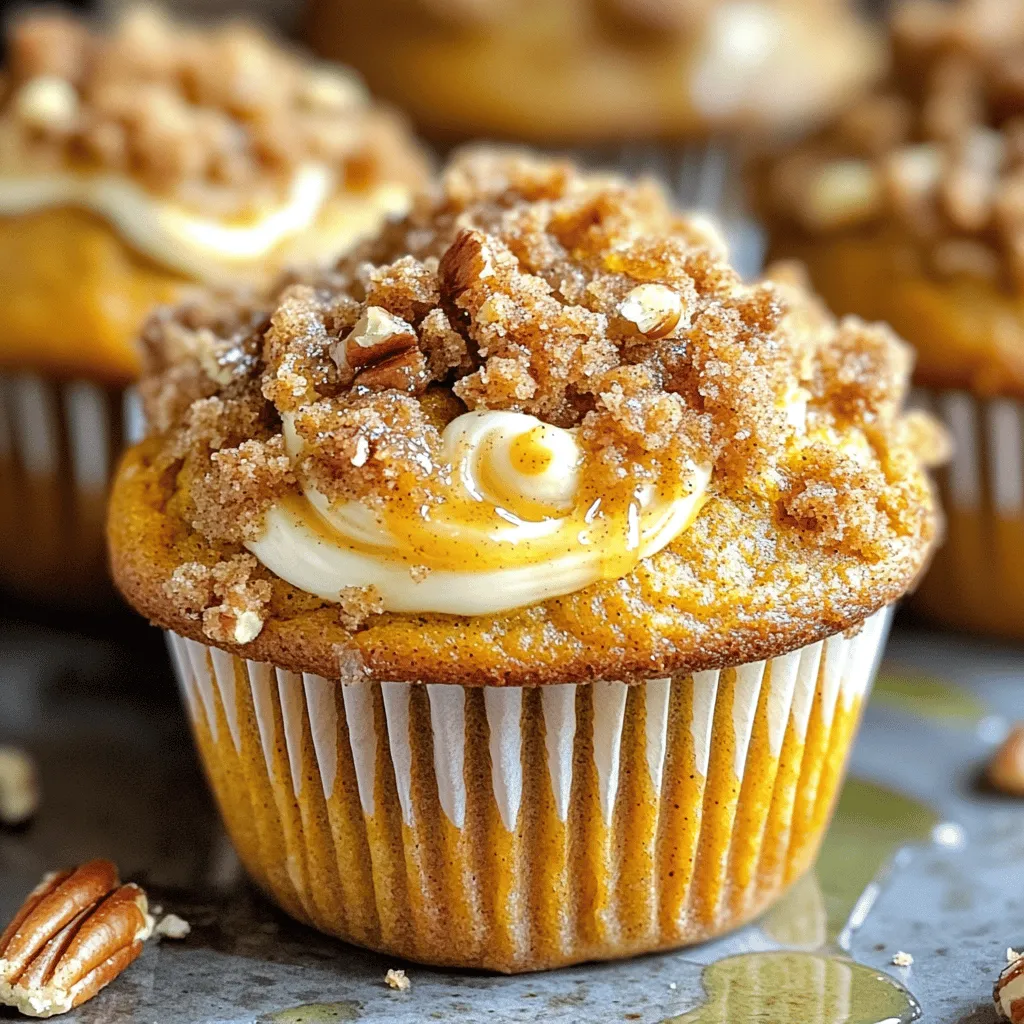
Streusel Pumpkin Cream Cheese Muffins Delightful Treat
If you love pumpkin flavors, you will adore these Streusel Pumpkin Cream Cheese Muffins. They mix rich pumpkin with creamy Read Full Recipe -
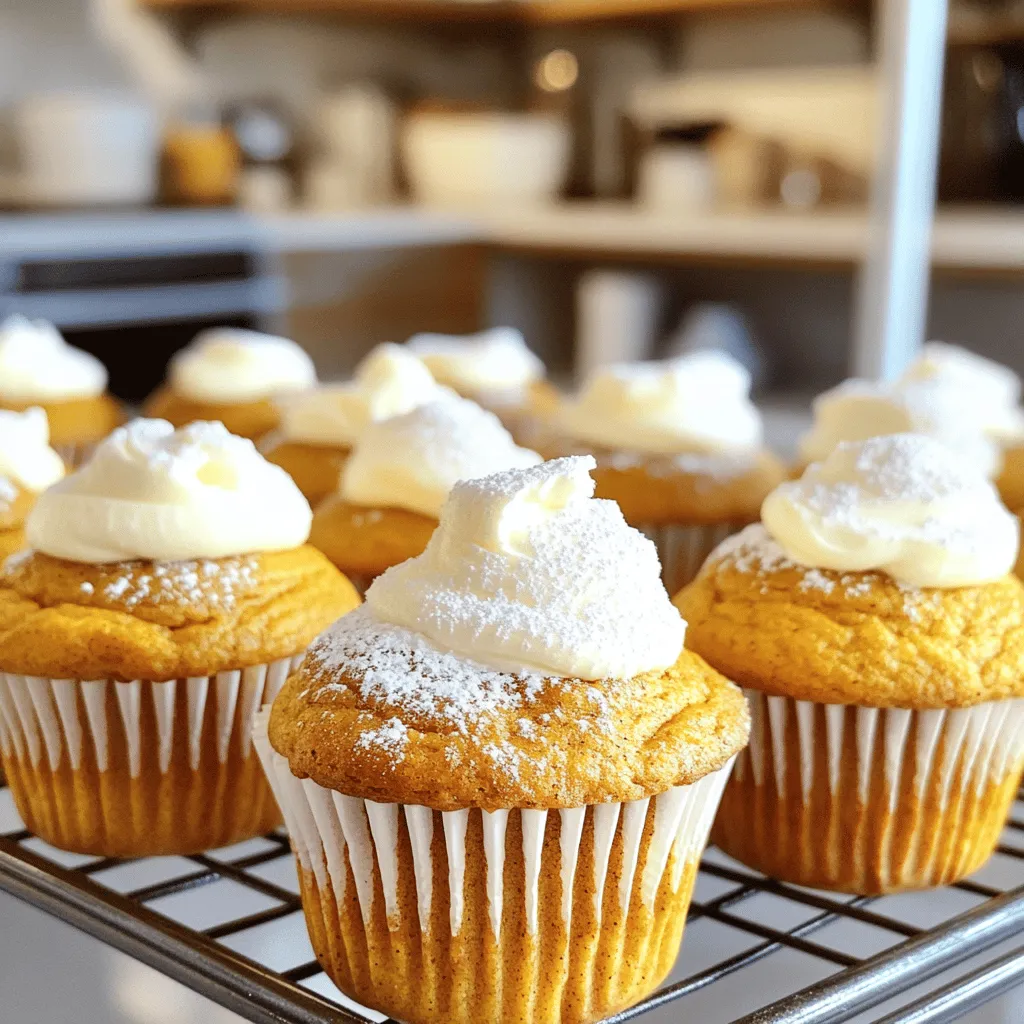
Easy Pumpkin Cream Cheese Muffins Tasty Fall Treat
Fall is here, and that means it’s time for warm, cozy treats! You’ll love these Easy Pumpkin Cream Cheese Muffins. Read Full Recipe -
Pumpkin Cream Cheese Muffins Delightful and Simple Recipe
Get ready to enjoy a treat that combines the warmth of pumpkin with creamy cheese! This simple recipe for pumpkin Read Full Recipe -
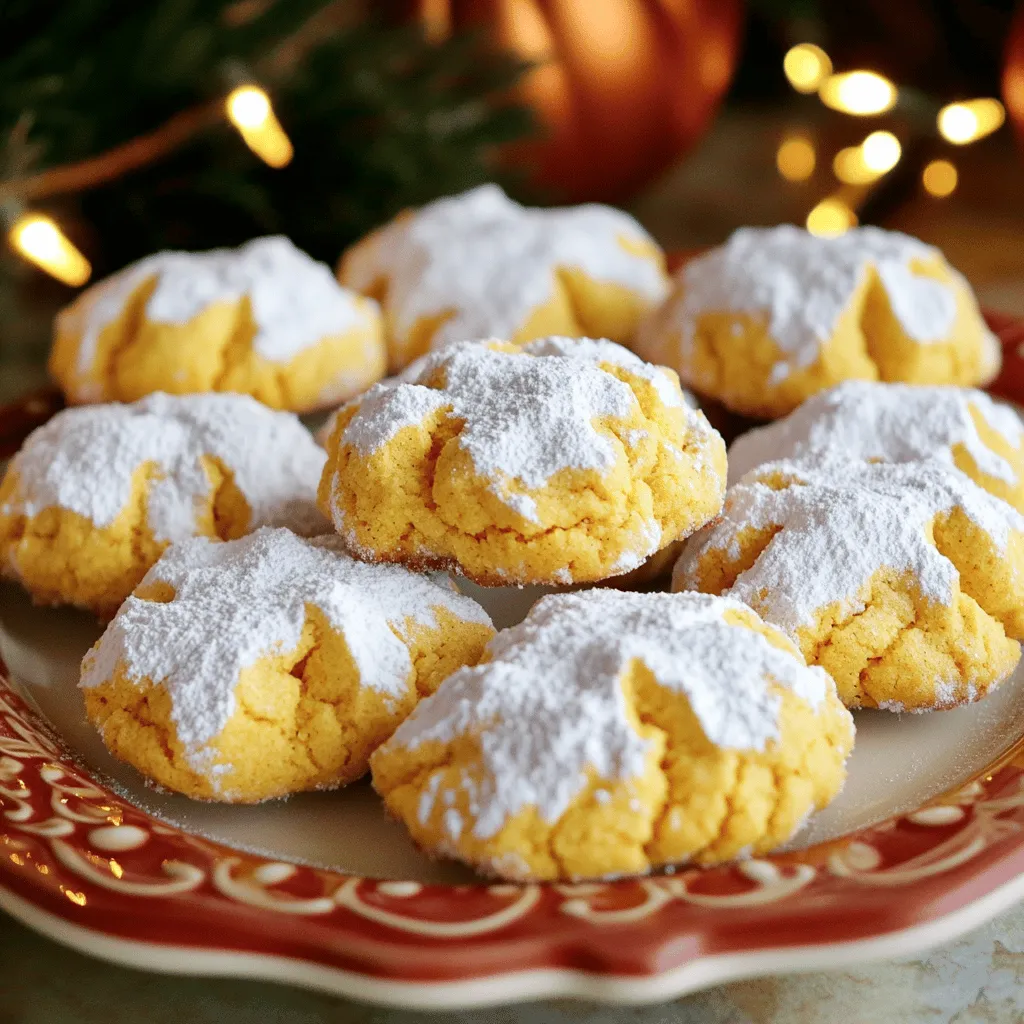
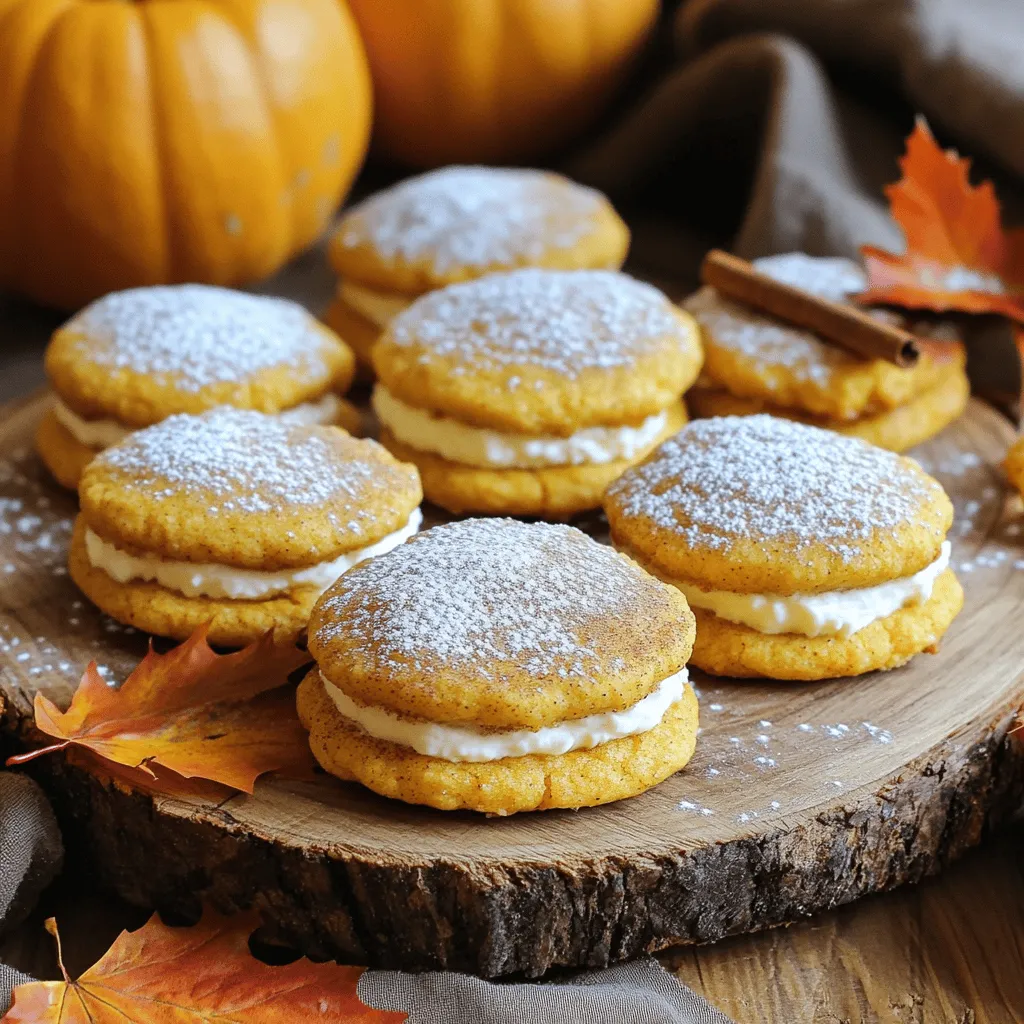
Pumpkin Pie Crinkle Cookies Charming Autumn Treat
Get ready to embrace autumn with a delightful twist on a classic favorite! Pumpkin Pie Crinkle Cookies combine the warm Read Full Recipe -
Pumpkin Cheesecake Cookies Irresistible Fall Treat
Welcome to the season of cozy flavors and pumpkin delights! If you crave a treat that combines the rich taste Read Full Recipe -
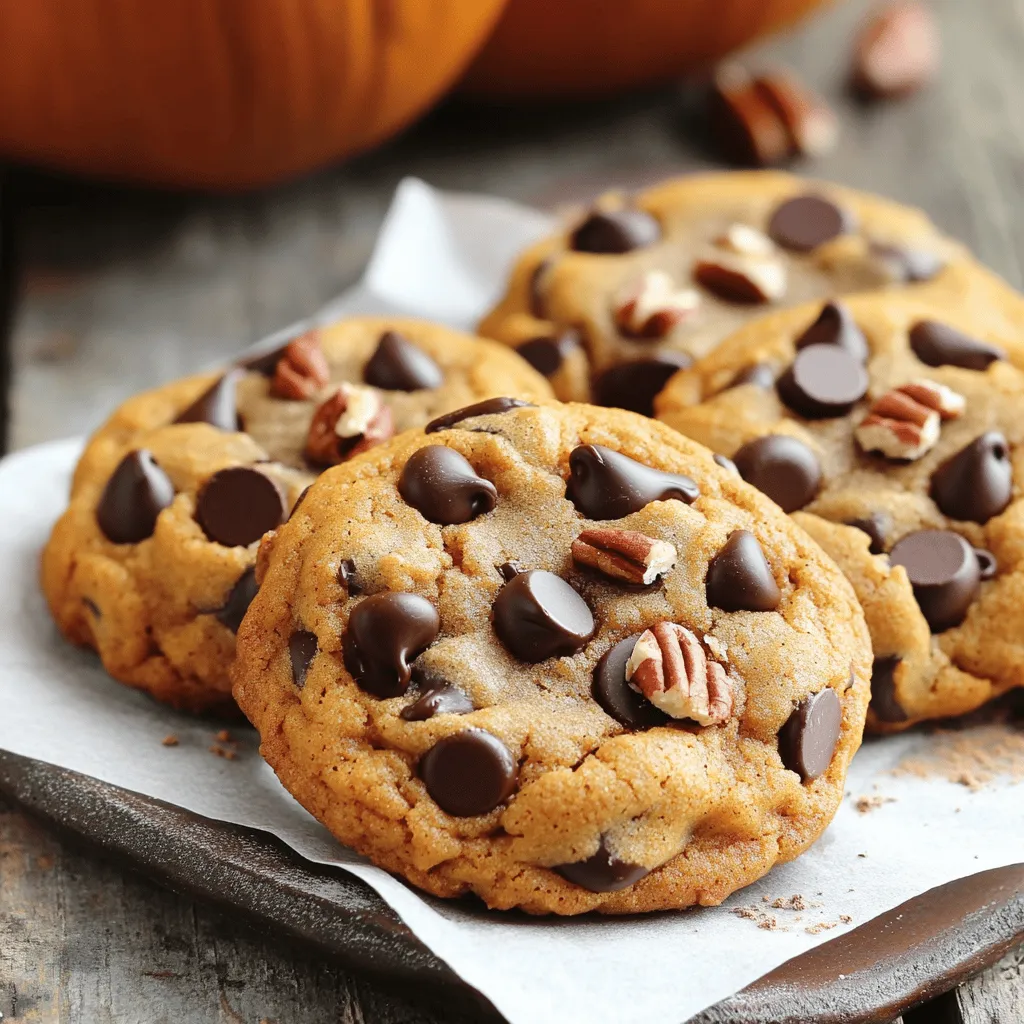
Chocolate Chip Pumpkin Cookies Flavorful Fall Treat
Are you ready to bake something special this fall? Chocolate chip pumpkin cookies blend sweet chocolate with warm pumpkin spice Read Full Recipe -
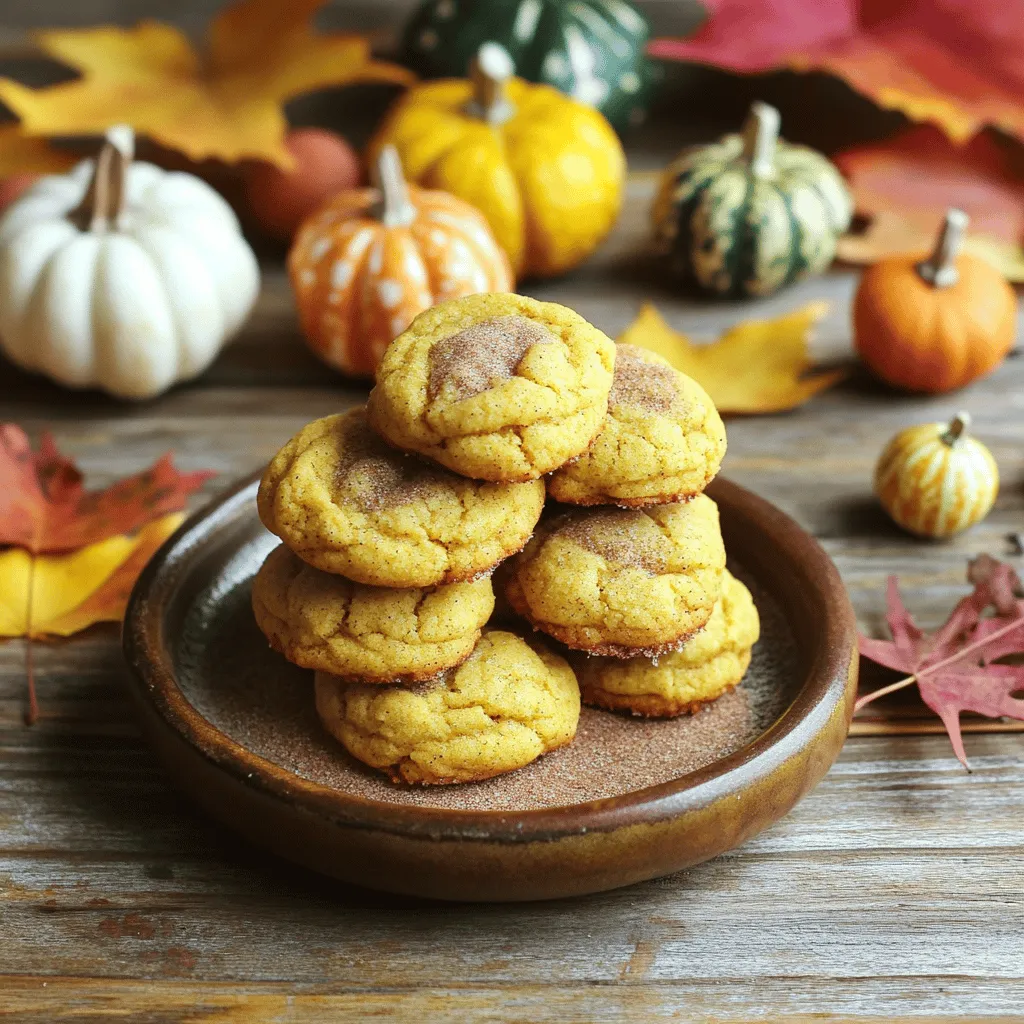
Pumpkin Butter Snickerdoodles Irresistible Cookie Treat
Looking for a new fall favorite? These Pumpkin Butter Snickerdoodles are the perfect cookie treat! With soft centers and a Read Full Recipe -
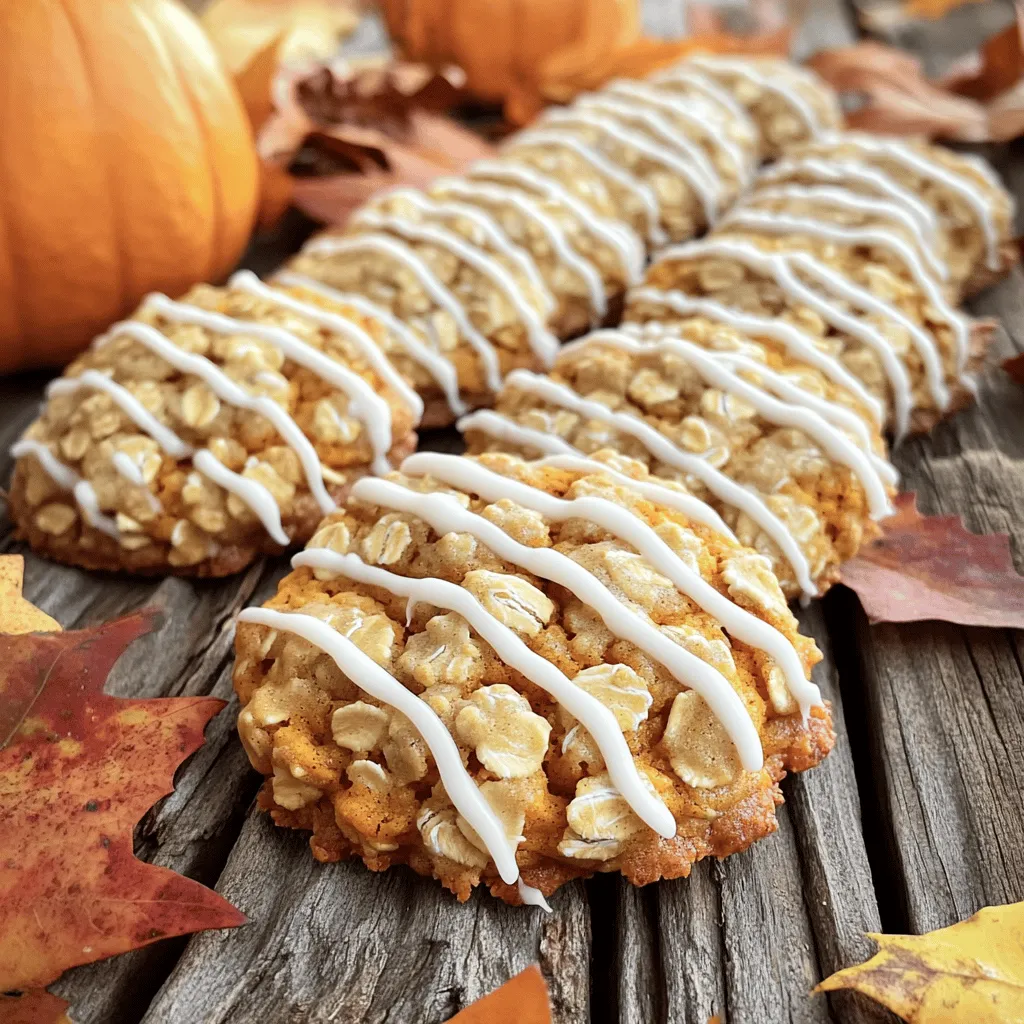
Pumpkin & Oatmeal Cookies with Icing Delight
If you’re looking for a delightful treat that combines the warm flavors of fall, you’re in the right place! In Read Full Recipe -
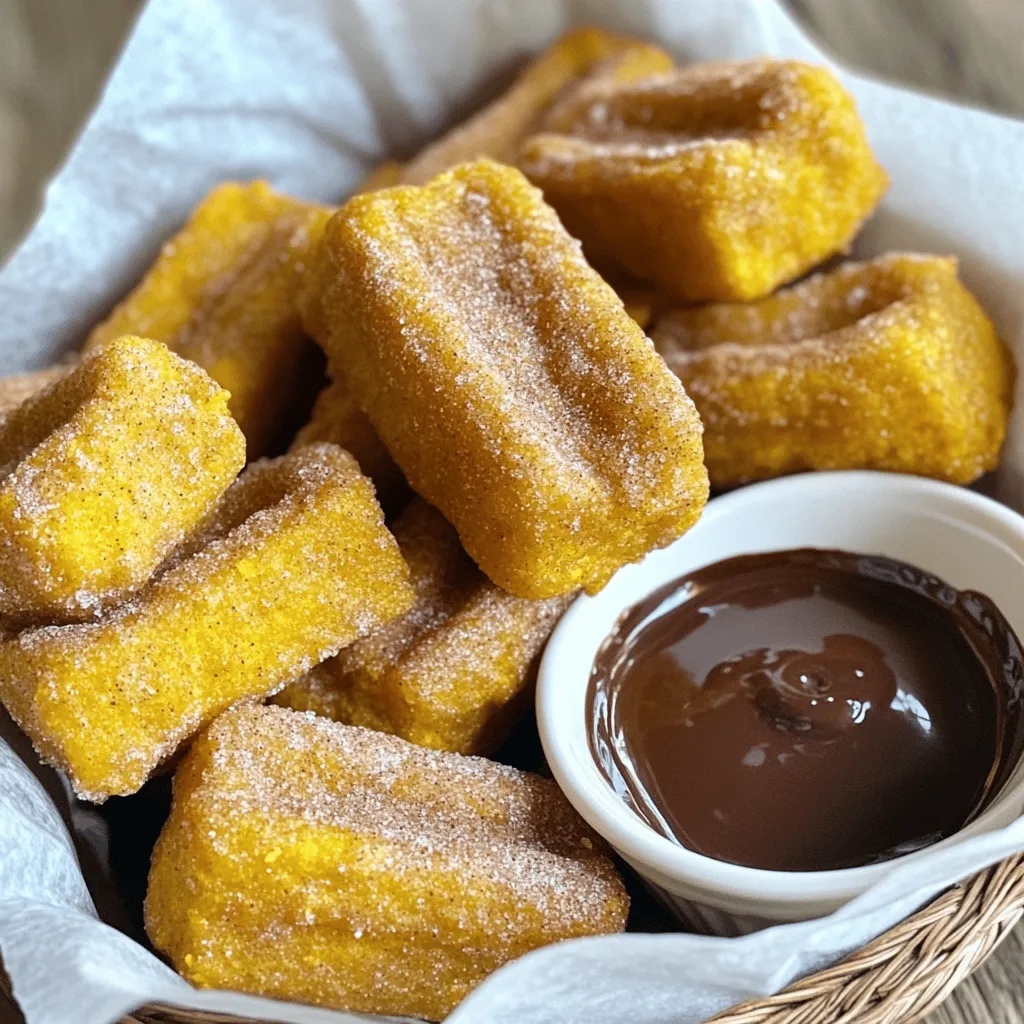
Pumpkin Churro Bites Tasty and Easy Dessert Treat
Are you ready to take your dessert game to the next level? These Pumpkin Churro Bites are here to impress! Read Full Recipe
My Latest Recipes

hey,
i’m !
I’m so happy you’re here!
Food is my passion, and perfecting each dish is my craft. I can’t wait for you to try them let’s dive into this delicious journey side by side.

![- 1 (8 oz) package cream cheese, softened - 1/2 cup powdered sugar - 1/4 cup brown sugar - 1 teaspoon vanilla extract - 1/2 cup caramel sauce - 1/2 teaspoon cinnamon - 2-3 apples (such as Granny Smith or Honeycrisp) - Chopped nuts (for garnish) You can change up this recipe with fun extras. Try adding mini chocolate chips for a sweet touch. You can also use different nuts, like almonds or pecans. If you want a twist, add a splash of maple syrup for flavor. For sweeteners, feel free to swap the sugars with alternatives like honey or agave syrup. You can also use a sugar-free caramel sauce if preferred. These options can make the dip fit your taste or dietary needs. Enjoy creating your perfect caramel apple dip! For the full recipe, check out the detailed instructions. Start by grabbing your mixing bowl. Take the softened cream cheese and beat it well. Use an electric mixer for this step. You want it to become smooth and creamy. This is the base of your dip. Next, add in the powdered sugar, brown sugar, and vanilla extract. Mix everything together until it’s fluffy. This sweet mixture will make the dip rich and tasty. Now, it’s time to layer. Take your creamy mix and spread it evenly into a serving dish. This will be the first layer people see. It should look nice and inviting. Now comes the fun part! Drizzle the caramel sauce over your cream cheese layer. Make sure to cover it well. This adds a sweet touch that everyone loves. Then, sprinkle cinnamon over the caramel. This will give it a warm flavor. If you like nuts, add chopped nuts on top. They add a great crunch! After adding the toppings, it’s time to chill. Place the dip in the refrigerator for about 30 minutes. This step is key because it lets the flavors mix. Chilling makes it taste even better! After it’s chilled, serve it with sliced apples. The fresh apples make a great pair with the dip. Enjoy your delicious Caramel Apple Dip with Cream Cheese! To get the best dip, use softened cream cheese. Softened cream cheese blends well and gives a smooth texture. Cold cream cheese can make your dip lumpy. Leave it out for about 30 minutes before mixing. When you beat the cream cheese, use a hand mixer or a stand mixer. Mix at medium speed for about two minutes. This helps to make the dip fluffy and light. You can add fun mix-ins to your dip. Try adding mini chocolate chips for a sweet twist. Chopped nuts also add crunch and flavor. If you like spice, add a pinch of nutmeg or ginger. Adjust the sweetness by adding more or less brown sugar. Taste as you go to find your perfect balance. The right apples can make your dip shine. I recommend Granny Smith apples for their tartness. Honeycrisp apples are sweet and crunchy, too. Slice your apples just before serving to keep them fresh. For a fun serving idea, use a cute bowl for the dip and place the apple slices around it. You can even add a few caramel candies on top for decoration. {{image_2}} You can mix up the flavors of your caramel apple dip. One tasty option is to add chocolate. You can swirl in some melted chocolate or sprinkle chocolate chips on top. The rich taste of chocolate pairs well with the sweetness of caramel. You can also add nuts or fruits to your dip. Chopped pecans or walnuts give a nice crunch. For a fruity twist, try adding dried cranberries or raisins. These add color and a bit of tang. Each bite can surprise you with new flavors. Seasonal changes can inspire new dips. For the holidays, you might want to sprinkle festive spices like nutmeg or ginger. A layer of crushed candy canes on top can make it even more special. You can also use seasonal fruits in your dip. In fall, crisp apples work great. In summer, try fresh peaches or strawberries. Each season brings a new chance to explore flavors. You can make this dip fit different diets easily. For a gluten-free option, just check that your caramel sauce is gluten-free. Many brands offer sauces that fit this need. If you want a vegan dip, you can swap cream cheese for a plant-based version. Use coconut or almond cream and vegan caramel sauce. This way, everyone can enjoy this tasty treat. For the full recipe, check out the [Full Recipe]. To keep your leftover dip fresh, store it in an airtight container. This will help prevent it from absorbing other smells in your fridge. If you want to keep it safe, use glass or plastic containers with tight-fitting lids. These containers keep moisture in and air out. The dip lasts about 3 to 5 days in the fridge. Make sure to check for any changes in smell or texture before eating it. If it looks or smells off, it’s best to throw it away. Yes, you can freeze the dip! To freeze it, place it in a freezer-safe container. Leave some space at the top for expansion. To thaw the dip, place it in the fridge overnight. This keeps the texture smooth. Before serving again, stir it gently to mix any separated ingredients. For the full recipe, check the link provided. Enjoy your caramel apple dip! Can I use low-fat cream cheese? Yes, you can use low-fat cream cheese. It will still taste good. Just remember, it may be a bit less creamy. How can I make caramel sauce from scratch? Making caramel sauce is simple! You need sugar, butter, and cream. Cook sugar until it melts and turns golden. Stir in butter, then add cream slowly. Cook until smooth. What kind of fruits can I dip? You can dip many fruits! Try apples, pears, bananas, or strawberries. These fruits pair well with the sweet dip. Why is my dip too runny? Your dip may be too runny if the cream cheese is not firm enough. Make sure to use softened cream cheese, not melted. What to do if the flavors are too strong? If the flavors are too strong, add more cream cheese. Mix it in to balance the taste. For the complete recipe details, check out the [Full Recipe](#). This blog post covered a tasty cream cheese dip recipe. You learned about the main ingredients, optional add-ins, and step-by-step instructions. I also shared tips for the best texture and flavor. You can even find variations and storage info. Creating this dip can be fun and easy. It’s a perfect treat for sharing. You can customize it to fit any occasion or flavor you like. Enjoy your dip and happy cooking!](https://mysavedrecipe.com/wp-content/uploads/2025/05/e104724d-97fd-4d7b-9a5a-be11c636641e-300x300.webp)

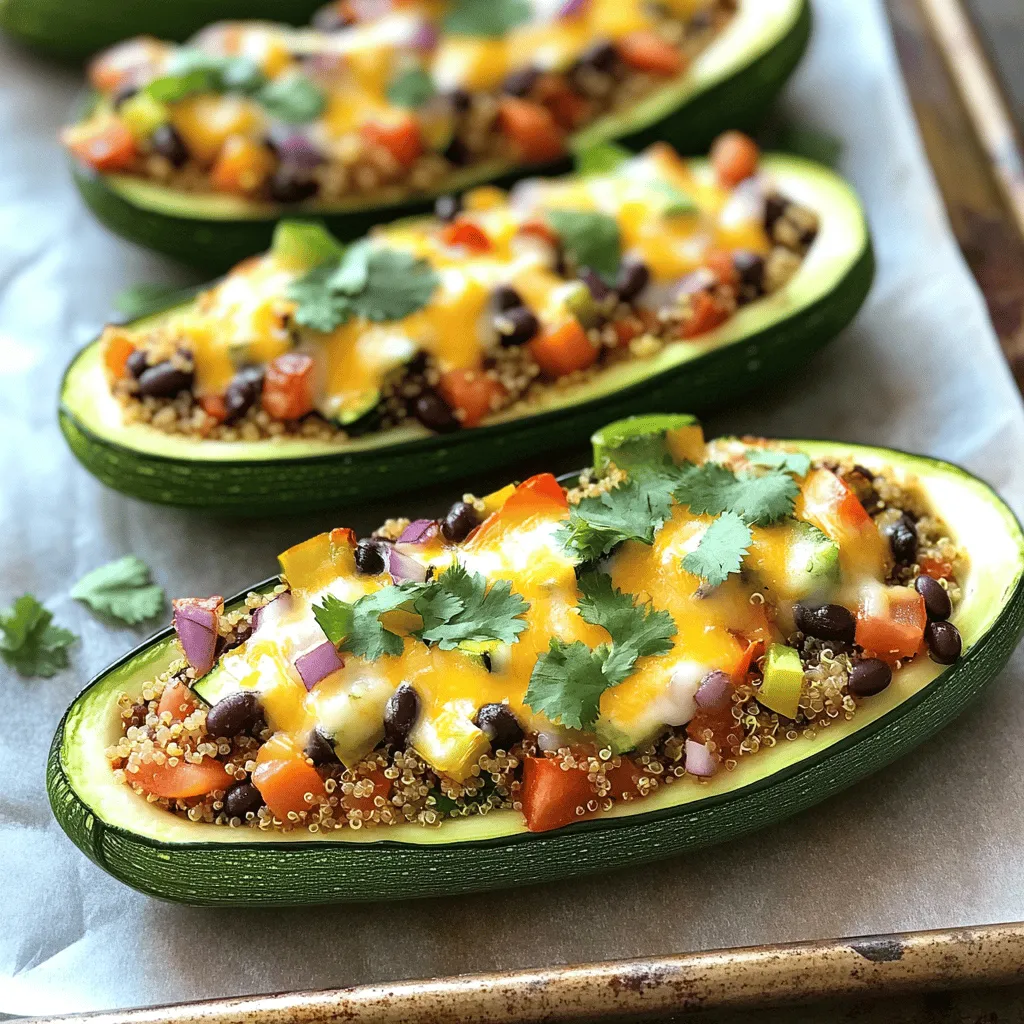
Stuffed Zucchini Boats Flavorful and Easy Meal Idea
If you’re looking for a simple, tasty meal, stuffed zucchini boats are the answer! These colorful veggies can hold a variety of fillings, making…