Latest & Greatest

Irresistible Blueberry Oatmeal Bake Simple Recipe
Are you ready to whip up a delicious breakfast that’s easy and healthy? This Irresistible Blueberry Oatmeal Bake is your
Read more…
Veggie Loaded Quiche Tasty and Simple Recipe Guide
Looking for a delicious way to pack your meal with veggies? This Veggie Loaded Quiche is a simple and tasty
Read more…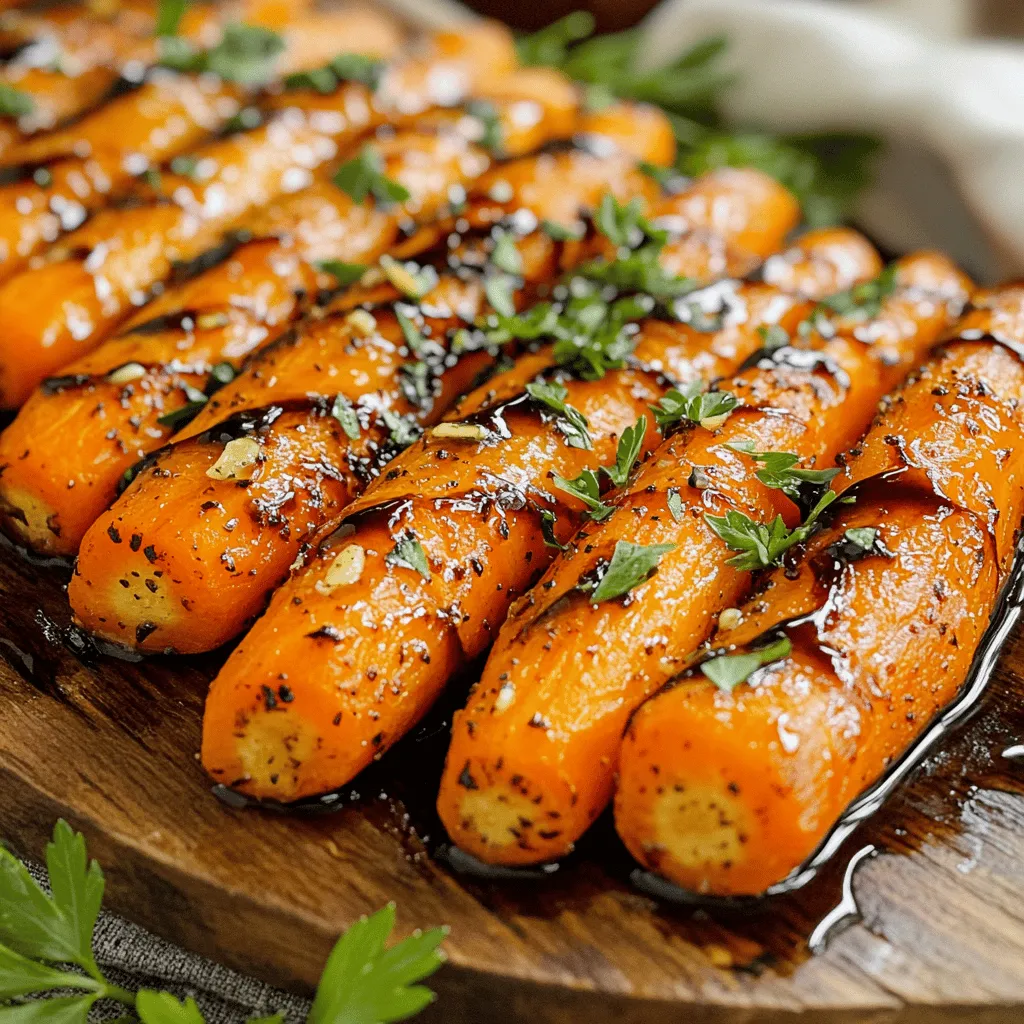
Honey Garlic Roasted Carrots Flavorful Side Delight
Looking for a side dish that bursts with flavor? Honey Garlic Roasted Carrots are your answer! This simple recipe transforms
Read more…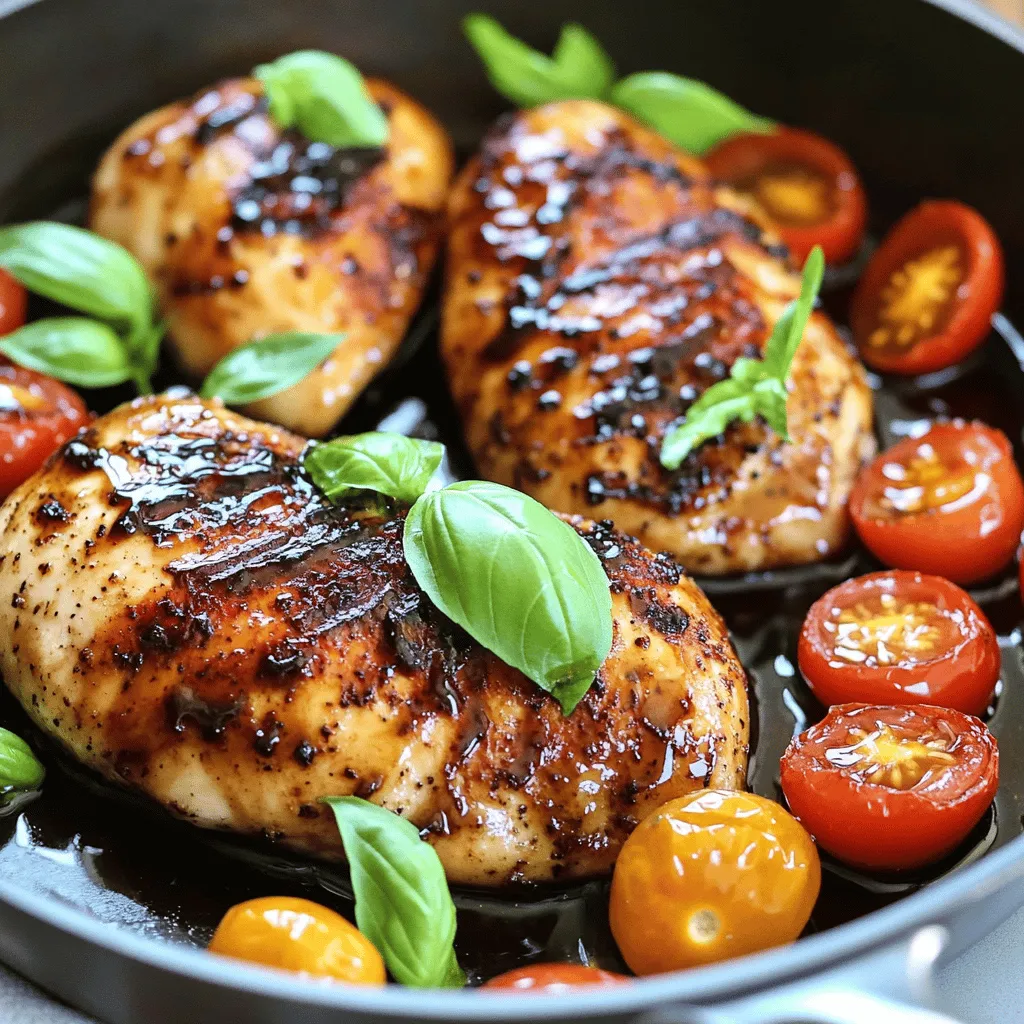
Balsamic Glazed Chicken Easy and Flavorful Meal
Looking for a simple yet tasty dinner idea? Balsamic glazed chicken is your answer! This meal combines juicy chicken with
Read more…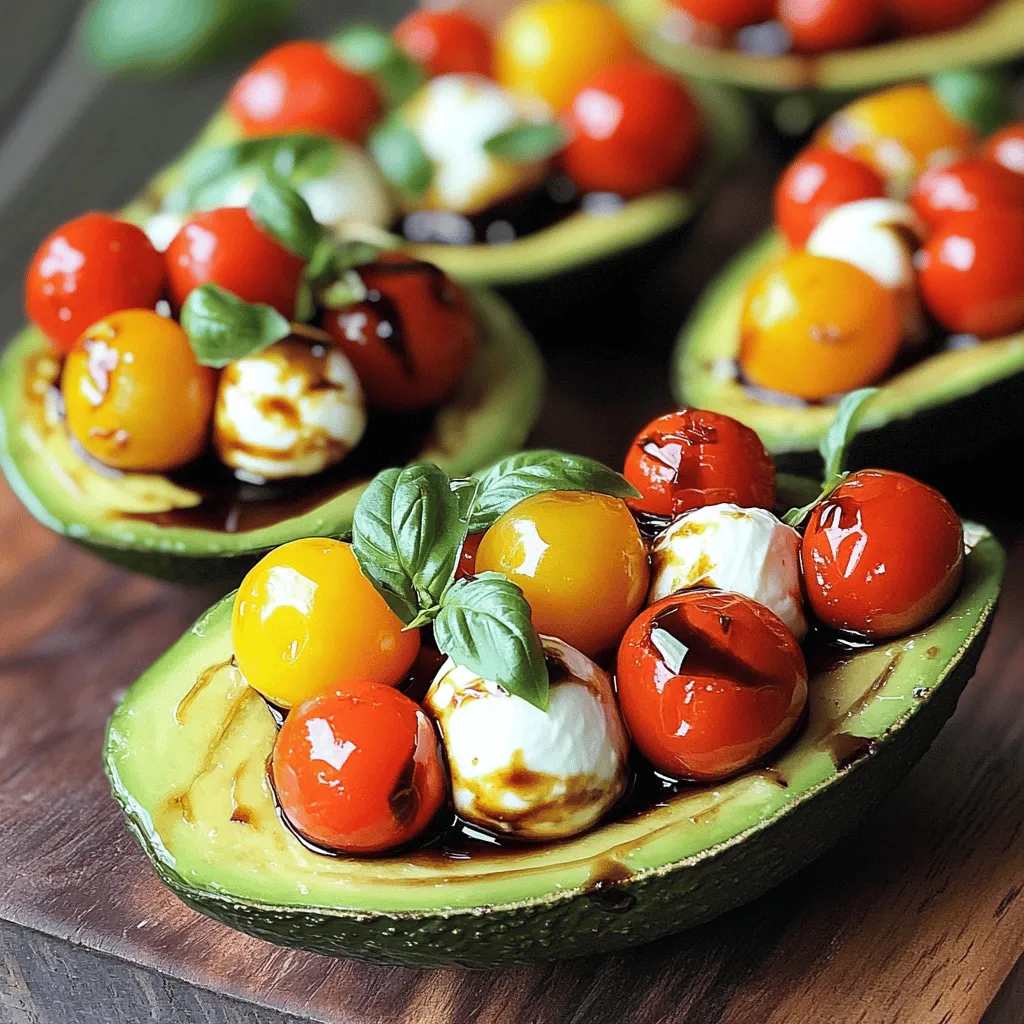
Caprese Stuffed Avocados Flavorful and Fresh Delight
Are you ready to dive into a fresh and flavorful treat? Caprese Stuffed Avocados combine ripe avocados, juicy cherry tomatoes,
Read more…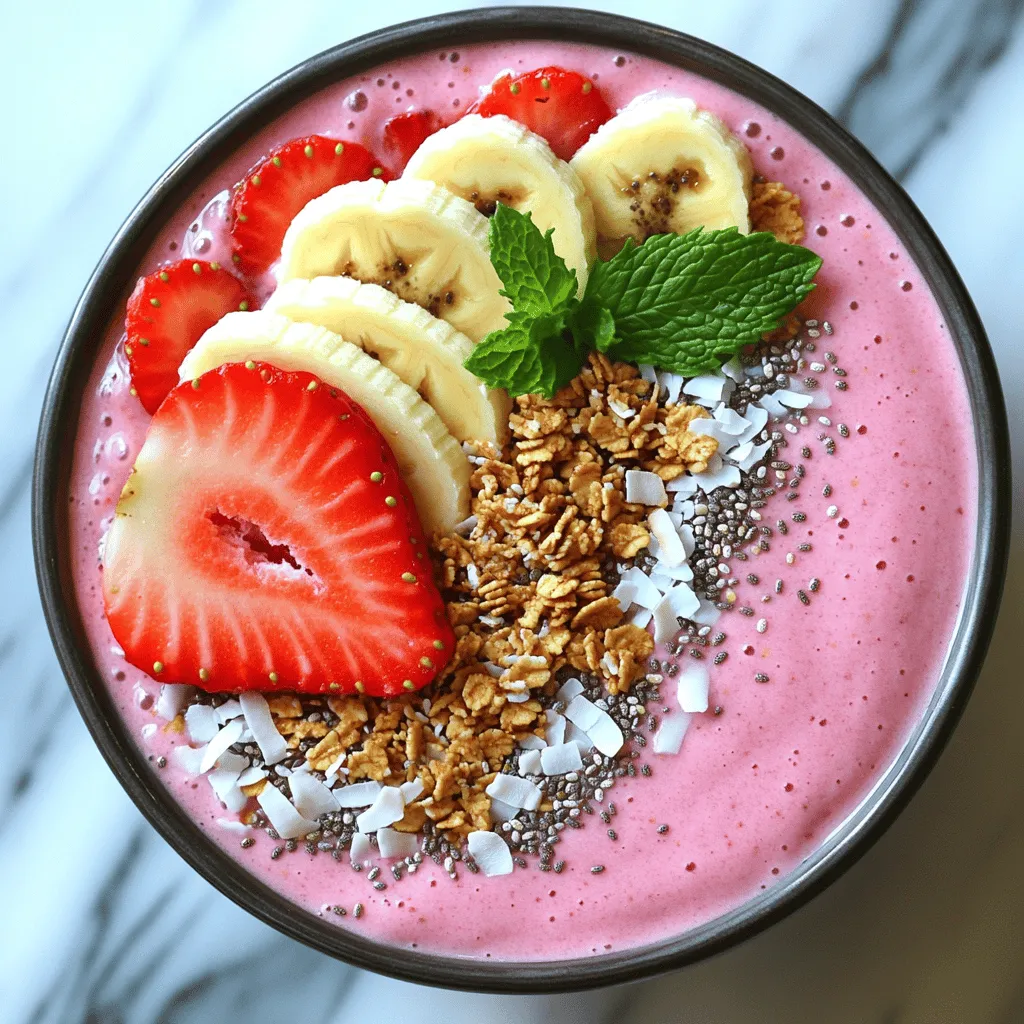
Strawberry Banana Smoothie Bowl Healthy and Refreshing
If you crave a sweet yet healthy treat, you need to try this Strawberry Banana Smoothie Bowl! Packed with frozen
Read more…
Spicy Chickpea Tacos Flavorful and Easy Meal Idea
Craving a meal that’s both quick and full of flavor? Look no further! Spicy Chickpea Tacos combine tender chickpeas with
Read more…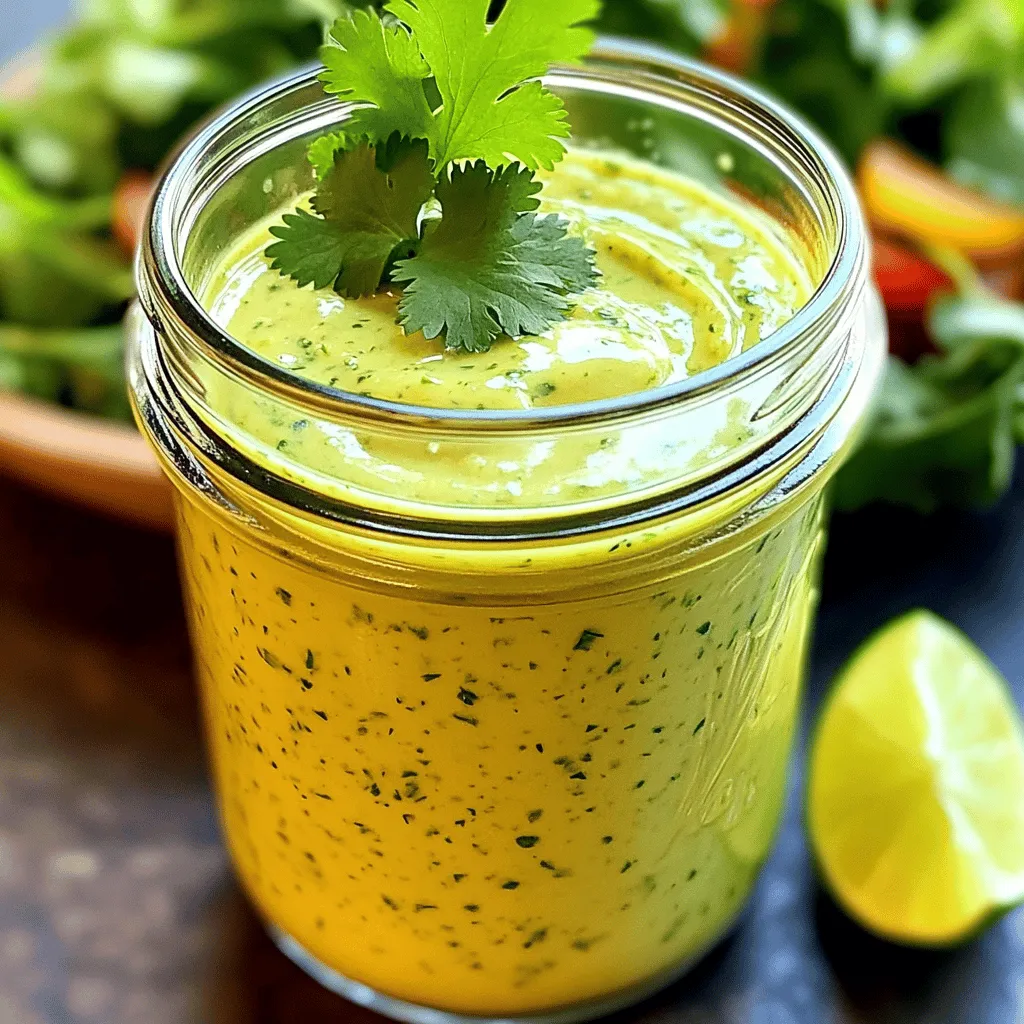
Creamy Cilantro Lime Dressing Simple and Flavorful
Looking for a zesty dressing that brings life to any meal? You’re in the right place! My Creamy Cilantro Lime
Read more…browse recipes


Minted Melon Agua Fresca Refreshing Summer Drink
Looking for a cool drink to beat the summer heat? My Minted Melon Agua Fresca is the perfect choice! This refreshing blend of watermelon,…
My Latest Desserts

Cream Soda Donut Holes Delightful Dessert Recipe
Are you ready to enjoy a fun twist on a classic treat? Cream Soda Donut Holes are sweet, fluffy, and Read Full Recipe-
Cookie Dough Bars Delightful Recipe for a Sweet Treat
If you’ve ever craved the rich, sweet goodness of cookie dough, then you’re in for a treat! My recipe for Read Full Recipe -
Chocolate Covered Cherries with Pistachio Dust Delight
Get ready to treat your taste buds with my “Chocolate Covered Cherries with Pistachio Dust Delight.” This sweet snack combines Read Full Recipe -
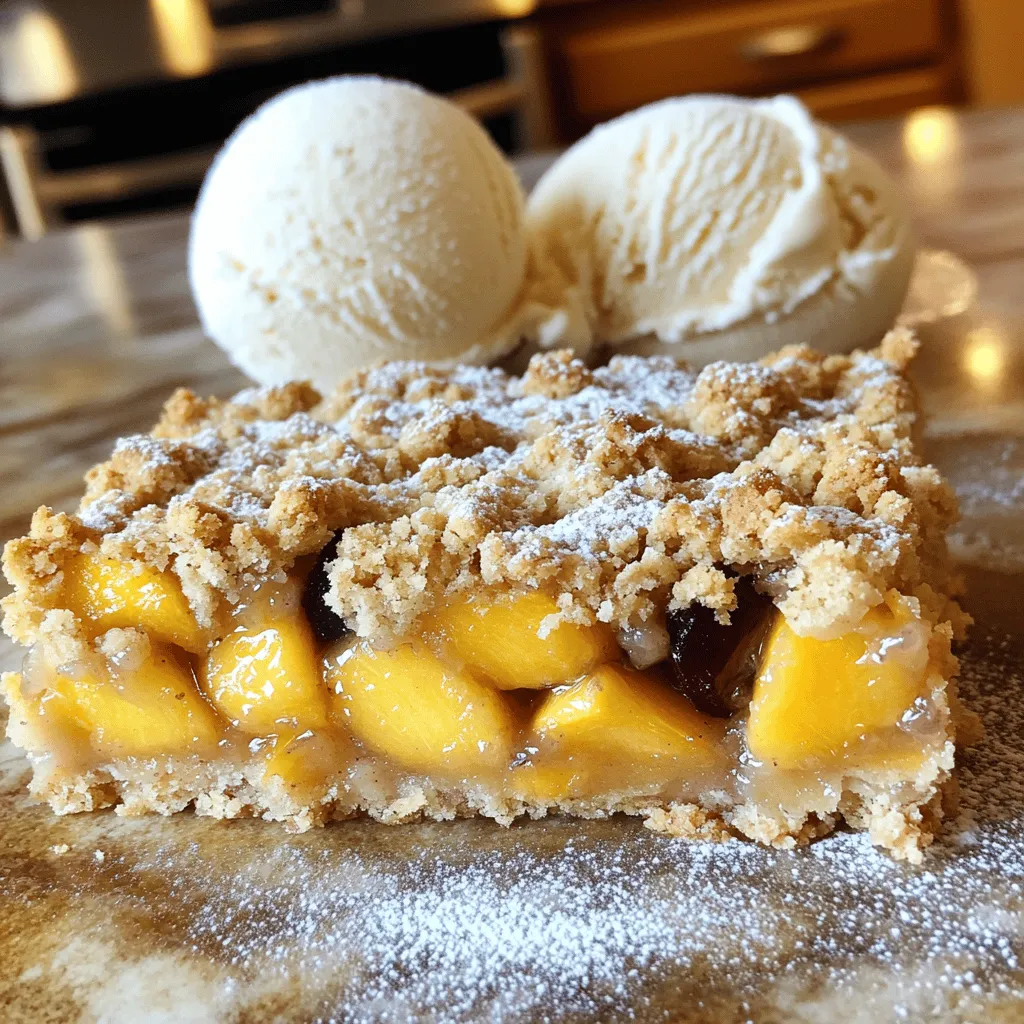
Peach Plum Crumble Bars Irresistible Sweet Treat
Are you ready for a dessert that combines the sweetness of peaches and plums? My Peach Plum Crumble Bars are Read Full Recipe -
Watercolor Buttercream Cupcakes Delightful Recipe Guide
Are you ready to bring some color to your baking? In this guide, I’ll show you how to make stunning Read Full Recipe -
No-Bake Peach Icebox Cake Simple and Refreshing Treat
If you’re seeking a sweet, cool treat that’s simple to make, it’s time to try my No-Bake Peach Icebox Cake. Read Full Recipe -
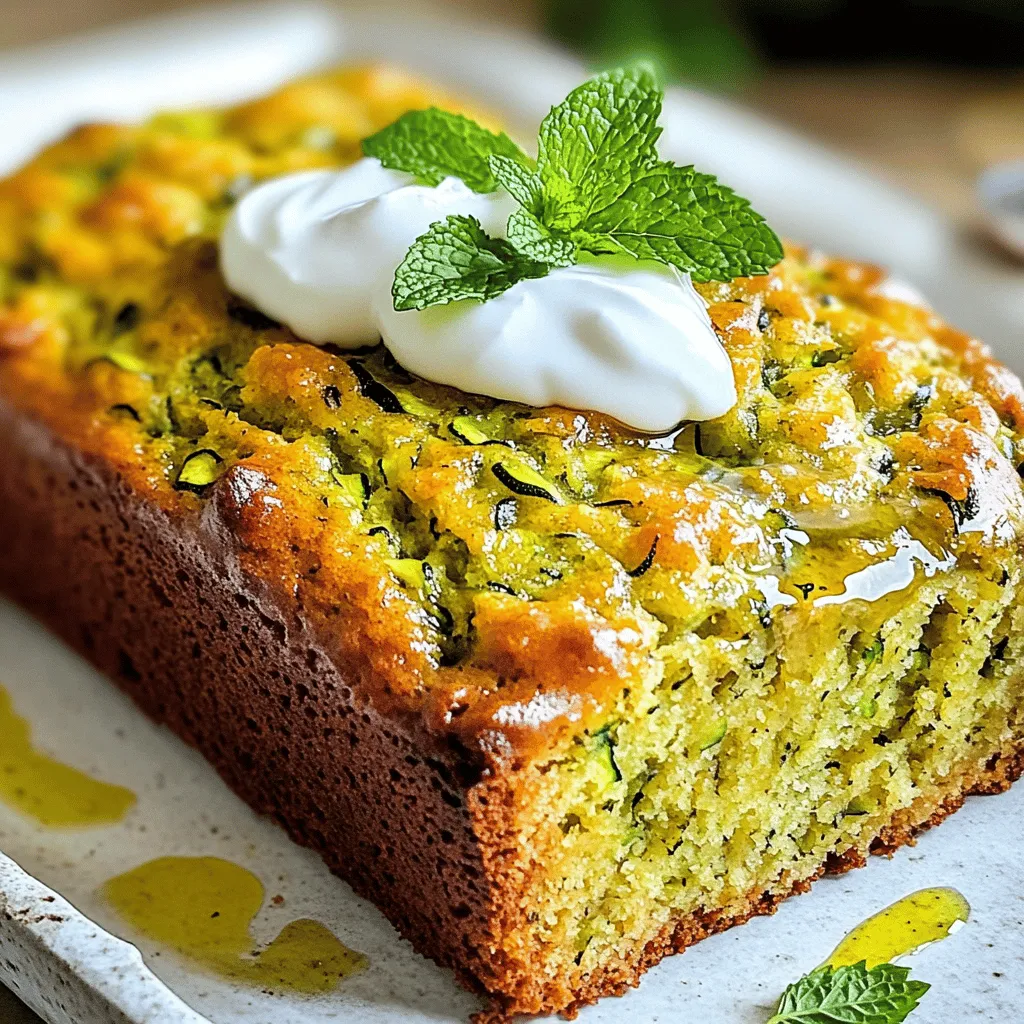
The Best Zucchini Bread Irresistible and Easy Recipe
Are you ready to bake the best zucchini bread that’s both irresistible and easy? This simple recipe combines fresh, grated Read Full Recipe -
Peach Cobbler Pancakes Delicious and Simple Recipe
Are you ready to bring a burst of flavor to your breakfast table? Peach Cobbler Pancakes are the perfect blend Read Full Recipe -
Olive Oil Zucchini Bread Moist and Flavorful Recipe
Welcome to your new favorite treat: Olive Oil Zucchini Bread! This recipe gives you a moist, flavorful loaf that’s perfect Read Full Recipe -
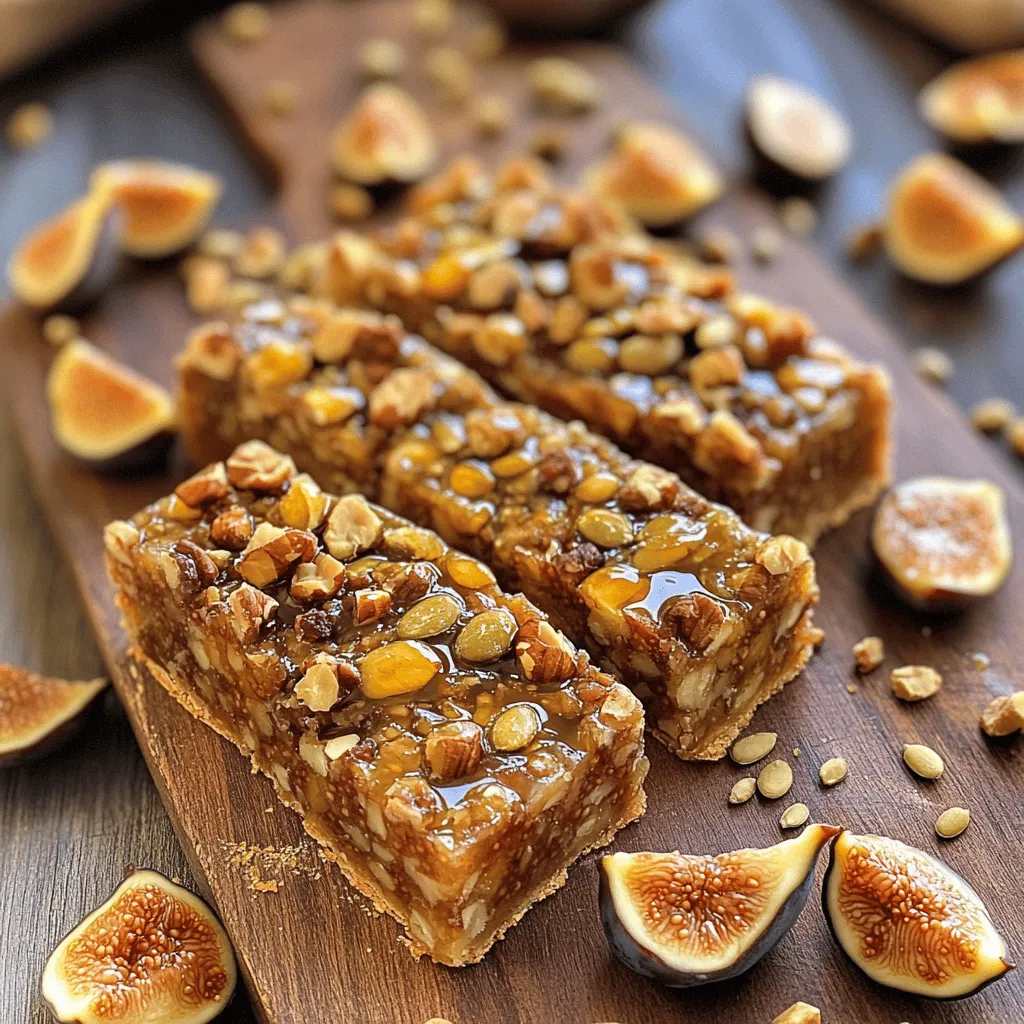
Fig and Walnut Bars Healthy and Flavorful Snack
If you’re searching for a tasty yet healthy snack, Fig and Walnut Bars are a perfect choice! Packed with nutritious Read Full Recipe


My Latest Recipes

hey,
i’m !
I’m so happy you’re here!
Food is my passion, and perfecting each dish is my craft. I can’t wait for you to try them let’s dive into this delicious journey side by side.

![To make Sweet Potato Black Bean Enchiladas, gather these simple ingredients: - 2 medium sweet potatoes, peeled and diced - 1 can (15 oz) black beans, rinsed and drained - 1 cup corn kernels (fresh or frozen) - 1 teaspoon cumin - 1 teaspoon chili powder - Salt and pepper, to taste - 2 cups enchilada sauce (store-bought or homemade) - 8 small corn tortillas - 1 cup shredded cheese (cheddar or Monterey Jack) - Fresh cilantro, for garnish - 1 avocado, sliced (for topping) These enchiladas are a tasty way to enjoy healthy ingredients. Each serving offers: - Calories: 350 - Protein: 14g - Carbohydrates: 54g - Dietary Fiber: 10g - Total Fat: 12g Sweet potatoes provide vitamins A and C while black beans add protein and fiber. This dish is filling and nutritious. You can adjust this recipe to fit various diets. Here are some options: - Vegan: Omit cheese or use a vegan cheese substitute. - Gluten-Free: Use gluten-free tortillas instead of corn tortillas. - Low-Carb: Substitute sweet potatoes with zucchini or cauliflower. These changes keep the dish flavorful while meeting different dietary needs. For the full recipe, check the earlier section. First, you need to preheat your oven to 375°F (190°C). This step is key for even cooking. Next, bring a large pot of salted water to a boil. Add the diced sweet potatoes and cook them for 10-12 minutes. You want them to be fork-tender. After that, drain and set them aside. In a large bowl, combine the sweet potatoes, rinsed black beans, corn, cumin, chili powder, salt, and pepper. Mix it well so all the flavors blend together. This filling will be the heart of your enchiladas. Now, warm the corn tortillas. Use a dry skillet over medium heat. Heat them for about 30 seconds on each side. This makes them soft and easy to work with. Grab a greased 9x13-inch baking dish. Pour about 1/2 cup of enchilada sauce on the bottom. Take one tortilla and fill it with about 1/3 cup of your sweet potato mixture. Sprinkle a little cheese on top, then roll it up tightly. Place it seam-side down in the dish. Repeat this for all tortillas. Pour the remaining enchilada sauce over the rolled enchiladas. Make sure they are covered well. Then, sprinkle the rest of the cheese on top. Cover the dish with foil and bake for 20 minutes. After that, remove the foil. Bake for another 10-15 minutes until the cheese is melted and bubbly. Take the dish out of the oven and let it cool for a few minutes. Before serving, garnish with fresh cilantro and sliced avocado. Enjoy your Sweet Potato Black Bean Enchiladas, bursting with flavor! For more detailed guidance, check the Full Recipe. To make the best enchiladas, use fresh tortillas. They should be soft and warm. Heat them in a skillet for a few seconds. This makes them easy to roll. Also, don’t overfill the tortillas. About 1/3 cup of filling works well. If you pack them too tight, they can break. When cooking sweet potatoes, cut them into even pieces. This helps them cook evenly. Boil them for 10-12 minutes until fork-tender. If you prefer, you can also roast them. Just toss them with a little oil, salt, and pepper. Roast at 400°F for about 25 minutes. This adds a nice caramelized flavor. For cheese, I love using cheddar or Monterey Jack. Both melt nicely and add great taste. Feel free to mix them for more flavor. As for sauces, you can use store-bought enchilada sauce or make your own. A homemade sauce gives a fresh taste and goes well with the sweet potatoes. For a twist, add some lime juice or cilantro to the sauce. You can find the Full Recipe for more detailed steps. {{image_2}} You can add ground turkey or chicken to your enchiladas. This step adds protein and richness. Start by cooking 1 pound of ground meat in a skillet until brown. Drain the fat and mix the meat with the sweet potato filling. This makes the dish hearty and satisfying. You can also season the meat with cumin and chili powder to match the filling's flavors. To make these enchiladas vegan, swap the cheese for a plant-based option. You can use cashew cheese or nutritional yeast for a cheesy flavor. Replace the regular tortillas with corn tortillas that are dairy-free. Ensure your enchilada sauce contains no animal products. This way, you keep the deliciousness without any animal ingredients. If you like heat, add jalapeños to the mix. Chop 1-2 fresh jalapeños and stir them into the sweet potato filling. You can also sprinkle some sliced jalapeños on top before baking. This adds a nice kick and makes the dish more exciting. Adjust the amount based on your spice preference. To keep your enchiladas fresh, let them cool completely. Place leftovers in an airtight container. They will stay good in the fridge for up to four days. If you want to enjoy them later, freezing is a great option. To reheat, take the enchiladas out of the fridge. Preheat your oven to 350°F (175°C). Cover the dish with foil to keep them moist. Heat for 20-25 minutes, or until warm. You can also use a microwave. Place them on a microwave-safe plate and heat in 30-second intervals until hot. To freeze, wrap each enchilada tightly in plastic wrap. Then place them in a freezer-safe bag. They can last for up to three months. When you're ready to eat, thaw them overnight in the fridge. Bake them at 350°F (175°C) until heated through. This way, you can enjoy sweet potato black bean enchiladas anytime! For the full recipe, check the earlier section. Yes, you can prepare these enchiladas ahead of time. Just assemble them and cover tightly. Store in the fridge for up to 24 hours. When ready to cook, just bake as directed. This makes meal prep easy and quick! If you want to swap black beans, use pinto beans or kidney beans. You can also try lentils for a different texture. Each option adds protein and flavor to your dish. To make enchilada sauce, blend together: - 1 can (15 oz) of tomato sauce - 2 tablespoons chili powder - 1 teaspoon cumin - 1 teaspoon garlic powder - Salt to taste. Heat it in a pot until warm, stirring often. This simple sauce gives your enchiladas a fresh taste! Enchiladas go well with many sides, like: - Mexican rice - Refried beans - A fresh salad - Guacamole. These sides add more color and flavor to your meal. To make the enchiladas gluten-free, use corn tortillas instead of flour tortillas. Make sure the enchilada sauce is gluten-free as well. This way, you can enjoy the dish without worry! For the full recipe, check out the [Full Recipe]. You learned about making tasty Sweet Potato Black Bean Enchiladas. We covered the key ingredients, steps, and tips for success. You can even make variations to suit your taste. Storage options help keep your leftovers fresh. I hope you feel ready to try this fun recipe. Enjoy your cooking and impress everyone with your delicious enchiladas!](https://mysavedrecipe.com/wp-content/uploads/2025/05/8a4ce175-32c4-4bc9-a779-9fbc3b8ebdf4-300x300.webp)

![- 2 ripe avocados - 1 medium garlic clove, minced - 2 tablespoons lemon juice - 1/4 cup fresh basil leaves, plus more for garnish - 1/4 cup grated Parmesan cheese (or nutritional yeast for a vegan option) - 2 tablespoons extra virgin olive oil - Salt and pepper to taste - 12 ounces spaghetti or your pasta of choice - Cherry tomatoes, halved (for garnish) - Crushed red pepper flakes (optional, for garnish) To make creamy avocado pasta, you need fresh and simple ingredients. Start with ripe avocados. They should feel soft but not mushy. Garlic adds a nice kick. Lemon juice gives a zesty touch and keeps the avocado from browning. Fresh basil brings a burst of flavor. Parmesan cheese adds richness, but if you want it vegan, use nutritional yeast. Extra virgin olive oil helps blend everything smoothly. Don’t forget salt and pepper; they enhance all the flavors. Choose spaghetti or your favorite pasta type. For a pretty finish, add halved cherry tomatoes and crushed red pepper flakes if you like heat. This recipe is quick and perfect for busy days. You can find the full recipe above. Enjoy cooking this easy and healthy dish! To start, boil a large pot of salted water. Add the spaghetti to the boiling water. Cook it according to the package instructions until it is al dente. This means it should be firm to the bite, not mushy. Once cooked, reserve about 1 cup of pasta water before draining the rest. This water helps to make the sauce creamy later. Grab a blender or food processor. You will use this to make the sauce. Add the ripe avocados, minced garlic, lemon juice, basil leaves, and Parmesan cheese (or nutritional yeast) to the blender. Blend these ingredients until the mixture is smooth and creamy. While blending, slowly drizzle in the olive oil. This helps to mix everything well and makes the sauce rich. Now it’s time to mix the pasta with the sauce. In a large mixing bowl, toss the cooked spaghetti with the creamy avocado sauce. Make sure every strand of pasta is well coated. For serving, divide the pasta into bowls. Top each bowl with halved cherry tomatoes and extra basil leaves for a fresh look. If you like a little heat, add some crushed red pepper flakes on top. Enjoy your delicious meal! For the complete recipe, check out the [Full Recipe]. To pick the best avocados, look for a few key signs. First, check the color. Ripe avocados usually have a dark green to almost black hue. Next, gently squeeze the avocado. It should feel firm but yield slightly to gentle pressure. If it feels mushy, it is overripe. Finally, look at the stem. If it comes off easily and is green underneath, the avocado is ripe. If it is brown, the avocado is likely bad. Sometimes the sauce may be too thick. You can fix this easily. After blending, save some pasta water. Slowly add this water to the sauce while mixing. Add a little at a time until you reach your desired creaminess. This will help you get the perfect texture for your creamy avocado pasta. To make the dish even tastier, try adding extra seasonings. A pinch of garlic powder or onion powder can boost the flavor. Fresh herbs like cilantro or parsley can offer different tastes. You can also add toppings like crumbled feta cheese or toasted pine nuts for a nice crunch. If you like spice, sprinkle some crushed red pepper flakes on top. These simple changes will make your creamy avocado pasta shine. For the complete recipe, check out the Full Recipe. {{image_2}} For a vegan twist on creamy avocado pasta, you can skip the Parmesan cheese. Use nutritional yeast instead. It gives a cheesy flavor without any dairy. Just add 1/4 cup of nutritional yeast to your sauce. This keeps your dish tasty and plant-based. If you need a gluten-free option, choose pasta made from rice or chickpeas. These types cook well and pair nicely with the creamy sauce. Look for brands like gluten-free spaghetti or penne. They will work perfectly in this dish. You can make this pasta even more fun by adding veggies or proteins. Try mixing in spinach, peas, or broccoli for extra nutrition. You can also add grilled chicken or shrimp for a protein boost. This makes the meal hearty and satisfying. To keep your creamy avocado pasta fresh, store leftovers in an airtight container. Make sure to cover the top with plastic wrap to limit air exposure. This helps slow down oxidation, keeping your pasta from turning brown. You can store it in the fridge for up to two days. When you’re ready to eat it again, give it a quick stir. Can you freeze avocado pasta? Yes, but with caution. Freezing can change the texture of the avocado. If you want to freeze it, do so without the pasta. Instead, freeze just the avocado sauce in a freezer-safe container. This will keep it fresh. You can freeze the sauce for up to three months. When you want to use it, thaw it overnight in the fridge. To reheat your creamy avocado pasta, you have a few great options. You can use the stove or the microwave. If using the stove, heat it on low in a pan. Stir it gently and add a splash of water or olive oil to keep it creamy. If you choose the microwave, place it in a bowl and cover it. Heat in short bursts of 30 seconds, stirring in between. This way, it warms evenly. To tell if an avocado is ripe, look for these signs: - The skin should be dark green or black. - Gently squeeze the avocado; it should feel soft but not mushy. - Check the stem; if it comes off easily and is green underneath, it’s ripe. Ripe avocados taste the best in creamy avocado pasta. If they are hard, let them sit at room temperature for a few days. Yes, you can prepare creamy avocado pasta ahead of time. Here are some meal prep tips: - Make the avocado sauce and store it in an airtight container. Add a bit of lemon juice to help prevent browning. - Cook the pasta and let it cool before storing it in the fridge. - When ready to eat, mix the pasta and sauce together for a fresh taste. This dish tastes best when served fresh, but prepped ingredients save time. Serve creamy avocado pasta with these tasty side dishes for a complete meal: - A fresh green salad with a light vinaigrette. - Garlic bread or toasted ciabatta for a crunchy texture. - Grilled vegetables like zucchini or bell peppers add color and flavor. These sides complement the creamy avocado pasta nicely, making for a well-rounded dinner. This blog post guides you through making a delicious creamy avocado pasta. You learned about the key ingredients, step-by-step instructions, tips for success, variations, storage methods, and answers to common questions. This dish is simple, tasty, and great for various diets. Enjoy customizing it to fit your needs. Now, you’re ready to impress friends and family with your new cooking skill. Pasta night will never be the same!](https://mysavedrecipe.com/wp-content/uploads/2025/06/a61ba880-dfe9-47cb-b6aa-6d20faf72ef6-300x300.webp)
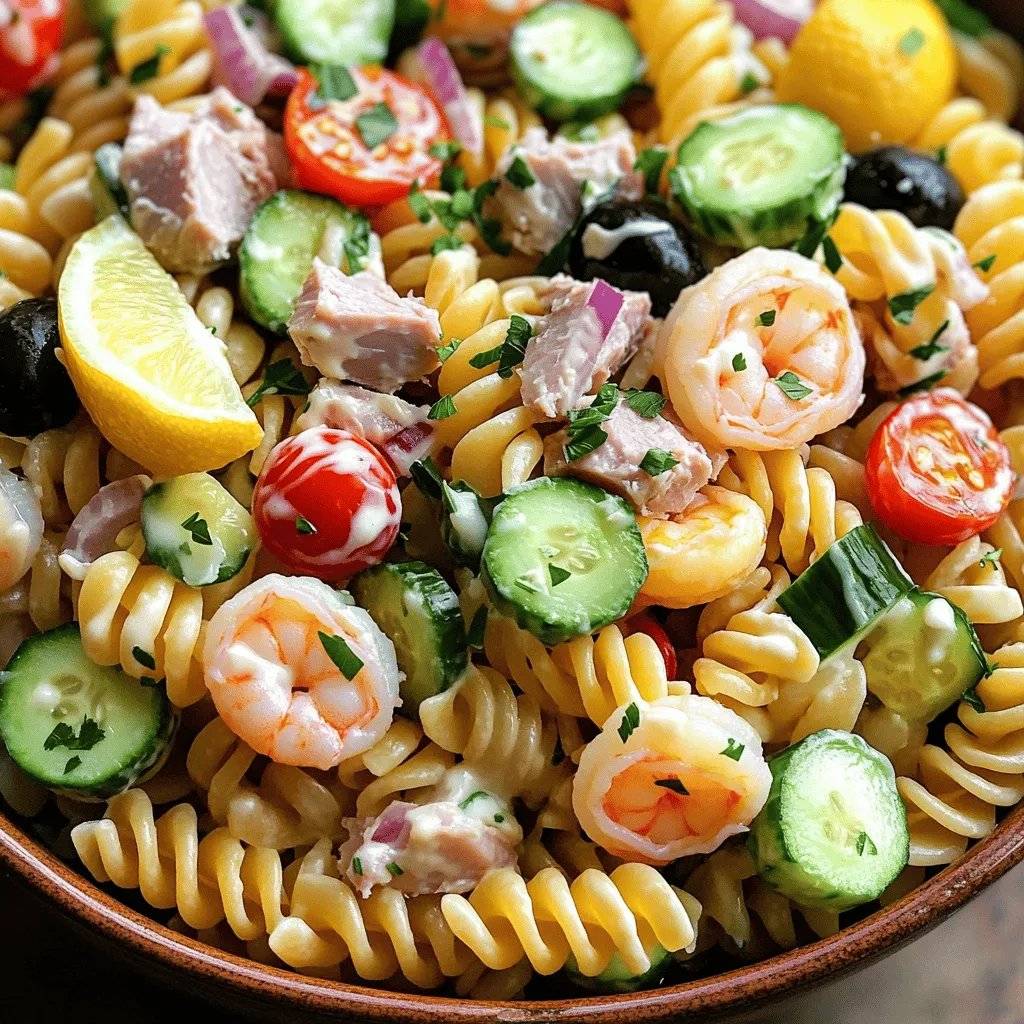
Quick and Easy Seafood Pasta Salad Flavorful and Simple
Craving a meal that’s both vibrant and simple? I’ve got you covered with my Quick and Easy Seafood Pasta Salad. This dish combines the…