


Latest & Greatest
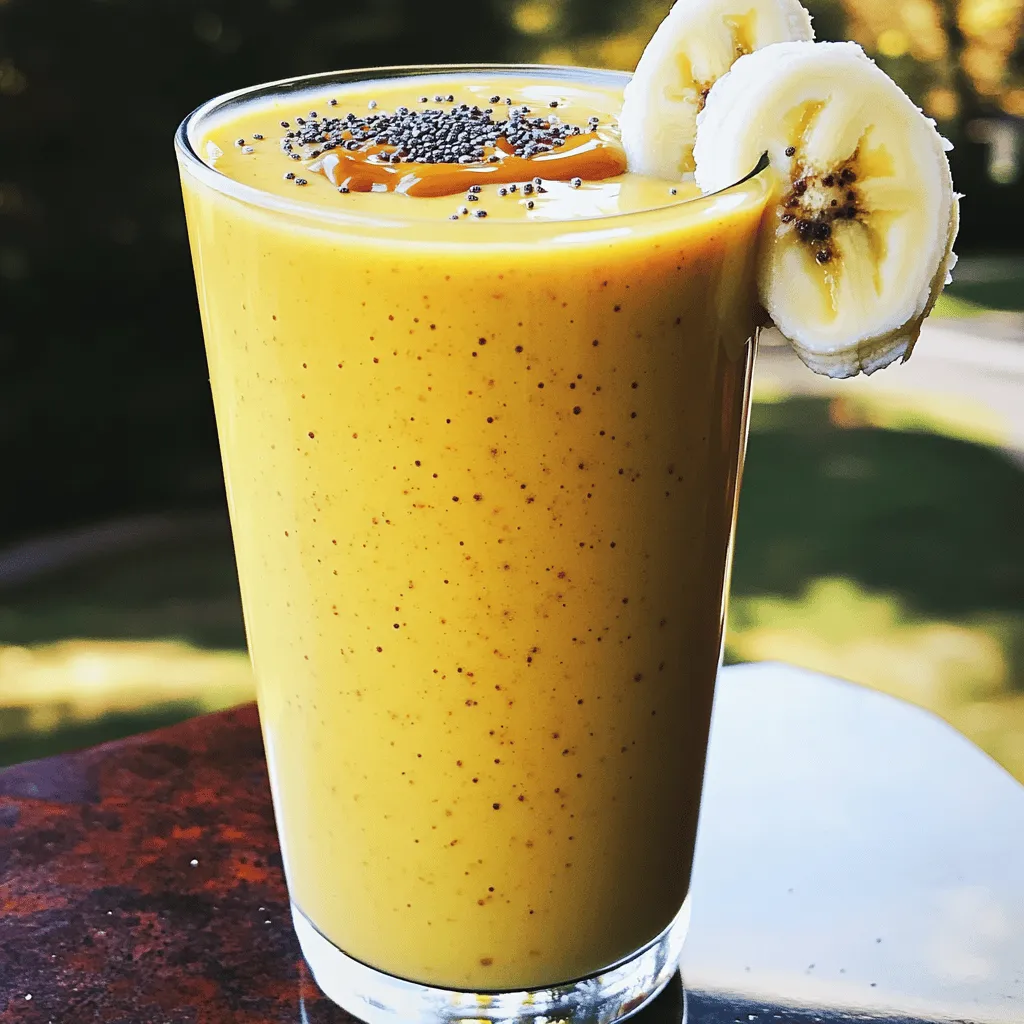
Peanut Butter Banana Smoothie Healthy and Delicious Drink
Looking for a tasty and healthy drink? The Peanut Butter Banana Smoothie is your perfect choice! It’s packed with energy-boosting
Read more…
Chocolate Dipped Strawberries Easy and Delicious Treat
If you’re looking for a quick and tasty dessert, you’ve come to the right place! Chocolate dipped strawberries are not
Read more…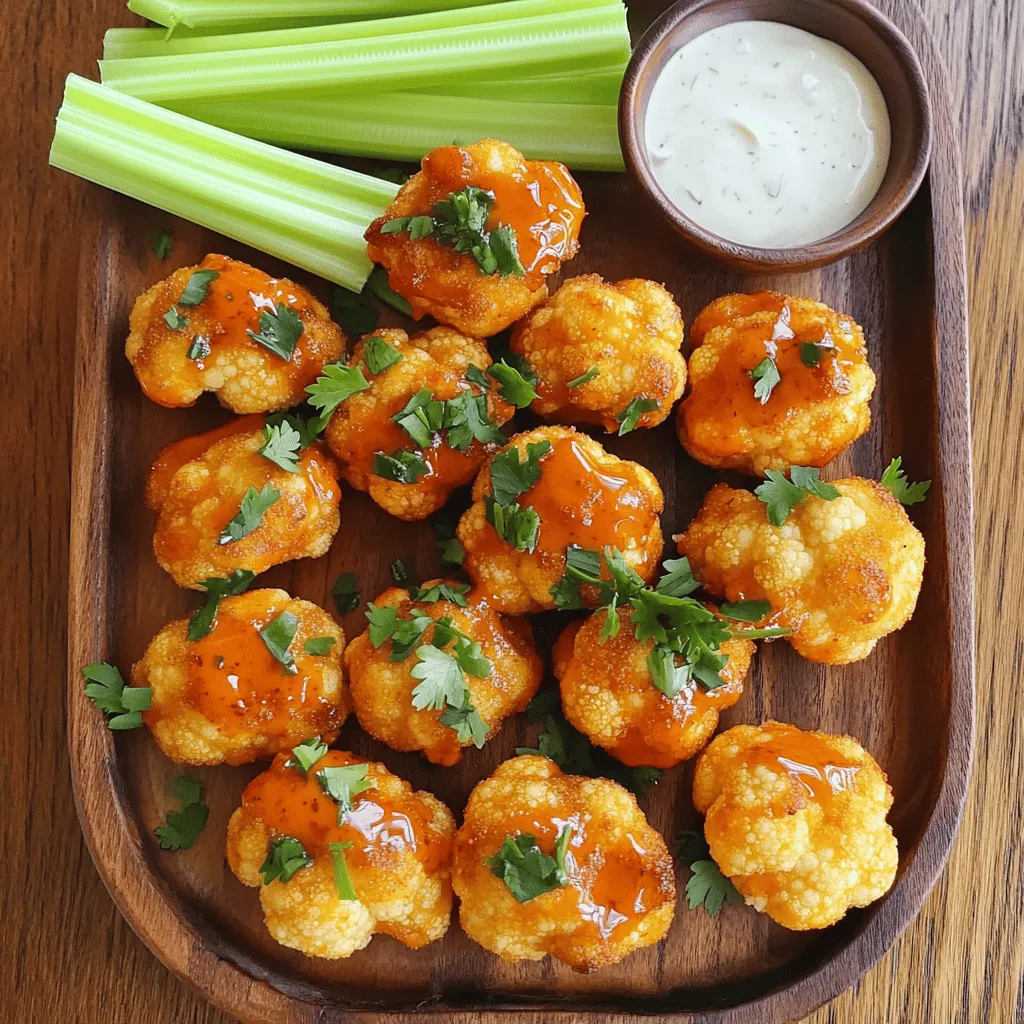
Savory Buffalo Cauliflower Bites Easy Snack Recipe
Are you ready to spice up your snack game? These savory Buffalo Cauliflower Bites are your answer! They pack a
Read more…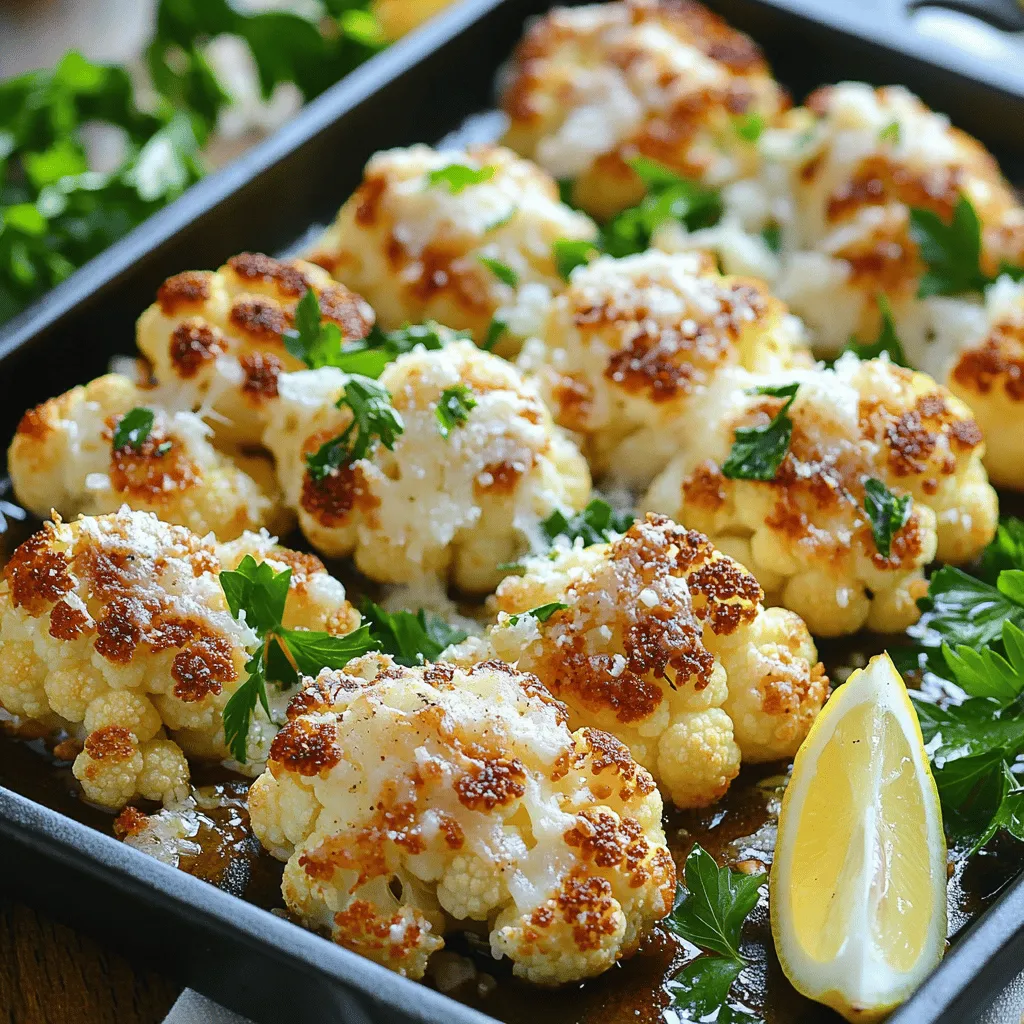
Garlic Parmesan Roasted Cauliflower Tasty Side Dish
If you’re looking for a side dish that wows, Garlic Parmesan Roasted Cauliflower is it! This dish is packed with
Read more…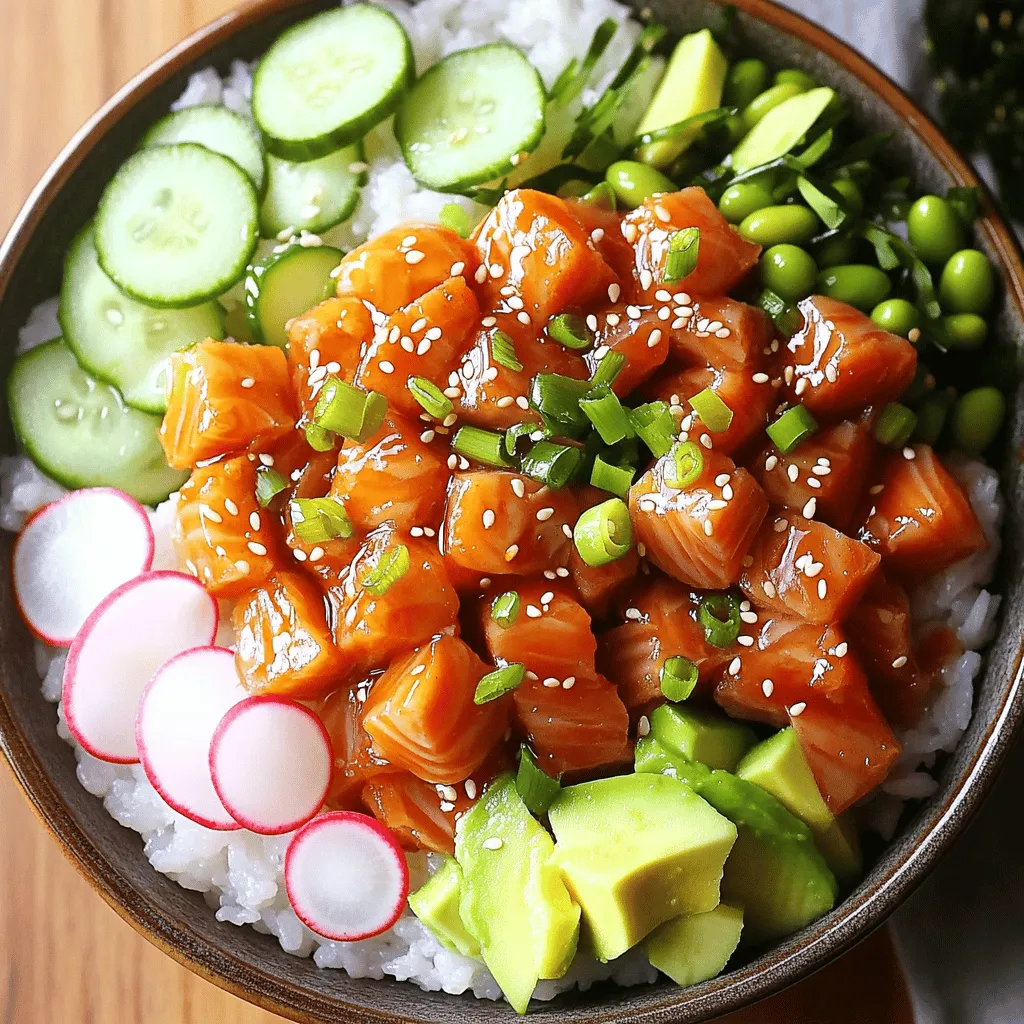
Spicy Tuna Poke Bowl Tasty and Easy to Make Recipe
Want to impress your friends with a dish that’s fresh, flavorful, and super easy? Let’s dive into creating a Spicy
Read more…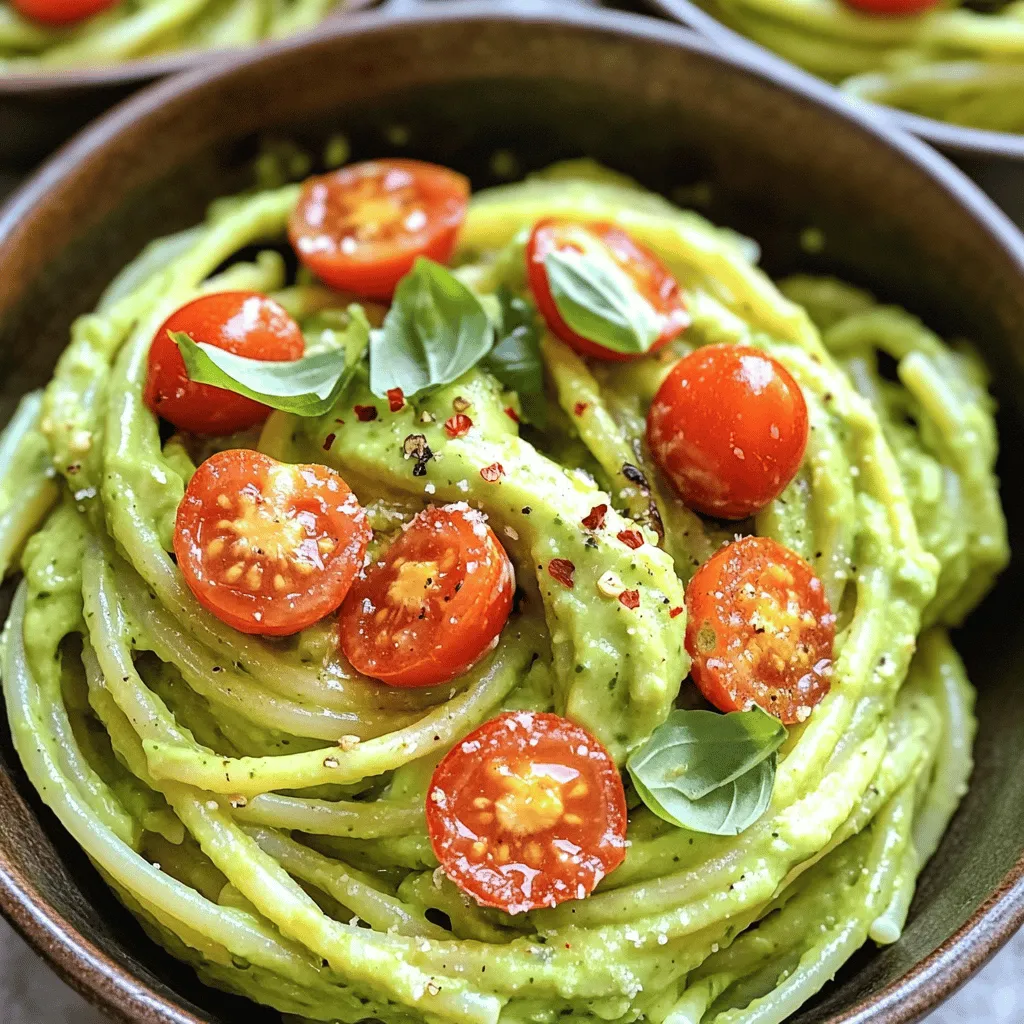
Creamy Avocado Pasta Simple and Tasty Recipe
Are you ready to impress your taste buds with a creamy twist on pasta? This Creamy Avocado Pasta recipe brings
Read more…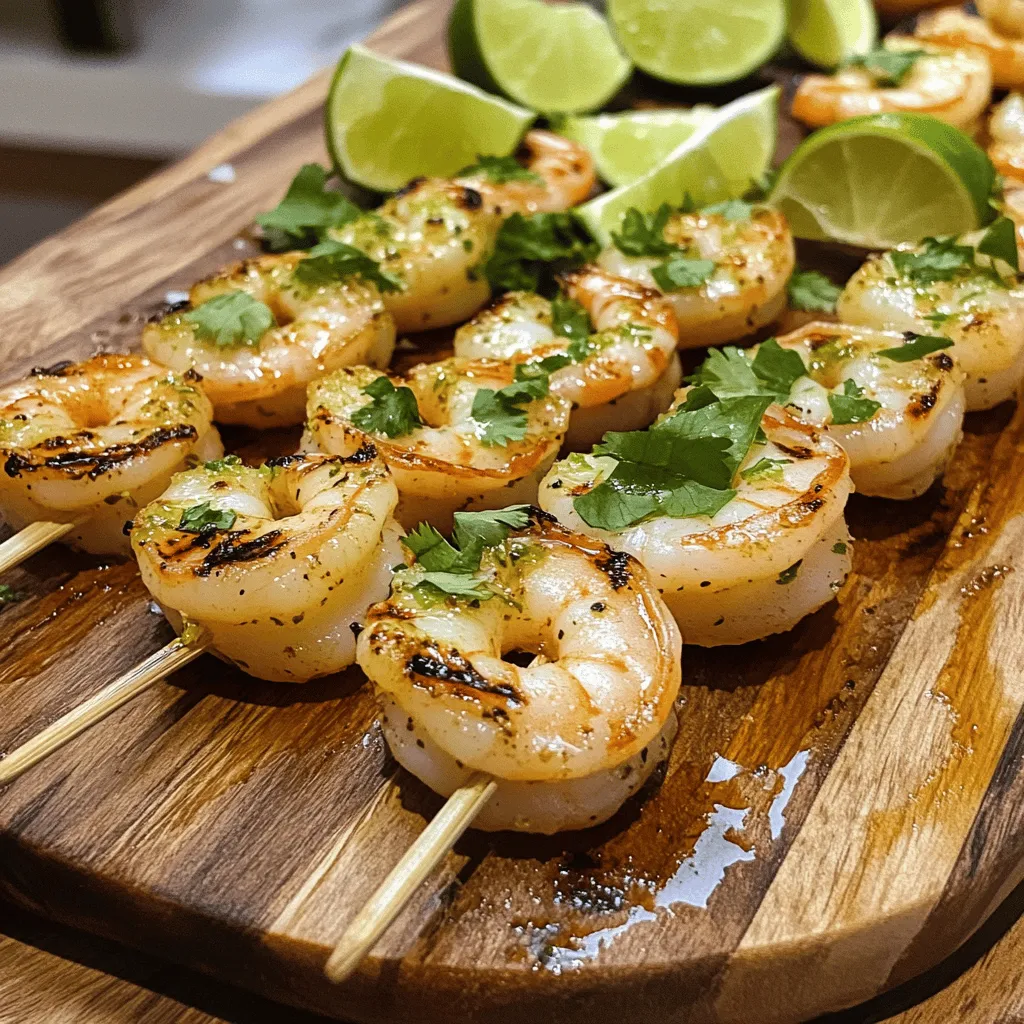
Zesty Lime Grilled Shrimp Flavorful and Easy Recipe
Get ready to fire up your grill with my Zesty Lime Grilled Shrimp recipe! This flavorful dish is packed with
Read more…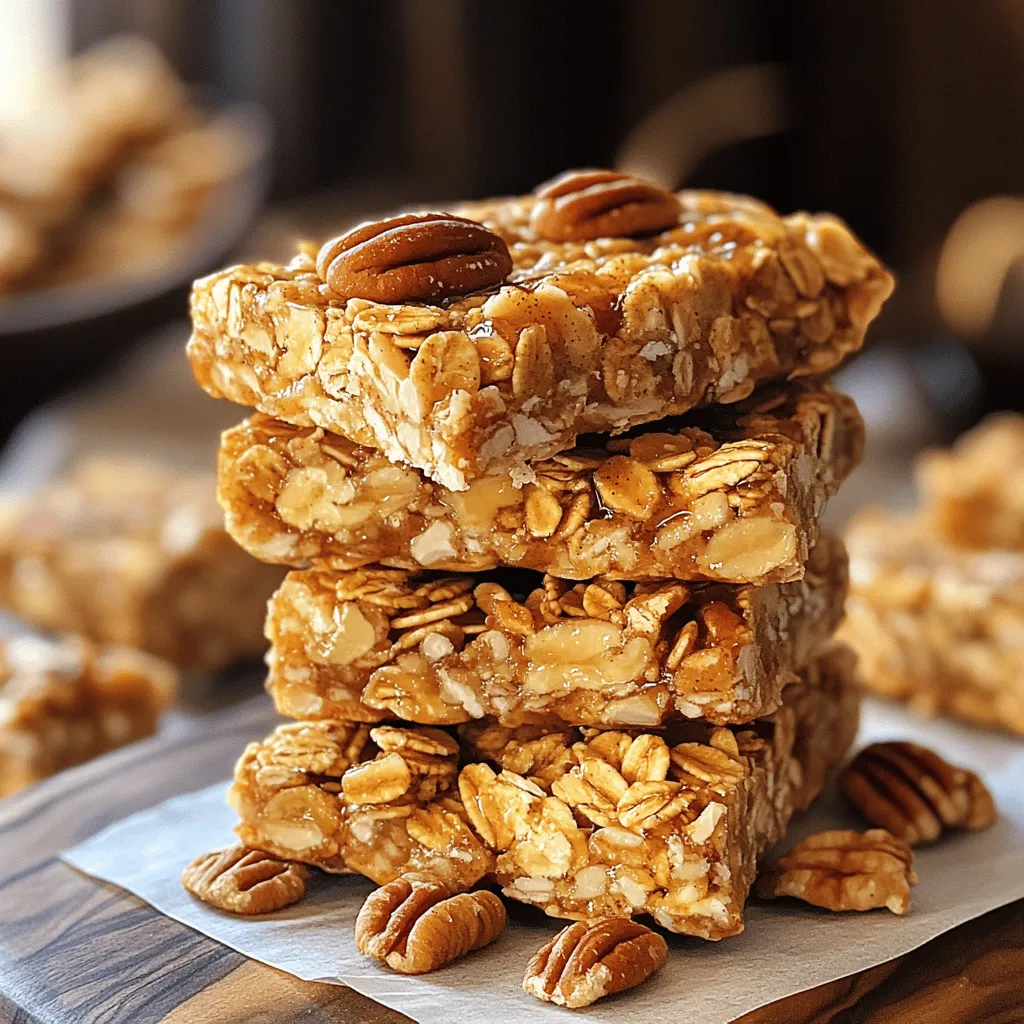
Maple Pecan Granola Bars Simple and Healthy Snack
Looking for a quick and healthy snack? You’ve come to the right place! In this post, I’ll show you how
Read more…browse recipes


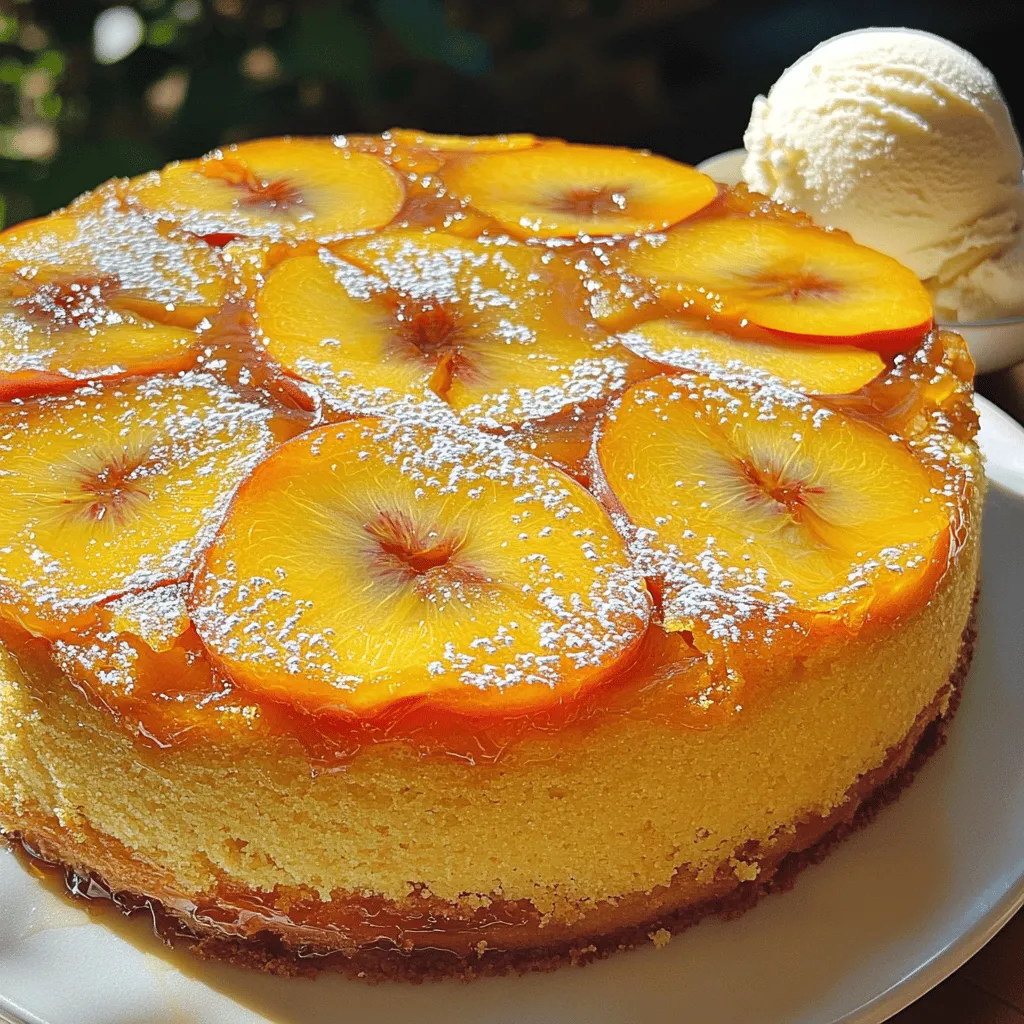
Peach Upside Down Cake Delightful and Easy Recipe
Are you ready to indulge in a delicious Peach Upside Down Cake? This easy recipe is a perfect blend of juicy peaches, sweet caramel,…
My Latest Desserts

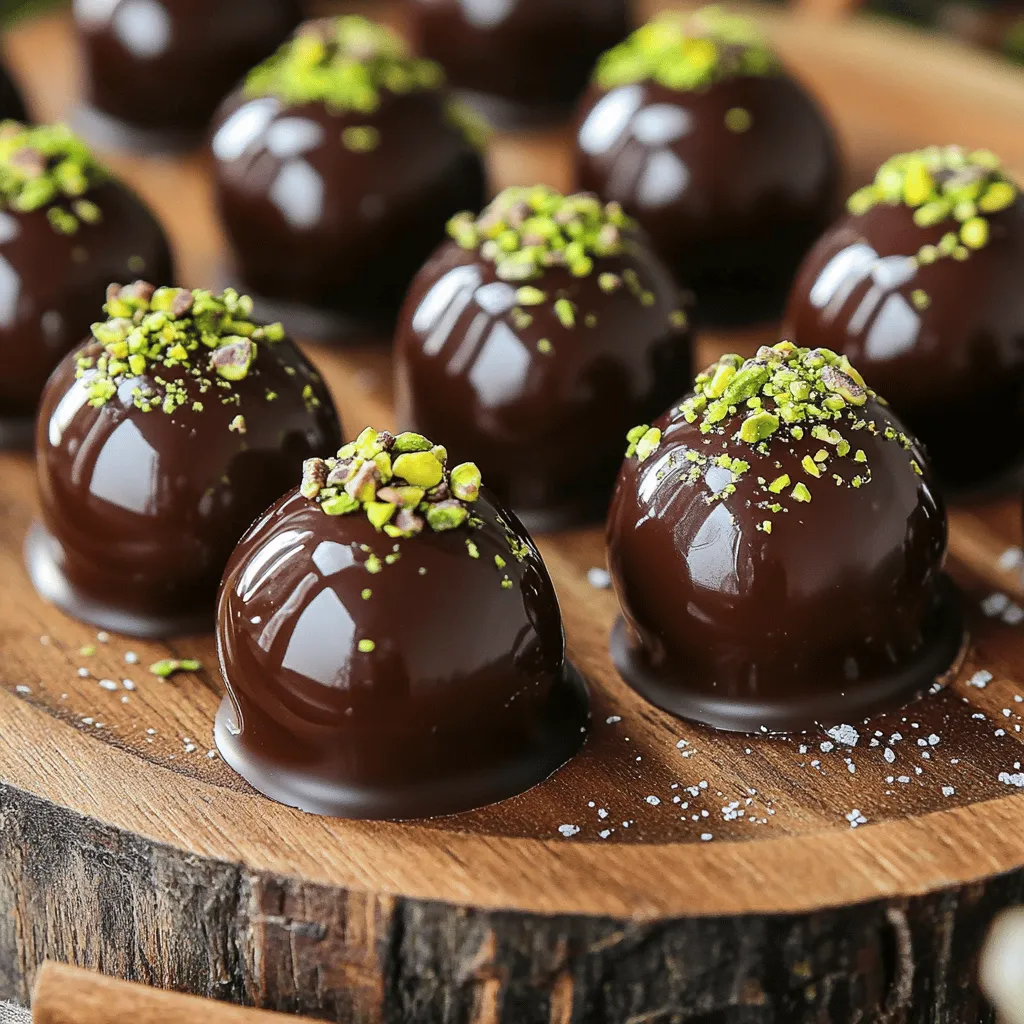
Chocolate Covered Cherries with Pistachio Dust Delight
Get ready to treat your taste buds with my “Chocolate Covered Cherries with Pistachio Dust Delight.” This sweet snack combines Read Full Recipe-
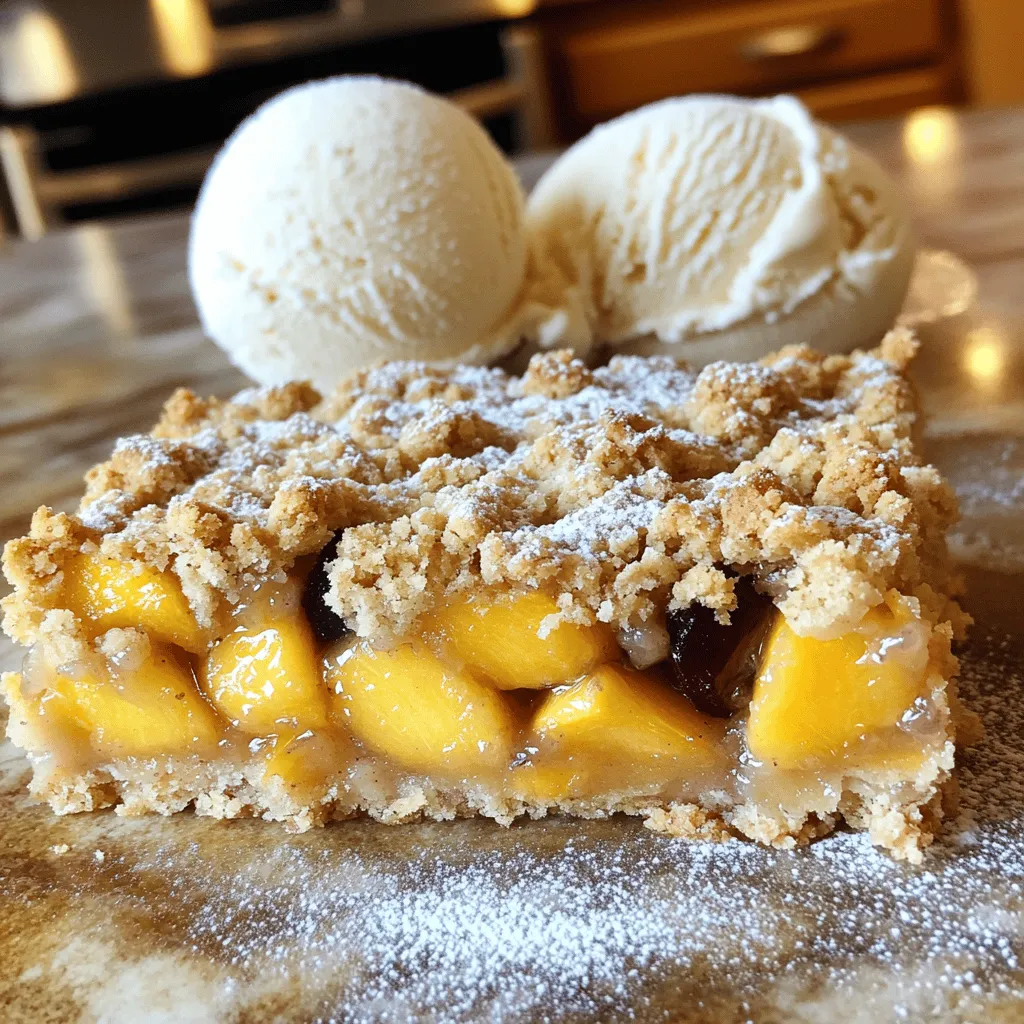
Peach Plum Crumble Bars Irresistible Sweet Treat
Are you ready for a dessert that combines the sweetness of peaches and plums? My Peach Plum Crumble Bars are Read Full Recipe -
Watercolor Buttercream Cupcakes Delightful Recipe Guide
Are you ready to bring some color to your baking? In this guide, I’ll show you how to make stunning Read Full Recipe -
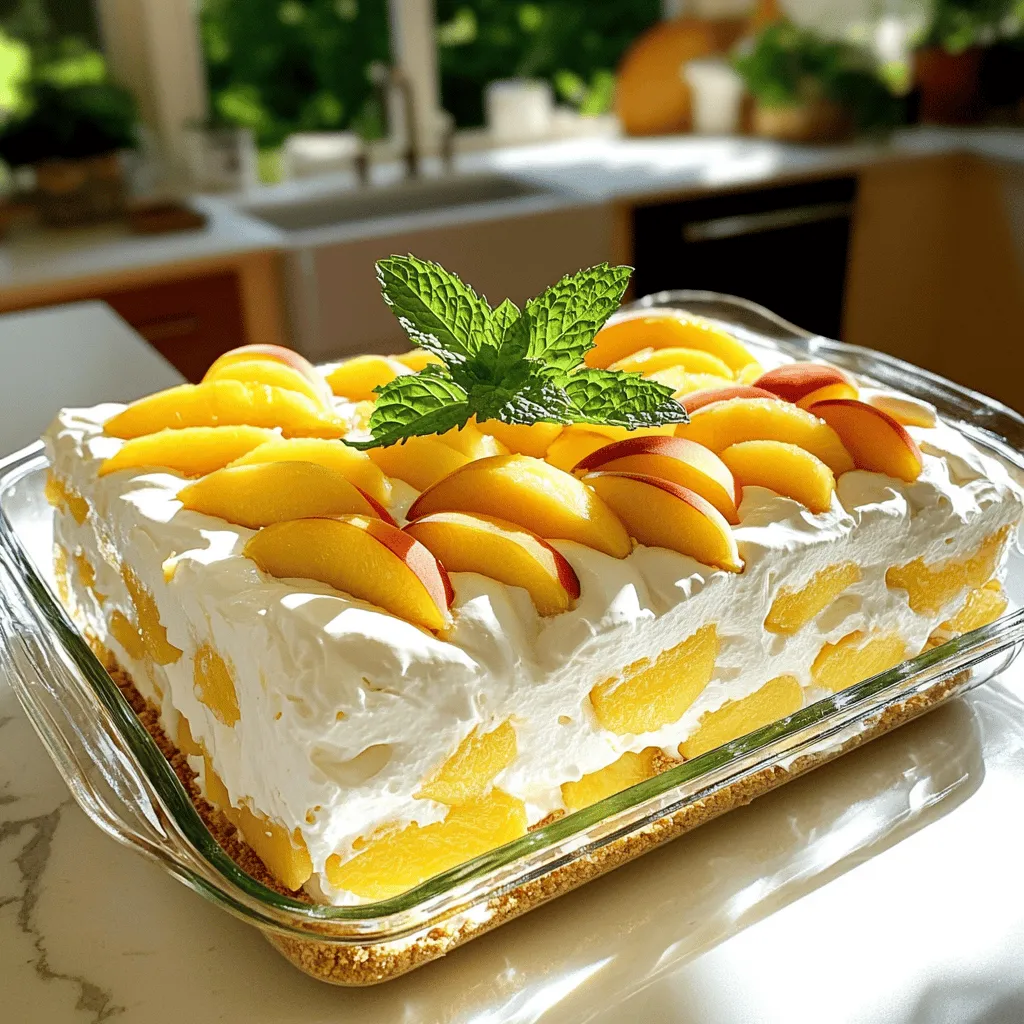
No-Bake Peach Icebox Cake Simple and Refreshing Treat
If you’re seeking a sweet, cool treat that’s simple to make, it’s time to try my No-Bake Peach Icebox Cake. Read Full Recipe -
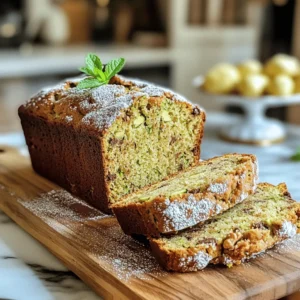
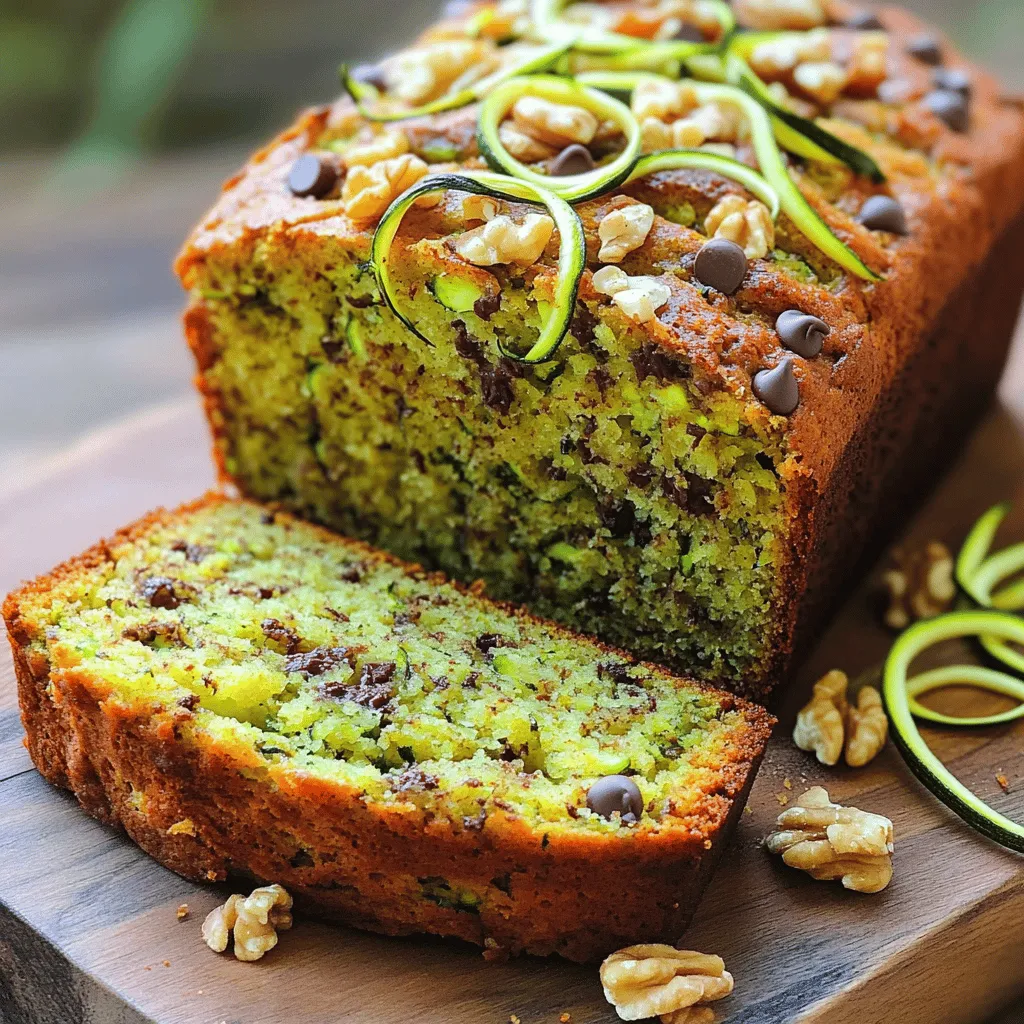
The Best Zucchini Bread Irresistible and Easy Recipe
Are you ready to bake the best zucchini bread that’s both irresistible and easy? This simple recipe combines fresh, grated Read Full Recipe -
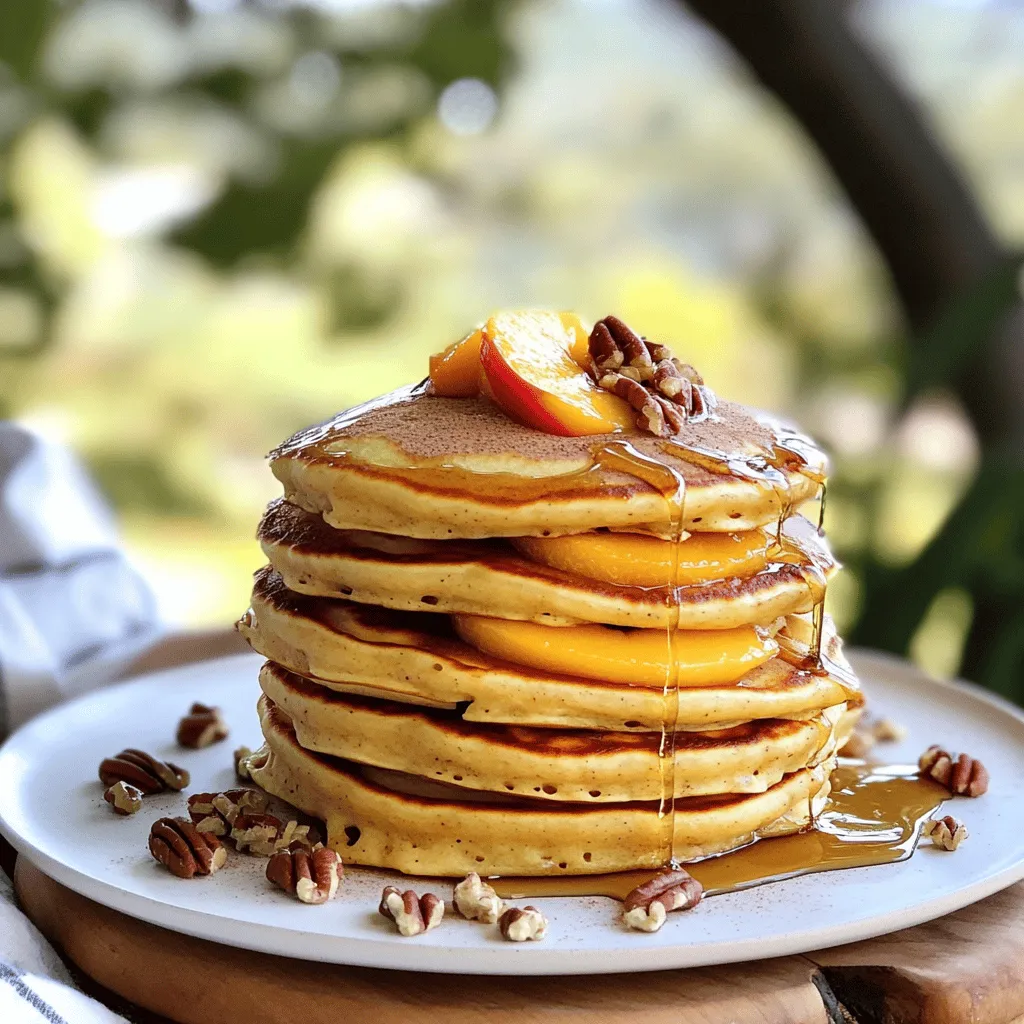
Peach Cobbler Pancakes Delicious and Simple Recipe
Are you ready to bring a burst of flavor to your breakfast table? Peach Cobbler Pancakes are the perfect blend Read Full Recipe -
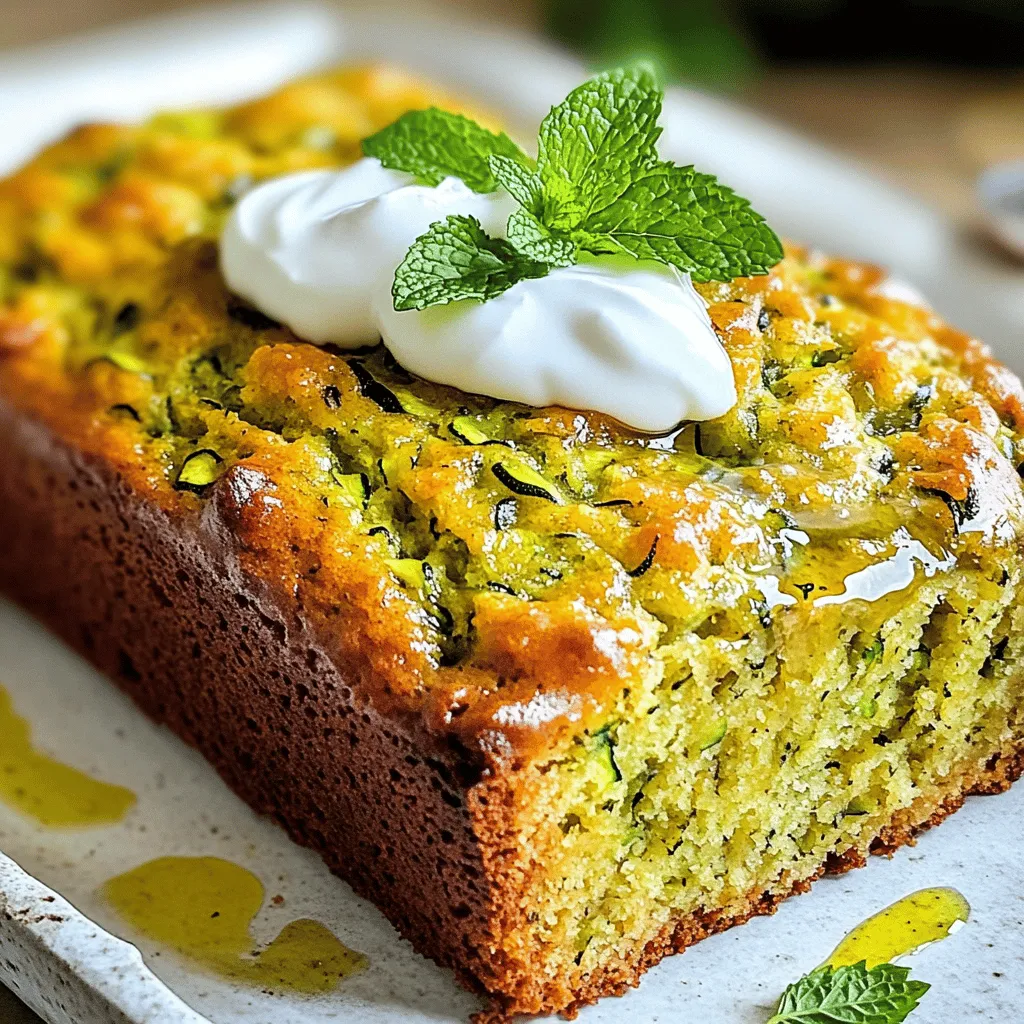
Olive Oil Zucchini Bread Moist and Flavorful Recipe
Welcome to your new favorite treat: Olive Oil Zucchini Bread! This recipe gives you a moist, flavorful loaf that’s perfect Read Full Recipe -
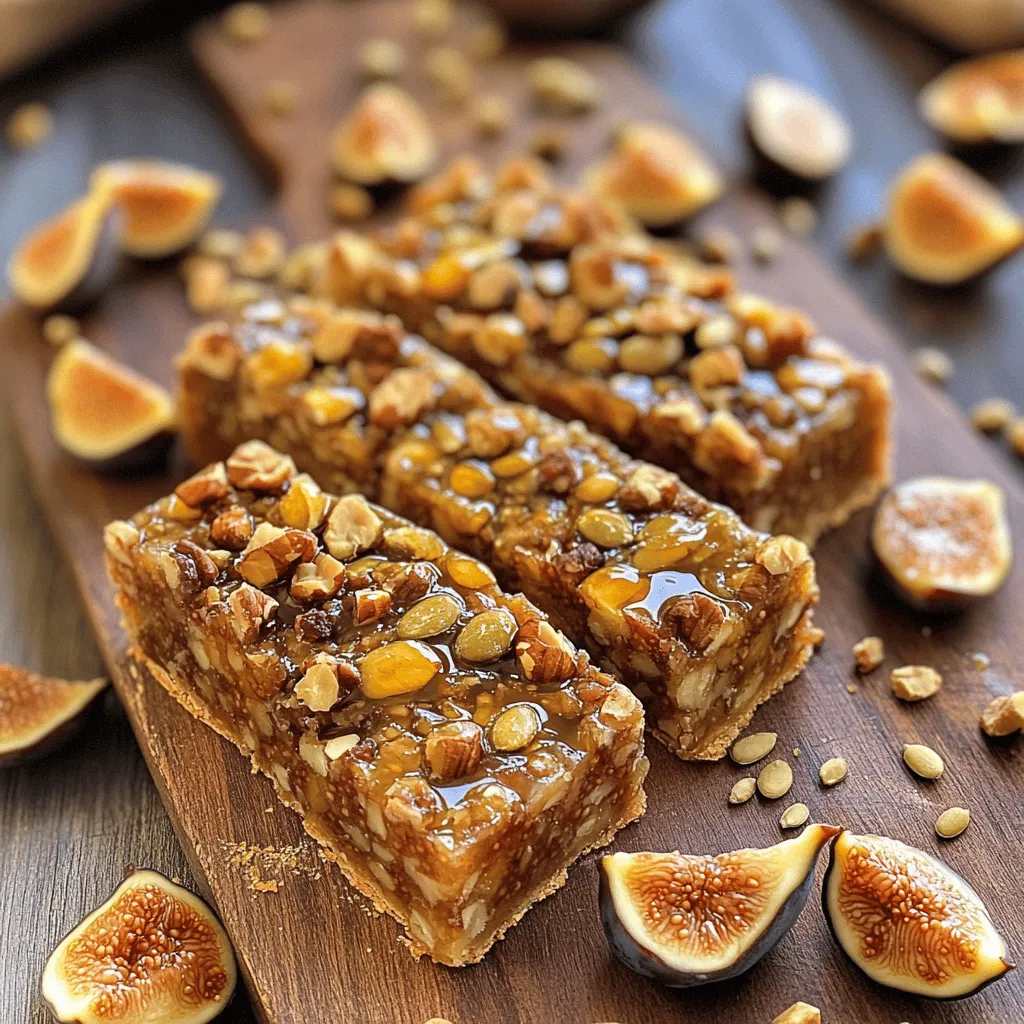
Fig and Walnut Bars Healthy and Flavorful Snack
If you’re searching for a tasty yet healthy snack, Fig and Walnut Bars are a perfect choice! Packed with nutritious Read Full Recipe -
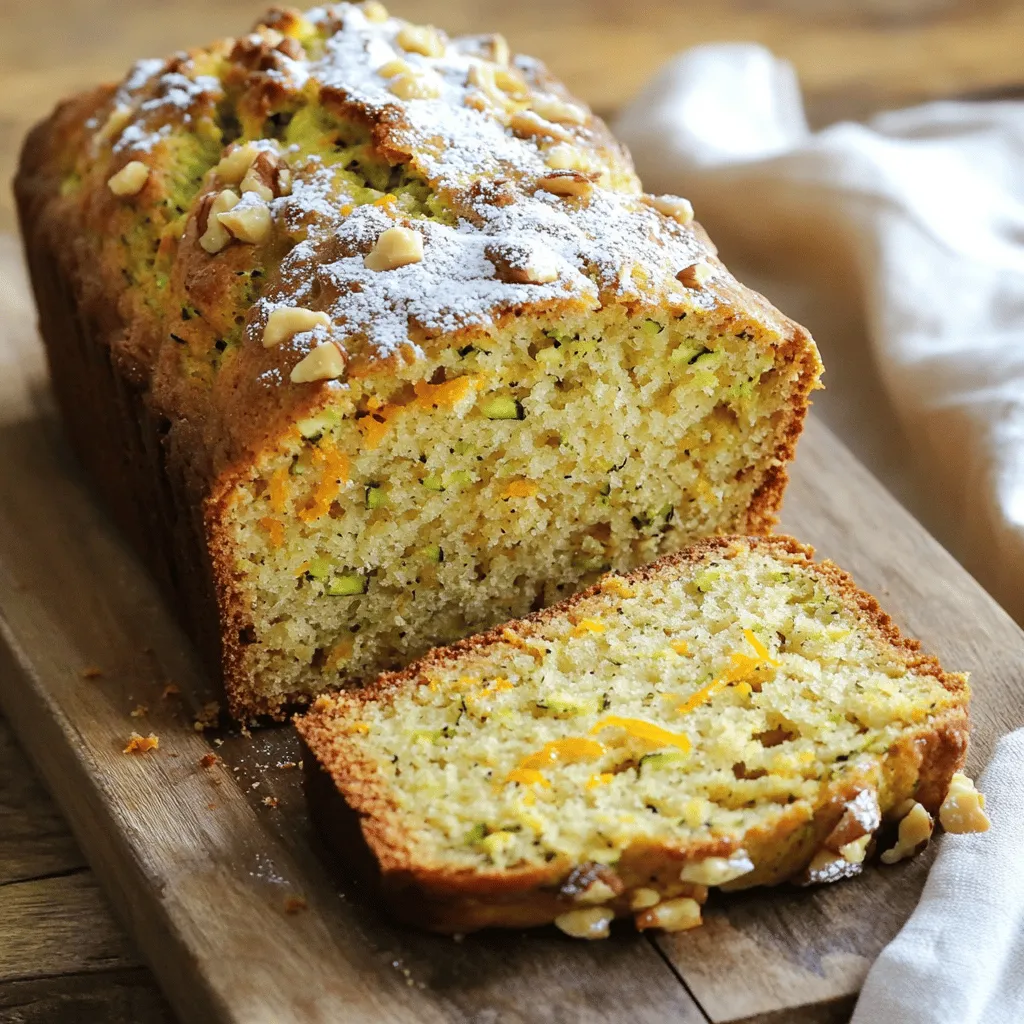
Zucchini Orange Bread Delightful and Easy to Bake
Are you ready to bake something truly delightful? This Zucchini Orange Bread combines fresh zucchini and bright orange zest for Read Full Recipe -
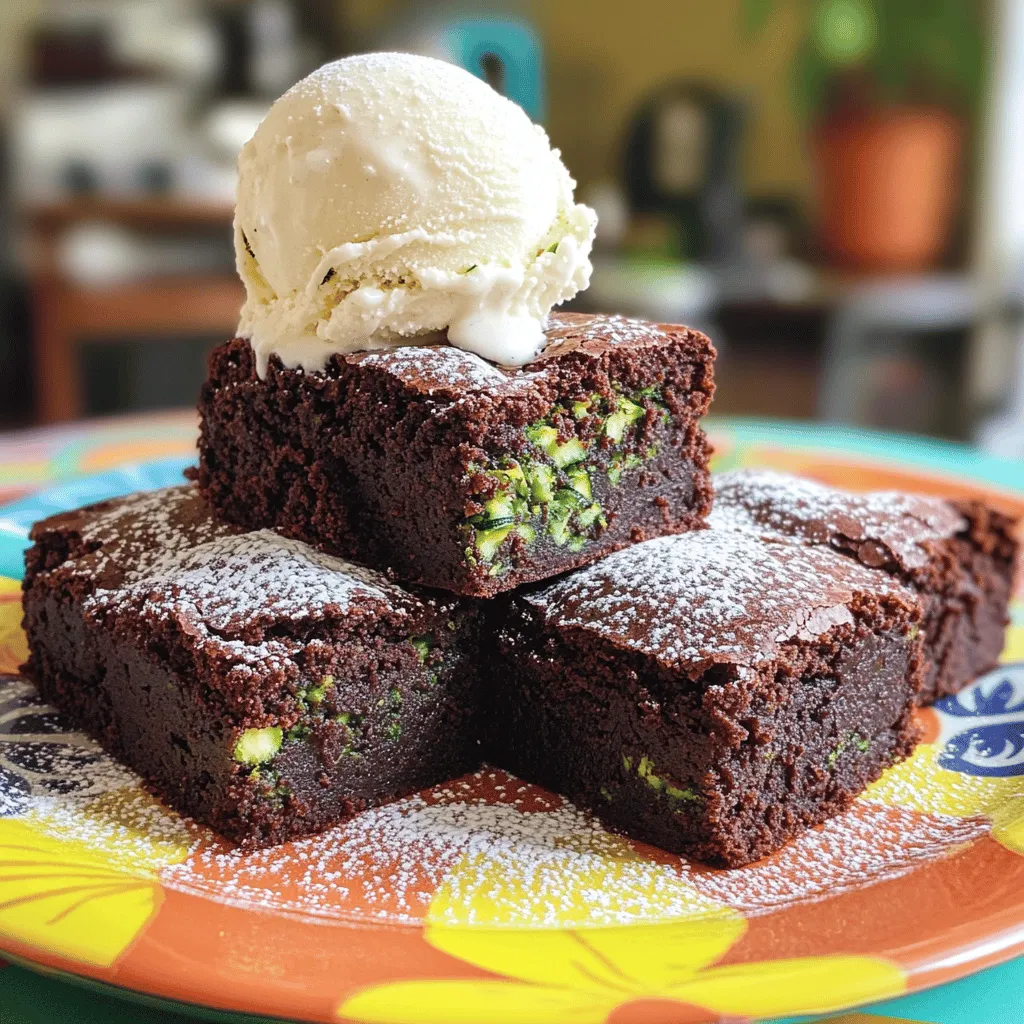
Zucchini Brownies for Kids Healthy and Tasty Delight
Are you looking for a new treat that kids will love while sneaking in some veggies? Look no further! These Read Full Recipe

My Latest Recipes

hey,
i’m !
I’m so happy you’re here!
Food is my passion, and perfecting each dish is my craft. I can’t wait for you to try them let’s dive into this delicious journey side by side.
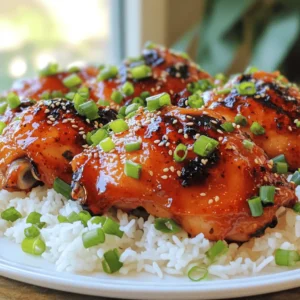
![- Chicken thighs (boneless and skinless) - All-purpose flour and cornstarch - Honey, soy sauce, and garlic for the sauce - Baking powder, garlic powder, and onion powder - Salt and pepper to taste - Freshly grated ginger and sesame oil - Green onions for garnish When making Crispy Honey Garlic Chicken, start with the main ingredients. Chicken thighs give great flavor and juiciness. You want them boneless and skinless for easy cooking. The flour and cornstarch mix gives the chicken a nice crunch. For the sauce, honey brings sweetness. Soy sauce adds a savory kick, and garlic gives it that yummy aroma. Now, let’s talk about seasonings. Baking powder helps the coating puff up. Garlic powder and onion powder add depth. Don’t forget salt and pepper! They make everything taste better. If you want to elevate your dish, consider optional garnishes. Freshly grated ginger adds warmth. A drizzle of sesame oil enhances the flavor too. Finally, chopped green onions make a bright and fresh garnish. You can find the full recipe for Crispy Honey Garlic Chicken in the main article. Start by cutting the chicken thighs into bite-sized pieces. This helps them cook evenly. Next, mix the dry ingredients for the coating. In a bowl, combine the flour, cornstarch, baking powder, garlic powder, onion powder, salt, and pepper. This blend gives the chicken a tasty crunch. Now, it's time to coat the chicken. Dredge each piece in the flour mixture. Make sure each piece is fully coated. Shake off any extra flour. Next, heat about one inch of oil in a large skillet over medium-high heat. Test the oil by dropping in a small piece of chicken; it should sizzle right away. Carefully add the coated chicken pieces in batches. Fry them for about 6-8 minutes, or until they turn golden brown and crispy. Turn them occasionally to ensure even cooking. While the chicken fries, let’s make the honey garlic sauce. In a small saucepan, combine honey, soy sauce, minced garlic, ginger, and sesame oil. Stir this mix over medium heat until it combines well. Bring it to a simmer and cook for 2-3 minutes until it thickens slightly. This sauce adds a sweet and savory flavor to your crispy chicken. For the full recipe, please check [Full Recipe]. To get crispy chicken, the oil temperature matters a lot. If the oil is too cool, the chicken will soak it up and become soggy. Aim for about 350°F (175°C). This ensures a nice crunch. You can check the heat by dropping a small piece of chicken in. It should sizzle right away. Also, coat your chicken evenly with flour and cornstarch. The blend creates a perfect crust. Mix them well before dredging the chicken to avoid clumps. Shake off any extra flour after coating. This keeps the chicken light and crispy. Want more flavor? You can add spices. Try paprika or cayenne for a kick. A touch of chili powder can also spice things up. Another great trick is to marinate the chicken before cooking. Use soy sauce, garlic, and a bit of ginger to infuse flavor. Let the chicken sit for at least 30 minutes. This will make every bite taste amazing. When serving, think about great side dishes. Rice or noodles pair well with this dish. You can also serve it with steamed veggies for a colorful plate. For presentation, place the chicken on a nice platter. Drizzle some honey garlic sauce over it. Add chopped green onions on top for a pop of color. It makes your meal look fancy and inviting. For the complete cooking process, check the Full Recipe. {{image_2}} You can switch up the protein in this dish easily. Chicken thighs work well, but you can also use chicken breasts. Just remember to cut them into bite-sized pieces. If you're looking for vegetarian options, try using tofu or tempeh. These will soak up the sauce and give you a satisfying bite. Want to mix things up? Try different sauces! Teriyaki or sweet and sour can add a fun twist to the dish. You can also add spices like chili powder or smoked paprika for extra flavor. This allows you to explore different cuisines without changing much in the recipe. If you want a healthier version, consider oven-baking. Preheat your oven to 400°F (200°C). Spread the coated chicken on a baking sheet and bake for about 20-25 minutes. Flip halfway through for even cooking. Air frying is another great option. Set your air fryer to 375°F (190°C) and cook the chicken for 12-15 minutes. This method requires little oil but still yields a crispy result. To keep your crispy honey garlic chicken fresh, store it in an airtight container. Place it in the fridge right after it cools down. This method helps keep it tasty. Your chicken will last for about 3 days in the fridge. To enjoy your leftovers, reheat them in the oven. Preheat your oven to 375°F (190°C). Place the chicken on a baking sheet and heat for about 10-15 minutes. This method helps keep the chicken crispy. Avoid using the microwave, as it can make the chicken soggy. Yes, you can freeze this dish! Allow the chicken to cool completely first. Place it in a freezer-safe bag or container. It will stay good for about 2-3 months in the freezer. When ready to eat, thaw in the fridge overnight. Then, reheat in the oven for the best results. Enjoy your crispy honey garlic chicken later with ease! For the full recipe, check out the detailed instructions provided earlier. To make Crispy Honey Garlic Chicken gluten-free, you can easily swap out the flour. Use gluten-free all-purpose flour or almond flour instead. For the sauce, check the soy sauce label. Opt for gluten-free soy sauce or tamari to keep it safe. These simple substitutions help you enjoy this dish without gluten. Yes, you can prepare the honey garlic sauce ahead of time. Simply mix the ingredients and store the sauce in an airtight container. Keep it in the fridge for up to a week. When ready to use, reheat it gently on the stove. Stir it well to get that great flavor back. Crispy Honey Garlic Chicken pairs well with many sides. Here are some tasty options: - Steamed rice - Fried rice - Roasted vegetables - Salad with fresh greens - Noodles with soy sauce Each side adds a unique touch to your meal and complements the chicken nicely. Enjoy experimenting with different pairings! Crispy Honey Garlic Chicken combines tasty ingredients and simple steps. Start with chicken thighs, coat them in a mix of flour and cornstarch, and fry until crispy. The honey garlic sauce adds amazing flavor, and you can tweak the recipe with spices or different proteins. Follow my tips to achieve the perfect texture and presentation. This dish is easy to store and reheat. Enjoy trying new variations, and make this recipe your own! Your kitchen adventures with this dish will surely impress everyone at your table.](https://mysavedrecipe.com/wp-content/uploads/2025/06/5c5a4d97-4df5-4d52-b795-3dd08ec1311a-300x300.webp)
No-Bake Orange Creamsicle Truffles Easy Dessert Recipe
Looking for a fun and simple dessert? Try my No-Bake Orange Creamsicle Truffles! These tasty bites combine creamy goodness and bright citrus flavor without…
![- 1 cup crushed graham crackers - 1 cup cream cheese, softened - 1/2 cup powdered sugar - Zest of 1 orange - 1/4 cup fresh orange juice - 1 teaspoon vanilla extract - 1 cup white chocolate chips, melted - Orange sprinkles (for garnish) To make No-Bake Orange Creamsicle Truffles, you'll need a few key ingredients. First, the crushed graham crackers give the truffles a nice base and texture. Cream cheese is next, adding creaminess that balances the sweetness. The powdered sugar sweetens the mix, while the zest and juice from the orange bring in that bright, citrus flavor. Vanilla extract adds depth, and melted white chocolate provides a sweet outer layer. Don't forget the orange sprinkles for a fun look! The combination of these ingredients creates a treat that is both tasty and visually appealing. These truffles are simple to prepare. Just gather all the ingredients and follow the steps in the [Full Recipe]. You will love how easy these are to make! - In a large bowl, combine: - 1 cup crushed graham crackers - 1 cup cream cheese, softened - 1/2 cup powdered sugar - Zest of 1 orange - 1/4 cup fresh orange juice - 1 teaspoon vanilla extract Mix these until you get a smooth dough. It should feel soft but not sticky. Use your hands to form small balls, about 1 inch in size. Place those on a lined baking sheet. This part is super fun, and you can even get kids involved! Next, chill the truffles in the fridge for about 30 minutes. This helps them firm up nicely. While they chill, melt 1 cup of white chocolate chips. Heat them in a microwave-safe bowl in 30-second bursts, stirring in between. You want it smooth and shiny. Once the truffles are stiff, take them out. Dip each one into the melted white chocolate, ensuring they are fully coated. Place them back on the lined sheet and sprinkle orange sprinkles on top while the chocolate is still warm. This adds a fun pop of color and zest! Put the tray back in the fridge for an extra 15 minutes. This time allows the chocolate to harden properly. When they are cold and set, they are ready to serve. Enjoy your No-Bake Orange Creamsicle Truffles as a delightful treat! For the full recipe, check out the details above. To make great No-Bake Orange Creamsicle Truffles, your mixture must have the right feel. If it is too sticky, add more crushed graham crackers, about a tablespoon at a time. Mix it until the dough holds together but feels smooth. Chilling is key! Place the truffles in the fridge for 30 minutes. This helps firm them up, making them easier to coat in chocolate. Achieving a smooth chocolate coat is easy if you follow a few steps. First, melt the white chocolate carefully. Use a microwave in 30-second bursts, stirring well in between. This way, you will avoid burning the chocolate. When you dip each truffle, ensure it is fully covered. If you see clumps of chocolate, gently tap the truffle against the side of the bowl to let excess chocolate drip off. Want to take your truffles to the next level? Consider adding a few drops of almond extract. It adds a nice depth to the flavor. You can also try mixing in some finely chopped nuts or shredded coconut for extra texture. These small tweaks can make your truffles even more special. For the full recipe, check out the instructions above! {{image_2}} You can switch up the flavor by using dark or milk chocolate instead of white. This change adds a rich taste. If you want to get creative, consider using fun toppings. Sprinkles, crushed nuts, or even shredded coconut can make your truffles pop. The choice is yours. Want to mix it up? Try using other citrus fruits like lemon or lime. These fruits add a zesty twist to your truffles. You can also add nuts or shredded coconut for a nice crunch. These additions can enhance the texture and flavor greatly. If you're looking for a healthier choice, you can swap cream cheese for Greek yogurt. This change reduces fat while keeping a creamy texture. Lower sugar options are also available. Consider using natural sweeteners like honey or maple syrup. These swaps keep your truffles delicious but a bit lighter. You can find the full recipe online for more ideas. To keep your No-Bake Orange Creamsicle Truffles fresh, store them in an airtight container. This helps keep the moisture in and stops them from drying out. Place a piece of parchment paper between layers if you stack them. It prevents sticking and keeps them nice and smooth. Always store them in the fridge. This helps them stay firm and tasty. You can freeze these truffles for later. To do this, place them in a single layer on a baking sheet and freeze until firm. Then, transfer them to an airtight container or a freezer bag. This way, they won't stick together. When you're ready to eat them, just take out the number you want. Let them thaw in the fridge for a few hours. This keeps the texture nice and prevents melting. In the fridge, these truffles last about a week. If you freeze them, they can last up to three months. Just remember to keep them in the right container! This helps you enjoy your No-Bake Orange Creamsicle Truffles at a later date. Yes, you can use low-fat cream cheese. However, this change may affect the texture and flavor. Low-fat cream cheese is softer and less creamy. Your truffles might not hold their shape as well. They could also lack some richness. If you choose this option, chill the mixture longer before forming the balls. Adjusting sweetness is easy. You can add or reduce powdered sugar in the recipe. If you want it sweeter, add more sugar, one tablespoon at a time. Taste the mixture after each addition. If it's too sweet for you, add a bit more cream cheese to balance it out. Yes, these truffles are great for making ahead. You can prepare them a day or two in advance. Just keep them stored in the fridge. When you are ready to serve, you can dip them in chocolate and add sprinkles. This makes them perfect for parties or gatherings. If you want to change the flavor, you have options. Try using lemon or lime juice for a tart twist. You can also use almond extract for a nutty flavor. Coconut gives a tropical vibe too. Feel free to be creative and mix flavors to find your favorite! These No-Bake Orange Creamsicle Truffles are easy to make and fun to enjoy. We covered all the ingredients needed, preparation steps, and tips to make them perfect. You can customize flavors and coatings to fit your taste. Plus, storing them is simple. Remember, with a few tweaks, these truffles can be a hit at any gathering. Don't hesitate to experiment and find your favorite version. Enjoy making and sharing these delightful treats!](https://mysavedrecipe.com/wp-content/uploads/2025/07/549036e3-4c4e-4b3e-ba9e-92372236a945.webp)
