Latest & Greatest
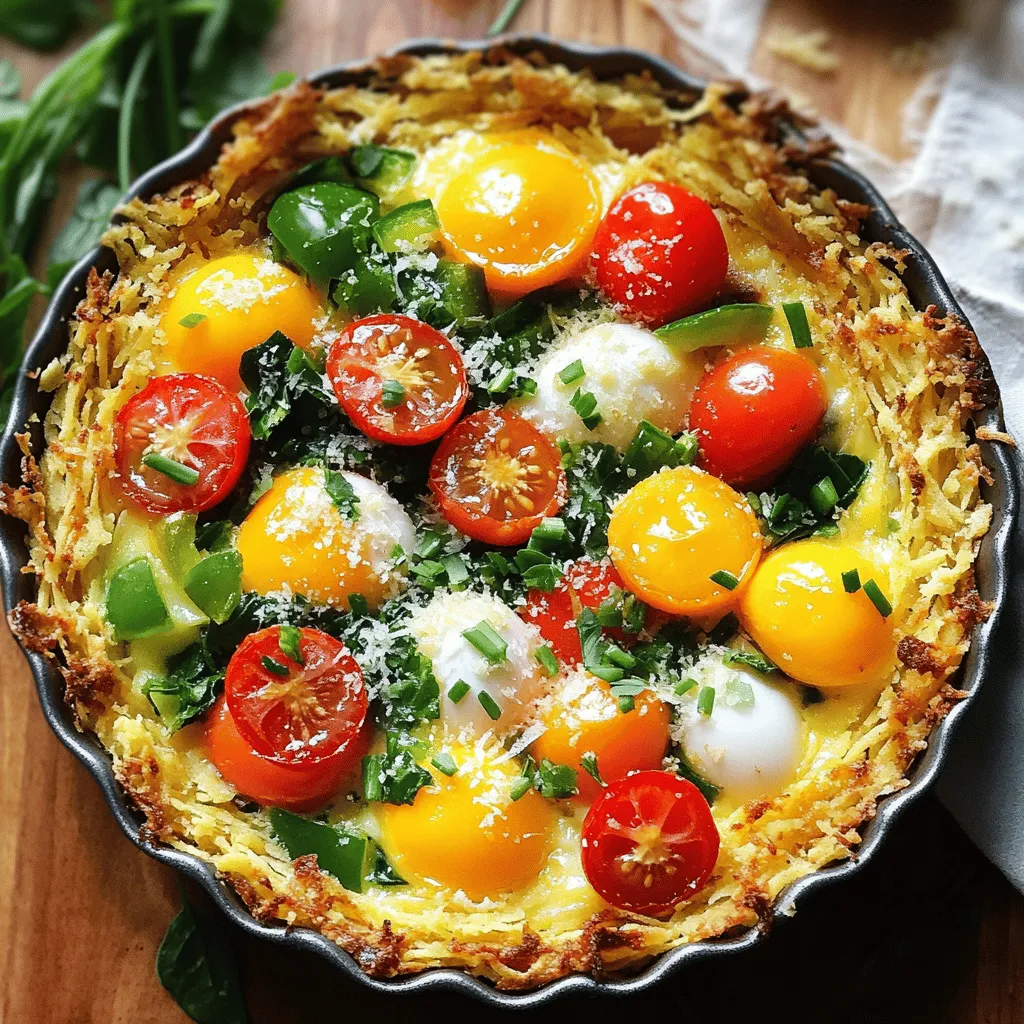
Spring Hash Brown Crust Quiche Flavorful and Easy Recipe
Spring brings fresh flavors, and this Spring Hash Brown Crust Quiche is a perfect way to enjoy them! With a
Read more…browse recipes


![- 4 medium yellow squashes, sliced into ¼-inch rounds - 1 tablespoon olive oil - 2 cloves garlic, minced - 1 teaspoon fresh thyme leaves (or ½ teaspoon dried thyme) - ½ teaspoon red pepper flakes (optional for spice) - Salt and pepper to taste - ¼ cup grated Parmesan cheese (optional for serving) - Fresh parsley for garnish To make easy sautéed yellow squash, gather these simple ingredients. The yellow squash adds bright color and a mild flavor. The garlic brings a nice aroma. Olive oil helps in cooking and adds richness. Fresh thyme gives a lovely herbal note. If you like a little heat, red pepper flakes work great. Salt and pepper enhance all the flavors. Finally, Parmesan cheese adds a nice touch if you choose to use it. Fresh parsley brightens the dish and makes it look pretty. This dish is quick to prepare and perfect for summer meals. You can find the full recipe in the article above. - First, slice the yellow squash into ¼-inch rounds. - Next, mince the garlic cloves finely. - Heat 1 tablespoon of olive oil in a large skillet over medium heat. - Add the minced garlic and sauté it for about 30 seconds. Keep an eye on it; you do not want it to brown. - Toss in the sliced yellow squash and stir well to coat it in the garlic oil. - Sprinkle in 1 teaspoon of fresh thyme leaves, ½ teaspoon of red pepper flakes if you like spice, and some salt and pepper to taste. - Sauté the squash for about 5 to 7 minutes, stirring occasionally. You want it tender but still a bit crisp. - When done, remove it from heat. If you like, sprinkle ¼ cup of grated Parmesan cheese on top while it’s hot. - Lastly, garnish with fresh parsley before serving. You can find the full recipe for this dish to enjoy the summer flavors. To choose fresh yellow squash, look for bright, smooth skin. The squash should feel firm and heavy for its size. Avoid any squash with soft spots or wrinkles. For sautéing, I recommend a large non-stick skillet. This type of skillet helps the squash cook evenly and prevents sticking. A well-seasoned cast-iron skillet also works well. You can try adding herbs like basil or oregano for a fresh twist. A splash of lemon juice at the end brightens the dish. Always be careful not to overcook the squash. You want it to be tender but still have a slight crunch. Yellow squash pairs well with grilled chicken or fish. You can also serve it alongside rice or quinoa for a healthy meal. For leftovers, store the squash in an airtight container in the fridge. It stays good for about three days. {{image_2}} You can swap out yellow squash for other veggies. Try zucchini, bell peppers, or even green beans. Each will give a different taste and texture. You can also play with seasonings. Instead of thyme, use basil or oregano. For more kick, try cumin or smoked paprika. These changes can make the dish new and exciting. You don’t have to sauté the squash. Oven-roasting brings out natural sweetness. Just toss the squash with oil and seasonings, and roast at 400°F for 20 minutes. You can also grill the squash. Grilling adds a smoky flavor that many love. Just slice it thick and place it on the grill for a few minutes on each side. If you need gluten-free options, this recipe is already safe. Just skip the Parmesan cheese if you want. For a vegan twist, replace the cheese with nutritional yeast. It gives a cheesy flavor without dairy. You can also add nuts or seeds for extra protein. These options keep the dish tasty and healthy for everyone. Explore the [Full Recipe] for more details on making this dish! To keep your sautéed yellow squash fresh, use airtight containers. Glass or plastic containers with tight lids work best. Make sure the squash cools down before sealing it. Store the squash in the fridge for up to three days. You can reheat leftover squash in a few ways. The best method is to use a skillet. Heat it on medium-low heat and add the squash. Stir often to warm it through. You can also microwave it in short bursts. Just be careful not to overheat it, as that can make the squash mushy. If you want to save cooked squash for later, freezing is a great option. First, let the squash cool completely. Then, place it in a freezer-safe bag or container. Remove as much air as you can. When you're ready to use it, thaw it overnight in the fridge. You can also microwave it on low power to defrost. This way, you can enjoy your sautéed yellow squash long after making the Full Recipe! I recommend sautéing yellow squash for about 5 to 7 minutes. This time allows the squash to become tender while keeping a little crispness. Stir occasionally for even cooking. Check for doneness by piercing with a fork. If it goes in easily, it’s ready! Yes, you can add other vegetables! Bell peppers, onions, and zucchini pair well with yellow squash. Just remember to cut them into similar sizes for even cooking. You can also try adding spinach or tomatoes for extra flavor and color. Yellow squash is low in calories and high in vitamins. It contains vitamin C, which boosts your immune system. It also has potassium, which is good for heart health. Plus, it has fiber to help with digestion. Eating yellow squash supports your overall health. To keep squash firm, do not overcook it. Start by heating your skillet well before adding the squash. Stir occasionally, but not too often. You want to give it time to brown slightly. This helps keep the texture right. Yes, this recipe is great for meal prep! You can make a big batch and store it in the fridge. It keeps well for about 3 to 4 days. Just reheat in a skillet or microwave before serving. This makes it easy to enjoy healthy meals all week long! For the full recipe, check out the previous section. In this blog post, I shared a simple way to cook yellow squash. We walked through key ingredients, preparation steps, and cooking methods. You learned tips for enhancing flavor and storing leftovers. I also covered easy variations to fit your diet. In conclusion, cooking yellow squash is fun and easy. With these details, you can enjoy a tasty dish packed with nutrients. Try different methods and flavors to make it your own. Enjoy your cooking journey!](https://mysavedrecipe.com/wp-content/uploads/2025/07/f6a4656a-7c03-49f3-8517-082d4d2e71be.webp)
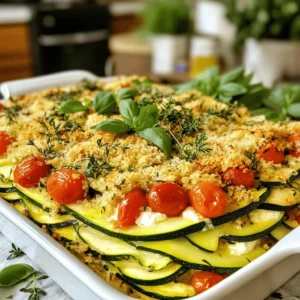
Easy Sauteed Yellow Squash Healthy and Simple Recipe
Looking for a quick and tasty way to enjoy yellow squash? I’ve got you covered! This Easy Sautéed Yellow Squash recipe is not only…
My Latest Desserts

Chocolate Covered Cherries with Pistachio Dust Delight
Get ready to treat your taste buds with my “Chocolate Covered Cherries with Pistachio Dust Delight.” This sweet snack combines Read Full Recipe-
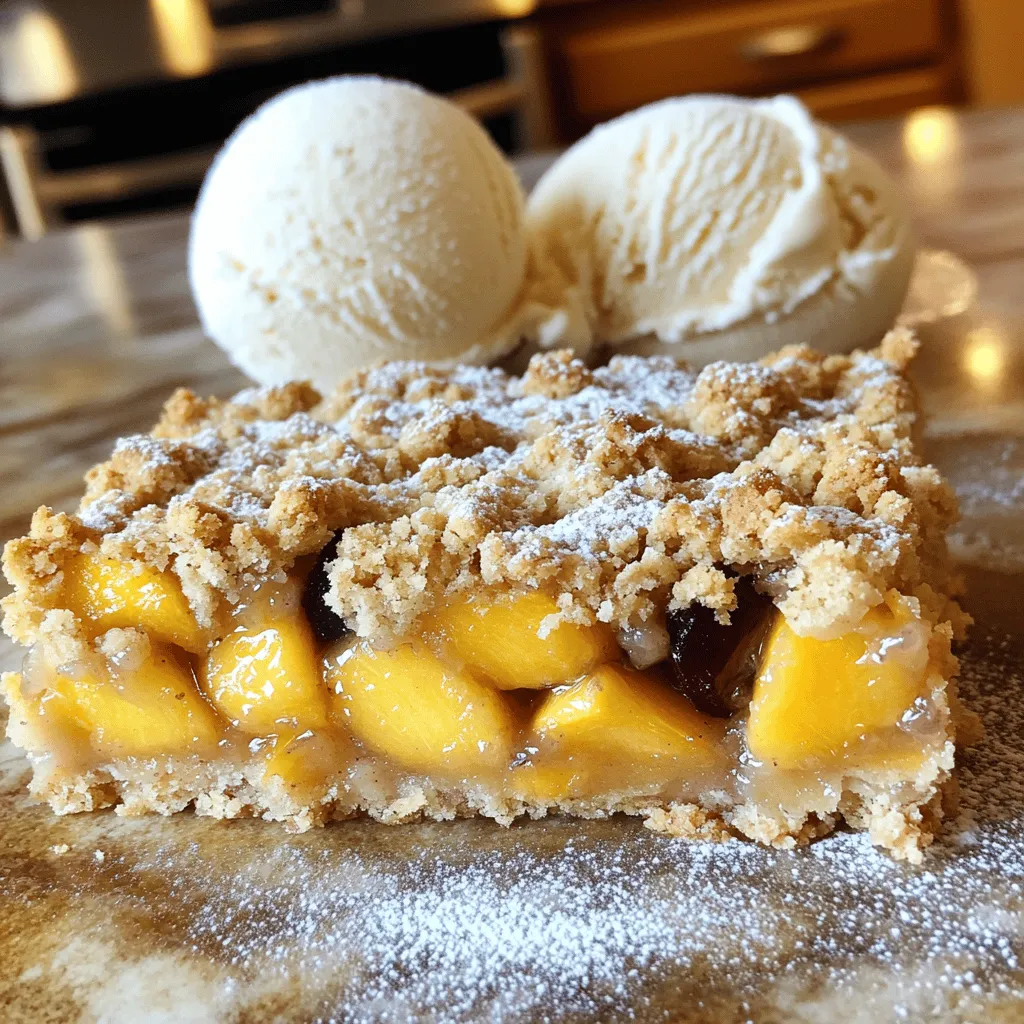
Peach Plum Crumble Bars Irresistible Sweet Treat
Are you ready for a dessert that combines the sweetness of peaches and plums? My Peach Plum Crumble Bars are Read Full Recipe -
Watercolor Buttercream Cupcakes Delightful Recipe Guide
Are you ready to bring some color to your baking? In this guide, I’ll show you how to make stunning Read Full Recipe -
No-Bake Peach Icebox Cake Simple and Refreshing Treat
If you’re seeking a sweet, cool treat that’s simple to make, it’s time to try my No-Bake Peach Icebox Cake. Read Full Recipe -
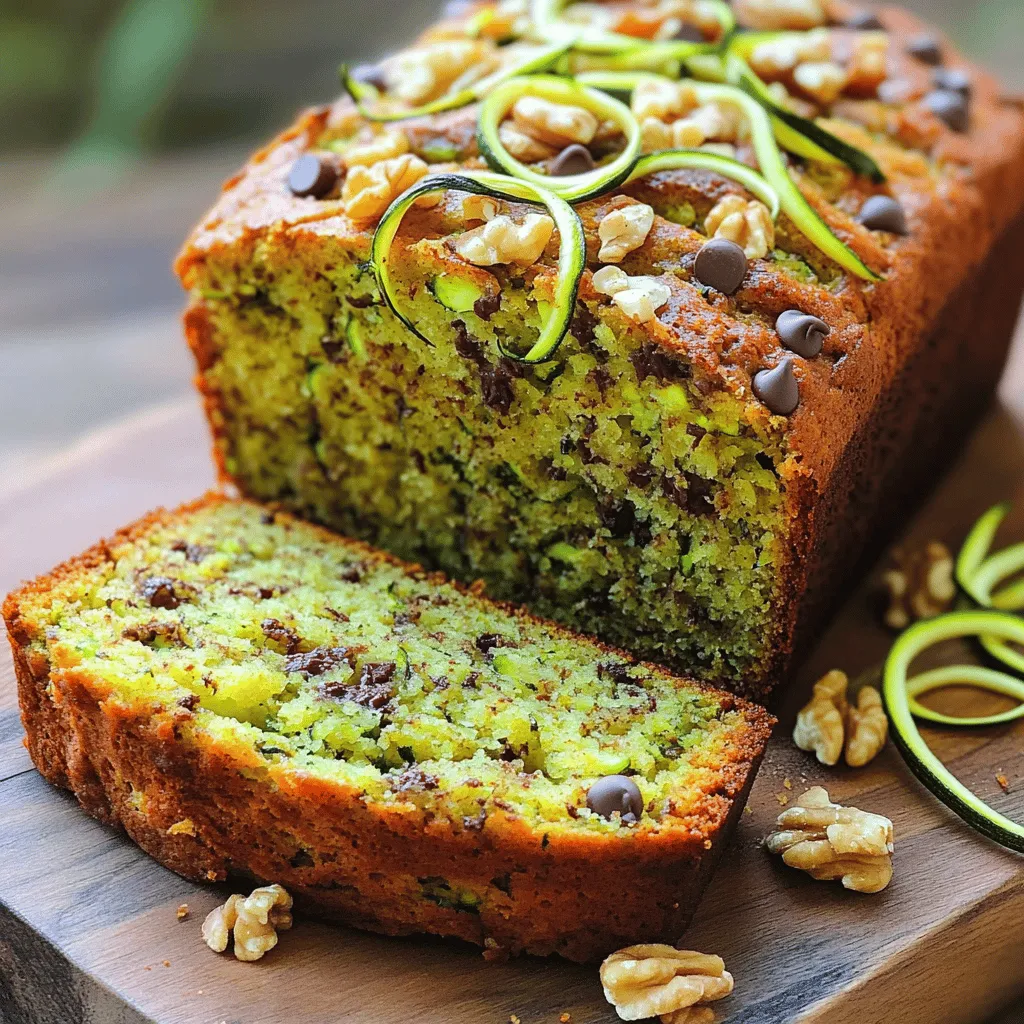
The Best Zucchini Bread Irresistible and Easy Recipe
Are you ready to bake the best zucchini bread that’s both irresistible and easy? This simple recipe combines fresh, grated Read Full Recipe -
Peach Cobbler Pancakes Delicious and Simple Recipe
Are you ready to bring a burst of flavor to your breakfast table? Peach Cobbler Pancakes are the perfect blend Read Full Recipe -
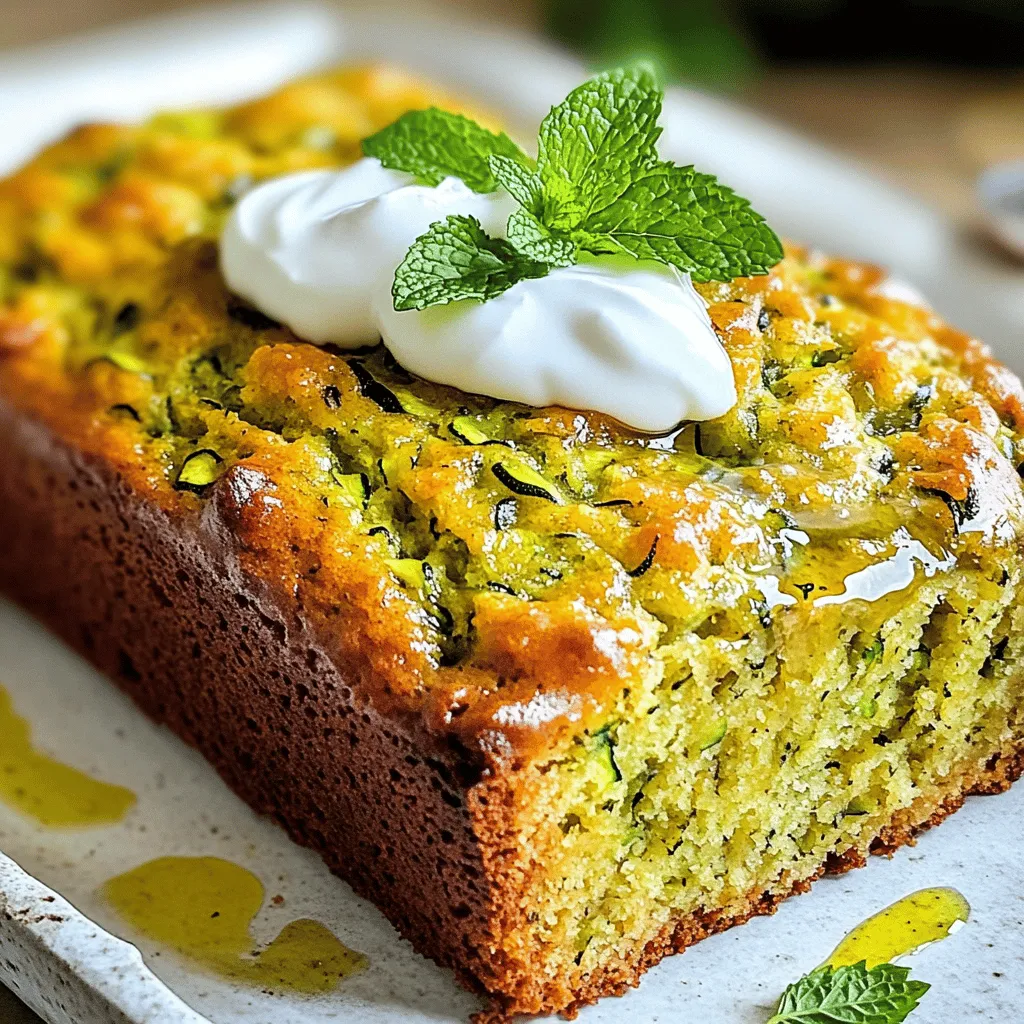
Olive Oil Zucchini Bread Moist and Flavorful Recipe
Welcome to your new favorite treat: Olive Oil Zucchini Bread! This recipe gives you a moist, flavorful loaf that’s perfect Read Full Recipe -
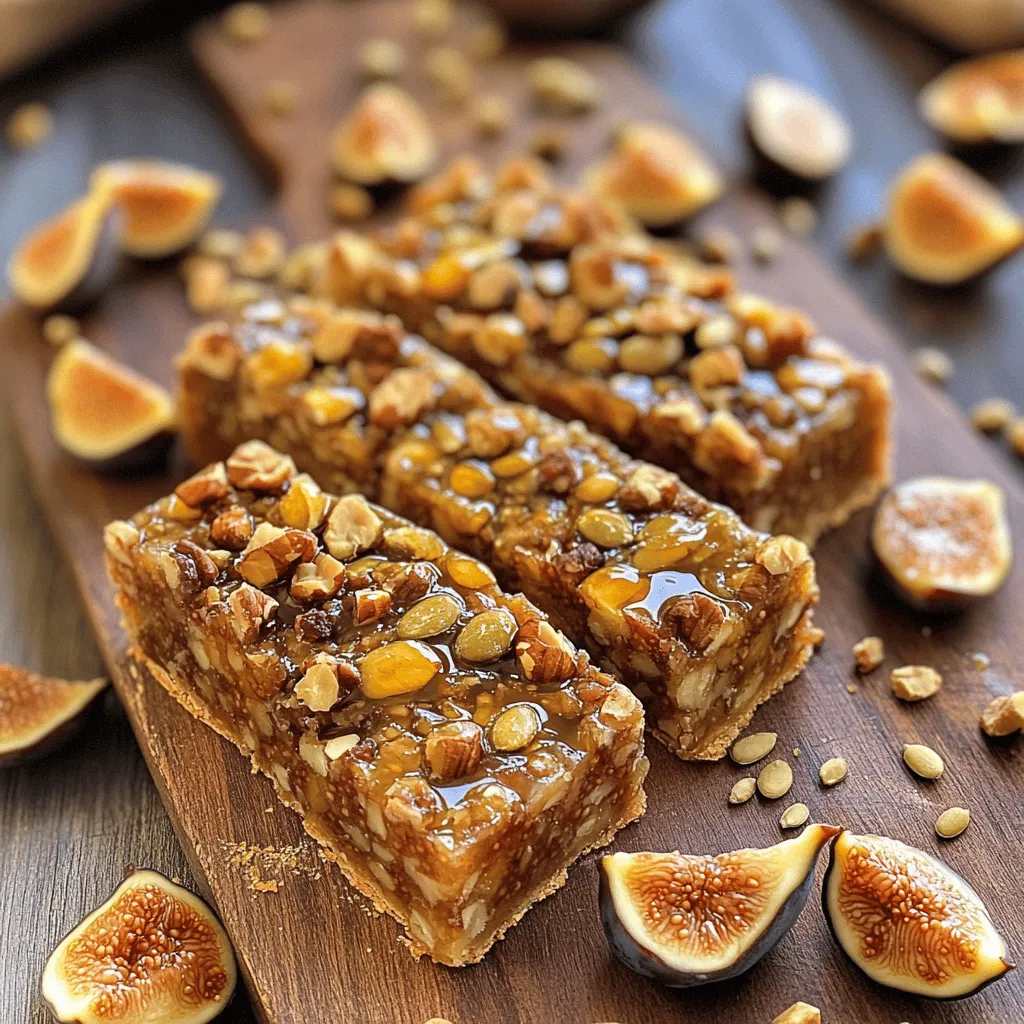
Fig and Walnut Bars Healthy and Flavorful Snack
If you’re searching for a tasty yet healthy snack, Fig and Walnut Bars are a perfect choice! Packed with nutritious Read Full Recipe -
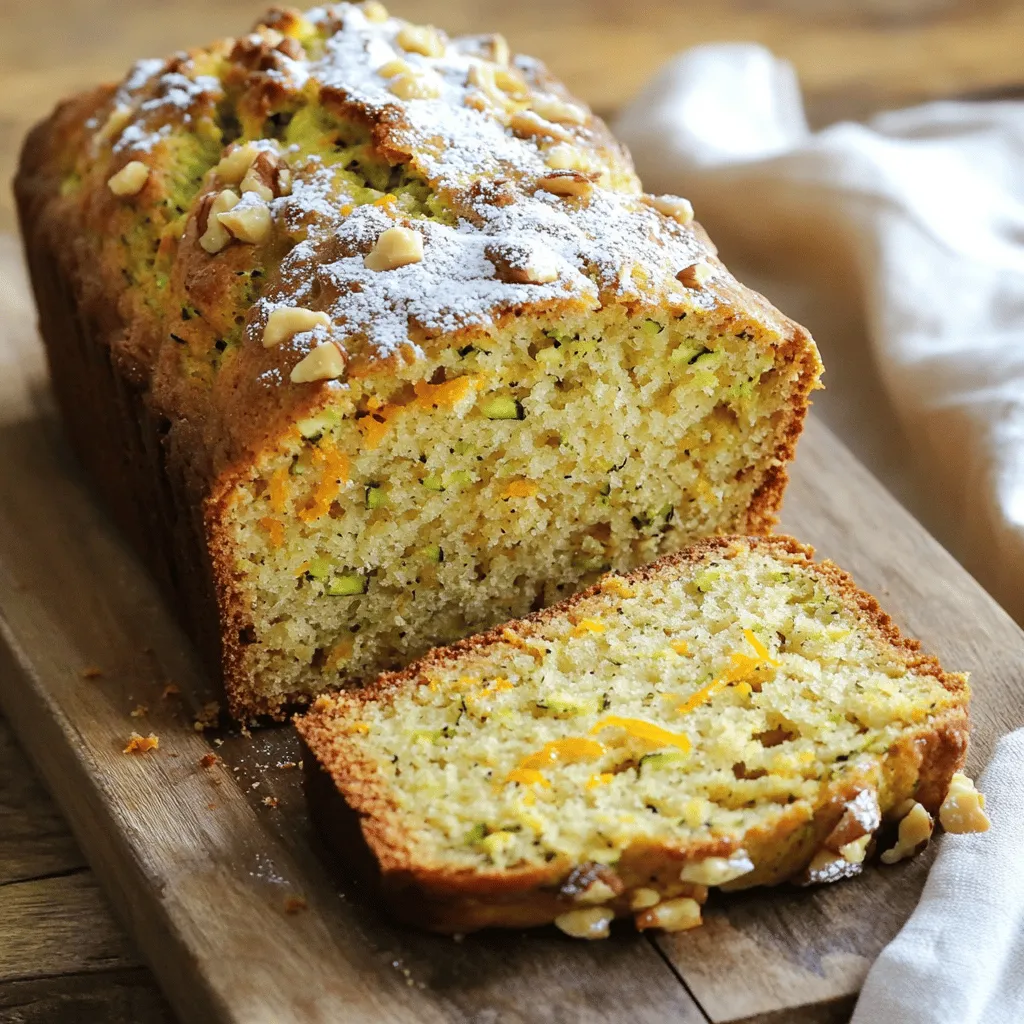
Zucchini Orange Bread Delightful and Easy to Bake
Are you ready to bake something truly delightful? This Zucchini Orange Bread combines fresh zucchini and bright orange zest for Read Full Recipe -
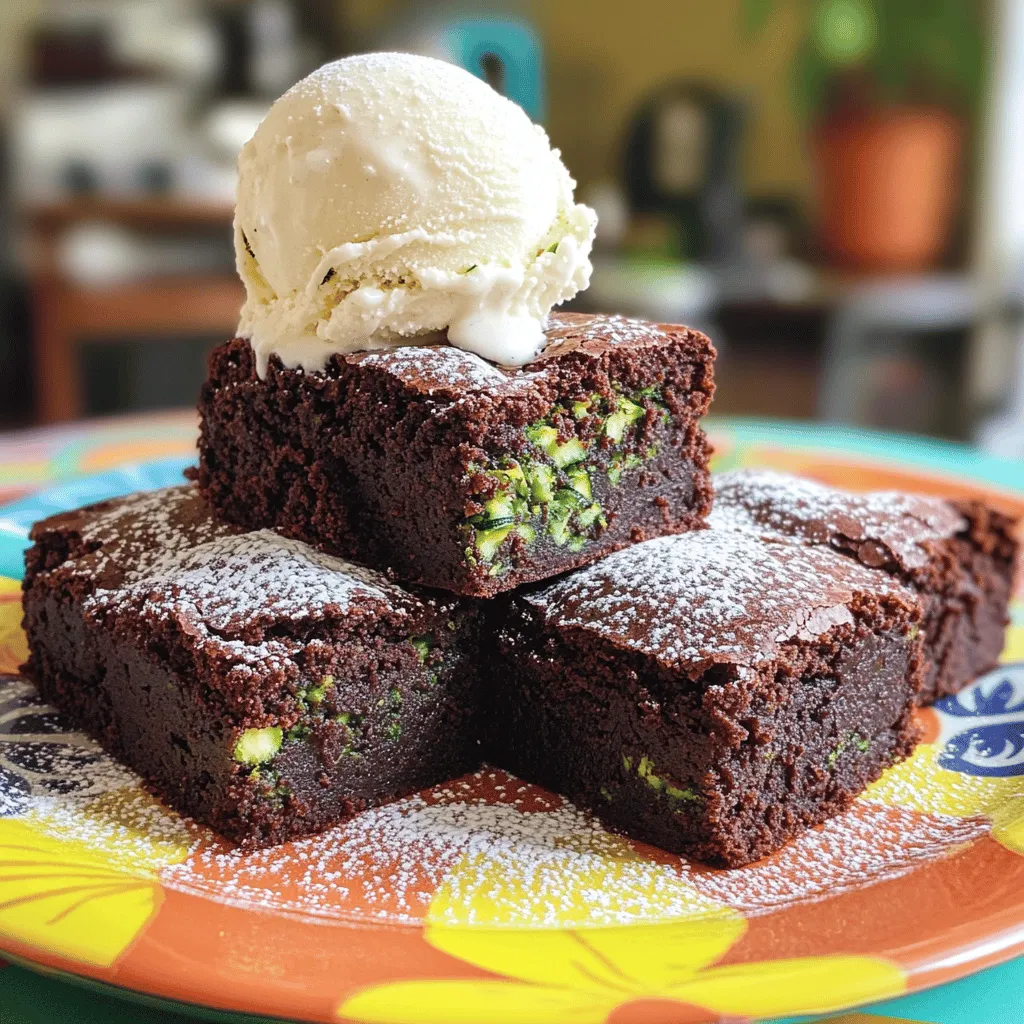
Zucchini Brownies for Kids Healthy and Tasty Delight
Are you looking for a new treat that kids will love while sneaking in some veggies? Look no further! These Read Full Recipe


My Latest Recipes

hey,
i’m !
I’m so happy you’re here!
Food is my passion, and perfecting each dish is my craft. I can’t wait for you to try them let’s dive into this delicious journey side by side.
. Start by cooking the jumbo pasta shells. Boil a large pot of salted water. Add the shells and cook until they are al dente, which takes about 8-10 minutes. Drain the pasta and let it cool for a bit. Make sure the shells do not stick together. You want them soft, but firm enough to hold the filling later. In a mixing bowl, combine the chopped spinach, ricotta cheese, half of the mozzarella cheese, and grated Parmesan. Add the beaten egg, garlic powder, onion powder, and salt and pepper. Mix everything well until it forms a creamy filling. The spinach adds a fresh taste, while the cheeses give a rich flavor. Now it's time to stuff those shells. Use a spoon or a piping bag to fill each shell with the spinach and cheese mixture. Be generous, but don’t overfill. Place the filled shells seam-side up in a baking dish. Spread 1 cup of marinara sauce on the bottom of the dish first. This keeps the shells from sticking and adds flavor. Cover the stuffed shells with aluminum foil and bake them in a preheated oven at 375°F (190°C) for 25 minutes. This helps them heat up evenly. After 25 minutes, remove the foil and sprinkle the rest of the mozzarella on top. Bake for an additional 10-15 minutes until the cheese is bubbly and golden. Let the shells cool for a few minutes before serving. Garnish with fresh basil leaves for a nice touch. For the complete recipe, check the Full Recipe section. To cook pasta shells perfectly, start by using a large pot. Fill it with water and add salt. The salt helps flavor the pasta. Bring the water to a rolling boil. Then, add the jumbo shells gently. Stir them to prevent sticking. Cook the shells for 8 to 10 minutes until they are al dente. This means they should be firm but not hard. After cooking, drain the shells and let them cool. This step helps with stuffing later. A great cheese blend makes your dish stand out. For Cheesy Spinach Stuffed Shells, mix ricotta, mozzarella, and Parmesan. Ricotta adds creaminess. Mozzarella gives that stretchy texture, while Parmesan adds a sharp taste. Use fresh cheeses for the best flavor. I recommend using shredded mozzarella and freshly grated Parmesan. Combine these cheeses with spinach and seasonings for a tasty filling. This mix ensures every bite is cheesy and delightful. When serving Cheesy Spinach Stuffed Shells, think about balance. A fresh salad pairs well with the rich flavors. A simple green salad with lemon vinaigrette is refreshing. If you want to add crunch, serve with garlic bread. The bread soaks up the marinara sauce beautifully. You can also top the shells with fresh basil for color and flavor. A glass of red wine complements the dish nicely. For a fun twist, try a light Italian white wine. For the full recipe, check out the details above. {{image_2}} You can change up the filling for your Cheesy Spinach Stuffed Shells. Try adding cooked ground meat, like beef or turkey, for a heartier meal. You could also use sautéed mushrooms for extra flavor. If you want a touch of spice, mix in some diced jalapeños. For a Mediterranean twist, add sun-dried tomatoes or feta cheese. These options let you customize your dish for any mood or taste. For a lighter take on this dish, swap out ricotta for cottage cheese. This change reduces calories but keeps the creamy texture. You can also use whole wheat pasta shells for added fiber. Instead of marinara sauce, try a homemade tomato sauce with fresh herbs. This option lowers sugar and adds more flavor. Using less cheese or a reduced-fat version can also help make this meal a bit healthier. You can easily make Cheesy Spinach Stuffed Shells vegan. Replace the ricotta with a blend of soaked cashews and nutritional yeast. This mix gives a creamy texture and cheesy flavor. Use vegan cheese for the mozzarella and Parmesan. For the egg, try a flaxseed meal or chia seed mixture to bind the filling. With these swaps, you can enjoy a delicious, plant-based version of this classic dish. For the full recipe, check the recipe section above. To store leftover stuffed shells, let them cool first. Place them in an airtight container. Make sure to layer them with parchment paper. This keeps them from sticking together. Keep the container in the fridge. They will stay fresh for up to three days. When you are ready to eat the leftovers, take them out of the fridge. Preheat your oven to 350°F (175°C). Place the stuffed shells in a baking dish. Pour some marinara sauce on top to keep them moist. Cover the dish with foil. Bake for about 20 minutes, or until heated through. For long-term storage, you can freeze the stuffed shells. After cooling, place them in a freezer-safe container. Use layers of parchment paper to separate them. Seal the container tightly. They will last for up to three months in the freezer. To cook, thaw them overnight in the fridge before reheating. Enjoy your cheesy spinach stuffed shells anytime! For the full recipe, check out the details above. Cheesy Spinach Stuffed Shells can last about 3 to 5 days in the fridge. Store them in an airtight container. This keeps the shells fresh and tasty. If they smell off or look dry, it's best to toss them. Yes, you can use different cheeses. Try using feta, gouda, or cheddar for a twist. Each cheese brings a new taste. Mixing cheeses can add depth and fun to your dish. Just keep the total amount the same for best results. Absolutely! You can prepare the shells and stuffing a day in advance. Just cover them tightly and store in the fridge. You can also bake them ahead of time. Reheat them in the oven for a warm meal. Many sides pair well with these stuffed shells. A fresh salad adds crunch and brightness. Garlic bread is great for soaking up sauce. Roasted vegetables offer a healthy, colorful plate. For a more filling meal, serve with a side of pasta or rice. For the full recipe, check out the details above! Cheesy spinach stuffed shells are simple and fun to make. We explored key ingredients, tools, and steps to create this dish. I shared tips to perfect your cooking and ideas for tasty variations. After mastering this recipe, you can store leftovers easily or serve them fresh. Remember, cooking should be enjoyable. Experiment with flavors and make it yours. Your kitchen can be a place of creativity and joy with these shells. Dive in and savor every bite!](https://mysavedrecipe.com/wp-content/uploads/2025/06/122d6c08-a9f4-4f56-8193-acd2d8f43b5e-300x300.webp)
![Creating balsamic glazed chicken is easy and rewarding. You need simple ingredients. The mix of tangy balsamic vinegar and sweet honey makes a great sauce. This dish is perfect for a weeknight meal or a dinner party. You can find the full recipe at the end. Here’s what you will need: - 4 boneless, skinless chicken breasts - 1/2 cup balsamic vinegar - 1/4 cup honey - 2 tablespoons olive oil - 4 cloves garlic, minced - 1 teaspoon Dijon mustard - 1/2 teaspoon salt - 1/4 teaspoon black pepper - 1 teaspoon dried Italian herbs (or fresh if available) - Fresh basil leaves for garnish - Optional: 1 cup cherry tomatoes, halved To make this dish even better, consider these options: - Add 1 cup of halved cherry tomatoes for a burst of flavor. - Use fresh herbs like rosemary or thyme for a different taste. - A splash of soy sauce can add depth to the marinade. - Try using maple syrup in place of honey for a unique twist. These extras can elevate your meal and impress your guests. Enjoy experimenting with flavors! Start by making the marinade. In a medium bowl, combine the balsamic vinegar, honey, olive oil, minced garlic, Dijon mustard, salt, pepper, and Italian herbs. Whisk it all together until smooth. This mix brings sweet and tangy flavors to the chicken. You can even taste it to see if you like it! Next, it's time to marinate the chicken. Place the chicken breasts in a resealable plastic bag or a shallow dish. Pour the marinade over the chicken. Make sure the chicken is fully covered. Seal the bag or cover the dish tightly. Let it sit in the fridge for at least 30 minutes. For even more flavor, you can marinate it for up to 4 hours. This step is key to juicy chicken! You can cook the chicken in two ways: on a grill or in a skillet. If using the grill, preheat it to medium heat. If you prefer a skillet, heat it over medium heat and add a drizzle of olive oil. Remove the chicken from the marinade and let the excess drip off. Cook the chicken for about 6-7 minutes on each side. It’s ready when the juices run clear and it reaches 165°F. If you want to make a glaze, simmer the leftover marinade in a saucepan while the chicken cooks. This adds extra flavor when you serve your dish. Enjoy your balsamic glazed chicken! To ensure your chicken cooks just right, use a meat thermometer. Aim for 165°F. This helps keep the chicken juicy. If you don’t have a thermometer, check the juices. They should run clear. Let the chicken rest for a few minutes after cooking. This makes it more tender and flavorful. You can make the marinade even better! Try adding fresh herbs like rosemary or thyme. You might also mix in some citrus juice for a zesty kick. Want a spicy twist? Add red pepper flakes to the mix. The balance of sweet and tangy from the balsamic vinegar and honey is key. Don’t skip this step; it brings out the best flavors. Balsamic glazed chicken pairs well with many sides. Roasted vegetables add color and nutrition. Try serving it with creamy mashed potatoes for comfort. A fresh salad with mixed greens and nuts also works great. For a lighter option, consider quinoa or rice pilaf. These sides complement the dish well and enhance your meal. Check the [Full Recipe] for more inspiration! {{image_2}} You can cook balsamic glazed chicken in different ways. The oven gives a nice roast. Preheat your oven to 400°F (200°C). Bake the chicken for 20-25 minutes. Check that it reaches 165°F (75°C) inside. The air fryer is quick and easy. Set it to 375°F (190°C) and cook for about 12-15 minutes. Both methods keep the chicken juicy and packed with flavor. You can change the balsamic vinegar if you like. Try apple cider vinegar for a fruity twist. Red wine vinegar adds a rich taste. For sweeteners, honey is great, but maple syrup works too. Brown sugar can add depth and more caramel notes. These swaps keep the dish interesting while keeping the flavor strong. Want to explore global flavors? Add soy sauce for an Asian flair. Mix in some ginger or sesame oil for a unique taste. You can even use curry powder for a spicy kick. For a Mediterranean vibe, add lemon juice and fresh herbs like oregano. These twists can turn a simple dish into something exciting and new. Check out the Full Recipe for more ideas! To store your balsamic glazed chicken, let it cool first. Place the chicken in an airtight container. Make sure to cover it well. Proper storage keeps the chicken fresh for up to four days in the fridge. If you have sauce left, store it in a separate container. This helps keep the chicken from getting too soggy. When you’re ready to eat leftovers, reheat gently. I recommend using the oven or stovetop. Preheat your oven to 350°F (175°C). Place the chicken in a baking dish and add a splash of water or broth. Cover it with foil to keep it moist. Heat for about 15-20 minutes. If using the stovetop, warm it in a skillet over low heat. Add a bit of the reserved sauce for flavor. If you want to save the chicken for later, freezing is a great option. Wrap each piece of chicken tightly in plastic wrap. Then, place them in a freezer bag. Squeeze out excess air to prevent freezer burn. You can freeze the chicken for up to three months. When ready to eat, thaw it overnight in the fridge before reheating. This way, you'll have a tasty meal ready whenever you want! To make Balsamic Glazed Chicken tender, you need to marinate it well. A good marinade helps break down the proteins in the chicken. Use a mix of balsamic vinegar, honey, olive oil, garlic, and herbs. Let the chicken sit in this mix for at least 30 minutes. For best results, marinate for 4 hours. This step makes the chicken juicy and full of flavor. Yes, you can use thighs instead of breasts. Chicken thighs have more fat, which keeps them moist. They also add a rich flavor to the dish. You can follow the same marinade and cooking times. Just make sure to check that the internal temperature reaches 165°F (75°C) for safety. You can serve Balsamic Glazed Chicken with many sides. Here are some ideas: - Roasted vegetables - Mashed potatoes - Quinoa or rice - A fresh salad - Garlic bread These sides complement the sweet and tangy glaze well. For a complete meal, pick a few of these options! This blog post shows you how to make delicious Balsamic Glazed Chicken. We covered the ingredients, cooking steps, and tips for great flavor. You can choose to grill or use a skillet for your chicken. I shared different ways to spice up the dish and how to store leftovers. Whether you want to try a new cooking method or explore international flavors, you have options. Enjoy this tasty meal with your favorite sides, and feel free to experiment. Make it your own and enjoy every bite!](https://mysavedrecipe.com/wp-content/uploads/2025/05/4837835d-a26b-40a5-838d-c2f4a501785d-300x300.webp)
![- 1 pound Brussels sprouts, trimmed and halved - 3 tablespoons olive oil - 4 cloves garlic, minced - Zest of 1 lemon - Juice of 1 lemon - 1 teaspoon honey - Salt and pepper to taste - 1/4 cup grated Parmesan cheese (optional) - Fresh parsley, chopped for garnish Using fresh Brussels sprouts is key. Look for tight, green heads. Avoid any yellow or wilted leaves. Fresh garlic adds a punch to the dish. Choose firm cloves. For the olive oil, opt for extra virgin. It enhances flavor and gives a nice finish. If you prefer, you can swap out honey for maple syrup to keep it vegan. For dairy-free options, skip the Parmesan cheese. You can add nutritional yeast instead for a cheesy flavor without dairy. If Brussels sprouts are not your favorite, try using cauliflower or green beans. Both will roast beautifully with the same flavor blend. First, gather your ingredients. You need 1 pound of Brussels sprouts, olive oil, garlic, lemon zest, lemon juice, honey, salt, and pepper. If you want, you can add Parmesan cheese and parsley. Trim and halve the Brussels sprouts. This helps them cook evenly. Mince the garlic. Zest and juice the lemon. Mixing these ingredients will give your dish a bright flavor. Now, preheat your oven to 400°F (200°C). In a large bowl, toss the Brussels sprouts with olive oil, minced garlic, lemon zest, lemon juice, honey, salt, and pepper. Make sure every piece gets coated. This makes them tasty! Spread the Brussels sprouts on a baking sheet. Keep them in a single layer. Roast them for about 20-25 minutes. Stir them halfway through cooking for even browning. If using cheese, add it in the last 5 minutes. This gives it a nice melt. When they look golden-brown, they are ready. Let the Brussels sprouts cool for a minute. Then, transfer them to a rustic bowl. For an extra touch, drizzle some lemon juice on top. You can also add lemon wedges on the side. Chopped parsley makes a nice garnish. This dish not only looks good but tastes amazing too. For the full recipe, check back for more details. To get that perfect crispness, start with dry Brussels sprouts. Moisture makes them soggy. After washing, pat them dry with a towel. Use enough olive oil for a nice coating. This helps to crisp them up in the oven. Spread the sprouts in a single layer on the baking sheet. This allows hot air to circulate around them. Stir halfway through roasting to ensure even browning. To boost flavor, add fresh herbs like thyme or rosemary. These herbs add a lovely aroma. You can also mix in red pepper flakes for a spicy kick. For a sweet twist, try adding a dash of balsamic vinegar. Another option is to sprinkle some nuts, like walnuts, right before serving. These little changes can make a big difference. One common mistake is overcrowding the baking sheet. This traps steam and makes the sprouts mushy. Make sure they have space to breathe. Another error is not using enough seasoning. Salt and pepper enhance all the flavors, so don’t skip them. Lastly, keep an eye on cooking time. Over-roasting can turn them too dark and bitter. Aim for golden-brown for the best taste. For the full recipe, check the [Full Recipe]. {{image_2}} You can make this dish even more colorful and tasty by adding other veggies. Carrots, bell peppers, and red onions work well. Just chop them into similar sizes as the Brussels sprouts. Mix them in with the sprouts. This gives you more flavors and textures. You can roast them all together. Enjoy the blend of tastes! While lemon and garlic shine in this recipe, you can get creative. Try adding herbs like thyme or rosemary for an earthy twist. A pinch of red pepper flakes adds some heat if you like spice. You can even use balsamic vinegar instead of lemon juice for a sweet tang. Each change can make a new favorite dish. If you want this dish to be vegan, skip the Parmesan cheese. You can use nutritional yeast instead for a cheesy flavor. It gives a nice umami taste without dairy. Also, ensure your honey is replaced with maple syrup or agave nectar for a fully vegan version. This way, everyone can enjoy the goodness of this dish. For the full recipe, check out the details above. To store leftover Lemon Garlic Roasted Brussels Sprouts, let them cool first. Place them in an airtight container. Keep the container in the fridge. They will stay fresh for about 3 to 5 days. If you want to keep them longer, consider freezing. When you are ready to eat leftovers, preheat your oven to 350°F (175°C). Spread the Brussels sprouts on a baking sheet. Heat them for about 10 to 15 minutes. This helps them get crispy again. You can also use a microwave, but they may lose some crunch. To freeze Brussels sprouts, start by letting them cool completely. Place them in a freezer-safe bag or container. Squeeze out as much air as you can. They can last up to 3 months in the freezer. When ready to cook, thaw them overnight in the fridge. Then, reheat in the oven for best results. For the full recipe, check out the Lemon Garlic Roasted Brussels Sprouts! I roast Brussels sprouts for about 20 to 25 minutes. This time works well at 400°F (200°C). The sprouts should be golden-brown and crispy. Stir them halfway through roasting. This helps them cook evenly. Yes, you can prepare this dish ahead of time. You can wash and cut the Brussels sprouts a day before. Mix them with the garlic and lemon juice. Store them in the fridge in a covered bowl. Just roast them when you are ready to eat. Lemon Garlic Roasted Brussels Sprouts go well with many dishes. They pair nicely with roasted chicken or fish. Try them with a grain salad for a fresh touch. You can also serve them with pasta or risotto. They add a nice crunch and flavor to any meal. For the full recipe, check out the Lemon Garlic Roasted Brussels Sprouts section. This blog post covered everything you need to know about making Lemon Garlic Roasted Brussels Sprouts. We discussed ingredients, cooking steps, and tips for perfect results. You learned how to enhance flavors and avoid common mistakes. Exploring variations helps you customize your dish for different diets. Finally, we shared storage and reheating tips to enjoy leftovers. Use these insights for a delicious meal every time. Cooking should be fun, so get creative and enjoy every bite!](https://mysavedrecipe.com/wp-content/uploads/2025/04/3e1832b4-3b69-47a3-9731-020d5482969c-300x300.webp)
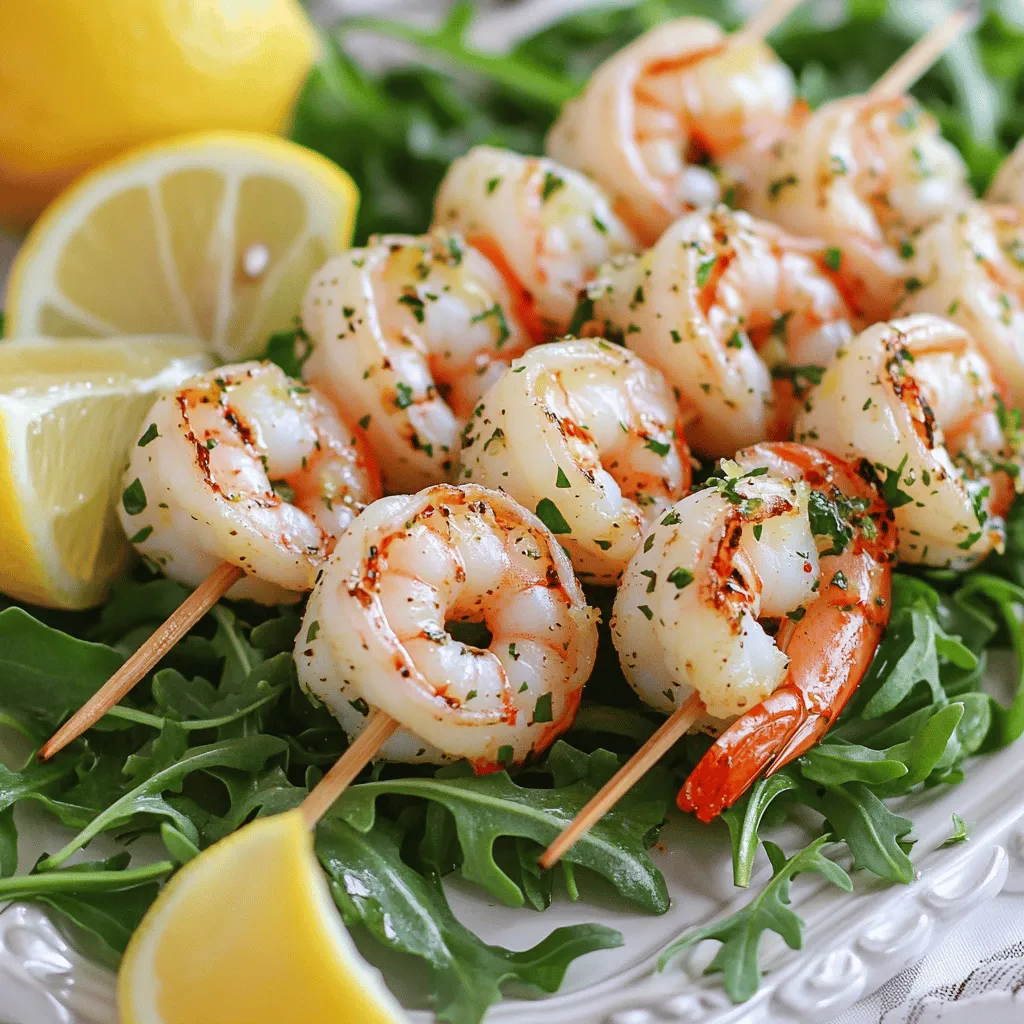
Garlic Herb Grilled Shrimp Flavorful and Easy Recipe
Are you craving a quick, tasty meal? Garlic Herb Grilled Shrimp is your answer! This dish bursts with flavor and can be ready in…