


Latest & Greatest
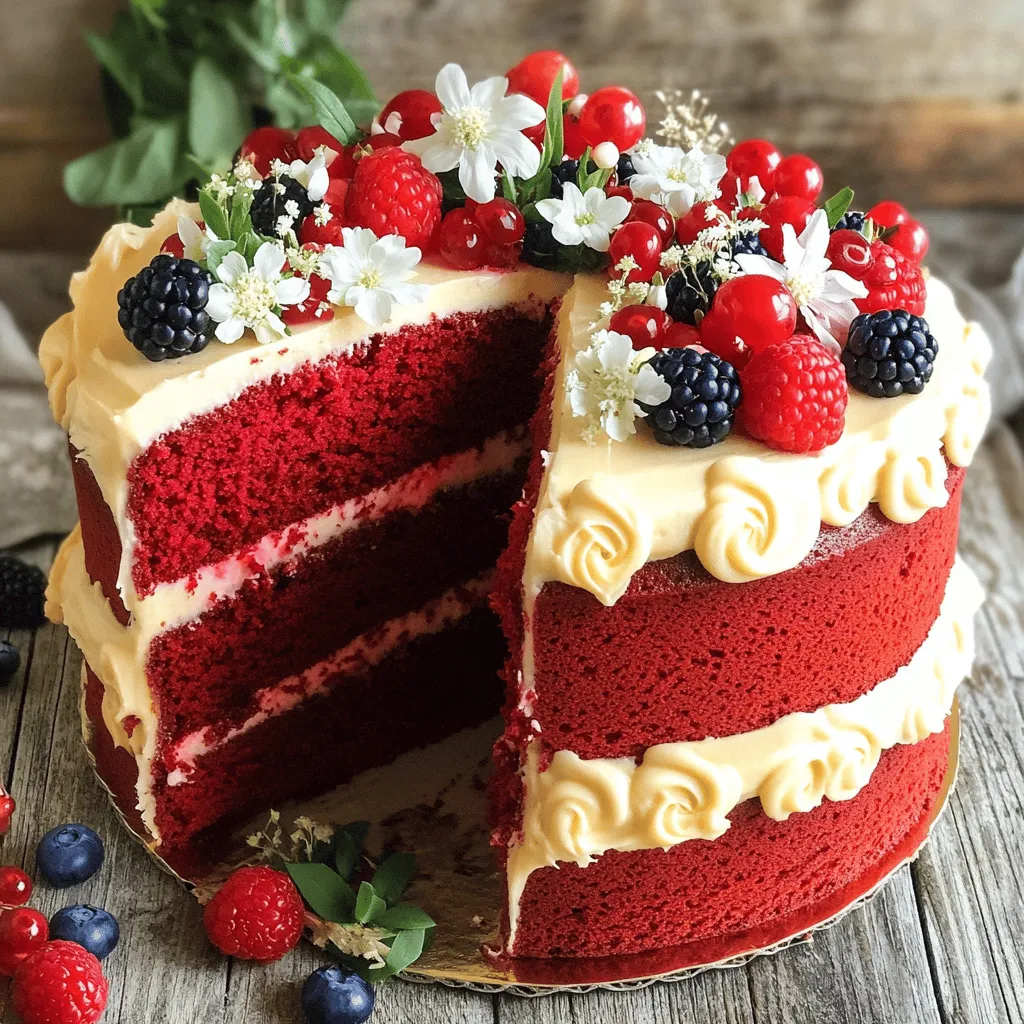
Red Velvet Cake Irresistible Treat for Any Occasion
If you’re craving something sweet, let me introduce you to the magic of Red Velvet Cake. This vibrant treat isn’t
Read more…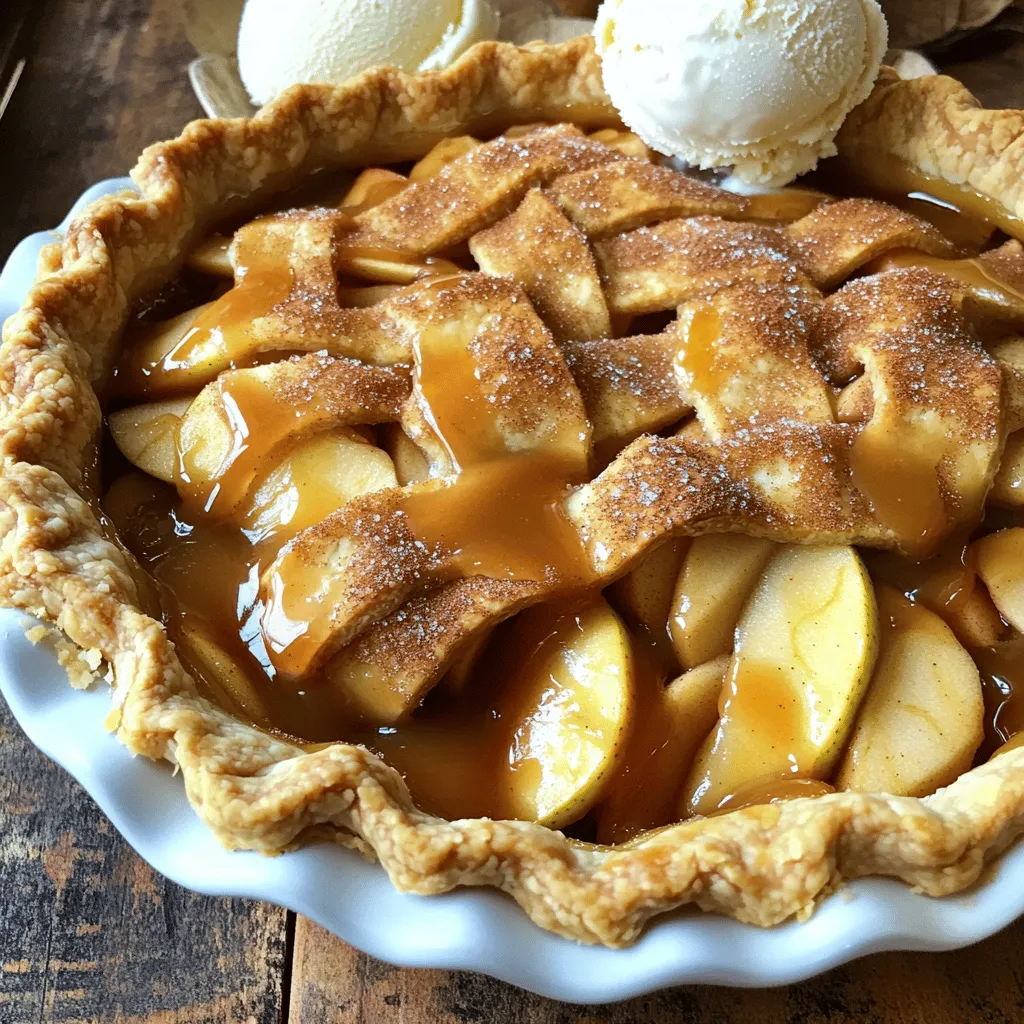
Apple Pie Delight with Cinnamon and Caramel Toppings
If you love the warm, sweet taste of apple pie, you’re in for a treat! My Apple Pie Delight with
Read more…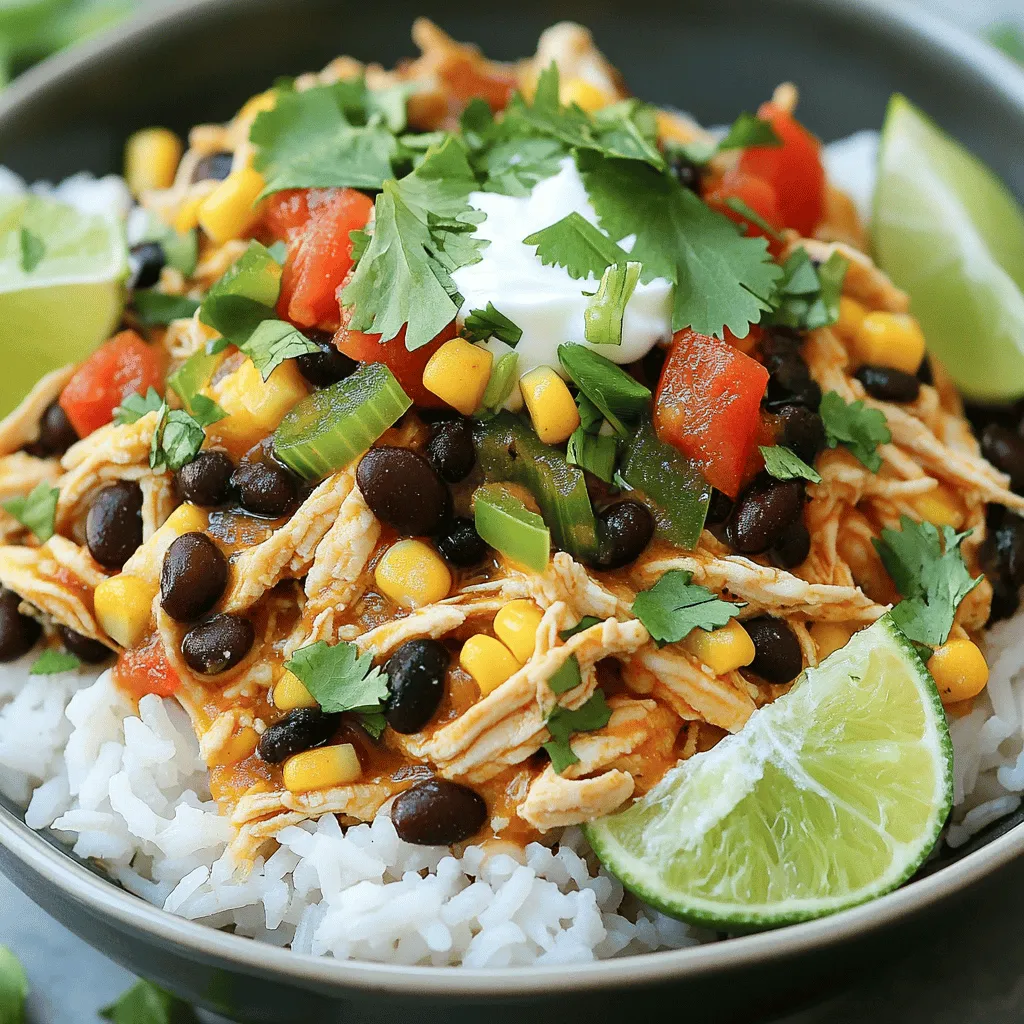
Crockpot Mexican Chicken Flavorful and Simple Dish
Are you ready to spice up your dinner routine? My Crockpot Mexican Chicken is a simple, flavorful dish that will
Read more…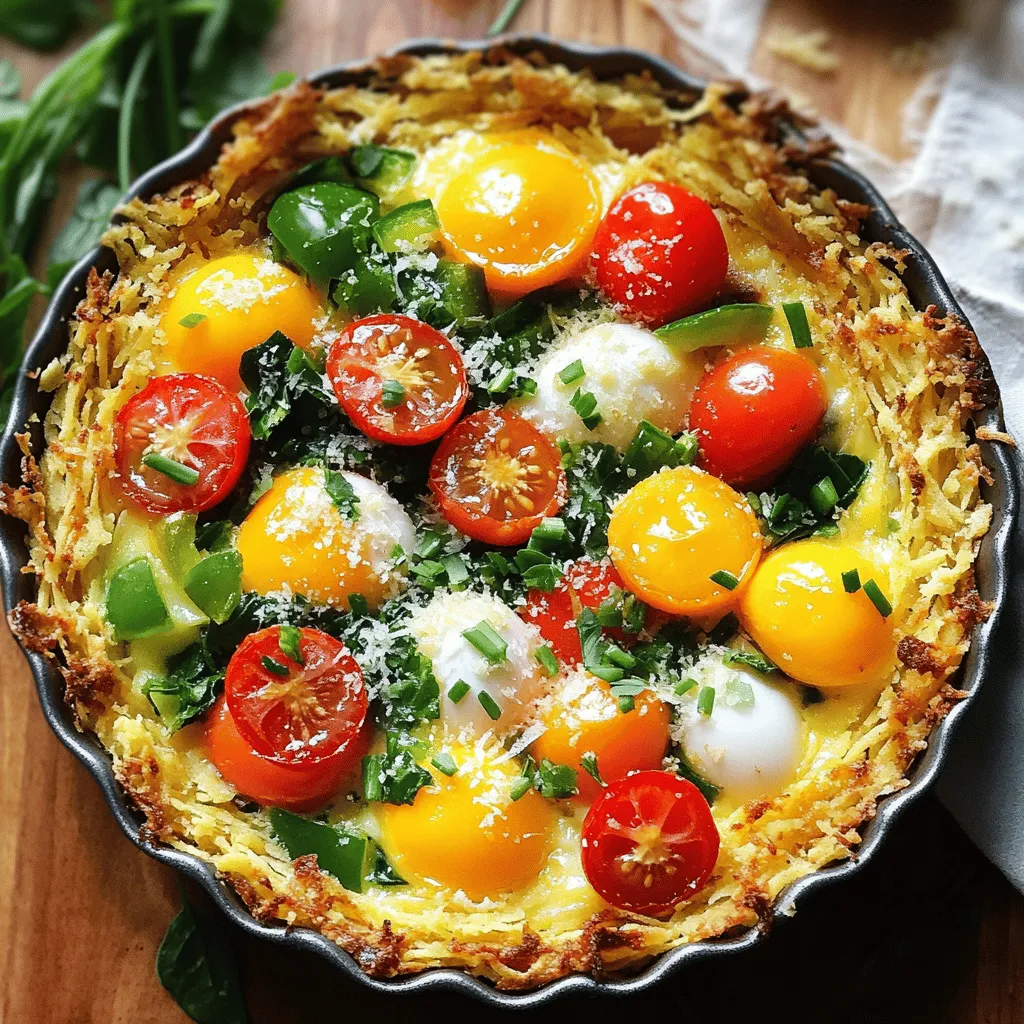
Spring Hash Brown Crust Quiche Flavorful and Easy Recipe
Spring brings fresh flavors, and this Spring Hash Brown Crust Quiche is a perfect way to enjoy them! With a
Read more…browse recipes


![- 4 chicken thighs, skin-on or skinless - 1 cup fresh parsley, chopped - 1/2 cup fresh cilantro, chopped - 4 cloves garlic, minced - 1/4 cup olive oil - 2 tablespoons red wine vinegar (or apple cider vinegar for a twist) Chimichurri chicken thighs are all about fresh ingredients. Chicken thighs bring rich flavor and juiciness. I prefer skin-on thighs for extra crispiness. Fresh parsley and cilantro add brightness to the dish. Garlic gives a robust taste that pairs well with the herbs. Olive oil helps bind the sauce and adds richness. Vinegar brings a tangy kick that balances the flavors. - 1 teaspoon red pepper flakes - 1 teaspoon smoked paprika - Salt and pepper to taste - Juice of 1 lime Spices are key to making this dish stand out. Red pepper flakes add a gentle heat, while smoked paprika adds a deep, smoky flavor. Salt and pepper are essential for seasoning the chicken. Lime juice enhances freshness and ties all the flavors together. - Olive oil for skillet - Optional garnish (lime wedges, fresh herbs) Using olive oil in the skillet helps the chicken cook evenly. I always keep some extra olive oil on hand for drizzling later. Garnishes like lime wedges and fresh herbs make the dish look as good as it tastes. They can elevate the meal and add vibrant color to your plate. For the full recipe, check the [Full Recipe]. First, gather your ingredients for the chimichurri sauce. In a bowl, whisk together: - 1 cup fresh parsley, chopped - 1/2 cup fresh cilantro, chopped - 4 cloves garlic, minced - 1/4 cup olive oil - 2 tablespoons red wine vinegar - 1 teaspoon red pepper flakes - 1 teaspoon smoked paprika - Juice of 1 lime - Salt and pepper to taste Mix until it looks nice and green. Set aside a portion for serving later. This sauce brings a bright flavor to the chicken. Now, let’s cook the chicken. Pat the thighs dry with paper towels. This helps them get crispy. Season both sides with salt and pepper. Heat a little olive oil in a large skillet over medium heat. Add the chicken thighs skin-side down. Cook for about 6-7 minutes until the skin is golden brown and crispy. Next, flip the chicken thighs. Pour half of the chimichurri sauce over them. Cover the skillet with a lid and cook for 10-12 minutes. The chicken should reach an internal temperature of 165°F (75°C). Once done, remove the skillet from heat. Let the chicken rest for 5 minutes. This keeps it juicy. Drizzle the reserved chimichurri sauce on top before serving. Enjoy your tasty chimichurri chicken thighs! For the full recipe, check [Full Recipe]. To ensure your chicken thighs are juicy, check the internal temperature. Use a meat thermometer. The safe temperature is 165°F (75°C). This keeps the chicken moist and safe to eat. After cooking, let the chicken rest for five minutes. Resting helps keep the juices inside. Chimichurri sauce needs a good balance of flavors. The acid from vinegar brightens the sauce. You can use red wine vinegar or apple cider vinegar. Add spices like red pepper flakes for a kick. Store chimichurri in the fridge for up to a week. Just keep it in a sealed jar to keep it fresh. Serve the chicken on a nice wooden board or a colorful plate. This adds a rustic touch. Garnish with lime wedges and fresh herbs. A sprinkle of parsley or cilantro makes it look great. The bright colors will make your dish pop and impress your guests. {{image_2}} You can change the flavor by using apple cider vinegar instead of red wine vinegar. This gives a sweet and tangy taste. You can also add herbs like oregano or spices like cumin for a new flavor. Mixing these can make each bite exciting. Grilling chicken thighs gives them a smoky flavor. This method creates great grill marks and a tasty crust. Alternatively, you can pan-sear them on the stove. This method keeps them juicy and tender. If you want a healthier choice, try oven-baking the thighs. This will keep the chicken moist while cutting extra fat. Serve chimichurri chicken thighs with sides that balance their bold flavor. A fresh salad with mixed greens and tomatoes works well. You can also try quinoa or rice for a hearty option. These sides round out the meal and make it more filling. For more ideas, check out the Full Recipe for perfect pairings. After cooking, let your chimichurri chicken thighs cool down. Place them in an airtight container. This keeps the chicken juicy and flavorful. Store it in the fridge for up to four days. If you want to enjoy them later, make sure to keep the sauce separate. You can freeze chimichurri chicken thighs for longer storage. First, let them cool completely. Wrap each thigh tightly in plastic wrap, then place them in a freezer bag. This helps to avoid freezer burn. They will stay good for about three months. When you want to eat them, thaw the chicken overnight in the fridge. Reheat in the oven or on the stove until hot. Don’t toss that leftover chimichurri sauce! It adds great flavor to many dishes. You can use it on grilled vegetables, in pasta, or even on sandwiches. Store the sauce in a sealed container in the fridge for up to one week. If you want to keep it longer, freeze it in ice cube trays. Then you can pop out a cube whenever you need some flavor. Cooking chimichurri chicken thighs takes about 30 minutes. This includes prep and cooking time. The size of the thighs can change cooking time. Thicker thighs may need a few extra minutes. Always check the internal temperature. It should reach 165°F (75°C) for safe eating. Yes, you can make chimichurri sauce ahead of time. It keeps well in the fridge for up to a week. Store it in an airtight container to keep it fresh. The flavors will deepen as it sits. Just give it a good stir before using it. If you want a different protein, chicken breasts work well. They cook faster but can be drier. You can also use pork chops or even firm tofu for a meatless option. Each choice will change the flavor and texture slightly. Adjust cooking times based on what you choose. Chimichurri chicken thighs are simple yet delicious. We explored the main ingredients, key flavors, and cooking techniques. You learned how to prepare the chimichurri sauce and ensure perfectly cooked chicken. We also covered variations, storage tips, and answers to common questions. Overall, this dish is flexible and easy to make. Whether grilling or pan-searing, you can customize the flavors to your liking. Enjoy your cooking adventure and share this tasty dish with others!](https://mysavedrecipe.com/wp-content/uploads/2025/06/ea5ef63b-525c-474b-89c2-afadb369c364.webp)
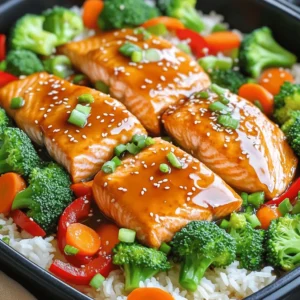
Chimichurri Chicken Thighs Juicy and Flavorful Dish
Juicy and flavorful, chimichurri chicken thighs are a perfect dish for any meal. In this post, I’ll show you how to make this delicious…
My Latest Desserts

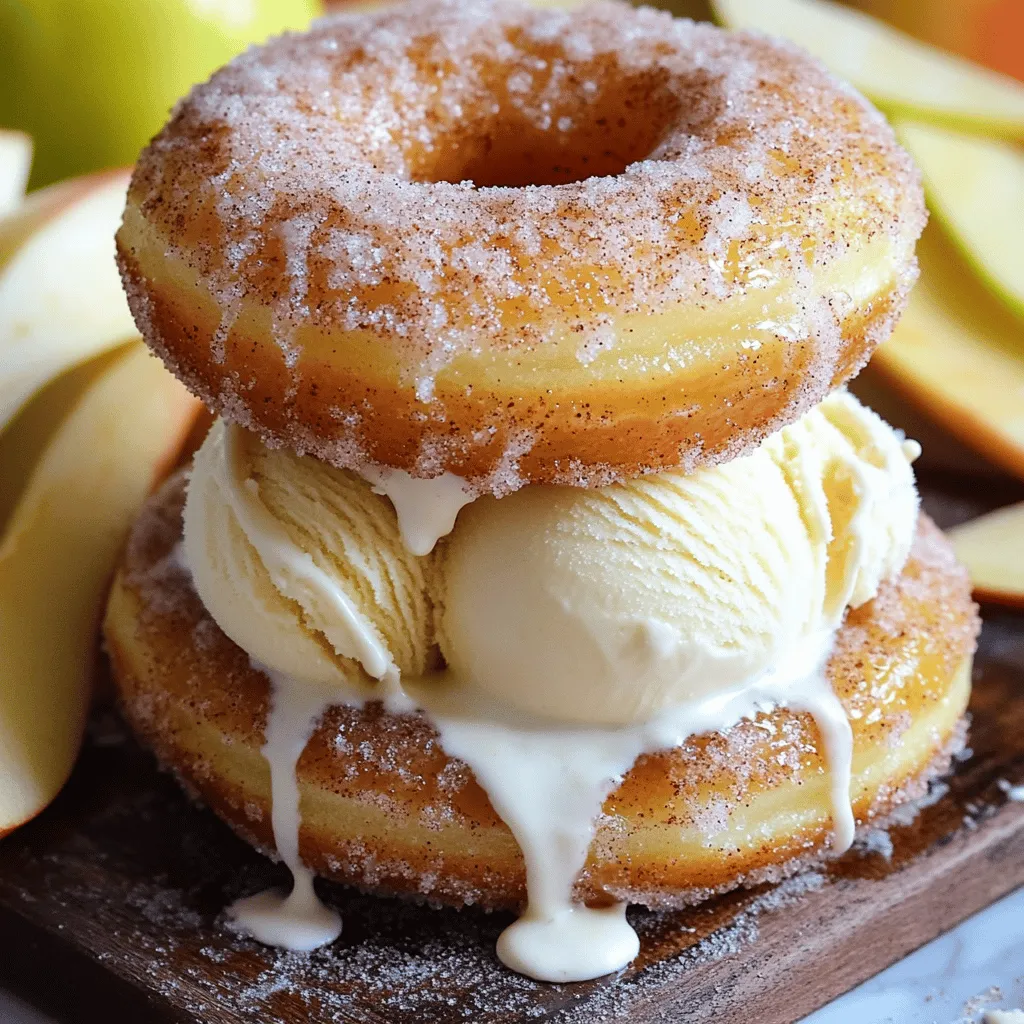
Apple Cider Donut Ice Cream Sandwiches Tasty Delight
Get ready for a sweet treat that combines two favorites: donuts and ice cream! Apple Cider Donut Ice Cream Sandwiches Read Full Recipe-
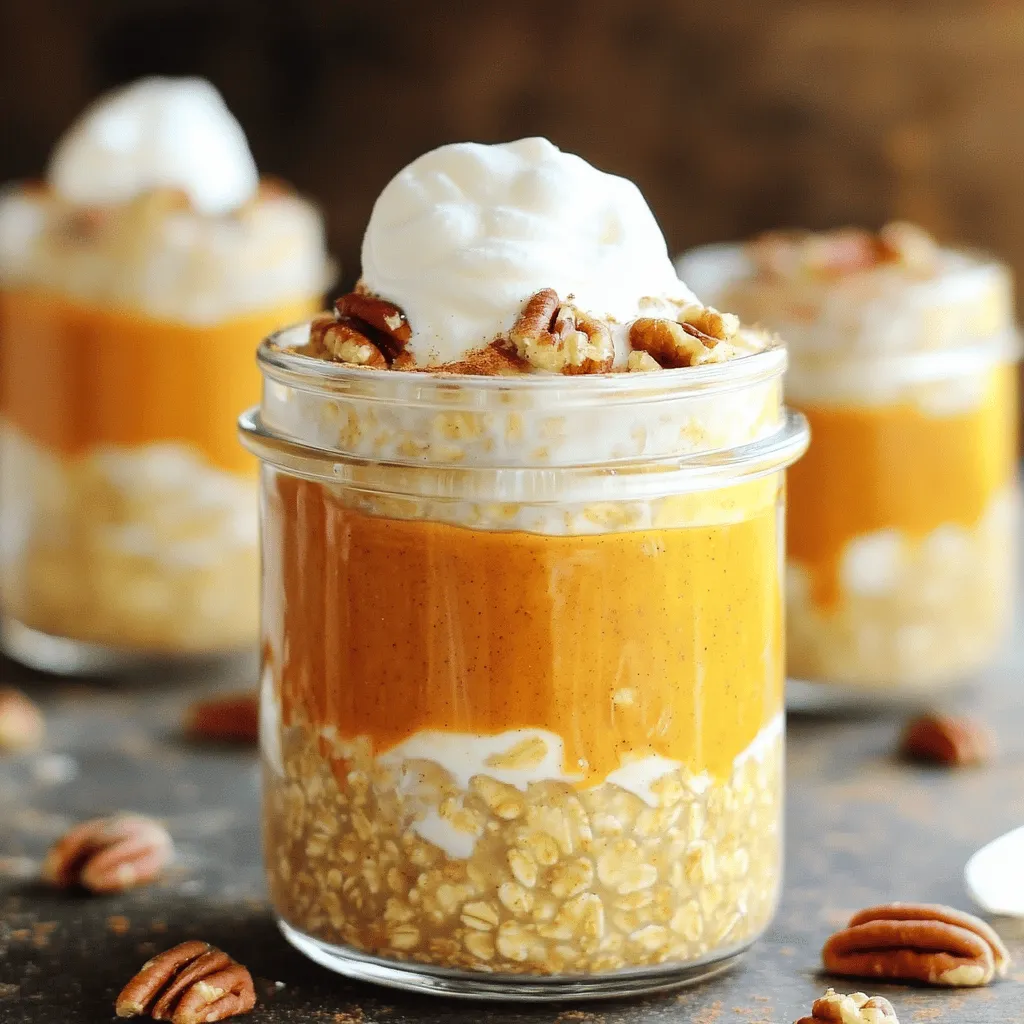
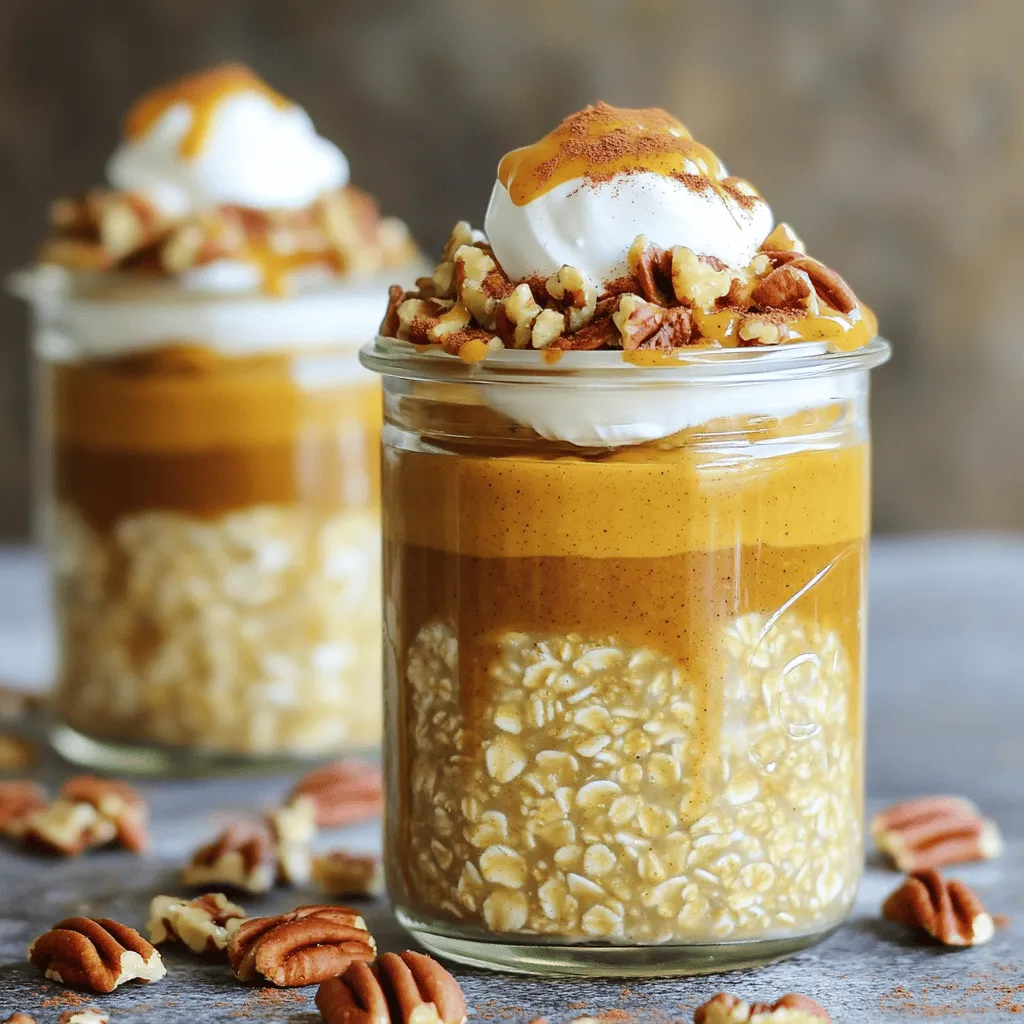
Brown Sugar Pumpkin Pie Overnight Oats Delight
Start your day with a warm slice of fall in a jar: Brown Sugar Pumpkin Pie Overnight Oats! This easy Read Full Recipe -
Apple Cider Donut Ice Cream Sandwiches Delightful Treat
Get ready to treat your taste buds! Apple Cider Donut Ice Cream Sandwiches blend fall flavors and sweet creaminess. These Read Full Recipe -
Brown Sugar Pumpkin Pie Overnight Oats Delight
Looking for a tasty breakfast that’s easy and fun? You’ll love my Brown Sugar Pumpkin Pie Overnight Oats Delight! This Read Full Recipe -
Cream Soda Donut Holes Delightful Dessert Recipe
Are you ready to enjoy a fun twist on a classic treat? Cream Soda Donut Holes are sweet, fluffy, and Read Full Recipe -
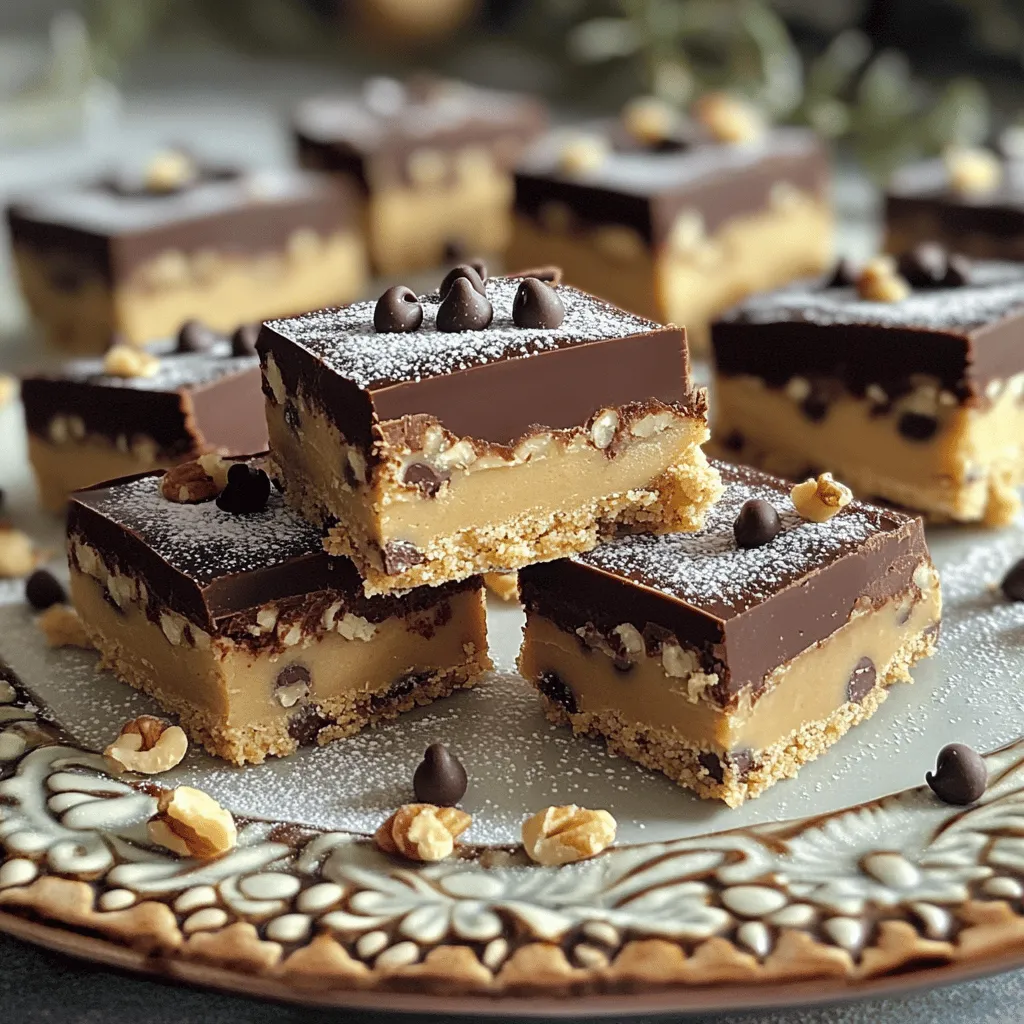
Cookie Dough Bars Delightful Recipe for a Sweet Treat
If you’ve ever craved the rich, sweet goodness of cookie dough, then you’re in for a treat! My recipe for Read Full Recipe -
Chocolate Covered Cherries with Pistachio Dust Delight
Get ready to treat your taste buds with my “Chocolate Covered Cherries with Pistachio Dust Delight.” This sweet snack combines Read Full Recipe -
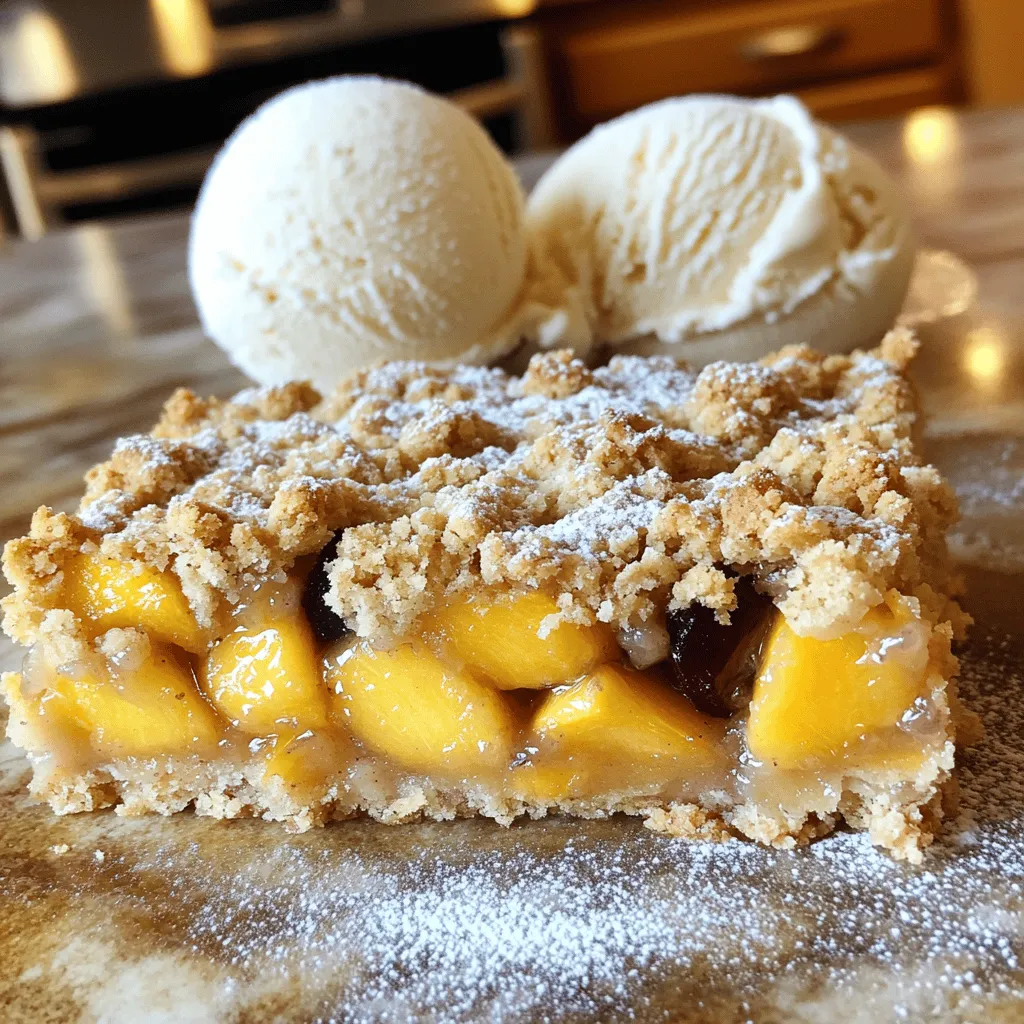
Peach Plum Crumble Bars Irresistible Sweet Treat
Are you ready for a dessert that combines the sweetness of peaches and plums? My Peach Plum Crumble Bars are Read Full Recipe -
Watercolor Buttercream Cupcakes Delightful Recipe Guide
Are you ready to bring some color to your baking? In this guide, I’ll show you how to make stunning Read Full Recipe -
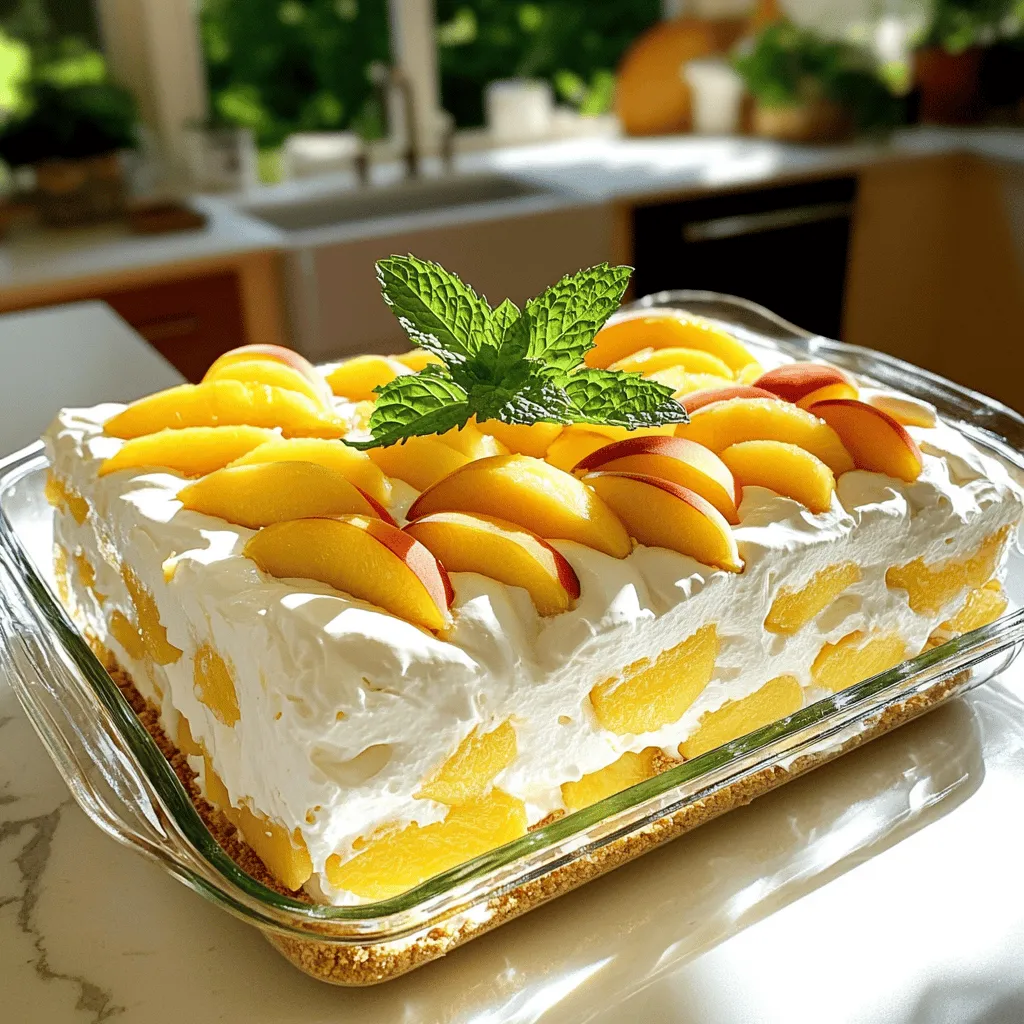
No-Bake Peach Icebox Cake Simple and Refreshing Treat
If you’re seeking a sweet, cool treat that’s simple to make, it’s time to try my No-Bake Peach Icebox Cake. Read Full Recipe


My Latest Recipes

hey,
i’m !
I’m so happy you’re here!
Food is my passion, and perfecting each dish is my craft. I can’t wait for you to try them let’s dive into this delicious journey side by side.
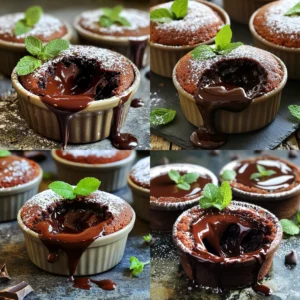
![For the ultimate chocolate fudge brownies, you need some core ingredients. These ingredients create a rich and delicious treat. - 1 cup unsalted butter (2 sticks) - 2 cups granulated sugar - 1 cup packed light brown sugar - 4 large eggs - 1 tablespoon vanilla extract - 1 cup all-purpose flour - 1 cup unsweetened cocoa powder - 1 teaspoon baking powder - 1/2 teaspoon salt - 2 cups semi-sweet chocolate chips Butter gives the brownies their rich flavor and fudgy texture. Sugar adds sweetness and helps create a shiny crust. Eggs bind all the ingredients together, making the brownies moist. Vanilla extract adds depth to the flavor. Flour gives structure, while cocoa powder provides that intense chocolate taste. Baking powder helps the brownies rise slightly, but we want them dense. Lastly, chocolate chips add extra chocolate goodness. You can enhance your brownies with some optional add-ins. Here are a few ideas to make them even better: - 1/2 cup chopped walnuts (optional) Adding nuts gives a nice crunch and flavor contrast. You can also consider these options: - Sea salt on top for a sweet-salty kick - Caramel swirls for a gooey texture - Peanut butter swirls for a nutty flavor These additions can take your brownies from great to spectacular. Feel free to mix and match based on what you enjoy! For the complete recipe, check out the [Full Recipe]. 1. Preheat your oven to 350°F (175°C). This step is key for even baking. 2. Prepare your baking pan. Grease a 9x13 inch pan or line it with parchment paper. This helps with easy removal of brownies later. 3. Melt the butter. Use a medium saucepan over low heat to melt 1 cup of unsalted butter completely. This gives the brownies a rich texture. 4. Combine wet ingredients. Remove the butter from heat and let it cool slightly. In a large bowl, mix the melted butter, 2 cups of granulated sugar, and 1 cup of packed light brown sugar. Stir until well mixed. 5. Add eggs and vanilla. Crack 4 large eggs into the bowl one at a time. Make sure to whisk well after each egg. Finally, stir in 1 tablespoon of vanilla extract. 1. Sift dry ingredients. In a separate bowl, sift together 1 cup of all-purpose flour, 1 cup of unsweetened cocoa powder, 1 teaspoon of baking powder, and 1/2 teaspoon of salt. This helps avoid lumps. 2. Incorporate dry ingredients into wet. Gradually add the dry mixture to your wet ingredients. Stir until just combined. Be careful not to overmix. This keeps the brownies fudgy and soft. 3. Fold in extras. If you want extra flavor, fold in 2 cups of semi-sweet chocolate chips and 1/2 cup of chopped walnuts, if desired. This adds crunch and richness. 1. Pour and spread. Pour the brownie batter into your prepared baking pan and spread it evenly. 2. Bake. Place the pan in your preheated oven. Bake for 25-30 minutes. To check for doneness, insert a toothpick in the center. It should come out with a few moist crumbs, not wet batter. 3. Cool properly. After baking, remove the brownies from the oven. Let them cool in the pan for 15 minutes. Then, transfer them to a wire rack to cool completely before slicing. This cooling step is important for the best texture. You can find the full recipe for Ultimate Chocolate Fudge Brownies to ensure you get every detail right! To get the perfect brownie texture, you need to choose between fudgy and cakey. For fudgy brownies, use more fat and less flour. This gives you a chewy, dense treat. For cakey brownies, use more flour and add baking powder. This makes them light and airy. Make sure your ingredients are at room temperature. Cold eggs or butter can affect how they mix. If you melt your butter, let it cool slightly before adding it to the mix. This helps keep your brownies rich and moist. Using the right tools is key for great brownies. I recommend using a metal or glass 9x13 inch baking pan. Metal pans heat evenly, while glass lets you see the bottom. Always grease your pan or line it with parchment paper. This makes it easy to lift out the brownies. To check if your brownies are done, use a toothpick. Insert it into the center of the brownies. If it comes out with a few moist crumbs, they are ready. If it comes out wet, they need more time. For a beautiful presentation, cut your brownies into squares and arrange them on a platter. You can dust them with powdered sugar for a nice touch. Drizzle some chocolate sauce on top for extra flair. Brownies pair wonderfully with ice cream or coffee. A scoop of vanilla ice cream on top makes them even more decadent. You could also enjoy them with a cup of strong coffee to balance the sweetness. For the ultimate treat, try both! For the full recipe, check out the Ultimate Chocolate Fudge Brownies! {{image_2}} You can change the taste of your Ultimate Chocolate Fudge Brownies in fun ways. One idea is to add mint extract. This gives a fresh, cool flavor that pairs well with chocolate. You can also swirl in peanut butter for a rich, nutty taste. Just drop spoonfuls of peanut butter into the batter and swirl with a knife before baking. Switch up the chocolate you use, too. Try dark chocolate for a deeper flavor. White chocolate chips can add a sweet touch to your brownies. Mixing different types of chocolate creates a rich, layered taste that excites your palate. If you need gluten-free brownies, you can use almond flour or coconut flour instead of all-purpose flour. These flours give a nice texture without gluten. Just make sure to adjust the amount since these flours absorb more liquid. For vegan brownies, swap the eggs with flaxseed meal. Mix one tablespoon of flaxseed with three tablespoons of water. Let it sit for a few minutes until it thickens. You can replace the butter with coconut oil or vegan butter. This keeps your brownies rich and moist without any animal products. These variations allow you to enjoy brownies that suit your taste and dietary needs. Check the Full Recipe for more details! To keep your brownies fresh, store them properly. Place them in an airtight container. This helps to lock in moisture. You can also wrap them tightly in plastic wrap. Avoid letting them sit out too long, as they can dry out. For best results, store brownies at room temperature for up to four days. If you want to keep them longer, refrigeration is an option, but it may change the texture slightly. Freezing brownies is a great way to save some for later. First, let the brownies cool completely. Then, cut them into squares. Wrap each piece in plastic wrap. This helps keep the flavor and texture. Next, place the wrapped brownies in a freezer-safe bag or container. They can last up to three months in the freezer. When you are ready to enjoy them, simply take them out and thaw them at room temperature. For a warm treat, you can microwave them for a few seconds. This will bring back some of that fudgy goodness. You can use many things in place of eggs. Common substitutes include: - Applesauce: Use 1/4 cup for each egg. It adds moisture and sweetness. - Mashed banana: A ripe banana works well. Use 1/2 banana per egg. - Yogurt: Use 1/4 cup of plain yogurt for each egg. It keeps brownies soft. - Flaxseed meal: Mix 1 tablespoon of flaxseed with 2.5 tablespoons of water. Let it sit until it thickens. These substitutes change the texture. Applesauce and banana add moisture. Flaxseed gives a slight nuttiness. Choose based on your taste and what you have at home. Watch for these signs when baking brownies: - Edges pull away: The edges will look firm and pull from the pan. - Shiny top: The surface will have a glossy sheen. - Toothpick test: Insert a toothpick into the center. It should come out with a few moist crumbs, not wet batter. These signs help you catch the perfect bake. Overbaking will make them dry. Keep an eye on your brownies during the last few minutes. Yes, you can use cocoa powder as the main chocolate source. Cocoa gives a rich chocolate flavor, but balance is key. - Dry to wet ratio: Cocoa is dry, so you need enough wet ingredients. - Add extra fat: Consider using more butter or oil for moisture. This method can make a delicious brownie, but adjust your other ingredients. Too much cocoa can lead to a dry brownie. Aim for that perfect balance! For the full recipe, check out the Ultimate Chocolate Fudge Brownies. In this post, we covered all you need to make Ultimate Chocolate Fudge Brownies. You learned about essential ingredients, the mixing process, and baking tips. We explored variations and how to store your brownies for later. Remember, choose your flavors and store them well for the best taste. Enjoying brownies can bring joy, whether alone or with friends. Get baking today and share your delicious results! Your taste buds will thank you.](https://mysavedrecipe.com/wp-content/uploads/2025/06/ecf212a4-d0fa-4c74-8ed0-c26c3d044df8-300x300.webp)
![- 3 ripe bananas, mashed - 1/2 cup Nutella - 1/2 cup sugar or honey - 1/3 cup unsalted butter, melted - 1 teaspoon vanilla extract - 1 teaspoon baking soda - Pinch of salt - 1 1/2 cups all-purpose flour - 1/2 cup chopped walnuts - 1/4 cup chocolate chips This recipe for Nutella Banana Bread is simple and fun. Each ingredient plays a big role in making it moist and delicious. Ripe bananas give the bread a sweet taste. They add moisture and make it soft. I always use bananas that are brown and speckled. They taste better this way. Nutella brings a rich, chocolatey flavor. I love how it swirls through the bread. You can mix it in or leave some on top for an extra treat. Sugar or honey adds sweetness. Honey can make it a bit healthier. Unsalted butter gives a nice texture. It helps to bind the mix and keeps it moist. The vanilla extract adds warmth. It enhances the overall flavor. Baking soda helps the bread rise. It makes the texture light and fluffy. A pinch of salt balances the sweetness. It brings out all the flavors. Finally, all-purpose flour gives structure. It holds everything together. If you want to add more flavor or texture, consider the optional add-ins. Chopped walnuts add crunch. Chocolate chips make it even more decadent. For the full recipe, check out the cooking guide. Each step will help you make this tasty treat. - Preheat the oven to 350°F (175°C). - Grease a 9x5-inch loaf pan. Start by preparing your oven and pan. Preheating ensures your bread bakes evenly. Greasing the pan helps the bread slide out easily once it's done. - Combine bananas and melted butter. - Stir in sugar or honey, Nutella, and vanilla. Next, you will mix your batter. In a large bowl, mash the ripe bananas. Then mix in the melted butter until it's smooth. Add sugar or honey, Nutella, and vanilla extract. Stir until everything blends into a nice, creamy mixture. - Incorporate baking soda and salt. - Gradually mix in flour without overmixing. Now it’s time for the dry ingredients. Sprinkle the baking soda and salt over the wet mix. Stir to combine. Gradually add the all-purpose flour. Mix gently, as overmixing can make your bread tough. - Fold in optional add-ins. - Pour batter into prepared pan and smooth the top. - Bake for 60-70 minutes and check for doneness. If you like, fold in chopped walnuts or chocolate chips for extra flavor. Pour the batter into the greased pan and smooth the top with a spatula. Bake in your preheated oven for 60 to 70 minutes. Check for doneness by inserting a toothpick in the center. If it comes out clean, your bread is ready! Using ripe bananas is key for great flavor. They should be soft and brown. This ripeness adds natural sweetness and moisture. For the perfect texture, mix the batter just until combined. Overmixing can make it tough. Serve Nutella Banana Bread warm for the best taste. Slice it thick and drizzle extra Nutella on top. Add a dollop of whipped cream for an extra treat. You can also serve it with fresh fruit or a scoop of ice cream for a fun twist. Common issues include bread being too dry or too wet. If it’s dry, check your oven temp. It might be too high. If too wet, bake a bit longer. Adjust baking time based on your oven. Every oven is different, so keep an eye on your bread! {{image_2}} You can make Nutella banana bread even more exciting. One way is to add spices like cinnamon or nutmeg. These spices add warmth and depth to the flavor. Just a teaspoon of cinnamon can change the whole taste. You can also try using different types of chocolate. Dark chocolate gives a rich taste, while milk chocolate adds sweetness. Mix and match to find your favorite flavors. If you want a healthier version, consider using whole wheat flour instead of all-purpose flour. This swap boosts fiber and nutrients. You can also make a vegan option. Replace the butter with coconut oil and the eggs with applesauce or flaxseed meal. This way, everyone can enjoy this tasty treat without worry. Not a fan of Nutella? You can replace it with peanut butter. This swap gives a nutty flavor and a creamy texture. If you need a nut-free version, try sunflower seed butter. This option keeps the bread moist and delicious. You can easily switch ingredients to fit your taste and needs. For the complete recipe, check out the [Full Recipe]. After you bake your Nutella banana bread, let it cool in the pan for about 10 minutes. This step helps it set and makes it easier to remove. Then, transfer the bread to a wire rack. Cooling it completely ensures the best texture. Once cool, wrap the bread tightly in plastic wrap or aluminum foil. You can also place it in an airtight container. This keeps it fresh and moist. To freeze Nutella banana bread, first cool it fully. Then, slice the bread into pieces for easy serving later. Wrap each slice in plastic wrap, then place them in a freezer-safe bag. This way, you can grab a slice whenever you want a treat. When you're ready to enjoy a slice, just take it out of the freezer. Let it thaw at room temperature for about 30 minutes. If you want it warm, pop it in the microwave for about 10-15 seconds. Nutella banana bread lasts about 3-4 days at room temperature. Store it in a cool, dry place to keep it fresh. If you see any mold or smell something off, it’s best to toss it. Always trust your senses! Keeping an eye out for any changes helps you enjoy your bread at its best. Yes, you can make this recipe gluten-free. Use a gluten-free flour blend instead of all-purpose flour. Brands like Bob's Red Mill or King Arthur Flour work well. Make sure to check the blend for equal measurements. This keeps the texture light and moist. To check if your banana bread is done, insert a toothpick into the center. If it comes out clean or with a few crumbs, it’s ready. You can also gently press the top. If it springs back, it is done. Make sure to avoid undercooking to keep it moist. Absolutely! You can add more Nutella for a richer flavor. Swirl in an extra 1/4 cup before baking. This gives you gooey pockets of chocolate-hazelnut goodness. You can also spread some on top after baking for extra indulgence. Enjoy the extra chocolatey goodness! In this post, we explored how to make delightful Nutella Banana Bread. We covered the key ingredients and outlined the step-by-step process. You learned helpful tips for baking and how to store your creation. Variations and adjustments make this recipe flexible for all diets. Now, it's your turn to bake and enjoy this tasty treat! Remember, the right ingredients lead to great results. Happy baking!](https://mysavedrecipe.com/wp-content/uploads/2025/05/90c8051d-a1bf-4f9d-aa95-4b73fa3bd991-300x300.webp)
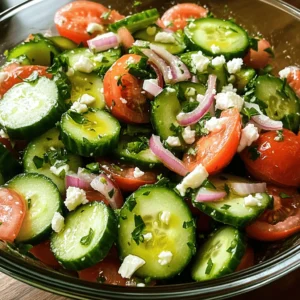
![To make a great Mediterranean chicken pasta salad, gather these fresh ingredients: - 2 cups of cooked penne pasta - 1 cup cooked, shredded chicken breast - 1/2 cup cherry tomatoes, halved - 1/2 cup cucumber, diced - 1/4 cup red onion, finely chopped - 1/3 cup Kalamata olives, pitted and sliced - 1/4 cup feta cheese, crumbled - 1/4 cup olive oil - 2 tablespoons red wine vinegar (optional) - 1 teaspoon dried oregano - Salt and pepper to taste - Fresh parsley for garnish These ingredients work together to create a colorful and tasty dish. The penne pasta serves as a hearty base. Shredded chicken adds protein, making it filling. Fresh veggies, like cucumbers and cherry tomatoes, give crunch and flavor. Kalamata olives add a briny touch, while feta cheese brings creaminess. I love using olive oil and red wine vinegar for the dressing. They bring a rich, tangy flavor to the salad. Dried oregano adds an herbal note that ties everything together. Make sure to use fresh parsley for garnish. It brightens the dish and adds a pop of color. Together, these ingredients create a vibrant Mediterranean chicken pasta salad that bursts with flavor. For the detailed preparation steps, check out the Full Recipe. To make this Mediterranean Chicken Pasta Salad, follow these easy steps. You will love how simple and tasty it is! - Combine pasta and chicken: In a large bowl, mix the cooked penne pasta and shredded chicken. This is the base of your salad. - Add vegetables and olives: Next, toss in the halved cherry tomatoes, diced cucumber, finely chopped red onion, and sliced Kalamata olives. These ingredients add color and crunch. - Whisk dressing ingredients: In a small bowl, whisk together the olive oil, red wine vinegar (if using), dried oregano, salt, and pepper. This dressing brings all the flavors together. - Toss pasta salad: Pour the dressing over the pasta mixture. Toss gently to coat each part well. This step ensures every bite is full of flavor. - Add feta cheese: Sprinkle crumbled feta cheese on top. Gently stir it in. The feta adds a creamy, salty touch to the dish. - Adjust seasoning: Taste the salad and add more salt and pepper if needed. This will help balance the flavors. - Let it sit: Cover the bowl and let the salad sit for about 20 minutes. This resting time allows the flavors to meld beautifully. - Serve with garnish: Before serving, sprinkle fresh parsley on top. It looks nice and adds a fresh taste. For the complete recipe, check out the [Full Recipe]. Enjoy your Mediterranean Chicken Pasta Salad! To make your Mediterranean Chicken Pasta Salad even better, start with the dressing. You can mix olive oil with lemon juice or yogurt. This adds a fresh twist. Marinating your chicken for at least one hour helps it taste amazing. Use herbs like oregano and thyme for a punch of flavor. Also, balance textures by adding crunchy cucumbers and soft feta cheese. This makes each bite exciting. Cooking pasta perfectly is key. Boil water and add salt for flavor. Cook until al dente, then drain and rinse in cold water. This keeps the pasta firm. For shredding chicken, use two forks to pull it apart easily. It’s quick and effective. Prepping your ingredients in advance saves time. Chop veggies and shred chicken the day before. This way, you’ll have everything ready when it’s time to mix the salad. For the full recipe, check the complete instructions above. {{image_2}} You can switch up the pasta in this dish. Try whole wheat, gluten-free, or even spiralized veggies. Each option adds a fun twist. For proteins, consider using tofu or shrimp instead of chicken. Tofu absorbs flavors well, making it a great choice. Shrimp cooks fast and gives a nice texture. If you want to skip dairy, use non-dairy cheese options like almond or cashew cheese. These give a creamy taste without the milk. To add more crunch, mix in nuts or seeds like pine nuts or sunflower seeds. They add a nice bite and extra nutrients. You can also use fresh herbs like basil or mint for a burst of flavor. These herbs brighten the dish and add freshness. Try different vinaigrette styles too! A lemon garlic dressing or a balsamic glaze can change the whole taste. Experiment to find your favorite combination. For the full recipe, check out the Mediterranean Chicken Pasta Salad section above. To keep your Mediterranean chicken pasta salad fresh, store it in an airtight container. Make sure it cools down to room temperature before sealing it. This step helps prevent moisture buildup. You can also separate the dressing from the salad if you want extra freshness. Just add it when you're ready to eat. If you have leftover ingredients, like chicken or olives, you can freeze them. Cooked chicken freezes well for about 2-3 months. Just chop it up and place it in a freezer bag. Olives can also freeze, but their texture may change slightly. In the fridge, your salad can last about 3-5 days. Always check for signs of spoilage. If you see any mold or smell something off, it’s best to toss it. Additionally, if the vegetables look mushy or slimy, that’s another sign it’s time to say goodbye. For the freshest taste, enjoy your Mediterranean chicken pasta salad within a couple of days. For the full recipe, check out the complete guide! Can I make this salad in advance? Yes, you can make this salad in advance. It tastes better after chilling. I suggest letting it sit for at least 20 minutes. This helps the flavors mix well. You can store it in the fridge for up to three days. Just remember to add fresh parsley before serving. What can I serve with Mediterranean Chicken Pasta Salad? This salad pairs well with grilled vegetables or a slice of crusty bread. You can also serve it with a light soup. A side of hummus and pita chips adds a nice touch. These options complete your meal and enhance the Mediterranean vibe. Is it gluten-free? No, this salad is not gluten-free. The penne pasta contains gluten. However, you can use gluten-free pasta instead. This swap keeps the dish tasty and safe for those with gluten allergies. How do I make it vegetarian? To make this salad vegetarian, remove the chicken. You can add chickpeas for protein. They provide a great texture and flavor. You can also add more veggies, like bell peppers or artichokes, to keep it hearty. Caloric content per serving One serving of Mediterranean Chicken Pasta Salad has about 350 calories. This value may change based on portion size and added ingredients. Key health benefits of ingredients - Chicken: High in protein, helps build and repair muscles. - Olive oil: Contains healthy fats, good for heart health. - Cherry tomatoes: Packed with vitamins A and C, great for skin health. - Cucumber: Hydrating and low in calories, perfect for weight management. - Feta cheese: Offers calcium and protein, supporting bone health. This salad is not just tasty; it also fuels your body well! For the full recipe, check out the Mediterranean Chicken Pasta Salad. This Mediterranean Chicken Pasta Salad is simple and tasty. You learned about the key ingredients and how to prep them. You can customize flavors and textures to suit your taste. Remember, storing leftovers properly keeps them fresh longer. With these tips, you can enjoy this dish multiple times. Explore varieties to find your favorite version. This salad is not just a meal; it’s a way to create joy in cooking and eating. Enjoy making it again and again!](https://mysavedrecipe.com/wp-content/uploads/2025/06/7e97549f-cad5-47f7-9a02-6057437abde8-300x300.webp)
Stuffed Yellow Squash with Beef Flavorful Recipe
Are you ready to spice up your dinner routine? This delicious Stuffed Yellow Squash with Beef recipe is simple, tasty, and packed with healthy…
. To keep your stuffed yellow squash fresh, first let it cool. After cooling, store leftovers in the fridge. Wrap each squash half tightly in plastic wrap. You can also place them in an airtight container. This keeps moisture in and prevents odors from mixing. The dish stays fresh for about 3-4 days in the fridge. Use glass or plastic containers that seal tightly. They are great for storing your squash. Glass containers let you see the food inside. They are also easy to clean. Choose containers that fit the size of your leftovers. Avoid using aluminum foil for long-term storage. It can react with the food and change the taste. To enjoy the flavors again, reheat leftovers carefully. The best method is to use an oven. Preheat the oven to 350°F (175°C). Place the stuffed squash in a baking dish. Cover with foil to keep moisture in. Heat for about 15-20 minutes until warm. This keeps the squash tender and the filling moist. You can also use a microwave for quick reheating. Place the squash on a microwave-safe plate. Cover it with a damp paper towel to keep it from drying out. Heat in short bursts, about 1-2 minutes at a time. Check the temperature to avoid overheating. The oven gives a better result, but the microwave is faster. Choose the method that works best for you. Can I use frozen squash? Yes, you can use frozen squash. Just thaw it before using. Frozen squash may change the texture a bit, but it still tastes good. How long does the dish last in the fridge? Stuffed yellow squash lasts about three to four days in the fridge. Store it in an airtight container to keep it fresh. Can I prepare this in advance? Absolutely! You can prepare the filling a day before. Just store it in the fridge. When ready, stuff the squash and bake. What can I serve with stuffed squash? Stuffed squash pairs well with a fresh salad or crusty bread. You could also serve it with rice or quinoa for a complete meal. What temperature should the beef be cooked to? Cook the beef to an internal temperature of 160°F (71°C). This ensures it’s safe to eat and full of flavor. Can I bake the stuffed squash without the cheese? Yes, you can bake it without cheese. The dish will still taste great! If you want, add a sprinkle of herbs for extra flavor. This dish combines yellow squash, ground beef, and quinoa into a tasty meal. We covered gathering fresh ingredients, preparing, and cooking the squash perfectly. I shared tips for serving and storing leftovers, plus ways to adapt the recipe. Remember, feel free to change the meat or add veggies. With these steps and tricks, you can enjoy a hearty meal. Test the recipe, impress your friends, and dive into the flavors!](https://mysavedrecipe.com/wp-content/uploads/2025/07/02a96845-252a-46e0-b429-cb18401ca88a.webp)
