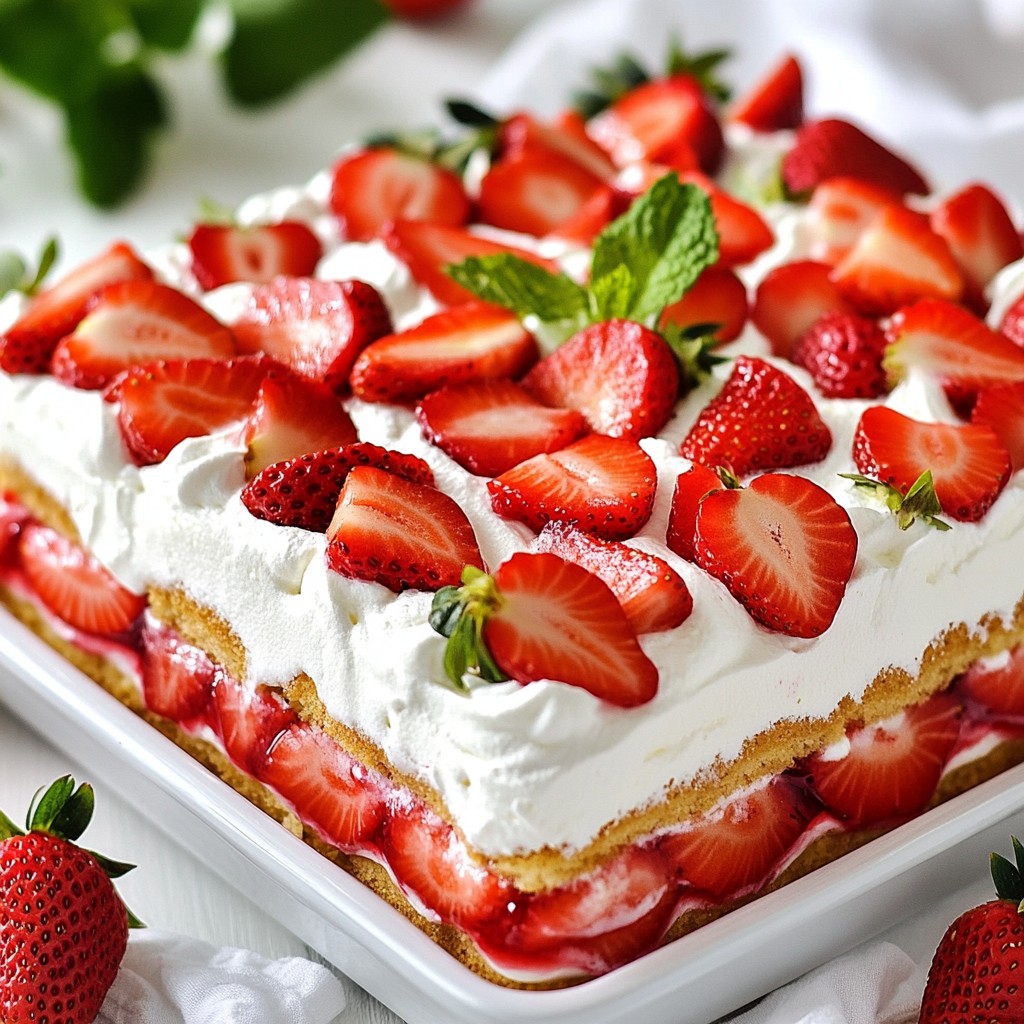
Are you craving a sweet treat that’s simple and refreshing? You’ll love my Strawberry Shortcake Icebox Cake! This easy recipe combines fresh strawberries, whipped cream, and ladyfinger cookies to create a light dessert perfect for any occasion. In this post, I’ll guide you through each step, share tips for the best flavor, and explore tasty variations. Let’s dive into making this delicious cake that’s sure to impress!
Why I Love This Recipe
- Fresh and Fruity: The combination of fresh strawberries and whipped cream creates a delightful and refreshing dessert perfect for any occasion.
- Easy to Prepare: This icebox cake requires minimal effort and no baking, making it a hassle-free dessert option.
- Layered Perfection: The layers of ladyfingers or sponge cake, cream, and strawberries meld together beautifully for a stunning presentation.
- Make Ahead: This dessert can be prepared in advance, allowing you to enjoy more time with guests and less time in the kitchen.
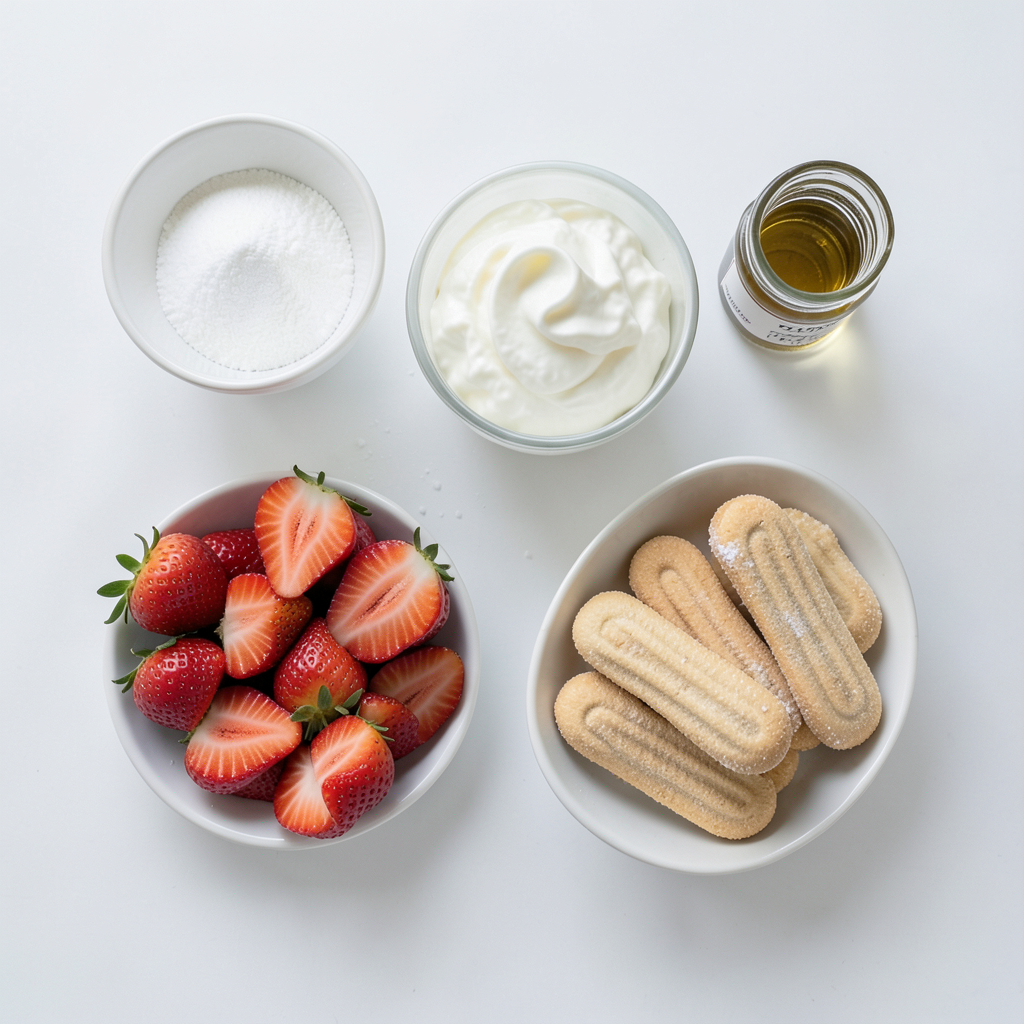
Ingredients
Fresh Strawberries
You need 2 pounds of fresh strawberries. Make sure they are ripe and sweet. Hull them and slice them thin. This helps them mix well with the other ingredients. The strawberries give the cake its fresh taste and bright color. They also add a juicy layer that everyone loves.
Sweeteners and Cream
For sweetness, you will need two types of sugar. Use 1/4 cup of granulated sugar for the strawberries. This helps them release their juices. You will also need 1/2 cup of powdered sugar for the whipped cream. Mix it with 1 cup of heavy whipping cream and 1 teaspoon of vanilla extract. This makes the cream light and sweet. If you want it creamier, you can add 1 cup of Greek yogurt. This step is optional but adds a nice flavor.
Ladyfinger Cookies or Sponge Cake
For the base, choose either ladyfinger cookies or sponge cake. You will need one package, which is about 14 ounces. Ladyfingers soak in the juices well, making them soft and tasty. Sponge cake gives a light and airy feel. Both options work great, so pick what you like best for your cake!
Step-by-Step Instructions
Preparing the Strawberries
First, wash and hull the strawberries. Slice them into thin pieces. In a mixing bowl, add your strawberries. Pour in the granulated sugar. Toss gently to coat each slice. Let the berries sit for about 30 minutes. This process is called macerating. It helps the strawberries release their sweet juices. You will see them get juicy and syrupy. This step makes the cake taste even better!
Whipping the Cream
Next, grab a clean mixing bowl. Pour in the heavy whipping cream. Add the powdered sugar and vanilla extract. Use a hand mixer or whisk to whip the cream. Beat until soft peaks form. If you want, fold in Greek yogurt for extra creaminess. Be gentle to keep the whipped cream fluffy. You want it light and airy for your cake layers.
Layering the Cake
Now it’s time to build your cake! Take a rectangular dish and lay down the ladyfinger cookies or sponge cake. Spread a thick layer of whipped cream over the cookies. Then, add a layer of your macerated strawberries. Let some juice seep into the layers. Repeat this until you use all your ingredients. The last layer should be whipped cream on top. Cover the dish with plastic wrap. Refrigerate it for at least 4 hours or overnight. This chilling time allows the flavors to mix. Enjoy your delicious Strawberry Shortcake Icebox Cake!
Tips & Tricks
Achieving the Perfect Whipped Cream
To make the best whipped cream, start with cold tools. Use a cold bowl and beaters. This helps the cream whip up fast. I use heavy cream for the best results. Add powdered sugar and vanilla for sweetness. Whip until soft peaks form, but don’t overbeat. If you overbeat, it turns into butter.
Macerating Strawberries for Flavor
Macerating strawberries makes them juicy and full of flavor. To do this, slice the strawberries and mix them with granulated sugar. Let them sit for about 30 minutes. During this time, the sugar pulls out the juices. This creates a sweet syrup that adds flavor to your cake. Always use fresh strawberries for the best taste.
Best Storage Practices
For storage, cover the cake with plastic wrap. Keep it in the fridge for at least four hours. It’s better to let it chill overnight. This helps all the flavors blend well. You can also freeze the cake, but it’s best to eat it fresh. If you freeze it, the texture may change.
Pro Tips
- Use Fresh Strawberries: For the best flavor, opt for ripe, fresh strawberries that are in season. They will provide the sweetest taste and vibrant color to your cake.
- Chill Thoroughly: Allow the icebox cake to chill for at least 4 hours, or overnight if possible. This helps the flavors meld and ensures the ladyfingers or sponge cake soften properly.
- Experiment with Flavors: Feel free to add a splash of lemon juice or a pinch of zest to the strawberries or whipped cream for an extra layer of flavor.
Variations
Alternative Fruits to Use
You can switch up strawberries for other fruits. Think about using blueberries, raspberries, or peaches. Each fruit brings its own taste and color. For example, blueberries add a nice burst of juice. Raspberries add a sweet-tart flavor. Peaches offer a soft, juicy bite. Layer them just like you do with strawberries. You might discover a new favorite!
Adding Flavors to the Whipped Cream
Whipped cream is key to this cake. You can change its flavor easily. Try adding a splash of almond extract for a nutty twist. Or mix in some cocoa powder for a chocolatey delight. You can even fold in citrus zest, like lemon or orange, for a refreshing zing. Each flavor will make your dessert unique and fun.
Gluten-Free Options
If you need a gluten-free option, don’t worry! You can use gluten-free ladyfinger cookies. You can also use gluten-free sponge cake. These options work just as well in your layers. Check the labels to make sure they are truly gluten-free. You can still enjoy this tasty treat without gluten!
Storage Info
Refrigeration Guidelines
After making your Strawberry Shortcake Icebox Cake, you need to store it right. Cover your cake with plastic wrap to keep it fresh. Place it in the fridge right after you finish. This cake tastes best when chilled, so let it sit for at least four hours before serving. If you can, leave it overnight. This helps the flavors mix well.
Freezing Strawberry Shortcake Icebox Cake
You can freeze this cake for later enjoyment. First, cut it into slices. Wrap each slice tightly in plastic wrap. Then, place the wrapped slices in a freezer-safe container. This way, you can enjoy the cake even months later. Just remember to let it thaw in the fridge before eating. The texture and taste will still be great!
How Long it Lasts
In the fridge, your Strawberry Shortcake Icebox Cake will last about three days. After that, it may lose some freshness. If you freeze it, it can last up to three months. Just make sure to check for any freezer burn before eating. Keeping it well-wrapped will help maintain its taste. Enjoy your delicious cake anytime!
FAQs
Can I use frozen strawberries?
Yes, you can use frozen strawberries. Just thaw them before use. Drain any excess liquid to avoid a watery cake. Frozen strawberries may not be as firm as fresh ones, but they still taste great. They can add a nice sweetness to your cake.
How to make this recipe dairy-free?
To make this recipe dairy-free, use coconut cream instead of heavy whipping cream. You can also use a dairy-free yogurt or whipped topping. Both options help keep the creaminess while removing dairy. Check labels for added sugars or other ingredients.
What is the best way to serve Strawberry Shortcake Icebox Cake?
The best way to serve this cake is chilled. Slice it and place each piece on a dessert plate. Drizzle extra strawberry juice on top for added flavor. Garnish with a fresh strawberry or a sprig of mint for a nice touch. This makes each slice look beautiful and appetizing.
This article covered how to make a delicious Strawberry Shortcake Icebox Cake. We talked about key ingredients like fresh strawberries, sweeteners, and ladyfinger cookies. I shared easy steps for preparing, whipping, and layering. You learned tips for perfect whipped cream and the best storage methods. Plus, I shared variations for flavor and alternative fruits.
In closing, making this treat is simple and fun. With your creativity, you can impress anyone with your dessert skills. Enjoy your cake!