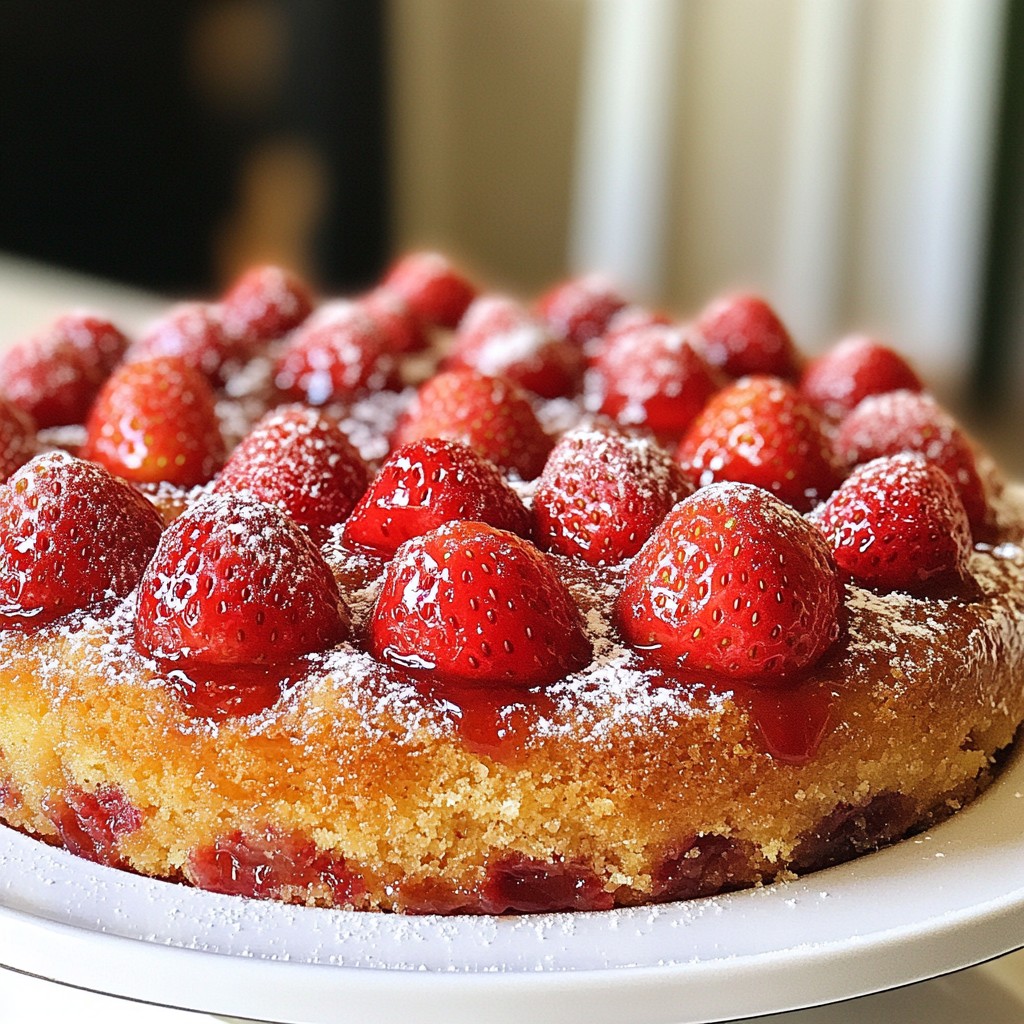
If you're craving a dessert that's both simple and delicious, I have just the thing for you! My Strawberry Upside-Down Cake is a fun twist on a classic treat. It bursts with sweet, fresh strawberries and is easy to make from scratch. In this article, I'll share my favorite recipe, step-by-step instructions, and tips to elevate your baking game. Let’s dive in and create something amazing together!
Why I Love This Recipe
- Bright and Colorful: This cake showcases the vibrant colors of fresh strawberries, making it a stunning centerpiece for any gathering.
- Deliciously Sweet: The combination of brown sugar and strawberries creates a sweet caramelized layer that enhances the overall flavor of the cake.
- Easy to Make: With simple ingredients and straightforward steps, this recipe is accessible for bakers of all skill levels.
- Perfect for Any Occasion: This cake is versatile enough to be served at parties, family gatherings, or even as a special treat during the week.
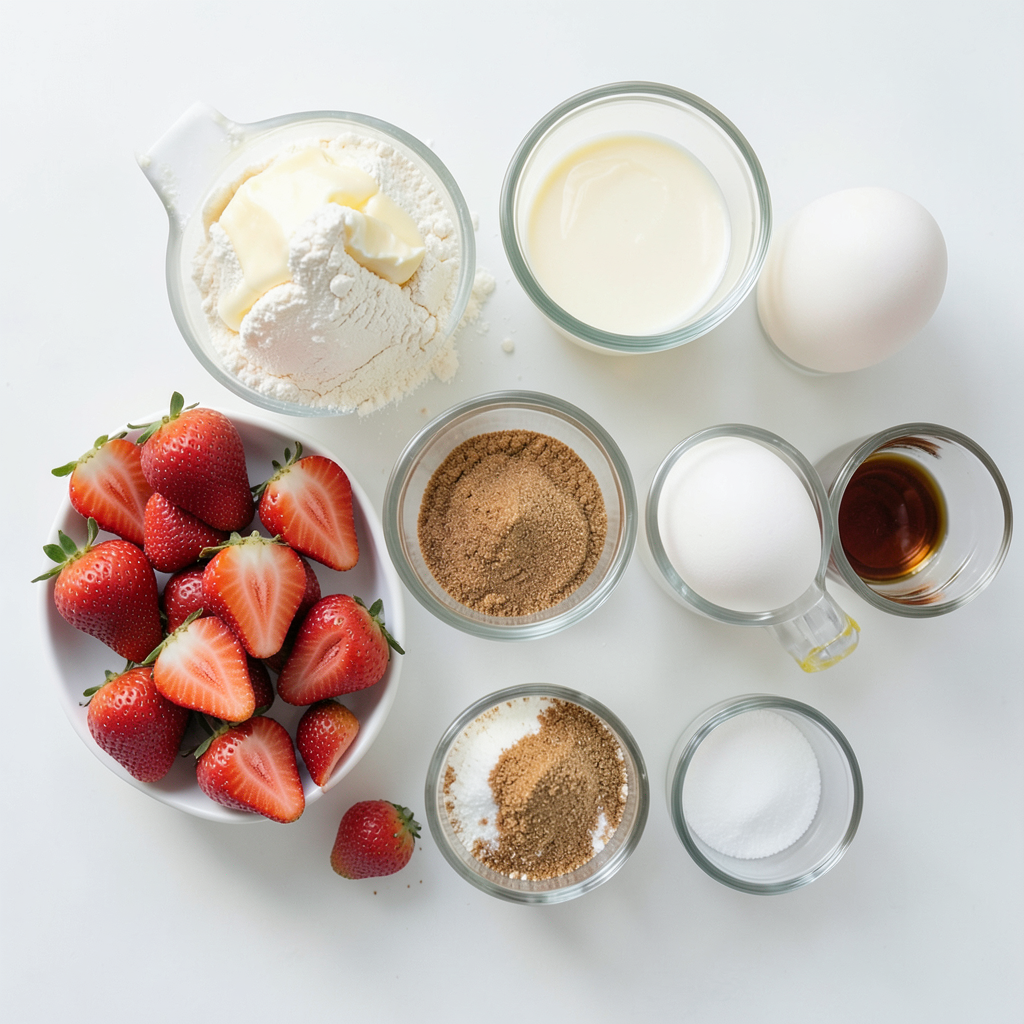
Ingredients
List of Fresh Ingredients
- 1 cup fresh strawberries, hulled and sliced
- 1/2 cup unsalted butter, melted
- 1 cup granulated sugar
List of Dry Ingredients
- 1 1/2 cups all-purpose flour
- 1 teaspoon baking powder
- 1/4 teaspoon salt
Other Essentials
- 1/2 cup brown sugar
- 1/2 cup milk
- 2 large eggs
- 1 teaspoon vanilla extract
- Zest of 1 lemon
For a perfect strawberry upside-down cake, fresh ingredients matter. You need ripe strawberries for the best flavor. Choose berries that are bright red and firm.
The butter must be unsalted and melted to mix well. Granulated sugar adds sweetness and helps create a nice crust.
In the dry ingredients, all-purpose flour is key for structure. Baking powder helps the cake rise. Salt balances the sweetness.
For other essentials, brown sugar gives a deep flavor and caramelizes nicely. Milk adds moisture, while eggs bind the mixture. Vanilla extract brings warmth, and lemon zest adds a fresh kick.
Gather these ingredients before starting. This will make the process smooth and enjoyable, letting you focus on creating a delicious cake.
Step-by-Step Instructions
Preparation Steps
1. Preheat your oven to 350°F (175°C). This helps the cake bake evenly.
2. Grease a 9-inch round cake pan with butter. This prevents sticking.
3. In a small bowl, combine the melted butter and brown sugar. Stir until mixed well.
4. Spread this butter-sugar mix evenly on the bottom of your cake pan. This will be the sweet base for your strawberries.
Arranging Strawberries
1. Take your fresh strawberries, hulled and sliced.
2. Arrange them in a decorative pattern on top of the butter-sugar mix. You can create circles or lines. This makes the cake look nice when flipped.
Mixing the Batter
1. In a large bowl, whisk together the granulated sugar and lemon zest. This adds a bright flavor.
2. Add two large eggs and one teaspoon of vanilla extract to the bowl. Whisk until everything is smooth.
3. In another bowl, sift together the flour, baking powder, and salt. This helps the cake rise well.
4. Gradually add the dry mix to the wet ingredients, alternating with half a cup of milk. Start and end with the flour. Mix until just combined.
Baking and Cooling
1. Carefully pour the batter over the arranged strawberries in the cake pan. Spread it evenly.
2. Bake in the preheated oven for 35-40 minutes. Check if a toothpick comes out clean.
3. Once baked, let the cake cool for about 10 minutes. This helps it set.
4. Invert the cake onto a serving platter. The strawberries will now be on top. Serve warm or at room temperature. Enjoy!
Tips & Tricks
Achieving the Perfect Texture
To make your cake fluffy, mix the batter gently. Overmixing can make it dense. Use a spatula to fold in the dry ingredients. This keeps air in the batter. Always use room temperature eggs and milk. Cold ingredients can slow the mixing process.
Flavor Enhancements
You can boost the flavor by adding spices. A pinch of cinnamon or nutmeg works well. Extracts also add richness. Try almond or lemon extract for a twist. If you want to change the fruit, use peaches or blueberries. You can also swap brown sugar for honey for a different sweet taste.
Serving Suggestions
This cake pairs well with vanilla ice cream or whipped cream. A scoop adds creaminess to each slice. For a nice touch, dust the cake with powdered sugar before serving. Arrange slices on a colorful plate for a beautiful display. You can also garnish with fresh mint leaves for color.
Pro Tips
- Use Fresh Strawberries: For the best flavor and texture, always opt for fresh, ripe strawberries. They will caramelize beautifully and enhance the cake's overall taste.
- Let the Cake Cool: Allow the cake to cool in the pan for 10 minutes before inverting. This helps set the caramel and prevents the strawberries from sticking.
- Experiment with Flavors: Feel free to add different fruits like peaches or blueberries for a unique twist. Just ensure they are not too watery to maintain the cake's structure.
- Serve with Ice Cream: This cake pairs wonderfully with a scoop of vanilla ice cream or whipped cream. The creamy texture complements the fruity flavors perfectly.
Variations
Fruit Alternatives
You can swap strawberries for other fruits. Blueberries work well, adding a burst of color. Peaches also shine in this cake, bringing a sweet, juicy taste. You can even mix different fruits based on what’s in season. Ripe blackberries or cherries can also enhance the flavor.
Gluten-Free Options
If you need a gluten-free cake, you have options. Replace all-purpose flour with almond or coconut flour. You may need to adjust the amount slightly. Add a gluten-free baking mix for ease. Ensure your baking powder is gluten-free too. This will help keep your cake light and fluffy.
Vegan Modifications
To make this cake vegan, replace the eggs with flax eggs. Mix one tablespoon of flaxseed meal with three tablespoons of water. Let it sit for a few minutes to thicken. Use almond or oat milk instead of regular milk. You can also use vegan butter in place of regular butter. These simple swaps make a delicious vegan version of this cake.
Storage Info
Storing Leftovers
To keep your cake fresh, cover it well. Use plastic wrap or aluminum foil. You can also place it in an airtight container. This method keeps the cake moist and tasty. Store it at room temperature for up to three days. If you want to keep it longer, refrigerate it. In the fridge, it lasts about a week. Just remember, the longer it sits, the more it may dry out.
Freezing Instructions
You can freeze your Strawberry Upside-Down Cake for later. First, let it cool completely. Wrap it tightly in plastic wrap. Then, place it in a freezer bag or container. This helps prevent freezer burn. The cake will stay good for up to three months. When you're ready to eat it, remove it from the freezer. Thaw it in the fridge overnight. For a quick method, leave it at room temperature for a few hours. Enjoy the same great taste and texture!
FAQs
How long does Strawberry Upside-Down Cake last?
Strawberry Upside-Down Cake lasts for about 3 days at room temperature. Store it in an airtight container to keep it fresh. If you want it to last longer, you can refrigerate it. In the fridge, it should stay good for about a week. Just remember to cover it well to avoid drying out.
Can I use frozen strawberries for this recipe?
Yes, you can use frozen strawberries. Just make sure to thaw them first and drain any excess juice. This helps keep the cake from getting soggy. Frozen strawberries may be softer but will still taste great. They can give your cake a nice, fruity flavor, just like fresh ones.
What is the best way to invert the cake without breaking it?
To invert the cake smoothly, let it cool for about 10 minutes after baking. Then, place a large plate over the cake pan. Hold the plate and pan tightly together, and flip them over quickly. Gently lift the pan off. If you prepared the bottom well, the cake should come out easily.
Can I make the cake ahead of time?
Yes, you can make the cake ahead of time. Bake it and let it cool completely. After that, wrap it tightly in plastic wrap. Store it at room temperature for up to 3 days. You can also freeze it for up to a month. Just make sure to let it thaw before serving.
This article covered how to make a Strawberry Upside-Down Cake. We discussed fresh and dry ingredients, essential items, and step-by-step instructions. You learned tips for perfect texture, flavor boosts, and serving ideas. We even explored variations like gluten-free and vegan options. Remember, storing your leftovers correctly keeps your cake fresh longer. Enjoy baking this delightful treat, and don't hesitate to experiment with different fruits. It's a fun way to impress friends and family!