My Saved Recipe

  • Home
  • Recipes
    • Dinner
    • Dessert
    • Appetizers
    • Drinks
  • About
  • Contact Us
  • Privacy Policy
menu icon
go to homepage
  • Home
  • Recipes
    • Dinner
    • Dessert
    • Appetizers
    • Drinks
  • About
  • Contact Us
  • Privacy Policy
search icon
Homepage link
  • Home
  • Recipes
    • Dinner
    • Dessert
    • Appetizers
    • Drinks
  • About
  • Contact Us
  • Privacy Policy
×
Savannah

Savannah

Savannah is the creative force behind My Saved Recipe, a space where food becomes both art and adventure. A passionate home chef, she delights in exploring flavors from around the world while honoring timeless classics.

Savannah’s philosophy centers on the power of food to bring people together, spark creativity, and create lasting memories. Through thoughtfully crafted recipes and practical tips, she inspires cooks of all levels to embrace fresh ingredients, experiment with confidence, and find joy in the kitchen.

  • - 2 large chicken breasts, diced - 1 tablespoon olive oil - 1 teaspoon chili powder - 1 teaspoon cumin - 1 teaspoon garlic powder - 1 teaspoon onion powder - Salt and pepper to taste - 8 small corn tortillas - 1 cup shredded cabbage - 1 ripe avocado, sliced - 1/2 cup fresh cilantro, roughly chopped - 1 lime, cut into wedges - 1/2 cup salsa (store-bought or homemade) These ingredients create a simple yet tasty meal. The chicken breasts serve as the main protein. The olive oil keeps the chicken moist while cooking. To make these tacos burst with flavor, I use chili powder, cumin, garlic powder, and onion powder. These spices bring warmth and depth. They create that classic street food taste. The salt and pepper enhance the overall flavor. Adjust these to your liking for a personal touch. Garnishes can elevate your tacos. I recommend adding shredded cabbage for crunch. Avocado adds creaminess and richness. Fresh cilantro provides a bright finish. Lime wedges add a zesty kick. A drizzle of salsa ties everything together. You can mix and match toppings based on your taste. First, grab two large chicken breasts. Dice them into small, even pieces. This helps them cook properly. In a medium bowl, combine the diced chicken with olive oil. Add one teaspoon each of chili powder, cumin, garlic powder, onion powder, salt, and pepper. Mix everything well. Make sure the chicken is coated with the spices. Next, heat a skillet over medium-high heat. Add the seasoned chicken to the hot skillet. Cook the chicken for about 8 to 10 minutes. Stir it occasionally. Look for the chicken to turn white and firm. It should not be pink inside. Once it’s done, remove it from the heat. While the chicken cooks, warm up the corn tortillas. You can do this in a separate pan or in the microwave. Make sure they are soft and pliable. Now, let’s build our tacos! Take a warm tortilla and add a scoop of cooked chicken. Top it with a handful of shredded cabbage. Next, add a few slices of ripe avocado. Sprinkle fresh cilantro on top. Drizzle some salsa over everything. Finally, squeeze fresh lime juice for a burst of flavor. Repeat this process for the rest of the tortillas and ingredients. Enjoy your tasty tacos! To cook chicken well, start with quality chicken breasts. Cut them into small, even pieces. This helps them cook faster. Use a hot skillet for a good sear. Cook the chicken for about 8 to 10 minutes. Stir often to get even cooking. Check that it is no longer pink inside. If you have a meat thermometer, aim for 165°F. This ensures safety and juiciness. Warming tortillas makes them soft and tasty. You can use a pan or the microwave. For a pan, heat it on medium. Place a tortilla in the pan for about 30 seconds on each side. If using a microwave, wrap tortillas in a damp paper towel. Heat them for 20 to 30 seconds. This keeps them warm and pliable. To make your tacos look great, use a colorful platter. Stack the tacos neatly, leaving space for lime wedges. Add a small bowl of salsa for extra flavor. Fresh cilantro can be sprinkled on top for color. Serve the tacos with lime wedges for a zesty kick. This not only looks good but tastes great too! Enjoy your meal with family or friends. {{image_2}} You can swap chicken for other proteins in these tacos. Try diced beef or shrimp. Both options bring their own unique taste. Ground turkey is a lean choice. If you want something different, use pork. Each protein absorbs the spices well. Adjust the cooking time based on your choice. For a meatless option, use beans or lentils. Black beans work great for a hearty fill. You can also use grilled veggies like bell peppers or zucchini. Tofu is another tasty choice. Marinate it in the same spices for flavor. Top with your favorite garnishes for a fresh touch. Salsa is key for flavor. You can use store-bought or homemade salsa. Try a spicy mango salsa for a fruity kick. A zesty tomatillo salsa adds a tangy taste. If you like heat, add jalapeños or hot sauce. For creaminess, use a sour cream or avocado sauce. Mix and match these options for fun flavor. To store your leftover chicken tacos, place them in an airtight container. This keeps them fresh for up to three days in the fridge. Make sure the tacos are fully cooled before sealing them. If you store them while warm, moisture will build up. This can make the tortillas soggy. You can freeze the chicken for later. First, cool it completely. Then, pack it in a freezer-safe bag or container. Remove as much air as possible. Label the bag with the date. You can freeze the chicken for up to three months. However, tortillas do not freeze well. It's best to make fresh tortillas when you reheat. To reheat, you can use the microwave or a skillet. For the microwave, place the taco on a plate and heat for about 30 seconds. Check if it's warm enough; if not, add more time in 10-second bursts. For the skillet, warm it on medium heat for 2-3 minutes. Turn it often to avoid burning. Enjoy your tacos hot and fresh! Street-style tacos are small, soft tacos filled with tasty ingredients. They often use corn tortillas. You can find them at food trucks or street vendors. These tacos usually have a simple filling, like seasoned meats or veggies. Fresh toppings like cilantro, onions, and salsa add flavor. Street-style tacos are all about bold, vibrant flavors. To spice up your tacos, you can add more chili powder to the chicken. You can also use spicy salsa or fresh jalapeños. Try adding hot sauce on top for an extra kick. Another option is to mix in a little cayenne pepper with the spices. Adjust the heat to suit your taste. Yes, you can make the chicken ahead of time. Just cook the chicken as directed and let it cool. Store it in an airtight container in the fridge for up to three days. You can also freeze the chicken for up to three months. Just thaw it in the fridge before using. This way, you can enjoy quick and easy tacos any time! You learned about the key ingredients for tasty chicken tacos. We covered preparation, cooking steps, and assembly. Tips and tricks can help you cook perfectly. You can explore variations with different proteins or vegetarian options. We also discussed how to store leftovers and answered common questions. Remember, making tacos is fun and flexible. Enjoy experimenting with flavors to create your perfect dish!
    Street Style Chicken Tacos Bold and Flavorful Recipe
  • - 1 cup pumpkin puree - 1/2 cup cream cheese, softened - 1/2 cup granulated sugar - 1/2 cup brown sugar, packed Pumpkin puree gives the bread its rich flavor and moist texture. Cream cheese adds creaminess and a slight tang. I love using both granulated and brown sugar. The granulated sugar adds sweetness, while brown sugar adds depth. - 2 cups all-purpose flour - 1 teaspoon baking soda - 1/2 teaspoon baking powder - 1 teaspoon ground cinnamon - 1/2 teaspoon ground nutmeg - 1/4 teaspoon ground ginger - 1/4 teaspoon salt - 1 teaspoon vanilla extract - 1/2 cup chopped walnuts or pecans (optional) For the dry mix, flour, baking soda, and baking powder create the right rise. The spices—cinnamon, nutmeg, and ginger—bring warmth and cozy flavors. If you want crunch, add chopped walnuts or pecans. They give a nice texture to each bite. First, you need to preheat your oven to 350°F (175°C). This step is key for even baking. Next, grab a 9x5 inch loaf pan. Grease it well or line it with parchment paper. This makes it easy to remove the bread later. In a large bowl, beat the softened cream cheese until it's smooth. Then, add in both sugars and the vegetable oil. Mix these together until they look well combined. Now, add the eggs one at a time. Make sure to mix well after each egg. Finally, stir in the pumpkin puree and vanilla extract. Keep mixing until everything is smooth and blended. In a separate bowl, whisk together the flour, baking soda, and baking powder. Then, add the spices: cinnamon, nutmeg, ginger, and salt. Whisk until everything is evenly mixed. Now, it’s time to bring the dry and wet ingredients together. Gradually fold the dry mix into the wet mix. Do this gently and stop as soon as they are combined. Over-mixing can make the bread tough. If you want some extra texture, fold in the chopped walnuts or pecans at this stage. Pour the batter into your prepared loaf pan. Use a spatula to smooth the top so it looks nice. Place the pan in your preheated oven. Bake for 60-70 minutes. To check if it's done, insert a toothpick into the center. If it comes out clean, your bread is ready. Let the bread cool in the pan for about 10 minutes before moving it to a wire rack. This will help it cool evenly. Enjoy the process! To make the best pumpkin cream cheese bread, avoid over-mixing the batter. When you mix too much, the bread can become tough. Mix just until you see no dry flour. This keeps the bread soft and fluffy. Ensuring the correct temperature for baking is crucial. Preheat your oven to 350°F (175°C). An oven that’s too hot can burn the outside while leaving the inside raw. Use an oven thermometer if needed. This small step makes a big difference. Using fresh spices makes your bread taste amazing. Fresh spices have a stronger flavor than pre-ground ones. They add depth to the pumpkin bread. Use whole spices and grind them just before baking for the best results. If you want to add nuts, do it right! To avoid clumping, toss the chopped walnuts or pecans in a bit of flour before mixing them into the batter. This simple trick helps them spread evenly throughout the bread. Enjoy the added crunch in every slice! {{image_2}} You can make this bread even more fun by adding chocolate chips or dried fruit. Chocolate chips give a rich, sweet burst. Dried fruit like raisins or cranberries adds a chewy texture. Both choices make your bread special. If you want to change the spices, try cardamom or allspice. Cardamom gives a floral note that brightens the flavor. Allspice has a warm, sweet taste that enhances the bread's cozy vibe. Feel free to mix and match spices to find your perfect blend. If you need gluten-free options, swap the all-purpose flour for a gluten-free blend. Many brands work well in baking and keep the bread light and fluffy. Just be sure to check the blend for best results. For those on a vegan diet, you can replace the eggs. Use flaxseed meal mixed with water or applesauce. Cream cheese can be swapped with vegan cream cheese for a dairy-free treat. Both adjustments keep your pumpkin bread tasty and enjoyable for everyone. To keep your pumpkin cream cheese bread fresh, choose the right storage method. You can store it on the countertop or in the fridge. If you keep it at room temperature, wrap it tightly in plastic wrap. This method keeps the bread soft for about three days. If you want it to last longer, the fridge is your best bet. In the fridge, the bread stays good for about a week. Freezing is a great way to save your pumpkin cream cheese bread for later. First, let the bread cool completely. Then, wrap it tightly in plastic wrap. After that, place it in a freezer bag or an airtight container. This keeps it safe from freezer burn. You can freeze it for up to three months. When you're ready to enjoy it, thaw the bread overnight in the fridge. For a warm treat, reheat it in the oven at 350°F (175°C) for about 10 minutes. What can I substitute for pumpkin puree? You can use butternut squash puree or sweet potato puree. Both have a similar texture and flavor. Make sure they are smooth and unsweetened. This keeps the taste close to pumpkin. Can I use a different type of sugar? Yes, you can use coconut sugar or maple sugar. They add a unique flavor. Just keep the amount the same as granulated sugar for best results. How do I know when my bread is fully baked? Insert a toothpick in the center of the bread. If it comes out clean, the bread is done. If not, bake a bit longer and check again. What if my bread is too dense? Dense bread may mean you over-mixed the batter. It can also happen if you added too much flour. Measure your flour correctly and mix gently. Best accompaniments for pumpkin cream cheese bread This bread pairs well with coffee or tea. You can also serve it with cream cheese spread or a sprinkle of powdered sugar on top. Ideal occasions for serving this recipe Enjoy this bread at brunch, fall gatherings, or holiday parties. It is perfect for sharing with friends and family. Pumpkin cream cheese bread is a delicious treat. You learned about key ingredients, helpful tips, and variations. The recipe is simple and offers many flavors. Remember to mix well and avoid over-mixing for perfect texture. Store any leftovers correctly to enjoy later. This bread shines at any gathering or cozy morning at home. Embrace your baking adventure and share it with others. Enjoy every bite of your freshly baked bread.
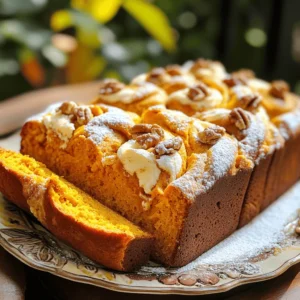
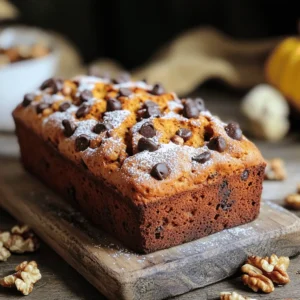
    Pumpkin Cream Cheese Bread Deliciously Soft Snack
  • - 1 ½ cups graham cracker crumbs - ½ cup unsalted butter, melted - 1 cup granulated sugar, divided - 1 (8 oz) package cream cheese, softened - 2 large eggs - 1 teaspoon vanilla extract - 2 cups peeled and diced apples (e.g., Granny Smith or Honeycrisp) - 1 teaspoon cinnamon - 1 cup caramel sauce (store-bought or homemade) - Optional: whipped cream and additional caramel for topping The key ingredients for these bars create a rich and tasty treat. The graham cracker crumbs form a crunchy crust. The unsalted butter helps bind the crumbs together. Using granulated sugar sweetens both the crust and the filling. Cream cheese gives the bars a creamy texture. Eggs help set the filling when baking. Vanilla extract adds a warm flavor that blends well. Apples bring a fresh taste and slight crunch. I recommend using tart apples, like Granny Smith or Honeycrisp, for a nice balance. Cinnamon adds warmth and spice that pairs perfectly with apples. Caramel sauce drizzled on top adds sweetness and richness. If you want to take it up a notch, whipped cream and extra caramel make great toppings. - Mixing bowls - Baking pan - Oven - Spatula You will need some basic tools to make these bars. Mixing bowls help combine the ingredients easily. A baking pan, preferably 9x9 inches, holds the bars while they bake. Your oven needs to be preheated to ensure even cooking. A spatula helps spread the cheesecake filling smoothly over the crust. With these items, you are ready to create a delicious dessert. First, you need to preheat your oven to 325°F (160°C). This temperature helps the bars bake evenly. While the oven heats, grease a 9x9 inch baking pan. You can also use parchment paper. This makes it easy to lift the bars out later. In a medium bowl, mix 1 ½ cups of graham cracker crumbs, ½ cup of melted unsalted butter, and ¼ cup of granulated sugar. Stir until the crumbs coat well. Next, press this mixture firmly into the bottom of your prepared pan. This forms a solid crust. Bake it in the oven for about 10 minutes until it is lightly golden. Remove it and let it cool for a bit. In another bowl, beat 1 (8 oz) package of softened cream cheese with ¾ cup of sugar. Mix until it is smooth and creamy. Then, add 2 large eggs, one by one, mixing well after each. Pour in 1 teaspoon of vanilla extract and stir. Now, gently fold in 2 cups of peeled and diced apples and 1 teaspoon of cinnamon. This gives your filling a great flavor. Pour the cheesecake filling over your cooled crust. Use a spatula to smooth the top. Bake everything in the oven for an additional 25-30 minutes. The center should be set but still jiggle a little. After baking, let the bars cool to room temperature. Drizzle a good amount of caramel sauce on top. Finally, chill them in the fridge for at least 2 hours. This makes them easier to slice. To make your cheesecake creamy, use room-temperature cream cheese. Cold cream cheese can cause lumps. Beat the cheese until smooth before adding other ingredients. This helps blend everything well. Cracks can ruin the look of your cheesecake. To avoid cracks, do not overmix the filling. Bake at a low temperature and avoid opening the oven door. Let the bars cool slowly in the oven after baking. If you need an alternative for cream cheese, try Greek yogurt or ricotta. These options can give a different flavor and texture. If you want lower sugar, use a sugar substitute like stevia or erythritol. These can work well in the recipe. Serve your cheesecake bars in a nice dish to make them pop. A glass plate shows off the layers well. Top with whipped cream and a drizzle of caramel for a tasty touch. You can also sprinkle some cinnamon on top for extra flair. {{image_2}} You can change the apple type for fun. Granny Smith apples are tart, while Honeycrisp are sweet. Each type gives the bars a new taste. Try mixing apples for a fun twist. You could use a mix of tart and sweet apples. Pears also make a great addition. Just peel and dice them like apples. They add a soft, juicy flavor that pairs well with cream cheese. Spices can change the flavor of your bars. Adding nutmeg or ginger gives a warm, cozy taste. Just a pinch can make a big difference. You can also add chocolate or caramel swirls. Drizzle melted chocolate or extra caramel on top. Swirl them into the filling for a fun effect. These simple changes make your cheesecake bars unique. To keep your caramel apple cheesecake bars fresh, store them properly. You can keep them in the fridge for up to one week. Just place them in an airtight container. This helps prevent them from drying out or absorbing other smells from your fridge. If you want to store them longer, freezing is a great option. Wrap the bars tightly in plastic wrap and then in foil. This prevents freezer burn. You can freeze them for up to three months. When you're ready to eat, just thaw them in the fridge overnight. If you want to serve your cheesecake bars warm, reheating is easy. Preheat your oven to 300°F (150°C). Place the bars in a baking dish and cover them loosely with foil. Heat for about 10-15 minutes. This helps keep the texture nice and creamy. Avoid using a microwave. It can make the bars too soft and change the texture. If you follow these steps, your cheesecake bars will taste just as good as when you first made them. Caramel apple cheesecake bars last up to five days in the fridge. To keep them fresh, store them in an airtight container. This helps them stay moist and tasty. Yes, you can make these cheesecake bars a day in advance. Prepare them, cool, and chill as usual. This gives the flavors more time to blend. Just cut and serve when ready. For clean cuts, use a sharp knife. Dip the knife in hot water before each slice. Wipe it dry after each cut to avoid sticking. This way, your bars look neat and pretty. Check for a slight jiggle in the center. The edges should be set and firm. If the top is lightly golden, it’s a good sign too. A toothpick should come out mostly clean when inserted. Caramel apple cheesecake bars are easy and fun to make. We covered all the essential ingredients, from graham cracker crumbs to creamy cheesecake. I shared step-by-step instructions, tips, and variations to help you create the best bars. Remember to store them well for freshness, and don’t hesitate to try new flavors. Enjoy your delicious creation and share it with friends and family for smiles all around. Make your kitchen a happy place with these tasty treats!
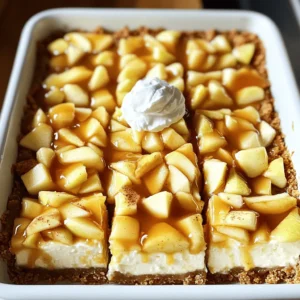
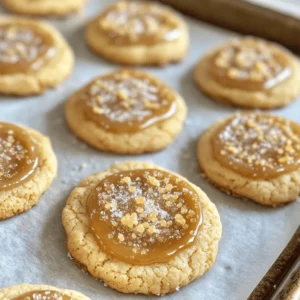
    Caramel Apple Cheesecake Bars Simple and Delicious Treat
  • To make this sticky pineapple brown sugar glazed ham, you will need: - 1 fully cooked bone-in ham (about 6-8 pounds) - 1 cup brown sugar - 1 cup pineapple juice - 1/2 cup honey - 1 tablespoon Dijon mustard - 1 teaspoon ground cloves - 1 teaspoon ground cinnamon - 1/2 teaspoon black pepper - 1 can (20 oz) sliced pineapple, drained (reserve juice) - 10-12 whole cloves (for studding the ham) The glaze brings a sweet and tangy taste. Brown sugar creates a rich sweetness. Pineapple juice adds a fruity zing. Honey enhances the glaze's stickiness. Dijon mustard gives a slight bite. Ground cloves and cinnamon add warmth and depth. Black pepper balances the sweetness with a hint of spice. Each element works together for a delicious flavor experience. You can swap some ingredients if needed. Use maple syrup instead of honey for a different sweetness. If you don’t have Dijon, yellow mustard works too but has a milder taste. For a spicier kick, add a pinch of cayenne pepper. If you can't find whole cloves, ground cloves can work, but use less. Adjust according to your taste preferences. First, preheat your oven to 325°F (165°C). This step warms the oven for even cooking. Next, take your fully cooked ham and score it. Make shallow cuts in a diamond pattern, one inch apart. This helps the glaze soak in. Now, stud the cuts with whole cloves. This adds flavor and makes the ham look nice. Now, let’s make the glaze. In a medium saucepan, mix the brown sugar, pineapple juice, honey, Dijon mustard, ground cloves, ground cinnamon, and black pepper. Heat this mixture over medium heat. Stir it often until it is smooth and bubbly. This should take about 5 minutes. Once done, remove it from the heat and set it aside. Place the ham in a roasting pan with the cut side down. Pour half of the glaze over the top of the ham. Arrange the pineapple slices on top. If needed, use toothpicks to keep them in place. Cover the ham loosely with aluminum foil. Bake it for about 1.5 to 2 hours. You want the internal temperature to reach 140°F (60°C). After that, remove the foil. Baste the ham with the remaining glaze and bake it for another 30 minutes. Baste every 10 minutes during this time. This helps the glaze become sticky and caramelized. Once done, let the ham rest for at least 15 minutes before slicing. This step keeps it juicy. Finally, slice the ham and plate it nicely with the glazed pineapples around it. Enjoy your sticky pineapple brown sugar glazed ham! To get that shiny, sticky glaze, heat your glaze mix well. Stir it until it is smooth and bubbly. This helps the sugar melt and blend with the juices. Pour half the glaze on the ham before baking. Baste it every ten minutes toward the end. This makes the glaze caramelize and stick well. To heat the ham evenly, score it in a diamond shape. This allows the glaze to seep into the meat. Place the ham cut side down in the pan. This helps keep it moist. Cover it loosely with foil during the first baking. This traps heat and warms the ham just right. Want to add more depth? Try using different spices. Ground ginger can give a nice kick. A bit of nutmeg adds warmth. You can also mix in some chili powder for a spicy touch. Experiment to find your perfect flavor blend. Enjoy the process and make it your own! {{image_2}} You can switch up the brown sugar in this recipe. Try using maple syrup for a deep flavor. Agave nectar offers a lighter touch, making the glaze less sticky. Each sweetener changes the taste and texture. Honey can also work well if you want a floral note. Experiment with what you have on hand. You don't have to stick to ham. A pork shoulder can work for this recipe. It will offer a great taste but will need longer cooking time. Turkey also makes a nice choice for a lighter meal. Just adjust the bake time based on the meat you choose. Each meat will soak up the glaze differently. Adding fruits can enhance your dish's flavor and texture. Consider using diced apples or pears for a fresh crunch. Chopped nuts, like pecans or walnuts, can add a nice crunch too. These ingredients make your dish unique and fun. Just make sure to add them near the end of baking to keep them fresh. After your sticky pineapple brown sugar glazed ham cools, slice it for easy storage. Let it rest for at least 15 minutes before slicing. This helps keep the juices in the ham. Store the slices in an airtight container. You can keep it in the fridge for up to five days. Always ensure the ham is cooled to room temperature before sealing. To reheat, preheat your oven to 325°F (165°C). Place the ham slices in a baking dish. Add a splash of pineapple juice for moisture. Cover the dish with foil to prevent drying out. Heat for about 20-25 minutes or until warmed through. You want the internal temperature to reach 140°F (60°C). If you like, brush with leftover glaze for extra flavor. You can freeze the ham if you have leftovers. Wrap each slice tightly in plastic wrap, then place them in a freezer-safe bag. This helps keep the flavor and texture nice. You can store it in the freezer for up to three months. When ready to eat, thaw overnight in the fridge. Reheat as mentioned above for the best taste. You can check the ham's doneness by measuring its internal temperature. Use a meat thermometer. The safe temperature for ham is 140°F (60°C). If it reaches this, it’s ready. You can also check the color. The meat should be pink and juicy. If it looks dry, it may be overcooked. Yes, you can use a spiral-cut ham. It works well with this glaze. The cuts allow the glaze to seep into the meat. This makes every bite sweet and sticky. Just adjust the cooking time. Spiral-cut hams are often smaller and may cook faster. Many sides pair well with glazed ham. Here are some great options: - Roasted vegetables - Mashed potatoes - Green bean casserole - Macaroni and cheese - Coleslaw These sides balance the sweetness of the ham. They also bring color and variety to your plate. Cooking a glazed ham can be easy and fun. We covered the key ingredients and steps needed to make it shine. The tips and tricks shared help you get that perfect glaze and even cooking. You also learned about variations to customize your dish and how to store leftovers. No matter your choice of meat or flavors, this dish can be a hit. Follow these steps to create a tasty centerpiece for any meal. Enjoy your cooking adventure!
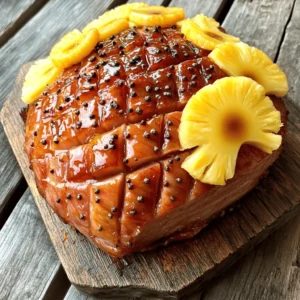
    Sticky Pineapple Brown Sugar Glazed Ham Recipe Delight
  • - 4 ears of fresh corn, husked - 1 red bell pepper, diced - 1 small red onion, finely chopped - 1 cup cherry tomatoes, halved - 1 avocado, diced - ¼ cup fresh cilantro, chopped - 3 tablespoons lime juice - 2 tablespoons olive oil - 1 teaspoon chili powder - Salt and pepper to taste Fresh corn is the star here. Choose ears that feel heavy and firm. The kernels should be plump and bright. This ingredient gives the salad its sweet and crisp bite. Next, we add vibrant vegetables. The red bell pepper adds crunch and color. The red onion gives a nice kick. Halved cherry tomatoes bring juiciness. Diced avocado adds creaminess, balancing the flavors. For herbs, we use fresh cilantro. It adds a burst of freshness. The lime juice and olive oil make a zesty dressing. The chili powder gives warmth without too much heat. Salt and pepper enhance all the flavors. - ½ cup feta cheese, crumbled (optional) Adding feta cheese can elevate the salad. Its salty flavor pairs well with the sweet corn. If you prefer a different cheese, try goat cheese or queso fresco. These options bring their unique tastes too. You can also add protein. Grilled chicken or shrimp makes it heartier. Black beans or chickpeas are great for a vegetarian twist. Each addition changes the salad while keeping it fresh. - Mixing bowls - Cutting board and knife You’ll need good tools for this salad. A mixing bowl helps combine all the fresh ingredients. A cutting board and sharp knife make prep easy. Chopping veggies becomes quick and safe. With these ingredients and tools, you’re ready to make a delicious Summer Street Corn Salad. Enjoy each step of the process! First, fill a large pot with water. Bring it to a boil. After boiling, add your husked corn. Let it cook for 5-7 minutes. The corn should be tender when done. Remove the corn from the pot. Let it cool for a moment. Once cool enough, cut the kernels off the cobs into a large bowl. You can grill the corn for a smoky flavor. Simply place the husked corn on a hot grill. Cook for about 10 minutes, turning often. You can also roast it in the oven. Wrap the corn in foil and bake at 400°F for 20 minutes. Next, prepare your veggies. Dice the red bell pepper and chop the red onion finely. Halve the cherry tomatoes. Cut the avocado into small cubes. Make sure to be careful with your knife. Place all chopped ingredients in the bowl with the corn. Gently mix the corn and veggies using a large spoon. Make sure everything blends well. You want the colors to shine and the flavors to start combining. In a small bowl, add lime juice, olive oil, chili powder, salt, and pepper. Use a whisk to mix everything together. You want a smooth dressing that blends the flavors. Pour the dressing over the salad mixture. Toss it gently to coat everything. Be careful not to mash the avocado. If using feta cheese, sprinkle it on top and give it a light stir. This will add a creamy touch to your salad. Selecting the Best Corn When picking corn, look for bright green husks. They should feel firm and tightly wrapped. The silk at the top should be brown and sticky, not dry. This means the corn is fresh. Fresh kernels should be plump and shiny. To test, press a kernel; it should pop easily. Ripeness of Other Vegetables For a colorful salad, choose ripe vegetables. Red bell peppers should be firm and shiny. Tomatoes should be slightly soft but not mushy. Avocados should yield to gentle pressure. If they are hard, let them sit until they ripen. Suggested Seasoning Adjustments To boost flavor, try adding more lime juice or chili powder. If you like heat, add diced jalapeños. You can also mix in a dash of cumin for a warm taste. Always taste your salad as you mix to find the right balance. Fresh Herb Use Fresh herbs can brighten your salad. Try using parsley or mint along with cilantro. Chop them finely to blend well. Herbs add depth and freshness that make your dish pop. Serving Bowl Ideas Serve your salad in a large, colorful bowl. A white bowl makes bright colors stand out. You can also use a wooden bowl for a rustic look. Make sure the bowl is large enough for tossing. Garnishing Techniques Garnish your salad with extra cilantro and lime wedges. Place them on top for color and flavor. You can also sprinkle extra feta cheese if desired. This makes the dish look beautiful and inviting. {{image_2}} Gluten-Free Alternatives This salad is naturally gluten-free. All the main ingredients are safe for gluten-free diets. Make sure you check any added dressings or toppings to ensure they are gluten-free, too. Vegan Options To make this salad vegan, simply omit the feta cheese. You can add more avocado or even use a vegan cheese substitute for extra creaminess. Spicy Additions If you like heat, add jalapeños or red pepper flakes. You can mix these in with the dressing for a spicy kick that balances well with the corn's sweetness. Sweet Corn Salad Twist For a sweet twist, add diced mango or pineapple. These fruits add a fresh, juicy flavor that pairs nicely with the corn. Substituting Ingredients Feel free to swap seasonal veggies in this salad. Zucchini or cucumbers work great in summer. They add crunch and freshness, making the dish even more colorful. Using Grilled Corn For a smoky flavor, try using grilled corn. Grill the corn on the cob first, then cut the kernels off. This adds a unique taste that elevates the salad. To keep this salad fresh, store it in an airtight container. This helps prevent wilting. Place it in the fridge right after serving. The expected shelf life is about three days. After that, the veggies may lose their crunch. Can you freeze corn salad? I don’t recommend it. Freezing changes the texture of fresh veggies. If you must, freeze only the corn. Thawing and reusing is easy. Just let the corn sit in the fridge overnight. Mix it back in with fresh veggies for the best taste. Preparing ahead of time saves you effort. Chop your veggies and store them separately. You can mix them the day you plan to serve. Use glass or BPA-free plastic containers for storage. These keep your salad fresh and safe. Yes, frozen corn works well here. It is quick and easy to use. Frozen corn is picked at peak ripeness. This means it often has great flavor. It is also convenient since you don’t have to cook or cut it. Just thaw it and add it to your salad. If you want to skip feta cheese, there are many options. You can use crumbled goat cheese for a tangy flavor. Cotija cheese is also a great choice and adds a nice texture. For a dairy-free option, try using avocado or a nut-based cheese. These options still give your salad a creamy touch. To add heat to your salad, you can use several methods. Adding diced jalapeños gives a nice kick. You can also sprinkle cayenne pepper into the dressing. Another option is to mix in hot sauce, adjusting to your taste. Don’t forget fresh chopped cilantro; it pairs well with heat. Your salad can sit out for about two hours. This time is safe for food. If it is hot outside, keep it out for no more than one hour. After that, store it in the fridge. This keeps it fresh and safe to eat later. In this blog post, we explored how to make a delicious Summer Street Corn Salad. We covered key ingredients like fresh corn and herbs, as well as optional add-ins such as cheese and proteins. I explained easy cooking methods and how to mix everything perfectly. Finally, I shared tips on selecting the best fresh ingredients and tasty variations. Remember, this salad is versatile and perfect for any occasion. Enjoy making it your own, and share it with friends and family!
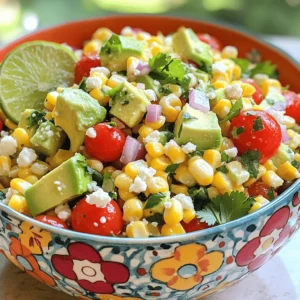
    Summer Street Corn Salad Fresh and Flavorful Dish
  • - 2 cups all-purpose flour - 1 teaspoon baking powder - 1 teaspoon baking soda - 1 teaspoon ground cinnamon - 1/2 teaspoon ground nutmeg - 1/2 teaspoon ground ginger - 1/4 teaspoon salt The dry ingredients are key to the cake's texture. I use all-purpose flour for a soft crumb. Baking powder and baking soda help the cake rise. Spices like cinnamon, nutmeg, and ginger give it a warm flavor. Salt balances the sweetness and enhances all the flavors. - 1 cup granulated sugar - 1 cup packed brown sugar - 1 cup vegetable oil - 4 large eggs - 2 cups canned pumpkin puree - 1 teaspoon vanilla extract The wet ingredients create moisture and sweetness. I combine granulated and brown sugars for depth. Vegetable oil keeps the cake moist. Eggs add structure and richness. Pumpkin puree is the star, bringing flavor and moisture. Vanilla extract enhances the overall taste. - 8 oz cream cheese, softened - 1/2 cup unsalted butter, softened - 1 cup powdered sugar - 1/4 cup caramel sauce - 1/2 teaspoon vanilla extract - Pinch of salt For the frosting, I use cream cheese for tanginess. Unsalted butter adds creaminess and richness. Powdered sugar sweetens and thickens the frosting. Caramel sauce gives it a delicious flavor. Vanilla extract and salt round out the taste. This frosting is smooth and luscious, perfect for our cake. First, preheat your oven to 350°F (175°C). Next, grease and flour two 9-inch round cake pans. This step helps the cake come out easily. In a medium bowl, whisk together the dry ingredients. You will need: - 2 cups all-purpose flour - 1 teaspoon baking powder - 1 teaspoon baking soda - 1 teaspoon ground cinnamon - 1/2 teaspoon ground nutmeg - 1/2 teaspoon ground ginger - 1/4 teaspoon salt Set this bowl aside. Now, in a large mixing bowl, combine the sugars and oil. You will need: - 1 cup granulated sugar - 1 cup packed brown sugar - 1 cup vegetable oil Beat this mixture until it is well combined. Add in the eggs one at a time, mixing well after each addition. Next, stir in: - 2 cups canned pumpkin puree - 1 teaspoon vanilla extract Mix until everything is blended. Gradually add the dry ingredients to the wet mixture. Mix just until combined. Do not overmix, as this can make the cake tough. Divide the batter evenly between the prepared cake pans. Smooth out the tops. Bake for about 25-30 minutes. Check if they are done by inserting a toothpick in the center. If it comes out clean, the cakes are ready. After baking, let the cakes cool in the pans for about 10 minutes. Then, carefully transfer them to a wire rack to cool completely. While the cakes cool, prepare the caramel cream cheese frosting. In a mixing bowl, beat together: - 8 oz cream cheese, softened - 1/2 cup unsalted butter, softened Beat until creamy and smooth. Gradually add in: - 1 cup powdered sugar - 1/4 cup caramel sauce (store-bought or homemade) - 1/2 teaspoon vanilla extract - Pinch of salt Beat this mixture until fluffy and well combined. Once the cakes are cool, you can frost them. Place one layer on a plate and spread frosting on top. Add the second layer and frost the sides and top of the cake. If you want, drizzle more caramel sauce on top for a lovely finish. To get the best cake, avoid overmixing the batter. Mix just until the flour is gone. If you mix too much, the cake can turn out tough. You want it light and fluffy. Baking time is also key. Bake the cake for 25 to 30 minutes. Check it with a toothpick to see if it’s done. If it comes out clean, the cake is ready. Let it cool in the pans for about 10 minutes. Then, move it to a wire rack to cool fully. This keeps it soft and moist. For a fluffy frosting, start with softened cream cheese and butter. Beat them together until smooth. Add the powdered sugar slowly. This helps mix it well without lumps. Then, add the caramel sauce and a pinch of salt. Beat until it is airy and light. To get a smooth finish on your cake, use a spatula. Spread the frosting evenly. Work from the center outwards for a neat look. If you want a pretty touch, drizzle extra caramel on top. It not only looks good but tastes great too! When serving your cake, place it on a nice plate. You can add some extra decorations like nuts or fresh fall fruit. This makes it more inviting. Pairing the cake with drinks can enhance the flavors. Try it with hot apple cider or a rich coffee. The warm drinks will balance the sweet cake well. Enjoy! {{image_2}} You can easily add exciting flavors to your cake. Adding nuts or chocolate chips gives great texture. Chopped walnuts or pecans add crunch and a nutty taste. If you love chocolate, mix in semi-sweet chocolate chips. This will make each bite feel rich and special. You might also want to explore different spices. Instead of just cinnamon, try cardamom or allspice. These spices add warmth and depth to the pumpkin cake. You can also use pumpkin pie spice for a stronger flavor. Feel free to experiment and find your favorite mix! While caramel cream cheese frosting is a dream, you can switch it up. Try a classic buttercream with vanilla for a lighter touch. Or use a chocolate ganache for a rich, decadent finish. A cream cheese frosting without caramel is also a great option. It will still be creamy and smooth. If you seek healthier options, consider Greek yogurt frosting. It’s tangy and lighter than cream cheese. You can also use coconut cream for a dairy-free option. Both will still taste delicious while being a bit lighter! Making this cake for special diets is easy. For a gluten-free version, swap the all-purpose flour for gluten-free flour. Make sure to check the blend you use. Some blends work better than others in cakes. If you want a vegan alternative, replace eggs with flaxseed meal. Mix one tablespoon of flaxseed meal with three tablespoons of water. Let it sit for five minutes to thicken. Use a plant-based butter for the frosting. You can also use almond milk instead of regular milk. These changes keep the flavor while making it vegan-friendly! To keep your Autumn Pumpkin Cake fresh, store it in the refrigerator. Place the cake in an airtight container. This will keep it moist and tasty for a few days. If you have leftover frosting, store it separately. Cover the frosting tightly with plastic wrap or in a container. This helps prevent it from drying out. If you want to save your cake for later, freezing it is a great option. First, wrap each layer tightly in plastic wrap. Then, place the wrapped layers in a freezer bag or container. This method keeps the cake fresh for up to three months. When you are ready to enjoy it, take it out and let it thaw in the fridge overnight. How long does the cake last? In the fridge, the cake stays fresh for about five days. If it’s frozen, it can last up to three months. Keep an eye out for signs of spoilage. If you see mold or if the cake smells off, it’s best to toss it. Always check your cake before serving to ensure it is safe to eat. To make your Autumn Pumpkin Cake even more moist, you can add applesauce. This ingredient brings extra moisture and a slight sweetness. Use about 1/2 cup of unsweetened applesauce for best results. It keeps the cake fluffy and tender. If you prefer, try adding sour cream or yogurt as well. Both will give the cake a rich texture. Yes, you can use fresh pumpkin! To prepare fresh pumpkin, start by selecting a small sugar pumpkin. Cut it in half and scoop out the seeds. Then, roast the halves cut-side down in the oven at 350°F for about 45 minutes. Once soft, scoop the flesh into a bowl and mash it until smooth. Use this fresh pumpkin puree in place of canned pumpkin. It adds a lovely, fresh flavor to your cake. Frosting a layered cake can be fun! Start with a chilled cake for easy frosting. Place the first layer on a flat plate. Spread a generous layer of frosting on top, leaving a little room at the edges. Stack the second layer on top and repeat. For the sides, use a spatula to spread frosting evenly. Rotate the cake as you frost for even coverage. A bench scraper can help create a smooth finish. Finish with a drizzle of caramel for extra flair! You learned how to make a delicious Autumn Pumpkin Cake. We covered the key ingredients: dry and wet. You also got the scoop on frosting options. I shared step-by-step instructions, tips for the best texture, and serving ideas. Try fun variations, like adding nuts, or exploring dietary options. Store the cake properly to keep it fresh. With these insights, you can impress friends and family with your baking skills. Enjoy creating your tasty masterpiece!
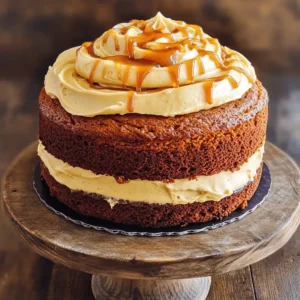
    Autumn Pumpkin Cake with Caramel Cream Cheese Frosting Delight
  • - Apples: Choose 2 large apples like Granny Smith or Honeycrisp. Granny Smith gives a nice tartness. Honeycrisp offers great sweetness and crunch. Both work well for frying. - Flour and Seasonings: Use 1 cup of all-purpose flour. Add 1 teaspoon baking powder for lightness. Include 1/2 teaspoon cinnamon and 1/4 teaspoon nutmeg for warmth. Finish with 1/4 teaspoon salt to enhance flavor. - Additional Components: For the batter, you need 1 cup of cold sparkling water. It keeps the batter light and crispy. Use 1 cup of breadcrumbs, preferably panko, for extra crunch. Finally, get vegetable oil for frying. You might want powdered sugar for dusting, but this is optional. These ingredients come together to create a sweet and crispy treat. Enjoy the process of making these delightful apple rings! First, wash the apples under cold water. Make sure to dry them well. Use an apple corer or a sharp knife to remove the core. Slice the apples into rings about 1/4 inch thick. The slices should be even for cooking. In a mixing bowl, combine the following dry ingredients: - 1 cup all-purpose flour - 1 teaspoon baking powder - 1/2 teaspoon cinnamon - 1/4 teaspoon nutmeg - 1/4 teaspoon salt Whisk these together until they blend well. Next, slowly add 1 cup of cold sparkling water. Whisk until the batter is smooth. It should be thick enough to coat the apple rings. Prepare a shallow dish with 1 cup of breadcrumbs. Panko breadcrumbs work best for extra crunch. Heat about 2 inches of vegetable oil in a deep pan over medium-high heat. Use a deep-fry thermometer to keep the oil at 350°F (175°C). Dip each apple ring into the batter. Make sure it is fully coated. Then, transfer it to the breadcrumbs. Press the breadcrumbs onto the batter to coat the ring well. Once the oil is hot, carefully place a few apple rings in the oil. Do not overcrowd the pan; this helps them cook evenly. Fry for 2-3 minutes on each side until they turn golden brown and crispy. When done, use a slotted spoon to remove the fried apple rings. Set them on a plate lined with paper towels to drain any extra oil. If you want, sprinkle powdered sugar on top of the warm apple rings before serving. To make your apple rings super crispy, use cold sparkling water. The bubbles help create a light batter. This makes each ring puff up nicely. Panko breadcrumbs work best for extra crunch. They are larger and give a better texture than regular breadcrumbs. Avoid putting too many apple rings in the pan at once. This keeps the oil hot and helps them fry evenly. It’s best to fry just a few at a time. Aim for a golden brown color, which takes about 2-3 minutes per side. For a fun presentation, stack the crispy rings on a platter. You can drizzle caramel sauce over them. They also pair well with cinnamon ice cream for a sweet treat. Enjoy your crispy fried apple rings! {{image_2}} You can make crispy fried apple rings even more exciting with some fun flavors. One way is to add spices to your batter. Nutmeg and allspice are great choices. They give a warm, cozy taste. Just a pinch can change everything! You can also infuse your batter with extracts. Vanilla extract adds a lovely sweetness. You might even try almond extract for a nutty twist. Experimenting with these additions keeps the recipe fresh and lively. Dipping sauces can take your apple rings to the next level. Caramel sauce is a classic choice. It pairs well with the sweet apples. You can even warm it up for a gooey treat. Cinnamon sugar is another delicious option. Just mix sugar and cinnamon together. Sprinkle it on the warm apple rings right after frying. This adds a sweet, crunchy layer that everyone will love. To keep your crispy fried apple rings tasty, store them in the fridge. Place them in an airtight container. They will stay fresh for about 2 days. If you want to reheat them, use the oven. Preheat it to 350°F (175°C). Place the apple rings on a baking sheet. Bake for about 10 minutes. This method helps keep them crispy. If you want to save some for later, freezing is a great option. First, let the apple rings cool completely. Then, place them in a single layer on a baking sheet. Freeze them for about 1 hour. Once frozen, move them into a freezer-safe bag. This method stops them from sticking together. When you are ready to eat, take out what you need. Thaw the apple rings in the fridge for a few hours before reheating. This helps ensure they heat evenly. To make crispy fried apple rings, start by washing and drying two large apples. Core the apples and slice them into rings about 1/4 inch thick. In a bowl, mix 1 cup of flour, 1 teaspoon of baking powder, 1/2 teaspoon of cinnamon, 1/4 teaspoon of nutmeg, and 1/4 teaspoon of salt. Gradually stir in 1 cup of cold sparkling water until smooth. Dip each apple ring into the batter, then coat it with breadcrumbs. Fry in hot oil until golden brown. Yes! You can fry other fruits, too. Pears, bananas, and peaches work well. These fruits have a soft texture that absorbs the batter nicely. Just remember to slice them thick enough to keep them from falling apart in the oil. Each fruit will add its own flavor twist! For the best coating, dip each apple ring fully in the batter. Make sure the batter sticks well. Then, transfer it to the breadcrumbs. Press gently on the breadcrumbs to help them stick. This method ensures a crispy texture after frying. You can also double-coat by repeating the process for extra crunch. Leftover apple rings can be stored in the fridge for 1-2 days. Keep them in an airtight container to stay fresh. If you want to enjoy them later, reheating them in an oven can help restore their crispiness. Avoid microwaving, as it can make them soggy. Crispy fried apple rings are simple and fun to make. We discussed key ingredients, from apple selection to necessary spices and batter. I shared step-by-step instructions for preparing, battering, and frying. You learned tips for crispiness and serving ideas, plus variations for flavor and sauces. Remember, using cold sparkling water and avoiding crowded pans ensures great results. Whether you serve them fresh or store leftovers, these apple rings can be a delightful treat. Enjoy experimenting with different flavors and find your favorites!
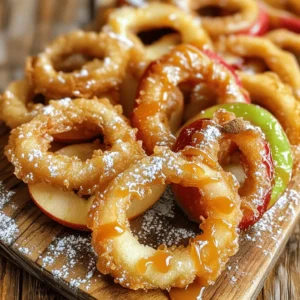
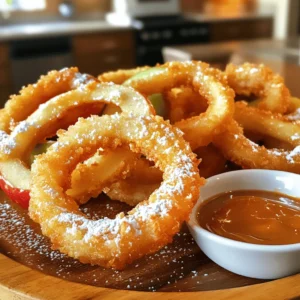
    Crispy Fried Apple Rings Delightful Snack Idea
  • Here is what you need to make Crème Brûlée Cookies: - 1 cup unsalted butter, softened - 1 cup granulated sugar - 1/2 cup brown sugar, packed - 2 large eggs - 1 teaspoon vanilla extract - 2 1/2 cups all-purpose flour - 1 teaspoon baking powder - 1/2 teaspoon salt - 1 tablespoon heavy cream - 1 cup granulated sugar (for topping) - 1 tablespoon cornstarch If you use metric measurements, here are the conversions: - 1 cup unsalted butter = 227 grams - 1 cup granulated sugar = 200 grams - 1/2 cup brown sugar = 110 grams - 2 large eggs = about 100 grams - 1 teaspoon vanilla extract = 5 milliliters - 2 1/2 cups all-purpose flour = 312 grams - 1 teaspoon baking powder = 5 grams - 1/2 teaspoon salt = 3 grams - 1 tablespoon heavy cream = 15 milliliters - 1 cup granulated sugar (for topping) = 200 grams - 1 tablespoon cornstarch = 8 grams You can swap some ingredients if needed: - Use margarine instead of butter if you want. - Brown sugar can be replaced with white sugar plus a bit of molasses. - For a dairy-free option, try using coconut cream. - If you are gluten-free, use a gluten-free flour mix. These options help you customize your cookies while keeping them tasty. Enjoy your baking! Start by preheating your oven to 350°F (175°C). Line two baking sheets with parchment paper. In a large bowl, mix 1 cup of softened butter, 1 cup of granulated sugar, and 1/2 cup of brown sugar. Beat these together until the mix is light and fluffy. Add 2 large eggs, one at a time, mixing well after each. Stir in 1 teaspoon of vanilla extract. In another bowl, whisk 2 1/2 cups of all-purpose flour, 1 teaspoon of baking powder, 1/2 teaspoon of salt, and 1 tablespoon of cornstarch. Slowly mix this dry blend into the wet ingredients until just combined. Use a cookie scoop to drop rounded balls of dough onto the baking sheets, leaving space for spreading. Bake the cookies in your preheated oven for about 10 to 12 minutes. Look for golden edges but slightly underbaked centers. Once done, remove the cookies and let them cool on the baking sheets for 5 minutes. While your cookies cool, prepare the topping. In a small bowl, mix 1 tablespoon of heavy cream with 1 cup of granulated sugar. This should create a thick paste. After the cookies have cooled slightly, spread a thin layer of this mixture over each cookie. To finish, use a kitchen torch to caramelize the sugar until it forms a crispy, golden crust. If you don’t have a torch, broil the cookies in the oven for a minute or two. Watch closely to avoid burning. Finally, let the cookies cool for another 10 minutes until the topping hardens. To get the best cookie texture, start with soft butter. It should feel like a pillow. Cream the butter and sugars well until light and fluffy. This adds air. Then, mix in the eggs one at a time. This helps the cookies rise. Finally, be careful not to over-mix when adding the dry ingredients. Stir until just combined. This keeps your cookies soft and chewy. Caramelizing the sugar is key to that yummy topping. You can use a kitchen torch for the best results. Hold it about 2 inches above the cookie. Move it slowly in circles to ensure even melting. If you don’t have a torch, broil the cookies in the oven. Watch them closely to avoid burning. The sugar should turn a golden brown for that crunchy layer. To store your cookies, let them cool completely. Then, place them in an airtight container. They stay fresh for up to a week. If you want to enjoy them warm, use the oven. Preheat it to 350°F (175°C). Heat the cookies for about 5 minutes. This makes them soft again without melting the topping. {{image_2}} You can make these cookies even more fun by adding flavors. Try mixing in some lemon zest for a bright twist. It pairs well with the creamy topping. Almond extract is another great option. Just swap it for vanilla extract. You can also add mini chocolate chips for a sweet surprise. They give a nice contrast to the crispy topping. Feel free to experiment with spices too. A pinch of cinnamon or nutmeg can add warmth. If you need a gluten-free version, use a gluten-free flour blend. Many blends work well in cookies. Just make sure it has xanthan gum. This helps give the cookies structure. Follow the same steps in the recipe. You'll still get that soft center and crispy topping. Always check labels for cross-contamination if that’s a concern for you. For a vegan version, swap out the butter for a plant-based spread. Use flax eggs instead of regular eggs. Mix 1 tablespoon of ground flaxseed with 3 tablespoons of water. Let it sit for a few minutes to thicken. Use coconut cream in place of heavy cream for the topping. These changes keep the cookie delicious and creamy, while still being plant-based. When you want to enjoy Crème Brûlée Cookies without baking, you have options. You can find delicious pre-made Crème Brûlée Cookies from several brands. - Tate’s Bake Shop: Known for crispy cookies with a rich flavor. - Entenmann’s: Offers a soft and sweet version. - Lofthouse: Features a frosted cookie style that many love. These brands are usually available at major grocery stores. Many local bakeries make their own Crème Brûlée Cookies. - Check your favorite bakery for unique flavors. - Ask if they use real vanilla and fresh cream for the best taste. - Local bakeries often add their own twists, making each one special. Supporting local businesses also means enjoying fresh cookies. You can also buy Crème Brûlée Cookies online. - Amazon: A great place for various brands. - Goldbelly: Offers cookies from famous bakeries across the country. - Etsy: Some home bakers sell their unique cookie creations here. Ordering online can bring special cookies right to your door. Crème Brûlée Cookies combine two great desserts. They have the soft texture of cookies and the rich flavors of crème brûlée. The crispy caramel topping adds a fun crunch that surprises your taste buds. This blend makes them special and enjoyable for all. Yes, you can make the dough early. Wrap it in plastic wrap and refrigerate it. This keeps the dough fresh for up to three days. You can also freeze the dough for about three months. Just thaw it in the fridge before baking. To avoid burning the topping, keep a close watch while you caramelize. If using a kitchen torch, move it in small circles. If broiling, check every 30 seconds. This way, you can catch it before it gets too dark. A golden color is what you want. Yes, you can freeze these cookies. Allow them to cool completely first. Then, place them in an airtight container or a freezer bag. They can last up to three months in the freezer. Just thaw them at room temperature when you are ready to enjoy. Crème Brûlée Cookies stay fresh for about five days at room temperature. Keep them in an airtight container to maintain their softness. If you want them to last longer, freeze them for later use. Crème brûlée cookies blend rich flavors and textures into a tasty treat. We covered essential ingredients, step-by-step baking, and useful tips for success. You learned how to make variations that suit your diet or taste. Don't forget to explore buying options for ready-made cookies if you're short on time. Enjoy crafting these cookies and sharing them with loved ones. With practice, you'll master this delightful dessert. Your kitchen will smell amazing, and your cookies will impress everyone! Happy baking!
    Crème Brûlée Cookies Delightful and Easy Recipe
  • To make crispy fried apple rings, you need: - 2 large apples (Granny Smith or Honeycrisp), cored and sliced into ½-inch rings - 1 cup all-purpose flour - 1 teaspoon baking powder - ½ teaspoon cinnamon - ¼ teaspoon nutmeg - 1 tablespoon sugar - 1 cup cold sparkling water - ½ cup breadcrumbs (panko for extra crunch) - Oil for frying - Powdered sugar for dusting (optional) - Caramel sauce for dipping (optional) These ingredients come together to create a sweet and crunchy treat. The flour and baking powder give the batter a light texture. Cinnamon and nutmeg add warmth and flavor, making these rings hard to resist. When choosing apples, select varieties that balance sweetness and tartness. My favorites are: - Granny Smith: Tart and crisp, great for frying. - Honeycrisp: Sweet and juicy, holds up well in heat. Both options keep their shape and add a nice flavor to your snack. To kick your apple rings up a notch, try these optional ingredients: - Vanilla extract: A splash can enhance the sweetness. - Coconut flakes: Adds a tropical twist to your apple rings. - Chopped nuts: Almonds or pecans can add crunch and flavor. Feel free to mix and match according to your taste. These additions can make your crispy fried apple rings even more special! To start, you need two large apples. I like using Granny Smith or Honeycrisp. These apples are tart and sweet, making them perfect for frying. First, core the apples and slice them into rings. Aim for slices that are about ½-inch thick. This thickness helps them cook evenly. After slicing, pat the rings dry with a kitchen towel. Removing extra moisture is key for crispiness. Next, grab a large bowl. In this bowl, whisk together the flour, baking powder, cinnamon, nutmeg, and sugar. Make sure they mix well. Then, slowly add in one cup of cold sparkling water. Stir gently until you get a smooth batter. It’s okay if there are a few lumps; don’t overmix! Set aside a shallow dish for the breadcrumbs. Now it’s time to fry! Heat about 1-2 inches of oil in a skillet over medium-high heat until it reaches 350°F (175°C). Dip each apple ring into the batter, letting the excess drip off. Then, coat the ring in breadcrumbs. Carefully place the coated apple rings into the hot oil. Fry only a few at a time to avoid overcrowding. Cook for about 2-3 minutes on each side until they turn golden brown and crispy. Once they are done, use a slotted spoon to remove the rings. Place them on a plate lined with paper towels to drain excess oil. If you like, dust them with powdered sugar. Serve them warm with caramel sauce for dipping. Enjoy this tasty snack! To get that perfect crunch, start with cold sparkling water. The bubbles in the water add air, making the batter light. Use panko breadcrumbs for extra crunch. They hold up better than regular breadcrumbs. Fry in oil heated to 350°F (175°C). This temp cooks the rings fast and keeps them crispy. Do not overcrowd the pan. Fry just a few rings at a time. This ensures they cook evenly. One common mistake is using warm batter. Always keep your batter cold for crispiness. Avoid using too much flour when coating the rings. A light coat keeps them crunchy. If the oil is not hot enough, the apple rings will soak up oil. This makes them soggy instead of crispy. Lastly, do not skip drying the apple rings. Moisture can ruin the crispiness. Crispy fried apple rings are great on their own, but you can add fun toppings. Dust them with powdered sugar for a sweet touch. Pair them with caramel sauce for dipping. You can also serve them with vanilla ice cream. This makes for a great dessert. Try adding a sprinkle of sea salt for a sweet-salty mix. Enjoy these warm for the best taste! {{image_2}} You can switch up the coating for your apple rings. Instead of plain breadcrumbs, try using crushed cornflakes. This adds a nice crunch. For a twist, use seasoned breadcrumbs. They give a savory touch. You can also coat the rings in coconut flakes for a tropical vibe. Just make sure to dip the apple rings in the batter first. Adding different flavors can make your apple rings pop! Consider mixing vanilla extract into the batter. This gives a sweet aroma. You can also add a pinch of ginger for an extra kick. If you like a bit of heat, try adding cayenne pepper. It contrasts well with the sweetness of the apples. Want a healthier version? You can bake the apple rings instead of frying them. Preheat your oven to 400°F (200°C). Coat the apple rings in the batter and place them on a baking sheet. Use parchment paper to prevent sticking. Bake for about 15-20 minutes. Flip halfway through for even cooking. You still get a tasty treat with less oil! To keep your leftover apple rings fresh, place them in an airtight container. Make sure to let them cool completely before sealing. If you skip this step, moisture will build up and make them soggy. Store the container in the fridge for up to three days. When you're ready to enjoy your apple rings again, reheating is key. Preheat your oven to 350°F (175°C). Spread the apple rings on a baking sheet in a single layer. Bake them for about 10 minutes or until they feel warm and crispy. Avoid using the microwave, as it can make them mushy. If you want to save apple rings for later, you can freeze them. First, let the cooked rings cool completely. Lay them out in a single layer on a baking sheet. Freeze them for about an hour. Once frozen, transfer the rings to a freezer bag. Remove as much air as possible before sealing. They will last for about two months in the freezer. To make crispy fried apple rings, start with two large apples. I like Granny Smith or Honeycrisp for their tartness. Core and slice the apples into ½-inch rings. Pat them dry with a kitchen towel to remove moisture. In a large bowl, whisk together one cup of all-purpose flour, one teaspoon of baking powder, half a teaspoon of cinnamon, a quarter teaspoon of nutmeg, and one tablespoon of sugar. Gradually add one cup of cold sparkling water to the dry mix. Stir gently until you get a smooth batter. Next, dip each apple ring into the batter, letting the excess drip off. Coat them gently in breadcrumbs. Heat oil in a skillet to 350°F (175°C). Fry each apple ring for about 2-3 minutes per side, until golden brown and crispy. Use a slotted spoon to remove them and place on paper towels to drain excess oil. Dust with powdered sugar and serve warm with caramel sauce. Yes, you can use other fruits for frying! Try bananas, peaches, or pears. Each fruit adds a unique taste and texture. Just make sure they are firm enough to hold their shape while frying. Slice them into rings or wedges similar to apples. Follow the same batter and frying process. Experimenting with different fruits can lead to delicious surprises! To keep apple rings from browning, soak them in a mixture of water and lemon juice. Use one tablespoon of lemon juice for every cup of water. This will help keep them fresh and bright while you prepare the recipe. Another tip is to pat the apple rings dry after soaking. This way, they won’t affect the batter. Enjoy your crispy fried apple rings without worrying about browning! We covered how to make tasty fried apple rings. You learned about the right apples and other ingredients to use. I shared easy steps to prepare, mix, and fry the rings. You now know tips for crispiness and common mistakes to avoid. There are many ways to add flavor and store your leftovers. Keep experimenting with new coatings and spices. Enjoy your apple rings fresh and crispy. Happy cooking!
    Crispy Fried Apple Rings Irresistible and Easy Snack
  • - 1 cup unsalted butter, softened - 1 cup granulated sugar - 1/2 cup brown sugar, packed - 2 large eggs - 1 teaspoon vanilla extract - 2 cups all-purpose flour - 1 teaspoon baking soda - 1/2 teaspoon salt - 1/2 cup heavy cream - 1/4 cup granulated sugar (for topping) Using fresh, high-quality ingredients makes a big difference. I always choose unsalted butter for better control over salt levels. Granulated sugar and brown sugar should be fresh and free from lumps. I prefer large eggs for their size. Vanilla extract must be pure for the best flavor. Fresh all-purpose flour should be sifted to avoid lumps. Heavy cream should have a high-fat content for a rich taste. If you're dairy-free, use coconut oil or a dairy-free butter. For egg allergies, flax eggs are a good option. Instead of all-purpose flour, you can use a gluten-free blend. If you dislike vanilla, almond extract adds a nice twist. Always check labels for allergens when substituting ingredients. Start by preheating your oven to 350°F (175°C). Line two baking sheets with parchment paper. In a large bowl, cream together 1 cup of softened unsalted butter, 1 cup of granulated sugar, and 1/2 cup of brown sugar. Mix this until it gets light and fluffy. This should take about 2-3 minutes. Next, add in 2 large eggs one by one. Make sure to mix well after each egg. Stir in 1 teaspoon of vanilla extract. In another bowl, whisk together 2 cups of all-purpose flour, 1 teaspoon of baking soda, and 1/2 teaspoon of salt. Slowly add this dry mix to your wet ingredients. Mix until just combined. Now pour in 1/2 cup of heavy cream. Gently fold it into your dough until it looks smooth and glossy. Using a tablespoon or a cookie scoop, drop rounded balls of dough onto the prepared baking sheets. Leave about 2 inches between each ball. Bake these in the preheated oven for 10-12 minutes. You want the edges to be lightly golden, but the centers should still be soft. After baking, remove the cookies from the oven and let them cool on the sheets for about 5 minutes. Then, transfer them to a wire rack to cool completely. Once your cookies are cool, sprinkle a thin layer of granulated sugar on top of each cookie. Use about 1/4 teaspoon per cookie. Now, take a kitchen torch and caramelize the sugar. Move the flame in a circular motion over the sugar until it melts and forms a golden crust. Be careful not to burn it! After caramelizing, let the sugar cool and harden before you serve these delightful treats. To get the best texture for your Crème Brûlée Cookies, focus on the dough. Start with softened butter for easy mixing. Cream the butter and sugars well until light and fluffy. This step adds air and makes the cookies soft. Don’t overmix the dough once you add the flour. Gently fold in the heavy cream to keep that nice, chewy bite. Bake just until the edges are golden. The centers should remain soft for that perfect melt-in-your-mouth feel. If you have leftover cookies, store them in an airtight container. This keeps them fresh and soft. You can place a slice of bread in the container. The bread helps keep the cookies moist. If you want to store them longer, freeze the cookies. Just make sure they are fully cooled first. Wrap each cookie in plastic wrap and place them in a freezer bag. They can last up to three months in the freezer. One common mistake is not measuring ingredients correctly. Use measuring cups and spoons for accuracy. Another mistake is baking at the wrong temperature. Always preheat your oven to 350°F (175°C). Watch the cookies closely while they bake. If you let them bake too long, they may turn hard. Lastly, when caramelizing the sugar, keep the torch moving. This helps avoid burning the sugar and gives you a nice, even crust. {{image_2}} You can easily change the basic recipe to fit your taste. Try adding chocolate chips for a rich twist. Dark, milk, or white chocolate all work well. You can mix in chopped nuts like pecans or walnuts for crunch. Toast them first to enhance their flavor. Want a fruity touch? Add dried fruit, like cranberries or cherries. They add a fun burst of flavor and color. If you need a gluten-free option, swap the all-purpose flour. Use a gluten-free flour blend that works well for baking. Make sure it has xanthan gum for better texture. Your cookies will still be soft and delicious. Keep an eye on baking time, as gluten-free cookies may need slight adjustments. Mini cookies are a fun way to serve these treats. Use a small cookie scoop to form smaller balls of dough. Bake them for around 8-10 minutes. They will be perfect bite-sized delights! You can then top them with sugar and caramelize as usual. This makes them great for parties or sharing with friends. To keep your Crème Brûlée Cookies fresh, store them in an airtight container. This helps maintain their soft texture and rich flavor. Place parchment paper between layers to avoid sticking. Store them at room temperature for up to five days. If you want them to last longer, consider freezing. Freezing these cookies is simple. First, let them cool completely. Then, place them in a single layer on a baking sheet. Freeze for about two hours until firm. After that, transfer the cookies to a freezer bag. Remove as much air as possible before sealing. They can stay frozen for up to three months. To reheat your cookies, preheat the oven to 350°F (175°C). Place the cookies on a baking sheet. Heat for about five minutes, just until warm. If you want to refresh the sugar crust, use a kitchen torch quickly. This gives them that fresh-out-of-the-oven taste! Yes, you can make these cookies ahead of time. Prepare the dough and chill it in the fridge. You can store it for up to three days. When ready, scoop and bake the cookies fresh. This keeps them soft and tasty. These cookies blend classic crème brûlée flavors into a cookie form. The creamy texture comes from heavy cream mixed in the dough. The sugar topping adds a crunchy, caramelized layer. This combination creates a delightful contrast in each bite. To avoid burning the sugar, use a kitchen torch carefully. Keep the flame moving in a circular motion. This helps the sugar melt evenly. Aim for a golden color, not dark brown. If it burns, the taste turns bitter, so watch closely! You learned about the key ingredients for crème brûlée cookies. Quality matters, and there are easy substitutions for allergies. Our step-by-step guide showed you how to prep, bake, and caramelize the top for that perfect crunch. I shared tips to ensure the best texture and storage methods to keep your cookies fresh. Remember to explore variations like adding chocolate or going gluten-free. Now, you’re ready to enjoy these tasty treats. Make them your own and impress your friends with your baking skills!
    Crème Brûlée Cookies Delightful and Decadent Treat
  • To make this super moist pumpkin loaf, you need some key ingredients. Here’s what you will gather: - 1 ½ cups all-purpose flour - 1 teaspoon baking powder - 1 teaspoon baking soda - ½ teaspoon salt - 1 teaspoon ground cinnamon - ½ teaspoon ground nutmeg - ½ teaspoon ground ginger - ½ cup unsweetened applesauce - 1 cup pure pumpkin puree - ¾ cup granulated sugar - ½ cup brown sugar, packed - 2 large eggs - ½ cup vegetable oil - 1 teaspoon vanilla extract These ingredients work together to create a loaf that is moist and full of flavor. The pumpkin puree adds moisture and texture. The spices give it that warm, cozy taste. Feel free to make this pumpkin loaf your own by adding some extras. Here are a couple of tasty options: - ½ cup chopped walnuts or pecans - ½ cup chocolate chips Adding nuts gives a nice crunch. Chocolate chips add sweetness and richness. You can mix and match based on your taste. You can easily swap some ingredients for others based on what you have. Here are some ideas: - Flour: Use whole wheat flour for more fiber. - Sugars: Coconut sugar or honey can work, but adjust amounts. - Applesauce: You can use yogurt for a creamier texture. - Oil: Substitute with melted coconut oil or melted butter. These swaps can change the flavor and texture a bit. Experiment to find what you like best! Start by preheating your oven to 350°F (175°C). This step is key for even baking. Next, prepare your loaf pan. You can grease it or line it with parchment paper. Lining makes it easier to take the loaf out later. In a bowl, whisk together the dry ingredients. Combine 1 ½ cups of all-purpose flour, 1 teaspoon of baking powder, 1 teaspoon of baking soda, and ½ teaspoon of salt. Then, add 1 teaspoon of ground cinnamon, ½ teaspoon of ground nutmeg, and ½ teaspoon of ground ginger. Mix well until everything is combined. Set this bowl aside. In a large bowl, mix the wet ingredients. Start with ½ cup of unsweetened applesauce and 1 cup of pure pumpkin puree. Add ¾ cup of granulated sugar and ½ cup of packed brown sugar. Crack in 2 large eggs, and pour in ½ cup of vegetable oil and 1 teaspoon of vanilla extract. Stir these until they blend into a smooth mixture. Now, fold the dry ingredients into the wet mix. Use a spatula to gently combine them. Don’t overmix; a few lumps are okay. If you want, add ½ cup of chopped walnuts or pecans, and ½ cup of chocolate chips. Gently fold these in until they spread evenly through the batter. Pour the batter into your prepared loaf pan. Smooth the top with a spatula. Place the pan in the oven and bake for 55-65 minutes. Check if it’s done by inserting a toothpick into the center. If it comes out clean, your loaf is ready! If it browns too fast, cover it with foil for the last 10-15 minutes. Once baked, let it cool in the pan for 10 minutes. After that, move it to a wire rack to cool completely. Enjoy your Super Moist Pumpkin Loaf! You can find the Full Recipe for more details. To make your pumpkin loaf super moist, use pure pumpkin puree. Canned pumpkin works well and helps keep the loaf soft. Mixing in unsweetened applesauce adds extra moisture too. You can also add a bit of vegetable oil for richness. Be careful not to overmix your batter. Overmixing can lead to a dry loaf. Just mix until the dry ingredients are combined with the wet ones. Baking can be tricky. Here are some common problems to watch for: - Incorrect oven temperature: Always check your oven with a thermometer. An oven that's too hot can burn the loaf. - Underbaking: If you pull it out too soon, the inside may be gooey. Use a toothpick to check for doneness. - Overbaking: This can dry out your loaf. Keep an eye on the time, especially in the last few minutes. - Not greasing the pan: Make sure your pan is greased or lined. This helps with easy removal after baking. Serving your pumpkin loaf is fun! Here are some tasty ideas: - Slice the loaf and serve it warm. Add a pat of butter on each slice. - Top with cream cheese spread for a rich taste. - Dust the top with powdered sugar for a pretty finish. - Pair it with a warm drink like coffee or tea. This makes a great snack or breakfast treat. Explore these options to enjoy your super moist pumpkin loaf even more! For the full recipe, check the earlier section. {{image_2}} You can make this pumpkin loaf a bit healthier. Swap half the sugar for honey or maple syrup. Use whole wheat flour instead of all-purpose flour. You can also replace the oil with mashed banana or yogurt. These changes keep your loaf tasty while cutting calories. Want to kick up the flavor? Add a teaspoon of vanilla bean paste. It gives a rich taste. Try mixing in a tablespoon of orange zest for a citrus twist. You can also add a pinch of cloves for warmth. For those who love spice, a dash of cayenne pepper can create a surprising kick. Change your pumpkin loaf with seasonal ingredients. In fall, add dried cranberries or chopped apples. In winter, mix in chopped pecans for crunch. For a summer treat, try adding blueberries or fresh peaches. Each season brings new flavors to explore! For the complete recipe, check out the Full Recipe section above. To keep your pumpkin loaf moist, wrap it well. Use plastic wrap or aluminum foil. Store it at room temperature for up to three days. If you want it to last longer, consider refrigerating it. In the fridge, it can stay fresh for up to a week. Just remember to let it come to room temp before serving. Freezing is a great option if you want to save some for later. First, let the loaf cool completely. Then, slice it into pieces. Wrap each slice in plastic wrap, then place them in a freezer bag. Label the bag with the date. Your loaf can last up to three months in the freezer. When you’re ready to enjoy, simply thaw it overnight in the fridge. Reheating your pumpkin loaf is simple. If you want it warm, preheat your oven to 350°F (175°C). Place the slices on a baking sheet and heat for about 10-15 minutes. For a quick option, use the microwave. Heat one slice for about 15-20 seconds. Add a little butter or cream cheese for extra flavor. Enjoy every bite of your super moist pumpkin loaf! For the full recipe, refer to the cooking instructions above. Yes, you can make this pumpkin loaf vegan. To replace the eggs, use flaxseed meal. Mix one tablespoon of flaxseed meal with three tablespoons of water. Let it sit for a few minutes until it thickens. You can also swap the vegetable oil for a plant-based oil like coconut oil. For the applesauce, make sure it's unsweetened. This keeps the loaf moist and tasty. The pumpkin loaf stays fresh for about four days. Store it in an airtight container at room temperature. If you want it to last longer, you can refrigerate it for up to a week. Just make sure to seal it well to avoid drying out. You can also freeze it if you want to save some for later. Absolutely! Fresh pumpkin works great in this recipe. First, you'll need to roast the pumpkin until it's soft. Then, scoop out the flesh and mash it. Aim for about one cup of mashed pumpkin. This adds a nice fresh taste to your loaf. Just remember to let it cool before mixing it into your batter. You can enjoy this pumpkin loaf plain or with toppings. Spread some butter or cream cheese for extra flavor. It also pairs well with coffee or tea. For a fun twist, serve slices with a scoop of vanilla ice cream. You can even add a drizzle of caramel sauce on top for a sweet treat. To check if your pumpkin loaf is done, use the toothpick test. Insert a toothpick into the center of the loaf. If it comes out clean, it’s ready. If it has batter on it, bake for a few more minutes. Keep an eye on the top; it should be golden brown. If it browns too fast, cover it with foil. For the full recipe, check the instructions above! You learned about key ingredients for super moist pumpkin loaf, helpful baking tips, and fun variations. We covered storage methods and answered common questions too. Remember, the right mix of ingredients and proper technique ensures a tasty loaf. Try different flavors and swap out items to suit your taste. Enjoy baking your pumpkin loaf, and share it with friends and family. It’s a perfect treat for any season. Happy baking!
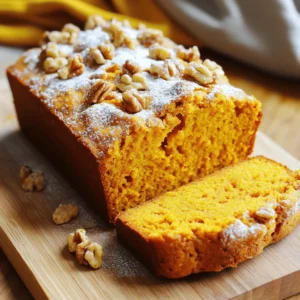
    Super Moist Pumpkin Loaf Irresistibly Delicious Treat
  • To make my easy pumpkin bread, gather these essential ingredients: - 1 ½ cups all-purpose flour - 1 teaspoon baking powder - 1 teaspoon baking soda - ½ teaspoon salt - 1 teaspoon ground cinnamon - ½ teaspoon ground nutmeg - ¼ teaspoon ground ginger - ½ cup vegetable oil - 1 cup granulated sugar - 2 large eggs - 1 cup canned pumpkin puree - 1 teaspoon vanilla extract These ingredients combine perfectly to create a warm, spiced loaf that feels like a hug in bread form. The pumpkin puree adds moisture and flavor, making each bite rich and satisfying. You can jazz up your pumpkin bread with some fun add-ins. Consider these options: - ½ cup chopped walnuts or pecans - ½ cup chocolate chips - ½ cup dried cranberries These add-ins can bring extra flavor and texture. Nuts give a nice crunch, while chocolate chips add sweetness. Dried cranberries can offer a fruity surprise. If you don’t have an ingredient on hand, here are some easy swaps: - Use whole wheat flour for a healthier option. - Swap vegetable oil with melted coconut oil for a different flavor. - Replace granulated sugar with brown sugar for added depth. These substitutions keep the bread delicious, while still making it your own. Don’t be afraid to experiment! Check out the Full Recipe for all the details on how to make this delightful treat. Start by preheating your oven to 350°F (175°C). This heat makes sure your bread cooks evenly. While the oven warms up, take a 9x5-inch loaf pan. You can grease it with butter or spray. If you want an easy cleanup, line it with parchment paper. This keeps your bread from sticking. Next, grab a medium bowl. In this bowl, whisk together these dry items: - 1 ½ cups all-purpose flour - 1 teaspoon baking powder - 1 teaspoon baking soda - ½ teaspoon salt - 1 teaspoon ground cinnamon - ½ teaspoon ground nutmeg - ¼ teaspoon ground ginger Mix them well. This step ensures your spices and leavening agents are evenly spread. Now it's time for the wet mix. In a large bowl, add: - ½ cup vegetable oil - 1 cup granulated sugar Whisk these until smooth. Then, add 2 large eggs, one by one. Beat well after each egg. Next, stir in: - 1 cup canned pumpkin puree - 1 teaspoon vanilla extract Mix until these ingredients are fully combined. Now, take your dry mix and fold it into the wet mix. Be gentle. Overmixing can make your bread tough. If you like nuts, fold in ½ cup of chopped walnuts or pecans. Pour your batter into the prepared loaf pan. Smooth the top with a spatula. Place the pan in the oven for 60-70 minutes. To check if it's done, insert a toothpick into the center. If it comes out clean, your bread is ready. Once baked, let it cool in the pan for 10 minutes. Then, transfer it to a wire rack to cool completely. Enjoy your pumpkin bread! To keep your pumpkin bread soft, mix gently. Overmixing makes the bread tough and dry. After adding the dry mix to the wet, stir just until you see no flour. Clumps are okay. Remember, it's not a race, so take your time. The key to moist pumpkin bread is the pumpkin puree. It adds flavor and keeps the bread soft. Use canned pumpkin puree for ease and consistency. If you want to add moisture, consider using applesauce. It works well without changing the taste much. Let the bread cool in the pan for about 10 minutes. Then, transfer it to a wire rack. This helps it cool evenly. When slicing, use a serrated knife for clean cuts. Warm slices are perfect with a little butter or cream cheese. Enjoy your delicious pumpkin bread! {{image_2}} You can boost the flavor of your pumpkin bread by adding more spices. Try adding a pinch of cloves for warmth. Or, mix in some allspice for a unique taste. You can even add a bit of cardamom for a fragrant twist. These spices work well with pumpkin, making the bread even tastier. If you want a healthier version, swap all-purpose flour for whole wheat flour. This change gives you more fiber and nutrients. For sugar, you can use honey or maple syrup. This switch keeps the sweet flavor but reduces refined sugars. These options make your pumpkin bread a bit better for you. Adding mix-ins can take your pumpkin bread to another level. Chocolate chips give a sweet and rich flavor. Dried cranberries add a tart bite that contrasts with the sweetness. You can also add nuts for crunch. Walnuts or pecans work great in this recipe. Get creative with your mix-ins, and enjoy trying new combinations. To keep your pumpkin bread fresh, wrap it in plastic wrap. You can also use aluminum foil or store it in an airtight container. This helps keep moisture in and prevents it from drying out. Store it at room temperature for best results. If you live in a humid area, consider refrigerating it. When stored properly, your pumpkin bread lasts about 3 to 4 days at room temperature. If you put it in the fridge, it can last up to a week. However, refrigeration can change the texture, making it a bit firmer. For the best taste, eat it fresh within the first few days. Freezing is a great way to keep your pumpkin bread longer. First, let it cool completely. Then, wrap it tightly in plastic wrap and place it in a freezer bag. Remove as much air as you can. Pumpkin bread can last up to 3 months in the freezer. When you're ready to enjoy it, just thaw it in the fridge or at room temperature. For quick enjoyment, you can even slice and toast the frozen bread! You can test if your pumpkin bread is done by using a toothpick. Insert the toothpick into the center of the bread. If it comes out clean, your bread is ready. If it has batter on it, bake for a few more minutes. The top should look golden and feel firm to the touch. Yes, you can use fresh pumpkin. Start by roasting a pumpkin until soft. Then, scoop out the flesh and blend it until smooth. Make sure to measure it as you would canned pumpkin. The flavor will be richer and fresher, giving your bread a unique touch. Pumpkin bread pairs well with many tasty options. Here are some ideas: - Cream cheese spread - Butter - Honey or maple syrup - Chopped nuts on top - A hot drink like coffee or tea These will enhance the flavors and make each bite even more enjoyable. To make your pumpkin bread more moist, you can try a few tricks: - Add a little more oil or butter. - Use brown sugar instead of white sugar. - Include a small amount of yogurt or sour cream. - Ensure you do not overbake the bread. These tips can help keep your pumpkin bread soft and delicious. Try them out next time you bake! To make easy pumpkin bread, you need simple ingredients. Here’s what you'll need: - 1 ½ cups all-purpose flour - 1 teaspoon baking powder - 1 teaspoon baking soda - ½ teaspoon salt - 1 teaspoon ground cinnamon - ½ teaspoon ground nutmeg - ¼ teaspoon ground ginger - ½ cup vegetable oil - 1 cup granulated sugar - 2 large eggs - 1 cup canned pumpkin puree - 1 teaspoon vanilla extract - ½ cup chopped walnuts or pecans (optional) Follow these steps to bake your pumpkin bread. 1. First, preheat your oven to 350°F (175°C). Grease a 9x5-inch loaf pan or line it with parchment paper. 2. In a medium bowl, whisk together flour, baking powder, baking soda, salt, cinnamon, nutmeg, and ginger until mixed. 3. In a large bowl, combine vegetable oil and sugar. Whisk until smooth. 4. Add the eggs to the sugar mix, one at a time. Beat well after each egg. Then stir in pumpkin puree and vanilla until fully mixed. 5. Gradually fold the dry mix into the wet mix. Don't overmix. If using nuts, gently stir them in. 6. Pour the batter into your loaf pan. Smooth the top with a spatula. 7. Bake for 60-70 minutes, or until a toothpick inserted in the center comes out clean. 8. After baking, remove from the oven. Cool in the pan for 10 minutes. Then transfer to a wire rack to cool fully. Each slice of pumpkin bread is a tasty treat. It offers warmth and comfort. Here are some ideas for serving: - Slice the bread and serve warm. A sprinkle of powdered sugar adds a nice touch. - Spread cream cheese on top for extra flavor. - Wrap the loaf in colorful parchment paper. Tie it with twine for a lovely gift. This recipe brings joy to your kitchen with its rich flavors and delightful aroma. Enjoy! You can make easy pumpkin bread with just a few key ingredients and simple steps. We explored different mixes, tips for great texture, and how to store your bread. Remember, you have options for flavors and healthy swaps. Baking can be fun and rewarding. Whether you stick to the basics or try new things, enjoy every moment. Your homemade pumpkin bread will taste great, and you'll impress your friends and family. Let your creativity shine as you bake!
    Easy Pumpkin Bread Quick and Simple Recipe Idea
  • To make these tasty rolls, you need a few key items: - 2 ripe bananas, mashed - 1/4 cup granulated sugar - 1/4 cup brown sugar, packed - 1/2 cup unsalted butter, melted - 1 large egg - 1 teaspoon vanilla extract - 2 cups all-purpose flour - 1 tablespoon baking powder - 1/2 teaspoon baking soda - 1/2 teaspoon salt - 1 tablespoon ground cinnamon - 1 cup chopped nuts (walnuts or pecans) (optional) These ingredients blend well to create a soft, sweet dough that holds the flavors of banana and cinnamon. For the filling that makes these rolls special, gather: - 1/2 cup brown sugar, packed - 1 tablespoon ground cinnamon - 1/4 cup unsalted butter, softened This mix adds a warm, sweet swirl to each bite, enhancing the banana flavor. To top your rolls with a sweet glaze, you'll need: - 1 cup powdered sugar - 2 tablespoons milk - 1/2 teaspoon vanilla extract The glaze brings a smooth finish that ties all the flavors together. For the full recipe, check out the instructions in the main section. To start, preheat your oven to 375°F (190°C) and grease a 9x13-inch baking dish. In a large bowl, mix together 2 ripe bananas, 1/4 cup granulated sugar, 1/4 cup brown sugar, and 1/2 cup melted butter. Add 1 large egg and 1 teaspoon vanilla extract. Stir until smooth. In another bowl, whisk together 2 cups all-purpose flour, 1 tablespoon baking powder, 1/2 teaspoon baking soda, and 1/2 teaspoon salt. Gradually mix the dry ingredients into the banana mixture until just combined. If you like, fold in 1 cup of chopped nuts. Now, roll out the dough on a floured surface into a rectangle, about 1/4 inch thick. For the filling, mix 1/2 cup brown sugar and 1 tablespoon cinnamon in a small bowl. Spread 1/4 cup softened butter evenly over the dough, then sprinkle the cinnamon-sugar mixture on top. Starting from one long edge, roll the dough tightly into a log. Slice the log into 12 equal pieces and place them in the greased baking dish, leaving space between each roll. Bake the rolls in the preheated oven for 25-30 minutes or until they turn golden brown. While the rolls bake, make the glaze by whisking together 1 cup powdered sugar, 2 tablespoons milk, and 1/2 teaspoon vanilla extract until smooth. Once the rolls are out of the oven, let them cool for a few minutes. Drizzle the glaze over the warm rolls for a sweet finish. For the full recipe, check out the complete instructions above. Enjoy your delicious treat! Baking banana bread cinnamon rolls can be easy with a few tips. First, always use ripe bananas. They add more flavor and moisture. Second, don’t overmix the dough. Mix just until combined. This keeps the rolls soft and fluffy. Finally, let the rolls rise for a bit before baking. This step helps them grow tall and light. To get a moist banana bread base, use enough mashed bananas. Two ripe bananas work well for this recipe. They not only add moisture but also flavor. Adding melted butter also helps. Use unsalted butter for the best taste. Make sure you mix the wet ingredients well before adding the dry ones. This helps blend all the flavors nicely. When serving banana bread cinnamon rolls, warmth is key. Serve them straight from the oven for the best taste. You can drizzle the glaze on top for a sweet finish. For a nice touch, add chopped nuts or a sprinkle of cinnamon. Use a pretty plate to make the rolls look even more inviting. This adds a special touch to your treat. For more ideas, check out the Full Recipe for variations and fun toppings. {{image_2}} You can make your banana bread cinnamon rolls even more fun with some tasty add-ins. Many people love using chopped nuts like walnuts or pecans. They add a nice crunch and pair well with the soft bread. You can also mix in chocolate chips for a sweet touch. Dark or milk chocolate works great here. If you want a fruity twist, add dried fruit like raisins or cranberries. Just remember to adjust the sugar if you add sweet dried fruit. For a healthier version, consider using whole wheat flour instead of all-purpose flour. This swap gives your rolls more fiber and nutrients. You can also cut back on the sugar. Try using half the amount or substituting with natural sweeteners like honey or maple syrup. These options still taste great and will keep your rolls light and fluffy. If you want a vegan treat, it's easy to make your banana bread cinnamon rolls without eggs and dairy. You can use flaxseed meal mixed with water as an egg substitute. Just mix one tablespoon of flaxseed meal with three tablespoons of water and let it sit for a few minutes. For the butter, use coconut oil or a vegan butter spread. Make sure to use plant-based milk in the glaze too. These simple swaps let everyone enjoy this sweet delight! You can find the full recipe above. To keep your leftover cinnamon rolls fresh, place them in an airtight container. You can also wrap them tightly in plastic wrap. This method helps keep them soft and moist. Store them at room temperature for up to three days. If you want to keep them longer, consider freezing them. If you plan to save the rolls for later, freezing is a great option. First, let the rolls cool completely after baking. Then, wrap each roll in plastic wrap. After that, place them in a freezer bag or container. Make sure to squeeze out as much air as possible. They will stay fresh in the freezer for up to three months. To enjoy your cinnamon rolls again, you can reheat them easily. If they are frozen, let them thaw in the fridge overnight. Then, place them on a baking sheet. Preheat your oven to 350°F (175°C) and warm them for about 10-15 minutes. You can also microwave them for about 15-20 seconds. Serve warm with a drizzle of glaze from the Full Recipe for the best taste. You can tell when the rolls are done by their color. They should turn golden brown. You can also use a toothpick. Insert it into the center of a roll. If it comes out clean, the rolls are ready. If it has dough on it, bake them a bit longer. The rolls should feel firm but soft. Let them cool slightly before adding the glaze. Yes, you can use banana puree instead of ripe bananas. One medium banana equals about 1/3 cup of puree. Keep in mind that the texture may change a little. The flavor remains sweet and delicious. Puree gives a smoother batter, which some may prefer. Just make sure the puree is not too watery, or it may affect the dough. The best way to frost cinnamon rolls is while they are warm. This allows the glaze to melt into the rolls. Start with a drizzle from the center and work your way out. You can use a spoon or a small whisk for control. If you want, sprinkle some nuts or cinnamon on top for extra flavor. For a fun twist, try adding a pinch of sea salt to the glaze for balance. For the complete recipe, check out the Full Recipe. In this post, we covered how to make tasty banana bread cinnamon rolls. We discussed the main ingredients and sharing tips for perfect rolls. The variations allow you to customize the taste and healthiness. Storing and reheating tips ensure your rolls stay fresh. Final thoughts: You can create amazing treats that everyone will love. Enjoy baking and experimenting!
    Banana Bread Cinnamon Rolls Delightful and Simple Treat
  • - 2 cups cooked chicken, shredded - 1 cup mushrooms, sliced (cremini or button) - 1 medium onion, diced - 2 cloves garlic, minced - 3 cups chicken broth - 1 cup heavy cream - 2 tablespoons olive oil - 1 tablespoon butter - 1 teaspoon dried thyme - Salt and pepper to taste - Fresh parsley, chopped for garnish Every ingredient plays a key role in making this creamy chicken mushroom soup tasty. The cooked chicken gives it heartiness. You can use leftover chicken or rotisserie chicken for easy prep. Mushrooms add a rich flavor and nice texture. I love using cremini or button mushrooms for this recipe. Onions and garlic boost the overall taste. They add depth and warmth. Chicken broth forms the base of the soup, making it comforting and savory. Heavy cream is what makes this soup creamy and rich. Using olive oil and butter helps sauté the veggies and adds flavor. Thyme brings a wonderful aroma and taste. Finally, season with salt and pepper to your liking. Fresh parsley adds a pop of color and freshness. For the full recipe, check out the details provided above. - Heat olive oil and butter in a large pot. - Sauté onion until translucent. To start, I heat two tablespoons of olive oil and one tablespoon of butter in a big pot. I place the pot over medium heat. Once the butter melts, I add one medium diced onion. I sauté it until it turns translucent, which usually takes about five minutes. This step builds a great base for flavor. - Add garlic and mushrooms, cooking until softened. - Stir in thyme, salt, and pepper. Next, I add two cloves of minced garlic and one cup of sliced mushrooms to the pot. I let them cook for about five minutes until the mushrooms soften and get a nice brown color. Then, I sprinkle in one teaspoon of dried thyme, salt, and pepper to taste. This brings a warm, herbal note to the soup. - Pour in chicken broth and bring to a boil. - Add shredded chicken and simmer. - Incorporate heavy cream and adjust seasoning. - Serve and garnish with parsley. After that, I pour in three cups of chicken broth. I bring the mixture to a gentle boil. Once boiling, I reduce the heat to low and stir in two cups of shredded cooked chicken. I let it simmer for about ten minutes to let the flavors blend. Now comes the creamy part! I slowly add one cup of heavy cream while stirring. This makes the soup rich and smooth. I taste it and adjust the seasoning as needed. Finally, I ladle the soup into bowls and garnish with fresh chopped parsley. For the full recipe, check out the details above. Enjoy this creamy delight! To boost flavor, use homemade chicken broth. It makes the soup richer and tastier. You can also add spices like paprika or nutmeg. These spices give a warm touch to the soup. For a creamier soup, blend a portion of it. This gives a smooth feel while keeping some chunks. Also, try a mix of mushrooms, like cremini and button. Different mushrooms add unique textures and flavors that make every bite exciting. Pair your creamy chicken mushroom soup with crusty bread. It’s perfect for dipping and adds a nice crunch. You can also enjoy it with a fresh salad for a light meal. This soup works well as an appetizer or a main dish, making it very versatile. Explore more with the Full Recipe for detailed steps. {{image_2}} You can make this creamy chicken mushroom soup fit your needs. If you want a dairy-free option, use coconut milk or almond milk. This keeps the soup creamy without dairy. For gluten-free adjustments, check your broth and seasoning. Many brands offer gluten-free products. You don’t have to stick with chicken! Try turkey or tofu instead. This adds a fun twist and makes it vegetarian. You can also mix in different veggies. Spinach or carrots work well and boost nutrition. Make it exciting by changing how you serve the soup. You could add noodles to turn it into a pasta dish. This makes it even heartier. Another fun idea is to serve it in a bread bowl. It’s interactive and delicious! For the full recipe, check out the detailed instructions. To store leftovers, let the soup cool to room temperature. Then, pour it into an airtight container. This keeps the soup fresh. Make sure to seal it well. You can store it in the fridge for up to three days. If you want to enjoy it later, freezing is a great option. If you plan to freeze the soup, first let it cool. Then, transfer it to freezer-safe containers. Leave some space at the top since soup expands when frozen. This soup can last for up to three months in the freezer. To reheat, thaw it in the fridge overnight. Then, heat it on the stove over low heat. Stir often to keep the texture smooth and creamy. For easy meal prep, you can assemble the soup ahead of time. Chop your ingredients and store them in separate containers. Keep the broth and cream separate until cooking. This keeps everything fresh. When you are ready to cook, just combine everything in a pot. It makes dinner quick and simple. This method helps you enjoy a warm meal any night of the week. For the full recipe, refer to the beginning section. How long does creamy chicken mushroom soup last in the fridge? This soup lasts about 3 to 4 days in the fridge. Store it in an airtight container. Make sure it cools down first before sealing. Can I use frozen chicken for this recipe? Yes, you can use frozen chicken. Just ensure you cook it all the way through. If using frozen, add more time to cook it properly. Is it necessary to sauté the onions and mushrooms before adding broth? Yes, sautéing the onions and mushrooms adds flavor. This step helps to release their natural sweetness. It makes the soup taste richer and more complex. Can I use other types of meat for this soup? Absolutely! You can use turkey or even shredded beef. Just adjust the cooking time as needed. Each meat will give a different taste to the soup. How many calories are in creamy chicken mushroom soup? One serving has about 350 calories. This can vary based on specific ingredients. Always check the labels for exact numbers. What are the health benefits of mushrooms in this recipe? Mushrooms are low in calories and packed with nutrients. They provide vitamins like B and D. Plus, they are a good source of antioxidants, which help keep you healthy. This article covered making a delicious creamy chicken mushroom soup from scratch. We explored key ingredients, step-by-step directions, and tips for adding flavor and texture. You can modify the recipe to suit dietary needs and even switch up ingredients. Proper storage can keep leftovers fresh, making this a perfect meal prep option. Enjoying this soup can warm any chilly day or impress at dinner. With simple steps, you can create a comforting dish that you’ll want to share again and again. Dive in and savor every bite!
    Creamy Chicken Mushroom Soup Simple and Delicious Recipe
  • To make delicious blueberry cream cheese bars, you need some key ingredients. Here’s what you will need: - 1 cup all-purpose flour - ½ cup unsalted butter, softened - ½ cup granulated sugar - 1 teaspoon vanilla extract - ½ teaspoon baking powder - ¼ teaspoon salt - 8 oz cream cheese, softened - 1/3 cup powdered sugar - 1 egg - 1 cup fresh blueberries - Zest of 1 lemon Each ingredient plays a role. The flour gives structure, while butter adds richness. Sugar sweetens your bars, and cream cheese brings creaminess. Fresh blueberries add a burst of flavor, and lemon zest brightens it all up. You can add a few optional ingredients for extra fun. Consider these: - 1 teaspoon cinnamon for warmth - 1 tablespoon honey for extra sweetness - A pinch of nutmeg for depth These flavors can elevate your bars. Cinnamon and nutmeg add warmth, while honey offers a different kind of sweetness. Feel free to mix and match based on your taste! To make the process smooth, gather these tools: - 9x9-inch baking pan - Mixing bowls - Electric mixer or whisk - Rubber spatula - Measuring cups and spoons Having the right tools makes cooking easier. A good mixer helps create a smooth filling, while a spatula ensures you get every bit from the bowl. This setup will help you craft tasty blueberry cream cheese bars with ease! For the full recipe, check out the detailed instructions. Start by gathering all your ingredients. You need flour, butter, sugar, vanilla, baking powder, salt, cream cheese, powdered sugar, an egg, blueberries, and lemon zest. Make sure everything is at room temperature. This helps with mixing and gets a smooth texture. In a medium bowl, mix the softened butter and granulated sugar. Beat them together until it looks light and fluffy. Then, add in the vanilla, baking powder, and salt. Stir to combine. Next, slowly add the flour. Mix until just combined. Don't overmix, or the crust may become tough. In another bowl, beat the softened cream cheese and powdered sugar. Mix until the cream cheese is smooth and creamy. Then, add the egg and lemon zest. Mix again until everything is well blended. This filling adds a rich taste to your bars. Once the crust is baked, take it out of the oven. Pour the cream cheese mixture over the hot crust. Spread it evenly with a spatula. Now, bake the dish again for 25 to 30 minutes. The center should be set and just slightly jiggly. Let the bars cool in the pan at room temperature. Then, refrigerate them for at least 2 hours. This helps the flavors meld and makes cutting easier. Once chilled, cut into squares. Now, you’re ready to enjoy these tasty treats! For the full recipe, check the earlier section. To make a great crust, start with soft butter. It blends better with sugar. Mix them until light and fluffy. This adds air and makes the crust nice and crisp. Use all-purpose flour for the right texture. Make sure to press the crust firmly in the pan. This helps it hold its shape while baking. Bake it until it’s just lightly golden. If you bake it too long, it gets hard. Keep an eye on it during baking. For a smooth filling, use softened cream cheese. It blends easily with powdered sugar. Mix them well until there are no lumps. Add the egg and lemon zest slowly. This gives the filling a fresh taste. When folding in the blueberries, be gentle. You want to keep them whole for texture. This step also adds a burst of flavor in every bite. Avoid overmixing once you add the blueberries. This keeps the filling creamy and light. These bars are great chilled or at room temperature. Serve them fresh from the fridge for a cool treat. You can also drizzle a bit of honey on top. This adds a nice touch of sweetness. For a fun twist, add some whipped cream. It pairs well with the tangy filling. If you want to impress guests, garnish with mint leaves. This adds color and freshness. For a casual gathering, cut them into bite-sized pieces. This makes sharing easier and more fun. You can find the full recipe below to make your own! {{image_2}} You can change the flavor of Blueberry Cream Cheese Bars easily. For a Lemon Blueberry twist, add more lemon zest to the cream cheese mix. This gives a fresh and zesty taste. If you prefer strawberries, swap the blueberries for fresh strawberries. Just chop the berries into small pieces. This adds a sweet and fruity flavor with a lovely color. To make these bars gluten-free, use a gluten-free flour blend instead of all-purpose flour. Many blends work well in baking. Make sure to check the package for a one-to-one ratio. This way, you can still enjoy the same great taste without gluten. You can also make a vegan version. Replace the cream cheese with a vegan cream cheese alternative. Use a flax egg instead of a regular egg. To make a flax egg, mix 1 tablespoon of ground flaxseed with 2.5 tablespoons of water. Let it sit for five minutes until it thickens. This keeps your bars creamy and rich while being plant-based. Check out the Full Recipe for more details on making these tasty treats. To keep your blueberry cream cheese bars fresh, store them in an airtight container. Place a piece of parchment paper between layers to avoid sticking. This helps maintain their texture. You can keep them in the fridge for up to five days. Always check for any signs of spoilage before eating. To freeze blueberry cream cheese bars, wrap them well in plastic wrap. Then, place the wrapped bars in a freezer bag or a container. This protects them from freezer burn. They can last for up to three months. When you’re ready to enjoy, simply thaw them in the fridge overnight. After storing, I recommend serving the bars chilled. They taste best when cold. If they have sat at room temperature, pop them back in the fridge for 20 minutes. This helps the flavors come alive again. Remember, you can also dust them with powdered sugar before serving for a nice touch. For the full recipe, check out the previous section. Yes, you can use frozen blueberries. They work well in this recipe. Just remember to thaw and drain them first. This avoids excess moisture in your bars. These bars last about five days in the fridge. Store them in an airtight container. This keeps them fresh and tasty. Absolutely, you can make these bars a day or two ahead. Just cool and chill them in the fridge. This allows the flavors to blend nicely. Serve these bars chilled or at room temperature. They pair well with whipped cream or a scoop of vanilla ice cream. For a fun twist, dust them with powdered sugar before serving. For the full recipe, check here. In this post, we explored making blueberry cream cheese bars. You learned about essential and optional ingredients, tools, and a step-by-step baking guide. We shared tips for a perfect crust and filling, plus fun variations like vegan or gluten-free options. Remember, baking these bars can be fun. Experiment with flavors and enjoy your tasty treats! Store them well to keep them fresh, and serve with joy. Happy baking!
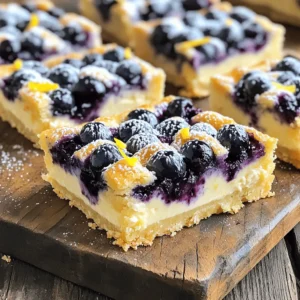
    Blueberry Cream Cheese Bars Simple and Tasty Treat
  • - 2 large apples, peeled, cored, and diced - 1/2 cup brown sugar - 1 teaspoon ground cinnamon - 1/4 teaspoon nutmeg - 1 tablespoon lemon juice - 1 tablespoon cornstarch - 1 package of pre-made pie crusts - 1 egg, beaten - 1 tablespoon granulated sugar For the best flavor in your mini apple pies, I suggest using Granny Smith or Honeycrisp apples. These types balance sweetness and tartness well. If you want to make your own pie crust, you can use flour, butter, and water. This gives a fresh taste. Also, feel free to swap brown sugar with maple syrup or honey for a different sweetness. You will need a muffin tin to shape the pies. Mixing bowls are great for combining ingredients. A baking sheet will catch any drips while baking. 1. Preheat the oven and prepare the filling Start by preheating your oven to 375°F (190°C). This step is key for a crispy crust. In a medium bowl, mix together 2 large apples, 1/2 cup brown sugar, 1 teaspoon ground cinnamon, 1/4 teaspoon nutmeg, 1 tablespoon lemon juice, and 1 tablespoon cornstarch. Toss everything until the apples are well coated. Let the mixture sit so the flavors blend. 2. Prepare the muffin tin and pie crusts Lightly grease a muffin tin with non-stick spray or butter. This will help prevent sticking when you bake. Roll out your pre-made pie crusts on a floured surface. Use a round cutter, about 4 inches wide, to cut out 12 circles from the dough. 3. Create the pie shells Place each dough circle into a muffin tin cup. Press it gently against the sides and bottom. This will form a small pie shell that holds your filling. 1. Fill the shells with apple mixture Spoon the apple filling into each mini pie shell. Fill them just to the top, but don’t overfill. You want to allow room for bubbling as they bake. 2. Add decorative tops Use the leftover dough to cut out smaller circles. You can also make fun shapes, like stars, to place on top. This adds a nice touch to your pies. If you prefer, you can leave them open-faced for a rustic look. 3. Bake until golden brown Brush the tops with a beaten egg for a golden finish. Sprinkle granulated sugar on top for added sweetness and crunch. Bake in your preheated oven for 20-25 minutes. Look for a golden brown crust and bubbling filling. 1. Cooling time and techniques Once baked, let the mini apple pies cool in the muffin tin for about 10 minutes. This makes them easier to remove. After that, carefully lift them out and place them on a wire rack to cool completely. 2. Presentation tips Serve these tasty treats warm. They pair wonderfully with a scoop of vanilla ice cream or a drizzle of caramel sauce. For an elegant touch, add a sprig of mint on top. This makes your mini apple pies not just delicious, but beautiful too. For the full recipe, check out the details provided earlier. Enjoy your baking! To make your muffin tin mini apple pies perfect, focus on the crust. To avoid soggy crusts, use fresh pie crusts and bake them at the right temperature. Pre-baking the crust slightly can help too. This step helps firm it up. For even baking, rotate your muffin tin halfway through baking. This ensures all pies get equal heat. Check the pies at the 20-minute mark. You want them golden brown and bubbling. Using pre-made pie crusts is a great way to save time. They help you skip the dough-making step. You can find them in any grocery store. Just roll them out and cut them into circles for your mini pies. Batch prepping is another smart move. You can prepare the apple filling ahead of time. Store it in the fridge for up to three days. This makes your baking day quick and easy. One mistake to watch for is overfilling the pies. If you fill them too high, the filling will ooze out. This can cause a mess in your oven. Aim to fill them just to the top for best results. Not cooling the pies properly before serving is also a common error. Let them cool for about 10 minutes in the tin. This makes them easier to remove and helps the filling set. Enjoy these tips to make your Muffin Tin Mini Apple Pies delicious! For the full recipe, check out the provided link. {{image_2}} You can switch up the flavor of your mini apple pies in fun ways. One great option is to make caramel apple mini pies. To do this, simply add a few tablespoons of caramel sauce to your apple filling. This adds a sweet and rich taste. Another fun twist is a cinnamon roll-inspired version. Use cinnamon roll dough instead of pie crust. Place it in the muffin tin and fill it with your apple mixture. The result is a warm, gooey treat that feels like a dessert and breakfast all in one. If you need gluten-free options, use a gluten-free pie crust. Many brands offer good choices. This way, everyone can enjoy your mini pies without worry. For vegans, you can substitute the butter in the crust with coconut oil. Use maple syrup or agave instead of brown sugar in the filling. These changes keep the flavor while making it plant-based. Serve your mini pies warm for the best taste. Pair them with a scoop of vanilla ice cream for a classic touch. The cold ice cream mixes well with the warm pie, creating a great experience. You can also drizzle the pies with caramel sauce for extra sweetness. For a creative look, arrange them on a platter and garnish with mint leaves. This adds a fresh touch that makes the dessert even more appealing. To keep your mini apple pies fresh, store them in an airtight container. Place a piece of parchment paper between layers to avoid sticking. The pies will stay good in the fridge for about 3 to 4 days. If you want to save some for later, freezing is easy. First, let the pies cool completely. Then, wrap each pie in plastic wrap and place them in a freezer bag. They can last up to 2 months in the freezer. To reheat, simply bake them at 350°F (175°C) for about 15-20 minutes. This will keep the crust nice and crispy. If you have leftover pie crusts or apple filling, you can make other tasty treats. Use extra pie crusts to make cookies or tarts. For leftover apple filling, try adding it to oatmeal or yogurt for a sweet twist. You can also make an apple crisp by layering the filling with oats and butter. These ideas let you enjoy every bit of your ingredients! To balance sweetness in the filling, choose tart apples. Granny Smith is a great choice. You can also reduce the brown sugar by a few tablespoons. Adding lemon juice brightens the flavor and cuts the sweetness. A pinch of salt can also help balance the flavors. Yes, you can use frozen apples. Thaw them first and drain excess liquid. Frozen apples might be softer than fresh ones. They work well if you want to save time. Just adjust the sugar if your frozen apples are sweetened. To reheat mini apple pies, use an oven. Preheat it to 350°F (175°C). Place the pies on a baking sheet. Heat them for about 10 minutes. This keeps the crust crispy and warms the filling. Microwave can make the crust soggy, so avoid that. These mini apple pies take about 20-25 minutes to bake. Watch for the crust to turn golden brown. The filling should bubble slightly. If you see this, your pies are done. Always check them a few minutes early to avoid overbaking. You can create delicious mini apple pies with simple ingredients and easy steps. We covered everything from ingredients to common mistakes. Remember to choose the right apple types for great flavor. Pay attention to cooling and presentation for the best results. With practice, you will impress friends and family. Enjoy making these tasty treats, and don’t forget to get creative with your variations and serving ideas! Happy baking!
    Muffin Tin Mini Apple Pies Tasty and Simple Treat
  • - 1 ¾ cups all-purpose flour - 1 teaspoon baking soda - ½ teaspoon baking powder - 1 teaspoon ground cinnamon - ½ teaspoon ground nutmeg - ½ teaspoon ground ginger - ½ teaspoon salt - 1 cup granulated sugar - ½ cup brown sugar - ½ cup vegetable oil - 3 large eggs - 1 cup pumpkin puree - 1 teaspoon vanilla extract - 1 cup chopped walnuts or pecans (optional) - Ingredients for Cream Cheese Frosting: - 8 oz cream cheese, softened - ½ cup unsalted butter, softened - 2 cups powdered sugar - 1 teaspoon vanilla extract - A pinch of salt To make pumpkin bread with cream cheese frosting, you need fresh, tasty ingredients. The dry ingredients create the base of the bread. Flour gives it structure. Baking soda and baking powder help it rise. Spices like cinnamon, nutmeg, and ginger add warmth and flavor. The salt balances the sweetness. For the wet ingredients, the sugars add sweetness and moisture. Vegetable oil keeps the bread soft. Pumpkin puree makes it rich and moist. Eggs bind everything together and provide lift. Vanilla extract enhances the overall taste. If you want a crunch, add walnuts or pecans. They also give a nice texture. The cream cheese frosting takes it to the next level. It is creamy and sweet. Softened cream cheese and butter blend well. Powdered sugar adds sweetness. A pinch of salt rounds out the flavors. For the full recipe, check the link above. This joy-filled bread is perfect for fall and any gathering. First, you need to preheat your oven to 350°F (175°C). This makes sure your bread cooks evenly. Next, grease a 9x5 inch loaf pan with butter or oil to prevent sticking. In a medium bowl, whisk together the dry ingredients: 1 ¾ cups all-purpose flour, 1 teaspoon baking soda, ½ teaspoon baking powder, 1 teaspoon ground cinnamon, ½ teaspoon ground nutmeg, ½ teaspoon ground ginger, and ½ teaspoon salt. This step blends the flavors well. Now, move to a large bowl. Mix together the granulated sugar, brown sugar, and ½ cup vegetable oil until smooth. This mixture will help the bread rise and stay moist. Add in 3 large eggs, one at a time, beating well after each. Finally, mix in 1 cup pumpkin puree and 1 teaspoon vanilla extract. Keep mixing until everything is smooth. Now, it’s time to combine the wet and dry mixtures. Gradually add the dry mixture to the wet mixture. Stir gently just until no flour streaks remain. Be careful not to over-mix, or your bread may turn out tough. If you want, fold in 1 cup chopped walnuts or pecans for some crunch. Pour the batter into your prepared loaf pan. Smooth the top with a spatula for an even bake. Place the pan in the oven and bake for 60-70 minutes. You’ll know it’s done when a toothpick inserted into the center comes out clean. While the bread bakes, it will fill your kitchen with a wonderful smell. Once finished, let the bread cool in the pan for about 10 minutes. Then, transfer it to a wire rack to cool completely before adding the frosting. While the bread is cooling, let’s whip up the cream cheese frosting. In a bowl, beat together 8 oz of softened cream cheese and ½ cup unsalted butter until smooth. This will create a creamy base for your frosting. Gradually add in 2 cups of powdered sugar, 1 teaspoon vanilla extract, and a pinch of salt. Mix until it’s fluffy and well combined. Once your pumpkin bread has cooled completely, you can spread a generous layer of cream cheese frosting on top. This will add a delightful sweetness to the spicy bread. You can find the full recipe for Pumpkin Spice Delight Bread and enjoy this treat any time! To make your pumpkin bread great, avoid over-mixing the batter. When you mix too much, the bread can get tough. Stir just until you no longer see flour streaks. This keeps your bread soft and moist. Next, check for doneness with a toothpick. Insert it into the center of the bread. If it comes out clean, your bread is ready. If it has wet batter on it, give it more time in the oven. Always let the bread cool completely before adding frosting. This prevents the frosting from melting and sliding off. It also helps the flavors settle. To apply frosting evenly, use a spatula. Start from the center and spread outwards. This gives a nice, smooth finish. You can also add decorative touches for a pretty look. Try adding a sprinkle of cinnamon or some chopped nuts on top. If your bread turns out too dry or dense, you might have mixed it too long or baked it too much. Always check the baking time and adjust as needed to ensure a light texture. If your frosting is too thin or runny, add more powdered sugar a little at a time. Mix until you reach a spreadable consistency. It should hold its shape well when spread on the bread. {{image_2}} You can easily change the flavor of your pumpkin bread. Here are some great add-ins: - Chocolate chips: Add about 1 cup for a sweet twist. The chocolate melts and pairs well with pumpkin. - Dried cranberries or raisins: These add a nice chew and burst of flavor. Use about 1 cup for a fruity touch. If you want to switch up the frosting, try these options: - Maple frosting: Replace the cream cheese with maple syrup for a rich flavor. - Whipped cream topping: Light and airy, this makes a beautiful finish. Just whip heavy cream with a bit of sugar and vanilla. You can enjoy this bread even with dietary needs. Here are some ways: - Substituting flour: Use a gluten-free blend instead of all-purpose flour. This keeps the texture nice. - Egg replacements for vegan diets: Use one of these: 1/4 cup applesauce or 1 mashed banana for each egg. This keeps it moist and fluffy. For the complete recipe, check out the Full Recipe for all the details! To keep your pumpkin bread fresh, you have two great options. - Refrigeration: Wrap the bread tightly in plastic wrap. Place it in an airtight container. This keeps moisture in and prevents it from drying out. - Room Temperature: If you plan to eat it within a few days, store it at room temperature. Just keep it in a cool, dry place. Want to save some for later? Freezing is a smart choice. - Freezing the Bread: Let the bread cool completely. Wrap it in plastic wrap, then in foil. This prevents freezer burn. You can keep it frozen for up to three months. - Freezing the Frosting: You can freeze the cream cheese frosting too! Place it in an airtight container. Thaw it in the fridge when you're ready to use it. When you want to enjoy your frozen bread, here’s what to do: - Remove the bread from the freezer. Let it thaw overnight in the fridge. - If you need it fast, you can leave it out at room temperature for a few hours. You may wonder how long your homemade pumpkin bread lasts. - When stored properly, it can last about one week at room temperature. In the fridge, it can last up to two weeks. - Look for signs of spoilage. If you see mold or it smells off, it’s best to throw it away. Make sure to check the full recipe for all the details on making this delicious treat! Yes, you can use fresh pumpkin. Start by cooking the pumpkin. Cut it open, remove the seeds, and roast it until soft. Then, mash it until smooth. This will give your bread a fresh taste, but canned pumpkin is easier to use. You can replace eggs with several items. Use 1/4 cup of applesauce for each egg. Alternatively, use a mashed banana or a mix of flaxseed and water. One tablespoon of flaxseed meal mixed with three tablespoons of water works well. To reduce sweetness, cut back on sugars. You can use half the granulated sugar or brown sugar. Adding spices like cinnamon can enhance flavor without extra sugar. Taste the batter to find the right balance. Absolutely! If you don’t like nuts, just leave them out. The bread will still taste great. You can also add chocolate chips or dried fruit for extra flavor and texture. The cream cheese frosting lasts about a week in the fridge. Store it in an airtight container. If you freeze it, it can last up to three months. Just defrost it in the fridge before using. Find the complete recipe for Pumpkin Spice Delight Bread [here](#). You learned how to make a delicious pumpkin bread from scratch. We covered ingredients, steps, and tips to make it perfect. You can also explore variations and storage tips. With this knowledge, you can bake pumpkin bread with confidence. Share it with friends or keep it as your secret recipe. Enjoy every slice and make it your own!
    Pumpkin Bread with Cream Cheese Frosting Delight
  • - 2 medium-sized apples (Granny Smith or Honeycrisp) - 1 cup granulated sugar - 1/2 cup unsalted butter - 1/3 cup light corn syrup - 1 teaspoon vanilla extract - 1/8 teaspoon salt - 1 cup chopped nuts (pecans or walnuts) - 1 cup mini chocolate chips (optional) - Additional toppings like sprinkles or sea salt To make these caramel apple bites, you start with fresh apples. I love using Granny Smith or Honeycrisp. Their tartness balances the sweet caramel. You’ll need sugar, butter, corn syrup, vanilla, and a pinch of salt. These form the rich, sticky caramel that makes this treat special. For toppings, you can get creative. Chopped nuts add a nice crunch. Mini chocolate chips give a fun twist. You can also use sprinkles for color or sea salt for a savory touch. Each ingredient adds a unique flavor and texture. This recipe is perfect for fall gatherings or a family snack. You can find the Full Recipe to follow along and create your own delicious bites. - Wash and dry the apples well. - Cut the apples into bite-sized wedges. Remove the cores. - Insert a skewer or toothpick into each wedge. - In a medium saucepan, combine sugar, butter, corn syrup, and salt. - Stir over medium heat until the butter melts and the sugar dissolves. - Turn the heat to medium-high. Let the mixture boil for 4-5 minutes. - Check the caramel temperature. It should reach 240°F (115°C). - Quickly dip each apple wedge into the hot caramel. Make sure to coat it well. - Let excess caramel drip off before moving to the next step. - Roll each caramel-coated wedge in chopped nuts or sprinkle with chocolate chips. - Place the bites on a parchment-lined baking sheet to cool. Let them set for about 30 minutes. For the full recipe, check the detailed instructions above. You'll create a treat that's perfect for fall! To make great caramel, I always use a candy thermometer. This tool helps me get the right temperature. For caramel, aim for 240°F (115°C). This ensures a nice, smooth finish. The right consistency is key. When your caramel cools, it should be thick but still pourable. If it’s too thin, it won’t stick. If it’s too thick, it might break. To avoid grainy caramel, stir gently while melting. Do not stir once it starts boiling. This keeps the sugar from crystallizing. If you see any sugar crystals, wipe the sides of the pot with a wet brush. For plating, I love to use a colorful platter. You can arrange the bites in a circle or in rows. Add some fresh apple slices around the bites for color. Drizzle some melted chocolate on top for flair. Pair caramel apple bites with dips or sauces. Creamy caramel sauce or rich chocolate sauce are great choices. You can even serve them with a side of whipped cream. These bites fit many occasions. Serve them at fall parties, game nights, or family gatherings. Kids and adults will love these treats! {{image_2}} You can easily change the flavor of your caramel apple bites. Try adding flavored extracts like cinnamon or almond. A few drops can give your bites a fun twist. You can also experiment with different types of chocolate. Dark, white, or even milk chocolate can work great. Each choice brings a new taste to the table. If you need gluten-free options, use gluten-free granulated sugar and ensure your toppings are safe. You can also make these bites vegan. Substitute the butter with coconut oil and use a plant-based cream. This way, everyone can enjoy caramel apple bites, no matter their diet. Make your caramel apple bites even more fun with different fruits. You can skewer them with strawberries or bananas. This adds color and flavor. For a sparkly touch, use edible glitter or colored candies. These small details make your treats eye-catching and fun for any gathering. To keep your caramel apple bites fresh, use an airtight container. This will stop air from drying them out. You can stack them carefully, but don’t crush them. If you have a lot, use separate layers of parchment paper. Store them in the fridge for the best results. The cool air helps keep the caramel soft. If you want, you can leave them at room temp for a short time. Just be careful; they might get sticky if it’s warm. Caramel apple bites stay fresh for about 5 days in the fridge. After that, they may lose their taste and texture. Look for signs that they’ve gone bad. If the caramel looks dry or hard, it’s time to toss them. Also, check for any strange smells or mold. If you see any of these signs, don’t eat them. If your caramel gets hard, don’t worry. You can fix it! Place the bites in a microwave-safe bowl. Heat them in short bursts of 10 seconds. Check after each burst to avoid melting them too much. To keep them soft, try wrapping them in plastic wrap or foil. This will help hold in moisture. If you need to, add a slice of apple to the container. This will help keep everything nice and fresh. For the full recipe, check out my complete guide to making these tasty treats! To make caramel apple bites stick, ensure your apples are dry. The caramel needs a clean surface to grip. You can also chill the apple wedges before dipping them. This helps the caramel set better. Yes, you can make caramel apple bites in advance. After coating them in caramel, let them cool completely. Then, store them in an airtight container in the fridge. They taste best within a couple of days. You can find pre-made caramel apple bites at many grocery stores. Check the candy aisle or the seasonal section during fall. Some bakeries also sell them. They may not taste as fresh as homemade ones. The best apples for caramel apple bites are Granny Smith or Honeycrisp. Granny Smith gives a tart flavor that pairs well with sweet caramel. Honeycrisp is crunchy and sweet, making it a favorite for many. To prevent the caramel from hardening too quickly, work fast. Dip the apples as soon as the caramel reaches the right temperature. Keep the caramel warm on low heat as you coat each apple. This keeps it runny and easy to use. We covered how to make delicious caramel apple bites from scratch. You learned about key ingredients, step-by-step instructions, and helpful tips. You also discovered fun variations and storage methods for your treats. Remember, feel free to get creative with flavors and toppings. These bites are perfect for parties or a cozy night in. Enjoy making and sharing this tasty snack with friends and family!
    Caramel Apple Bites Tasty Fall Treat for Everyone
  • - 12 oz (340g) pasta: I recommend using penne or fettuccine for great texture. - 2 cups butternut squash: Peel and dice it for even cooking and sweet flavor. - 1 tablespoon olive oil: This adds richness and helps cook the squash. - 1 pound (450g) Italian chicken sausage: Remove casings to mix well with the other ingredients. - 3 cloves garlic: Mince it for a strong, aromatic base. - 4 cups fresh spinach: Roughly chop it to easily blend into the pasta. - 1 teaspoon dried oregano: This brings a nice earthy flavor. - 1/2 teaspoon nutmeg: It adds warmth and depth to the dish. - Salt and pepper: Season to taste; these enhance all flavors. - 1/2 cup grated Parmesan cheese: Mix it in for creaminess, and save some for serving. - Red pepper flakes: Optional, but they add a little heat if you like spice. These ingredients come together to create a hearty, satisfying meal. Each component plays a role in making this dish special. You can find the Full Recipe at the end for easy reference. Start by boiling a large pot of salted water. Once the water is at a rolling boil, add 12 oz of your favorite pasta, like penne or fettuccine. Cook it according to the package instructions, usually around 8-10 minutes, until it is al dente. This means it should be firm but not hard. Don’t forget to reserve 1 cup of pasta water before draining it. This water helps to make the sauce creamy later. While the pasta cooks, grab a large skillet and set it over medium heat. Pour in 1 tablespoon of olive oil. When the oil is hot, add 2 cups of diced butternut squash. Stir it every few minutes for about 5-7 minutes. You want the squash to start softening but still hold its shape. To check for doneness, poke it with a fork. If it goes in easily but the squash is not mushy, it's ready. Now it’s time to add the sausage. Push the butternut squash to one side of the skillet and add 1 pound of Italian chicken sausage to the empty space. Use a wooden spoon to break apart the sausage. Cook it for about 5-6 minutes until it turns brown and is cooked all the way through. Mixing the sausage with the squash helps blend their flavors. Once the sausage is cooked, add 3 cloves of minced garlic to the skillet. Stir it for about 1 minute until it smells good. Next, toss in 4 cups of roughly chopped spinach. Stir everything together and cook for another 2-3 minutes until the spinach wilts down. This adds great color and nutrition to your dish. Now it’s time to bring everything together. Add the drained pasta to the skillet. Sprinkle in 1 teaspoon of dried oregano, 1/2 teaspoon of nutmeg, and season with salt and pepper to taste. Toss everything together. If the mixture looks too dry, add some of that reserved pasta water a little at a time. This helps to make the sauce smooth and creamy. For serving, plate the pasta in shallow bowls. Top each bowl with some grated Parmesan cheese. You can add a sprinkle of red pepper flakes for a bit of heat if you like. Drizzling a touch of olive oil on top makes the dish shine. For an extra pop, garnish with freshly cracked black pepper and a sprig of fresh basil. This makes your meal look and taste even better. For the full recipe, check the detailed instructions provided earlier. Enjoy your Butternut Squash Sausage Spinach Pasta! To save time, use pre-diced butternut squash. You can find this in most grocery stores. This way, you skip peeling and cutting. For the sausage, opt for ground sausage instead of links. It cooks faster and mixes well. You can also prepare all your ingredients ahead of time. Chop the garlic and spinach in advance. This helps you stay organized. When you start cooking, everything will be ready to go. For the best flavor, always use medium heat. This allows the butternut squash to caramelize. It brings out its natural sweetness. A large skillet works best for this dish. It gives you enough space to mix everything easily. Using a wooden spoon helps break up the sausage. It keeps the texture nice and even. You can also use a spatula to stir the pasta and sauce together. Feel free to add your favorite spices. Try adding smoked paprika or thyme for a twist. If you like heat, add red pepper flakes to the mix. They add a nice kick! If you want a vegetarian option, swap the sausage for lentils or mushrooms. Both add great flavor and texture. You can also skip the cheese or use a plant-based alternative. {{image_2}} If you want to change things up, you can swap the sausage. Try turkey sausage or even a plant-based version. These options still give great flavor without the extra fat. You can also use ground beef or pork if you prefer. When it comes to veggies, feel free to mix in others. Carrots, zucchini, or bell peppers add nice texture and taste. You could even use kale instead of spinach for a different twist. To make the dish creamy, you can add cream or cheese. Start by stirring in heavy cream after cooking the sausage. This will give a rich base. You can also mix in cream cheese or ricotta for a smooth texture. Adjust your cooking method by lowering the heat. This helps the cream blend well without curdling. Stir gently to combine everything smoothly. This dish pairs well with simple sides. A fresh green salad with vinaigrette works nicely. Garlic bread is another great choice for soaking up sauce. For wine lovers, a light white wine is perfect. Try a Sauvignon Blanc or a Pinot Grigio. These wines complement the flavors in the dish without overpowering them. You can find the Full Recipe for a detailed guide on how to make this wonderful meal! To keep your butternut squash sausage spinach pasta fresh, store it right. First, let it cool completely. Then, place it in an airtight container. This helps prevent moisture loss. You can use glass or plastic containers for this purpose. Glass containers are great for reheating since they can go in the oven or microwave. If you want to freeze the dish, follow these steps. Once it cools, portion it into freezer-safe bags or containers. Squeeze out any air before sealing. This helps avoid freezer burn. You can freeze it for up to three months. When you're ready to eat, thaw it in the fridge overnight. To reheat, place it in a pan over medium heat, adding a splash of water or broth to keep it moist. Stir until heated through. In the fridge, the pasta lasts about three to four days. If you freeze it, it will stay good for three months. Check for signs of spoilage before eating. If you see mold or smell something off, it's best to throw it away. Keeping track of the storage time is key to enjoying this delicious meal safely. I recommend using penne or fettuccine for this dish. Penne’s tubes catch the sauce well. Fettuccine offers a nice, flat surface for the sauce to cling to. Both options create a great balance with butternut squash and sausage. Yes, you can easily make this dish vegetarian. Swap out the Italian sausage for plant-based sausage. You can also use mushrooms or lentils for added texture. This keeps the dish hearty and delicious without meat. To make this dish gluten-free, choose gluten-free pasta. Many brands offer rice, quinoa, or chickpea pasta. These options work well and maintain a good texture. Just cook them according to package instructions. You can prepare this dish ahead of time. Cook the pasta and sauce separately and store them in the fridge. When you’re ready to eat, just heat them together. This keeps the pasta from getting mushy. A simple side salad pairs well with this pasta. You can also serve garlic bread or roasted vegetables. These sides add freshness and balance to the meal. You can find the Full Recipe for butternut squash sausage spinach pasta [here](#). This link has all the cooking steps and tips you need. This blog post covered how to make a delicious butternut squash, sausage, and spinach pasta. We talked about the right ingredients, step-by-step cooking directions, and tips that make it easy. Remember, you can switch ingredients to suit your taste or needs. Whether you serve it fresh or store it for later, this dish is both satisfying and flexible. Enjoy creating your own versions and sharing them with family and friends!
    Butternut Squash Sausage Spinach Pasta Delightful Meal
  • To make these tasty Pumpkin S’mores Cookies, you need a mix of simple ingredients. Here’s what you will need: - 1 cup all-purpose flour - 1/2 cup rolled oats - 1/2 teaspoon baking soda - 1/2 teaspoon baking powder - 1/4 teaspoon salt - 1 teaspoon ground cinnamon - 1/2 teaspoon ground nutmeg - 1/4 cup unsalted butter, softened - 1/2 cup brown sugar, packed - 1/4 cup granulated sugar - 1/2 cup pumpkin puree - 1 teaspoon vanilla extract - 1/2 cup mini marshmallows - 1/2 cup chocolate chips - 1/2 cup crushed graham crackers These ingredients create a soft, chewy cookie. The pumpkin adds moisture and flavor. The oats give a nice texture. Chocolate, marshmallows, and graham crackers make it a true s’mores treat. You can play with these cookies by adding some fun extras. Consider these options: - Chopped nuts like walnuts or pecans for crunch. - A sprinkle of sea salt on top for a salty bite. - White chocolate chips for a different sweet flavor. - Dried fruit like cranberries for a chewy element. These add-ins can make your cookies unique. Feel free to mix and match! Not all ingredients may be on hand. Here are some easy swaps: - Use whole wheat flour instead of all-purpose for more fiber. - Swap pumpkin puree with applesauce for a lighter taste. - If you need a dairy-free option, use coconut oil instead of butter. - Maple syrup can replace granulated sugar for a natural sweetener. These substitutions keep the cookie delicious while meeting dietary needs. Experiment to find your favorite version! For the full recipe, check out the instructions above. First, I preheat the oven to 350°F (175°C). This step ensures the cookies bake evenly. Next, I line a baking sheet with parchment paper to prevent sticking. In a bowl, I mix the dry ingredients. I combine 1 cup of all-purpose flour, 1/2 cup of rolled oats, 1/2 teaspoon of baking soda, 1/2 teaspoon of baking powder, 1/4 teaspoon of salt, 1 teaspoon of ground cinnamon, and 1/2 teaspoon of ground nutmeg. I whisk these until they blend well. In another bowl, I cream together 1/4 cup of softened unsalted butter, 1/2 cup of packed brown sugar, and 1/4 cup of granulated sugar. I beat this mixture until it gets light and fluffy. Then I add 1/2 cup of pumpkin puree and 1 teaspoon of vanilla extract. I mix until smooth. Now, I gradually add the dry mix to the wet mix. I stir until just combined, being careful not to overmix. Finally, I fold in 1/2 cup each of mini marshmallows, chocolate chips, and crushed graham crackers. This gives the cookies that s’mores flavor. With the dough ready, I scoop tablespoon-sized portions onto the prepared baking sheet. I space them about 2 inches apart to allow room for spreading. I bake them for 12-15 minutes. The edges should be lightly golden, and the cookies should look set at this point. After baking, I let the cookies cool on the sheet for 5 minutes. This helps them firm up a bit. Then I transfer them to a wire rack to cool completely. For serving, I like to arrange the cookies on a rustic wooden board. A sprinkle of whole graham crackers and chocolate chips adds a nice touch. I often serve them warm with a glass of cold milk. A mini s’mores skewer makes a fun garnish! For the full recipe, check out the [Full Recipe]. Enjoy your delicious Pumpkin S’mores Cookies! To make these cookies stand out, use fresh pumpkin puree. It adds a rich flavor. You can also chill your dough for 30 minutes before baking. This helps the cookies hold their shape. Bake them until the edges are golden but the centers stay soft. This gives a nice texture. One common mistake is overmixing the dough. This can make the cookies tough. Mix just until ingredients combine. Another mistake is not measuring ingredients correctly. Use proper measuring cups for dry and wet ingredients. Lastly, don’t skip the parchment paper. It prevents sticking and helps with even baking. You’ll need a few key tools to make these cookies. A large mixing bowl works best for combining ingredients. Use a whisk for dry ingredients and a hand mixer for wet ones. A cookie scoop makes portioning easy and uniform. Finally, a baking sheet lined with parchment paper is essential. These tools help ensure your cookies turn out great every time. For the full recipe, check out the details above! {{image_2}} You can make gluten-free pumpkin s’mores cookies with a few easy swaps. Use a gluten-free all-purpose flour blend instead of regular flour. The blend will help keep the cookie texture just right. Make sure the oats you use are certified gluten-free. This will keep the cookies safe for anyone who needs to avoid gluten. The taste remains rich and delicious, just like the original. To make these cookies vegan, you’ll need to change a few ingredients. Replace the unsalted butter with coconut oil or vegan butter. Use a flax egg instead of a regular egg. To make a flax egg, mix one tablespoon of ground flaxseed with three tablespoons of water. Let it sit for five minutes until it thickens. You can still enjoy the same sweet flavors while keeping it plant-based. You can get creative with flavor variations, too! Try adding white chocolate chips for a fun twist. Chopped nuts like pecans or walnuts add a nice crunch. You can also mix in pumpkin spice for extra warmth. For a fun seasonal touch, consider adding a sprinkle of sea salt on top before baking. Each variation keeps the spirit of s’mores alive while offering new tastes. For the full recipe, check out the steps earlier in this article. Once your pumpkin s’mores cookies cool, you can store them easily. Place the cookies in an airtight container. This keeps them fresh and soft. You can layer parchment paper between the cookies to prevent sticking. Store them at room temperature for up to one week. If you want, you can also keep them in the fridge. Just remember, they may dry out a bit. Freezing cookies is a smart way to save them for later. To freeze your pumpkin s’mores cookies, wait until they cool completely. Then, place them in a single layer on a baking sheet. Freeze them for about an hour. After that, transfer the cookies to a freezer bag. Remove as much air as possible before sealing. They can stay fresh for up to three months in the freezer. When you are ready to eat, let them thaw at room temp. To keep your cookies fresh, avoid mixing flavors. Store different cookies in separate containers. You can also add a slice of bread to the container. This helps keep cookies soft for longer. If you notice them getting hard, you can warm them in the oven for a few minutes. Always check your cookies for signs of spoilage. Fresh cookies should smell sweet and look appealing. To make your Pumpkin S’mores Cookies chewy, focus on two things: moisture and baking time. First, ensure you use enough pumpkin puree. The moisture from the puree keeps the cookies soft. Second, do not overbake them. Take them out when the edges are lightly golden. They will continue to cook slightly on the baking sheet. This method will give you that perfect chewy texture you crave. Yes, you can use canned pumpkin! Canned pumpkin is a great option. It saves time and provides a consistent flavor. Just make sure you choose pure pumpkin puree, not pumpkin pie filling. The filling has added sugars and spices that might change the taste of your cookies. Using pure pumpkin keeps your cookies true to the recipe. It adds moisture and rich flavor without extra work. Pumpkin S’mores Cookies are best served warm. They are delicious with a glass of cold milk. For a fun twist, you can create mini s’mores skewers. Just use a toothpick to stack mini marshmallows, chocolate pieces, and graham crackers. Place these on the side when serving. You can also arrange the cookies on a rustic wooden board. This adds a cozy fall vibe to your gathering. For the full recipe, check the section above. In this post, I shared how to make Pumpkin S’mores Cookies. We explored the ingredients, step-by-step instructions, and essential tips. I also offered ideas for variations and storage. Remember, using the right tools helps create tasty cookies. Avoid common mistakes for the best results. Enjoy these treats fresh or try freezing them for later. Keep experimenting with flavors and enjoy the fun!
    Pumpkin S’mores Cookies Irresistible Fall Treat
  • To make this tasty dish, you need some key ingredients. Here’s a list: - 2 pounds boneless, skinless chicken thighs, cut into bite-sized pieces - 1 cup unsalted roasted peanuts - 1 red bell pepper, diced - 1 green bell pepper, diced - 1 small onion, diced - 3 cloves garlic, minced - 1 tablespoon fresh ginger, minced - 1/4 cup soy sauce (low sodium) - 1/4 cup chicken broth - 2 tablespoons rice vinegar - 2 tablespoons brown sugar - 1 tablespoon cornstarch - 1/2 teaspoon crushed red pepper flakes (adjust to taste) - 1 tablespoon sesame oil - Salt and pepper to taste - Chopped green onions and sesame seeds for garnish These main ingredients create a rich and flavorful dish that warms your stomach. You might want to tweak the recipe to fit your taste. Here are some ideas: - Vegetables: Add snow peas or carrots for extra crunch. - Nuts: Use cashews instead of peanuts if you prefer. - Sweetness: Swap brown sugar with honey or maple syrup for a different taste. - Spiciness: If you love heat, add more crushed red pepper or chili paste. These optional ingredients help you customize your meal. Experiment and find your perfect mix. You only need a few tools to make this easy dish: - Crockpot: This is key for slow cooking. - Cutting board and knife: To chop your veggies and chicken. - Mixing bowl: Use this to mix your marinade. - Measuring cups and spoons: For accurate ingredient amounts. Having the right tools makes cooking smoother and more enjoyable. With these items, you're all set to create a delicious Crockpot Kung Pao Chicken. For the step-by-step guide, check out the Full Recipe. Gather all your ingredients first. This makes cooking easy and fun. You need: - 2 pounds boneless, skinless chicken thighs, cut into bite-sized pieces - 1 cup unsalted roasted peanuts - 1 red bell pepper, diced - 1 green bell pepper, diced - 1 small onion, diced - 3 cloves garlic, minced - 1 tablespoon fresh ginger, minced - 1/4 cup soy sauce (low sodium) - 1/4 cup chicken broth - 2 tablespoons rice vinegar - 2 tablespoons brown sugar - 1 tablespoon cornstarch - 1/2 teaspoon crushed red pepper flakes (adjust to taste) - 1 tablespoon sesame oil - Salt and pepper to taste - Chopped green onions and sesame seeds for garnish In a large mixing bowl, add the chicken thighs. Pour in the soy sauce, chicken broth, and rice vinegar. Then, add brown sugar, cornstarch, minced garlic, minced ginger, and crushed red pepper flakes. Mix it well until the chicken is coated in the marinade. Now, transfer the chicken mixture into the crockpot. This is where the magic happens! On top of the chicken, add the diced red and green bell peppers and onions. Drizzle the sesame oil over everything. This will give it a nice flavor. Cover the crockpot with a lid. Set it to cook on low for 6-8 hours or high for 3-4 hours. You want the chicken to be tender and fully cooked. About 30 minutes before you plan to serve, add the roasted peanuts to the crockpot. Stir gently so the peanuts mix in but stay whole. This adds a nice crunch to your meal. Once done, taste the dish. Adjust with salt and pepper if needed. Serve the Kung Pao Chicken hot. Garnish with chopped green onions and a sprinkle of sesame seeds for that final touch. Enjoy your flavorful dinner delight! For the complete recipe, check out the Full Recipe. To boost the flavor of your Crockpot Kung Pao Chicken, use fresh ingredients. Fresh garlic and ginger make a big difference. You can also add more veggies, like carrots or snap peas, for extra crunch. Toasting the peanuts briefly before adding them enhances their nutty taste. If you like more heat, add extra crushed red pepper flakes. Marinate the chicken for a few hours before cooking. This lets the flavors soak in well. If your chicken turns out dry, it could be overcooked. Always check the time and temperature. If the dish is too salty, add a little sugar to balance it. Too much sauce can make your meal watery. You can thicken it with cornstarch mixed in water. If the sauce is bland, a splash more soy sauce or vinegar can help. Taste as you go to find the right flavor. Serve your Kung Pao Chicken over white or brown rice. This helps soak up the sauce. You can also serve it with steamed broccoli or snap peas for color and nutrition. A side of egg rolls or spring rolls pairs nicely too. For a fun twist, try it in lettuce wraps. Garnish with green onions and sesame seeds to make the dish pop. Check out the [Full Recipe] for more tips! {{image_2}} You can easily make this dish vegetarian or vegan. Instead of chicken, use tofu or tempeh. Cut them into bite-sized pieces. Marinate them just like the chicken. The sauce still brings a great flavor. You can add extra veggies, like broccoli or snap peas. This keeps the dish colorful and tasty. Do you want to switch things up? Try using shrimp or pork. Shrimp cooks quickly and adds a nice flavor. Pork can also work well, but make sure it is tender. Just follow the same cooking time as the chicken. The sauce will blend well with any protein you choose. Do you like a kick in your food? You can add more crushed red pepper flakes. Start with one teaspoon for a good heat. If you prefer it mild, reduce the flakes. You can also use sweet chili sauce for a twist. It gives the dish a sweet and spicy taste. Adjust it to match your taste buds! For the full recipe, click [here](#). After enjoying your Crockpot Kung Pao Chicken, let it cool. Place it in an airtight container. Store it in the fridge for up to four days. If you want to keep it longer, freezing is a great option. To reheat, take the chicken out of the fridge. You can use a microwave or a stovetop. If using a microwave, heat it in short bursts. Stir it often to ensure even heating. On the stovetop, warm it over low heat. Add a splash of water or broth to keep it moist. If you freeze leftovers, use a freezer-safe container. Label it with the date so you remember when you made it. To thaw, move it to the fridge overnight. You can also use the microwave for quick thawing. Once thawed, reheat it properly before serving. For the full experience, check out the Full Recipe for more tips. If you need a peanut substitute, try cashews or almonds. Both give a nice crunch. You can also use sunflower seeds for a nut-free option. These will add a similar texture without the peanut flavor. Just keep in mind that the taste will change slightly. Make sure to adjust your cooking time if you use softer nuts. To add more heat, use extra crushed red pepper flakes. Start with one teaspoon and add more if you like it hot. You can also add chopped fresh chili peppers. Another option is to use spicy chili sauce in the sauce mix. Just be sure to taste as you go. Everyone’s spice level is different! Yes, you can use chicken breasts instead of thighs. However, they may cook faster and can dry out if overcooked. I recommend checking them at the 3-hour mark if cooking on high. If you want juicy meat, thighs are best since they stay tender. For the best taste, stick to the recipe for now. You can find the full recipe to guide you through the process. This blog post shared how to make tasty Crockpot Kung Pao Chicken. We covered the main ingredients, optional swaps, and the right tools. You learned step-by-step how to prepare, cook, and serve this dish. I also shared tips for boosting flavor and solving common issues. We explored variations for different diets and gave storage advice. Now, you can enjoy a delicious meal any day of the week. Dive into cooking and have fun!
    Crockpot Kung Pao Chicken Flavorful Dinner Delight
  • To make these enchiladas, start with the main items. You will need: - 2 lbs boneless, skinless chicken breasts - 1 can (10 oz) enchilada sauce (choose red or green) - 1 can (15 oz) black beans, rinsed and drained - 1 can (15 oz) corn, drained - 1 cup salsa - 1 tsp ground cumin - 1 tsp garlic powder - 1 tsp onion powder - 1 tsp chili powder - 8 large tortillas (either corn or flour) - 2 cups shredded cheese (opt for cheddar or a Mexican blend) These ingredients come together to create a hearty, flavorful meal. The chicken absorbs all the spices and sauce, making each bite delicious. Feel free to add your own touch to the enchiladas. Some optional ingredients are: - Diced bell peppers - Sliced jalapeños for heat - Chopped onions - Avocado slices for a fresh taste - Black olives for an extra layer of flavor These options let you customize your dish to match your taste. You can mix and match as you like! Cheese is a key part of the enchiladas. I recommend: - Cheddar cheese for its sharp flavor - Mexican blend cheese for a nice variety - Monterey Jack for creaminess Using different cheeses can change the flavor profile. Cheese adds that gooey texture that enchiladas need. Check out the Full Recipe for more details on assembly and cooking! First, gather your ingredients. You need chicken, enchilada sauce, black beans, corn, and spices. Place the two pounds of chicken breasts in the bottom of your slow cooker. In a bowl, mix the enchilada sauce, black beans, corn, salsa, and spices. Stir this mix well. Pour it over the chicken in the slow cooker. Make sure the chicken is fully coated in the sauce. Now, cover the slow cooker. Cook on low for 6-7 hours or on high for 3-4 hours. The chicken should become tender and easy to shred. When the cooking time is up, take out the chicken. Use two forks to shred it. Return the shredded chicken to the sauce in the slow cooker. Stir everything together well. Preheat your oven to 350°F (175°C). Take a tortilla and place some chicken mixture in the center. Sprinkle cheese on top of the chicken. Roll the tortilla tightly and place it seam-side down in a greased baking dish. Repeat this with all your tortillas. Pour any leftover sauce from the slow cooker over the rolled enchiladas. Top with more cheese. Bake in the oven for 20-25 minutes. The cheese should melt and bubble. Garnish with cilantro before serving. For the full recipe, check the earlier section. To make your enchiladas burst with flavor, focus on your sauce. Use a good quality enchilada sauce. You can make your own too! Combine canned tomatoes, chili powder, and spices. This adds depth. Adding black beans and corn adds texture and taste. Don't skip on seasoning. A bit of cumin and garlic powder enhances the dish. Taste the sauce before pouring it over the chicken. Adjust the spices as needed to suit your taste. Shredding chicken can be simple. After cooking, let the chicken cool a bit. Use two forks to pull apart the chicken. If you want an easier method, use a hand mixer. Just place the chicken in a bowl and mix on low speed. This shreds the chicken fast and saves your hands. Shredded chicken mixes well with the sauce. It helps keep each bite flavorful and moist. To get that perfect cheese melt, use shredded cheese. This melts evenly and quickly. Mix different cheese types for more flavor. Cheddar and Monterey Jack work great together. Before baking, sprinkle cheese on top and pour some sauce over it. This creates a delicious crust. Bake the enchiladas until the cheese is bubbly and golden. Keep an eye on them to avoid burning. Enjoy the gooey, cheesy goodness! {{image_2}} You can make a tasty vegetarian version of enchiladas. Simply swap the chicken for veggies. Try using zucchini, bell peppers, and mushrooms. You can also add black beans for protein. Use the same enchilada sauce and spices for great flavor. This option is healthy and still very filling. If you prefer beef or turkey, you can easily switch the protein. Use the same amount of ground beef or turkey. Brown the meat in a pan before adding it to the slow cooker. This adds depth to the flavor. Just follow the same steps in the recipe. The enchiladas will be hearty and satisfying. To make gluten-free enchiladas, use corn tortillas instead of flour ones. Corn tortillas work well and add a nice texture. You can find gluten-free tortillas at many grocery stores. This way, everyone can enjoy enchiladas, regardless of dietary needs. Just remember to check the labels for any hidden gluten. For the full recipe, refer to the Slow Cooker Chicken Enchiladas recipe above. To store leftover enchiladas, let them cool first. Place them in an airtight container. Make sure to cover them well to keep them fresh. You can keep them in the fridge for up to three days. If you want to enjoy them later, freezing is a great option. When you are ready to eat your stored enchiladas, preheat your oven to 350°F (175°C). Place the enchiladas in a baking dish. Cover them with foil to keep them moist. Heat for about 20 minutes or until warmed through. You can also reheat them in the microwave for a quick option. Just heat for 1-2 minutes, checking to avoid overheating. To freeze your enchiladas, wrap each one tightly in plastic wrap. Then place them in a freezer-safe bag or container. They can last in the freezer for up to three months. When you are ready to enjoy them, thaw them in the fridge overnight before reheating. This way, you will keep all the flavors intact for a tasty meal. You can store slow cooker chicken enchiladas in the fridge for about 3-4 days. Keep them in an airtight container. This helps keep them fresh and tasty. If you want to eat them later, just reheat them in the oven or microwave. Yes, you can make slow cooker chicken enchiladas ahead of time. You can prepare them the day before. Just follow the steps in the Full Recipe. After cooking, let them cool. Then, cover and store in the fridge. When you are ready, bake them for a warm meal. Many side dishes go well with chicken enchiladas. Here are some ideas: - Mexican rice - Refried beans - Corn salad - Guacamole - Chips and salsa These sides add flavor and balance to your meal. You can mix and match to find your favorites! Slow cooker chicken enchiladas are easy and fun to make. We covered the main ingredients, tasty tips, and cooking steps. You can change things up with different proteins or make them vegetarian. Don’t forget to store leftovers right to keep them fresh. With these simple steps and tricks, you can enjoy your meal and impress others. Now, it's your turn to try this recipe and enjoy delicious enchiladas at home!
    Savory Slow Cooker Chicken Enchiladas Easy Recipe
  • To make Crockpot Crack Chicken, gather these items: - 2 lbs boneless, skinless chicken breasts - 1 packet ranch dressing mix - 8 oz cream cheese, cubed - 1 cup chicken broth - 1 cup shredded cheddar cheese - ½ cup cooked crispy bacon bits (optional) - ¼ cup green onions, sliced - Salt and pepper to taste You will need a few tools for this recipe: - A crockpot - Measuring cups and spoons - Mixing spoons - Two forks (for shredding chicken) - A cutting board and knife If you want to change things up, try these options: - Chicken: Use thighs instead of breasts for more flavor. - Cream Cheese: Swap for Greek yogurt for a lighter option. - Cheese: Use pepper jack cheese for a spicy kick. - Bacon: Substitute turkey bacon for a healthier choice. - Ranch Mix: Make a homemade ranch mix using herbs and spices. These simple swaps can help you make the dish your own while keeping it delicious. Start by placing 2 lbs of boneless, skinless chicken breasts at the bottom of the crockpot. This is the base of your dish. Next, season the chicken with salt and pepper. Just a pinch of each will do. This will add great flavor to your meal. Now it’s time to add some deliciousness! Sprinkle 1 packet of ranch dressing mix evenly over the chicken. Then, pour in 1 cup of chicken broth. This adds moisture and flavor. Next, cube 8 oz of cream cheese and place it on top. Don’t stir yet; it will melt as it cooks. Cover the crockpot and set it to cook on low for 6-8 hours or high for 3-4 hours. You will know it's ready when the chicken is tender and easy to shred. After cooking, remove the chicken from the pot. Use two forks to shred it. This is a fun step! Return the shredded chicken back to the pot. Now, stir everything together until well mixed. It’s time to add 1 cup of shredded cheddar cheese and ½ cup of cooked crispy bacon bits, if you like. Stir until the cheese melts and everything is creamy. For a fresh touch, top with ¼ cup of sliced green onions. Serve in bowls with toasted bread or over rice. Enjoy your meal! For the complete recipe, check out the Full Recipe. One big mistake is not seasoning the chicken well. Always add salt and pepper to bring out the flavors. Another error is stirring too soon. If you mix before cooking, the cream cheese won’t melt right. Also, avoid overcooking. Chicken can dry out if left too long. Stick to the cooking times for juicy results. To boost the taste, try adding garlic powder or onion powder. These spices work well with ranch. You can also add a splash of hot sauce for a kick. If you like herbs, fresh parsley or dill can add brightness. Experiment with different cheeses too. Pepper jack or gouda can change the dish’s profile. Timing is key! If you use the low setting, cook for 6-8 hours. For the high setting, 3-4 hours is best. Check your chicken after the minimum time. If it shreds easily, it’s done. Always use a meat thermometer. The chicken should reach 165°F for safety. Enjoying it fresh is the best way to savor this meal. For the complete process, see the Full Recipe. {{image_2}} You can make Crockpot Crack Chicken lighter. Use lean chicken breast for less fat. Swap cream cheese for Greek yogurt. This change cuts calories and adds protein. Use low-sodium chicken broth to lower salt. You can also skip the bacon for a healthier dish. Try adding different herbs or spices. Mix in garlic powder for a nice kick. You can also use taco seasoning instead of ranch. This gives a fun twist to the dish. For a zesty touch, add lime juice. Fresh cilantro also brightens the flavor. Crockpot Crack Chicken shines when paired with sides. Serve it on a toasted bun for a tasty sandwich. It also works well over rice or pasta. For a fresh touch, add a side salad. You can even serve it with veggie sticks for crunch. Enjoy the creamy goodness with your favorite sides! Store leftover Crockpot Crack Chicken in an airtight container. Make sure it cools first. Place it in the fridge within two hours of cooking. It stays fresh for about three to four days. Always label the container with the date for easy tracking. If you see any signs of spoilage, toss it out. You can freeze Crockpot Crack Chicken for longer storage. Divide the dish into smaller portions. Use freezer-safe bags or containers to prevent freezer burn. Remove as much air as possible before sealing. It can last for up to three months in the freezer. When ready to eat, thaw it in the fridge overnight. To reheat, the best methods are the microwave or stovetop. If using the microwave, heat in short bursts. Stir in between to ensure even warming. On the stovetop, use low heat and add a splash of broth to keep it moist. Avoid overheating, as it can dry out the dish. Enjoy your meal just as much as the first time! Yes, you can use frozen chicken. Just add a bit more time to cook. If you use frozen chicken, it will take about 8-10 hours on low. This way, the chicken cooks fully and stays tender. To make it dairy-free, swap cream cheese with a dairy-free alternative. You can use cashew cream or a dairy-free cream cheese. Make sure to check that the ranch mix is dairy-free too. You can serve this dish in many ways! Here are some ideas: - Over rice: The creamy sauce pairs well with rice. - On toasted bread: Make a tasty sandwich or toast. - With veggies: Serve with a fresh salad or steamed veggies. - In a wrap: Use tortillas to make a fun wrap. Crockpot Crack Chicken can last about 3-4 days in the fridge. Store it in an airtight container. Make sure to let it cool before sealing it up. This blog post covered everything you need for Crockpot Crack Chicken. We explored the full ingredient list, essential kitchen tools, and useful substitutions. You learned the steps for preparing, cooking, and serving the dish. I shared tips to avoid mistakes, enhance flavors, and time your cooking perfectly. We also discussed variations, storage, and answered common questions. With these insights, you can enjoy a tasty meal the easy way. Cooking should be fun and rewarding. Now, go make your own Crockpot Crack Chicken and impress everyone!
    Crockpot Crack Chicken Delightful and Easy Meal
  • To make a classic Southern green bean casserole, you will need: - 2 (14.5 oz) cans of green beans, drained - 1 cup fresh mushrooms, sliced - 1 medium onion, finely chopped - 2 cloves garlic, minced - 1 cup heavy cream - 1 cup shredded cheddar cheese - 1 cup french fried onions - 2 tablespoons butter - 1 teaspoon Worcestershire sauce - Salt and pepper to taste These ingredients create a rich and creamy dish. The green beans provide a tender crunch. Fresh mushrooms add depth with their earthy flavor. Onions and garlic bring a sweet aroma that fills the kitchen. Heavy cream makes the casserole creamy, while cheddar cheese adds a nice cheesy texture. Lastly, french fried onions on top give a satisfying crunch. You can change this recipe to suit your taste. Try these optional ingredients: - Different types of cheese, like mozzarella or gouda, for a unique flavor - Adding protein, such as chicken or bacon, for extra heartiness - Fresh herbs like thyme or parsley for a burst of freshness These options let you customize the casserole. You can make it your own with just a few tweaks. If you need to swap out ingredients, here are some ideas: - Use dairy-free cream for a lighter option - Look for gluten-free seasoning for flavor without gluten - Frozen green beans work well if you don’t have canned ones These substitutions keep the dish accessible. You can still enjoy a tasty casserole while meeting dietary needs. For the full recipe, check out the complete details in the previous section. First, wash your green beans under cold water. If you use fresh beans, trim the ends. For canned beans, just drain them well. Next, slice your mushrooms and finely chop the onion. Don’t forget to mince the garlic. Measure out the heavy cream, cheese, and fried onions too. This will help you stay organized as you cook. Start by heating a medium skillet over medium heat. Add the butter and let it melt. Next, toss in the chopped onions. Sauté them until they turn soft and clear. This takes about 4 to 5 minutes. Now, add the sliced mushrooms and minced garlic. Cook for another 5 minutes. You want the mushrooms to soften nicely. In a large mixing bowl, combine the drained green beans, onion, and mushroom mix. Pour in the heavy cream and Worcestershire sauce. Season with salt and pepper to taste. Stir everything well until combined. Now, fold in half of your shredded cheddar cheese and half of the fried onions. This mix is the heart of the dish. With everything mixed, transfer the mixture to a greased baking dish. Spread it out evenly for even cooking. Before baking, preheat your oven to 350°F (175°C). Bake the casserole for 25 to 30 minutes. You’ll know it’s ready when it’s hot, bubbly, and the top is golden brown. This is when the magic happens! Once done, let it cool for a few minutes before serving. Enjoy this classic dish! For the full recipe, refer to the earlier section. To make your green bean casserole just right, focus on three key areas. First, ensure the right consistency. Mix the ingredients well but avoid over-mixing. The cream should coat everything, not drown it. Next, avoid overcooking the toppings. You want them crispy, not burnt. Keep an eye on the casserole while it bakes. The top should be golden brown when done. Lastly, timing is key. Serve the casserole hot, right from the oven. It stays creamy and delicious that way. If you let it sit too long, the texture will change. I see many cooks make three common mistakes. The first is using too much liquid. Your casserole should be creamy, not soupy. Stick to the heavy cream as your main liquid. Another mistake is undercooking the green beans. If they are too crunchy, they won’t blend well. Make sure they’re tender before mixing them in. Lastly, don’t forget key flavor enhancers. Worcestershire sauce adds depth. Salt and pepper bring everything together. Missing these can leave your dish flat. Pair your casserole with classic Southern dishes. Fried chicken or cornbread make great companions. They enhance the meal and create a comforting vibe. For a pretty presentation, consider garnishing. A sprinkle of fresh parsley adds color. You can also add crispy fried onions on top for extra crunch. These tips will help you create a tasty and beautiful Southern green bean casserole. For the complete recipe, check the Full Recipe section. {{image_2}} Southern green bean casserole has many fun twists. In Louisiana, folks often add a kick of Cajun spice. This gives it warmth and depth. In Texas, you might find green chilies stirred in for a zesty flavor. Each region brings its flair based on local tastes and traditions. Seasons also inspire changes. In fall, you can mix in roasted butternut squash for sweetness. During summer, fresh herbs and tomatoes can brighten the dish. Don’t be afraid to make it your own based on what's fresh and available! If you want a lighter version, use low-fat cream or Greek yogurt. This keeps the dish creamy but cuts some fat. You can also swap in veggie broth for a lighter base. For vegetarian adaptations, try using mushrooms as a main flavor. They add richness and texture. Another option is to substitute the heavy cream with unsweetened almond milk. It lightens the dish and makes it dairy-free. Plant-based cheese can also work well for a cheesy touch without dairy. Adding spices can give your casserole a fun twist. For heat, try crushed red pepper or cayenne. This adds a nice kick that balances the creamy flavors. You might also consider adding a dash of smoked paprika for depth. Incorporating seasonal vegetables can also add variety. Fresh corn, zucchini, or even kale can bring new textures and flavors. Mixing these colorful veggies into the casserole makes it vibrant and appealing. Don't hesitate to get creative with your additions! To keep your Southern green bean casserole fresh, let it cool first. Then, transfer it to an airtight container. This keeps moisture in and odors out. In the fridge, it lasts about 3 to 5 days. If you need it to last longer, freezing is a great option. To freeze your casserole, cut it into portions. Wrap each piece tightly in plastic wrap, followed by aluminum foil. This prevents freezer burn. You can store it this way for up to 3 months. When you’re ready to eat, thaw it overnight in the fridge before reheating. For the best texture, reheat in the oven. Preheat to 350°F (175°C) and cover the dish with foil. Bake for about 20-25 minutes until hot. If using a microwave, heat it in short bursts. Stir between intervals to ensure even heating. This way, you enjoy the same great taste and texture as when it was fresh. Yes, you can prepare Southern Green Bean Casserole ahead. Make it up to a day before. Assemble the casserole, cover it, and store it in the fridge. When you're ready to bake, just pop it in the oven. This makes meal prep easy, especially for gatherings. Southern Green Bean Casserole pairs well with many dishes. Here are some great options: - Roast chicken or turkey - Baked ham - Mashed potatoes - Cornbread - Collard greens These sides create a classic Southern feast. Yes, you can make a vegan version! Use these substitutions: - Swap heavy cream for coconut cream or unsweetened almond milk - Use vegan cheese instead of cheddar - Replace butter with olive oil or vegan butter - Choose a plant-based Worcestershire sauce These changes keep the rich flavor while making it vegan-friendly. Many people enjoy tweaking this recipe for variety. Here are some popular changes: - Add cooked chicken or bacon for protein - Use different cheeses like mozzarella or pepper jack - Mix in fresh herbs like thyme or rosemary These adjustments keep the dish exciting! To get that perfect crispy topping, follow these tips: - Use fresh, high-quality french fried onions - Add the onions right before baking for extra crunch - Bake at the right temperature, usually around 350°F - Check towards the end of baking to avoid burning With these steps, your topping will always be golden and crunchy. For the full recipe, check the detailed steps above. Southern green bean casserole is a beloved dish with many delicious options. We explored the main and optional ingredients, plus ways to substitute to meet your needs. I shared step-by-step cooking instructions to guide you through the process. Remember to avoid common mistakes for the perfect casserole. In the end, this recipe is versatile and easy. You can customize it for any meal or season. Enjoy making this classic dish, and let it bring smiles to your table!
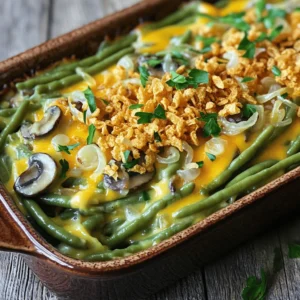
    Savory Southern Green Bean Casserole Recipe Guide
  • To make delicious ham and cheese empanadas, gather these key ingredients: - 1 cup cooked ham, finely chopped - 1 cup shredded mozzarella cheese - ½ cup cream cheese, softened - 1 small onion, finely diced - 1 teaspoon garlic powder - ½ teaspoon smoked paprika - Salt and pepper to taste - 1 package (10 oz) empanada dough discs - 1 egg, beaten (for egg wash) - Olive oil for frying These ingredients create a rich and creamy filling. The ham adds savory flavor, while the cheeses give a wonderful melt. The spices enhance the taste and aroma. You can add these optional ingredients to boost the flavor: - Fresh herbs like parsley or cilantro - Chopped bell peppers for extra crunch - Jalapeños for a spicy kick - A splash of hot sauce for heat These extras can tailor the empanadas to your taste. Feel free to experiment! To prepare your empanadas, you will need: - A large mixing bowl - A fork for crimping edges - A skillet for frying - A spatula for flipping - Paper towels for draining excess oil Having the right tools makes the process smoother. With these items, you can easily whip up tasty empanadas. For more details, check the Full Recipe. To make the filling, start with a large mixing bowl. Add 1 cup of finely chopped cooked ham. Next, mix in 1 cup of shredded mozzarella cheese. Then, add ½ cup of softened cream cheese. This adds a nice creaminess. Now, add 1 small diced onion for flavor. Sprinkle in 1 teaspoon of garlic powder and ½ teaspoon of smoked paprika. Season with salt and pepper to taste. Stir everything together until it’s well mixed. This filling is both cheesy and savory. You can even taste it to see if you like the flavor. Grab an empanada dough disc. Place about 2 tablespoons of the filling in the center of the disc. Fold the disc in half to create a semicircle. Press the edges together firmly to seal the empanada. You can use a fork to crimp the edges for a pretty touch. Repeat this with the remaining dough and filling until you have a nice batch. Make sure to keep the empanadas sealed well to hold the filling inside. Preheat a large skillet over medium heat. Pour in enough olive oil to coat the bottom of the skillet. Wait for the oil to get hot. Fry the empanadas in batches. Cook each one for about 3-4 minutes on each side. Look for a golden brown color, which means they are ready. Once cooked, remove the empanadas and place them on a paper towel-lined plate. This will help drain any extra oil. For a shiny finish, brush the tops with a beaten egg if you want. Now, your ham and cheese empanadas are ready to enjoy! To get the perfect crunch, use enough oil when frying. Make sure the oil is hot before adding the empanadas. This helps them cook quickly and brown nicely. Fry in small batches to avoid crowding the pan. Each empanada needs space to fry evenly. For a lighter bite, you can bake instead. Brush the tops with egg wash before baking for a golden look. One big mistake is overfilling the empanadas. Too much filling makes them hard to seal. Always leave space around the edges when filling. Another mistake is not sealing them well. Use a fork to crimp the edges tightly. This keeps the filling from leaking out. Also, make sure to let them cool slightly before eating. This helps avoid burns and makes them easier to handle. Serve your ham and cheese empanadas with a tasty dipping sauce. A tangy salsa or creamy ranch dressing works great. You can also add a salad on the side for freshness. Try pairing them with a light soup for a hearty meal. These empanadas are perfect for parties too! They make a fun finger food for guests. Enjoy them warm for the best flavor and texture. For the full recipe, check out the details above. {{image_2}} You can make a tasty vegetarian version of ham and cheese empanadas. Instead of ham, use cooked mushrooms or a mix of veggies like bell peppers and spinach. This swap keeps the dish hearty. Add the same cheeses for that creamy texture. You can also use plant-based cheese for a vegan option. It's a fun way to enjoy empanadas without meat. Cheese is key to great empanadas. While mozzarella is classic, feel free to mix it up. Try sharp cheddar for a bold flavor or creamy gouda for a smooth finish. You can also add feta for a tangy twist. Mixing two or more types of cheese gives a great taste and texture. This makes every bite exciting. If you like heat, make spicy ham and cheese empanadas. Add chopped jalapeños or red pepper flakes to the filling. This will bring a nice kick. You can also use pepper jack cheese for extra spice. These small changes make a big impact. You’ll love the balance of savory and spicy in every bite. You can store leftover empanadas in an airtight container. Keep them in the fridge. They stay fresh for about three days. Make sure they cool down before you store them. This helps prevent sogginess. If you want to keep them longer, freezing is a great option. To reheat your empanadas, the oven works best. Preheat the oven to 350°F (175°C). Place the empanadas on a baking sheet. Bake them for about 10-15 minutes. This will keep them crispy. You can also use a skillet. Heat on medium-low and cook for 5-7 minutes per side. This method also keeps them nice and crunchy. Freezing empanadas is easy and smart. First, let the cooked empanadas cool. Next, lay them flat on a baking sheet. Freeze them for about an hour until firm. Then, transfer them to a freezer-safe bag. They can last up to three months. When ready to eat, just reheat them from frozen. Enjoy your tasty treat anytime! Ham and cheese empanadas come from Latin America. They often have Spanish roots. Empanadas are popular in many countries, like Argentina and Colombia. Each region has its own twist on filling. The combination of ham and cheese is loved for its taste and comfort. It is a simple yet delicious way to enjoy a classic dish. You can find these empanadas in homes and restaurants alike. They are often served at parties and gatherings. Yes, you can use pre-made filling for empanadas. Many stores sell ready-made options. This can save you time in the kitchen. Just make sure the filling has good flavor. You want it to mix well with the dough. If you like a little extra flavor, add your spices or herbs. Pre-made fillings can be a great shortcut, but homemade is always a treat. To make empanadas gluten-free, use gluten-free dough. Many brands offer gluten-free empanada dough. You can also make your own at home. Use almond flour, coconut flour, or a gluten-free blend. Make sure your filling is also gluten-free. Double-check all labels when shopping. This way, everyone can enjoy your tasty empanadas. You won’t lose any flavor by going gluten-free. For the full recipe, check out the section above. Ham and cheese empanadas are tasty and fun to make. We talked about the main and optional ingredients, kitchen tools, and step-by-step cooking instructions. I shared tips for the perfect texture and common mistakes to avoid. You can even explore tasty variations and learn how to store them. These empanadas can be your new favorite treat. Make, enjoy, and share them with friends!
    Ham and Cheese Empanadas Savory and Simple Recipe
  • To make delicious Cranberry Turkey Stuffing Balls, gather these key ingredients: - 1 lb ground turkey - 2 cups bread crumbs (preferably whole grain) - 1 cup fresh cranberries, chopped - 1/2 cup onion, finely chopped - 1/4 cup celery, finely chopped - 2 cloves garlic, minced - 1 teaspoon dried sage - 1 teaspoon dried thyme - 1/2 teaspoon salt - 1/4 teaspoon black pepper - 1 egg, beaten - 1/4 cup chicken broth - Olive oil for drizzling These ingredients work together to create a perfect mix of flavors. The turkey gives a nice base, while cranberries add a sweet touch. Fresh herbs enhance the taste, making the stuffing balls truly special. You can also add these ingredients for more flavor: - Additional vegetables like bell peppers or carrots - Cheese options such as feta or mozzarella - Seasoning variations like paprika or cayenne pepper Using these extras can make your stuffing balls unique. Try different combinations to find your favorite mix! These stuffing balls are not only tasty but also nutritious. Here’s a quick look at their nutritional profile: - Caloric content: Around 250 calories per serving - Macronutrient breakdown: - Protein: 20g - Carbohydrates: 30g - Fat: 10g This dish balances protein and carbs well. It’s a great option for a holiday meal, providing energy and flavor. For the full recipe, check out the [Full Recipe]. 1. Preheating the oven: Start by preheating your oven to 375°F (190°C). This temperature is perfect for getting a nice golden color on your stuffing balls. 2. Preparing the baking sheet: Line a baking sheet with parchment paper. This helps prevent sticking and makes for easy cleanup later. 1. Combining turkey and vegetables: In a large bowl, mix together 1 pound of ground turkey with 2 cups of bread crumbs, 1 cup of chopped fresh cranberries, 1/2 cup of finely chopped onion, 1/4 cup of finely chopped celery, and 2 minced garlic cloves. The cranberries add a sweet and tart flavor that balances the savory turkey. 2. Incorporating wet ingredients: Add 1 beaten egg and 1/4 cup of chicken broth to your mixture. Use your hands to combine everything well. You want it to be moist but firm enough to hold its shape. 1. Forming the stuffing balls: Take small portions of the mixture and roll them into golf ball-sized balls. Place them on the prepared baking sheet, leaving some space between each ball. This helps them cook evenly. 2. Baking tips for perfect texture: Drizzle a little olive oil over each ball to help them brown nicely. Bake in your preheated oven for 25-30 minutes. They should turn golden brown and reach an internal temperature of 165°F (74°C). Enjoy the lovely aroma as they cook! For the complete steps and more details, check the [Full Recipe]. To keep your stuffing balls moist, avoid overcooking them. If they dry out, they lose flavor and texture. Use an egg and chicken broth in your mix. The egg helps bind the ingredients. The broth adds needed moisture. Always check the mixture’s consistency; it should be moist but hold its shape. Herbs make a big difference in flavor. I recommend using dried sage and thyme for a classic taste. These herbs blend well with turkey and cranberries. Feel free to adjust the salt and pepper to fit your taste. You can also mix in some fresh herbs if you have them on hand. For a beautiful golden finish, drizzle olive oil over the stuffing balls before baking. This helps them crisp up nicely. Bake them at 375°F for 25-30 minutes. Keep an eye on them as they bake. They should reach an internal temperature of 165°F. That’s how you know they are fully cooked and safe to eat. {{image_2}} You can easily change the protein in your stuffing balls. Instead of turkey, try ground chicken or even beef. Each swap gives a unique taste. If you want a vegetarian option, use black beans or lentils. They add protein and flavor. Changing the type of bread can also make a big difference. Use sourdough for a tangy taste or cornbread for a sweet note. You can even mix different breads for a fun twist. Want to add crunch? Toss in some chopped nuts, like walnuts or pecans. They add texture and a nutty flavor. Dried fruits like raisins or apricots also work well. They bring sweetness that pairs nicely with cranberries. Don’t be afraid to play with spices. Add a pinch of cumin or paprika for warmth. You can also try fresh herbs, like parsley or rosemary, for a fresh kick. These stuffing balls shine with the right sauces. A cranberry sauce adds a sweet touch. Gravy can make them rich and hearty. Serve them with roasted veggies or mashed potatoes for a lovely meal. For a fun presentation, stack the balls on a platter with sprigs of fresh herbs. You can also serve them in small cups for a party-style dish. These ideas will impress your guests and make the meal feel special. For the full recipe, check out the [Full Recipe]. To store leftovers, let the stuffing balls cool first. Place them in an airtight container. This keeps them fresh. You can store them in the fridge for up to three days. For the best taste, eat them within this time. If you want to freeze them, wrap each stuffing ball in plastic wrap. Then, place them in a freezer bag. This helps avoid freezer burn. They stay good in the freezer for about three months. When you're ready to eat, thaw them overnight in the fridge. Reheat them in the oven at 350°F (175°C) for about 15 minutes. Preparing in advance makes life easier. You can mix the ingredients a day before and refrigerate. Just shape the balls before baking. Portioning them into meal-sized servings helps with storage. It also makes it easy to grab what you need for a quick meal. Follow the Full Recipe for best results! To check if your stuffing balls are done, use a meat thermometer. The internal temperature should reach 165°F (74°C). If you do not have a thermometer, look for a golden brown color on the outside. The balls should feel firm and not soft. The juices should run clear when you cut into one. This ensures the turkey is cooked through and safe to eat. Yes, you can prep these stuffing balls in advance. You can mix the ingredients and shape them into balls. Then, place them on a baking sheet and cover with plastic wrap. Store them in the fridge for up to 24 hours. You can also freeze the unbaked stuffing balls. Just make sure to separate them on the baking sheet before freezing. Once frozen, transfer them to a freezer bag. Bake them straight from the freezer; just add a few extra minutes to the cooking time. These stuffing balls pair well with many dishes. Serve them with a simple green salad for a light meal. They also go great with mashed potatoes or sweet potato mash. Consider adding a tangy cranberry sauce on the side for extra flavor. You could even serve them with roasted vegetables for a colorful plate. For a festive touch, try them with gravy or a creamy mushroom sauce. Enjoy mixing and matching these flavors! In this post, we explored the ingredients and steps to make tasty cranberry turkey stuffing balls. We discussed essential and optional ingredients for added flavor, along with nutrition facts. I shared tips to keep the stuffing moist and flavorful. We also covered variations, storage tips, and common questions. With these insights, you can create a delicious dish, experiment with flavors, and impress at your next meal. Enjoy your cooking and savor each bite!
    Cranberry Turkey Stuffing Balls Flavorful Holiday Treat
  • - 4 ripe heirloom tomatoes, diced - 1 cup cherry tomatoes, halved - 1 medium cucumber, diced - 1/2 red onion, thinly sliced - 1/4 cup fresh basil leaves, torn - 1/4 cup parsley, chopped - 3 cloves garlic, minced - 3 tablespoons olive oil - 2 tablespoons balsamic vinegar - Salt and pepper to taste - Feta cheese, crumbled (optional) Gathering fresh produce is key for this salad. Heirloom tomatoes stand out with their rich flavors. I love using ripe heirloom tomatoes in this recipe. Cherry tomatoes add a sweet burst. Their bright colors make the salad fun. A crisp cucumber brings a nice crunch. Thinly sliced red onion adds a hint of sharpness. Fresh herbs like basil and parsley brighten the dish. For the dressing, garlic works wonders. It adds a bold kick. A drizzle of olive oil gives a smooth texture. Balsamic vinegar balances the flavors with its tang. Salt and pepper are must-haves for seasoning. If you want an extra layer of taste, add feta cheese. It melts deliciously into the salad. I recommend using the freshest ingredients for the best taste. Each bite should burst with flavor. For the full recipe, check the complete guide. How to dice heirloom tomatoes Start with ripe heirloom tomatoes. Wash them well. Cut off the stem. Slice the tomato into wedges. Then, chop each wedge into small pieces. Aim for bite-sized cubes for easy eating. Halving cherry tomatoes Next, take your cherry tomatoes. Rinse them under cool water. Place them on a cutting board. Slice each tomato in half. This helps release their sweet juices and adds color to your salad. Dicing cucumber and slicing red onion Now, grab a fresh cucumber. Wash it first. Cut the ends off, then slice it down the middle. Dice the cucumber into small bits. For the red onion, peel off the skin. Slice it thinly to add a nice crunch and flavor to your salad. Combining all vegetables in a bowl In a large mixing bowl, add the diced heirloom tomatoes, halved cherry tomatoes, diced cucumber, and sliced red onion. Use a large spoon to gently toss them together. This helps mix all the colors and flavors. Adding garlic and dressing Next, add minced garlic to the bowl. Pour in the olive oil and balsamic vinegar. Toss everything again until all the veggies are coated. This dressing gives your salad a fresh taste that shines. Mixing herbs and adding feta Now, it’s time for fresh herbs. Toss in torn basil and chopped parsley. If you like, sprinkle crumbled feta cheese on top for extra creaminess. Mix gently to combine all the flavors. Letting the salad rest Finally, let the salad sit for about 10 minutes. This allows the flavors to blend beautifully. Serve it in a large dish and enjoy your fresh and healthy Tomato Garlic Summer Salad! For complete details, check the Full Recipe. Using fresh ingredients is key for any salad. Fresh tomatoes, herbs, and vegetables bring bright and lively tastes. When you use ripe heirloom tomatoes, you get a sweet flavor that shines. Fresh herbs like basil and parsley add depth. Always choose the best produce you can find. Letting flavors meld is also important. After you mix the salad, let it sit for about ten minutes. This waiting time allows the olive oil and balsamic vinegar to soak into the veggies. It also helps the herbs release their oils, creating a more vibrant taste. For a beautiful dish, presentation matters. Serve the salad in a large, shallow bowl. This gives it room to shine. Add a few extra basil leaves on top and a sprinkle of feta cheese. This adds color and texture, making your salad look gourmet. Pairing options can elevate your meal. This salad pairs well with grilled chicken or fish. You can also serve it with crusty bread for a light lunch. The fresh tastes balance well with rich flavors. For extra fun, try adding a side of hummus and pita chips. {{image_2}} For a twist on the classic dish, try other tomato varieties. You can use sweet grape tomatoes or juicy Roma tomatoes. Each type offers a unique flavor that can change the whole salad. Switching herbs can also make a difference. Instead of basil, use fresh cilantro or dill. These herbs bring their own taste and aroma, adding new life to your salad. If you want a vegan or dairy-free option, simply leave out the feta cheese. The salad remains fresh and flavorful without it. You can also add avocado for creaminess. For those needing low-carb choices, skip the tomatoes. Instead, use more cucumbers and bell peppers. This keeps the salad light while still providing crunch and color. Explore these variations to make the salad your own! For the full recipe, check out the details provided above. To store leftover salad, place it in a clean container. I recommend using an airtight container. This helps keep the salad fresh and crisp. You want to avoid wilting and sogginess. If you plan to store it, skip adding the feta cheese until you're ready to eat. In the fridge, the salad lasts about three days. Check for signs of spoilage. Look for wilting leaves or a strong smell. If the tomatoes become mushy or slimy, it's time to toss the salad. Always trust your senses; they guide you best in the kitchen. For the full recipe, you can refer to the details above. Enjoy your fresh and healthy Tomato Garlic Summer Salad! How do I prepare tomatoes for a salad? To prepare tomatoes, wash them well. Then, cut the tomatoes into small pieces. You can use a sharp knife for clean cuts. Dicing heirloom tomatoes gives a nice texture. Make sure all pieces are similar in size for even mixing. Can I make this salad ahead of time? Yes, you can make this salad ahead of time. Just keep it in the fridge for up to three hours. The flavors blend nicely as it sits. However, add fresh herbs and feta just before serving. This keeps them bright and tasty. What can I substitute for feta cheese? If you want to skip feta, try goat cheese or cottage cheese. You can also use a dairy-free option like cashew cheese. These add creaminess and flavor without the dairy. Choose what fits your taste best. Nutritional benefits of tomatoes and garlic Tomatoes are low in calories but high in vitamins. They provide vitamin C and potassium. Garlic has health benefits too. It may help boost the immune system and lower blood pressure. Together, they create a healthy dish that supports your wellness. Caloric breakdown of the salad This salad is light, with around 150 calories per serving. Most calories come from tomatoes and olive oil. The feta adds a bit more, but it’s a small amount. This makes it a great choice for a summer meal. Where did the concept of tomato garlic salad come from? Tomato garlic salad has roots in Mediterranean cooking. Many cultures use tomatoes and garlic in their dishes. It showcases fresh flavors and simple ingredients. This style of cooking celebrates local produce and healthy eating. Cultural significance of summer salads Summer salads are important in many cultures. They bring people together during warm months. These dishes are often made with seasonal produce. They reflect the freshness and abundance of summer. Sharing salads is a way to enjoy food and friendship. This blog post covered how to make a fresh tomato garlic salad. We talked about key ingredients like heirloom tomatoes, basil, and feta. I shared step-by-step instructions for preparation and mixing, along with tips to enhance flavor. You learned about variations and how to store leftovers. Remember, using fresh ingredients makes a big difference. This salad is a great way to enjoy the summer flavors. Try it out, and let your creativity shine in the kitchen!
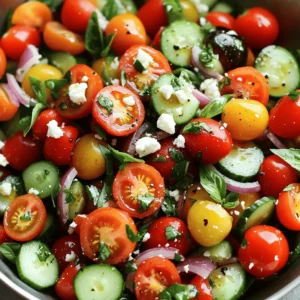
    Tomato Garlic Summer Salad Fresh and Healthy Dish
  • - 4 large russet potatoes - 1 medium onion - 2 cloves garlic - 4 cups vegetable broth - 1 cup heavy cream - 1 cup shredded sharp cheddar cheese - ½ cup sour cream - Optional: 4 strips of cooked turkey bacon The key to my loaded creamy potato soup starts with russet potatoes. They have the perfect starch content for a creamy base. Use medium onion and garlic to build a solid flavor foundation. Sauté these in olive oil to bring out their sweetness. Next, add vegetable broth for a rich taste. The broth should cover the potatoes well to ensure they cook evenly. Heavy cream adds that luxurious texture that makes this soup feel special. For tang, I use sour cream. It balances the richness perfectly. If you want a smoky touch, turkey bacon is a great optional addition. It adds a savory crunch that elevates each bite. - Salt and pepper - 1 tablespoon olive oil - 1 teaspoon dried thyme - 1 teaspoon paprika - Fresh parsley and green onions for garnish Seasoning is essential. I use salt and pepper to enhance the flavors. A tablespoon of olive oil keeps the soup smooth while adding a hint of fruity flavor. Dried thyme gives an earthy note, while paprika adds warmth and color. For garnish, fresh parsley and chopped green onions brighten the dish. They also add a pop of color and freshness. For the Full Recipe, check the detailed instructions to bring these ingredients together into a warm bowl of comfort. Start by making the base for your soup. First, heat 1 tablespoon of olive oil in a large pot over medium heat. Add the chopped onion and minced garlic. Sauté them for about 3 to 4 minutes until the onion is soft and translucent. This step builds a flavorful foundation. Next, add 4 large russet potatoes that you’ve peeled and diced. Pour in 4 cups of vegetable broth, along with 1 teaspoon of dried thyme, 1 teaspoon of paprika, and salt and pepper to taste. Stir everything together and bring the mixture to a boil. Once it boils, lower the heat and let it simmer for 15 to 20 minutes. You want the potatoes to become tender. As the soup simmers, keep an eye on the potatoes. You can check for tenderness by poking them with a fork. They should mash easily. When they are ready, grab a potato masher or an immersion blender. Use it to partially mash the potatoes. This gives the soup a creamy yet chunky texture that feels cozy. Once you have the right texture, stir in 1 cup of heavy cream, or use coconut cream if you prefer a dairy-free option. Bring the soup back to a gentle simmer. Then, add in 1 cup of shredded sharp cheddar cheese and ½ cup of sour cream. Stir until the cheese melts and the soup becomes smooth. Don’t forget to taste your soup! Adjust the seasoning with more salt and pepper if needed. If you want a little crunch, mix in 4 strips of cooked turkey bacon that you’ve crumbled. This step adds a nice texture and flavor boost. Serve your loaded creamy potato soup hot, garnished with chopped green onions and fresh parsley. Enjoy your warm bowl of goodness! For the complete recipe, check out the Full Recipe. To get the right creaminess in your soup, use an immersion blender. This tool helps blend the soup while keeping some potato chunks. If you like a thicker soup, blend more. If you prefer a chunkier texture, blend less. You can even use a regular blender, but let the soup cool a bit first to avoid splatters. To make your soup even tastier, try adding fresh herbs like rosemary or chives. You can also add a pinch of cayenne pepper for a kick. Using homemade vegetable broth can give your soup a rich flavor. Store-bought broth works too, but taste it first to adjust the seasoning. Serve your loaded creamy potato soup in rustic bowls for a cozy feel. Add a sprinkle of cheese and chopped green onions on top for color. A dollop of sour cream adds a nice touch too. Fresh parsley makes the dish look bright and inviting. For a fun twist, try serving with a side of crusty bread. You can find the full recipe earlier in this article. {{image_2}} You can make this soup dairy-free easily. Swap heavy cream for coconut cream. It gives a rich taste without dairy. For cheese, use dairy-free shredded cheese. Look for brands made from nuts or soy. For sour cream, try a cashew-based version or plain coconut yogurt. Both work well in this recipe. If you want to change up the potatoes, try Yukon Gold or red potatoes. They add a different flavor and texture. You can also add veggies for more nutrients. Carrots, celery, or even spinach taste great in this soup. Just chop them small and add them early in the cooking process. They will cook down nicely. For bacon lovers, try different types of bacon. You can use regular pork bacon or even pancetta for a twist. If you want a vegetarian protein, add cooked lentils or chickpeas. They will make the soup hearty and filling. Both options fit well with the creamy base, adding flavor and texture. For the full recipe, check the earlier section. How long does the soup last in the fridge? It lasts about 3 to 5 days. Store it in a sealed container to keep it fresh. What are the proper storing techniques? Let the soup cool to room temperature. Then, pour it into an airtight container. Label the container with the date. This way, you can track how long it’s been stored. What are the best practices for freezing potato soup? You can freeze it for up to 3 months. First, let the soup cool completely. Then, use freezer-safe bags or containers. Leave some space for the soup to expand when it freezes. What are the thawing and reheating tips? To thaw, place the soup in the fridge overnight. For quick thawing, you can microwave it on low. When reheating, do it slowly on the stove. Stir often to keep it smooth. If it seems thick, add a splash of broth or water. For the full recipe, check out the Loaded Creamy Potato Soup section. To thicken your loaded creamy potato soup, you have a few options. Here are some techniques to achieve your desired consistency: - Mash the potatoes: After cooking, use a potato masher to mash some of the potatoes. This adds thickness without losing texture. - Add a roux: Cook equal parts flour and butter together, then stir into the soup. This creates a rich, creamy base. - Use cornstarch: Mix cornstarch with cold water, then stir it into the soup. Let it simmer until thickened. - Add more cream: A little extra heavy cream can also help thicken the soup and add richness. Feel free to mix and match these methods to get the perfect thickness for your soup. Yes, you can make this soup ahead of time! Here’s how to prep and store it for meal prep: - Make it in advance: Cook the soup fully and let it cool. This can save time on busy days. - Storage: Store the soup in an airtight container in the fridge for up to three days. - Freezing: You can freeze the soup for up to three months. Just make sure to leave some room in the container for expansion. - Reheat: When ready to serve, gently reheat the soup on the stove. Stir well and add a splash of cream if needed for smoothness. Making the soup ahead lets the flavors blend even more! Toppings can add great flavor and texture to your potato soup. Here are some popular choices: - Shredded cheese: Cheddar or mozzarella adds a nice melty touch. - Bacon bits: Crumbled turkey bacon or regular bacon gives a crispy bite. - Sour cream: A dollop adds creaminess and a tangy kick. - Green onions: Chopped green onions provide a fresh crunch. - Herbs: Fresh parsley or chives brighten the dish. Feel free to mix and match toppings to suit your taste! This blog post showed you how to make loaded creamy potato soup. We covered essential ingredients, cooking steps, and tips for creaminess. Remember, blending and seasoning are key to a great taste. Explore variations to suit your taste, from dairy-free options to extra proteins. Store your soup well for long-lasting enjoyment and easy reheating. Enjoy making this comforting dish that warms your heart and your home. Happy cooking!
    Loaded Creamy Potato Soup Comforting and Easy Recipe
  • - 1 cup all-purpose flour - 1 cup buttermilk (or regular milk with a splash of vinegar) - 1 large egg - 2 tablespoons sugar - 2 tablespoons melted butter - 1 teaspoon baking powder - 1/2 teaspoon baking soda - 1/2 teaspoon salt - Cooking spray or oil for the pan These main ingredients create a fluffy and tasty donut. The all-purpose flour gives it structure. The buttermilk adds moisture and a slight tang. The egg helps bind everything together, while the melted butter brings richness. - 1 cup powdered sugar - 2 tablespoons pure maple syrup - 1 tablespoon milk (or more for desired consistency) The maple glaze is simple but tasty. Powdered sugar makes it sweet and smooth. Pure maple syrup gives it that classic flavor. Adjust the milk to get the thickness you like. - Flavor extracts (e.g., vanilla) - Chocolate chips or nuts You can make these donuts your own with add-ins. A splash of vanilla extract enhances the flavor. Chocolate chips add sweetness, while nuts give a nice crunch. Feel free to mix and match to create your perfect donut. For the full recipe, check out the details above! First, gather your dry ingredients. You need: - 1 cup all-purpose flour - 2 tablespoons sugar - 1 teaspoon baking powder - 1/2 teaspoon baking soda - 1/2 teaspoon salt In a large bowl, mix these together. This helps the baking powder and baking soda to combine well. Next, move on to the wet ingredients. You’ll need: - 1 cup buttermilk (or regular milk with a splash of vinegar) - 1 large egg - 2 tablespoons melted butter Whisk these together in a separate bowl. Once mixed, gently add this wet mixture to the dry ingredients. Stir until just combined. Be careful not to over-mix; this keeps your donuts light and fluffy. Now it’s time to preheat your cooking tool. You can use either a donut maker or a skillet. If you have a donut maker, preheat it as per the instructions. For a skillet, heat it on medium heat. Lightly grease it with cooking spray or oil. This step is key to prevent sticking and get a nice golden color on your donuts. Let’s shape those donuts! If you have a donut pan, you can use a piping bag or a zip-lock bag with the corner cut. Fill each cavity with batter. If you’re using a skillet, pour about 1/4 cup of batter into the pan. Form a small circle. Cook each donut for about 2-3 minutes on one side until bubbles form. Flip them over and cook for another minute or so until they turn golden brown. In a donut maker, the cooking time is about 4-5 minutes. Follow the manufacturer's instructions to get the best results. With these steps, you can create delicious pancake donuts that everyone will love! For the full recipe, check the detailed instructions above. To get the best texture for your pancake donuts, here are some key tips: - Avoid over-mixing batter: Mix just until the wet and dry ingredients combine. If you mix too much, the donuts can turn out tough. The batter should be slightly lumpy, and that's okay! - Recommended cooking temperatures: Keep your skillet or donut maker at medium heat. If it's too high, the outside will burn before the inside cooks. If it's too low, the donuts won’t rise well. Getting the maple glaze just right is essential for flavor: - Adjusting glaze thickness: For a thicker glaze, use less milk. For a thinner glaze, add more milk. You want it smooth but not runny. Find the right balance for your taste. - Glazing methods for best results: Dip each donut in the glaze while it’s warm. This helps the glaze stick better. Let them cool on a rack to avoid a soggy bottom. Presentation makes a big difference: - Ideal accompaniments: Serve your pancake donuts with fresh fruit, whipped cream, or extra maple syrup. These pair well and add flavor. - Presentation tips like extra toppings: Stack the donuts on a pretty plate. Drizzle with extra syrup. Sprinkle chopped nuts or even crushed bacon bits for a fun crunch. These toppings add character and taste! {{image_2}} You can change the taste of your pancake donuts easily. Adding spices like cinnamon or nutmeg gives them warmth. Just a pinch can make a big difference. You can also mix in fruits. Mashed bananas add sweetness and moisture. Blueberries work well too, bursting with flavor. If you need gluten-free options, try using gluten-free flour. Many brands work great in this recipe. For vegan adaptations, swap out the egg for a flax egg. Use almond milk or oat milk instead of regular milk. These changes keep the flavor while meeting your diet needs. While maple glaze is classic, you can get creative. Try using chocolate glaze for a rich twist. Other flavored glazes, like vanilla or lemon, are fun too. You can also add decorative toppings. Sprinkles add color, while crushed cookies give a nice crunch. Enjoy mixing flavors and textures! To keep your pancake donuts fresh, store them in an airtight container. This helps prevent them from drying out. You can use a plastic container or a resealable bag. Make sure they are completely cool before sealing. This keeps the glaze from getting sticky. Store them at room temperature for up to two days. If you want to save some for later, freezing works well. First, let the donuts cool completely. Then, place them in a single layer on a baking sheet. Freeze them for about an hour. After that, transfer them to a freezer-safe bag or container. This method helps them keep their shape. You can freeze them for up to three months. When you’re ready to eat, thaw them overnight in the fridge. You can reheat your pancake donuts in different ways. The microwave is quick but may make them soft. Heat them for about 10-15 seconds. If you prefer a crispy texture, use the oven. Preheat it to 350°F (175°C). Place the donuts on a baking sheet and heat for 5-7 minutes. This keeps them nice and firm. To avoid sogginess, don’t cover them while reheating. Enjoy your treats warm! Yes, you can make these donuts ahead of time. To keep them fresh, store the donuts in an airtight container. They will stay good for about two days at room temperature. If you want them to last longer, you can freeze them. Just place them in a freezer bag. When you want to eat them, thaw them in the fridge overnight. For reheating, use the microwave for about 10 to 15 seconds. This warms them up quickly. If you prefer a crisp outer layer, use the oven. Preheat it to 350°F and bake for about five minutes. If you don't have buttermilk, you can make your own. Add one tablespoon of vinegar to a cup of regular milk. Let it sit for five minutes. This will mimic buttermilk's tangy taste. You can also use plain yogurt or sour cream mixed with water. Thin them until you get a pourable consistency. Almond milk or oat milk can work too, but they may change the flavor slightly. To get the right glaze, mix powdered sugar with maple syrup and milk. Start with one cup of powdered sugar. Add two tablespoons of maple syrup and one tablespoon of milk. Stir well. If it's too thick, add more milk, one teaspoon at a time. For a thinner glaze, add more milk. If it’s too thin, add more powdered sugar. To apply smoothly, dip the donut top into the glaze. Let the excess drip off before placing them on a rack. There are many fun toppings you can try with these donuts. Chopped nuts, like pecans or walnuts, add crunch. You can also use sprinkles for color. For a gourmet touch, drizzle chocolate or caramel sauce. Fresh fruit, like sliced strawberries or bananas, can also enhance the flavor. Get creative! Mix and match to make your own special donut. Pancake donuts combine fun flavors and textures with easy steps. You learned how to make the batter, prepare the maple glaze, and add your favorite mix-ins. Remember, the key is to master the cooking temperature and avoid over-mixing. You can also get creative with flavors and toppings. Enjoy your delicious donuts fresh or store them for later. Making these treats is a fun way to sweeten your day!
    Pancake Donuts with Maple Glaze Simple and Delicious
  • - Whole turkey (12 lbs, thawed) - Olive oil (4 tablespoons) and butter (2 tablespoons, softened) - Garlic powder (1 tablespoon) - Onion powder (1 tablespoon) - Fresh herbs: thyme (2 teaspoons) and rosemary (2 teaspoons) - Chicken broth (4 cups, low sodium) - Vegetables for stuffing: - Onion (1 large, quartered) - Carrots (4, cut into chunks) - Celery (3 stalks, cut into chunks) - Stuffing (3 cups, homemade or store-bought) - Mashed potatoes (4 cups, prepared in advance) - Green bean casserole (2 cups, prepared in advance) - Cranberry sauce (1 cup, store-bought or homemade) - Pumpkin pie (1, store-bought or homemade) - Suggestions for drinks to serve, such as cider or sparkling water These ingredients form the backbone of your feast. They blend flavors and create a warm, inviting spread. Each item works together to give your guests a memorable meal. You can make preparations easier by prepping sides a day or two ahead. This way, you can focus on the turkey and enjoy the day with family. If you want to dive deeper, check out the full recipe for further details on bringing it all together. - Preheat your oven to 325°F (163°C). This helps the turkey cook evenly. - In a small bowl, mix 4 tablespoons of olive oil, 2 tablespoons of softened butter, 1 tablespoon of garlic powder, 1 tablespoon of onion powder, 2 teaspoons of dried thyme, 2 teaspoons of dried rosemary, 2 teaspoons of salt, and 1 teaspoon of black pepper. This blend adds great flavor. - Pat the turkey dry with paper towels. Rub the olive oil mixture all over the turkey. Make sure to get it under the skin and inside the cavity. - Stuff the turkey with quartered onion, carrots, and celery. This will give it more taste as it cooks. - Place the turkey on a roasting rack in a large pan. Pour 4 cups of low-sodium chicken broth into the bottom of the pan. This keeps the turkey moist. - Roast the turkey for about 13-15 minutes per pound. Use a meat thermometer to check if it reaches 165°F (74°C) in the thickest part of the thigh. - Baste the turkey every 30 minutes with the pan juices. This helps keep it juicy and adds flavor. - Once cooked, remove the turkey from the oven. Let it rest for at least 30 minutes before carving. This keeps the juices inside. - If you use store-bought stuffing, prepare it according to package instructions. For homemade, sauté onions and celery in butter. Mix with bread cubes and broth, then bake. - For mashed potatoes, you can use instant mash for ease. Keep them warm in a slow cooker. - Make the green bean casserole in advance. Combine green beans, cream of mushroom soup, and crispy onions, then bake as directed. By following these steps, you create a delicious feast that allows you to enjoy Thanksgiving with less stress. For the full recipe, check the earlier section. To make your Thanksgiving feast easy and tasty, start early. Here are some best practices for prepping dishes in advance: - Plan Your Menu: Choose recipes that keep well. The Make-Ahead Thanksgiving Celebration recipe is a great option. - Prep Ingredients: Wash and chop vegetables a day or two ahead. Store them in airtight containers. - Batch Cook Sides: Make mashed potatoes and green bean casserole a day early. This saves time on the big day. Timing is key for cooking and reheating: - Turkey Timing: Roast your turkey first. It takes the longest and needs time to rest. - Reheat Sides: For sides, reheat in the oven while the turkey rests. Aim for around 350°F (175°C) for even heating. A festive table makes your meal special. Here are some serving suggestions: - Use a Large Platter: Carve your turkey and place it on a big platter. It looks great and makes serving easy. - Colorful Sides: Arrange your sides in colorful bowls. Use white bowls for mashed potatoes and vibrant ones for green bean casserole. Garnishes enhance your table's look: - Fresh Herbs: Sprinkle fresh herbs on dishes for a pop of color. Use parsley or thyme on the turkey. - Seasonal Decor: Add small pumpkins or fall leaves to your table. They add charm and make it festive. Some issues can happen when cooking: - Dry Turkey: To avoid this, baste every 30 minutes while roasting. Let your turkey rest after cooking. This helps keep it juicy. - Lumpy Mashed Potatoes: Use warm milk and butter when mixing. This keeps your potatoes smooth and creamy. Adjusting cooking times helps too: - Thick Foods: Foods like stuffing may need extra time. Check for doneness before serving. - Oven Space: If you have many dishes, consider staggered cooking. Start with the turkey, then add sides as space opens up. {{image_2}} If you want to switch it up this Thanksgiving, consider different proteins. Turkey is classic, but ham makes a tasty choice. A glazed ham adds a sweet, savory flavor. You can also try a roast chicken for a smaller feast. If you prefer vegetarian, stuffed squash or a hearty mushroom roast can impress your guests. These options let you create a feast that fits your style. Side dishes can bring fun twists to your table. For stuffing, try cornbread stuffing with jalapeños, or a wild rice blend with nuts and cranberries. Both add unique flavors to your meal. For veggies, think beyond green beans. Roasted Brussels sprouts with balsamic glaze or honey-roasted carrots can steal the show. These sides not only taste great but also brighten your plate. Desserts are another area to get creative. Instead of pumpkin pie, consider pecan pie or a spiced apple crisp. Both are festive and delicious. For dietary-friendly choices, you can make a gluten-free chocolate tart or a vegan pumpkin mousse. These options ensure everyone can enjoy dessert without missing out. Your Thanksgiving will shine with these sweet variations. To store your leftover turkey and sides, follow these best practices: - Cool Quickly: Let the food cool to room temperature. - Use Airtight Containers: Choose containers that seal well. This keeps moisture in and air out. - Label and Date: Write the date on each container. This helps you track freshness. - Refrigerate Promptly: Store leftovers in the fridge within two hours of serving. For turkey, carve it up before storing. This helps it cool faster. Keep dark and white meat in separate containers for easier use later. For sides, group similar items together. This makes it easy to grab what you need. When reheating turkey and sides, it’s key to avoid drying them out. Here’s how: - Turkey: Reheat at 325°F (163°C) for about 20-30 minutes. Use broth to keep it moist. Cover with foil to trap steam. - Mashed Potatoes: Warm them in a pot on low heat, adding milk or butter as needed. Stir often to prevent sticking. - Green Bean Casserole: Reheat in the oven at 350°F (175°C) for 20-25 minutes, covered with foil. Keep an eye on your food to avoid overcooking. This will help keep everything juicy and tasty. Knowing how long your dishes last is important for safety. Here’s a quick guide: - Cooked Turkey: Lasts 3-4 days in the fridge. - Stuffing and Sides: Also good for 3-4 days. - Pumpkin Pie: Can stay fresh for about 3-4 days too. Look for signs of spoilage, like off smells or mold. If in doubt, throw it out. Always prioritize safety when enjoying your Thanksgiving feast! Yes, you can prep the turkey the night before. Start by thawing your turkey in the fridge. This can take up to three days for a large bird, so plan ahead. The night before, rub the turkey with olive oil and seasonings. Stuff it with vegetables for added flavor. Cover it and leave it in the fridge overnight. This will help the flavors soak in. On Thanksgiving morning, simply take it out, let it sit, and roast. It saves time and effort on the big day. Let the turkey rest for at least 30 minutes after cooking. This step is key for juicy meat. Resting allows the juices to redistribute throughout the turkey. If you cut too soon, the juices run out. This can lead to dry meat. Use this time to finish your sides and set the table. It keeps everything warm and ready to serve. To serve leftover stuffing, first, reheat it in the oven. Preheat to 350°F (175°C) and bake for about 20 minutes. This warms it through and gives it a nice texture. You can also add a splash of broth to keep it moist. For something new, try stuffing it into peppers or mushrooms. You can even mix it into a breakfast casserole with eggs. Leftover stuffing is versatile and can add flavor to many dishes. Preparing a great Thanksgiving meal involves key ingredients, careful steps, and smart tips. Start with the turkey and perfect sides. Plan to make dishes ahead for ease. Don't forget fun dessert options and drinks for everyone. Stay calm and check cooking times to avoid common issues. Explore variations to make your feast unique. Lastly, store leftovers safely for more meals later. With this guide, you can create a memorable Thanksgiving that everyone will enjoy.
    Make-Ahead Thanksgiving Feast Simple and Flavorful Guide
  • - 2 large cucumbers - 1 cup plain Greek yogurt - 2 tablespoons fresh dill - 1 clove garlic - 1 tablespoon lemon juice - 1 tablespoon olive oil - Salt and pepper - Crushed red pepper flakes - Roasted pine nuts for garnish - Mixing bowl - Colander - Sharp knife for slicing Using fresh ingredients makes a big difference. For this creamy cucumber yogurt salad, I choose crisp cucumbers. When picking cucumbers, look for ones that are firm and smooth. They should feel heavy for their size. This gives you a refreshing crunch in every bite. The Greek yogurt adds creaminess and protein. I love using plain Greek yogurt because it has a rich taste. It also helps balance the flavors. Fresh dill gives a bright and aromatic touch. Don't skip the garlic, either! It adds a nice kick. You can adjust the flavors with optional ingredients. If you like heat, sprinkle in some crushed red pepper flakes. Roasted pine nuts add a lovely crunch on top. Salt and pepper are essential for bringing all the flavors together. Get ready to mix! Gather a mixing bowl, colander, and a sharp knife. The colander helps drain the cucumbers, which keeps the salad from getting soggy. You'll want to keep everything fresh and crisp. For the complete instructions and tips, check out the Full Recipe. Enjoy the process of making this salad, and let your creativity shine! First, wash the cucumbers well under cold water. This step removes dirt and any chemicals. Next, slice the cucumbers thinly. I prefer half-moon shapes, but you can choose any shape you like. After slicing, place them in a colander. Sprinkle a bit of salt over them. Let them sit for about 15 minutes. This process helps draw out excess moisture. After 15 minutes, rinse the cucumbers under cold water. Pat them dry with a paper towel. This helps keep your salad from getting watery. In a mixing bowl, add 1 cup of plain Greek yogurt. Then, chop 2 tablespoons of fresh dill and add it to the bowl. Next, mince 1 clove of garlic and mix that in as well. Add 1 tablespoon of lemon juice for a bright taste. Lastly, pour in 1 tablespoon of olive oil. Stir everything together until it becomes creamy. This dressing is the heart of your salad, bringing all the flavors together. Now it’s time to bring it all together. Gently fold the drained cucumbers into the yogurt dressing. Make sure every cucumber slice gets coated well. This step ensures each bite is full of flavor. Season the salad with salt and pepper to taste. If you like a little heat, add 1/4 teaspoon of crushed red pepper flakes. Transfer the salad to a serving bowl. For a nice touch, sprinkle some roasted pine nuts on top. They add a great crunch and flavor. To make your creamy cucumber yogurt salad even better, adjust the seasoning to your taste. Start with a little salt and pepper, then add more if needed. You can also add a splash of vinegar for a nice tang. This little trick brightens the flavors and gives it a zesty kick. Chill the salad before serving. This helps the flavors meld together and makes it refreshing. Serve it alongside grilled meats or as a light lunch option. It pairs well with chicken, fish, or even on its own as a snack. This salad is low in calories and high in protein. The Greek yogurt adds a creamy texture without too many calories. If you want a dairy-free option, just swap the yogurt for a plant-based alternative. You can still enjoy all the great flavors while keeping it healthy. {{image_2}} You can change the herbs to suit your taste. Substitute dill with fresh mint or parsley for a new twist. Mint gives a fresh and bright flavor. Parsley adds a mild, earthy touch. You can also try adding cumin. Cumin brings a warm and earthy taste to the salad. It pairs well with the coolness of the cucumbers. If you want a lighter version, use low-fat yogurt instead of regular. This keeps the salad creamy but cuts some calories. You can also add other veggies. Bell peppers add sweetness and crunch. Radishes give a peppery bite and bright color. Mixing in these veggies makes the dish more colorful and nutritious. For a vegan option, try using tahini instead of yogurt. Tahini brings a rich, nutty flavor to the salad. It makes it creamy while keeping it plant-based. If you like a bit of spice, add a splash of mustard. Mustard gives the salad a zesty kick that enhances the overall taste. To keep your creamy cucumber yogurt salad fresh, store leftovers in an airtight container. This helps maintain the taste and texture. You can keep it in the fridge for up to 3 days. However, the sooner you eat it, the better it will taste! Freezing this salad is not recommended. The yogurt will change texture when thawed. It may become watery and lose its creamy feel. Enjoy the salad fresh instead. To keep your salad fresh, keep the cucumbers separate until you are ready to serve. This prevents sogginess and helps the salad stay crisp. If you want, you can mix them right before serving for the best experience. Yes, but for best texture, add cucumbers closer to serving time. This keeps them crisp and fresh. If you mix the cucumbers too early, they may become soggy. To avoid this, prepare the yogurt dressing ahead of time. Store it in the fridge. Add cucumbers right before serving. This salad pairs well with grilled meats, fish, or as a standalone dish. It brightens up any meal. You can serve it alongside grilled chicken or fish tacos. The coolness of the salad balances the heat of grilled foods. It also works great as part of a picnic spread. Yes, all ingredients are naturally gluten-free. You can enjoy this salad worry-free. It is perfect for those with gluten sensitivities or celiac disease. Just check the yogurt label to ensure no added gluten. This salad contains healthy fats, protein, and vitamins; great for a balanced diet. Cucumbers are low in calories and high in water. Greek yogurt adds protein and probiotics, which are good for your gut. Dill also offers vitamins and antioxidants. This dish supports a healthy lifestyle. Yes, feel free to use non-dairy yogurt for a vegan version. There are many tasty plant-based options today. Almond or coconut yogurt works well too. Just ensure the flavor matches your taste. This way, everyone can enjoy this salad. Refer to the Full Recipe for detailed instructions and tips. This creamy cucumber yogurt salad is simple and quick to make. We covered the main ingredients, preparation steps, and tips to enhance flavor. You can easily customize it with herbs or veggies. Remember to chill it for the best taste. Enjoy this refreshing dish as a light lunch or alongside grilled meats. It’s nutritious and fits well in a balanced diet. Try it out and share your variations. Your taste buds will thank you!
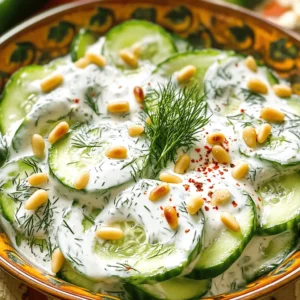
    Creamy Cucumber Yogurt Salad Fresh and Flavorful Dish
  • - 1 lb fresh green beans, trimmed and cut into 2-inch pieces - 1 cup sliced button mushrooms - 1 medium onion, finely chopped - 2 cloves garlic, minced - 1 cup sour cream - 1 cup cream of mushroom soup - 1 teaspoon soy sauce - 1 teaspoon black pepper - 1 cup fried onion rings (plus more for topping) - Olive oil for sautéing - Salt to taste To make a great Classic Green Bean Casserole, you need fresh ingredients. Fresh green beans are key for crunch. Sliced button mushrooms add a nice earthy flavor. The onion and garlic give a great base taste. Sour cream and cream of mushroom soup create a rich and creamy texture. Fried onion rings add the perfect crunch on top. Finally, season with soy sauce, black pepper, and a touch of salt for flavor. - Dairy-free alternatives: Use cashew cream or coconut cream in place of sour cream. - Low-sodium options: Choose low-sodium cream of mushroom soup and soy sauce. - Other mushroom varieties: Try shiitake or portobello mushrooms for a different taste. If you need to make changes, substitutions work well. Dairy-free options allow everyone to enjoy this dish. Low-sodium choices help keep it heart-healthy. Different mushrooms can change the flavor and texture, making it fun to experiment. - Baking dish - Large pot for blanching - Skillet for sautéing - Mixing bowl and spoon You’ll need some basic tools for this recipe. A baking dish is essential for the oven. A large pot is great for blanching the green beans. Use a skillet to sauté the onion and mushrooms. Finally, a mixing bowl and spoon help combine all the ingredients. This setup makes cooking easy and enjoyable. For the full recipe, check out Creamy Heaven Green Bean Casserole. To make your casserole shine, start with fresh green beans. First, trim the ends. Use a sharp knife to cut them into 2-inch pieces. This helps them cook evenly. Next, blanch the green beans. Bring a big pot of salted water to a boil. Add the green beans and cook for 3-4 minutes. They should be bright green and slightly tender. After that, drain them well. Set them aside to cool. Now it's time to cook the mixture. Heat a tablespoon of olive oil in a large skillet over medium heat. Add the chopped onion and sauté for about 3-4 minutes. You want them to soften a bit. Then, add the minced garlic and sliced mushrooms. Sauté for another 5 minutes. The mushrooms will turn golden, and the onions will be clear. In a large mixing bowl, combine the sour cream, cream of mushroom soup, soy sauce, black pepper, and salt. Stir it all together until it’s smooth. Once mixed, fold in the sautéed onions and mushrooms. Then, add the blanched green beans and half of the fried onion rings. Toss gently to combine everything well. Now, let’s layer the ingredients. Pour the mixture into a greased 9x13-inch baking dish. Spread it out evenly. Don’t forget to top it with the rest of the fried onion rings. They add a nice crunch. Preheat your oven to 350°F (175°C). Bake the casserole for 25-30 minutes. It should bubble and have a golden brown top. After baking, let it cool slightly before serving. Enjoy this comforting family dish! For the full recipe, check out the details above. To get a creamy texture, use fresh ingredients. Fresh green beans work best. Blanch them briefly for a bright taste. Mix sour cream with cream of mushroom soup well. This blend makes the filling rich and smooth. For a golden crunchy top, focus on the fried onion rings. Use a generous amount on top before baking. Bake until the edges bubble. This way, you get a nice crunch. Pair your casserole with simple sides. Mashed potatoes or roasted chicken are great choices. For a pop of color, add a fresh salad. Serve the casserole in the baking dish for warmth. Garnish it with parsley for a bright look. You can prepare this dish ahead of time. Assemble it and cover it with foil. Keep it in the fridge for up to 24 hours. When ready to bake, remove the foil. Reheating leftovers is easy. Bake at 350°F (175°C) for about 20 minutes. This way, it stays warm and tasty. You can also use a microwave, but the oven keeps the texture better. {{image_2}} You can change up the green bean casserole with different veggies. Try adding carrots, corn, or bell peppers for some color and taste. You might also add cooked bacon or shredded chicken for extra flavor and protein. These additions can make your dish even heartier and more satisfying. If you want to try something new, consider a Southwestern twist. Add diced green chilies and a sprinkle of cumin for a spicy kick. For an Italian-inspired flavor, mix in Italian herbs like oregano and basil. You can also use sun-dried tomatoes for a rich taste that pairs well with the green beans. For gluten-free options, use gluten-free cream of mushroom soup. You can also substitute soy sauce with tamari. If you want a vegan dish, replace sour cream with cashew cream or a dairy-free yogurt. Use plant-based cream of mushroom soup and skip the fried onion rings or use a vegan version. This way, everyone can enjoy the casserole! You can find the full recipe [here](#). To keep your green bean casserole fresh, store it in the fridge. Use an airtight container. Let it cool down before sealing. This way, it stays tasty for later meals. If you want to freeze it, prepare it without baking. Place it in a freezer-safe dish. Cover it tightly with plastic wrap and foil. This helps prevent freezer burn. In the fridge, your casserole lasts about 3 to 5 days. Check for signs of spoilage. If it smells sour or looks off, it's best to toss it. When frozen, it can last for about 2 to 3 months. When reheating, the oven is your best friend. Preheat it to 350°F (175°C). Place the casserole in a baking dish, cover it with foil, and heat for about 20 minutes. This helps keep it creamy and warm. If you use a microwave, heat it in short bursts. Stir in between to heat evenly. Avoid overcooking, as it may turn mushy. Yes, you can prepare this dish ahead of time. To do this, follow these steps: - Prepare the casserole: Make it up to the point before baking. - Refrigerate: Cover it tightly with plastic wrap. This keeps it fresh for up to two days. - Bake when ready: Just add a few extra minutes to the baking time. This makes it easy for busy days! If you want to skip the cream of mushroom soup, you have options. Here are a few ideas: - Homemade version: Cook 1 cup of mushrooms, 2 tablespoons of flour, and 1 cup of broth. Mix until smooth. - Creamy alternatives: Use a mix of sour cream and Greek yogurt. This adds richness without mushrooms. These swaps keep your dish creamy and tasty! Yes, you can make this casserole gluten-free. Here are some substitutes: - Gluten-free cream of mushroom soup: Many brands offer gluten-free options. Check labels to be sure. - Use gluten-free flour: If making a homemade soup, use a gluten-free flour mix in place of regular flour. These swaps help you enjoy this classic dish without worries! Yes, frozen green beans work well too. Here are some tips: - No need to blanch: You can skip the blanching step if using frozen beans. - Adjust cooking time: Frozen beans may need a few extra minutes in the oven. Using frozen beans can save time while keeping the dish delicious! This blog post covered how to make a classic green bean casserole. We went over the main ingredients and their alternatives. We also discussed tools you'll need and provided clear step-by-step cooking instructions. Plus, I shared tips for getting the best texture and flavor. Remember, this dish is flexible. You can switch out ingredients and add new flavors to make it your own. Enjoy creating a tasty casserole that suits you!
    Classic Green Bean Casserole Comforting Family Dish
  • To make Hawaiian Huli Huli grilled chicken, you need some key ingredients. Here are the main ones: - 4 chicken thighs (bone-in, skin-on for extra flavor) - 1/2 cup soy sauce - 1/4 cup honey - 1/4 cup ketchup - 1/4 cup pineapple juice - 2 cloves garlic, minced - 1 teaspoon grated fresh ginger - 1 teaspoon sesame oil - 1/2 teaspoon black pepper - 1/4 teaspoon red pepper flakes (optional for heat) These items create that sweet and savory taste we love about Huli Huli chicken. Garnishes add a nice touch to your dish. For Huli Huli chicken, consider these: - Sliced green onions - Sesame seeds These garnishes make the dish look fresh and colorful. You can change some ingredients if needed. Here are a few ideas: - Use chicken breasts if you prefer leaner meat. - Swap honey for brown sugar to change the sweetness. - Try coconut aminos instead of soy sauce for a soy-free option. - Use lemon juice instead of pineapple juice for a different zing. These swaps can help you customize the dish to your taste or pantry. For the full recipe, check out the details above. Start by gathering your ingredients. You will need soy sauce, honey, ketchup, pineapple juice, garlic, ginger, sesame oil, black pepper, and red pepper flakes. In a bowl, mix these items well. Whisk until they blend into a smooth sauce. This marinade gives the chicken a sweet and savory flavor. You can adjust the spice level by adding more or less red pepper flakes. Next, take your chicken thighs. I prefer bone-in and skin-on for the best taste. Place them in a large resealable bag or a shallow dish. Pour the marinade over the chicken. Make sure each piece is coated well. Seal the bag or cover the dish, and place it in the fridge. Let it marinate for at least one hour. For deeper flavor, try marinating overnight. When you're ready to grill, preheat your grill to medium-high heat. Take the chicken out of the marinade. Shake off any extra liquid, but keep the leftover marinade for basting later. Place the chicken on the grill, skin-side down. Grill it for about six to seven minutes. Then, flip the chicken and baste it with the marinade. Grill for another six to seven minutes. Use a meat thermometer to check for doneness. The chicken should reach 165°F (75°C). After grilling, let the chicken rest for five minutes. This keeps it juicy. Garnish with sliced green onions and sesame seeds to add color. Enjoy your Hawaiian Huli Huli grilled chicken! You can find the full recipe for more details. To get the right taste for Huli Huli chicken, use fresh ingredients. Fresh garlic and ginger make a big difference. Pineapple juice adds that sweet and tangy kick. You can also mix in a little soy sauce for depth. This blend makes the chicken truly Hawaiian. Marinate the chicken for at least one hour, but overnight works best. This allows the flavors to soak in completely. When grilling, preheat your grill to medium-high heat. This step ensures even cooking and nice grill marks. Start by placing the chicken skin-side down. This helps to crisp up the skin. Grill for about 6-7 minutes before flipping. Use a brush to baste with the marinade. This keeps the chicken moist and adds flavor. Always check that the chicken reaches an internal temperature of 165°F (75°C) to ensure it’s safe to eat. One common mistake is not marinating long enough. If you skip this step, the flavor won’t be as good. Another mistake is moving the chicken too much on the grill. Let it sit to get those perfect grill lines. Lastly, avoid adding too much sauce at once. This can cause flare-ups. Instead, add it gradually while grilling. Following these tips will lead you to a perfect Huli Huli chicken every time. For further guidance, check out the Full Recipe. {{image_2}} You can swap chicken for other meats. Try pork for a juicy twist. Turkey thighs also work well. They pick up the marinade's flavor nicely. If you prefer fish, salmon or mahi-mahi makes a great choice. Just adjust the cooking time, as fish cooks faster. Don't worry if you want a meatless meal. Tofu is a great protein substitute. Use firm tofu and press it to remove extra water. Marinate it just like you would chicken. Grilling vegetables is another fun option. Pineapple, bell peppers, and mushrooms taste amazing with this marinade. Feel free to mix up the marinade. Add fresh herbs like cilantro or basil for a new flavor. You can also experiment with citrus juices, like lime or orange. For a spicy kick, include more red pepper flakes. This keeps every meal exciting and fresh. The Full Recipe will give you a great base, but the fun comes from your creativity! After enjoying your Hawaiian Huli Huli grilled chicken, let it cool. Place leftovers in an airtight container. This keeps the chicken fresh and tasty. Store it in the fridge for up to three days. If you want to keep it longer, consider freezing it. When reheating, you want to keep the chicken juicy. Use your oven for best results. Preheat it to 350°F (175°C). Place the chicken on a baking tray. Cover it with foil to keep moisture. Heat for about 15-20 minutes until warm. You can also use a microwave. Heat in short bursts, checking often to avoid drying it out. To freeze the chicken, wrap each piece in plastic wrap. Then, place it in a freezer bag. Squeeze out the air and seal it tightly. You can freeze the chicken for up to three months. When ready to eat, thaw in the fridge overnight. After that, reheat using the tips above for the best flavor. For the complete recipe, check out the [Full Recipe]. Huli Huli Chicken comes from Hawaii. The name "Huli" means "turn" in Hawaiian. It started in the 1950s at a small roadside stand. The owners grilled chicken over an open flame with a tasty sauce. This method made the chicken juicy and flavorful. Today, it is a popular dish at luaus and cookouts. Yes, you can make Huli Huli sauce for other foods. Many people use it on tofu, pork, or veggies. Just follow the same recipe, but swap the meat. The sauce works well with many types of food. You still get that sweet and savory taste without chicken. The spice level of Huli Huli Grilled Chicken is mild. It has a bit of heat from the black pepper and optional red pepper flakes. If you like more spice, add extra red pepper flakes. If you prefer no heat, just skip them. This way, you can customize the dish to your taste. You learned how to make Huli Huli grilled chicken with ease. We covered key ingredients, from the marinade to optional garnishes. I shared tips for great flavor and grilling tricks. You also found ideas for variations and how to store leftovers. Huli Huli chicken is fun to make and taste. Enjoy this tasty dish at your next meal! Your friends and family will love it.
    Hawaiian Huli Huli Grilled Chicken Savory Delight
  • For a truly authentic slow cooker chile verde, you need to gather these key ingredients: - 2 lbs boneless chicken thighs, cut into chunks - 1 lb tomatillos, husked and quartered - 2 poblano peppers, seeds removed and chopped - 1 green bell pepper, chopped - 1 medium onion, chopped - 4 cloves garlic, minced - 1 cup chicken broth - 1 tablespoon ground cumin - 1 tablespoon dried oregano - 1 tablespoon lime juice - Salt and pepper to taste - Fresh cilantro for garnish - Tortillas, for serving These ingredients work together to create a rich and vibrant flavor that makes chile verde special. If you want to elevate your dish, consider adding: - 1 jalapeño pepper for heat - 1 teaspoon smoked paprika for depth - 1 tablespoon apple cider vinegar for tang These additions can enhance the taste and give you a more layered dish. Sometimes you may not have all the ingredients on hand. Here are some substitutes: - Use chicken breast instead of thighs for a leaner option. - Swap tomatillos with green tomatoes if needed. - Replace poblano peppers with green bell peppers for a milder taste. These substitutes will help you stay on track even if your pantry is a bit sparse. Keep these options in mind as you prepare your meal! To start, gather all your ingredients. You will need: - 2 lbs boneless chicken thighs, cut into chunks - 1 lb tomatillos, husked and quartered - 2 poblano peppers, seeds removed and chopped - 1 green bell pepper, chopped - 1 medium onion, chopped - 4 cloves garlic, minced - 1 cup chicken broth - 1 tablespoon ground cumin - 1 tablespoon dried oregano - 1 tablespoon lime juice - Salt and pepper to taste - Fresh cilantro for garnish - Tortillas for serving Next, chop the peppers, onion, and garlic. This makes the cooking process easier. Set these aside in a bowl. Cut your chicken into bite-sized pieces. This helps it cook evenly and shred well later. Now, place the chicken into the slow cooker. Add the tomatillos, peppers, onion, and garlic. Mix them well. Pour in the chicken broth. This adds moisture and flavor. Sprinkle in the ground cumin and dried oregano. These spices give your dish its authentic taste. Add the lime juice, then season with salt and pepper. Stir gently to combine everything. Cover the slow cooker. If you choose low heat, cook for 6 to 8 hours. If on high, cook for 4 to 5 hours. You know it's done when the chicken is tender and shreds easily with a fork. After cooking, use two forks to shred the chicken in the slow cooker. Mix it well with the sauce. Taste your Chile Verde. Adjust the seasoning if needed. Serve it hot in bowls with warm tortillas on the side. Garnish with fresh cilantro for a pop of color. This dish looks as good as it tastes! Enjoy your meal and savor the flavors of your Authentic Slow Cooker Chile Verde. For the full recipe, check the earlier section. To make your Chile Verde truly authentic, focus on fresh ingredients. Use ripe tomatillos for the best taste. The green peppers should be firm and vibrant. When you add spices, use whole cumin seeds if possible. Toast them lightly in a pan before grinding to boost their flavor. I also suggest adding lime juice just before serving. It makes everything brighter and fresher. If your Chile Verde seems bland, it may need more salt or lime juice. Taste it before serving and adjust as needed. If the sauce is too thin, you can thicken it. Mix a little cornstarch with water and stir it in. Let it cook for a few more minutes until thick. If it's too spicy, add a bit of sugar to balance the heat. Serve your Chile Verde hot in bowls. I recommend warm tortillas on the side. You can use corn or flour, depending on your taste. Fresh cilantro on top adds color and flavor. For a fun touch, serve with diced avocado or sour cream. This gives a nice creaminess to the dish. You can find the Full Recipe for more details on cooking and serving. {{image_2}} You can make a tasty vegetarian or vegan chile verde! Swap the chicken for hearty veggies. Use ingredients like zucchini, mushrooms, or eggplant. For protein, add beans such as black beans or pinto beans. You can also include tofu for a protein boost. To keep it flavorful, add extra spices and herbs, like cumin and oregano. This way, you still get that rich, savory taste. If you love spice, mix up the peppers! Try using jalapeños or serrano peppers for more heat. You can keep the poblano for flavor and add these spicy options. The heat level depends on how many peppers you add. Always taste as you go to ensure the spice suits your palate. You can also add a dash of hot sauce before serving to kick it up a notch. While chicken is great, other meats work well too. You can use pork shoulder, which gives a rich flavor. Just cut it into chunks like the chicken. Beef can also be an option; use chuck roast for tender bites. If you prefer a leaner choice, turkey is a fantastic substitute. Each meat brings its own unique taste to the dish, so try them out! For the full recipe, check out the Authentic Slow Cooker Chile Verde. After you enjoy your Authentic Slow Cooker Chile Verde, store any leftovers safely. First, let the dish cool down to room temperature. Place it in an airtight container. This will keep it fresh for up to three days in the fridge. You can also separate the meat and sauce if you like. This helps preserve the flavors better. When it’s time to enjoy your leftovers, reheating is easy. You can use the microwave or a stovetop. If using the microwave, heat in short bursts. Stir in between to ensure even warming. For the stovetop, add a bit of water or broth to keep it moist. Heat over medium-low until hot. This keeps the flavors vibrant and makes it enjoyable again. Freezing is a great option for longer storage. To freeze, let the dish cool completely. Pour it into freezer-safe bags or containers. Squeeze out extra air before sealing. You can freeze it for up to three months. To reheat, thaw overnight in the fridge. Then, warm it up on the stovetop or microwave. Enjoy your Chile Verde anytime! For the full recipe, check out the Authentic Slow Cooker Chile Verde. The best cut of meat for Chile Verde is boneless chicken thighs. They stay juicy and tender during cooking. You can also use pork shoulder for a richer flavor. Both cuts absorb the flavors well and make the dish hearty. Yes, you can cook Chile Verde on the stovetop. Use a large pot to sauté the veggies first. Then, add the meat and broth. Simmer for about 1.5 to 2 hours until the meat is tender. Stir occasionally to prevent sticking. To add spice, use hotter peppers. You can swap in jalapeños or serranos for poblano peppers. You can also add a pinch of cayenne pepper or red pepper flakes. Adjust based on your heat preference. Chile Verde pairs well with warm tortillas or rice. You can also serve it with beans. For a fresh touch, add lime wedges and cilantro on the side. This adds flavor and color to your meal. Yes, Chile Verde tastes even better the next day. Make it a day ahead, cool, and store in the fridge. Reheat on the stove or in the slow cooker before serving. The flavors will deepen and blend beautifully. The chicken is done when it shreds easily with a fork. If it feels tough, it needs more cooking time. Once it reaches this point, you can mix it into the sauce for a perfect blend of flavors. Yes, you can freeze Chile Verde for later use. Let it cool completely before transferring to an airtight container. It can last up to three months in the freezer. Thaw in the fridge before reheating. If you can’t find tomatillos, you can use canned green tomatoes. They won’t taste the same but can work in a pinch. You can also try using fresh green tomatoes, but they may alter the flavor slightly. Absolutely! You can make a vegetarian Chile Verde by using mushrooms or jackfruit. Replace the chicken with these ingredients and use vegetable broth. This keeps the dish hearty and full of flavor. To enhance flavor, toast the spices before adding them to the dish. This brings out their natural oils and boosts taste. You can also add a splash of vinegar or a touch of sugar to balance the flavors. In this article, we've explored the key ingredients and cooking steps for a delicious Chile Verde. You learned about essential and optional ingredients, plus some great substitutes. We detailed the cooking process and offered tips for authentic flavor. Variations for different diets and spice levels ensure everyone can enjoy this dish. Finally, we shared storage tips and answered common questions. By following these steps, you'll create a tasty meal that satisfies all. Enjoy your cooking and the delightful flavors of Chile Verde!
    Authentic Slow Cooker Chile Verde Flavorful Meal Guide
  • - Whole turkey (12-14 pounds) - Unsalted butter, olive oil, kosher salt - Fresh herbs (thyme, rosemary, sage) The main ingredients create a rich flavor and tender meat. The turkey is the star. Choose a bird that is fresh. The butter and oil add moisture. The kosher salt enhances the taste. Fresh herbs give the turkey a lovely aroma. - Onion and garlic additions - Lemons: zest and juice Aromatics boost the turkey's flavor. Use a large onion, quartered, to fill the cavity. Smashed garlic cloves add a savory touch. The lemons provide bright notes. Zest and juice will elevate the dish. This combination makes each bite delicious. - Roasting pan - Kitchen twine and sharp knife Tools make cooking easier. A sturdy roasting pan is essential. It holds the turkey and broth. Kitchen twine helps tie the legs together. A sharp knife is important for carving. These tools help create a beautiful meal. For the full recipe, check out the detailed instructions. Enjoy creating a flavorful feast! Preheating the oven and preparing the turkey Start by preheating your oven to 325°F (165°C). This temperature ensures even cooking. Next, take your whole turkey and remove the giblets from the cavity. Pat the turkey dry with paper towels. Drying it helps achieve crispy skin. Creating the herb butter mixture In a small bowl, mix these ingredients together: - 4 tablespoons unsalted butter, softened - 1 tablespoon olive oil - 1 tablespoon kosher salt - 1 teaspoon black pepper - 2 lemons, zested and juiced - 1 tablespoon fresh thyme, chopped - 1 tablespoon fresh rosemary, chopped - 1 tablespoon fresh sage, chopped Stir until well combined. This herb butter will add rich flavor to your turkey. Separating skin and meat for optimal flavor Using your hands, carefully separate the skin from the meat. Focus on the breast and thighs. This step creates space for the herb butter to penetrate the meat. It makes the turkey juicy and full of flavor. Applying the herb butter and stuffing Spread half of the herb butter mixture under the skin. Ensure it is even and covers all the meat. Next, rub the remaining herb butter all over the outside of the turkey. Stuff the cavity with: - 1 large onion, quartered - 4 cloves garlic, smashed - 2 lemon halves This stuffing adds a lovely aroma and flavor to your roast. Adding broth and placing the turkey in the pan Pour 2 cups of low-sodium chicken broth into the bottom of a large roasting pan. This broth keeps the turkey moist during cooking. Place the turkey, breast side up, in the pan. Tie the legs with kitchen twine and tuck the wing tips under the body. This helps prevent burning. Basting and monitoring cooking times Roast the turkey in the preheated oven. Baste it every 30 minutes with the pan juices. Cook for about 13-15 minutes per pound. The turkey is done when the internal temperature reaches 165°F (74°C) in the thickest parts. Use a meat thermometer for accuracy. For more details, follow the Full Recipe. Basting your turkey is key for juicy meat. I recommend basting every 30 minutes. This keeps the skin from burning while adding moisture. Use the pan juices for basting. They soak up flavor and keep the meat tender. Check the turkey's internal temperature to ensure it cooks evenly. The thickest part of the breast and thigh should reach 165°F (74°C). You can use a meat thermometer for this. It’s the best way to know your turkey is safe to eat. For a burst of flavor, consider marinating or brining your turkey. A simple brine can be made with water, salt, and sugar. Soak the turkey overnight for best results. This adds moisture and flavor deep into the meat. After roasting, use leftover broth to make gravy or sauces. Strain the drippings from the roasting pan. Mix them with flour or cornstarch to thicken. This creates a rich sauce that pairs well with the turkey. Garnish your roast turkey with fresh herbs. Thyme, rosemary, and sage add color and aroma. Scatter them on the serving platter for a lovely display. When carving, use a sharp knife for clean cuts. Start with the legs and then slice the breast. Arrange the slices on a platter. This makes your turkey look beautiful and appetizing. For the complete recipe, check out the Full Recipe. {{image_2}} You can make your turkey special with different flavors. A Mediterranean twist adds olives and feta. This mix gives the turkey a salty and tangy taste. Just chop olives and mix them with feta. Spread this mixture under the skin before roasting. You can also try a Thanksgiving-style turkey. Add cranberries to the stuffing for sweetness. Fresh or dried cranberries work great. This adds a pop of color and flavor. You can cook turkey in many ways. A slow cooker method makes the turkey very tender. Just place the seasoned turkey in the slow cooker with broth. Cook on low for 6 to 8 hours. This method keeps the turkey juicy and flavorful. Another option is smoking the turkey. This gives the bird a rich, smoky flavor. Use a wood like hickory or apple for a nice taste. Smoke the turkey for several hours at low heat. The result is a unique and delicious turkey. For those needing gluten-free options, use gluten-free broth and seasonings. Always check labels to ensure all ingredients are safe. If you want a low-fat turkey, use less butter. You can replace some butter with olive oil. This keeps the turkey moist while reducing fat. Remember, these variations let you customize your Gordon Ramsay style roast turkey. They make it suit your taste and dietary needs while still being a flavorful feast. For the full recipe, check out the complete instructions. To keep your turkey fresh, store leftovers in the fridge. Wrap the turkey in plastic wrap or foil. Place it in an airtight container to prevent drying out. Aim to eat leftovers within three to four days. For longer storage, freeze the turkey. Slice it into pieces before freezing to make it easier to use later. Use freezer-safe bags, and remove as much air as possible. Label the bags with the date. Frozen turkey can last up to six months. Reheating turkey can be tricky. You want to keep it moist and tasty. The best way is to use the oven. Preheat your oven to 325°F (165°C). Place the turkey in a baking dish. Add a splash of broth or water to keep it moist. Cover it with foil to trap steam. Heat for about 20 minutes or until warm. If using a microwave, slice the turkey into pieces. Heat in short bursts, checking often to avoid dryness. Leftover turkey is very versatile. You can make great sandwiches. Use crusty bread and add cranberry sauce or mayo. It also works well in salads. Mix turkey with greens, nuts, and your favorite dressing. Another idea is turkey soup. Combine turkey with broth, veggies, and herbs for a hearty meal. You can even add it to stir-fries or tacos. The options are endless! For detailed recipes, check the Full Recipe section. You should cook a turkey for about 13 to 15 minutes per pound. For example: - 10 pounds: 2 to 2.5 hours - 12 pounds: 2.5 to 3 hours - 14 pounds: 3 to 3.5 hours Use a meat thermometer to check the turkey. It should reach 165°F in the thickest part of the breast and thigh. The safe internal temperature for turkey is 165°F (74°C). This ensures harmful bacteria are killed. Use a meat thermometer to check at the breast and thigh. Letting the turkey rest after cooking allows the juices to spread, making it juicy. Yes, you can prepare the turkey in advance. You can season it a day before and store it in the fridge. This helps the flavors soak in. Just be sure to let it come to room temperature before roasting. This helps it cook evenly. To make the perfect turkey, focus on your ingredients and tools. You need a whole turkey, butter, and fresh herbs for flavor. Prepping the bird is key, from seasoning to cooking times. Basting helps achieve that juicy roast. Don’t forget tips for leftovers—creative uses can minimize waste and make tasty meals. This process can be simple and rewarding. Enjoy creating a delicious turkey for your next meal. Happy cooking!
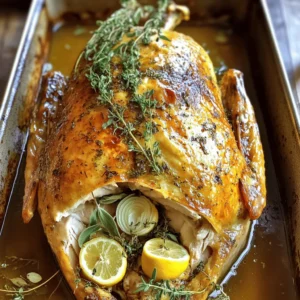
    Gordon Ramsay Style Roast Turkey Flavorful Feast
  • You need just a few fresh items for this zesty dish: - 2 large cucumbers, thinly sliced - 2 cups cherry tomatoes, halved - 1/4 red onion, thinly sliced - 1/4 cup fresh parsley, chopped - 1/4 cup olive oil - 3 tablespoons apple cider vinegar - 1 tablespoon honey - 1 teaspoon dried oregano - Salt and pepper to taste - 1/4 teaspoon red pepper flakes (optional for heat) These ingredients work together to create a bright, refreshing flavor. The cucumbers bring a crisp texture. The tomatoes add sweetness. The red onion gives a nice bite. Fresh parsley brightens everything up. Olive oil and vinegar create a tangy dressing. Honey balances the acidity, while oregano adds depth. Salt and pepper enhance all the flavors. Red pepper flakes give an optional kick. I love how easy this salad is to make. You can find all these ingredients at your local store. Mix them together, and you have a dish that shines at any meal. For the full recipe, check out the provided link. To start, gather your fresh ingredients. You will need: - 2 large cucumbers, thinly sliced - 2 cups cherry tomatoes, halved - 1/4 red onion, thinly sliced In a large mixing bowl, combine the sliced cucumbers, halved cherry tomatoes, and red onion. This colorful mix sets the stage for a zesty salad. Next, prepare the dressing in a separate bowl. You will need: - 1/4 cup olive oil - 3 tablespoons apple cider vinegar - 1 tablespoon honey - 1 teaspoon dried oregano - Salt and pepper to taste - 1/4 teaspoon red pepper flakes (optional for heat) Whisk together the olive oil, apple cider vinegar, honey, dried oregano, salt, pepper, and red pepper flakes, if using. This dressing adds a bright kick. Now, pour the dressing over the cucumber and tomato mixture. Gently toss to coat all the vegetables evenly. Finally, add in 1/4 cup chopped fresh parsley and toss lightly again. This adds a fresh note to the dish. Cover the bowl with plastic wrap or transfer it to an airtight container. Refrigerate the salad for at least 30 minutes. This time allows the flavors to blend and deepen. For optimal flavor infusion, consider these tips: - Use fresh ingredients for the best taste. - Allow more time to marinate if you prefer stronger flavors. Before serving, give the salad another gentle toss. Taste it and adjust the seasoning. Add more salt, pepper, or even a touch of honey if you like. This dish is now ready. Enjoy the fresh flavors of zesty marinated cucumbers and tomatoes! For the complete recipe, check [Full Recipe]. To get the best texture in your salad, slice cucumbers and tomatoes properly. For cucumbers, use a sharp knife to cut thin slices. Thin slices help them stay crisp. For cherry tomatoes, cut them in half. This exposes their juicy inside and adds flavor. You can boost flavor by adding fresh herbs like dill or basil. Chopped mint also works well. If you want a stronger taste, try adding garlic powder or crushed garlic. Making the dressing ahead of time helps flavors develop. Whisk the dressing and store it in the fridge. This way, you save time and add even more taste. To serve your salad nicely, use a clear glass bowl. This shows off the bright colors of the cucumbers and tomatoes. You can also layer the salad with parsley on top. This adds a fresh touch. Serve it next to grilled meats or fish for a beautiful meal. For a fun garnish, sprinkle sesame seeds or sunflower seeds on top. They add a nice crunch and look great! For the complete recipe, check out the [Full Recipe]. {{image_2}} You can switch up the main ingredients in your dish. If cucumbers are not in season, try using zucchini or bell peppers. For tomatoes, you can use diced avocados or roasted red peppers, giving a new twist. Adding protein makes this dish even better. Feta cheese adds a creamy texture, while chickpeas add heartiness. Either choice boosts flavor and nutrition. The dressing can change the whole vibe of your salad. Use balsamic vinegar instead of apple cider for a richer taste. You can also try rice vinegar for a milder flavor. Sweeten with maple syrup or agave instead of honey. Want some zing? Add minced garlic or a squeeze of fresh lemon juice. This way, you create layers of flavor that excite your taste buds. As the seasons change, so can your salad. In summer, add fresh basil or mint for a refreshing touch. In fall, consider roasted squash for warmth. For winter, add hearty greens like kale or spinach. Each season brings new flavors, making your marinated salad suitable for any occasion. To store your zesty marinated cucumbers and tomatoes, place them in an airtight container. This helps keep moisture in and air out. Make sure to cover the container tightly. You want to preserve that fresh flavor. The salad stays good in the fridge for about 3 to 5 days. After that, the taste may change. Can you freeze the marinated salad? I don’t recommend it. Freezing can make the cucumbers and tomatoes mushy. If you want to prepare for future meals, consider storing just the dressing separately. You can mix the fresh vegetables right before serving for the best taste. This keeps your salad crisp and bright. How long can I marinate cucumbers and tomatoes? You can marinate cucumbers and tomatoes for 30 minutes to 2 hours. The longer you marinate, the better the flavors mix. I recommend not exceeding 2 hours to keep the veggies crisp. Can I make this salad a day ahead? Yes, you can prepare this salad a day in advance. However, the cucumbers might soften a bit. If you want them crunchy, try marinating just for a few hours before serving. What can I use instead of apple cider vinegar? If you don’t have apple cider vinegar, use white wine vinegar or rice vinegar. Both will give a nice tang. You can also use lemon juice for a fresh twist. Are there alternatives for honey in the recipe? Yes, you can swap honey for maple syrup or agave syrup. Both options will add sweetness. If you prefer a sugar-free option, try a sugar substitute like stevia. What dishes pair well with zesty marinated cucumbers and tomatoes? This salad goes great with grilled chicken, fish, or burgers. It adds a fresh touch to any meal. You can also serve it alongside a hearty grain bowl for a complete dish. How to serve it as a main dish rather than a side? To make it a main dish, add some protein. Grilled shrimp, feta cheese, or chickpeas work well. Toss in some quinoa or brown rice for a filling meal. Enjoy the vibrant flavors! This blog post shared a simple recipe for zesty marinated cucumbers and tomatoes. We covered ingredients, step-by-step instructions, and helpful tips for perfecting flavors and presentation. You can also explore variations and storage options for maximum freshness. Remember, this dish is flexible. Feel free to swap ingredients or tweak the dressing to match your taste. Enjoy your cooking, and savor every bite of your vibrant, refreshing salad!
    Zesty Marinated Cucumbers and Tomatoes Flavor Boost
  • For easy pizza rolls, you need a few simple items. Gather these ingredients: - 1 package of refrigerated pizza dough - 1 cup shredded mozzarella cheese - ½ cup pepperoni slices, chopped - ½ cup bell peppers, diced (any color) - ½ cup marinara sauce (for dipping) - 1 teaspoon Italian seasoning - 1 tablespoon olive oil - 1 egg, beaten (for egg wash) - Flour for dusting Using the right tools makes cooking easier. Here are the tools you will need: - Rolling pin - Baking sheet - Parchment paper - Mixing bowl - Pastry brush - Knife or pizza cutter Choosing fresh ingredients improves taste. Here are some quick tips: - Pizza Dough: Look for dough with a clean label. Check the expiration date. - Cheese: Choose block mozzarella for the best flavor. Shred it yourself for freshness. - Pepperoni: Pick a brand with minimal fillers. Look for a nice red color. - Bell Peppers: Select firm peppers with shiny skin. Avoid any soft spots or wrinkles. - Marinara Sauce: Go for sauces with fewer additives. Taste a few for the best flavor. With these ingredients and tools, you'll make tasty pizza rolls in no time. For the full recipe, check out the details provided! First, get your oven ready. Set it to 400°F (200°C). This heat will make your pizza rolls crispy. While the oven heats, prepare your baking sheet. Line it with parchment paper. This way, your rolls won’t stick. Next, you will work with the pizza dough. Take your package of refrigerated dough. Open it and place it on a lightly floured surface. Roll it out until it is about ¼ inch thick. A rolling pin works best for this task. If you don’t have one, you can use a wine bottle! Once you have rolled out the dough, cut it into squares. Each square should be about 3x3 inches. You will need enough squares for all your filling. Now, let’s make the filling. In a bowl, mix together 1 cup of shredded mozzarella cheese, ½ cup of chopped pepperoni, ½ cup of diced bell peppers, and 1 teaspoon of Italian seasoning. Stir it well so all flavors blend together. Take a square of dough and place about one tablespoon of filling in the center. Make sure not to overfill it! Fold the corners of the dough over the filling. Pinch the edges tightly to seal the pocket. This helps keep the yummy filling inside. Arrange each filled pizza roll on your baking sheet. Leave some space between them. This helps them bake evenly. Before baking, brush the tops of the rolls with a beaten egg. This gives them a nice golden color when baked. Place the baking sheet in your preheated oven. Bake for 15 to 20 minutes. Keep an eye on them. They should turn golden brown and puff up nicely. Once done, take them out and let them cool for a few minutes. Serve warm with marinara sauce for dipping. Enjoy your tasty pizza rolls! For the full recipe, check the recipe section. To get that perfect golden brown finish, brush the tops of your pizza rolls with beaten egg. This egg wash helps create a nice, shiny crust. Make sure your oven is fully preheated to 400°F (200°C). Place the rolls on the center rack for even cooking. Keep an eye on them as they bake. The rolls should take about 15 to 20 minutes to reach that golden look. Avoid overcrowding your baking sheet. If the rolls are too close, they may steam instead of bake. This will make them soggy. Make sure to seal the edges well. If they open while baking, the filling will ooze out. Lastly, don't skip the Italian seasoning. It adds a lot of flavor to your rolls. If you're new to cooking, start with simple steps. Roll the dough thin, about a quarter-inch thick. Thin dough puffs up nicely and cooks evenly. Use a sharp knife to cut your squares. Uneven cuts can lead to uneven baking. If you’re unsure about how much filling to use, start with a tablespoon. Too much filling can make sealing hard. Enjoy the process and have fun in the kitchen! {{image_2}} You can change up the filling to match your taste. Some great options include: - Cooked sausage, crumbled - Sliced olives - Sautéed mushrooms - Spinach - Feta cheese Mix and match these ingredients to create your own unique flavor. Just remember to keep the balance of cheese and sauce. If you want a meat-free option, go for a veggie mix. You can try: - Spinach and ricotta - Roasted zucchini and bell peppers - Mushrooms and mozzarella For a vegan twist, skip the cheese. Use vegan cheese or tofu instead. You can also try a mix of herbs for added flavor. For those who like a kick, add some heat. Consider using: - Jalapeños - Hot sauce in the filling If you prefer sweet, try: - Nutella with banana slices - Cinnamon sugar with cream cheese These options let you explore new flavors. Don’t be afraid to experiment! Use the full recipe to inspire your creations. After you enjoy your pizza rolls, cool them down. Place them in an airtight container. This keeps them fresh. You can store them in the fridge for about three days. If you want to keep them longer, freeze them. To reheat pizza rolls, the oven works best. Preheat it to 350°F (175°C). Place the rolls on a baking sheet. Heat them for about 10-15 minutes until they are warm. You can also use a microwave. Heat them for about 30 seconds but they may get soggy. To freeze pizza rolls, first, let them cool completely. Lay them on a baking sheet in a single layer. Freeze them for about an hour. Once frozen, transfer them to a freezer bag. This way, you can enjoy a quick snack anytime! Yes, you can use homemade dough for Easy Pizza Rolls. Making your own dough adds a personal touch. It can taste fresher and more flavorful. Just ensure the dough is easy to roll out and not too sticky. You can follow a simple bread or pizza dough recipe. This way, you control the ingredients and flavors. You can store pizza rolls in the fridge for up to three days. Make sure they cool completely before placing them in an airtight container. This helps keep them fresh and tasty. If you want to enjoy them later, reheat them in an oven or air fryer. This method keeps them crispy. The best dipping sauce for pizza rolls is marinara sauce. It pairs well with the cheesy and savory flavors. You can also try ranch dressing for a creamy twist. If you like heat, a spicy marinara or hot sauce works great too. Feel free to experiment with different sauces to find your favorite! For a full recipe of Easy Pizza Rolls, check out the main article. In this article, I covered essential ingredients, tools, and tips for making pizza rolls. I shared step-by-step instructions for preparation, assembly, and baking. I also highlighted common mistakes and ways to ensure a perfect finish. Remember, experimenting with different fillings can make pizza rolls even more fun. Store any leftovers properly for quick snacks later. Enjoy your cooking and the tasty results!
    Easy Pizza Rolls Quick and Flavorful Snack Recipe
  • For a tasty Turkey and Pepper Stir Fry, you will need the following: - 1 lb ground turkey - 1 red bell pepper, sliced - 1 green bell pepper, sliced - 1 yellow bell pepper, sliced - 1 small onion, thinly sliced - 2 cloves garlic, minced - 1 inch fresh ginger, grated - 3 tablespoons soy sauce - 1 tablespoon sesame oil - 1 tablespoon hoisin sauce - 1 tablespoon cornstarch - 2 tablespoons water - Salt and pepper to taste - Cooked rice or noodles, for serving - Sesame seeds and green onions for garnish These ingredients form the base for a quick and healthy meal. Each item plays a key role in creating layers of flavor. Ground turkey gives you a lean protein, while the bell peppers add crunch and sweetness. The onion, garlic, and ginger give depth and warmth. The sauces combine to create a rich, savory taste. You can serve this stir fry over rice or noodles. This dish is not only easy to make, but it is also full of fresh flavors. You can find the Full Recipe for step-by-step instructions to make this delicious meal! 1. Preheat the skillet: Start by heating your large skillet or wok over medium-high heat. Add 1 tablespoon of sesame oil. This oil gives the dish a nice flavor and helps cook the turkey and veggies well. 2. Prepare the turkey and vegetables: While the skillet heats, slice your bell peppers and onion. Mince the garlic and grate the ginger. You want everything ready to go since stir-frying cooks quickly. 3. Cooking process overview: First, sauté the aromatics like garlic and ginger. Then, brown the turkey. Finally, add the veggies and sauce for a tasty mix. 1. Sautéing vegetables: Once the skillet is hot, toss in the onion, garlic, and ginger. Sauté for about 2 minutes until they smell great. This step builds the base flavor for your stir fry. 2. Browning turkey: Next, add 1 pound of ground turkey. Use a spoon to break it apart. Cook it for 5 to 7 minutes until it turns brown and is fully cooked. This step keeps the turkey juicy and flavorful. 3. Combining sauce with ingredients: After the turkey is brown, add the sliced bell peppers. Sauté them for 3 to 4 minutes until they are tender but still crisp. In a small bowl, mix 3 tablespoons of soy sauce, 1 tablespoon of hoisin sauce, 1 tablespoon of cornstarch, and 2 tablespoons of water. Pour this sauce into the skillet. Stir well to coat everything. Cook for 2 to 3 more minutes until the sauce thickens a bit. You can serve this stir fry over cooked rice or noodles and add sesame seeds and green onions on top. This dish is colorful and full of flavor! For the full recipe, check the earlier section. To avoid dry turkey, cook it quickly. Use medium-high heat to keep it juicy. Break it apart in the pan. Stir it often for even cooking. For crisp vegetables, do not overcook them. Add bell peppers last. Cook them for just a few minutes. They should be bright and crunchy, not mushy. Pair your turkey and pepper stir fry with rice or noodles. They soak up the sauce well. Serve it over a bed of fluffy rice for a filling meal. For garnishes, sprinkle sesame seeds on top. Add some chopped green onions too. These add flavor and a nice look to your dish. For the complete dish, check the Full Recipe. Enjoy your cooking! {{image_2}} You can easily change this dish with different proteins. Instead of ground turkey, try chicken, beef, or tofu. Each option brings its unique taste and texture. Chicken is light, while beef adds depth. Tofu is a great choice for those wanting a plant-based meal. You can also swap out the bell peppers. Use broccoli or snow peas for a new twist. Broccoli adds crunch and color. Snow peas bring a sweet flavor that pairs well with the turkey. Feel free to mix and match your veggies based on what you have! To boost the flavor, add spices like red pepper flakes or a squeeze of lime juice. Red pepper flakes add heat, while lime juice brightens the dish. Both options make every bite exciting. Consider using alternative sauces too. Teriyaki sauce adds a sweet touch, while sweet chili sauce gives a nice balance of sweet and spicy. These changes can really elevate your stir fry. Don't hesitate to experiment and find your favorite flavors. To keep your Turkey and Pepper Stir Fry fresh, use airtight containers. Glass or BPA-free plastic works best. Store your leftovers in the refrigerator for up to three days. If you want to keep them longer, freeze them for up to three months. Make sure to label your containers with the date. This way, you know how long they've been stored. You can reheat your stir fry in two ways: in the microwave or on the stovetop. The microwave is quick and easy. Just put your dish in for about two minutes. Stir it halfway for even heating. For a better texture, use the stovetop. Heat a skillet over medium heat, add a splash of water, and stir the dish for about five minutes. This helps keep the vegetables crisp and tasty. Enjoy your meal again! Can I make this dish ahead of time? Yes, you can make this dish ahead of time. Just cook the stir fry and let it cool. Then, store it in an airtight container. You can keep it in the fridge for up to three days. Before serving, reheat it on the stove or in the microwave until hot. What can I serve with Turkey and Pepper Stir Fry? You can serve this stir fry with cooked rice or noodles. Both options soak up the sauce well and add texture. You can also add a side of steamed broccoli or a fresh salad for a complete meal. How do I adjust the spice level? To adjust the spice level, you can add red pepper flakes to the stir fry. Start with a small pinch and taste as you go. For a milder flavor, skip the flakes or use sweet bell peppers. What type of turkey is best for stir fry? Ground turkey works best for stir fry. It cooks quickly and absorbs flavors well. You can also use turkey breast, cut into thin strips, if you prefer a different texture. Can I use frozen vegetables? Yes, you can use frozen vegetables. They are a time-saver and can work well in stir fry. Just add them directly to the skillet. Cook them a little longer to ensure they heat through and become tender. This blog post covers how to create a tasty Turkey and Pepper Stir Fry. We explored the key ingredients, like ground turkey and colorful bell peppers. I provided step-by-step cooking instructions and essential tips for juicy turkey and crisp veggies. You learned about variations to personalize your dish and storage info for leftovers. In short, this meal is simple to make and fun to enjoy. Give it a try and savor the flavors!
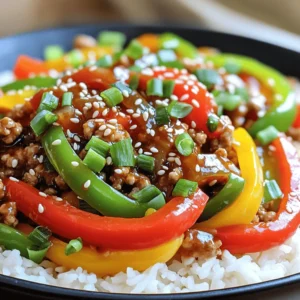
    Turkey and Pepper Stir Fry Quick and Easy Recipe
  • - 2 cups shredded cooked chicken - 1/2 cup chipotle ranch dressing - 1 cup black beans, drained and rinsed - 1 cup corn kernels (fresh, frozen, or canned) - 1 cup cooked rice (white or brown) - 1 cup shredded cheddar cheese - 1/2 cup diced tomatoes - 1/4 cup chopped fresh cilantro - 4 large flour tortillas - Salt and pepper to taste - Additional toppings (e.g., avocado, jalapeños) The main stars of your burrito are shredded chicken and chipotle ranch dressing. The chicken adds protein and flavor, while the dressing gives it a spicy kick. Together, they create a rich and tasty base. Next, we have the additional ingredients. Black beans provide fiber and texture. Corn kernels add sweetness and color. Rice helps to fill the burrito and makes it hearty. Shredded cheddar cheese brings creaminess, while diced tomatoes add freshness. Fresh cilantro offers a burst of herb flavor. Don't forget the seasoning! A pinch of salt and pepper can elevate your dish. You can also add other toppings like avocado for creaminess or jalapeños for heat. For the full recipe, check out the details above. This combination of ingredients will make your Chipotle Ranch Chicken Burrito a delicious and satisfying meal. 1. Combine chicken and dressing: In a large bowl, mix 2 cups of shredded cooked chicken with 1/2 cup of chipotle ranch dressing. Make sure the chicken gets coated well. 2. Add remaining ingredients: Next, add 1 cup of black beans, 1 cup of corn kernels, and 1 cup of cooked rice to the bowl. Now, toss in 1 cup of shredded cheddar cheese, 1/2 cup of diced tomatoes, and 1/4 cup of chopped cilantro. Season with salt and pepper to taste. Gently stir everything until combined. 1. Warming tortillas in the microwave: Take 4 large flour tortillas and warm them for about 15 seconds in the microwave. This makes them soft and easy to roll. 2. Skillet method: If you prefer, you can warm the tortillas in a skillet. Heat the skillet over medium heat. Place each tortilla in the skillet for about 20-30 seconds on each side until they are pliable. 1. Layering the filling: Lay a warm tortilla flat on a clean surface. Add a generous scoop of your chicken mixture in the center. 2. Folding techniques: Fold the sides of the tortilla inward. Then, roll from the bottom up. Tuck in the filling as you go to create a tight burrito. 3. Repeat this for all the tortillas and filling. If you want extra crispiness, heat a skillet over medium heat. Place the burritos seam side down and cook for 2-3 minutes on each side until golden and slightly crispy. I hope you enjoy making this Chipotle Ranch Chicken Burrito! For the complete recipe, check out the [Full Recipe]. - Drizzle extra chipotle ranch dressing on top for more flavor. - Garnish with fresh cilantro or lime slices for a pop of color. - For a crispy texture, grill the burritos. Cook each side for 2-3 minutes. - You can also bake burritos in the oven at 375°F for about 15 minutes. - Use pre-cooked chicken or store-bought chipotle ranch dressing to save time. - Make a big batch for meal prep. Store extras in the fridge for quick meals. This recipe is easy to follow and full of flavor. You can find the Full Recipe earlier in this article. {{image_2}} You can switch up the main protein in the burrito. Use turkey or beef instead of chicken. Both options add a different flavor. If you want a meatless meal, try tofu. Tofu absorbs flavors well. It will soak up the chipotle ranch dressing nicely. To make the dish more exciting, add spices to the mix. Cumin brings warmth, while paprika adds a sweet touch. You can also try other dressings. A spicy salsa or zesty ranch can change the taste. Experiment with what you like best. If you want to change how you serve this dish, consider burrito bowls. Layer the ingredients in a bowl instead of a wrap. This way, you can enjoy all the flavors without the tortilla. You can also make tacos using the same filling. Just use smaller tortillas for a fun twist. You can store your burritos in the fridge for up to three days. Make sure they cool down first. Place the burritos in an airtight container. This keeps them fresh and prevents them from drying out. For longer storage, you can freeze burritos. Wrap each burrito in plastic wrap. Then, place them in a freezer bag or container. They can last up to three months in the freezer. When you're ready to eat, let them thaw overnight in the fridge. Reheat them in the microwave for about 2-3 minutes. You can also warm them in the oven at 350°F for about 15-20 minutes. To keep your leftovers fresh, use airtight containers. This helps retain moisture and flavor. You can also use parchment paper to wrap each burrito before placing them in a container. This adds an extra layer of protection. If you want, you can separate the filling and tortillas. Store them separately for better freshness. A Chipotle Ranch Chicken Burrito is a tasty wrap filled with shredded chicken and chipotle ranch dressing. It also includes black beans, corn, rice, and cheese. The flavor is rich and smoky, with a hint of spice. This burrito is a crowd-pleaser and perfect for any meal. Yes! You can prepare the filling ahead of time. Store it in the fridge for up to three days. Just warm the filling and tortillas before serving. This saves time when you're ready to eat. To add heat, try these options: - Mix in diced jalapeños. - Use hot chipotle ranch dressing. - Sprinkle red pepper flakes into the filling. These additions will give your burrito a spicy kick. Many fast-casual spots offer burritos like this. Look for places that focus on Mexican or Tex-Mex food. You can often find similar options on their menu. Chain restaurants may also have their own take on this dish. Here are some great sides for your burritos: - Tortilla chips with salsa or guacamole. - A fresh salad with lime dressing. - Mexican rice or refried beans. These sides will enhance your meal and make it more filling. You can easily change your burrito filling. Here are some ideas: - Swap the chicken for turkey, beef, or tofu. - Add different veggies like bell peppers or onions. - Use brown rice or quinoa for a healthier twist. Feel free to get creative with your ingredients! You now know how to make a tasty Chipotle Ranch Chicken Burrito. Start with chicken and Chipotle ranch dressing, adding other ingredients for flavor. Warm your tortillas and layer your filling well. Remember, you can customize ingredients, try different cooking methods, and even prepare ahead of time. Whether you make burritos or bowls, the options are endless. Enjoy your delicious meal with friends or save some for later. Happy cooking!
    Chipotle Ranch Chicken Burrito Easy and Flavorful Dish
  • For a warm bowl of classic chicken noodle soup, gather these ingredients: - 1 tablespoon olive oil - 1 medium onion, diced - 2 carrots, sliced - 2 celery stalks, sliced - 3 cloves garlic, minced - 8 cups chicken broth - 2 cups cooked chicken, shredded - 1 teaspoon dried thyme - 1 bay leaf - Salt and pepper to taste - 2 cups egg noodles - 1 tablespoon fresh parsley, chopped (for garnish) When you select ingredients, look for fresh and vibrant produce. Here are some tips: - Onions: Choose firm onions with dry, papery skins. Avoid soft spots. - Carrots: Pick bright orange carrots. They should feel crisp and not bend. - Celery: Look for stalks that are firm and have a bright green color. - Garlic: Select heads that feel heavy and firm. Avoid sprouted garlic. - Chicken: Use fresh or high-quality cooked chicken for the best flavor. If you have specific dietary needs, you can make some easy swaps: - Chicken: Use tofu or chickpeas for a vegetarian option. - Noodles: Swap egg noodles for whole wheat or gluten-free noodles. - Broth: Use vegetable broth for a vegetarian soup. - Herbs: Fresh herbs can replace dried ones for a more vibrant taste. Feel free to explore these options to make this soup your own! Check out the Full Recipe for more details. 1. Start with a large pot. Heat the olive oil over medium heat. 2. Add the diced onion, sliced carrots, and sliced celery. Sauté them for about 5-7 minutes. The goal is to soften the veggies and make the onion clear. 3. Next, add the minced garlic. Cook for one more minute. You want that garlic smell to fill the kitchen. 4. Now, pour in the chicken broth. Bring the mix to a boil. 5. When it boils, add the shredded chicken, thyme, bay leaf, salt, and pepper. Turn the heat down to a simmer. Let it cook for about 15 minutes. 6. Stir in the egg noodles. Cook them for another 7-10 minutes. Check that the noodles are soft before serving. 7. Finally, remove the bay leaf. Taste the soup. Add more salt and pepper if you need it. 8. Serve the soup hot. Top it with fresh parsley for a nice touch. Imagine a large pot bubbling with bright veggies. You see the golden olive oil shimmer as it heats. The chopped onions turn clear, and the carrots and celery become tender. Garlic adds its strong scent, making you hungry. When you pour in the broth, the steam rises. You see the chicken and spices mix in, creating a warm blend. The noodles swirl around, soaking up the flavor. Finally, as you add the parsley, the soup looks just right. - Prep Time: 15 minutes - Cooking Time: 25 minutes - Total Time: 40 minutes This soup takes less than an hour from start to finish. It's quick, simple, and perfect for any day. For the full recipe, check the details above and get ready to enjoy a bowl of warmth! To make your chicken noodle soup truly shine, focus on fresh ingredients. Fresh herbs add a burst of flavor. I love using thyme and parsley. They bring warmth and brightness. Cook your veggies well at the start. Sauté them in olive oil until soft. This step builds a strong base for your soup. Adding a bay leaf is crucial. It infuses a subtle depth of flavor. Don’t forget to season as you go. Taste your broth and adjust salt and pepper. A little bit of acid, like lemon juice, can enhance the flavors too. Just a splash at the end brightens everything up. Cooking your noodles just right is key. I recommend adding them in the last 10 minutes of cooking. This keeps them from getting mushy. Use egg noodles for their nice texture. They soak up the broth well. Always check the package for cooking time. Taste them before draining to ensure they are al dente. If you plan to store leftovers, consider cooking the noodles separately. Mix them in when you serve. This keeps them from absorbing too much broth and getting soggy. One common mistake is adding too much salt early on. It’s easy to over-season before tasting. Always wait until the end to adjust salt and pepper. Another mistake is not cooking the vegetables enough. Under-cooked veggies can taste raw and harsh. Make sure to sauté them until tender. Also, don’t skip straining out the bay leaf before serving. It’s not meant to be eaten. Lastly, avoid boiling the soup too hard after adding the noodles. A gentle simmer is best for keeping everything tender. For the full recipe, check out the details above. {{image_2}} You can make chicken noodle soup healthier by swapping some ingredients. Use low-sodium chicken broth instead of regular broth. This helps cut back on salt. You can also add more veggies, like spinach or kale. They boost nutrition and add nice color. Using whole grain egg noodles is another great option. They are higher in fiber. You might also try using skinless chicken breast instead of dark meat. This reduces fat while keeping great flavor. Want to mix things up? Consider adding new ingredients. Sweet corn can add a nice pop of sweetness. You might also try adding peas for color and texture. For a zing, add a splash of lemon juice before serving. Fresh herbs like dill or basil can change the taste too. If you like spice, include some red pepper flakes or hot sauce. These small changes can create a whole new soup experience. You don’t have to stick to the stove. A Crockpot is perfect for making chicken noodle soup. Just add all your ingredients and let it cook on low for 6-8 hours. The flavors blend well over time. An Instant Pot is another great option. It cooks the soup quickly, in about 30 minutes. Just follow the same steps in the recipe. With these methods, you can enjoy a warm bowl of soup with less time and effort. Check out the Full Recipe for details on cooking methods. Storing leftover chicken noodle soup is easy. Use a clean, airtight container. Let the soup cool to room temperature first. This helps prevent moisture buildup. You can keep it in the fridge for up to three days. Make sure to label the container with the date. This way, you know when to eat it. If you want to save the soup for later, freezing is a great option. First, cool the soup completely. Then, pour it into freezer-safe bags or containers. Leave some space at the top for expansion. You can freeze it for up to three months. When you're ready to eat, just thaw it in the fridge overnight. Reheating chicken noodle soup should be simple. Pour the soup into a pot over medium heat. Stir it often to keep it from sticking. If it seems thick, add a little broth or water. You can also reheat individual servings in the microwave. Just cover the bowl to avoid spills. Heat in short intervals, stirring in between. Enjoy the warmth of your homemade soup, just like when you first made it! Yes, you can use rotisserie chicken. It saves time and adds flavor. Just shred the chicken and add it to the soup. This makes your meal even easier. Plus, it gives you a rich taste with less work. This soup lasts about 3 to 4 days in the fridge. Store it in an airtight container. If you want to keep it longer, consider freezing it. Just make sure to cool it first before freezing. Chicken noodle soup is warm and soothing. It can help when you're sick. The broth keeps you hydrated. Chicken provides protein, which helps your body heal. Vegetables add vitamins and minerals. Overall, it’s a great comfort food that nourishes you. For the full recipe, check out the section on ingredients and cooking steps. In this post, we explored making chicken noodle soup. We covered ingredient tips and how to ensure freshness. You now know substitutions for dietary needs. I provided easy steps for cooking and a visual guide. I shared tips to enhance flavor and avoid common mistakes. We also offered healthier variations and storage ideas. Enjoy your soup-making journey! Follow these tips, and you'll have a warm bowl of comfort.
    Classic Chicken Noodle Soup Comforting and Simple Meal
  • For this Christmas salad, I use 4 cups of mixed greens. A blend of spinach, arugula, and romaine works best. This mix gives the salad a crunchy texture and a bit of peppery flavor. You can adjust the greens to fit your taste, but this mix is delightful. The fun part is adding colorful ingredients. Here’s what I choose: - 1 cup cherry tomatoes, halved - 1 cup cucumber, diced - 1/2 cup pomegranate seeds - 1/2 cup walnuts, toasted and roughly chopped - 1/4 cup feta cheese, crumbled - 1/4 cup red onion, thinly sliced These add-ins bring vibrant colors and flavors. The pomegranate seeds add a sweet burst, while the walnuts give a nice crunch. Feta cheese adds creaminess, and red onion gives a sharp taste. The dressing ties everything together. For the honey mustard dressing, you need: - 1/4 cup olive oil - 2 tablespoons apple cider vinegar - 2 tablespoons honey - 1 tablespoon Dijon mustard - Salt and pepper to taste This dressing is easy to make. The honey makes it sweet, while the mustard gives it a tangy kick. Mixing these ingredients creates a smooth and tasty dressing that coats the salad perfectly. You can find the full recipe linked within this section for more details. To start, gather your ingredients. You will need 4 cups of mixed greens, like spinach, arugula, and romaine. Next, take 1 cup of cherry tomatoes and cut them in half. Dice 1 cup of cucumber, too. Slice 1/4 cup of red onion thinly. In a large salad bowl, mix the greens, tomatoes, cucumber, and red onion. This base gives the salad a fresh, crunchy feel. The colors will brighten up your holiday table. Now, let’s make the honey mustard dressing. In a small bowl, whisk together 1/4 cup of olive oil, 2 tablespoons of apple cider vinegar, 2 tablespoons of honey, and 1 tablespoon of Dijon mustard. Add salt and pepper to taste. Whisk until all ingredients blend well. The dressing should be smooth and creamy. This adds a sweet and tangy flavor to your salad. Pour the honey mustard dressing over the salad base. Toss gently to coat everything evenly. This step is key to ensure every bite is delicious. Next, add 1/2 cup of pomegranate seeds and 1/2 cup of toasted walnuts. These add crunch and color. Sprinkle 1/4 cup of crumbled feta cheese on top for a creamy finish. Serve your Christmas salad right away or chill it for 30 minutes. This lets the flavors blend well. Enjoy your beautiful, festive dish! For the full recipe, check out the details above. To make your Christmas salad shine, use fresh ingredients. Fresh greens and ripe tomatoes give the best taste. Look for bright colors and firm textures. If you buy greens, check for wilting or browning. It’s best to use them within a few days. Store greens in the fridge in a sealed bag. This keeps them crisp. For the pomegranate seeds, choose ones that are plump. They add a juicy burst of flavor to your salad. Whisking the dressing well is key to a great salad. Start with a bowl for your dressing. Add olive oil, vinegar, honey, and mustard. Use a whisk or a fork to mix them together. Whisk until the dressing looks smooth and creamy. This helps to blend the flavors well. If you want a creamier dressing, you can add a bit of Greek yogurt. This adds a nice texture and taste. To wow your guests, focus on how you serve the salad. Use a large, colorful bowl to show off the bright greens and toppings. Arrange the salad layers nicely. Start with the greens, then add the veggies, and top with walnuts and feta. For a festive touch, sprinkle extra pomegranate seeds on top. This makes the salad look vibrant. You can also serve it in individual bowls for a more personal touch. Remember, a beautiful salad is just as important as a tasty one. For the full recipe, check out the Christmas Salad with Honey Mustard. {{image_2}} You can switch up the greens in the Christmas salad. Instead of mixed greens, try kale or baby spinach. These greens add a nice texture and flavor. If you want to go lighter, use shredded cabbage or iceberg lettuce. These alternatives can make your salad crunchy and fresh. Nuts and cheese can change the taste of your salad. Walnuts give a rich flavor, but pecans or almonds work well too. Toast the nuts for extra crunch and flavor. For cheese, feta is great, but goat cheese or blue cheese can add a unique twist. Try different combos to find your favorite mix. Fruits bring sweetness and color to your salad. Pomegranate seeds add a festive touch, but you can use cranberries or mandarin oranges for variety. Sliced apples or pears also work well. For seasonal flavors, add spices like cinnamon or nutmeg to the dressing. These small changes can make your Christmas salad even more delightful. For the full recipe, check out the complete details above. To store your Christmas salad leftovers, place them in an airtight container. Make sure to keep the salad dressing separate. This helps keep the greens crisp. You can refrigerate the container for up to three days. If you mix the salad with the dressing, it may get soggy. To keep your salad ingredients fresh, store them properly. Wrap mixed greens in a damp paper towel. Place them in a plastic bag or container. Keep cucumbers and cherry tomatoes in the fridge, but not in the crisper drawer. Pomegranate seeds and walnuts should stay in airtight containers to prevent them from losing taste. Most salad ingredients taste best when fresh. Mixed greens last about three days. Cherry tomatoes and cucumbers can last up to a week. Pomegranate seeds and walnuts can stay fresh for around two weeks. Feta cheese keeps well for about a week after opening. For the best taste, enjoy your Christmas salad soon after making it. Check out the Full Recipe for more tips on creating this delightful dish! Yes, you can make the honey mustard dressing ahead. Mix it and store it in the fridge. This saves time when you want to serve the salad. The flavors will blend and taste even better after a few hours. Just shake or whisk it again before you pour it on the salad. If you want a swap for feta cheese, try goat cheese or ricotta. Both add creaminess and flavor. You can also use a dairy-free option like a nut cheese. These choices keep the salad tasty and satisfying. Yes, this salad works well for meal prep! Store the salad and dressing separately. Keep the greens fresh by adding them just before serving. This way, they stay crisp and colorful. You can enjoy this salad throughout the week without losing flavor. Try the full recipe for great results! This blog post covered how to make a fresh salad with honey mustard dressing. We started with mixed greens and explored add-ins, toppings, and dressing components. You learned step-by-step instructions for salad prep, dressing mixing, and combining everything for serving. Tips included ways to keep ingredients fresh and stylish presentation ideas. In conclusion, enjoy experimenting with flavors and ingredients. Your creativity can make each salad unique. Remember, fresh ingredients make the best taste. Happy salad-making!
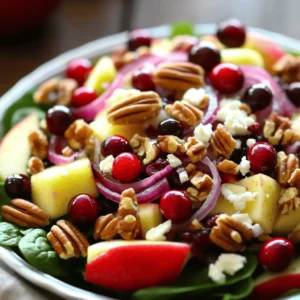
    Christmas Salad with Honey Mustard Delightful Recipe
  • To make this Apple Cranberry Pecan Salad, you will need: - 2 medium-sized apples (Granny Smith or Honeycrisp), diced - 1 cup fresh cranberries (or dried if out of season) - 1/2 cup pecans, roughly chopped - 1/4 cup red onion, thinly sliced - 1/4 cup feta cheese, crumbled (optional for creaminess) - 2 cups fresh spinach or mixed greens - 3 tablespoons olive oil - 2 tablespoons apple cider vinegar - 1 tablespoon honey or maple syrup - Salt and pepper to taste You can add a few optional items to enhance your salad. Consider adding: - Sliced avocado for creaminess - Chopped celery for crunch - Dried figs for sweetness - A sprinkle of sunflower seeds for extra protein This salad packs a punch of nutrition. Here are some benefits of the main ingredients: - Apples provide fiber and vitamin C, supporting heart health. - Cranberries are rich in antioxidants, promoting good health. - Pecans add healthy fats and protein for energy. - Spinach is loaded with vitamins A and K, boosting immunity. - Olive oil offers healthy monounsaturated fats, good for your heart. - Honey or maple syrup adds natural sweetness with antioxidants. This combination makes the Apple Cranberry Pecan Salad not just tasty, but also a smart choice for your meals. For the full recipe, check out the section above. First, gather your fresh ingredients. Aim for two medium apples, like Granny Smith or Honeycrisp. Next, grab a cup of fresh cranberries, or dried ones if they’re out of season. You’ll also need half a cup of pecans, chopped roughly, and a quarter cup of red onion, sliced thin. If you want a creamy touch, add a quarter cup of crumbled feta cheese. Don’t forget two cups of fresh spinach or mixed greens. In a large mixing bowl, combine the diced apples, cranberries, chopped pecans, red onion, and feta cheese if you chose to use it. This mix brings together sweet, tart, and crunchy flavors, making it a delight! Now, let’s make the dressing. In a small bowl, whisk together three tablespoons of olive oil. Add two tablespoons of apple cider vinegar for a tangy kick. Then, mix in one tablespoon of honey or maple syrup for sweetness. Finally, sprinkle in salt and pepper to taste. Whisk until it’s smooth and well combined. This dressing will tie all the salad ingredients together. Drizzle the dressing over your apple and cranberry mixture. Gently toss the salad to coat all the ingredients. Be careful not to mash the apples or greens. After everything is mixed, add the fresh spinach or mixed greens. Toss lightly again to combine. This adds a lovely green color and extra nutrients. Taste your salad and adjust the seasoning if needed. If you want it sweeter, add more honey. If it needs more flavor, add a pinch of salt or pepper. Serve immediately for a fresh and crisp taste. You can also chill it for about 15 minutes to let the flavors meld. For a pretty presentation, serve in a large bowl and top with extra pecans and cranberries. Enjoy your Apple Cranberry Pecan Delight! When you choose apples, pick ones that feel firm and smell sweet. Granny Smith and Honeycrisp are great options. For cranberries, look for bright, shiny berries. They should be plump, not shriveled. If fresh cranberries are hard to find, dried cranberries work too. Select pecans that are crunchy and smell nutty. The red onion should be firm and have vibrant color. Fresh spinach or mixed greens should look crisp and green. This salad shines when served fresh. You can present it in a large bowl for sharing. For a festive touch, sprinkle extra pecans and whole cranberries on top. You might also add crumbled feta cheese for creaminess. Serve it as a side dish at dinner or as a light lunch. Pair it with grilled chicken or fish for a full meal. Avoid using overripe apples; they make the salad mushy. Don’t skip the dressing; it brings all the flavors together. When mixing, be gentle to keep the greens crisp. If you prepare the salad ahead of time, the greens can wilt. Always taste it before serving to adjust the seasoning. You want the right balance of sweet and tangy. For the full recipe, check out the Apple Cranberry Pecan Delight. {{image_2}} You can swap the apples for pears. Pears add a sweet touch to your salad. If you can’t find fresh cranberries, use dried ones. Dried cranberries work well and stay sweet. You can also replace pecans with walnuts or almonds. Both nuts give a nice crunch and flavor. In fall, add roasted butternut squash for warmth. It pairs nicely with apples and cranberries. In spring or summer, use juicy strawberries or peaches instead of apples. These fruits bring a fresh taste. Try adding herbs like mint or basil for a new twist. They add bright flavors and make the salad pop. This salad is easy to make vegan. Just leave out the feta cheese, or use a vegan cheese. You can also skip honey and use maple syrup for sweetness. For gluten-free options, this salad is already safe. Just check that your dressing ingredients are gluten-free. Enjoy this salad with any meal while keeping it healthy! You can find the full recipe for more details on how to make it. To keep your apple cranberry pecan salad fresh, place it in an airtight container. This helps prevent the greens from wilting. If you have dressing left, store it separately. This way, your salad stays crisp and tasty. You can store the salad in the fridge for up to three days. After that, the apples may brown, and the greens lose their crunch. Always check for freshness before eating leftovers. If the salad looks or smells off, it’s best to discard it. I do not recommend freezing this salad. Freezing affects the texture of the apples and greens. However, you can freeze the dressing. Just store it in a small container or jar. When you're ready to use it, thaw it in the fridge overnight. For the full recipe, check out the recipe section. This salad stays fresh for about three days in the fridge. The apples may brown, but they still taste great. Store it in an airtight container to keep it crisp. Yes, you can prep this salad ahead. Keep the dressing separate until you are ready to eat. Mix everything right before serving for the best taste and texture. This salad pairs well with grilled chicken or fish. It also goes great with a warm soup. For a full meal, serve it with whole-grain bread or a hearty grain dish. Check out the Full Recipe for more ideas! This blog post shared key ingredients for a tasty Apple Cranberry Pecan Salad. We covered the steps to prepare, mix, and serve it well. I discussed tips to pick fresh items, avoid common mistakes, and offered variations for different diets. Storing leftovers is simple, and I provided answers to common questions. Enjoy making this healthy salad often. It’s easy and fun to share with others. Dive into the flavors and get creative with your salad!
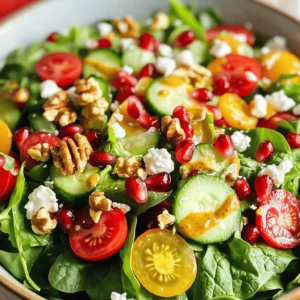
    Apple Cranberry Pecan Salad Nutritious and Flavorful

Posts pagination

← Newer 1 … 8 9 10 11 12 … 28 Older →

Footer

↑ back to top

More information

  • Dinner
  • Drinks
  • Appetizers
  • Dessert
  • About
  • Contact Us

    Our Policies

    • Privacy Policy
    • Cookie Policy
    • Copyright Policy
    • Disclaimer
    • GDPR Policy
    • Terms Of Us

    Copyright © 2024 My Saved Recipe