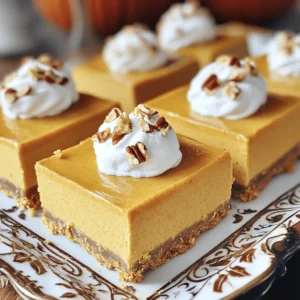
- No-Bake Pumpkin Cheesecake Bars Easy and Delicious Treat
- Pumpkin Spice Latte Cookies Irresistible Fall Treat
- Pumpkin Chocolate Chip Cookies Irresistible Fall Treat
- Copycat Starbucks Pumpkin Syrup Simple and Tasty Recipe
- Keto Veggie Sticks with Ranch for Crunchy Snack
- Cheeseburger Sliders Tasty and Easy Recipe Guide
- Starbucks Pumpkin Cream Cold Foam Tasty Fall Treat
- Cheeseburger Game Day Sliders Irresistible Flavor Treat
- Pumpkin Streusel Muffins Irresistible Fall Treat
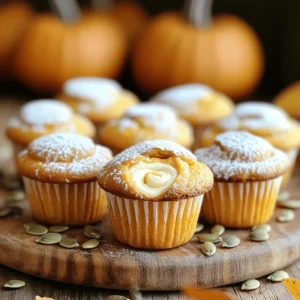
- Pumpkin Cheesecake Muffins Delightful Flavor Treat
- Skinny Pumpkin Spice Coffee Creamer Flavorful Delight
- Pumpkin Spice Cookie Bites Irresistible Fall Treat
- Vegan Pumpkin Spice Cookies Tasty Fall Delight
- Copycat Big Mac Sliders Tasty and Easy to Make
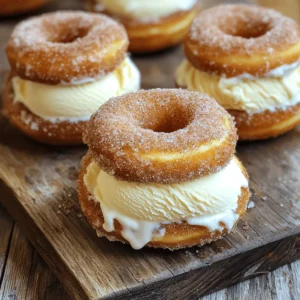
- Apple Cider Donut Ice Cream Sandwiches Tasty Delight
- Flavorful Pickle de Gallo Pico Dip Recipe to Enjoy
- Pumpkin Spice Cold Foam Floats Delightful and Easy Recipe
- Cider Braised Short Rib Street Tacos Flavor Explosion
- Loaded Mac and Cheese Football Cups Flavorful Game Treat
- Roasted Beet and Goat Cheese Butter Board Delight
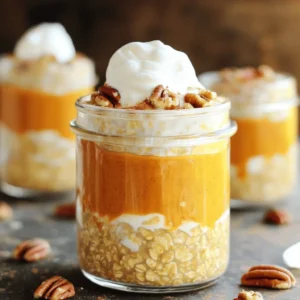
- Brown Sugar Pumpkin Pie Overnight Oats Delight
- Tailgate Buffalo Chicken Sushi Rolls Flavorful Delight
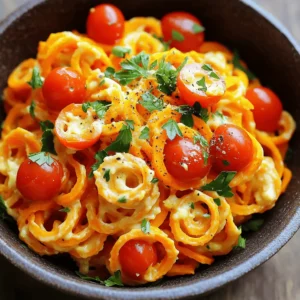
- Spiralized Sweet Potato Carbonara Flavorful Delight
- Pickle de Gallo Pico Dip Flavorful and Fresh Delight
- Pumpkin Spice Cold Foam Floats Delightful Seasonal Treat
- Cider Braised Short Rib Street Tacos Flavor Burst
- Loaded Mac and Cheese Football Cups Super Bowl Snack
- Roasted Beet and Goat Cheese Butter Board Delight
- Brown Sugar Pumpkin Pie Overnight Oats Delight
- Tailgate Buffalo Chicken Sushi Rolls Fun and Flavorful Dish
- Spiralized Sweet Potato Carbonara Creamy and Delicious
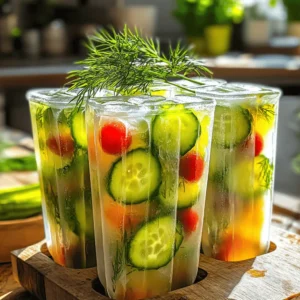
- Pickle Brine Bloody Mary Popsicles Refreshing Summer Treat
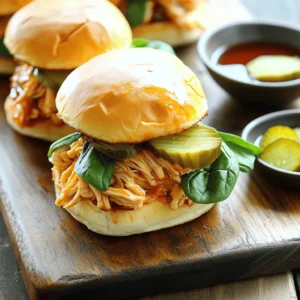
- Cherry Cola Chicken Sliders Flavorful and Easy Recipe
- Caramelized Corn and Cherry Salsa Flavorful Delight
- Dill Pickle Potato Salad Easy and Flavorful Recipe
- Cherry Balsamic Burrata Crostini Tasty Easy Treat
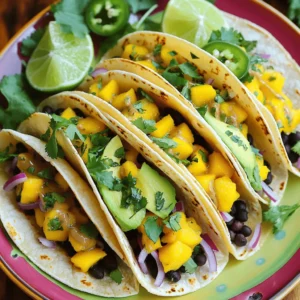
- Mango Pickle Tacos Flavorful and Fresh Delight
- Cream Soda Donut Holes Delightful Dessert Recipe
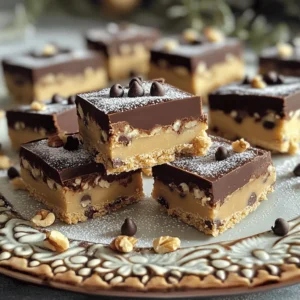
- Cookie Dough Bars Delightful Recipe for a Sweet Treat
- Miso Cherry Glazed Grilled Salmon Flavorful Delight
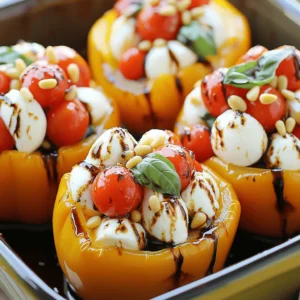
- Caprese Stuffed Peppers Flavorful and Easy Recipe
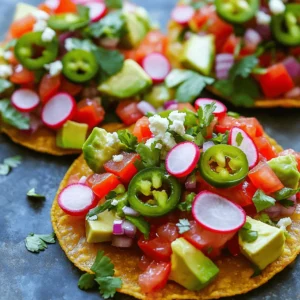
- Pickle De Gallo Tostadas Fresh and Flavorful Recipe


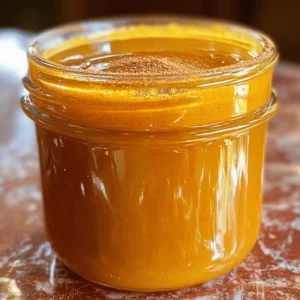


![To make the best skinny pumpkin spice coffee creamer, you need a few key items. Here’s what you’ll need: - 1 cup unsweetened almond milk - 1/2 cup canned pumpkin puree - 1/4 cup pure maple syrup - 1 teaspoon vanilla extract - 1 teaspoon pumpkin pie spice - 1/4 teaspoon ground cinnamon - A pinch of salt These ingredients blend to create a creamy and flavorful treat. The almond milk keeps it light, while the pumpkin adds a cozy autumn vibe. You can tweak this recipe to match your tastes. Here are some optional ingredients to consider: - A splash of coffee extract for a stronger coffee flavor - A touch of nutmeg for extra warmth - Sweeteners like agave syrup or honey if you prefer - A bit of cocoa powder for a chocolate twist Feel free to mix and match. This way, you can enjoy a unique flavor each time. This creamer is not just tasty; it’s also a smart choice. Here’s a quick look at the nutrition per serving: - Calories: About 50 - Sugar: Roughly 8 grams - Fat: Less than 2 grams - Carbohydrates: Around 10 grams This information makes it easier to enjoy your coffee without guilt. You can savor the flavors and keep track of what you eat! Making skinny pumpkin spice coffee creamer is easy and fun. You only need a few simple steps. Start by gathering your ingredients. Then, heat them together to create a creamy delight. Follow the steps carefully for the best results. 1. In a medium saucepan, pour in 1 cup of unsweetened almond milk and 1/2 cup of canned pumpkin puree. 2. Turn the heat to medium. Whisk the mixture until it is smooth and well mixed. 3. Add 1/4 cup of pure maple syrup, 1 teaspoon of vanilla extract, and 1 teaspoon of pumpkin pie spice. 4. Sprinkle in 1/4 teaspoon of ground cinnamon and a pinch of salt. Keep whisking until all is warm, about 5 minutes. 5. Remove the saucepan from the heat. Let the mix cool slightly for a few minutes. 6. Use a fine mesh strainer to pour the creamer into a clean jar. This removes lumps and gives you a smooth texture. 7. Cool the creamer fully before sealing the jar. Store it in the fridge for up to 7 days. Shake well before each use. To get a silky smooth creamer, whisk well as you heat. This helps blend the pumpkin and milk. If you notice lumps, strain the mixture like I showed you. This will keep your creamer velvety. Also, be sure not to let it boil. Boiling can change the texture, making it grainy. Enjoy your creamy, pumpkin-spiced treat in your coffee! For the complete recipe, see the Full Recipe section. To make my skinny pumpkin spice coffee creamer shine, I focus on using fresh spices. Freshly ground cinnamon packs a rich aroma. You can also try adding a dash of nutmeg or ginger for depth. If you want a sweeter touch, use a little extra maple syrup. Just remember to keep it balanced. I love this creamer in my morning brew. Just add a few tablespoons to your coffee for a cozy feel. It also works well in lattes or even iced coffee. If you're feeling adventurous, drizzle some over whipped cream on top. This adds a fun twist to your favorite drinks. Homemade is always better than store-bought. Many store creamers contain hidden sugars and additives. With my recipe, you control the ingredients. You can even swap almond milk for oat milk for a creamier texture. This way, you enjoy a tasty drink that is also good for you. Check out the Full Recipe for more details on making this delicious creamer. {{image_2}} If you want a dairy-free creamer, almond milk is a great start. You can also use coconut milk for a richer taste. Oat milk works well too, giving a creamy texture. Each option brings its own flavor, so choose what you like best. For a sugar-free version, swap the maple syrup with a sugar-free sweetener. Stevia or erythritol can work well without adding calories. Just adjust the amount to taste, as these sweeteners can be much sweeter than regular sugar. You can play with flavors for different seasons. For Christmas, add a hint of peppermint extract. In summer, try mixing in some vanilla or even a splash of cold brew coffee. These small tweaks can keep your creamer exciting all year round. Feel free to check the Full Recipe to explore even more flavor options! To keep your skinny pumpkin spice coffee creamer fresh, use a clean jar. A glass jar works best. Make sure to let the creamer cool completely before sealing. This step helps to avoid extra moisture that can cause spoilage. Always shake well before pouring to mix up any settled ingredients. Homemade creamer lasts about 7 days in the fridge. Use it within this time for the best taste. If you notice any changes in smell or color, it’s best to toss it out. Before using, give it a good shake as flavors can separate. Enjoy it in your coffee, tea, or even with desserts! You can freeze your creamer for longer storage. Pour it into ice cube trays for easy use. Once frozen, transfer the cubes to a freezer bag. They can last up to 3 months. To use, simply thaw a few cubes in the fridge overnight. This way, you always have your favorite flavor ready! Check the [Full Recipe] for more details on making this delicious creamer. To make this creamer dairy-free, just use unsweetened almond milk as the base. Almond milk gives a creamy texture without dairy. You can also try coconut milk for a richer taste. Just follow the [Full Recipe] for the right mix of flavors. Yes, you can swap maple syrup for other sweeteners. You might try agave syrup or honey. If you want it sugar-free, use stevia or monk fruit. Keep in mind that each sweetener has a different taste. Adjust the amount to find your perfect sweetness. Homemade creamer lasts up to seven days in the fridge. Store it in a clean jar with a tight lid. Always shake well before using it, as ingredients may settle. If you see any changes in smell or texture, it’s best to toss it. Yes, this recipe is vegan-friendly! It uses almond milk and no animal products. The pumpkin puree and spices add a rich flavor without dairy. Enjoy this cozy treat knowing it fits into a vegan diet. This blog post covered how to make skinny pumpkin spice coffee creamer. We discussed the main and optional ingredients, along with their nutritional info. I also shared step-by-step instructions, tips for smooth texture, and ways to enhance flavor. You can customize your creamer with dairy-free and sugar-free options. Plus, I explained how to store it properly and answered common questions. Enjoy your coffee with this tasty and healthy creamer, and feel free to experiment with new flavors!](https://mysavedrecipe.com/wp-content/uploads/2025/07/3f0e729b-5653-45f7-aa4f-aa6d6e475fb5-300x300.webp)
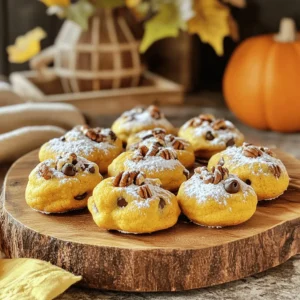
![To make Vegan Pumpkin Spice Cookies, gather these key ingredients: - 1 cup canned pumpkin puree - 1/2 cup coconut sugar - 1/3 cup maple syrup - 1/4 cup coconut oil, melted - 1 teaspoon vanilla extract - 1 1/2 cups whole wheat flour - 1 teaspoon baking soda - 1 teaspoon baking powder - 1 teaspoon pumpkin pie spice - 1/2 teaspoon cinnamon - 1/4 teaspoon nutmeg - 1/4 teaspoon salt - 1/2 cup vegan chocolate chips (optional) Using fresh pumpkin puree has some benefits. Fresh puree has a rich flavor and bright color. It also packs more nutrients than canned. Yet, canned pumpkin is easy and saves time. It offers a consistent texture and taste. If you want to substitute ingredients, here are some options: - Coconut sugar can be swapped for brown sugar. - Maple syrup works well with agave nectar. - Coconut oil can be replaced with vegetable oil or vegan butter. - Whole wheat flour can be substituted with all-purpose flour or gluten-free flour. Feel free to get creative with your ingredients. This flexibility will help you make these cookies your own. For the full recipe, check the section above. To make these vegan pumpkin spice cookies, start by mixing the wet ingredients. In a large bowl, combine: - 1 cup canned pumpkin puree - 1/2 cup coconut sugar - 1/3 cup maple syrup - 1/4 cup melted coconut oil - 1 teaspoon vanilla extract Stir this mixture well until it is smooth. Next, in another bowl, whisk together the dry ingredients. Combine: - 1 1/2 cups whole wheat flour - 1 teaspoon baking soda - 1 teaspoon baking powder - 1 teaspoon pumpkin pie spice - 1/2 teaspoon cinnamon - 1/4 teaspoon nutmeg - 1/4 teaspoon salt Once mixed, slowly add the dry ingredients to the wet mixture. Stir until just combined. You want the cookie dough to be thick but not dry. If it feels too sticky, add a bit more flour. Folding in chocolate chips is optional, but I highly recommend it for extra flavor. Add 1/2 cup vegan chocolate chips, if you like, and gently fold them into your dough. Preheat your oven to 350°F (175°C) before baking. Line a baking sheet with parchment paper to prevent sticking. Using a tablespoon, scoop out your cookie dough. Place the dough on the sheet, leaving space between each scoop. The cookies will spread while baking. Bake your cookies for 12-15 minutes or until the edges are lightly golden. To check if they are done, look for a firm edge and a soft center. Once baked, let the cookies cool on the baking sheet for about 5 minutes. This step helps them set. After that, transfer them to a wire rack to cool completely. This way, they will have the perfect texture! To bake the best vegan pumpkin spice cookies, avoid these common mistakes: - Overmixing the batter: This can lead to tough cookies. Mix until just combined. - Not measuring ingredients correctly: Use proper measuring cups to ensure accuracy. - Skipping the cooling time: Let the cookies cool on the sheet for five minutes. This helps them set. Here are some recommended tools for your baking: - Mixing bowls: Use large bowls for easy mixing. - Parchment paper: This prevents sticking and makes cleanup easy. - Cookie scoop: A scoop helps make uniform cookie shapes. Enhancing flavor is simple! Try these tips: - Use fresh spices: They add more flavor than old ones. - Add vanilla extract: It adds depth and richness to your cookies. - Experiment with extracts: Almond or maple extract can boost the flavor. Pair your cookies with these delicious treats: - Non-dairy milk: Almond or oat milk complements the cookies well. - Coffee or tea: A warm drink enhances the cozy fall vibe. - Dairy-free ice cream: Serve a scoop beside the cookies for a special dessert. For a lovely presentation: - Arrange cookies on a decorative plate: This makes them look inviting. - Sprinkle extra pumpkin pie spice on top: It adds a nice touch. - Serve with a side of fresh fruit: This adds color and freshness to your plate. Try these tips, and you'll have a delightful cookie experience! For the full recipe, check out the [Full Recipe]. {{image_2}} You can easily change the flavor of your vegan pumpkin spice cookies. Try different spices or extracts for a new twist. Instead of pumpkin pie spice, you can use ginger or allspice. This change will give your cookies a unique taste. You can also add a splash of almond or orange extract for a fresh flavor. Adding nuts or dried fruits can enhance your cookie dough. Walnuts or pecans add a nice crunch. Dried cranberries or raisins bring a sweet, chewy texture. Mix in 1/2 cup of your chosen nuts or fruits for extra flavor and fun. For gluten-free options, swap out whole wheat flour. Use almond flour or oat flour instead. These flours work well and keep the cookies soft. You can also try a gluten-free flour blend for an easy switch. If you want lower-sugar cookies, reduce the coconut sugar. Use just 1/4 cup instead of 1/2 cup. You can also add mashed bananas or applesauce for natural sweetness. This keeps your cookies tasty without adding too much sugar. To keep your vegan pumpkin spice cookies fresh, store them in an airtight container. This helps keep the moisture in and prevents them from getting stale. You can store them at room temperature for about a week. If you prefer, you can also refrigerate the cookies. This will extend their shelf life for up to two weeks. However, the texture may change slightly. If you want the best taste, I suggest room temperature storage. Freezing the cookies is a great way to enjoy them later. To freeze, first allow the cookies to cool completely. Then, place them in a single layer on a baking sheet. Freeze them for about an hour. After that, transfer the cookies to a freezer-safe bag or container. Make sure to remove excess air to prevent freezer burn. They can last for up to three months in the freezer. When you want to enjoy them again, thaw the cookies in the refrigerator overnight. This helps maintain their soft texture. You can also warm them in the oven for a few minutes before serving. This makes them taste freshly baked! Can I use a different sweetener? Yes, you can use other sweeteners. Agave nectar or brown sugar can work. Just keep the ratio the same. This will help your cookies stay sweet and chewy. How long will the cookies last? These cookies can last about a week. Store them in an airtight container at room temperature. You can also freeze them for longer storage. Can I make these cookies without pumpkin? Yes, you can! If you want to skip the pumpkin, try using mashed bananas or applesauce instead. This will change the flavor but still keep the cookies moist. What can replace coconut oil in the recipe? You can use vegetable oil, canola oil, or even vegan butter. Each option will give a slightly different taste but will still work well. Is there an alternative for maple syrup? Yes, you can use agave syrup or brown rice syrup. Both options have a similar sweetness and will help keep your cookies moist. In this blog post, we covered how to create delicious vegan pumpkin spice cookies. We discussed key ingredients, from fresh versus canned pumpkin puree to substitutes for common ingredients. The step-by-step instructions helped you mix, bake, and cool your cookies perfectly. Remember to avoid common mistakes and consider flavor variations. Finally, proper storage keeps your cookies fresh. With these tips, you can enjoy tasty treats that impress. Happy baking!](https://mysavedrecipe.com/wp-content/uploads/2025/07/c270734a-c8e2-4842-8631-0f9ab059e0c7-300x300.webp)

. {{image_2}} You can swap out the short ribs for other meats. Try pork shoulder or chicken thighs. Both options add their own twist to the dish. If you want to keep it plant-based, use jackfruit or mushrooms. They soak up flavor well and taste great. When it comes to tortillas, corn is the classic choice. But you can also use flour tortillas for a softer bite. Consider lettuce wraps for a low-carb option. They bring a fresh crunch to your tacos. Adding spices can really boost flavor. Try smoked chipotle for heat, or cinnamon for warmth. A pinch of cayenne can add a kick. Don't be afraid to experiment with what you have on hand. Toppings can change your taco game completely. Fresh avocado adds creaminess, while mango salsa gives sweetness. You can also try pickled onions for tang. Each topping adds its special flair. For gluten-free tacos, use corn tortillas. They are naturally gluten-free and perfect for all diets. Just check the label to be sure. If you want to keep it dairy-free, skip the queso fresco. Instead, use avocado or a dairy-free cheese. You can also top with fresh herbs for flavor. Both options keep your tacos tasty and satisfying. For the full recipe, check the detailed cooking process. It will guide you through each step to create these delicious tacos. How long do Cider Braised Short Rib Street Tacos last in the fridge? These tacos stay fresh for about 3 days in the fridge. Store them in an airtight container. Can I make the short ribs ahead of time? Yes, you can make the short ribs a day ahead. Just reheat gently before serving. What type of cider is best for cooking? I recommend using a dry apple cider. It adds great depth without being too sweet. Can I use a slow cooker for this recipe? Absolutely! A slow cooker works well. Cook on low for 6 to 8 hours for tender meat. What's the benefit of braising over other cooking methods? Braising locks in flavor and moisture. It makes tougher cuts tender and juicy, perfect for tacos. What are the best sides to pair with these tacos? You can serve these tacos with Mexican rice and black beans. A fresh salad also works well. How many tacos per person should I plan for? Plan for 2 to 3 tacos per person. It ensures everyone has enough to enjoy! Cider Braised Short Rib Street Tacos pack a big flavor punch. This dish combines tender beef short ribs with sweet apple cider. Ingredients: - 2 lbs beef short ribs - 2 cups apple cider - 1 large onion, chopped - 4 cloves garlic, minced - 2 teaspoons smoked paprika - 1 teaspoon ground cumin - 1 teaspoon chili powder - 2 tablespoons olive oil - Salt and pepper to taste - 12 small corn tortillas - Fresh cilantro, chopped (for garnish) - 1 cup diced apples (for topping) - 1/2 cup crumbled queso fresco (for topping) - Lime wedges (for serving) Cooking Process: 1. Start by seasoning the short ribs with salt and pepper. 2. Sear them in olive oil until brown. 3. Sauté onion and garlic in the same pot. 4. Stir in spices and apple cider to deglaze. 5. Add short ribs back and braise for 2.5 to 3 hours. 6. Shred the meat and warm the tortillas. 7. Assemble tacos with your favorite toppings. Prep Time: 15 minutes Total Time: 3 hours 15 minutes Servings: 12 tacos For a detailed cooking process and tips, check the Full Recipe. This blog post shared a tasty recipe for Cider Braised Short Rib Street Tacos. We covered ingredients, step-by-step cooking, tips, variations, and common questions. Enjoying these tacos will impress any guest. You can change ingredients for your taste or dietary needs. Store leftovers well and reheat for later. Cooking these tacos is fun and easy; they are worth the effort. Try making them today for a flavorful meal!](https://mysavedrecipe.com/wp-content/uploads/2025/07/6d1dc40a-5c36-42a3-851a-66f19137a207-300x300.webp)


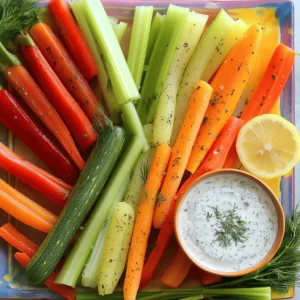
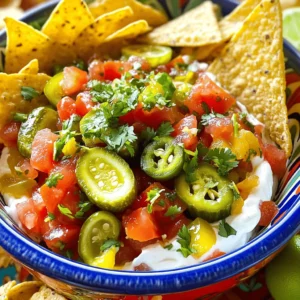
![- 1 cup diced pickles (dill or sweet) - 1 medium tomato, diced - 1/2 red onion, finely chopped - 1-2 jalapeños, finely minced (adjust for heat) For this dip, I choose pickles based on my mood. Dill gives a tangy kick, while sweet adds a nice contrast. The tomatoes add juiciness and color. I love using red onions for their mild and sweet taste. Minced jalapeños can turn up the heat. If you like it spicy, add more! - 1 cup cream cheese, softened - 1 cup shredded cheddar cheese Cream cheese is the base of this dip. It makes it smooth and rich. I always let it soften at room temperature. It blends better that way. Shredded cheddar adds flavor and a nice finish. It also looks pretty on top. - 1/4 cup fresh cilantro, chopped - Juice of 1 lime - 1/2 teaspoon garlic powder - Salt and pepper to taste Fresh cilantro brings a burst of flavor. Lime juice adds brightness and balances the dip. Garlic powder gives it a nice depth. Don't forget salt and pepper; they make all the flavors pop! For the full recipe, check out the details above. Enjoy making this dip for your next gathering! To start, gather your fresh ingredients. You will need diced pickles, a tomato, red onion, jalapeños, and cilantro. In a large mixing bowl, combine the diced pickles, tomato, red onion, jalapeños, and cilantro. This mix is colorful and full of flavor. Next, squeeze the juice of one lime over the mixture. Add garlic powder, salt, and pepper. Stir well! This step is key as it ties all the flavors together. Now, let’s incorporate the cream cheese. In a separate bowl, whisk the softened cream cheese until it’s smooth. This makes mixing easier. Gradually fold the pickle mixture into the cream cheese. Mix gently until everything combines well. You want a nice, creamy dip. Once mixed, transfer your dip to a serving dish. To finish it off, sprinkle shredded cheddar cheese on top. This adds a lovely touch and extra flavor. Chill the dip in the refrigerator for at least 30 minutes. This allows the flavors to meld together. It’s worth the wait! When ready to serve, enjoy it cold. This dip pairs well with tortilla chips, crackers, or vegetable sticks. Each bite is a burst of fresh flavor! For the full recipe, check out the details above. To make your Pickle de Gallo Pico Dip shine, you can adjust the heat level easily. If you like it spicy, add more jalapeños. For a milder dip, use just one or skip them. Remember, you can always taste as you go! Fresh herbs enhance the taste too. I love using cilantro, but you can try parsley or green onions for a different twist. They add a burst of flavor that makes the dip pop. When it comes to dippers, the options are endless. Tortilla chips are a classic choice. They add crunch and flavor. You can also use crackers or veggie sticks like celery and carrots. Each dipper brings its unique taste and texture! This dip is perfect for many occasions. Serve it at parties, game nights, or barbecues. It also makes a great snack for movie nights. Any time you want a tasty treat, this dip fits right in. Preparing your dip in advance is a great idea. You can mix the ingredients a day before serving. Just keep it in the fridge. This helps the flavors blend together nicely. For storage, use an airtight container. This keeps your dip fresh. It’s best to eat it within three to four days. If you notice any changes in smell or appearance, it’s time to toss it. If you’re ready to make your own Pickle de Gallo Pico Dip, check out the [Full Recipe]. Enjoy creating this flavorful and fresh delight! {{image_2}} For those with dietary needs, there are easy changes to make. - Gluten-free adaptations: This dip is naturally gluten-free. Just ensure all ingredients, like the cream cheese, are labeled gluten-free. Most pickles and spices fit this need too. - Vegan alternatives: You can use plant-based cream cheese to make it vegan. Look for brands that taste creamy and rich. You can also try adding mashed avocado for a twist. It keeps the dip smooth and adds healthy fats. You can change the flavors in this dip to fit your taste. - Adding fruits or spices: Try mixing in some diced mango or pineapple for a sweet kick. These fruits pair well with the tangy pickles. Also, consider adding a pinch of smoked paprika or cumin. These spices will give it a warm depth. - Different cheese combinations: While cheddar adds nice flavor, you can try other cheeses too. Creamy goat cheese or spicy pepper jack can bring new tastes. Experiment and find what you like best! For more detailed steps and tips, check the Full Recipe. To keep your Pickle de Gallo Pico Dip fresh, store it in the fridge. Use an airtight container to seal in the flavors. I recommend glass or plastic containers with tight lids. This helps prevent the dip from absorbing any unwanted smells from the fridge. Make sure the dip is cool before sealing it. This way, it stays fresh for longer. To keep the dip tasting great, use it within three to five days. Always check for signs of spoilage. If you see any mold or notice an off smell, it’s best to toss it. Freshness is key, and you want to enjoy every bite. When serving, only take out what you need. This keeps the rest of the dip safe and tasty. For the best flavor, serve it chilled. If you want a non-dairy option, try using silken tofu. It has a smooth texture and is easy to blend. Another great choice is cashew cream. Just soak cashews in water, then blend until smooth. For a cream cheese substitute, consider using Greek yogurt. It adds creaminess and a slight tang. You can also try ricotta cheese for a lighter option. Both work well in the dip, keeping it tasty and rich. Yes, you can freeze Pickle de Gallo Pico Dip, but there are some tips. First, place the dip in a container that seals tightly. Leave some space at the top, as it may expand when frozen. When you thaw it, the texture may change a bit. The cream cheese can become grainy. But you can mix it well after thawing to improve the texture. The flavor will still be good, so it's worth it if you have leftovers. You can store Pickle de Gallo Pico Dip in the fridge for about 3 to 5 days. To keep it fresh, place it in an airtight container. This limits air exposure, which can lead to spoilage. If you see any changes in color or smell, it's best to toss it. Always give it a quick taste before serving again, just to make sure it's still good. Pickle de Gallo Pico Dip is a fun, tasty treat. We combined fresh pickles, tomatoes, and cream cheese for flavor. Enhancing with cilantro and lime juice adds a zesty twist. Remember to chill it before serving for the best taste. You can adjust the heat with jalapeños based on your preference. Also, try different cheeses or even fruits for new flavors. Follow these tips to store it right and keep it fresh. Enjoy making and sharing this dip at your next party or snack time!](https://mysavedrecipe.com/wp-content/uploads/2025/07/2a171727-d4f3-423a-85ef-242b2fcb505f-300x300.webp)
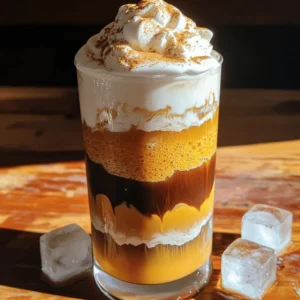
![- Cold coffee or cold brew - Milk options: dairy or non-dairy - Heavy cream - Pumpkin puree - Maple syrup - Vanilla extract - Pumpkin spice - Ice cubes Gather these ingredients to create your own pumpkin spice cold foam float. The base starts with cold coffee, which can be brewed or store-bought. You can choose any milk you prefer, whether dairy or non-dairy. Heavy cream adds richness to the foam. Next, you'll need pumpkin puree. This ingredient gives the float its signature flavor. Maple syrup adds sweetness, while vanilla extract enhances the taste. Pumpkin spice, of course, is essential for that warm, cozy flavor we all love. Finally, ice cubes keep your drink cold and refreshing. Using this list, you can easily whip up a delicious drink. Once you have everything ready, you can check the [Full Recipe] for step-by-step instructions. Enjoy crafting this delightful treat for yourself or to share! To make your cold coffee, you can brew your own or use cold brew coffee. Brew a strong cup of your favorite coffee. Let it chill in the fridge until it’s cold. If you want, you can also buy cold brew coffee from the store. Fill a tall glass halfway with ice cubes. Then, pour the cold coffee over the ice. This adds a refreshing chill to your drink. Now, let’s make the pumpkin spice cold foam. In a mixing bowl, combine these ingredients: - 1/2 cup milk of your choice (dairy or non-dairy) - 1/4 cup heavy cream - 2 tablespoons pumpkin puree - 1 tablespoon maple syrup - 1 teaspoon vanilla extract - 1/2 teaspoon pumpkin spice Whisk or use a milk frother to mix them until frothy. The foam should be light and airy. If you want it frothier, keep whisking. To assemble your float, slowly pour the pumpkin spice cold foam over the cold coffee. This way, you can see the two layers. It looks pretty and tastes great! For the final touch, sprinkle some extra pumpkin spice on top. This gives it a nice flavor and makes it look festive. Enjoy this delightful treat right away! Using the right tools helps you achieve perfect foam. A good milk frother works best. If you don’t have one, a whisk can also do the job, but it takes more effort. Make sure your milk is cold before you start frothing. Avoid over-frothing. If you whip the milk too much, it can become too stiff. You want it creamy, not dry. Also, don’t forget to clean your frother right after use. This keeps it in great shape for your next float. Pouring the foam correctly is key to a great float. Start by tilting your glass slightly. This helps create a smooth layer. Pour the cold foam slowly over the back of a spoon. This gentle method keeps the layers separate and beautiful. For a striking presentation, use a clear glass. You’ll want to show off those rich layers. A sprinkle of extra pumpkin spice on top makes it look even more inviting. Want to jazz up your drink? You can add more spices. Try nutmeg or cinnamon for an extra kick. If you like it sweeter, a drizzle of honey or flavored syrups can do wonders. Flavored syrups like vanilla or caramel can also enhance the taste. Explore different versions of this recipe. You might find a new favorite! For the full recipe, check out the details above. {{image_2}} You can use cold brew or brewed coffee for your base. Cold brew gives a smooth taste. Brewed coffee has a bold flavor. Both work well with pumpkin spice. If you want something different, try chai or matcha. Chai adds warmth and spice. Matcha brings a grassy note. Both can give your float a fun twist. When it comes to milk, you have choices. Almond, oat, or coconut milk can be great non-dairy options. They change the flavor and texture of your float. Almond milk is light and nutty. Oat milk is creamy and sweet. Coconut milk adds a tropical touch. Each choice makes your drink unique. You can spice things up with seasonal add-ins. Nutmeg and cinnamon can enhance the flavor. Just a pinch can make a big difference. For a festive touch, think about holiday-themed items like crushed gingerbread or peppermint. These small changes can add fun to your drink and delight your taste buds. To keep your coffee and foam fresh, use these tips. Store leftover cold coffee in an airtight container in the fridge. It lasts up to three days. For the pumpkin spice cold foam, place it in a sealed jar. It will stay good for two days. If foam separates, just whisk it again before using. You may want to warm your cold coffee. Use a microwave for this. Heat it in short bursts, about 15 seconds. Stir in between to check the temperature. As for the foam, simply use it as is. If you want a hot drink, you can add the foam to warm coffee. Making preparations in advance saves you time. You can whip up the pumpkin spice cold foam a day ahead. Just store it in the fridge. When you want to serve, pour the foam on top of your cold coffee. This keeps it fresh and quick for serving. Enjoy your pumpkin spice cold foam float any time! You can find the Full Recipe to guide you through the process. If you don't have pumpkin puree, you can use butternut squash puree. It's smooth and sweet. You can also try sweet potato puree for a different flavor. If you want a lighter option, consider using applesauce. This will change the taste but still give you a nice texture. Yes, you can easily make the pumpkin spice cold foam float vegan. Use a non-dairy milk like almond, oat, or coconut milk instead of regular milk. For the heavy cream, choose a vegan alternative like coconut cream or a vegan whipping cream. This way, you can enjoy the drink without dairy. You can adjust the sweetness by adding more or less maple syrup. If you like it sweeter, add an extra tablespoon. If you prefer it less sweet, reduce the syrup. You can also use honey or agave syrup as alternatives. Taste as you go to find your perfect balance. For more details, check out the Full Recipe. This blog post covered how to make a delicious pumpkin spice cold foam float. We explored the key ingredients, including cold brew coffee, pumpkin puree, and tasty spices. I provided step-by-step instructions for preparation, assembly, and creative variations. In conclusion, this drink is simple and fun to prepare. It allows for many adjustments to fit your taste. Enjoy experimenting with different flavors and ingredients! Your perfect fall drink awaits.](https://mysavedrecipe.com/wp-content/uploads/2025/07/6eb10ad1-6c1e-40bd-9530-0e0a72cd0621-300x300.webp)

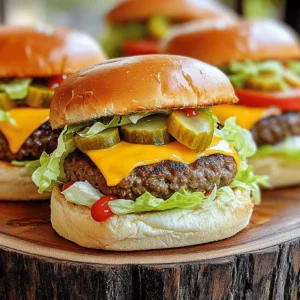
![To make Loaded Mac and Cheese Football Cups, you need these main items: - 2 cups elbow macaroni - 2 tablespoons butter - 2 tablespoons all-purpose flour - 2 cups milk - 2 cups sharp cheddar cheese, shredded - 1 cup mozzarella cheese, shredded - 1 teaspoon garlic powder - 1 teaspoon onion powder - 1/2 teaspoon smoked paprika - Salt and pepper to taste The elbow macaroni forms the base of our dish. It holds the rich cheese sauce well. The butter and flour create a roux, which helps thicken the sauce. Milk adds creaminess, while cheddar and mozzarella give that gooey texture we love. You can add extra toppings to enhance flavor and texture: - 1/2 cup cooked and crumbled turkey sausage (optional) - 1/4 cup green onions, sliced - 1/4 cup sour cream - 1/4 cup crispy fried onions (for topping) Turkey sausage adds protein and a savory bite. Green onions offer a fresh touch, and sour cream provides a creamy contrast. Crispy fried onions add crunch and flavor. Here’s what you need to cook these tasty cups: - Mini muffin tin - Cooking spray or butter for greasing The mini muffin tin shapes the cups perfectly. Greasing it ensures easy removal after baking. For the complete recipe, check the [Full Recipe]. Start by boiling a large pot of salted water. Add 2 cups of elbow macaroni to the pot. Cook the pasta according to the package directions, usually around 7-8 minutes. You want it al dente, so it holds up when baked. Drain the pasta in a colander and set it aside. This step is key. Properly cooked pasta ensures your Loaded Mac and Cheese Football Cups will be delicious. In the same pot, melt 2 tablespoons of butter over medium heat. Once melted, whisk in 2 tablespoons of all-purpose flour to create a roux. Cook this for about 1-2 minutes until it turns light golden. Next, gradually whisk in 2 cups of milk. Stir constantly until the sauce thickens and is smooth, which should take about 3-5 minutes. Lower the heat and add 2 cups of sharp cheddar cheese and 1 cup of mozzarella cheese. Also mix in 1 teaspoon of garlic powder, 1 teaspoon of onion powder, and 1/2 teaspoon of smoked paprika. Season with salt and pepper to taste. Stir until the cheese melts and the sauce is creamy. This sauce is what makes your mac and cheese rich and tasty. Now it’s time to mix! Fold the cooked elbow macaroni into the cheese sauce. Make sure every piece of pasta is well coated. If you want to add some protein, mix in 1/2 cup of cooked and crumbled turkey sausage. This step adds flavor and makes your cups even heartier. Preheat your oven to 350°F (175°C). Grease a mini muffin tin with cooking spray or butter. Using a spoon or small cookie scoop, fill each muffin cup with the mac and cheese mixture. Press down slightly to pack it into each cup. Bake in the oven for 15-20 minutes until the tops are golden brown and slightly crisp. The baking time is crucial; it helps achieve that perfect texture. Once baked, let them cool for a few minutes, then garnish each cup with a dollop of sour cream, a sprinkle of crispy fried onions, and sliced green onions. These tasty bites will impress everyone at your Super Bowl party! Check out the Full Recipe for more details! To make the creamiest cheese sauce, start with a roux. Melt the butter in a pot. Then, whisk in the flour. Cook for one to two minutes until it turns light brown. Gradually add milk while stirring. Keep mixing until the sauce thickens, which takes about three to five minutes. For the best flavor, choose sharp cheddar and mozzarella. Stir in the cheese until it melts completely. This gives you a rich, creamy sauce that coats the pasta perfectly. When filling the muffin tin, it helps to use a small scoop or spoon. This keeps your cups even. Fill each muffin cup with the mac and cheese mixture. Press it down gently as you fill. This ensures they hold together when baked. Don’t overfill; leave a little space for the topping. This makes sure they bake evenly without spilling over. To monitor the baking process, set a timer for 15 minutes. Check the cups after this time. You want the tops to be golden brown and slightly crisp. If they need more time, check every couple of minutes. This helps avoid overbaking. Once they are ready, let them cool for a few minutes before serving. This helps them set and makes them easier to remove from the tin. Remember, for the full recipe, refer to the previous sections. {{image_2}} You can mix up the cheese for your Loaded Mac and Cheese Football Cups. While sharp cheddar and mozzarella are great, try these options: - Monterey Jack: This cheese melts well and adds a mild flavor. - Pepper Jack: Adds a spicy kick for those who enjoy heat. - Gouda: Offers a smooth and creamy taste that enhances richness. - Parmesan: A sprinkle on top adds a nice, salty finish. To make a meat-free version, skip the turkey sausage. You can add more veggies instead. Here are some ideas: - Spinach: Fresh or frozen, it adds color and nutrients. - Mushrooms: Sautéed mushrooms bring umami and texture. - Bell Peppers: Diced bell peppers add sweetness and crunch. - Zucchini: Grated zucchini mixes in well and adds moisture. Want to boost the flavor? Add some spices and extra ingredients: - Mustard Powder: Just a pinch can add depth to the cheese sauce. - Hot Sauce: A few drops can spice things up. - Bacon Bits: These can add a savory crunch if you want meat. - Fresh Herbs: Chopped parsley or chives brighten the dish. These variations keep the recipe fresh and fun. You can explore new tastes while enjoying the classic comfort of mac and cheese! Check out the Full Recipe for more details on how to make these delicious cups. To keep your Loaded Mac and Cheese Football Cups fresh, follow these steps: - Cool Down: Let the cups cool completely at room temperature. - Use Airtight Containers: Place them in a clean, airtight container. - Refrigerate: Store in the fridge for up to 3 days. This keeps them tasty and safe to eat. When you want to enjoy your leftovers, follow these tips: - Oven Method: Preheat your oven to 350°F (175°C). Place the cups on a baking sheet. Bake for about 10-15 minutes. This warms them through and keeps them crispy. - Microwave Method: If you're in a hurry, use a microwave. Heat each cup on a microwave-safe plate for about 30 seconds to 1 minute. Check to make sure they are hot all the way through. If you want to save some for later, freezing is a great option: - Cool Completely: Make sure the cups are fully cooled before freezing. - Use Freezer Bags or Containers: Place them in freezer-safe bags or containers. Remove as much air as possible to avoid freezer burn. - Label and Date: Write the date on the bag or container. They can stay in the freezer for up to 2 months. - Thawing: When ready to eat, thaw in the fridge overnight, then reheat using the methods above. Following these storage tips ensures your Loaded Mac and Cheese Football Cups stay delicious for game day or anytime you crave comfort food! For the complete recipe, refer to the Full Recipe section. Yes, you can! You can prepare the cups a day in advance. Just follow the steps up to baking. Then, store them in the fridge, covered, for up to 24 hours. When it's game day, just pop them in the oven to bake. They will take about 20 minutes to heat through. This makes it easy to enjoy them during the Super Bowl without extra stress! These cups go great with many sides! Try serving them with: - Fresh vegetable sticks, like carrots or celery - A light salad with a simple dressing - Buffalo wings for a spicy kick - Homemade potato chips for crunch - Cold drinks like soda or lemonade These pairings will keep your guests happy and satisfied during the game! Absolutely! Kids love Loaded Mac and Cheese Football Cups. They are creamy, cheesy, and easy to eat. The small size is perfect for little hands. You can also adjust the flavors if needed. For less spice, skip the smoked paprika. Kids can help make these cups too! They will love adding toppings like green onions and crispy fried onions. Enjoy making them together! You learned how to make Loaded Mac and Cheese Football Cups. With elbow macaroni, a creamy cheese sauce, and fun toppings, these cups delight all ages. You now know how to cook, combine, bake, and store them. Plus, you have tips for variations and serving ideas. Get ready to impress family and friends with this tasty recipe. Enjoy the process and share your tasty creations. You’ll love serving these cups at your next gathering!](https://mysavedrecipe.com/wp-content/uploads/2025/07/05de4ce0-4935-4021-8eae-51a22e940077-300x300.webp)
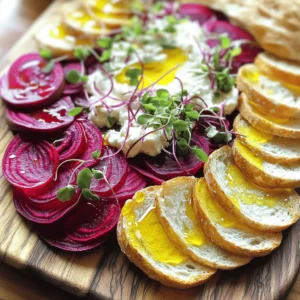
![To make the Roasted Beet and Goat Cheese Butter Board, you will need: - 2 medium beets, scrubbed and trimmed - 4 tablespoons olive oil, divided - Salt and pepper to taste - 1 cup creamy goat cheese, softened - 1/2 cup unsalted butter, softened - 1 tablespoon honey - 1 teaspoon fresh thyme leaves, plus more for garnish - 1/2 cup toasted walnuts, roughly chopped - Fresh arugula, for serving - Artisan bread or crackers for dipping If you need alternatives, here are some easy swaps: - Replace goat cheese with cream cheese or feta for a different taste. - Use coconut oil in place of unsalted butter for a dairy-free option. - For sweetness, maple syrup can work instead of honey. - If you don't have walnuts, try pecans or almonds for crunch. - Fresh herbs like rosemary or parsley can replace thyme for a new flavor. To make this tasty board, gather the following tools: - A roasting pan or baking sheet - Aluminum foil for wrapping the beets - Mixing bowl for the goat cheese butter - Spoon for spreading and creating texture - A serving platter or wooden board to arrange everything This list ensures you have all you need to create this delightful dish. If you're ready to dive into the full recipe, check out the [Full Recipe]. Enjoy the colorful and tasty flavors that come together beautifully! Start by gathering your ingredients. You will need beets, goat cheese, butter, honey, thyme, walnuts, arugula, and bread or crackers. Make sure everything is fresh and ready to go. Preheat your oven to 400°F (200°C). This step is crucial for roasting the beets perfectly. Wrap each beet in aluminum foil. Drizzle one tablespoon of olive oil on each beet. Season them with salt and pepper. Seal the foil tightly to keep the steam in. Place the wrapped beets on a baking sheet. Roast them for about 45-60 minutes. Check them with a fork; they should be fork-tender. When done, let them cool a bit. Unwrap the foil, peel the skins, and slice the beets thinly. The colors will be vibrant and beautiful. In a mixing bowl, combine the softened goat cheese and butter. Add honey and thyme leaves to the bowl. Mix everything well until it’s nice and creamy. This will be your goat cheese butter. Spread this mixture on your serving platter or board. Use the back of a spoon to create some indents for a nice texture. Now, arrange your sliced beets on top of the goat cheese butter. Sprinkle the toasted walnuts over the beets. If you like a touch of sweetness, drizzle a little extra honey on top. Garnish with more thyme leaves. Serve it with fresh arugula and your choice of artisan bread or crackers for dipping. Enjoy your Roasted Beet and Goat Cheese Butter Board Delight! For the full recipe, check out the details above. Store any leftovers in an airtight container. Keep it in the fridge. The beet and goat cheese butter can last up to three days. Ensure to separate the bread or crackers to keep them crisp. If you want to enjoy it later, you can freeze the butter spread. Just thaw it in the fridge overnight before using. When choosing beets, look for smooth skin and firm texture. Avoid beets with soft spots or blemishes. Smaller beets tend to be sweeter and more tender. To prepare, wash them well under cold water. Trim off the tops and roots. You can roast them whole or cut them into wedges. Roasting brings out their natural sweetness and enhances their flavor. For a stunning display, use a wooden board as your base. Spread the goat cheese butter in a thick layer. Arrange the beet slices on top in a circular pattern. Sprinkle chopped walnuts for a nice crunch. Add fresh thyme leaves for color. Serve with artisan bread or crunchy crackers around the board. This makes it easy for guests to dip and enjoy. If you want, add a small dish of honey for an extra touch. For more ideas, check the Full Recipe. {{image_2}} You can swap goat cheese for cream cheese or feta. Cream cheese makes the dish smooth and rich. Feta adds a tangy kick that pairs well with beets. Both options work great and change the flavor. In spring, try adding fresh herbs like dill or chives. In summer, add fresh berries for a pop of color and flavor. In fall, roasted squash can add warmth to the board. Using seasonal ingredients keeps it fresh and fun. Consider adding sliced radishes for crunch and color. You can also sprinkle pomegranate seeds for a sweet burst. Toasted seeds or nuts add texture. For a spicy touch, drizzle with chili oil. These toppings make the board even more exciting. Explore the full recipe to discover more ways to customize your roasted beet and goat cheese butter board. This butter board shines with great pairings. I love serving it with crusty artisan bread. Crackers make a nice crunchy contrast too. Fresh arugula adds a peppery bite. You might also try it with sliced apples or pears. Their sweetness balances the tangy goat cheese. For drinks, a light white wine works perfectly. A crisp Sauvignon Blanc or a fruity Riesling complements the flavors. If you prefer non-alcoholic options, try sparkling water with a slice of lemon. This will refresh your palate while you enjoy the board. Leftovers are a treat! Spread the goat cheese butter on toasted bagels for breakfast. Mix leftover beets into a salad for lunch. You can also blend them into a dip for veggies. Don’t forget to use it as a spread for sandwiches. It adds a gourmet touch to any meal. For the full recipe, check out Roasted Beet and Goat Cheese Butter Board. Roasted beets can last about 5 to 7 days in the fridge. Keep them in an airtight container. This keeps them fresh and tasty. If you have leftovers, enjoy them in salads or sandwiches. Yes, you can mix it up with other cheeses! Cream cheese or ricotta works well too. Each cheese brings its own flavor. Goat cheese gives a tangy taste, while cream cheese is milder. Try different combos to find your favorite. You can add many tasty things to your butter board. Try fresh herbs, sliced radishes, or roasted garlic. Nuts like almonds or pistachios add a nice crunch. You can even use fruits like figs or berries for a sweet touch. Get creative and make it your own! For the full recipe, check the earlier section. Roasting beets and making goat cheese butter is simple and fun. We covered the ingredients and their substitutes, plus equipment needed. The step-by-step guide ensured anyone can follow along. I shared tips for storage, selection, and presentation. You now know variations to try and great pairings for serving. Enjoy your tasty butter board and feel free to make it your own!](https://mysavedrecipe.com/wp-content/uploads/2025/07/397e87d9-c2e6-46de-973c-ba932716451c-300x300.webp)


![For this salsa, you need fresh corn kernels. Use about 2 cups, which comes from 3 to 4 ears of corn. Fresh corn gives a sweet taste and great texture. You can also use canned corn, but fresh is best. Cherries add a burst of flavor. You will want 1 cup of pitted and chopped cherries. They balance the sweetness of the corn. Next, use one small red onion, finely chopped, for a nice crunch. Add one jalapeño, deseeded and minced, for some heat. To bring it all together, you need some seasoning. Use 2 tablespoons of olive oil for cooking. Honey adds just a tablespoon to sweeten the mix. For acidity, include 2 tablespoons of lime juice. Finally, chop 1/4 cup of fresh cilantro. This herb adds freshness. Don’t forget to add salt and pepper to taste. You can find the full recipe and more tips in the [Full Recipe]. Start by husking the corn. Remove all the silk and green leaves. Use a sharp knife to cut the kernels from the cob. Aim for about 2 cups of fresh corn. This will give you a sweet taste. Fresh corn is key for this salsa. In a large skillet, heat the olive oil over medium heat. Once hot, add the corn kernels. Sauté the corn for about 8-10 minutes. Stir occasionally until the corn is golden and caramelized. Then, add the finely chopped red onion. Sauté for another 2-3 minutes until the onion is soft and clear. Next, stir in the minced jalapeño. Cook for one more minute to blend the flavors. Remove the skillet from heat and transfer the corn mix to a bowl. Let it cool for a few minutes. Once the corn mixture is cool, it's time to mix! Add the chopped cherries, honey, lime juice, and fresh cilantro to the bowl. Season with salt and pepper to taste. Gently stir all the ingredients together. Let the salsa sit for at least 15 minutes. This helps the flavors mix well. For the full recipe, refer to the section above. To make great caramelized corn, start with fresh corn. Remove the kernels from the cob for the best taste. Heat olive oil in a skillet over medium heat. Add the corn and let it cook without stirring for a few minutes. This helps it brown. After that, stir it every few minutes. Cook until the corn is golden, about 8-10 minutes. This gives your salsa a sweet, rich flavor. I love serving this salsa in a bright bowl. It looks great on the table. You can also add lime wedges and extra cilantro on top. This makes it even more colorful. This salsa pairs well with grilled chicken or fish. You can also use it as a dip with tortilla chips. Guests enjoy the mix of sweet and spicy flavors. Feel free to get creative! You can add diced bell peppers for crunch. A sprinkle of feta cheese adds a nice salty bite. If you want more heat, add more jalapeño or some red pepper flakes. Fresh mint can also bring a unique twist to the salsa. Each add-in gives a new flavor to enjoy. For the full recipe, check out the earlier section. {{image_2}} You can swap out ingredients based on what you have. For corn, use frozen corn if fresh isn’t available. It will still taste great. Instead of cherries, try diced peaches or mango. They add a fun twist. If you don’t like cilantro, parsley works well too. You can also use green onions for a milder flavor. If you want heat, leave some seeds in the jalapeño. For a milder salsa, use a small amount of bell pepper instead. You can also add a pinch of cayenne pepper for a kick. If you prefer no spice, skip the jalapeño entirely. The sweetness of the cherries will shine through. This salsa is great as a topping. Use it on grilled chicken or fish. It also pairs well with tacos or burritos. Serve it as a dip with tortilla chips for a fun snack. Try it on a salad for added flavor. You can even mix it into cold pasta for a fresh side dish. Explore these ideas to make the most of your Caramelized Corn and Cherry Salsa. For the full recipe, check out the section above. To keep your caramelized corn and cherry salsa fresh, store it in an airtight container. Glass containers work well. Make sure to let the salsa cool to room temperature before sealing it. This prevents moisture from building up inside the container. It’s best to refrigerate the salsa right after you make it. When stored properly in the fridge, your salsa can last up to three days. If you want to keep it longer, you can freeze it. However, I recommend only freezing the corn mixture without the cherries. The cherries may become mushy after thawing. To freeze, place the corn mixture in a freezer-safe bag. It should stay fresh for up to three months. If you freeze the corn mixture, let it thaw overnight in the fridge. To reheat, warm it in a skillet over medium heat. Stir it gently until heated through. Add the fresh cherries, lime juice, and cilantro after reheating. This keeps the flavors bright and fresh. Enjoy your salsa with grilled chicken or as a dip for chips! Caramelized corn and cherry salsa is a sweet and savory mix. It combines golden corn and juicy cherries. The dish also has red onion and spicy jalapeño. Honey and lime juice add a bright flavor. This salsa is perfect for summer or any gathering. It pairs well with grilled meats or chips. You can find the full recipe above to make your own. Yes, you can use frozen corn. Just thaw and drain the corn before cooking. It may not caramelize as well as fresh corn. However, it still tastes great in the salsa. Make sure to cook it long enough to warm through. You can keep the salsa in the fridge for about three days. Store it in an airtight container. The flavors will blend and deepen over time. Just give it a gentle stir before serving. If you see any signs of spoilage, toss it out. In this article, we explored how to make a tasty caramelized corn and cherry salsa. You learned about the key ingredients like fresh corn and sweet cherries. We detailed step-by-step instructions for cooking, combining, and serving. Tips for perfect caramelization and storage practices were shared. Each variation lets you customize the salsa to your taste. Enjoy making this dish. It's easy, fun, and packed with flavor! You'll impress your family and friends.](https://mysavedrecipe.com/wp-content/uploads/2025/07/ed347129-a99a-4822-a4b6-8c8dc4d2c2d4-300x300.webp)
![To make Dill Pickle Potato Salad, gather these key items: - 2 pounds baby potatoes, halved - 1 cup dill pickles, diced - 1/2 cup red onion, finely chopped - 1/2 cup celery, diced - 1 cup mayonnaise - 2 tablespoons Dijon mustard - 1 tablespoon apple cider vinegar - 2 tablespoons fresh dill, chopped (or 1 tablespoon dried dill) - Salt and pepper to taste You can make this salad your own by adding: - 1 hard-boiled egg, chopped - Fresh herbs like parsley or chives - A sprinkle of smoked paprika - Chopped bell peppers for extra crunch If you want to switch things up, here are some ideas: - Use Greek yogurt instead of mayonnaise for a lighter option. - Substitute cucumbers for dill pickles if you prefer a milder flavor. - For a tangy kick, try using spicy mustard instead of Dijon. - If you don’t have fresh dill, dried dill works fine, but use less. This recipe allows plenty of room for your personal touch. Enjoy exploring different flavors! For the full recipe, check out the detailed instructions and tips. First, wash the baby potatoes. Cut them in half. Place them in a pot. Add water and a pinch of salt. Turn on the heat and bring the water to a boil. Once boiling, cook the potatoes for 10 to 12 minutes. Check them with a fork; they should be tender but not mushy. Drain the potatoes and let them cool down. In a large mixing bowl, add the cooled potatoes. Next, chop the dill pickles, red onion, and celery. Toss these into the bowl with the potatoes. The colors and textures will look great together. Gently mix all these ingredients with a spatula. Be careful not to break the potatoes. In a small bowl, combine mayonnaise, Dijon mustard, and apple cider vinegar. Whisk them together until smooth. Add chopped dill, salt, and pepper to taste. This dressing is what gives the salad its creamy and tangy flavor. Pour the dressing over the potato mix. Toss gently until everything is coated. If you want, you can fold in a chopped hard-boiled egg for extra richness. Taste the salad and adjust the seasoning if needed. Finally, refrigerate the salad for at least one hour. This helps the flavors blend nicely. You can find the full recipe [Full Recipe]. To cook potatoes well, use small baby potatoes. They cook evenly and taste great. Start by placing them in cold, salted water. Bring the water to a boil. Cook for about 10 to 12 minutes. Check with a fork; they should be soft but not mushy. Drain them and let them cool fully before mixing into the salad. This helps keep their shape. You can make this salad a day in advance. It tastes even better after sitting in the fridge. Just prepare everything and store it in a sealed container. Let the flavors blend overnight. When ready to serve, give it a quick stir and adjust any seasoning. If you want a fresh twist, add a bit more dill or pickles before serving. Seasoning is key to a tasty potato salad. Start with salt and pepper to bring out the flavors. You can also add a splash more apple cider vinegar for zing. Fresh dill works wonders, but dried dill is good too. If you want a kick, try adding some crushed red pepper flakes. Taste as you go to find your perfect mix. For a creamy touch, don’t forget the mayonnaise and Dijon mustard in the dressing. For the complete recipe, check out the [Full Recipe]. {{image_2}} You can make a vegan version of this dish. Swap out the mayonnaise for vegan mayo. It keeps the creamy texture while being plant-based. You can also use silken tofu blended smooth as a great substitute. This option adds protein and keeps it rich. Add your favorite fresh herbs for a burst of flavor. Chopped parsley or chives work well here. If you want to cut carbs, try using cauliflower instead of potatoes. Steam cauliflower florets until tender but firm. This swap keeps the salad light and fresh. You can still toss in the same pickles, onions, and dressing. It gives you that classic taste without the carbs. This version is perfect for anyone watching their carb intake. Boost the nutrition by adding proteins like chicken or chickpeas. Cut cooked chicken into small pieces or add canned chickpeas. Both options make the salad more filling. You can also mix in other veggies like bell peppers or radishes. They add crunch and color, making the dish even more appealing. Feel free to experiment with flavors you enjoy. For the full recipe, check out the main dish instructions. To store leftover potato salad, place it in an airtight container. Make sure to seal it well. This helps keep the flavors fresh. You can keep it in the fridge for about 3 to 5 days. If you notice any signs of spoilage, it’s best to throw it away. To maintain freshness, avoid letting the salad sit out too long. Serve it chilled and cover it if you plan to leave it out for a while. Using fresh ingredients when you make the salad also helps. If you have extra dill pickles, add them right before serving. This keeps the crunch intact. Reheating potato salad is not always necessary. However, if you prefer it warm, do so gently. Use the microwave in short bursts. Stir it between heating sessions. Be cautious, as the mayonnaise can separate when heated too much. If possible, enjoy it cold for the best flavor. For the full recipe, refer to the recipe section above. If you want a mayo swap, try Greek yogurt. It adds creaminess and tang. You can also use sour cream or avocado for a rich taste. Each option changes the flavor, so choose what you like best. Dill Pickle Potato Salad can last about 3 to 5 days in the fridge. Make sure to store it in a sealed container. Always check for any off smells or changes in texture before enjoying it again. Yes, you can make this salad a day ahead. It tastes even better after sitting in the fridge. Just mix it well and let the flavors blend overnight. Remember to keep it covered for freshness. Freezing potato salad is not recommended. The texture of the potatoes can change when thawed. If you want to save some, consider making smaller batches to enjoy fresh. For best results, eat it within a few days after making it. For a full recipe, check out the detailed instructions and tips! In this blog post, I covered how to make a delicious potato salad. We explored essential and optional ingredients, plus substitutions for your needs. You learned step-by-step instructions for prepping potatoes, mixing the salad, and making a tasty dressing. I shared tips for cooking and storing your salad, ensuring it stays fresh. Finally, I introduced fun variations, from vegan to low-carb options. Remember, potato salad is flexible. Customize it to match your taste and enjoy every bite!](https://mysavedrecipe.com/wp-content/uploads/2025/07/f3d16f7f-45d6-4872-ac39-39576a397c4c-300x300.webp)

. To make cream soda donut holes from scratch, follow these steps: 1. Preheat the Oven: Set your oven to 350°F (175°C). 2. Grease the Pan: Use cooking spray on a mini muffin tin or donut hole pan. 3. Mix Dry Ingredients: In a bowl, whisk together the flour, sugar, baking powder, and salt. 4. Prepare Wet Ingredients: In another bowl, mix the eggs, milk, cream soda, melted butter, and vanilla until smooth. 5. Combine: Pour the wet mix into the dry mix. Stir gently, but don’t over-mix. 6. Fill the Pan: Spoon the batter into the prepared pan, filling each spot about two-thirds full. 7. Bake: Bake for 12-15 minutes until golden. A toothpick should come out clean. 8. Cool and Coat: Let them cool for five minutes. Roll the warm donut holes in powdered sugar. Add sprinkles if you like. This recipe makes about 24 donut holes. These bites are sweet, fluffy, and bursting with cream soda flavor. You can find cream soda donut holes at local bakeries or specialty shops. Some grocery stores may carry them in their bakery section. If you prefer online shopping, try platforms like Amazon or local delivery services. You can also check websites that specialize in gourmet treats. Yes, you can prepare these donut holes ahead of time. You can bake them a day before your event. Store them in an airtight container at room temperature. For longer storage, freeze them. To freeze, place them in a single layer on a baking sheet. Once frozen, transfer them to a zip-top bag. When ready to enjoy, thaw them at room temperature. You can reheat them in the oven for a few minutes to restore their warmth and texture. In this blog post, we covered how to make delicious cream soda donut holes. We discussed essential ingredients and key flavor enhancers that give them a unique taste. I shared step-by-step instructions, tips for perfect results, and variations for different diets and flavors. Remember, you can always store these treats for later or even freeze them. With these easy methods, you can enjoy baking fun treats. Don’t be afraid to get creative and try new variations. Your donut holes will delight friends and family!](https://mysavedrecipe.com/wp-content/uploads/2025/07/35e6bc4e-749b-460c-b9bb-8388b3f2e612-300x300.webp)