My Saved Recipe

  • Home
  • Recipes
    • Dinner
    • Dessert
    • Appetizers
    • Drinks
  • About
  • Contact Us
  • Privacy Policy
menu icon
go to homepage
  • Home
  • Recipes
    • Dinner
    • Dessert
    • Appetizers
    • Drinks
  • About
  • Contact Us
  • Privacy Policy
search icon
Homepage link
  • Home
  • Recipes
    • Dinner
    • Dessert
    • Appetizers
    • Drinks
  • About
  • Contact Us
  • Privacy Policy
×
Savannah

Savannah

Savannah is the creative force behind My Saved Recipe, a space where food becomes both art and adventure. A passionate home chef, she delights in exploring flavors from around the world while honoring timeless classics.

Savannah’s philosophy centers on the power of food to bring people together, spark creativity, and create lasting memories. Through thoughtfully crafted recipes and practical tips, she inspires cooks of all levels to embrace fresh ingredients, experiment with confidence, and find joy in the kitchen.

  • Fresh zucchini gives this bread moisture. I use about one medium zucchini, grated. It adds a nice texture and a subtle flavor. Make sure to squeeze out some excess water after grating. This step keeps the bread from being too wet and helps it rise better. I use one cup of granulated sugar for sweetness. It balances well with the tart lemon. For oil, I prefer half a cup of olive oil. It adds richness without being too heavy. The oil also helps keep the bread moist and tender. You can replace it with another oil, but I find olive oil works best. The lemon juice and zest give this bread its bright flavor. I use a quarter cup of fresh lemon juice and the zest from one large lemon. The zest adds a punch of citrus aroma. This combination makes each bite fresh and lively. You won’t want to skip these ingredients in the full recipe. Start by gathering all your ingredients. You will need 1 cup of grated zucchini, which comes from about 1 medium zucchini. Grate it using a box grater or a food processor. This helps release moisture and flavor into the bread. Next, measure 1 cup of granulated sugar and 1/2 cup of olive oil to keep the bread moist. Grab 2 large eggs, 1/4 cup of freshly squeezed lemon juice, and zest from 1 large lemon. The zest adds a bright taste. For dry ingredients, you need 1 1/2 cups of all-purpose flour, 1 teaspoon of baking powder, 1/2 teaspoon of baking soda, 1/2 teaspoon of salt, and 1/2 teaspoon of ground cinnamon. If you like nuts, get 1/2 cup of chopped walnuts or pecans ready. In a large mixing bowl, combine the grated zucchini and sugar. Mix them well so the sugar starts to dissolve. Next, add the olive oil, eggs, lemon juice, and lemon zest. Whisk these ingredients together until blended. You want a smooth mix that brings out the fresh lemon flavor. This step is key for a light and airy bread. In another bowl, whisk together the dry ingredients: flour, baking powder, baking soda, salt, and cinnamon. Make sure to combine them well to avoid lumps. Gradually add this dry mix to the wet mix. Stir gently until they just come together. Be careful not to overmix; lumps are okay. If you choose to add nuts, fold them in now for extra crunch. Pour the batter into your greased loaf pan. Smooth the top with a spatula. Now, it's time to bake! Follow the [Full Recipe] for detailed baking instructions and enjoy the wonderful aroma that fills your kitchen. Choose firm, shiny zucchini. Look for ones without soft spots or blemishes. Smaller zucchinis work best. They have more flavor and less moisture. One medium zucchini gives you about one cup when grated. Remember, fresh zucchini makes a big difference in taste. When you mix your batter, do it gently. Stir until the dry ingredients just blend in. Overmixing can make your bread tough. It’s okay if a few lumps remain. This keeps your bread light and fluffy. Trust me, the texture will be much better! To check if your bread is done, use a toothpick. Insert it into the center of the loaf. If it comes out clean, your bread is ready. If it has wet batter on it, bake for a few more minutes. Let it cool before slicing. This helps the flavors settle. For more tips, check out the Full Recipe. {{image_2}} You can make your lemon zucchini bread even better by adding nuts or seeds. Chopped walnuts or pecans give a nice crunch. They also add healthy fats and protein. You can mix in about half a cup. Just fold them into the batter gently. If you prefer seeds, try sunflower seeds or pumpkin seeds. They will add a fun twist to the texture. Want to boost the flavor? Adding vanilla extract can enhance the taste. Just a half teaspoon is enough. You could also add warm spices like nutmeg or cardamom. These spices blend well with lemon and zucchini. They give your bread a cozy flavor. Experiment with different amounts to find your perfect mix. A sweet glaze can brighten your bread. Mix powdered sugar with a bit of lemon juice for a quick glaze. Drizzle it on top after the bread cools. You could also use a cream cheese frosting for a richer treat. For a lighter option, sprinkle powdered sugar over the slices. Fresh lemon slices on the plate add a nice touch. For the full recipe, check out the details above. After you bake the lemon zucchini bread, let it cool. Once cool, wrap it tightly in plastic wrap. This keeps the bread fresh. You can also place it in an airtight container. Store it at room temperature for up to three days. If you want to keep it longer, consider freezing it. To freeze lemon zucchini bread, slice it first. Wrap each slice in plastic wrap. Then, place the wrapped slices in a freezer bag. Squeeze out as much air as possible before sealing. This helps prevent freezer burn. You can freeze the bread for up to three months. When you're ready to eat it, just thaw it in the fridge overnight. To reheat the bread, simply take a slice out. Place it on a microwave-safe plate. Heat it in the microwave for about 15 to 20 seconds. If you prefer, you can toast it in a toaster oven. Toasting brings back the fresh, warm taste. Enjoy your delicious lemon zucchini bread fresh, even after storing! For the full recipe, check out the Lemon Zucchini Delight. Yes, you can swap some ingredients in this recipe. For example, you can use coconut oil instead of olive oil. You can also replace granulated sugar with brown sugar for a deeper flavor. If you want a gluten-free option, try a gluten-free flour blend. Just make sure to keep the same ratios. This keeps the bread moist and tasty. To check if the bread is done, use a toothpick. Insert it into the center of the bread. If it comes out clean, your bread is ready. If there are wet crumbs or batter, bake it a little longer. Usually, it takes about 45-50 minutes in the oven. Zucchini bread has some great health perks. Zucchini is low in calories but high in fiber. This helps with digestion and keeps you full. It also has vitamins A and C, which are good for your skin and eyes. Plus, using olive oil adds healthy fats. So, this bread can be a tasty treat that offers nutrition too! For the full recipe, check out the details above. This blog post shared a simple recipe for lemon zucchini bread. We covered key ingredients, including fresh zucchini, sugars, and oils. I gave you step-by-step instructions for easy preparation. Tips helped you select the best zucchini and avoid overmixing. We explored tasty variations to make your bread unique. Lastly, I provided storage advice to keep leftovers fresh. Enjoy making delicious lemon zucchini bread that friends and family will love.
    Lemon Zucchini Bread Fresh and Flavorful Delight
  • - 1 cup crushed graham crackers - 1 cup cream cheese, softened - 1/2 cup powdered sugar - Zest of 1 orange - 1/4 cup fresh orange juice - 1 teaspoon vanilla extract - 1 cup white chocolate chips, melted - Orange sprinkles (for garnish) To make No-Bake Orange Creamsicle Truffles, you'll need a few key ingredients. First, the crushed graham crackers give the truffles a nice base and texture. Cream cheese is next, adding creaminess that balances the sweetness. The powdered sugar sweetens the mix, while the zest and juice from the orange bring in that bright, citrus flavor. Vanilla extract adds depth, and melted white chocolate provides a sweet outer layer. Don't forget the orange sprinkles for a fun look! The combination of these ingredients creates a treat that is both tasty and visually appealing. These truffles are simple to prepare. Just gather all the ingredients and follow the steps in the [Full Recipe]. You will love how easy these are to make! - In a large bowl, combine: - 1 cup crushed graham crackers - 1 cup cream cheese, softened - 1/2 cup powdered sugar - Zest of 1 orange - 1/4 cup fresh orange juice - 1 teaspoon vanilla extract Mix these until you get a smooth dough. It should feel soft but not sticky. Use your hands to form small balls, about 1 inch in size. Place those on a lined baking sheet. This part is super fun, and you can even get kids involved! Next, chill the truffles in the fridge for about 30 minutes. This helps them firm up nicely. While they chill, melt 1 cup of white chocolate chips. Heat them in a microwave-safe bowl in 30-second bursts, stirring in between. You want it smooth and shiny. Once the truffles are stiff, take them out. Dip each one into the melted white chocolate, ensuring they are fully coated. Place them back on the lined sheet and sprinkle orange sprinkles on top while the chocolate is still warm. This adds a fun pop of color and zest! Put the tray back in the fridge for an extra 15 minutes. This time allows the chocolate to harden properly. When they are cold and set, they are ready to serve. Enjoy your No-Bake Orange Creamsicle Truffles as a delightful treat! For the full recipe, check out the details above. To make great No-Bake Orange Creamsicle Truffles, your mixture must have the right feel. If it is too sticky, add more crushed graham crackers, about a tablespoon at a time. Mix it until the dough holds together but feels smooth. Chilling is key! Place the truffles in the fridge for 30 minutes. This helps firm them up, making them easier to coat in chocolate. Achieving a smooth chocolate coat is easy if you follow a few steps. First, melt the white chocolate carefully. Use a microwave in 30-second bursts, stirring well in between. This way, you will avoid burning the chocolate. When you dip each truffle, ensure it is fully covered. If you see clumps of chocolate, gently tap the truffle against the side of the bowl to let excess chocolate drip off. Want to take your truffles to the next level? Consider adding a few drops of almond extract. It adds a nice depth to the flavor. You can also try mixing in some finely chopped nuts or shredded coconut for extra texture. These small tweaks can make your truffles even more special. For the full recipe, check out the instructions above! {{image_2}} You can switch up the flavor by using dark or milk chocolate instead of white. This change adds a rich taste. If you want to get creative, consider using fun toppings. Sprinkles, crushed nuts, or even shredded coconut can make your truffles pop. The choice is yours. Want to mix it up? Try using other citrus fruits like lemon or lime. These fruits add a zesty twist to your truffles. You can also add nuts or shredded coconut for a nice crunch. These additions can enhance the texture and flavor greatly. If you're looking for a healthier choice, you can swap cream cheese for Greek yogurt. This change reduces fat while keeping a creamy texture. Lower sugar options are also available. Consider using natural sweeteners like honey or maple syrup. These swaps keep your truffles delicious but a bit lighter. You can find the full recipe online for more ideas. To keep your No-Bake Orange Creamsicle Truffles fresh, store them in an airtight container. This helps keep the moisture in and stops them from drying out. Place a piece of parchment paper between layers if you stack them. It prevents sticking and keeps them nice and smooth. Always store them in the fridge. This helps them stay firm and tasty. You can freeze these truffles for later. To do this, place them in a single layer on a baking sheet and freeze until firm. Then, transfer them to an airtight container or a freezer bag. This way, they won't stick together. When you're ready to eat them, just take out the number you want. Let them thaw in the fridge for a few hours. This keeps the texture nice and prevents melting. In the fridge, these truffles last about a week. If you freeze them, they can last up to three months. Just remember to keep them in the right container! This helps you enjoy your No-Bake Orange Creamsicle Truffles at a later date. Yes, you can use low-fat cream cheese. However, this change may affect the texture and flavor. Low-fat cream cheese is softer and less creamy. Your truffles might not hold their shape as well. They could also lack some richness. If you choose this option, chill the mixture longer before forming the balls. Adjusting sweetness is easy. You can add or reduce powdered sugar in the recipe. If you want it sweeter, add more sugar, one tablespoon at a time. Taste the mixture after each addition. If it's too sweet for you, add a bit more cream cheese to balance it out. Yes, these truffles are great for making ahead. You can prepare them a day or two in advance. Just keep them stored in the fridge. When you are ready to serve, you can dip them in chocolate and add sprinkles. This makes them perfect for parties or gatherings. If you want to change the flavor, you have options. Try using lemon or lime juice for a tart twist. You can also use almond extract for a nutty flavor. Coconut gives a tropical vibe too. Feel free to be creative and mix flavors to find your favorite! These No-Bake Orange Creamsicle Truffles are easy to make and fun to enjoy. We covered all the ingredients needed, preparation steps, and tips to make them perfect. You can customize flavors and coatings to fit your taste. Plus, storing them is simple. Remember, with a few tweaks, these truffles can be a hit at any gathering. Don't hesitate to experiment and find your favorite version. Enjoy making and sharing these delightful treats!
    No-Bake Orange Creamsicle Truffles Easy Dessert Recipe
  • - 1 cup cream cheese, softened - 1/2 cup unsalted butter, softened - 3/4 cup granulated sugar - 1 large egg - 1 tablespoon lemon zest - 2 tablespoons lemon juice - 1 1/2 cups all-purpose flour - 1/2 teaspoon baking powder - 1/4 teaspoon baking soda - 1/4 teaspoon salt - 2 tablespoons poppy seeds - Powdered sugar, for dusting Each ingredient in these Lemon Poppy Seed Cheesecake Cookies plays a key role in flavor and texture. - Cream cheese gives the cookies a rich, creamy base. Its smooth texture helps bind the dough. - Unsalted butter adds a rich flavor. It also helps make the cookies soft and chewy. - Granulated sugar sweetens the cookies and helps them brown nicely. - Egg binds all the ingredients together and adds moisture. - Lemon zest brings a bright, fresh flavor. It adds that wonderful citrus kick. - Lemon juice enhances the lemon flavor and keeps cookies moist. - All-purpose flour gives structure to the cookies. - Baking powder and baking soda help the cookies rise and become fluffy. - Salt balances the sweetness and enhances overall flavor. - Poppy seeds add a delightful crunch and a hint of nuttiness. - Powdered sugar provides a sweet, light finish for the cookies. If you need to make swaps, here are some ideas: - Cream cheese: Use mascarpone cheese for a lighter texture. - Unsalted butter: Coconut oil works well for a dairy-free option. - Granulated sugar: Try using coconut sugar for a more natural sweetener. - Egg: Replace with a flax egg (1 tablespoon ground flaxseed + 2.5 tablespoons water) for a vegan choice. - All-purpose flour: Use almond flour for a gluten-free option. - Lemon juice: Lime juice can substitute for a different citrus taste. - Poppy seeds: Chia seeds can be used for a similar texture. These substitutions keep your cookies delicious while fitting your needs! You can find the Full Recipe to guide you through making these delightful snacks. First, gather your ingredients. You need: - 1 cup cream cheese, softened - 1/2 cup unsalted butter, softened - 3/4 cup granulated sugar - 1 large egg - 1 tablespoon lemon zest - 2 tablespoons lemon juice - 1 1/2 cups all-purpose flour - 1/2 teaspoon baking powder - 1/4 teaspoon baking soda - 1/4 teaspoon salt - 2 tablespoons poppy seeds - Powdered sugar, for dusting Next, preheat your oven to 350°F (175°C). Line two baking sheets with parchment paper. This helps the cookies not stick. In a large bowl, beat the cream cheese and butter until smooth. Add the sugar and mix for about 2-3 minutes. It should be light and fluffy. Then, mix in the egg, lemon zest, and lemon juice. Make sure everything blends well. In another bowl, whisk together the flour, baking powder, baking soda, and salt. Slowly add this dry mix to the wet mix. Stir until just combined. You don’t want to over-mix. Finally, fold in the poppy seeds gently. This way, they spread evenly in the dough. Now, scoop tablespoon-sized balls of dough onto the baking sheets. Keep them about 2 inches apart. This gives them space to spread while baking. Bake the cookies in your preheated oven for 12-15 minutes. They should look lightly golden around the edges. Keep an eye on them. Every oven is different. Once baked, let the cookies cool on the baking sheets for 5 minutes. This helps them set. Then, transfer them to a wire rack to cool completely. When they are cool, dust the cookies with powdered sugar. This adds a nice touch and a bit of sweetness. For the full recipe, check the earlier section. Enjoy your tasty lemon poppy seed cheesecake cookies! When baking, it’s easy to make small errors. I often see people skip the softening step for cream cheese and butter. This step is key for a smooth mix. If your butter is cold, the cookies may not spread well. Always measure your flour correctly. Too much flour can lead to dry cookies. Use a spoon to scoop flour into your measuring cup, then level it off with a knife. To get the right texture, beat your cream cheese and butter well. This creates air pockets that make the cookies fluffy. Adding the egg slowly helps with a uniform mix. When you add dry ingredients, mix just until combined. Overmixing can make the cookies tough. Lastly, folding in the poppy seeds gently ensures they stay intact. Timing is key when baking. Set your timer for 12 minutes, but keep an eye on them. The edges should be lightly golden, while the center looks soft. If you like a chewier cookie, take them out a minute early. Let them cool on the baking sheet for five minutes before moving them. This helps them firm up without breaking apart. You can find the Full Recipe to guide you through the entire process. {{image_2}} You can easily change the taste of your Lemon Poppy Seed Cheesecake Cookies. Adding extracts gives a new twist. For a richer flavor, try adding a teaspoon of vanilla extract. Almond extract also works well. Just remember, a little goes a long way. You could even add a splash of coconut extract for a tropical vibe. If you need a gluten-free version of these cookies, I have you covered. You can replace all-purpose flour with a gluten-free baking blend. Make sure it has xanthan gum for the best texture. This swap keeps your cookies soft and chewy. You won't lose any flavor, which is a win for gluten-free baking! Want to make your cookies even more fun? Consider adding creative mix-ins. Chopped nuts like walnuts or pecans add crunch. You could even throw in some mini chocolate chips for a sweet surprise. Dried fruits, like cranberries or raisins, can add a nice chewiness. Each of these add-ins can change your cookie game completely! For the full recipe, check back to get started on your baking adventure. To keep your Lemon Poppy Seed Cheesecake Cookies fresh, store them in an airtight container. This helps to lock in moisture. Place a piece of parchment paper between layers to prevent sticking. Avoid direct sunlight and heat. Keep the cookies in a cool, dry place. This will help maintain their flavor and texture. When stored properly, these cookies last about one week. You may notice they taste best in the first few days. After that, they may lose some freshness. If you keep them in the fridge, they can last up to two weeks. Just remember to let them warm up a bit before enjoying. To freeze your cookies, first, let them cool completely. Place them in a single layer on a baking sheet. Freeze for about an hour until firm. Then, transfer the cookies to a freezer-safe bag. Remove as much air as you can. They can last up to three months in the freezer. When ready to eat, thaw them at room temperature. For an extra treat, warm them in the oven for a few minutes. Enjoy your homemade delight! For the full recipe, check the section above. To make these cookies, start by mixing the cream cheese and butter in a bowl until smooth. Next, add the sugar and beat until fluffy. Then, mix in the egg, lemon zest, and lemon juice. In another bowl, whisk the flour, baking powder, baking soda, and salt. Gradually add the dry mix into the wet mix. Lastly, fold in the poppy seeds. Scoop the dough onto baking sheets and bake at 350°F for 12-15 minutes. You can find the Full Recipe for more details. Yes, you can use other citrus fruits! Oranges and limes work well in this recipe. They add different flavors and aromas, making your cookies unique. Just replace the lemon zest and juice with your chosen citrus. Adjust the amounts as needed to keep the balance right. Experimenting with flavors can bring fun twists to your baking! If you need a substitute for cream cheese, try using ricotta cheese or Greek yogurt. Both options give a creamy texture and similar taste. You can also use vegan cream cheese for a dairy-free version. Adjust the sugar slightly if using yogurt, as it can be tangier. Always choose a substitute that complements the lemon flavor for the best results. This article covered the key ingredients and their roles in your baking. I shared step-by-step instructions for perfect cookies. We discussed common mistakes and tips for the best texture. You also learned about flavor variations and creative add-ins. Lastly, we reviewed storage tips to keep cookies fresh. Baking cookies can be fun and easy with these tips. Explore each section and enjoy your cookie-making journey!
    Lemon Poppy Seed Cheesecake Cookies Delightful Snack
  • To make Grilled Cowboy Butter Chicken Skewers, you need these key ingredients: - 1 lb boneless, skinless chicken thighs - 1/2 cup unsalted butter - 2 tablespoons olive oil - 4 cloves garlic - Fresh herbs: parsley, chives - Spices: smoked paprika, onion powder, cayenne pepper - Salt and pepper - Lemon (zest and juice) - Skewers Each ingredient plays a big role in flavor. The chicken thighs give the dish its heartiness. They stay juicy and tender when cooked. The unsalted butter is the star of the show. It adds richness and depth. Olive oil helps the butter blend well and adds a nice touch. Garlic brings in a punch of flavor that you can't miss. Fresh herbs lift the taste and freshness. The spices, especially smoked paprika, give a warm, smoky note. Don't forget the lemon! It brightens and balances the richness of the butter. Lastly, skewers make it fun and easy to grill. For best results, soak wooden skewers in water first. This helps prevent burning on the grill. For the full recipe, check the detailed cooking steps to bring these flavors together for a tasty delight! To make the Cowboy Butter, gather your ingredients first. In a large bowl, add the softened butter and olive oil. Then, mix in the minced garlic, fresh parsley, and chives. Next, sprinkle in the smoked paprika, onion powder, cayenne pepper, salt, and pepper. Finally, add the lemon zest and juice. - Combining ingredients: Use a fork or spatula to mix everything well. Ensure the butter is smooth and all ingredients are evenly distributed. - Tips for mixing: If the butter is too thick, let it sit at room temperature. This will help with mixing. Take your chicken thighs and place them in the bowl with the Cowboy Butter. Toss the chicken well to coat it fully. - Coating with Cowboy Butter: Make sure every piece is covered. This helps infuse flavor into the chicken. - Recommended marination time: Let the chicken marinate for at least 30 minutes. If you have more time, let it sit for up to 2 hours in the fridge for deeper flavor. Before grilling, you need to preheat your grill. Set it to medium-high heat. If you are using a charcoal grill, wait until the coals are covered with white ash. - Threading the chicken onto skewers: Take the marinated chicken and thread it onto the skewers. Leave some space between each piece for even cooking. - Cooking times and temperature: Place the skewers on the grill and cook for about 12-15 minutes. Turn them occasionally. Check that the chicken reaches an internal temperature of 165°F (75°C). This is a simple way to make tasty grilled chicken skewers. For a full recipe, check the details above. To get perfect grill marks, start by preheating your grill. This ensures even cooking. Keep the grill at medium-high heat. When you place chicken on the grill, do not move it right away. Let it sit for a few minutes. Turn the skewers only after you see nice grill lines. This method helps lock in the flavor. Monitor your grill temperature closely. If the heat is too high, the chicken can burn. If it’s too low, it may cook unevenly. A reliable grill thermometer can help you maintain the right temperature. Feel free to get creative with spices! You might try adding cumin or rosemary for a new twist. If you like heat, consider more cayenne pepper. You can also mix in some lemon pepper for a zesty touch. Don’t forget about leftover Cowboy Butter. Use it to baste the chicken while grilling. This adds a rich taste and keeps the chicken juicy. You can also drizzle it over the finished skewers for extra flavor. Pair your skewers with sides like grilled corn or a fresh salad. These sides complement the chicken well. You might also serve some garlic bread to soak up any leftover Cowboy Butter. For a great presentation, arrange the skewers on a large platter. Drizzle with Cowboy Butter and sprinkle fresh herbs on top. This makes the dish look vibrant and inviting. {{image_2}} You can switch up the proteins in this recipe. Try using shrimp or tofu for a twist. Both options will soak up the Cowboy Butter flavor well. If you want more depth, play with different herbs and spices. Fresh basil or cilantro can add zest. You can even try a dash of cumin for warmth. You don’t have to grill these skewers if you prefer other methods. Oven-baking works great too. Just preheat your oven to 400°F (200°C). Place the skewers on a baking sheet and cook for about 20-25 minutes. You should flip them halfway through to ensure even cooking. Another option is using an air fryer. Set the air fryer to 375°F (190°C) and cook for about 10-12 minutes. This gives you a crispy finish without all the oil. Feeling adventurous? You can make spicy variations by adding more cayenne pepper or even crushed red pepper flakes. For a sweet and tangy version, mix in honey or maple syrup with the Cowboy Butter. This adds a nice contrast to the savory chicken. You can also add a splash of vinegar or lime juice for extra zing. Each variation offers a unique taste experience with the same base recipe. Explore, and enjoy the flavors! For the complete guide on making these delicious skewers, check out the Full Recipe. To keep your Grilled Cowboy Butter Chicken Skewers fresh, use an airtight container. This helps lock in moisture and flavor. Store them in the refrigerator. They will stay good for about 3 to 4 days. If you want to keep them longer, consider freezing. When reheating your skewers, use a low heat setting. This method helps avoid dryness. You can use an oven or a grill. Heat them for about 10 minutes or until warm. If using a microwave, cover them with a damp paper towel. This keeps the chicken moist while heating. To freeze your skewers, wrap them tightly in plastic wrap. Then, place them in a freezer bag. This prevents freezer burn. You can keep them frozen for up to 3 months. When ready to eat, thaw them in the fridge overnight. Then, reheat as needed. Enjoy the flavors of your Cowboy Butter! You can use either wooden or metal skewers. Wooden skewers are great for soaking in water. This helps prevent burning. Metal skewers are durable and easy to clean. They also help the chicken cook evenly. For both types, remember to leave space between the pieces. This ensures even cooking and nice grill marks. Yes, you can grill indoors! Use a grill pan or an electric grill. Both tools give great results. Make sure your kitchen is well-ventilated. This helps reduce smoke. Keep an eye on the heat. You want medium-high heat for the best cooking. The most reliable way is to check the internal temperature. Chicken should reach 165°F (75°C) to be safe. Use a meat thermometer for accuracy. Insert it into the thickest part of the chicken. This method ensures juicy, safe chicken every time. Always practice safe cooking by washing your hands and surfaces after handling raw chicken. To make it gluten-free, check all your ingredients. Ensure your spices and butter do not have gluten. Use gluten-free alternatives if needed. You can also swap regular soy sauce for gluten-free soy sauce. Adjust the cooking workflow by using clean tools and surfaces. This will prevent cross-contamination. Enjoy your tasty Cowboy Butter Chicken Skewers without worry! For the complete recipe, check the [Full Recipe]. In this blog post, we explored a tasty chicken skewer recipe. We covered key ingredients like chicken thighs and Cowboy Butter. You learned to prepare, marinate, and grill for perfect skewers. We shared tips for ideal grill marks and side dish pairings too. Remember, substitutions can keep things fresh, and proper storage keeps leftovers tasty. Enjoy grilling with this recipe and make it your own!
    Grilled Cowboy Butter Chicken Skewers Tasty Delight
  • - 8 oz penne pasta - 1 cup feta cheese, crumbled - 1/2 cup dried cranberries These three main ingredients create a great base for the salad. The penne pasta gives it a nice bite. Feta cheese adds a creamy texture with a salty kick. Dried cranberries bring a sweet touch that balances the flavors. - 1/4 cup red onion, finely chopped - 1/2 cup cucumber, diced - 1/2 cup cherry tomatoes, halved Red onion adds a sharp flavor that wakes up your taste buds. Cucumber gives a refreshing crunch. Cherry tomatoes add juiciness and a pop of color. Together, they make the salad bright and vibrant. - 1/4 cup olive oil - 3 tablespoons orange juice - 1 tablespoon orange zest - 1 tablespoon apple cider vinegar - Salt and pepper to taste The dressing is key to this salad. Olive oil adds richness. Orange juice and zest bring a zesty brightness that ties everything together. Apple cider vinegar adds a hint of tang. Finally, salt and pepper help enhance all the flavors. For the full recipe, check out the main article. To boil penne pasta, bring a large pot of salted water to a rolling boil. Add the penne and stir gently. Cook it for about 8 to 10 minutes, or until it is al dente. This means it should be firm but not hard. Once done, drain the pasta in a colander and rinse it under cold water. This stops the cooking process and cools the pasta quickly. For perfect al dente pasta, keep an eye on the clock. Taste a piece before the time is up. If it feels slightly firm, it’s ready. Always remember, you can cook it a bit longer if needed, but you can't undo overcooking. For the orange vinaigrette, you will need these ingredients: - 1/4 cup olive oil - 3 tablespoons orange juice - 1 tablespoon orange zest - 1 tablespoon apple cider vinegar - Salt and pepper to taste To make the vinaigrette, whisk all these ingredients together in a small bowl. Use a fork or a whisk and mix until it looks smooth. Proper whisking helps to blend the oil and vinegar well, creating a nice emulsion. To combine the salad, take a large bowl and add the cooled penne pasta, crumbled feta cheese, dried cranberries, finely chopped red onion, diced cucumber, halved cherry tomatoes, and chopped parsley. Mix these ingredients gently. Once combined, pour the orange vinaigrette over the salad. Toss everything together until the pasta and veggies are nicely coated. Chilling the salad is key. Cover it and place it in the fridge for at least 30 minutes before serving. This allows the flavors to blend and makes the salad taste even better. To cool your pasta quickly, first, drain it in a colander. Rinse it under cold water until it's cool to the touch. This stops the cooking process and keeps the pasta from becoming mushy. You can also spread the pasta on a baking sheet to cool faster. This method helps air circulate around the pasta. Adjusting the vinaigrette is easy. Start with the basic recipe, then taste it. If it’s too tangy, add a little more olive oil. If you want more zing, add extra orange juice or zest. You can also add a pinch of salt to enhance the flavors. Each person has different tastes, so make it your own! Serving this salad can be fun and creative. Try using a large, clear bowl to show off the colorful ingredients. You can also serve it in individual glass jars for a fun twist. This makes it easy for guests to grab their own portion. For garnish, sprinkle some extra feta cheese on top. Add a few whole cranberries for a pop of color. Fresh parsley leaves also make a great touch. These small details make your salad look beautiful and inviting. For the full recipe, check out the details provided earlier. {{image_2}} You can easily change a few ingredients in this salad. For cheese, try goat cheese instead of feta. Goat cheese gives a tangy taste that works well. You can also swap dried cranberries for raisins or chopped dates. These options add sweetness and chewiness. Seasons change, so your salad can too! In spring and summer, fresh herbs like basil or mint add great flavor. You can also toss in veggies like bell peppers or zucchini for crunch. If you want to add protein, consider grilled chicken or chickpeas. They make the salad heartier and more filling. To explore more ideas and find the Full Recipe, check out the detailed instructions in the article. To store leftover salad, place it in an airtight container. This keeps the salad fresh and tasty. Always make sure the container is clean and dry before use. You can also use glass containers for better storage. They are great for keeping flavors intact. If you have extra vinaigrette, store it in a separate container. This way, your salad stays crisp and not soggy. The salad lasts about 3 to 4 days in the fridge. Always check for signs of spoilage before eating. If you see any mold, discard the salad right away. Another sign is a strange smell. If it smells off, trust your nose and throw it out. Always remember that fresh ingredients have a shorter shelf life. So, enjoy your Feta Cranberry Penne Salad with Orange Vinaigrette as soon as you can for the best taste. For the full recipe, you can refer back to the main section. Can I make the salad in advance? Yes, you can make this salad ahead of time. I often prepare it a day early. Just store it in the fridge. The flavors get better as they mingle. You can toss it again just before serving. Is this salad gluten-free? The salad is not gluten-free as it contains penne pasta. However, you can easily swap the penne for gluten-free pasta. This keeps the dish just as tasty while meeting gluten-free needs. Caloric content per serving Each serving of this salad has about 300 calories. This can vary based on the amount of dressing you use. It’s a healthy option that fills you up without weighing you down. Benefits of the key ingredients - *Penne Pasta:* A good source of carbs for energy. - *Feta Cheese:* Provides protein and calcium. - *Dried Cranberries:* Packed with antioxidants and vitamins. - *Olive Oil:* Offers healthy fats that support heart health. What to pair with Feta Cranberry Penne Salad? This salad pairs well with grilled chicken or fish. You can also serve it with fresh bread for a complete meal. A light white wine enhances the flavors nicely. Ideal occasions for serving this salad This salad is perfect for picnics, potlucks, or summer barbecues. It shines at holiday gatherings too. I love bringing it to family dinners, as it always gets rave reviews. For the full recipe, check out the detailed instructions. This blog post covers the tasty Feta Cranberry Penne Salad you can easily make. We discussed the main and additional ingredients, along with the simple dressing. I shared step-by-step cooking tips and tricks to make your salad shine. Remember to chill it well for the best flavor! Ultimately, this salad is perfect for gatherings or a light meal. You can tweak the ingredients to fit your taste. Enjoy this fresh and flavorful dish, knowing it's easy to make and share.
    Feta Cranberry Penne Salad with Orange Vinaigrette Delight
  • For a delightful mango strawberry sorbet, you will need these main ingredients: - 2 ripe mangoes, peeled and diced - 2 cups fresh strawberries, hulled and halved - 1/2 cup honey or maple syrup (adjust for sweetness) - 1 tablespoon fresh lime juice - 1 cup coconut water (or regular water) These fruits provide a sweet and tangy flavor. The honey or maple syrup adds a nice touch of sweetness. Lime juice gives it a refreshing zing. Coconut water keeps it light and hydrating. You can add a few optional ingredients to enhance the taste: - A pinch of salt to balance the sweetness - Fresh mint leaves for a hint of herbal flavor - A splash of vanilla extract for depth These extras can make your sorbet even more special. Try different combinations to find what you like best. If you can’t find some ingredients, don't worry! Here are some substitutions: - Use agave syrup instead of honey or maple syrup for a vegan option. - Swap coconut water for regular water or fruit juice for a different twist. - If mangoes are out of season, use frozen mango chunks instead. These alternatives can help you whip up this treat anytime. Enjoy experimenting and making it your own! For the complete recipe, check out the Full Recipe. Start by choosing ripe mangoes and fresh strawberries. Ripe mangoes should feel soft but firm. To prepare, peel the mangoes and cut them into small pieces. For the strawberries, remove the green tops and cut them in half. This helps with blending. You want about 2 cups of strawberries. Use a measuring cup for accuracy. Fresh fruit gives the best taste for your sorbet. In a blender, add the diced mangoes and halved strawberries. Then, pour in your sweetener, like honey or maple syrup. Next, add the lime juice and coconut water. Blend on high speed until the mix is smooth and creamy. You may need to stop and scrape the sides of the blender. This ensures all the fruit blends well. Taste the mixture. If it needs more sweetness, add a little more honey or syrup. Pour your blended mixture into a shallow dish or silicone ice cube tray. This helps it freeze evenly. Place the dish in the freezer for about 4 to 6 hours. Every hour, take it out and stir with a fork. This breaks up ice crystals and keeps the texture smooth. Once it is fully frozen, let it sit for a few minutes before serving. This helps soften it for easy scooping. Enjoy your homemade mango strawberry sorbet! For more details, check the Full Recipe. To make your mango strawberry sorbet sweet and tasty, use ripe fruit. Ripe mangoes and strawberries add natural sugar. Taste your blend before freezing. This way, you can adjust the sweetness. If it’s not sweet enough, add more honey or maple syrup. Keep in mind, everyone has different tastes. So, adjust based on your preference. For creamy sorbet, blend well. Make sure to break down all the fruit. Use a high-speed blender for the best results. After blending, freeze the mixture in a shallow dish. This helps it freeze evenly. Stir it every hour with a fork. This will break up ice crystals. Doing this gives you that smooth texture you want. Serve your sorbet in chilled bowls. This keeps it cool longer. For a fun touch, garnish with lime slices or mint. You can also add fresh fruit on top. Try using small mint leaves for color. This makes your dessert look fancy. Enjoy your mango strawberry sorbet with friends and family. It’s a perfect treat for warm days. For the complete recipe, check out the Full Recipe section. {{image_2}} You can make your mango strawberry sorbet even better! Add fruits like bananas, peaches, or raspberries for extra flavor. These fruits mix well with mango and strawberry. For example, bananas give a creamy texture. Raspberries add a tart kick. Just remember to keep the same amount of fruit for the best taste. Making this sorbet vegan is easy! Instead of honey, use maple syrup or agave. Both sweeteners work great. You can also use coconut water for a tropical feel. This keeps the recipe plant-based. Enjoy the same yummy taste without dairy or animal products! Want a tropical touch? Try adding pineapple or passion fruit! These fruits bring a fun twist to the sorbet. The sweet and tangy flavors balance well with mango and strawberry. You can also add a splash of coconut milk to make it creamier. This gives you a taste of the tropics in every scoop! Check out the Full Recipe for more ideas. To store leftover sorbet, place it in an airtight container. This keeps out air and moisture. Make sure to press the sorbet down to remove any gaps. Cover the top with plastic wrap for extra protection. Label the container with the date. The sorbet stays fresh for about one week. For long-term storage, freeze the sorbet in a deep, airtight container. Use a silicone mold for easy portioning. This way, you can scoop out just what you need. Always let the sorbet cool completely before sealing it. Quick freezing helps maintain the flavor and texture. Watch for changes in color or smell. If the sorbet looks icy or has a grainy texture, it may be spoiled. An off smell or taste indicates it’s time to toss it out. Always trust your senses; if it seems wrong, do not eat it. Yes, you can use frozen fruit. This works well for mango and strawberries. Just remember to let them thaw a bit before blending. This step helps in getting a smooth texture. Frozen fruit can also be sweeter. So, adjust the honey or syrup based on your taste. To reduce ice crystals, stir the mixture every hour while it freezes. This breaks up any ice that forms. You can also use a little less water or coconut water. A splash of vodka or another spirit can help too. It lowers the freezing point, leading to a creamier texture. Serve the sorbet in chilled bowls for a nice touch. You can add a slice of lime or mint on top. This adds color and freshness. Another fun idea is to scoop it into cones for a playful treat. Try pairing it with fresh fruit on the side for extra flavor. Mango strawberry sorbet can last about two weeks in the freezer. Make sure to store it in an airtight container. This prevents ice from forming on the surface. If you notice ice crystals or a change in texture, it’s best to enjoy it soon. For the full recipe, check out the steps above! Mango strawberry sorbet is easy to make and full of flavor. We covered the main ingredients and how to prepare the fruits. I shared tips for a smooth texture and creamy consistency. You can even try different fruits for a fun twist. Remember to store leftovers right and keep an eye for spoilage signs. Enjoy this refreshing treat and impress your family and friends with your sorbet skills! You’ll love every scoop of this tasty dessert.
    Mango Strawberry Sorbet Flavorful Frozen Delight
  • To make a tasty watermelon sorbet, you will need: - 4 cups ripe watermelon, cubed and seeds removed - 1/2 cup sugar (or honey for a natural sweetener) - 2 tablespoons lime juice - Pinch of salt These ingredients create a sweet and refreshing treat that shines in the summer heat. Using ripe watermelon is key, as it provides the best flavor. You can add fun twists to your watermelon sorbet. Here are some options: - Fresh mint leaves for garnish - A splash of coconut milk for creaminess - Other fruits like strawberries or pineapple for added sweetness - A hint of chili powder for a spicy kick These additions can enhance your sorbet and make it even more exciting. To create your watermelon sorbet, gather these tools: - A baking sheet for freezing the watermelon - A blender or food processor to mix the ingredients - A shallow dish for freezing the sorbet Having the right tools will help you make this treat easily and effectively. You can find the full recipe for watermelon sorbet in the next section. To start, choose a ripe watermelon. It should feel heavy for its size. Cut the watermelon into cubes, removing all seeds. Place the cubes on a baking sheet. Spread them out to freeze evenly. Freeze the watermelon cubes for 2-3 hours. This step makes the sorbet icy and refreshing. Now, take your frozen watermelon from the freezer. Place it in a blender or food processor. Add half a cup of sugar or honey, depending on your choice. Then, squeeze in two tablespoons of lime juice. Add a pinch of salt to balance the sweet taste. Blend until the mixture is smooth and creamy. You might need to scrape down the sides to help it blend well. Taste the mixture. Adjust the sweetness or lime juice if needed. Pour the blended sorbet mixture into a shallow dish. Spread it out evenly. Freeze the mixture for another 1-2 hours. This helps it firm up nicely. When it's ready, scoop the sorbet into bowls. You can garnish with fresh mint leaves if you like. Enjoy your homemade watermelon sorbet! For more details, check the Full Recipe. Choose a ripe watermelon for the best taste. Look for a heavy watermelon. A dull skin means it is ripe. Check for a yellow spot. This spot shows it sat on the ground and ripened in the sun. For a smooth texture, freeze the watermelon cubes first. This keeps the sorbet light and fluffy. Blend well until everything is creamy. If it seems too thick, add a bit of water or lime juice. Taste your sorbet mixture before freezing. You can add more sugar or honey if needed. Adjust the lime juice too. This balance makes your sorbet bright and tasty. Remember, sweetness can vary based on the watermelon. {{image_2}} You can easily make this sorbet vegan. Just use a natural sweetener like agave or maple syrup instead of sugar. The taste remains sweet and fresh. I love how simple it is to keep the recipe plant-based. You still enjoy the same fruity flavor. Mixing in other fruits makes the sorbet even more fun! You can add berries, mango, or pineapple. Each fruit brings its own taste and color. For example, strawberries add a nice red hue and a sweet flavor. Just blend them with the watermelon. You can also try adding herbs like basil or ginger for a twist. Want a grown-up treat? Try adding alcohol to your sorbet. A splash of rum or vodka can make it special. This works great for summer parties. Just mix in about 1/4 cup of your favorite spirit before freezing. Remember to enjoy responsibly! These variations keep your watermelon sorbet fresh and exciting. Feel free to get creative and explore new tastes. You will find joy in every scoop! For the full recipe, check out the detailed steps above. To store your homemade watermelon sorbet, first make sure it is in an airtight container. This keeps the sorbet fresh and prevents ice crystals. You can also cover the surface with plastic wrap to add extra protection. It’s best to use a shallow dish as this helps the sorbet freeze evenly. When freezing your sorbet, set your freezer to a cold setting. This helps it freeze faster and stay smooth. Avoid opening the freezer often to keep the temperature stable. If you plan to store it long-term, consider dividing the sorbet into smaller portions. This way, you can take out just what you need. Homemade watermelon sorbet can last about one month in the freezer. After that, it may lose flavor and texture. Signs of spoilage include ice crystals forming on the surface or a change in color. If the sorbet smells off or has an unusual taste, it’s best to throw it away. For more detailed instructions, check the Full Recipe. Yes, you can use seedless watermelon. Seedless watermelon is sweet and juicy. It makes your sorbet smooth and easy to blend. If you use seeded watermelon, make sure to remove all the seeds. This will keep your sorbet creamy and tasty. You can make watermelon sorbet without a blender by using a fork. First, freeze the watermelon cubes as usual. Then, once frozen, place them in a bowl. Use a fork to mash the watermelon into small bits. Mix in the sugar, lime juice, and salt. Spread the mixture in a dish and refreeze. This method takes a bit more time, but it works well! Watermelon sorbet pairs great with many treats. You can serve it with fresh fruit, like berries or mint. It also goes well with cookies or cake. For a fun twist, try topping it with a splash of coconut milk. You can even use it as a refreshing side to grilled meats at a summer barbecue. Enjoy this sorbet with whatever you love! Making watermelon sorbet is fun and simple. We covered key ingredients, tools, and step-by-step instructions. You learned tips for selecting the best watermelon and adjusting sweetness. Variations like vegan options or alcohol flavors add a twist. Storing your sorbet properly ensures it stays fresh longer. With these insights, you can enjoy a delicious treat any time. Enjoy making this refreshing dessert to share with family and friends!
    Watermelon Sorbet Fresh and Tasty Summer Treat
  • - Chicken thighs: Use 4 chicken thighs with skin-on and bone-in. This keeps the meat juicy and adds flavor. - Citrus and flavor-enhancing ingredients: You need 1 large orange for juice and zest. The zest gives a bright taste. Add 3 cloves of minced garlic and 1 tablespoon of grated fresh ginger for depth. - Additional seasonings and garnishes: Use 2 tablespoons of olive oil, 2 tablespoons of honey, and 1 tablespoon of soy sauce. Season with 1 teaspoon of smoked paprika, 1 teaspoon of salt, and ½ teaspoon of black pepper. Finally, garnish with fresh parsley to add color and freshness. For the full recipe, check the section above. This combination of ingredients creates a harmony of flavors in your roasted orange chicken. To make the marinade, start by mixing orange juice and zest in a bowl. Add olive oil, minced garlic, grated ginger, honey, soy sauce, smoked paprika, salt, and black pepper. Whisk this mixture until it blends nicely. This marinade gives the chicken a bright and zesty flavor. Next, marinate the chicken for the best taste. Place the chicken thighs in a large dish and pour the marinade over them. Make sure each piece is well-coated. Cover the dish and let it marinate for at least 30 minutes. For even more flavor, marinate it in the fridge for up to two hours. Now, it’s time to bake your chicken. Preheat your oven to 400°F (200°C). This temperature helps the chicken cook evenly and become crispy. After marinating, arrange the chicken thighs in the baking dish, skin-side up. Roast them for 35 to 40 minutes. The chicken is done when it reaches an internal temperature of 165°F (75°C). Use a meat thermometer to check this. When your chicken is done, take it out of the oven and let it sit for five minutes. This helps the juices settle. For a beautiful plate, place the chicken on a platter. Drizzle some of the leftover marinade over the top. You can add orange slices and chopped parsley for color and flair. This dish looks great and tastes even better! For the full recipe, check out the details above. To keep your chicken juicy, marinating is key. Marinades add flavor and moisture. Use the orange juice and zest from the recipe. The acid in the juice helps tenderize the meat. A good rule is to marinate for at least 30 minutes. For more flavor, go for two hours. Cooking techniques also matter. Roast your chicken at a high temperature, around 400°F (200°C). This helps seal in juices. Avoid overcooking, as it dries out the meat. Use a meat thermometer to check for doneness. The chicken should reach 165°F (75°C). Crispy skin makes the dish special. Start by patting the chicken dry with paper towels before seasoning. This step removes excess moisture. When the skin is dry, it crisps up better in the oven. Resting time is important too. After roasting, let the chicken sit for 5 minutes. This allows juices to redistribute, keeping the meat moist. You will enjoy a perfect bite every time. Spice up your dish with herbs and spices. Fresh herbs like thyme or rosemary pair well with orange. They add a nice touch. If you only have dried herbs, use them too. Just remember, dried herbs are stronger. Choosing fresh over dried ingredients can elevate your meal. Fresh garlic and ginger bring more flavor than dried ones. Use what you have, but know that fresh gives the best taste. For more ideas, check the Full Recipe for added flavor tips. {{image_2}} If you want to change the chicken thighs, you can use chicken breasts or drumsticks. Chicken breasts cook faster but can dry out. Drumsticks add flavor and stay juicy. For a twist on the citrus, try lemon, lime, or grapefruit. Each fruit brings a unique taste. Lemon gives a bright zing, while lime adds a fresh kick. Grapefruit offers a sweet and slightly bitter flavor. You can grill roasted orange chicken for a smoky flavor. Just marinate the chicken as usual. Place the chicken on a grill over medium heat. Grill for about 20 minutes, flipping halfway through. The slow cooker is another great option. It makes the chicken super tender. Just place the marinated chicken in the slow cooker. Cook on low for 6-7 hours or on high for 3-4 hours. The chicken will soak up all the flavors. Pair your roasted orange chicken with grains like rice or quinoa. These sides soak up the tasty juices. You can also serve it with roasted veggies or a fresh salad for a healthy twist. If you have leftovers, get creative! Use the chicken in tacos, salads, or sandwiches. Shred the chicken and mix it with some salsa for a quick meal. For more details on making this dish, check out the Full Recipe. After enjoying your roasted orange chicken, store leftovers in an airtight container. This keeps the chicken moist. It lasts in the fridge for about three to four days. Always let it cool before sealing. This helps prevent sogginess. To freeze roasted chicken, place it in a freezer-safe bag or container. Remove as much air as possible to avoid freezer burn. It can stay fresh for up to three months. When you're ready to eat, thaw it in the fridge overnight. This helps keep the flavors intact. To reheat without drying out the chicken, use the oven or stovetop. Preheat your oven to 350°F (175°C). Place the chicken on a baking sheet and cover it with foil. Heat for about 15-20 minutes. This keeps the chicken juicy. If using a stovetop, warm it in a skillet over low heat. Aim for an internal temperature of 165°F (75°C) to ensure it's safe to eat. You can use chicken breasts or drumsticks. Bone-in cuts add flavor. If you prefer, try turkey thighs for a leaner option. For a vegetarian twist, use firm tofu or tempeh. Just ensure you adjust cooking times. Yes, marinating overnight gives the chicken a deeper flavor. The longer it sits, the more the chicken absorbs the marinade. This makes every bite juicy and tasty. Just keep it in the fridge to stay safe. Use a meat thermometer to check the chicken’s inside temperature. It should reach 165°F (75°C). Look for clear juices and no pink meat. The skin should be crispy and golden. Absolutely! Use gluten-free soy sauce or tamari. You can also swap honey for maple syrup if needed. Be sure to check all labels to avoid hidden gluten in other ingredients. In this post, I shared how to make roasted orange chicken using simple steps. I covered key ingredients, easy cooking methods, and tasty serving ideas. Remember to marinate for the best flavor. Use tips for juicy chicken and crispy skin. You can also try variations with different proteins and cooking methods. Leftovers can be stored well for future meals. This dish is flexible and fun, making it great for any occasion. Enjoy making and sharing this delicious recipe!
    Roasted Orange Chicken Flavorful and Juicy Delight
  • - 1 pound sirloin steak, cut into bite-sized pieces - 2 cups cooked jasmine rice - 1 tablespoon vegetable oil - 2 cloves garlic, minced - 1 teaspoon fresh ginger, grated - 1 cup broccoli florets - 1 carrot, julienned - 1 zucchini, sliced - 2 tablespoons soy sauce - 1 tablespoon teriyaki sauce - 1 teaspoon sesame oil - 2 green onions, sliced (for garnish) - Sesame seeds (for garnish) Gather these ingredients before you start cooking. The sirloin steak gives a rich flavor. It’s tender and juicy, perfect for hibachi bowls. Jasmine rice adds a nice touch with its fragrance. I like to use fresh veggies like broccoli, carrots, and zucchini. They not only taste great but also add color and nutrients. The sauces are key for flavor. Soy sauce brings saltiness, while teriyaki sauce adds sweetness. Sesame oil rounds out the dish with a nutty taste. Green onions and sesame seeds are the perfect finishing touches, giving texture and crunch. Ready to dive into the cooking? Check out the Full Recipe to see how to bring these ingredients together for a delicious meal. - Combine steak with soy sauce, teriyaki sauce, and sesame oil. - Allow to marinate for at least 15 minutes. Marinating the steak adds rich flavor. The soy sauce gives it saltiness, while teriyaki adds a sweet kick. Sesame oil brings a nutty taste. Make sure to coat every piece well. Letting it sit for 15 minutes helps the flavors sink in. You can marinate it longer if you have time. - Heat vegetable oil in a skillet or hibachi grill. - Sauté garlic and ginger until fragrant. Heat your skillet on medium-high. Add the vegetable oil. Once hot, toss in the minced garlic and grated ginger. Stir for about 30 seconds. You want them fragrant, not burnt. This step builds a great base for your veggies. - Stir-fry broccoli, carrot, and zucchini. - Cook marinated steak until browned. - Combine steak and vegetables. Add the broccoli, carrots, and zucchini to your skillet. Stir-fry for about 4 to 5 minutes. You want them tender but still crunchy. Next, add the marinated steak. Cook for about 4 to 6 minutes until browned. Once done, mix the veggies back in. This melds all the flavors together. - Add jasmine rice to serving bowls. - Top with steak and vegetable mixture. - Garnish with green onions and sesame seeds. Scoop some jasmine rice into each bowl. Then, load it up with the steak and veggie mix. Finally, sprinkle sliced green onions and sesame seeds on top. This adds color and crunch. For the full recipe, check out the [Full Recipe]. For the best hibachi steak, I recommend sirloin or ribeye. These cuts are tender and flavorful. When choosing your steak, look for good marbling. This means small white lines of fat in the meat. They make the steak juicy and tasty. To ensure perfect tenderness, let your steak sit at room temperature for about 30 minutes before cooking. This helps it cook evenly and stay soft. Preparing your veggies right makes a big difference. For carrots, peel them first. Then, slice them into thin strips, called julienne. This helps them cook quickly. For zucchini, cut off the ends, then slice it into rounds. Aim for thin slices for even cooking. Cook broccoli florets for about 4-5 minutes. Carrots and zucchini should cook for the same time. This way, they stay crunchy and vibrant. Marinating your steak boosts flavor. To make it even better, add some garlic or a splash of lime juice. Let your steak marinate for at least 15 minutes. You can go longer if time allows. This helps the flavors soak in. Just remember, don’t marinate too long, or it may become mushy. Your steak deserves that perfect balance of taste and texture. For the full recipe, check out the Hibachi Steak Bowls section above. {{image_2}} You can swap out steak for chicken or tofu. Chicken is lighter and cooks faster. Tofu is great for a plant-based meal. If you use chicken, cut it into small pieces. Cook it for about 5-7 minutes until it's no longer pink. For tofu, press it to remove water, then cut and cook for about 3-5 minutes. This way, you can enjoy a tasty bowl with your favorite protein. Feel free to use seasonal vegetables. This adds freshness and flavor to your dish. Try using bell peppers, snap peas, or asparagus. They cook quickly and add color. You can also mix in mushrooms or corn for extra texture. Just chop them into bite-size pieces, so they cook evenly. Experiment with different sauces to change the flavor. You might try spicy marinades if you like heat. Garlic sauce can add a nice kick too. You can make your own sauces or use store-bought ones for convenience. Just remember, a good sauce brings the whole dish together. Check out the Full Recipe for more details on ingredients and flavors. To keep your hibachi steak bowls fresh, store leftovers in the fridge. Use airtight containers to prevent moisture loss. Glass or BPA-free plastic works best. Make sure to let the dish cool before sealing. This helps maintain the flavor and texture. Consume leftovers within three days for the best taste. For reheating, the stovetop is the best option. It keeps the steak tender and the veggies crisp. Place the bowl in a skillet over medium heat. Stir occasionally until heated through. If using the microwave, remove the lid and cover with a damp paper towel. Heat in short bursts. Check often to avoid overcooking. To freeze hibachi steak bowls, pack them tightly in airtight containers. Leave some space for expansion. You can freeze them for up to three months. When ready to eat, thaw in the fridge overnight. To reheat, use the stovetop for the best results, or microwave if short on time. A hibachi steak bowl is a delicious dish with tender steak and fresh veggies. It often includes jasmine rice as the base. You can add a mix of flavors from soy sauce and teriyaki sauce. The dish is quick to make, so it’s great for busy nights. It's colorful and filling, perfect for any meal. To make hibachi steak bowls healthier, use lean cuts of steak. Substitute brown rice for jasmine rice for more fiber. You can also add more veggies like bell peppers or snap peas. Keep portion sizes small to avoid eating too much. Use less oil when cooking and try to grill instead. Yes, you can make hibachi steak bowls in advance! Cook the steak and veggies, then store them in the fridge. Keep the rice separate to avoid sogginess. You can prep up to three days ahead. Just reheat everything in a skillet or microwave when ready to eat. Many Japanese restaurants offer hibachi steak bowls. Look for places that specialize in hibachi or teppanyaki. Popular chains like Benihana serve similar dishes. You can also find them at food trucks or local eateries. Check online reviews to find the best spots near you. You've learned how to make tasty hibachi steak bowls from scratch. We covered key ingredients, step-by-step cooking, and tips to enhance your meal. Remember, you can switch proteins or veggies to suit your taste. Store leftovers properly, and you can enjoy this dish later. Try experimenting with the flavors based on what you like. Making hibachi steak bowls can be fun and rewarding. Enjoy your cooking!
    Hibachi Steak Bowls Flavorful and Easy Weeknight Meal
  • To make a fresh and tasty Pearl Couscous Chickpea Salad, you need simple and vibrant ingredients. Here is the complete list of what you will need: - 1 cup pearl couscous - 1 can (15 oz) chickpeas, rinsed and drained - 1 red bell pepper, diced - 1 cup cherry tomatoes, halved - 1 cucumber, diced - 1/4 red onion, finely chopped - 1/4 cup fresh parsley, chopped - 1/4 cup feta cheese, crumbled (optional) - 3 tablespoons olive oil - 2 tablespoons lemon juice - 1 teaspoon ground cumin - Salt and pepper to taste These ingredients create a bright and colorful dish. Pearl couscous brings a unique texture, while chickpeas add protein. The red bell pepper and cherry tomatoes offer sweetness and crunch. Cucumber adds a refreshing bite, and red onion gives it a bit of zing. Fresh parsley brightens the flavor, and feta cheese adds creaminess if you choose to include it. The olive oil and lemon juice give the salad a zesty finish. Use salt and pepper to taste for extra flavor. For the full recipe, check out the instructions to see how to bring these ingredients together into a delightful salad. To cook pearl couscous, start by boiling 1.5 cups of water in a medium saucepan. Add 1 cup of pearl couscous and a pinch of salt. Cover the pot and reduce the heat to low. Let it simmer for about 8 to 10 minutes. The couscous should be al dente, which means it will have a slight bite. Once cooked, remove it from the heat and let it cool. This cooling step is vital; it keeps the couscous from getting mushy. While the couscous cools, wash and chop your vegetables. Use a sharp knife for easy cutting. Dice the red bell pepper, cucumber, and onion into small pieces. Halve the cherry tomatoes for a juicy burst in every bite. Place all the chopped veggies in a large mixing bowl with one can of rinsed and drained chickpeas. Add freshly chopped parsley for color and flavor. Mixing all ingredients in one bowl makes it easier to combine later. Creating a zesty dressing is simple. In a small bowl, whisk together 3 tablespoons of olive oil, 2 tablespoons of lemon juice, and 1 teaspoon of ground cumin. Add salt and pepper to taste. This dressing adds a bright flavor that ties the salad together. You can adjust the olive oil and lemon juice for a milder or stronger taste based on your preference. Once the couscous is cool, add it to the bowl with the veggies and chickpeas. Drizzle the zesty dressing over the mixture. Use a large spoon to gently toss everything together. This ensures all flavors blend well. It’s important to chill the salad in the fridge for at least 30 minutes. Chilling helps the flavors meld together, making each bite more delicious. You can sprinkle crumbled feta cheese on top just before serving if you like. For the full recipe, check out the detailed instructions above. To boost the flavor of your Pearl Couscous Chickpea Salad, use fresh herbs. Fresh parsley adds brightness. You can also add mint for a unique twist. For extra zest, consider a splash of vinegar or citrus juice. Adjust seasonings to fit your taste. Start with a pinch of salt, then add more if needed. Taste as you go to find the right balance. You can prepare many ingredients in advance. Chop the vegetables a day before. Store them in airtight containers in the fridge. You can also cook the pearl couscous ahead of time. Let it cool completely before storing it. This will help save time on serving day. Keep all prepped items separate until you're ready to mix and serve. For a fun presentation, layer the salad in a clear bowl. This shows off the colorful ingredients. You could also serve it in lettuce cups for a fresh twist. Pair this salad with grilled chicken or fish for a complete meal. It works well for picnics or potlucks too. You can enjoy it as a light lunch or a hearty side dish. For the full recipe, check the earlier section. {{image_2}} You can swap out chickpeas for other beans. Black beans or white beans work well. They add protein and flavor. For vegetables, try using bell peppers or zucchini. You can even add corn for a sweet crunch. Each swap brings a new twist to the salad. If you want a creamy dressing, try yogurt or tahini. Both give a nice flavor boost. For a herbal twist, mix in fresh basil or mint. These herbs add freshness and aroma. You can also use balsamic vinegar for a different taste. To make the salad vegan, leave out the feta cheese. You can add avocado for creaminess instead. For a gluten-free option, choose gluten-free couscous or quinoa. Both give great texture and taste. Adjust the recipe to fit your needs and enjoy! To keep your salad fresh, use an airtight container. Glass or plastic containers work well. Make sure to store it in the fridge. You can keep it for up to three days. After that, the veggies may lose their crunch. This salad is best enjoyed cold. If you want to warm it up, do so gently. Use a microwave on low heat. Be careful not to overheat, as this can ruin the texture. If it feels dry, drizzle a little olive oil on top before serving. Freezing this salad is not recommended. The texture of the veggies and couscous changes when frozen. If you must freeze it, separate the dressing and veggies first. Store the salad base in a freezer bag. When ready to eat, thaw overnight in the fridge and mix in the dressing. This way, you can revive it without losing too much flavor. Pearl couscous cooks in about 8 to 10 minutes. Boil 1.5 cups of water. Add a pinch of salt. Stir in 1 cup of pearl couscous. Cover and simmer on low heat. It should be al dente when done. Yes, you can make this salad ahead of time. It keeps well in the fridge. I suggest letting it chill for at least 30 minutes before serving. - Calories: About 250 per serving - Protein: Around 9 grams - Fats: Approximately 10 grams - Carbs: Roughly 35 grams This salad is hearty yet light. It's a great option for lunch or dinner. Absolutely! You can skip the feta cheese if you want. The salad will still taste fresh and zesty. Try adding avocado for creaminess instead. To make a warm version, cook the couscous as usual. Sauté the veggies in olive oil. Mix the warm couscous with the cooked veggies. Add the dressing while warm. Serve it right away for a cozy dish. For the full recipe, check the earlier section. Enjoy your cooking! In this blog post, I shared a simple recipe for Zesty Pearl Couscous Chickpea Salad. You learned about the fresh ingredients and step-by-step instructions to prepare it. I also offered tips for enhancing flavor and storage advice. This salad is versatile and easy to customize, making it perfect for any meal. Enjoy trying different ingredients and dressing options. With this recipe, you can create a delicious and healthy dish that suits your taste. Keep it fresh, mix it up, and savor every bite!
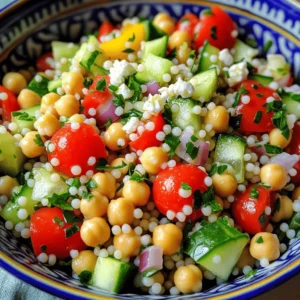
    Pearl Couscous Chickpea Salad Fresh and Flavorful Dish
  • - 1 cup glutinous rice - 1 ½ cups coconut milk - 2 ripe mangoes - 2 tablespoons sugar - ¼ teaspoon salt - 2 tablespoons toasted sesame seeds - Steamer - Banana leaves or parchment paper - Saucepan For this tasty treat, the key ingredients set the foundation. Glutinous rice is a must. It gives the rolls their signature texture. The coconut milk adds a rich, creamy flavor. Ripe mangoes bring natural sweetness and a bright color. You also need some extra ingredients. Sugar enhances the sweetness. A pinch of salt balances the flavors. Finally, toasted sesame seeds add a nice crunch on top. For equipment, a steamer is essential. It cooks the rice perfectly. You will also need banana leaves or parchment paper. They help form the rolls. A simple saucepan is key for making the coconut sauce. With these ingredients and tools, you're ready to create sweet mango sticky rice rolls. Check out the Full Recipe for detailed steps to make this delightful dish! Rinse the rice Start by rinsing 1 cup of glutinous rice. Place the rice in a bowl and cover it with cold water. Swirl the rice gently with your hand. Drain the water. Repeat this process until the water runs clear. This step helps remove excess starch and keeps the rice from being too sticky. Soak the rice Next, soak the rinsed rice in clean water. You should soak it for at least 4 hours, but overnight is best. This helps the rice absorb water and cook evenly. When you’re ready, drain the rice again. Steaming instructions To cook the rice, you need a bamboo steamer or a suitable plate. Place the soaked rice in the steamer, lined with cheesecloth. Steam the rice for about 20-25 minutes. The rice should turn translucent and feel tender when done. Preparing the coconut sauce While the rice steams, make the coconut sauce. In a saucepan, mix 1 ½ cups of coconut milk, 2 tablespoons of sugar, and ¼ teaspoon of salt. Heat this mixture over medium-low heat. Stir until the sugar dissolves, but do not let it boil. Mixing rice with coconut sauce Once the rice is cooked, put it in a large bowl. Pour about 1 cup of the coconut sauce over the rice. Stir gently to combine. Let the rice sit for about 30 minutes. This helps the rice soak up the coconut flavor. Adding mango filling Now, lay out banana leaves or parchment paper. Take a handful of the sticky rice and shape it into a rectangle, about ½ inch thick, on the leaf. Place a few strips of ripe mango in the center of the rice rectangle. Rolling technique Carefully fold the banana leaf or parchment paper over the rice and mango. Roll it tightly to seal the filling inside. Repeat this for the rest of the rice and mango. When finished, place the rolls on a platter. Drizzle the remaining coconut sauce on top and sprinkle with toasted sesame seeds for garnish. For the full recipe, check the details provided above. Enjoy your delicious Sweet Mango Sticky Rice Rolls! Soaking the rice is a must. It helps the grains absorb water. I recommend soaking for at least 4 hours, but overnight is best. This step makes the rice soft and sticky. Steaming time is also key. If you steam for too long, the rice can become mushy. Aim for 20 to 25 minutes. You want the rice to be tender and slightly translucent. Adjusting sweetness can make a big difference. You can add more sugar if you like it sweeter. Taste the coconut sauce before mixing it with the rice. This way, you can get it just right for your palate. Don’t be afraid to add other toppings. Toasted sesame seeds add a nice crunch. You can also try shredded coconut or crushed nuts for extra flavor. When serving, arrange the rolls neatly on a platter. Drizzling extra coconut sauce over the top looks great. It adds a nice touch and extra flavor. For garnishing, sprinkle toasted sesame seeds or fresh mint leaves. A little color goes a long way in making your dish pop. {{image_2}} You can swap out mango for other fruits. Consider using ripe bananas, strawberries, or even kiwi. Each fruit adds a unique flavor and texture. Next, think about your coconut sauce. Sweetened coconut sauce adds a rich flavor. Unsweetened sauce offers a more subtle taste. Choose what fits your palate! If you want a vegan option, this recipe is already perfect. All ingredients are plant-based. For gluten-free needs, stick to glutinous rice. It is naturally gluten-free and safe for all diets. For a low-sugar version, reduce the sugar in the coconut sauce. You can also use sugar alternatives like agave or stevia. This keeps the sweetness without the extra sugar. Adding spices can enhance the taste. Try a pinch of cinnamon or a dash of cardamom. These spices pair well with mango and coconut. You can also play with sauces. Consider drizzling a passion fruit syrup over the rolls. This adds a tart and sweet contrast to the creamy coconut. To keep your Sweet Mango Sticky Rice Rolls fresh, store them in an airtight container. Place parchment paper between the rolls to prevent sticking. Refrigerate them for up to 3 days. When you're ready to enjoy them again, reheat the rolls in a steamer. It keeps the rice moist and soft. You can also microwave them for about 20 seconds. Just cover them with a damp paper towel to trap steam. You can freeze these rolls either before or after you assemble them. If you freeze them before, make sure to wrap each roll tightly in plastic wrap. This helps keep the flavors and textures intact. Freeze them for up to a month. When you're ready to eat, thaw them in the fridge overnight. If you freeze them after assembly, let them cool first. Then, follow the same thawing steps before reheating. In the fridge, Sweet Mango Sticky Rice Rolls last about 3 days. After that, they start to lose their fresh taste and texture. Watch for signs of spoilage, like an odd smell or color changes. If the rice feels dry or hard, it's time to toss it. Always trust your senses; if something seems off, it’s best to be safe. Sweet Mango Sticky Rice Rolls come from Thailand. This dish is part of Thai culture and is enjoyed by many. It is often served as a dessert or snack. The main ingredients are sticky rice, coconut milk, and ripe mango. These flavors blend beautifully and create a unique taste. The dish is a popular treat during festivals and celebrations. Many Thai people see it as comfort food. It reminds them of home and joyful moments. No, you cannot use regular rice instead of glutinous rice. Glutinous rice has a high starch content. This makes the rice sticky and chewy when cooked. Regular rice does not have these properties. It will not give you the same texture. This dish relies on that sticky quality for the best flavor. If you want the true taste of Sweet Mango Sticky Rice Rolls, always use glutinous rice. To make this recipe dairy-free, use almond or oat milk. These alternatives work well in place of coconut milk. You can also use a dairy-free coconut cream. Make sure to check the labels for added sugars. This helps keep the flavor balanced. The rolls will still taste great and have a nice texture. Enjoy your Sweet Mango Sticky Rice Rolls without dairy! For the full recipe, follow the steps outlined above. To wrap up, we explored how to make Sweet Mango Sticky Rice Rolls. You learned about key ingredients like glutinous rice, coconut milk, and ripe mangoes. I shared step-by-step instructions and helpful tips for perfect results. You also saw variations, storage options, and addressed common questions. Enjoy making this dish! It’s fun, tasty, and perfect for sharing with friends. Happy cooking!
    Sweet Mango Sticky Rice Rolls Easy and Tasty Recipe
  • Mango cheesecake is a creamy delight that combines fresh mangoes and rich cheese. This dessert is perfect for any occasion. You will love the sweet and tangy flavor in each bite. The full recipe provides a simple way to enjoy this tropical treat. Here are the key ingredients you need: - 1 ½ cups graham cracker crumbs - ½ cup unsalted butter, melted - 2 cups cream cheese, softened - 1 cup sugar - 2 ripe mangoes, pureed (reserve some diced for garnish) - 2 teaspoons vanilla extract - 3 eggs - 1 tablespoon fresh lime juice - 1 cup sour cream - ¼ cup gelatin - ¾ cup cold water These ingredients work together to create a smooth and tasty cheesecake. You can add some fun garnishes to enhance your cheesecake. Consider these options: - Diced mango for a fresh touch - Mint leaves for color and flavor - Extra mango puree drizzled on top These garnishes make the cheesecake look beautiful and taste even better. Start by preheating your oven to 325°F (160°C). In a large bowl, mix the graham cracker crumbs and melted butter. Make sure it looks like wet sand. Press this mixture into the bottom of a 9-inch springform pan. Bake for 10 minutes, then take it out to cool. In a separate bowl, beat the softened cream cheese until it is smooth. Gradually add in the sugar while mixing. Next, fold in the mango puree, vanilla extract, lime juice, and sour cream. Blend until everything is smooth. Add the eggs one at a time. Mix gently after each egg, being careful not to overmix. In a small pan, dissolve the gelatin in cold water over low heat. Once melted, let it cool slightly, then stir it into the cheesecake mix. Pour the cheesecake mixture over the cooled crust. Smooth the top with a spatula. Bake in the oven for 50 to 60 minutes. The center should be set but still slightly jiggly. Turn off the oven, crack the door, and let it cool inside for an hour. This helps prevent cracking. After it cools, cover the cheesecake and put it in the fridge for at least 4 hours. For the best results, chill it overnight. Before serving, top with diced mango for a beautiful garnish. To keep your cheesecake smooth, follow a few simple steps. First, do not rush the mixing. Mix the cream cheese slowly to avoid air bubbles. Next, bake it at a lower temperature. A hot oven can cause cracks. After baking, let the cheesecake cool in the oven with the door slightly open. This helps it cool down gradually. Lastly, chill it in the fridge for at least four hours. This step will help firm it up and keep it crack-free. For a creamy mango cheesecake, start with room-temperature cream cheese. Cold cream cheese can lead to lumps. Use a mixer for smooth blending. Add the eggs one by one, mixing gently after each. Overmixing can cause a dense texture. When adding the mango puree, fold it in softly to keep the mixture light. Lastly, the sour cream adds creaminess, so don't skip it. When serving mango cheesecake, presentation matters. Place it on a nice cake stand for a beautiful look. For extra flair, drizzle mango puree on top. Add a few mint leaves for color and freshness. You can also serve it with whipped cream or ice cream. For a crunchy contrast, sprinkle some crushed nuts on the side. This adds a delightful texture that pairs well with the creamy cheesecake. For more details, check the Full Recipe. {{image_2}} If you want a quick dessert, try the no-bake mango cheesecake. This version skips baking and uses gelatin to set. Here’s how to make it: - Ingredients: - 1 ½ cups graham cracker crumbs - ½ cup unsalted butter, melted - 2 cups cream cheese, softened - 1 cup sugar - 2 ripe mangoes, pureed - 2 teaspoons vanilla extract - 1 cup heavy cream - ¼ cup gelatin - ¾ cup cold water 1. Mix the graham cracker crumbs and melted butter. Press into a pan for the crust. 2. In a bowl, blend cream cheese and sugar. Add the mango puree and vanilla. 3. Whip the heavy cream until stiff peaks form. Fold it gently into the cream cheese mix. 4. Dissolve gelatin in cold water and add to the mixture. 5. Pour into the crust, smooth the top, and chill for at least 4 hours. Going vegan? You can make a tasty mango cheesecake using plant-based ingredients. Here’s a simple swap: - Ingredients: - 1 ½ cups almond flour - ¼ cup coconut oil, melted - 2 cups cashews, soaked and blended - ½ cup maple syrup - 2 ripe mangoes, pureed - 2 teaspoons vanilla extract - 1 tablespoon lemon juice - ¼ cup agar-agar powder with water 1. Prepare the crust with almond flour and coconut oil. 2. Blend soaked cashews with maple syrup, mango puree, and vanilla. 3. Cook agar-agar in water until dissolved, then mix it into the cashew blend. 4. Pour into your crust and chill until firm. Love experimenting? You can mix flavors for fun twists on mango cheesecake. Here are some ideas: - Coconut Mango: Add shredded coconut to the filling for a tropical taste. - Passion Fruit: Stir in passion fruit puree for a tangy zing. - Chocolate Mango: Swirl melted chocolate into the mango filling for a rich contrast. These variations make your mango cheesecake even more exciting. Check out the Full Recipe for classic mango cheesecake! To keep your mango cheesecake fresh, store it in the fridge. Use an airtight container to prevent it from drying out. Cover the top with plastic wrap if you don’t have a container. This way, the cheesecake stays moist and tasty for days. Always chill it before serving to enjoy that creamy texture. If you want to save the cheesecake for later, freezing works well. First, let it cool completely. Then, slice it into pieces for easy serving. Wrap each slice in plastic wrap and then in aluminum foil. This double wrapping helps prevent freezer burn. Place the wrapped slices in a freezer bag. They can last up to three months in the freezer. Mango cheesecake stays fresh in the fridge for about five days. After that, it may lose its flavor and texture. Always check for signs of spoilage like an off smell or discoloration. If you freeze it, remember to let it thaw in the fridge overnight for the best taste. Enjoy your Mango Bliss Cheesecake knowing it lasts! Yes, you can use frozen mango. Just thaw it first. Drain any excess water. This helps keep the cheesecake firm. Frozen mango may not taste as fresh, but it still works well. If you use frozen mango, blend it until smooth. This way, your cheesecake stays creamy. Check for a slight jiggle in the center. The edges should be set, but the middle may still move a little. This is normal. The cheesecake firms up while cooling. Remember to turn off the oven and crack the door. Let it cool slowly to avoid cracks. Avoid overmixing the batter. This can add too much air and cause cracks. Make sure all ingredients are at room temperature. Cold ingredients make it hard to mix well. Don’t skip the cooling step in the oven. Quick changes in temperature can lead to cracks. For a perfect result, follow the Full Recipe closely. In this post, we covered how to make a delicious mango cheesecake. You now know the key ingredients, from crust to filling. We explored tips for a smooth texture and how to avoid cracks. I shared variations, like no-bake or vegan options. Proper storage is key for keeping your cheesecake fresh. Mango cheesecake is a sweet treat for any occasion. With practice, you’ll master this dessert. Enjoy making and sharing it with others!
    Mango Cheesecake Delight Simple and Irresistible Recipe
  • When making Lemon Posset, the right ingredients make all the difference. Here is what you need: - 2 cups heavy cream - 3/4 cup granulated sugar - 1/4 cup freshly squeezed lemon juice - Zest of 2 lemons - Optional garnishes: Fresh berries and mint leaves Each ingredient plays a key role. The heavy cream gives the posset its rich, creamy texture. Sugar balances the tartness of the lemons, creating a sweet and tangy flavor. Fresh lemon juice adds brightness, while lemon zest enhances the aroma. You can also add fresh berries or mint leaves to make your dessert pop. These garnishes add color and freshness. For the Full Recipe, check the detailed steps that will help you create this zesty treat. To make a creamy lemon posset, follow these simple steps. 1. Combine heavy cream and sugar in a saucepan. Start by pouring 2 cups of heavy cream and 3/4 cup of granulated sugar into your medium saucepan. Stir them together gently. 2. Heat until just before boiling, then remove from heat. Place the saucepan on medium heat. Stir the mixture as it warms. You want it hot enough to dissolve the sugar. Once it bubbles a bit, take it off the heat. 3. Stir in lemon juice and zest. Next, add 1/4 cup of freshly squeezed lemon juice and the zest of 2 lemons. Stir well to mix the flavors evenly. 4. Strain the mixture for a smooth texture. To avoid any lumps, strain the mixture using a fine-mesh sieve into a bowl. This step ensures that your posset is silky smooth. 5. Pour into serving glasses and chill until set. Carefully pour the strained mixture into your serving glasses or ramekins. Cover them with plastic wrap and place them in the fridge. Chill for at least 4 hours or overnight for the best results. Now you have a delightful lemon posset ready to enjoy! For the full recipe, check the complete guide. To get the best results, chill your posset for at least four hours. This time helps it set properly. If you can, let it chill overnight. The longer it sits, the creamier it becomes. For the right texture, watch the heat. Heat the cream just until it steams. If it boils, the posset may not set well. Stir the mixture well after adding lemon juice. This helps blend the flavors smoothly. Straining is key for a silky finish. Use a fine-mesh sieve to remove zest. Pour the mixture slowly to avoid any clumps. You want it to be as smooth as possible. This step makes a big difference in texture. These simple tips will elevate your Lemon Posset. They ensure you create a delightful dessert every time. For the full recipe, check the earlier section. Enjoy your cooking! {{image_2}} You can make lemon posset even more fun by adding new flavors. Here are some tasty ideas: - Different citrus flavors: Try lime or orange juice instead of lemon juice for a new taste. Each brings a unique twist and can make your dessert stand out. A mix of citrus can also add a bright, fresh flavor. - Incorporating herbs: Fresh herbs can elevate your posset. Consider adding a touch of basil or thyme to the cream. Just a small amount can add a surprising depth of flavor. It’s a great way to surprise your guests! - Swapping garnishes: Change up your garnishes based on the season. In summer, use bright berries like strawberries or raspberries. In fall, consider sliced apples or pears with a sprinkle of cinnamon. Seasonal garnishes make the dish look and taste great. Experiment with these ideas to find your perfect lemon posset. Each variation brings a new taste that keeps things exciting. You can find the Full Recipe to get started on your own lemon posset adventure. To keep your lemon posset fresh, store it in the fridge. Place the glasses in an airtight container. This helps prevent it from absorbing other smells. You can also cover the glasses with plastic wrap. Lemon posset stays fresh for about three to four days in the fridge. If you want to keep it longer, consider freezing it. To freeze, pour the posset into freezer-safe containers. Make sure to leave space at the top, as it may expand. You can freeze it for up to two months. When ready to eat, thaw it in the fridge overnight. For a quick treat, serve it chilled after thawing. Enjoy your creamy delight! For the full recipe, check the details above. Can I make Lemon Posset ahead of time? Yes, you can make Lemon Posset ahead of time. It needs at least four hours to set. For the best taste, make it the day before. This gives it time to chill and firm up. What can I use as a substitute for heavy cream? If you need a cream substitute, try using coconut cream. It gives a nice flavor and texture. You can also blend milk with butter for a lighter option, but it may not be as rich. How can I make Lemon Posset less sweet? To reduce the sweetness, cut back on the sugar. You can start with half the amount and taste as you go. Adding more lemon juice can also balance the taste. Full Recipe reference: Where to find a detailed Lemon Posset recipe? You can find the full recipe for Lemon Posset [here](#). It includes all the steps and tips for making this treat delicious. Lemon posset is a simple and tasty treat. We covered the key ingredients and a step-by-step guide to make it. Perfect chilling time helps it set just right. You can try different flavors and garnishes for fun twists. Store leftovers in the fridge to keep them fresh. I hope you feel confident to make your own lemon posset. It's a delightful dessert that impresses. Give it a try and enjoy this creamy, tangy treat!
    Lemon Posset Dessert Simple and Creamy Delight
  • To make Summer Berry Mini Galettes, you need a few simple ingredients. Here’s what you'll gather: - 1 ½ cups all-purpose flour - ½ teaspoon salt - 1 tablespoon sugar - ½ cup cold unsalted butter, cubed - 4-5 tablespoons ice water - 1 cup mixed summer berries (blueberries, raspberries, strawberries) - 2 tablespoons sugar (for berries) - 1 tablespoon cornstarch - 1 teaspoon vanilla extract - 1 egg, beaten (for egg wash) - Turbinado sugar for sprinkling These ingredients create a flaky crust and a sweet, fruity filling. The all-purpose flour gives the galettes their structure. Salt and sugar balance the flavor. Cold butter keeps the dough flaky. Ice water helps bind everything without melting the butter. The mixed berries bring freshness and color. Sugar and cornstarch help sweeten and thicken the berry filling. Vanilla adds warmth, while the egg wash gives a lovely golden finish. Lastly, turbinado sugar adds a crunchy texture on top. For the complete process, check out the Full Recipe. You’ll enjoy making these delightful mini galettes! - Mixing dry ingredients: Start by grabbing a large mixing bowl. Whisk together 1 ½ cups of all-purpose flour, ½ teaspoon of salt, and 1 tablespoon of sugar. This blend gives your crust a nice flavor. - Incorporating cold butter: Next, add ½ cup of cold unsalted butter, cut into small cubes. Use a pastry cutter or your fingers to blend until it looks like coarse crumbs. This step is key for a flaky crust. - Forming the dough: Slowly add 4-5 tablespoons of ice water, one tablespoon at a time. Mix gently until the dough comes together. Wrap it in plastic wrap and chill for at least 30 minutes. Chilling helps the gluten relax, making the crust tender. - Combining berries with sugar and cornstarch: In another bowl, toss together 1 cup of mixed summer berries (blueberries, raspberries, strawberries), 2 tablespoons of sugar, and 1 tablespoon of cornstarch. The sugar sweetens the berries, while the cornstarch thickens the juices. - Tossing in vanilla extract: Add 1 teaspoon of vanilla extract to the berry mix. This adds a lovely depth of flavor, making your filling even more delicious. - Rolling techniques: After chilling the dough, it’s time to roll it out. On a floured surface, roll the dough to about 1/8 inch thick. It should be thin but strong enough to hold the filling. - Portioning the filling: Cut the rolled dough into 5-inch circles. Place a heaping tablespoon of the berry mixture in the center of each circle. This gives every galette a fruity heart. - Folding the edges: Gently fold the edges of the dough up over the filling. Leave the center exposed for that rustic look. Pinch the edges to secure them, so the filling doesn’t spill out during baking. - Preheating the oven: Preheat your oven to 375°F (190°C). This ensures that the galettes bake evenly and get golden brown. - Egg wash application: Brush the surface of each galette with a beaten egg. This gives them that beautiful golden shine. Sprinkle some turbinado sugar on top for added crunch and sweetness. - Baking time and temperature: Place the galettes on a parchment-lined baking sheet, making sure they don’t touch. Bake for 25-30 minutes or until they are golden and the berries bubble. The smell will be amazing! For the full recipe, check the ingredients and steps to make these delightful Summer Berry Mini Galettes. - Choosing the right butter: Use cold unsalted butter. It helps the crust stay flaky. I like to cut it into small cubes. This makes mixing easier. - Ensuring the right temperature: Keep everything cold, from the butter to the water. Cold ingredients help create a nice, flaky crust. Chill your dough before rolling it out. - Selecting the best summer berries: Look for ripe, sweet berries. Blueberries, raspberries, and strawberries work great. They burst with flavor as they bake. - Flavor combinations and alternatives: Try adding a splash of lemon juice or zest for brightness. You can mix in some peaches or cherries for a twist. - Presentation ideas: Serve the mini galettes on a rustic wooden board. Dust them with powdered sugar for a fancy touch. Add mint leaves for color and freshness. - Pairing with ice cream or whipped cream: A scoop of vanilla ice cream or a dollop of whipped cream is a perfect match. The creaminess pairs well with the tart berries. Enjoy these tips while making your Summer Berry Mini Galettes! For the complete recipe, make sure to check out the Full Recipe section. {{image_2}} You can get creative with fruit in your galettes. While I love using a mix of blueberries, raspberries, and strawberries, other berries work too. Try blackberries, cherries, or even peaches for a twist. You can also mix fruits together. A blend of peaches and blueberries gives a sweet and tangy taste. You can also use apples with cinnamon for a fall twist. Each fruit brings a unique flavor and texture, so don’t be afraid to experiment. If you need a gluten-free galette, choose the right flour. Almond flour or coconut flour can work well. You will want to blend these with a gluten-free all-purpose flour. This helps keep the right texture. You may need to adjust the water amount, as these flours absorb moisture differently. A fun tip: adding a bit of cornstarch can help with the crispness. You can make these galettes vegan with a few swaps. Use vegan butter instead of regular butter. For the egg wash, brush the dough with plant-based milk. This gives a nice shine to the crust. Instead of an egg, you can use a mixture of flaxseed meal and water. Mix 1 tablespoon of flaxseed with 2.5 tablespoons of water and let it sit. This creates a gel-like texture that binds well. Enjoy the flavors without animal products! For the Full Recipe, see the earlier section. To keep your Summer Berry Mini Galettes fresh, start with refrigeration. Place them in an airtight container. They will stay good for about three days in the fridge. If you want to enjoy them later, consider freezing them. Wrap each galette in plastic wrap, then place them in a freezer bag. They can last up to three months in the freezer. When you are ready to eat, simply thaw them in the fridge overnight. When it's time to enjoy your galettes again, reheating is key. The best way to reheat them is in the oven. Preheat your oven to 350°F (175°C). Place the galettes on a baking sheet and heat for about 10-15 minutes. This method keeps the crust flaky and the filling warm. You can also use a toaster oven for a quick option. Just keep an eye on them to avoid burning. Enjoy each bite with that fresh taste! Yes, you can use frozen berries. Just make sure to thaw and drain them first. This keeps the dough from getting too soggy. Frozen berries work well and are often just as tasty as fresh ones. Look for a golden brown color on the crust. The edges should be crisp, and the filling should bubble slightly. You can also use a toothpick to check the dough. It should feel firm and not doughy. Absolutely! You can prepare the dough a day ahead. Just wrap it tightly in plastic wrap and store it in the fridge. This helps the flavors meld and makes rolling easier. Serve them warm or at room temperature. They taste great on their own, but you can add a scoop of vanilla ice cream or a dollop of whipped cream. A sprinkle of fresh mint adds a nice touch. Mini galettes stay good in the fridge for about three days. Store them in an airtight container to keep them fresh. You can also freeze them for up to a month. Just reheat them in the oven to crisp them back up. This blog post covered how to make mini galettes with summer berries. We discussed the simple ingredients for the crust and filling. I shared step-by-step instructions for preparing, baking, and serving them. From tips on creating the perfect crust to storing leftovers, I aimed to make this easy and enjoyable for you. In conclusion, baking these galettes is a great way to enjoy fresh flavors. Plus, you can customize them to fit your taste. Enjoy your baking adventure!
    Summer Berry Mini Galettes Fresh and Flaky Delight
  • - Chicken breast specifics: Use 1 pound of boneless, skinless chicken breasts. This keeps the meal healthy and tender. - Quinoa and vegetable broth: One cup of quinoa cooked in 2 cups of vegetable broth adds flavor and texture. - Fresh vegetables and toppings: Include a diced cucumber, 1 cup of halved cherry tomatoes, thinly sliced red onion, and Kalamata olives. Top it off with crumbled feta cheese and chopped parsley for color and taste. - Additional spices and herbs: You can add spices like cumin or smoked paprika for more flavor. - Alternative protein options: If you prefer, swap the chicken for salmon or tofu. - Dressings and sauces: Consider a drizzle of tzatziki or a balsamic glaze for extra zest. - Caloric content per serving: Each serving has about 450 calories, making it a balanced meal. - Macronutrient breakdown: The dish provides around 30g of protein, 40g of carbs, and 15g of fat. - Health benefits of the ingredients: This meal is rich in protein and fiber. The fresh veggies offer vitamins and antioxidants, promoting good health. For the complete recipe and detailed instructions, check the Full Recipe. - Ingredients for marination: - 2 tablespoons olive oil - 2 teaspoons dried oregano - 1 teaspoon garlic powder - Salt and pepper to taste To marinate the chicken, mix the olive oil, oregano, garlic powder, salt, and pepper in a bowl. Add the chicken breasts and coat them well. This step adds great flavor. Let the chicken marinate for at least 30 minutes. If you have more time, refrigerate it for up to 2 hours. This makes the chicken juicy and tasty. - Best practices for rinsing quinoa: - Rinse quinoa under cold water to remove bitterness. To cook the quinoa, rinse it well in a fine mesh strainer. This step gets rid of any bitter taste. In a medium pot, bring 2 cups of vegetable broth to a boil. Add 1 cup of rinsed quinoa. Then, reduce the heat to low. Cover and simmer for about 15 minutes. Once the liquid is absorbed, fluff the quinoa with a fork. Set it aside to cool. - Equipment needed for cooking: - Grill or stovetop grill pan Preheat your grill or stovetop grill pan over medium heat. Place the marinated chicken on the grill. Cook it for 6-7 minutes on each side. You want the chicken to reach an internal temperature of 165°F (75°C). A meat thermometer helps with this. After grilling, let the chicken rest for 5 minutes before slicing. This keeps it moist. - Layering ingredients for best presentation: - Start with quinoa, then add chicken and veggies. To assemble the bowls, place a layer of cooked quinoa in each serving bowl. Next, add sliced chicken on top. Then, add diced cucumber, halved cherry tomatoes, thinly sliced red onion, and halved Kalamata olives. Finally, sprinkle crumbled feta cheese on top. - Serving suggestions: Drizzle fresh lemon juice over each bowl. You can also add red wine vinegar for extra flavor. Finish with chopped parsley for a fresh touch. Serve with lemon wedges and a sprig of parsley on the side for a beautiful presentation. For more flavor, consider a scoop of tzatziki sauce on top. Check out the Full Recipe for all the steps! To avoid dry chicken, marinate it well. Use olive oil, oregano, and garlic powder. Let the chicken sit for at least 30 minutes. This helps it soak up flavors and stay moist. Cook it on medium heat. This keeps it juicy and tender. Aim for an internal temperature of 165°F (75°C). For fluffy quinoa, rinse it before cooking. This removes bitter saponins. Use vegetable broth for extra flavor. Bring it to a boil and then reduce the heat. Simmer it for about 15 minutes. Fluff it with a fork after cooking. This adds air and keeps it light. Make-ahead suggestions include cooking chicken and quinoa in advance. Store them in separate containers. You can also chop veggies ahead of time. Keep them fresh in the fridge until ready to serve. This saves time on busy days. For storage tips on leftovers, let the bowls cool first. Transfer them to airtight containers. They can last in the fridge for up to three days. When reheating, add a splash of water to keep the quinoa moist. For an attractive presentation, layer the ingredients neatly in the bowl. Start with quinoa, then add chicken and veggies. Use bright colors to make the bowl pop. Garnish with parsley and lemon wedges. These details make your dish look inviting. Pairing options include serving with tzatziki sauce. This adds creaminess and flavor. You can also enjoy it with a light, crisp white wine. This complements the dish well and enhances the meal experience. For the full recipe, you can refer back to the main recipe section. {{image_2}} You can switch the chicken for other proteins. Salmon, shrimp, or tofu work well. Each option gives a new taste and texture. - Salmon: Grill it with lemon juice for a fresh flavor. - Shrimp: Sauté quickly with garlic for a seafood twist. - Tofu: Marinate and grill for a tasty plant-based choice. For vegetarian needs, use chickpeas or lentils. They add protein and fiber. Spices can change the taste of your bowl. Add paprika for heat or cinnamon for sweetness. - For heat: Try cayenne pepper or red pepper flakes. - For sweetness: Use a dash of honey or cinnamon. You can also use seasonal veggies to keep it fresh. In summer, add zucchini or bell peppers. In winter, try roasted root vegetables. Quinoa is great, but you can swap it out. Rice or couscous are tasty options too. - Rice: Use brown or white rice for a filling base. - Couscous: It cooks quickly and has a nice texture. If you need gluten-free options, try cauliflower rice or lentils. They keep your bowl healthy and satisfying. For the full recipe, check out the complete guide on Greek Chicken Bowls! Greek chicken bowls can last in the fridge for up to four days. To keep them fresh, store the ingredients separately. This way, the flavors stay bright, and the textures remain nice. Place the cooked quinoa in one container and the chicken in another. Keep the veggies in a third container. This method helps maintain crispness and flavor. You can freeze the components of your Greek chicken bowls. First, cool the chicken and quinoa completely. Then, divide them into portions. Use airtight bags or containers for the best results. The chicken and quinoa will last up to three months in the freezer. When you're ready to eat, thaw them in the fridge overnight. To reheat, simply use the microwave or stovetop. To heat your bowls while keeping the texture, use the stovetop. Gently warm the chicken and quinoa in a pan over low heat. Stir frequently to avoid burning. If you use a microwave, cover the bowl with a damp paper towel. This helps keep moisture in. To prevent sogginess, avoid reheating the fresh veggies. Add them in after reheating to keep them crunchy and fresh. To cook quinoa, rinse it well in cold water. This removes any bitter taste. Use a ratio of 1 cup quinoa to 2 cups vegetable broth. Bring the broth to a boil, then add the quinoa. Reduce heat, cover, and simmer for about 15 minutes. Once the liquid is absorbed, fluff it with a fork. This method gives you a light, fluffy texture. Yes, you can use frozen chicken! Thaw the chicken in the fridge overnight for best results. If you need it faster, place the chicken in a sealed bag and submerge it in cold water. After thawing, marinate it as you would fresh chicken. This ensures even flavor and cooking. To add spice, try mixing in a pinch of cayenne pepper or red pepper flakes with the marinade. You could also add diced jalapeños or hot sauce to the bowls. For a smoky flavor, consider using smoked paprika. Adjust the heat to your taste! This article covered how to make delicious Greek chicken bowls. We looked at key ingredients like chicken, quinoa, and fresh veggies. I shared easy steps for marinating, cooking, and assembling the bowls. We discussed tips for storage and meal prep. For your next meal, be creative with flavors and ingredients. Explore different proteins and bases. Enjoy the health benefits while making it your own. These bowls are fun and tasty for everyone.
    Greek Chicken Bowls Energetic and Flavorsome Meal
  • - 2 ripe mangoes, julienned - 1 medium cucumber, julienned - 1 red bell pepper, thinly sliced - 1/2 red onion, thinly sliced - 1 carrot, shredded - 1/4 cup fresh cilantro, chopped - 1/4 cup roasted peanuts, roughly chopped - 2 tablespoons fish sauce or soy sauce (vegetarian option) - 1 tablespoon lime juice - 1 tablespoon honey or agave syrup - 1 red chili, minced (adjust to taste) - Salt and pepper to taste - Choosing ripe mangoes: Look for mangoes with a slight give when you press them. They should smell sweet at the stem end. - Selecting fresh vegetables for crunch: Pick cucumbers that are firm and smooth. Bright red bell peppers should feel heavy and have tight skin. - Opting for the best peanuts: Choose roasted peanuts without salt for a rich flavor. They should be crunchy and fresh. When you gather these ingredients, you set the stage for a vibrant dish. Each component adds a unique taste and texture. The sweet mango pairs perfectly with the crisp cucumber and spicy chili. This salad bursts with flavor and color. For the full recipe, check the details above. To start, you need to peel and julienne the mangoes. Hold the mango upright and slice down along the pit on both sides. Then, use a knife to make thin cuts in the flesh. You can cut these into strips for an easy julienne. Next, for the cucumber, slice off the ends. Cut it in half lengthwise, then make thin slices. You can stack the slices and cut them into strips, just like the mango. This technique gives a nice crunch. For the red bell pepper, first remove the seeds. Cut the pepper in half, then slice it thinly. This adds a sweet crunch to your salad. In a large bowl, combine all your fresh produce. Mix the julienned mangoes, cucumber, sliced bell pepper, red onion, and shredded carrot together. This is the base of your salad. Now, let's make the dressing. In a small bowl, whisk together the fish sauce or soy sauce, lime juice, honey, and minced red chili. Taste the dressing and adjust it based on your liking. If you want it sweeter, add more honey. For more spice, add extra chili. Once your dressing is ready, pour it over the salad mixture. Toss gently so that all the ingredients are coated in the dressing. To finish, add chopped cilantro and roasted peanuts on top of the salad. Toss everything once more for an even mix. Let the salad rest for about 10 minutes. This resting time helps the flavors meld together nicely. For serving, present the salad in a large bowl or in individual lettuce cups. This makes it look beautiful and fun to eat. Enjoy your Thai Mango Salad, a refreshing and healthy delight! For more detailed steps, check the Full Recipe. To make the best Thai mango salad, you can adjust the sweetness and spice. If the salad tastes too sweet, add a bit more lime juice. If you want it spicier, add more minced chili. Always taste as you go. That way, you can find the right balance for your taste buds. Letting the flavors meld is very important. Once you mix the salad, let it sit for about 10 minutes. This gives the ingredients time to blend. The longer they sit, the better the taste. Creative ways to serve Thai mango salad can make it more fun. You can serve it in a large bowl or in individual cups. Adding bright colors makes the dish pop. Using lettuce cups is an attractive option. Simply scoop some salad into a lettuce leaf. This makes a great finger food. Plus, it adds a nice crunch! You can prepare the salad in advance. Just chop the veggies and mangoes, then store them separately. Wait to mix in the dressing until just before serving. This keeps everything fresh and crisp. For storing leftovers, keep them in an airtight container. The salad stays good in the fridge for up to two days. However, the mango may get mushy over time. If you notice any off smells or colors, it’s best to toss it. {{image_2}} You can make your Thai mango salad heartier by adding proteins. Grilled chicken, shrimp, or tofu work well. For chicken, grill it until golden. Slice it thin and toss it in. If you choose shrimp, grill or sauté it until it turns pink. Then, mix it in. For a vegan option, use cubed, firm tofu. Cook the tofu until it's crispy, then add it to the salad. This way, you make the salad filling and tasty. The dressing can change the flavor of your salad. While the original dressing is great, try different options. You might swap fish sauce for a sesame dressing or a peanut sauce. If you want a fresher taste, mix in some orange juice. To customize, adjust the sweetness and spice levels. You can add more honey or a pinch of chili to fit your taste. This flexibility makes the salad fun! Seasonal fruits can add a twist to your Thai mango salad. In summer, add diced strawberries or peaches for sweetness. In the fall, try pomegranate seeds for crunch and color. You can also change the nuts or seeds you use. Almonds or sunflower seeds can replace peanuts. This keeps the salad fresh and exciting all year long! For the full recipe, check out the Tropical Thai Mango Salad 🥭. To keep your Thai mango salad fresh, store it in the fridge. Use an airtight container to help maintain its crispness. If you plan to eat it later, keep the dressing separate. This way, the salad stays crunchy and tasty. When stored properly, this salad lasts about 2-3 days in the fridge. After that, the veggies may start to lose their crunch. Look for signs of spoilage, like a sour smell or slimy texture. If you notice these, it’s best to toss it. Reheating isn’t needed for this salad. It’s best enjoyed cold. If you want to warm it, do so gently. Heat it in a pan on low heat. This helps keep the mango soft and the other veggies crisp. If you cannot find ripe mangoes, you can use other fruits. Try using peaches or nectarines instead. They have a sweet taste and similar texture. You can even use canned mango in syrup. Just drain it well before adding to the salad. This way, you still enjoy a fruity flavor. Yes, you can easily make this salad vegan. Instead of fish sauce, use soy sauce or tamari. This change adds a nice umami flavor without animal products. You can also swap honey for agave syrup or maple syrup. These options provide sweetness while keeping it plant-based. To make this salad spicier, add more red chili. You can also use fresh jalapeños or Thai bird chilies. For a different heat, try chili flakes or sriracha in the dressing. Start with a little and taste it. You can always add more to reach your desired spice level. Thai Mango Salad is a lively mix of fresh, colorful ingredients. You learned about selecting ripe mangoes, creating a tasty dressing, and adding protein for a hearty meal. Remember, this salad is versatile and easy to prepare. Try it with seasonal fruits or different dressings to keep it new. Your choice of presentation can elevate the dish. Enjoy the bright flavors and crunch, and feel free to experiment! This salad can become a favorite in your kitchen.
    Thai Mango Salad Refreshing and Healthy Delight
  • The main ingredients make this dish shine. Here’s what you need: - 4 chicken thighs (bone-in, skin-on) - 2 tablespoons jerk seasoning - 1 tablespoon olive oil - 1 cup long-grain rice - 2 cups chicken broth - 1 can (15 oz) black beans, drained and rinsed - 1 red bell pepper, diced - 1 cup corn kernels (fresh or frozen) - 1 teaspoon garlic powder - 1 teaspoon onion powder - 1 lime, juiced - Salt and pepper to taste - Fresh cilantro, chopped (for garnish) Each ingredient plays a role. The chicken brings protein and flavor. Jerk seasoning adds spice and depth. Rice serves as a hearty base, soaking up all the tasty juices. Want to take your dish up a notch? Try these options: - 1-2 tablespoons of honey for sweetness - 1-2 tablespoons of soy sauce for umami - Sliced scallions for added freshness - Fresh thyme or parsley for herbal notes These extras can add layers to your dish. Honey balances the spice, while soy sauce gives depth. Choosing the right ingredients is key. Here are some tips: - Look for fresh chicken thighs with a good amount of fat. This keeps them juicy. - Choose high-quality jerk seasoning. A mix with fresh spices works best. - For rice, go for long-grain, as it cooks fluffy and separate. - Select vibrant, firm bell peppers and sweet corn for the best taste. Quality ingredients make a big difference. Fresh and flavorful items lead to the best Caribbean Jerk Chicken and Rice. You can find the full recipe above to guide you! To make Caribbean jerk chicken and rice, follow these simple steps. First, gather all your ingredients. This will make cooking easier. Next, marinate the chicken. Coat each thigh with jerk seasoning in a bowl. Let it sit for at least 30 minutes. You can even marinate overnight for more flavor. After marinating, heat olive oil in a skillet. Add the chicken, skin-side down. Sear for 5-7 minutes until golden. Flip and cook the other side for another 5 minutes. Set the chicken aside. Now, it's time to prepare the rice. In the same skillet, add diced red bell pepper. Sauté for about 2-3 minutes until it's soft. Then, stir in the rice and mix it well. This helps the rice soak up the flavors. Pour in chicken broth, black beans, corn, garlic powder, onion powder, lime juice, salt, and pepper. Stir everything together and bring it to a gentle boil. Carefully place the seared chicken on top of the rice. Cover the skillet with a lid. Reduce the heat to low and let it simmer for 20-25 minutes. This helps the chicken cook through and the rice to soften. After that, remove from heat and let it sit for 5 more minutes. Fluff the rice with a fork, and your dish is ready to serve! Marinating is key for great jerk chicken. It allows the flavors to seep into the meat. Use a good jerk seasoning for the best taste. The longer you let it sit, the better it gets. I recommend at least 30 minutes. If you can, let it marinate overnight. This gives the chicken a deep, rich flavor that you will love. Timing is crucial when cooking this dish. Searing the chicken for 5-7 minutes helps lock in juices. Make sure to keep an eye on the heat. If it’s too high, the chicken may burn. When cooking the rice, low heat is best. This allows the rice to absorb the liquid slowly. Covering the skillet keeps the steam in, making the rice fluffy. Following these techniques ensures that your chicken and rice turn out perfect every time! To cook chicken thighs well, start with good seasoning. Use jerk seasoning to make the meat flavorful. Sear the chicken skin-side down in a hot skillet. This helps create a nice golden brown crust. Cook for about 5-7 minutes on each side. The goal is to lock in the juices. Make sure the internal temperature reaches 165°F for safety. Let the chicken rest after cooking. This keeps it moist. For fluffy rice, rinse it before cooking. This removes excess starch and prevents clumping. Use long-grain rice for the best texture. When cooking, use a ratio of 1 cup rice to 2 cups chicken broth. This adds flavor. Bring the broth to a boil before adding rice. Stir once, then cover the pot. Reduce heat to low and let it simmer. Avoid lifting the lid too often. This keeps the steam inside, making the rice fluffy. Garnishing makes your dish look inviting. Fresh cilantro adds a pop of color. Squeeze lime juice over the top for brightness. You can also add lime wedges on the side. Diced red bell peppers add color and crunch. Serve the chicken on a bed of rice and beans. This creates a beautiful plate. A vibrant dish makes it even more delicious. Explore these ideas to impress your guests. For the full recipe, check out the details above. {{image_2}} You can make a tasty vegetarian version of jerk rice. Instead of chicken, use tofu or tempeh. Both options soak up flavors well. Cut the tofu into cubes and marinate it with jerk seasoning. Cook it until golden. Use the same rice and veggies from the original recipe. This keeps the dish colorful and fun. If you want to change up the protein, try shrimp or fish. Shrimp cooks fast and adds a nice touch. Season shrimp with jerk spice and sauté until pink. If you like fish, choose firm types like mahi-mahi. Cook the fish in the skillet until flaky. Both options deliver great taste without missing out on flavor. You can adjust the flavors to fit your taste. Want it spicy? Add more jerk seasoning or some chopped peppers. If you prefer a milder dish, reduce the seasoning. Adding fruits like mango or pineapple offers a sweet twist. Toss in fresh herbs like basil or mint for an extra pop of flavor. Each tweak makes the dish your own. Store leftover Caribbean jerk chicken and rice in an airtight container. Make sure to let it cool down first. This helps keep the flavors fresh. Use within three days for the best taste. Label the container with the date. This way, you won’t forget when you made it. You can freeze the dish for later. Place the chicken and rice in a freezer-safe container. Make sure to separate portions if you want to eat it later. It stays good for about three months. When you're ready, take it out and let it thaw in the fridge overnight. To reheat, use the stove for the best taste. Heat a skillet on low heat. Add a splash of water or broth to keep it moist. Stir gently until heated through. You can also use the microwave. Just cover it and heat in short bursts, stirring in between. This keeps it from drying out. Enjoy every bite of your delicious meal! Jerk chicken is a spicy dish from Jamaica. It uses a special blend of spices called jerk seasoning. This mix often has allspice, thyme, and scotch bonnet peppers. The chicken gets marinated in this tasty mix, giving it a bold flavor. You cook it over a hot grill or in an oven. The result is juicy, smoky chicken with a kick. It is a favorite in Caribbean cuisine. Yes, you can use different types of rice. Long-grain rice works well, but you can try basmati or jasmine rice too. Each type gives a unique taste and texture. Just make sure to adjust the cooking time and liquid needed based on the rice type. Brown rice is another option, but it takes longer to cook. To adjust the spiciness, you can change the amount of jerk seasoning you use. If you like it milder, use less seasoning. You can also mix in some honey or brown sugar to balance the heat. For more spice, add more jerk seasoning or include extra scotch bonnet peppers. Always taste as you go. You can find Caribbean jerk chicken and rice in many Caribbean or Jamaican restaurants. Look for places that specialize in Caribbean cuisine. Food trucks and street vendors also serve this dish. Check local listings or food apps for the best spots near you. Enjoying this dish from a restaurant can inspire your home cooking. If you're curious about making it yourself, refer to the Full Recipe for guidance. Caribbean jerk chicken and rice is a flavorful dish full of spices and ingredients. We covered key ingredients, cooking steps, and tips for a perfect meal. You learned about variations, storage, and how to reheat leftovers. Cooking doesn’t need to be hard. With the right knowledge, you can enjoy this dish at home. Use these tips to create your own tasty version. Embrace your culinary skills, and have fun in the kitchen!
    Irresistible Caribbean Jerk Chicken and Rice Delight
  • - 2 cups cooked pasta (penne or rotini) - 1 cup marinara sauce - 1 cup pizza sauce - 1 cup mozzarella cheese, shredded - 1 cup pepperoni slices - 1/2 cup bell peppers, diced (red and green) - 1 teaspoon dried oregano - 1 teaspoon garlic powder - Fresh basil leaves for garnish When making Easy Pizza Pasta Bake, you want to choose your main ingredients wisely. Start with cooked pasta, either penne or rotini. They hold sauces well. Next, marinara sauce adds a rich flavor. Pizza sauce brings in that classic pizza taste. Mix them together to create a base that’s both familiar and comforting. For the best pizza experience, add mozzarella cheese. It melts beautifully and gives that gooey texture we all love. Pepperoni slices add a savory bite. Don't forget the bell peppers. They give color and a sweet crunch. Seasoning is key! Dried oregano and garlic powder enhance the flavor of the dish. Fresh basil leaves add a pop of color and freshness. If you want to make this dish even more exciting, consider adding mushrooms or olives. Now you have the full picture of what goes into this dish. For the complete recipe, check the [Full Recipe]. - Preheat your oven to 350°F (175°C). - In a large bowl, combine the cooked pasta, marinara sauce, and pizza sauce. Stir until mixed well. - Add the cheese, pepperoni, bell peppers, mushrooms, and olives to the pasta. - Season with oregano, garlic powder, salt, and pepper. Mix everything until it looks colorful and tasty. - Transfer the mixture to a greased baking dish. Spread it out evenly. - Cover the dish with aluminum foil and bake for 25 minutes. - Remove the foil and bake for another 10 to 15 minutes, until the cheese is bubbly and golden. This dish is fun to make and tastes great. For the full recipe, check the section above. Enjoy your meal! - Best pasta options for baking: I love using penne or rotini. They hold sauce well and add great texture. These shapes allow for a better mix of flavors and make every bite a delight. - How to achieve golden, bubbly cheese: For the best cheese topping, add a bit more mozzarella before baking. This extra layer gives the dish a nice, golden look. Bake it covered first, then uncover for the last part. This helps the cheese get bubbly and brown without drying out the pasta. - Presentation tips for the dish: Serve the pasta bake right from the dish for a cozy look. Add fresh basil on top for a pop of color. It makes the dish feel special and fresh. - Pairing ideas: This bake goes great with a simple side salad or warm breadsticks. A light salad balances the richness and adds freshness. Breadsticks are perfect for dipping into any extra sauce. - Suggestions for additional toppings: You can spice it up with more toppings. Try adding cooked sausage, fresh spinach, or even jalapeños for heat. Each topping adds a unique twist and makes it your own. - How to customize the recipe to your taste: Don’t hesitate to mix flavors. You can swap out sauces, use different cheeses, or even add veggies you love. Make it fun! The more you personalize it, the more you’ll enjoy your meal. For the full recipe, check out the detailed instructions in the recipe section. {{image_2}} You can easily make this dish vegetarian. Swap the pepperoni for your favorite veggies. Bell peppers, mushrooms, and spinach work great. You can also use alternative cheese options. Try using vegan cheese or ricotta for a creamy touch. For a gluten-free version, use gluten-free pasta. There are many options, like rice or chickpea pasta. Make sure to check the sauce labels too. Some sauces contain gluten, so look for certified gluten-free brands. Want to take it up a notch? You can add different meats. Sausage and chicken are great options. They add richness and depth to the dish. Spice it up with red pepper flakes or Italian seasoning. These add heat and extra flavor. Don't be afraid to mix and match! You can create a new favorite every time you make it. For the full recipe, check [Full Recipe]. To store leftovers properly, let the pasta bake cool down. Place it in an airtight container. This keeps the flavors fresh. Use glass or plastic containers that seal well. You can store it in the fridge for up to three days. Freezing the pasta bake is easy. First, let it cool completely. Then, wrap it tightly in plastic wrap. For best results, cover that with aluminum foil. This helps protect it from freezer burn. You can freeze it for up to three months. When ready to eat, thaw it overnight in the fridge. For reheating, the oven works best. Preheat it to 350°F (175°C). Place the pasta bake in a covered dish. Bake for about 20 minutes. This keeps the texture nice. You can also use the microwave for quick reheating. Just make sure to cover it to avoid dryness. Enjoy your cheesy pizza pasta bake warm and delicious! This dish takes about 15 minutes to prep and around 35 minutes to bake. In total, you will spend about 50 minutes from start to finish. This makes it a great option for busy weeknights or family get-togethers. Yes, you can prepare the Easy Pizza Pasta Bake ahead of time. You can mix the pasta with sauces and toppings. Store it in the fridge for up to 24 hours before baking. Just cover it tightly with foil or plastic wrap. If you want to keep it longer, you can freeze it for up to three months. Just thaw it overnight before baking. If you don’t have marinara sauce, you can use several alternatives. Pizza sauce works well because it adds a nice flavor. You can also try Alfredo sauce for a creamy twist. Another option is pesto, which gives the dish a fresh taste. Just make sure the sauce you choose pairs well with the other flavors. Absolutely! You can make the Easy Pizza Pasta Bake dairy-free. Use dairy-free cheese or skip the cheese altogether. For creaminess, consider adding cashew cream or coconut cream. These options keep the dish rich while catering to dietary needs. Just check the labels to ensure they are dairy-free. You now know how to make an Easy Pizza Pasta Bake. With simple ingredients and easy steps, it’s a dish anyone can master. Customize it to fit your taste with different toppings or sauces. Store leftovers correctly for later enjoyment. This recipe is fun to make and share. I hope you enjoy this dish as much as I do. Happy cooking!
    Easy Pizza Pasta Bake Quick and Tasty Family Meal
  • To create these tasty meatballs, you need the following main ingredients: - 1 pound ground turkey - 1/2 cup breadcrumbs - 1/4 cup grated Parmesan cheese - 1 small onion, finely chopped - 2 cloves garlic, minced - 1 large egg - 1/4 cup fresh parsley, chopped - 1 tablespoon fresh oregano, chopped (or 1 teaspoon dried) - 1 teaspoon dried thyme - 1/2 teaspoon salt - 1/4 teaspoon black pepper - Zest of 1 lemon - 1 tablespoon olive oil (for cooking) These ingredients help give the meatballs their unique flavor. The ground turkey keeps them lean, while the egg helps bind everything together. The herbs and spices add freshness and depth. You can enhance the flavor of your meatballs by adding some optional ingredients. Consider these: - 1/4 cup feta cheese, crumbled - 1/2 teaspoon red pepper flakes (for a spicy kick) - 1 tablespoon fresh mint, chopped Feta adds a creamy texture and tang, while mint and red pepper flakes brighten the dish. Feel free to mix and match based on your taste. These meatballs are not only delicious but also nutritious. Here's a quick overview: - Calories: About 250 per serving (5 meatballs) - Protein: Approximately 25g - Fat: Around 10g - Carbohydrates: Roughly 15g This recipe provides a good balance of protein and healthy fats. Plus, you can serve them with a side salad or tzatziki for more nutrients. For the full recipe, check out Juicy Greek Turkey Meatballs. To start, gather your ingredients. You need ground turkey, breadcrumbs, and Parmesan cheese. Also, grab a small onion, garlic, an egg, parsley, oregano, thyme, salt, and pepper. Don't forget the lemon for zest! In a large bowl, mix ground turkey, breadcrumbs, Parmesan, chopped onion, minced garlic, and lemon zest. Now, crack the egg into the bowl. Add chopped parsley, fresh oregano, dried thyme, salt, and pepper. Mix all the ingredients gently. Remember, overmixing makes the meatballs tough. Once combined, use your hands to form small balls, about 1 to 1.5 inches wide. You should have around 20 meatballs. Next, heat olive oil in a large skillet over medium heat. Once the oil is hot, add the meatballs. Make sure not to overcrowd the skillet. Cook the meatballs for 5-6 minutes on each side. They should turn golden brown and be fully cooked. Use a meat thermometer to check that the internal temperature reaches 165°F. After cooking, transfer the meatballs to a plate. Let them rest for a few minutes; this helps keep them juicy. For serving, place the meatballs on a large platter. Garnish with extra parsley and lemon wedges. Pair them with tzatziki sauce and a fresh Greek salad for a complete meal. Enjoy your delicious feast! For the full recipe, check out the details above. When mixing the meatball ingredients, start with a big bowl. Add ground turkey, breadcrumbs, and cheese first. Chop the onion and garlic finely. This helps spread their flavors well. For herbs, use fresh parsley and oregano when you can. They make a big difference! Mix everything gently. Overmixing can lead to tough meatballs. You want them soft and juicy. To cook juicy meatballs, heat olive oil in a skillet. Use medium heat, not high. High heat can burn the outside while leaving the inside raw. Place the meatballs in the skillet without crowding them. This helps them cook evenly. Cook for about 5-6 minutes on each side. Look for a golden-brown color. Always check the meatballs’ temperature. They need to reach 165°F for safety. These meatballs shine when served with tzatziki sauce. The cool sauce balances the warm, savory meatballs. You can also pair them with a Greek salad. Fresh veggies and feta cheese add a nice touch. Serve the meatballs on a large platter. Garnish with parsley and lemon wedges. This makes the dish look appealing and festive. For a full meal, include some warm pita bread too. Check out the Full Recipe for more ideas! {{image_2}} You can switch out turkey for other meats. Ground chicken works well for a lighter dish. If you crave beef, use lean ground beef. For a healthier choice, try ground lamb. Each option will bring a unique taste. Adjust the cooking time based on the meat you choose. Herbs can change the flavor of your meatballs. Try using fresh basil for a sweet note. Dill adds a fresh taste, perfect for summer meals. You can also mix in some mint for a bold twist. If you want a stronger flavor, add rosemary or thyme. Each herb brings its own special flair to the dish. Sauces can enhance your meatballs and add fun flavors. Tzatziki sauce is a classic choice, adding creaminess and coolness. A simple marinara sauce pairs well, too. For a spicy kick, try a harissa or sriracha sauce. You can even make a yogurt-based sauce with garlic and lemon. Each sauce can change your meal experience. Check the Full Recipe for more ideas on serving! To keep your leftover meatballs fresh, place them in an airtight container. Make sure the container is sealed tightly. You can store them in the fridge for up to three days. If you want to keep them longer, consider freezing them. To freeze your meatballs, first let them cool completely. Arrange them on a baking sheet in a single layer. Place the sheet in the freezer for about one hour. Once frozen, transfer the meatballs to a freezer-safe bag. Be sure to squeeze out any extra air. They can last in the freezer for up to three months. To reheat, you can use the oven or a skillet. For the oven, preheat it to 350°F. Place the meatballs on a baking tray and heat for about 15-20 minutes. If using a skillet, add a splash of water and cover it. Heat on medium until warm, about 5-7 minutes. For the best taste, do not overcook them. Enjoy your Juicy Greek Turkey Meatballs from the Full Recipe! To keep meatballs juicy, use moist ingredients like grated cheese and fresh herbs. Always mix gently; overmixing can make them tough. Adding a little olive oil helps too. Cooking at medium heat ensures they don’t cook too fast. You want them golden brown outside and moist inside. Yes, you can use ground chicken in this recipe. It works well and makes juicy meatballs. Just keep in mind that ground chicken may have less flavor than turkey. To enhance the taste, add extra herbs or spices. This way, you keep the dish exciting and fresh. These meatballs last about 3 to 4 days in the fridge. Store them in an airtight container to keep them fresh. If you want to enjoy them later, consider freezing them. Just be sure to separate layers with parchment paper so they don’t stick together. For more details, check out the Full Recipe. These Greek turkey meatballs are tasty and healthy. We covered key ingredients, cooking steps, and helpful tips. You can try different flavors or proteins to suit your taste. Storing and reheating them is easy, so you won’t waste any. In the end, these meatballs are fun to make and share. Enjoy cooking, and don't hesitate to mix things up!
    Juicy Greek Turkey Meatballs Flavorful and Simple Recipe
  • To make a tasty Chicken Pesto Pasta Salad, you need a mix of fresh and simple items. Here’s what you will need: - 2 cups cooked pasta (farfalle or rotini work well) - 1 cup cooked chicken breast, shredded or diced - 1 cup cherry tomatoes, halved - 1 cup fresh spinach, roughly chopped - 1/2 cup basil pesto - 1/4 cup grated Parmesan cheese - 1/4 cup pine nuts, toasted - Salt and pepper to taste - 1 tablespoon olive oil (optional for drizzling) Each ingredient plays a key role. The pasta serves as the base. The chicken adds protein, while the tomatoes and spinach bring freshness. The pesto gives it a rich, herby flavor. Together, these ingredients create a colorful and delicious salad. You don’t need fancy tools to make this dish. Here’s a list of what you’ll need: - Large mixing bowl - Measuring cups - Knife and cutting board - Spoon for mixing - Optional: Tongs for serving These tools help you prepare the salad with ease. A simple mixing bowl works well for combining everything. This Chicken Pesto Pasta Salad is not only tasty but also good for you. Here’s a quick look at what’s in it: - Calories: About 400 per serving - Protein: 25 grams - Carbohydrates: 35 grams - Fat: 20 grams This salad packs a balanced punch! It offers protein from chicken and healthy fats from olive oil and pine nuts. It’s filling without being heavy. If you want more info, check out the Full Recipe. Start by gathering your ingredients. You will need: - 2 cups cooked pasta (farfalle or rotini work well) - 1 cup cooked chicken breast, shredded or diced - 1 cup cherry tomatoes, halved - 1 cup fresh spinach, roughly chopped - 1/2 cup basil pesto - 1/4 cup grated Parmesan cheese - 1/4 cup pine nuts, toasted - Salt and pepper to taste - 1 tablespoon olive oil (optional for drizzling) First, cook the pasta according to package directions. Drain it and let it cool. While the pasta cooks, shred or dice your chicken. You can use leftover chicken or cook it fresh. Halve the cherry tomatoes and chop the spinach. In a large mixing bowl, combine the cooked pasta, chicken, and halved tomatoes. Gently add the chopped spinach and basil pesto. Mix well so every piece gets coated. Next, sprinkle in the grated Parmesan cheese and the toasted pine nuts. Toss everything together until it is all well combined. Now it's time to taste your salad! Add salt and pepper to your liking. If you want it richer, drizzle a tablespoon of olive oil over the top. Cover the salad and chill it in the fridge for at least 30 minutes. This helps the flavors blend nicely. When serving, you can place the salad in a big bowl or dish it out into individual portions. For a nice touch, garnish with extra pine nuts, a sprinkle of Parmesan, and fresh basil leaves. Enjoy your Chicken Pesto Pasta Salad! For the full recipe, check the earlier section. To make the best pasta, choose the right type. I love farfalle or rotini for this dish. Boil water in a large pot, then add salt. This adds flavor as the pasta cooks. Cook the pasta until it's al dente. This means it should still have a slight bite. Drain it well and rinse under cold water to stop the cooking. Cooking chicken properly is key for this salad. I recommend baking or poaching the chicken. Once it cools, use two forks to shred it. This method makes it easy and quick. Shredded chicken mixes well with the pasta and pesto. If you prefer diced pieces, cut the chicken into small cubes instead. You can add more flavor to your salad with extra ingredients. Try adding olives for a briny kick. Sun-dried tomatoes give a sweet and tangy taste. For crunch, consider adding bell peppers or cucumbers. You can also sprinkle in some herbs like oregano or thyme. If you like spice, add a pinch of red pepper flakes. These options let you personalize the dish. For the full recipe, check out Chicken Pesto Pasta Salad. {{image_2}} You can make this dish even better by adding more vegetables. Try bell peppers for a crunchy bite. Zucchini adds a fresh taste. You can also use broccoli florets or peas. These veggies not only taste great but also add color. Mix and match to find your favorite combo! If you want to change the protein, go for grilled shrimp or tofu. Both options will keep the salad light. You could also use turkey or ham for a different flavor. Each protein gives the dish a new twist. Experiment to find what you like best! The pasta shape can change the whole feel of this dish. Farfalle and rotini work well, but don’t stop there! Try penne, or even spaghetti, for fun. Each shape holds the pesto in its own way. This small change can make a big difference in each bite. For complete details on how to make this salad, check out the Full Recipe! To keep your Chicken Pesto Pasta Salad fresh, place it in an airtight container. This helps keep out air and moisture. Store it in the fridge for up to three days. Make sure to mix it well before serving again. The flavors will blend more as it sits. Freezing this pasta salad isn’t the best choice. The pasta may become mushy when thawed. However, if you must freeze it, do so without the pesto. Store the pasta and chicken in separate containers. Use them within two months for the best taste. When ready, defrost them in the fridge overnight. Reheat your Chicken Pesto Pasta Salad gently. Use the microwave and heat in short bursts. Stir often to ensure even warming. If the salad seems dry, add a splash of olive oil or a bit of fresh pesto before serving. This will bring back some moisture and flavor. Yes, you can make Chicken Pesto Pasta Salad ahead of time. It tastes even better after chilling. I recommend preparing it a few hours before serving. This gives the flavors time to mix well. Just cover it tightly and store it in the fridge. If you need a substitute for pesto, try using hummus or sun-dried tomato spread. These options add flavor without using pesto. You can also make your own pesto with spinach, garlic, and nuts if you prefer. Chicken Pesto Pasta Salad lasts about three to four days in the fridge. Make sure to store it in an airtight container. If it starts to look or smell off, it's best to throw it away. Absolutely! Leftover chicken works great in this salad. It saves time and adds extra flavor. Just shred or dice the chicken before adding it to the salad. To make this salad gluten-free, use gluten-free pasta. There are many options available that taste great. Just make sure to check the label when you buy it. Yes, you can add more veggies! Bell peppers, cucumbers, or olives work well. Just chop them up and toss them in with the other ingredients. This adds color and crunch. To make it vegetarian, skip the chicken and add more veggies or beans. Chickpeas or black beans can add protein and texture. You can also add more cheese for extra flavor. Serve this salad cold or at room temperature. You can put it in a large bowl or individual cups. Garnish with extra pine nuts and Parmesan cheese for a nice touch. Yes, you can easily make a smaller batch. Just reduce the ingredients to fit your needs. Keep the same ratios for the best taste. To make it creamier, add a bit of Greek yogurt or sour cream. Mix it in with the pesto for a richer flavor. This adds a nice tang and helps bind the salad together. For more details, check out the Full Recipe. This blog post covered the key steps to make Chicken Pesto Pasta Salad. We discussed main ingredients, tools, and nutritional info. I provided easy instructions for preparation, mixing, and serving the salad. You learned tips for perfect pasta and flavor boosts. We explored fun variations and how to store leftovers safely. In conclusion, making this dish is simple and fun. You can customize it to fit your taste. Enjoy your healthy, tasty salad anytime!
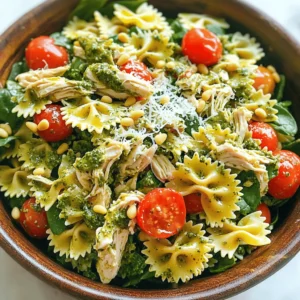
    Chicken Pesto Pasta Salad Flavorful and Fresh Dish
  • - 2 cups cooked rice (white or brown) - 1 lb (450g) chicken breast, diced - 1 cup broccoli florets - 1 red bell pepper, sliced - 1 carrot, julienned - 2 green onions, chopped - 1 tablespoon vegetable oil - Salt and pepper to taste - 1/4 cup mayonnaise - 2 tablespoons sweet chili sauce - 1 tablespoon sriracha sauce - 1 teaspoon garlic powder - 1 teaspoon lime juice When I make my Bang Bang Chicken Bowl, I keep it simple. I use fresh ingredients for the best taste. Cooked rice, chicken, and colorful veggies form the base of this dish. The chicken brings protein and heartiness. I prefer chicken breast because it cooks quickly and stays tender. The broccoli and red bell pepper add a nice crunch and bright color. Carrots bring a sweet note, while green onions add freshness. For the Bang Bang sauce, I mix mayonnaise with sweet chili and sriracha. This creates a creamy and spicy flavor. Garlic powder boosts the savory taste, and lime juice adds a tangy kick. This recipe is perfect for busy days. You can prep the ingredients ahead of time and cook them quickly. For the full recipe, check out the details above. Start by making the Bang Bang sauce. In a bowl, mix together these ingredients: - 1/4 cup mayonnaise - 2 tablespoons sweet chili sauce - 1 tablespoon sriracha sauce - 1 teaspoon garlic powder - 1 teaspoon lime juice Stir until smooth. This sauce adds a creamy, spicy kick to your bowl. Next, heat 1 tablespoon of vegetable oil in a large skillet. Season 1 pound of diced chicken breast with salt and pepper. Add the chicken to the skillet once the oil is hot. Cook it for about 6-8 minutes. You want it to be golden brown and fully cooked. Stir it occasionally for even cooking. Now, it's time to add some color and crunch. Toss in 1 cup of broccoli florets, 1 sliced red bell pepper, and 1 julienned carrot. Stir-fry these veggies with the chicken for about 4-5 minutes. The vegetables should be tender-crisp and bright. Once they are cooked, drizzle half of the Bang Bang sauce over the mixture. Toss everything to coat evenly. For the main event, grab 2 cups of cooked rice. Divide it into bowls. Top each bowl with the chicken and vegetable mix. This makes a hearty base for your meal. Finally, make your dish pop with flavor. Drizzle the remaining Bang Bang sauce over the top of each bowl. Sprinkle chopped green onions on each bowl for a fresh finish. Enjoy your colorful and tasty Bang Bang Chicken Bowl! Ensure you cook the chicken until it is golden brown. This gives the best texture. Use a medium-high heat in your skillet. This helps the chicken cook evenly. Make sure to stir it often, so it doesn’t stick. You want it juicy but not raw inside. A meat thermometer can help here. You can change the heat of the Bang Bang sauce. If you like it spicy, add more sriracha. If you prefer mild, use less. Taste the sauce as you mix it. This way, you can adjust it to your liking. The sweet chili sauce adds a nice balance to the heat. Serve your Bang Bang Chicken Bowl in colorful bowls. This makes the dish look fun and fresh. Add lime wedges on the side for a zesty kick. You can also sprinkle sesame seeds on top. They add crunch and a nice flavor. For more freshness, use extra green onions on the top. {{image_2}} You can easily swap the chicken in this dish. Shrimp, tofu, or beef work great too. Shrimp adds a nice sweetness. Tofu gives a soft texture and absorbs flavors well. Beef can add a hearty taste. Just adjust cooking time based on what protein you choose. You can mix up the veggies for more variety. Instead of broccoli and red bell pepper, try bell peppers, snap peas, or zucchini. Bell peppers bring a sweet crunch. Snap peas add a fresh snap. Zucchini is mild and cooks quickly. This keeps your meal colorful and fun. If you need a gluten-free meal, it’s simple to adjust. Use gluten-free soy sauce in the Bang Bang sauce. This keeps the flavor strong without gluten. It’s a great way to enjoy the dish without worry. Just make sure to check all labels to ensure they're gluten-free. Store leftovers in an airtight container in the refrigerator for up to 3 days. This keeps your Bang Bang Chicken Bowl fresh and tasty. When you're ready to eat, just take it out and enjoy. For longer storage, freeze the assembled bowl without the sauce. It can be kept for up to 3 months. This is a great option if you want to prep meals in advance. Just remember to remove the sauce before freezing. Reheat in a skillet or microwave until heated through. If you want to boost the flavor, add fresh sauce when you reheat. This makes the dish just as good as when you first made it. Yes, you can make it vegetarian. Simply replace the chicken with tofu or tempeh. Both options work well. Adjust the sauce if you like. Tofu absorbs flavors nicely, while tempeh adds a chewy texture. This makes the dish just as tasty. The spice level is flexible. You can change the heat by adjusting the sriracha amount in the sauce. If you want it spicier, add more sriracha. For less heat, use less. This way, you can cater to your taste. You can pair it with a side salad, spring rolls, or dumplings. These sides balance the meal and add variety. They also enhance the dining experience, making it more enjoyable. This recipe yields about 4 servings. This makes it great for family dinners or meal prep. You can easily double the recipe for more servings if needed. Try the full recipe for a delicious meal! This blog post taught you to make a tasty Bang Bang Chicken Bowl. We covered the main ingredients, sauce, cooking steps, and ways to customize your meal. You can use different proteins and veggies to suit your taste. Remember to store any leftovers properly to enjoy later. This bowl is not just easy to prepare but also fun to share. Try it out and enjoy each flavorful bite!
    Bang Bang Chicken Bowl Flavorful and Easy Recipe
  • - 2 cups cooked chicken breast, diced - 1 can (15 oz) chickpeas, rinsed and drained - 1/2 cup Greek yogurt - 1/4 cup Dijon mustard - 1 tablespoon honey - 1 cup cherry tomatoes, halved - 1/2 cup cucumber, diced - 1/4 cup red onion, finely chopped - 1/4 cup fresh parsley, chopped - Salt and pepper to taste Gathering the right ingredients is key to a great chicken salad. Start with the cooked chicken breast. You can use leftovers or cook fresh chicken. Diced pieces work best. Next, grab a can of chickpeas. Rinse them well to remove any canning liquid. Greek yogurt acts as a creamy base. It adds protein and tang. Dijon mustard gives a nice kick. Honey sweetens the mix without being overpowering. You will need cherry tomatoes for freshness. Halving them allows their juices to mix in. The cucumber adds crunch. Dicing it keeps the texture light. Red onion brings a punch of flavor. Use it finely chopped to avoid too much bite. For color and freshness, grab some parsley. It brightens up the dish. Finally, don't forget salt and pepper. They enhance all the flavors in this salad. This mix of ingredients makes a high protein chicken salad that is simple and tasty. For full details on preparing the dish, refer to the Full Recipe. - Combining chicken and chickpeas Start by taking a large mixing bowl. Add 2 cups of diced cooked chicken breast to the bowl. Then, add one can of rinsed and drained chickpeas. This mix gives you a great base packed with protein. - Making the yogurt dressing In a smaller bowl, mix together 1/2 cup of Greek yogurt, 1/4 cup of Dijon mustard, and 1 tablespoon of honey. Use a whisk to blend these until smooth. This dressing adds creaminess and flavor to the salad. - Mixing the salad ingredients Pour the yogurt dressing over the chicken and chickpeas. Stir gently to coat everything well. Next, add 1 cup of halved cherry tomatoes, 1/2 cup of diced cucumber, 1/4 cup of finely chopped red onion, and 1/4 cup of chopped fresh parsley. Fold these in carefully to keep the salad looking nice. - Seasoning the salad Sprinkle salt and pepper to taste. This step enhances the flavors and makes the salad truly delicious. Don't be shy; seasoning is key! - Refrigeration for flavor enhancement Cover the bowl with plastic wrap or a lid. Place it in the fridge for at least 30 minutes. This cooling time allows all the flavors to meld together, making each bite better. Enjoy this high protein chicken salad as a simple, tasty meal. For the complete recipe, check out the Full Recipe section! Keeping chicken moist To keep your chicken juicy, cook it properly. Bake or grill the chicken until it reaches 165°F. Let it rest before you cut it. This helps the juices stay inside. You can also marinate the chicken in yogurt for added flavor and moisture. Ensuring balanced flavors Balance is key. Use a mix of flavors and textures. The tangy yogurt and mustard pair well with the sweetness of honey. Add salt and pepper to taste. Fresh herbs, like parsley, add a nice touch. Taste your salad as you mix. Adjust the seasonings as needed. Storing leftovers properly If you have leftovers, store them in an airtight container. Keep it in the fridge for up to three days. This salad tastes even better the next day as flavors blend. Just remember to give it a good stir before serving again. Garnishing options Garnish your chicken salad with extra parsley for color. You can also add sliced olives or diced avocado for richness. A sprinkle of paprika on top gives a nice visual touch. Accompaniments for a complete meal Serve your salad with whole-grain pita or on a bed of greens. Pair it with a side of fruit for a fresh twist. You can also enjoy it with whole-grain crackers for crunch. Explore different combinations to find what you love! For the full recipe, refer to the detailed steps above. {{image_2}} This chicken salad is high in protein. Each serving has about 30 grams of protein. Protein helps build muscle and keeps you full longer. The main ingredients, chicken and chickpeas, are great sources. - Cooked chicken breast: A lean meat packed with protein. - Chickpeas: They add fiber and protein. They also help with digestion. Using Greek yogurt in this salad has great benefits. Greek yogurt is lower in fat than sour cream. It adds creaminess without many calories. Plus, it has probiotics that help your gut. Chickpeas are not just tasty; they are also nutrient-rich. They contain vitamins and minerals like iron and magnesium. These nutrients support your overall health and energy levels. This salad has about 300 calories per serving. It is light yet filling. The macronutrient breakdown is as follows: - Protein: 30 grams - Carbohydrates: 35 grams - Fats: 7 grams These numbers can vary based on the specific ingredients you use. If you want to cut calories, go easy on the dressing. However, the balance of protein, carbs, and fats keeps it satisfying. For the full recipe, check out the details provided earlier. You might want to switch out the chicken in your salad. You can use turkey, tuna, or even shrimp. Each option keeps the protein high and adds a unique taste. If you're looking for vegetarian choices, try using cooked lentils or tempeh. Both options add protein and make the salad filling. You can also mix in beans, like black beans or kidney beans, for a hearty touch. To make your salad even more exciting, consider adding fresh herbs and spices. Chopped basil or dill can brighten up the dish. A pinch of cumin or paprika adds a warm, earthy flavor. If you want to change the dressing, try a lemon vinaigrette or a creamy avocado dressing. These dressings bring a new twist and keep the salad fresh. Experiment with different combinations to find what you love best. For the full recipe, check out the Protein-Packed Chicken Salad section above. Can I make this salad ahead of time? Yes, you can make this salad ahead of time. It tastes even better after chilling. Just mix the salad and store it in the fridge. How long will the salad last in the fridge? This salad will last about 3 to 4 days in the fridge. Always cover it well to keep it fresh. What can I serve with high protein chicken salad? You can serve this salad with whole-grain pita, crackers, or on a bed of greens. It pairs well with fruit or a light soup too. Is this recipe suitable for meal prep? Yes, this recipe is great for meal prep. You can portion it into containers for easy lunches all week. How to adjust the recipe for more servings? To adjust the recipe for more servings, simply double or triple the ingredients. Keep the same ratios for best results. Can I use canned chicken for this recipe? Yes, you can use canned chicken if you need a quick option. Just drain it well and break it up before mixing it in. This blog post covered a tasty chicken salad you can make easily. We talked about key ingredients, step-by-step instructions, and helpful tips for a great outcome. I shared the health benefits and variations to keep things exciting. My final thought is to try this recipe and customize it to your taste. Enjoy a fresh meal that is healthy and satisfying!
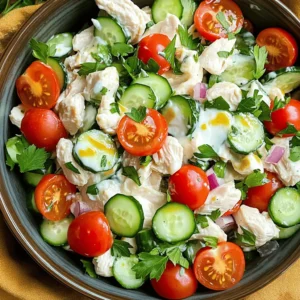
    High Protein Chicken Salad Simple and Tasty Meal
  • The key to a great Mexican chopped salad is fresh ingredients. Here’s what you need: - 1 cup cherry tomatoes, halved - 1 cup cucumber, diced - 1 cup bell peppers (red, yellow, green), diced - 1 cup corn kernels (fresh or canned) - 1 can (15 oz) black beans, drained and rinsed - 1 avocado, diced - 1/4 cup red onion, finely chopped - 1/4 cup cilantro, chopped - Juice of 2 limes - 3 tablespoons olive oil - 1 teaspoon cumin - Salt and pepper to taste - Optional: 1 jalapeño, deseeded and minced (for added heat) This salad serves 4-6 people. It looks great in a colorful bowl. You can garnish it with extra cilantro or lime wedges for a splash of color. Using fresh produce makes the salad vibrant and tasty. Whenever possible, use organic ingredients. This salad is healthy and refreshing. You can find the full recipe above. Start by gathering your ingredients. In a large bowl, combine the following: - 1 cup cherry tomatoes, halved - 1 cup cucumber, diced - 1 cup bell peppers (red, yellow, green), diced - 1 cup corn kernels (fresh or canned) - 1 can (15 oz) black beans, drained and rinsed - 1 avocado, diced - 1/4 cup red onion, finely chopped - 1/4 cup cilantro, chopped - Optional: 1 jalapeño, deseeded and minced Mix these ingredients gently. You want them to blend but not mash. Each bite should have a bit of everything. In a separate bowl, whisk together: - Juice of 2 limes - 3 tablespoons olive oil - 1 teaspoon cumin - Salt and pepper to taste Whisk until it’s smooth. This dressing adds a bright flavor to your salad. Pour the dressing over the salad ingredients. Gently mix everything until it is coated well. Then, fold in the chopped cilantro. Let the salad sit for about 10 minutes. This allows the flavors to meld together. The wait makes a big difference in taste. For the full recipe, check out the details provided above. Enjoy your fresh and vibrant Mexican chopped salad! You can swap ingredients to fit your taste. Try grape tomatoes if you can’t find cherry tomatoes. For a crunchier texture, use radishes instead of cucumbers. Black beans can be replaced with pinto beans or chickpeas. If you want a creamier salad, add diced mango or pineapple. For dressings, a zesty cilantro lime dressing pairs well. A creamy avocado dressing is also a great choice. Prep your ingredients a day in advance. Chop the veggies and store them in separate containers. Keep them fresh in the fridge. For the best taste, add the dressing right before serving. This keeps the salad crisp. Letting the salad sit for about ten minutes before serving helps the flavors blend well. Use spices to enhance your salad. A pinch of chili powder gives it a nice kick. You can add smoked paprika for a smoky flavor. If you like it spicy, include more jalapeño or a dash of hot sauce. To make it milder, skip the jalapeño and reduce the spices. Taste as you go and adjust to your liking. {{image_2}} You can boost your Mexican chopped salad with protein. Adding grilled chicken makes it heartier. Shrimp works well, too. For a vegetarian option, try adding tofu. Just cube it and toss it in. For a vegan-friendly salad, skip the chicken and shrimp. Instead, focus on beans, quinoa, or lentils for protein. Using seasonal ingredients keeps your salad fresh and exciting. Swap out bell peppers for ripe tomatoes in summer. In fall, add roasted butternut squash for a sweet touch. You can also include seasonal fruits. Diced mango adds a tropical flavor. Strawberries bring a sweet contrast to the savory beans. Dressings can change the whole vibe of your salad. For a creamy option, use Greek yogurt mixed with lime juice. A vinaigrette made with olive oil and lime juice is light and fresh. I love a taco seasoning dressing. Just mix taco seasoning with olive oil and lime juice. It adds a fun twist to this classic dish. Don't forget to check the Full Recipe for more ideas! To keep your Mexican Chopped Salad fresh, refrigerate it right after serving. Use an airtight container to keep it crisp. This salad lasts about 3 days in the fridge. However, the avocado may brown. To slow this, squeeze lime juice on the avocado before storing. You can freeze some parts of the salad, but not everything. The veggies lose their crunch when frozen. I suggest freezing only the beans and corn. Eat the fresh ingredients, like tomatoes and avocado. They taste best fresh! When you're ready, thaw the beans and corn in the fridge overnight before use. Mexican Chopped Salad is a colorful dish filled with fresh ingredients. It often includes cherry tomatoes, cucumber, bell peppers, corn, black beans, avocado, red onion, and cilantro. This salad bursts with flavor and is easy to make. You can enjoy it as a side or a main dish. The lime juice and olive oil dressing adds a zesty touch. To make a healthier dressing, consider using yogurt instead of oil. You can also replace oil with more lime juice or vinegar. Another option is to blend avocado into your dressing for a creamy texture without extra fat. Use fresh herbs like cilantro or parsley for added flavor without calories. Yes, you can use canned beans for convenience. Canned beans save time, and they are already cooked. Just rinse them well to reduce sodium content. They also add a nice texture and flavor to the salad. Black beans are a great choice for this dish. Yes, Mexican Chopped Salad is gluten-free. All the main ingredients, like vegetables and beans, are naturally gluten-free. Just ensure that any dressings or additional toppings are also gluten-free. This makes it a safe choice for those with gluten sensitivities. To prepare this salad in advance, chop the veggies and store them in an airtight container. Keep the dressing separate until you are ready to serve. This prevents the salad from getting soggy. Add the dressing just before serving to keep it fresh and crunchy. For the best taste, enjoy it within a day or two of making it. This blog post covered how to make a vibrant Mexican Chopped Salad. We discussed fresh ingredients, bright dressings, and serving ideas to elevate your meal. Remember, you can customize it easily with different proteins or seasonal produce. Making it ahead keeps it fresh for later. Explore these variations to fit your taste. With these tips, you can create a delicious and healthy dish every time. Enjoy your salad journey!
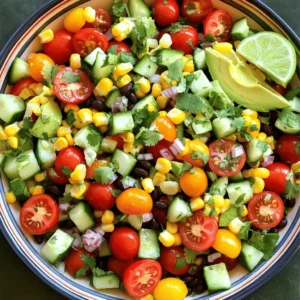
    Mexican Chopped Salad Simple and Fresh Recipe
  • - Pre-made tart shell (9-inch) - Ripe white peaches - Mascarpone cheese - Heavy cream - Powdered sugar - Vanilla extract - Lemon zest - Fresh mint leaves for garnish - Optional: Honey For this delightful White Peach Mascarpone Tart, you need simple yet fresh ingredients. The pre-made tart shell saves time and lets you focus on flavors. Ripe white peaches add sweetness and a lovely aroma. Mascarpone cheese makes the filling rich and creamy. Heavy cream helps it become light and fluffy. Using powdered sugar gives the filling a sweet touch. Vanilla extract enhances the taste, while lemon zest adds brightness. Fresh mint leaves not only look great but also bring a cool flavor. If you want extra sweetness, honey is a great option. Gather these ingredients, and you will be ready to create a stunning dessert. For the complete directions, check the Full Recipe. To start, gather your ingredients. First, combine the mascarpone cheese and heavy cream in a medium bowl. Then, add the powdered sugar, vanilla extract, and lemon zest. Mix these together using a hand mixer or whisk. Beat the mixture until it becomes light and fluffy, about 2-3 minutes. This fluffy filling is what makes the tart so delicious. Next, carefully pour the mascarpone filling into the pre-made tart shell. Spread it evenly, making sure every corner is filled. Now, take your ripe white peaches and slice them thinly. Arrange the peach slices on top of the mascarpone layer. Overlap them slightly for a nice look. If you want a touch of sweetness, drizzle a bit of honey over the peaches. Now, it’s time to chill the tart. Place it in the refrigerator for at least 1 hour. This helps all the flavors blend well. When ready to serve, garnish the tart with fresh mint leaves. They add a pop of color and flavor. For the full recipe, check out the link. Enjoy your beautiful tart! - Beating mascarpone for optimal fluffiness: To get the best texture, beat mascarpone with heavy cream. Use a hand mixer for about 2-3 minutes. This makes the filling light and airy. - Choosing the best white peaches: Pick ripe white peaches that are soft but not mushy. Look for a sweet scent. The best peaches add flavor and color to your tart. - Tips for a smooth filling: Ensure all ingredients are at room temperature. This helps them mix well. Sift the powdered sugar to avoid lumps. A smooth filling looks great and tastes better. - Using powdered sugar for dusting: Just before serving, dust the tart with powdered sugar. This adds a sweet touch and makes the tart look fancy. - Arranging peaches artfully: Place the peach slices in a pattern. Overlap them slightly for a beautiful design. This makes your tart more inviting. - Slicing and serving tips: Use a sharp knife to cut the tart into wedges. Serve each piece with extra peach slices on the side. This adds freshness and color to your plate. For the full recipe, check out the White Peach Mascarpone Tart . {{image_2}} You can switch up the flavor of your tart by using different fruits. Try ripe strawberries or juicy blueberries. They add a nice color and taste. You can also mix fruits. A peach and raspberry combo makes a great choice. Adding spices can make your tart even more special. A dash of cinnamon or nutmeg gives warmth. You might like a hint of fresh basil or mint for a herbal twist. Just a little can make a big impact. If you want a vegan version, swap the mascarpone cheese for tofu. Blend silken tofu with a bit of lemon juice and maple syrup. It’s creamy and delicious! Use coconut cream for the heavy cream. It adds a nice flavor too. For those who need gluten-free options, look for a gluten-free tart shell. Many stores sell them now. You can also make your own with almond flour or oats. It’s easy and tastes great! Check out the Full Recipe for more ideas on how to make this tart your own! To keep your White Peach Mascarpone Tart fresh, store it in the fridge. Place it in an airtight container. This helps prevent moisture loss and keeps the tart from absorbing other smells. If you use a pie dish, cover it tightly with plastic wrap. This works well too! If you want to freeze the tart, slice it first. Wrap each slice in plastic wrap. Place the slices in a freezer-safe bag to avoid freezer burn. When you’re ready to enjoy it, remove a slice and let it thaw in the fridge overnight. This keeps the flavors intact and the texture nice. Always serve it chilled for the best taste! How long can the tart be stored in the fridge? You can keep the tart in the fridge for up to three days. Make sure to cover it well. This keeps the tart fresh and tasty. After a few days, the peaches might get soft. Can I use other types of cheese instead of mascarpone? Yes, you can use cream cheese or ricotta. These cheeses will change the flavor a bit. Cream cheese is tangy, while ricotta is light and fluffy. Both are great choices if you want to mix it up! What’s the best way to cut the tart? Use a sharp knife for clean slices. Dip the knife in hot water, then dry it before cutting. This will help with cutting through the peaches and cream. Cut slowly and gently to keep the layers intact. For the full recipe and more tips, check out the [Full Recipe]. This blog post covered a delicious peach tart made with simple ingredients. You learned how to create a fluffy mascarpone filling, arrange peaches beautifully, and chill your tart. I shared tips to elevate your presentation and variations for different diets. For a sweet treat, this tart is easy and fun to make. Enjoy it fresh or store it for later. With this guide, you're all set to impress anyone with this tasty dessert!
    Delicious White Peach Mascarpone Tart Easy to Make
  • To make Chicken and Broccoli Rice Bowls, you need fresh and simple ingredients. Each ingredient brings flavor and nutrition to the dish. You can find these at your local grocery store. Here are the ingredients you will need: - 2 cups cooked jasmine rice - 1 pound boneless, skinless chicken breasts, cut into bite-sized pieces - 2 cups broccoli florets - 3 tablespoons soy sauce - 2 tablespoons sesame oil - 1 tablespoon honey - 2 cloves garlic, minced - 1 inch ginger, grated - 1 tablespoon rice vinegar - Salt and pepper to taste - 2 green onions, chopped (for garnish) - Sesame seeds (for garnish) - Chicken: A great source of lean protein. It helps build muscles and keeps you full. - Broccoli: Packed with vitamins C and K. It boosts your immune system and supports bone health. - Jasmine Rice: A tasty carbohydrate that gives you energy. It also has a nice aroma. - Soy Sauce: Adds flavor and umami. It contains antioxidants that may benefit your health. - Honey: A natural sweetener that can help soothe your throat and improve digestion. - Garlic and Ginger: Both have anti-inflammatory properties and add a delightful taste. These ingredients work together to create a meal that is tasty and nutritious. You can enjoy a healthy dish that doesn’t take long to make. For the complete cooking steps, check out the Full Recipe. First, gather a large mixing bowl. Add soy sauce, sesame oil, and honey. Then, mix in minced garlic and grated ginger. Pour in rice vinegar for some zing. Add the chicken pieces and stir well to coat. Let it marinate for at least 15 minutes. This step adds flavor and makes the chicken juicy. Next, heat a large skillet over medium-high heat. Add the marinated chicken to the hot skillet. Keep the leftover marinade; you’ll use it later. Cook the chicken for about 6-8 minutes. Stir occasionally until the chicken turns golden brown and is cooked through. Once done, remove the chicken from the skillet and set it aside. In the same skillet, it’s time to cook the broccoli. Add the broccoli florets along with a splash of water. Cover the skillet to steam the broccoli. Let it cook for about 3-4 minutes. You want it tender but still crisp. Remove the lid and pour in the reserved marinade. Cook for another 2-3 minutes to let the sauce thicken. Now, return the cooked chicken to the skillet. Mix it with the broccoli and sauce until everything is hot and well coated. Season with salt and pepper to taste. To serve, layer cooked jasmine rice in bowls. Top it with the chicken and broccoli mixture. Finally, garnish with chopped green onions and sesame seeds for a great finish. Enjoy your tasty meal! For the full recipe, check the original source. To save time, prep your ingredients ahead of time. You can chop the chicken and broccoli the night before. Marinate the chicken early. This adds flavor and cuts down on cooking time. Use pre-cooked rice or microwaveable rice for quick meals. These options help you make Chicken and Broccoli Rice Bowls fast. Using a skillet is great for cooking chicken and broccoli. The high heat gives the chicken a nice sear. It helps the broccoli stay crisp. You can also use a steamer for the broccoli. This keeps its bright color and nutrients. Stir-frying the chicken with the broccoli is another quick method. It mixes flavors well and cooks everything evenly. To cook rice perfectly, rinse it first. This removes excess starch. Use the right water ratio; for jasmine rice, 1 cup rice to 1.5 cups water works well. Bring it to a boil, then cover and simmer on low heat. Let it sit for a few minutes after cooking. Fluff it with a fork before serving. This makes your rice light and fluffy, perfect for your Chicken and Broccoli Rice Bowls. For the full recipe, check out the complete guide. {{image_2}} You can easily swap jasmine rice for healthier options. Quinoa provides more protein and fiber. Cauliflower rice is a great low-carb choice. Brown rice adds more nutrients and a nutty flavor. Each option works well with chicken and broccoli. To spice things up, try adding crushed red pepper for heat. A splash of lime juice can brighten flavors. You might enjoy adding a dash of curry powder for warmth. Mix in some fresh herbs, like cilantro or basil, to give your dish a fresh twist. If you want to switch proteins, tofu works great for a vegetarian option. Shrimp adds a fun seafood flair. You can also use beef or pork for a heartier meal. Each protein brings its unique taste to the bowl, making it exciting every time you cook. For the full recipe, make sure to check the details mentioned above! To keep your Chicken and Broccoli Rice Bowls fresh, store them in airtight containers. Make sure each bowl has all the components: rice, chicken, and broccoli. Let the dish cool down before sealing the container. Properly stored, your leftovers can last for about three days in the fridge. When you’re ready to enjoy your leftovers, reheat them gently. You can use the microwave or a skillet. If using a microwave, cover the bowl with a damp paper towel. Heat in short bursts, stirring in between, until warm. For a skillet, add a splash of water and cover to steam the dish. This keeps the rice moist and prevents it from drying out. Freezing is a great option if you want to save some meals for later. Use freezer-safe containers to avoid freezer burn. You can freeze the chicken and broccoli mixture separately from the rice if you prefer. When ready to eat, thaw the bowls in the fridge overnight. Reheat them in the microwave or skillet, just as you would with leftovers. Enjoy your tasty meals anytime! Yes, you can use frozen broccoli. Frozen broccoli works well in this dish. It saves time and gives you more convenience. Just add it directly to the skillet. You may need to cook it a bit longer since it's frozen. Watch for the broccoli to be tender, but not mushy. To make this dish vegetarian, replace chicken with tofu or chickpeas. Tofu absorbs flavors well and adds protein. Chickpeas also offer great texture and nutrition. Use the same marinade to flavor your protein choice. The rest of the recipe stays the same, keeping it tasty and filling. You can serve several things with these bowls. A side of spring rolls adds crunch. A simple salad can add freshness. You might also enjoy some pickled vegetables for a tangy touch. These sides can complement the main dish well. You can find the full recipe for Chicken and Broccoli Rice Bowls in the article. It details all the steps and ingredients you need. This makes it easy to follow, even for new cooks. In this blog post, we explored how to make delicious Chicken and Broccoli Rice Bowls. We covered essential ingredients, step-by-step cooking methods, and helpful tips to make it easier. We also looked at tasty variations and how to store leftovers correctly. Remember, cooking can be fun and rewarding. Using fresh ingredients and trying new flavors will make you a better cook. Enjoy your meals and share this great recipe with others!
    Chicken and Broccoli Rice Bowls Tasty and Easy Meal
  • - 2 cups whole wheat pasta (fusilli or rotini) - 1 cup cooked chicken breast, shredded - 1 ripe avocado, diced - 1 cup cherry tomatoes, halved - 1/2 cucumber, diced - 1/4 red onion, finely chopped - 1/4 cup Greek yogurt - 2 tablespoons lime juice - 1 tablespoon olive oil - 1 teaspoon garlic powder - Salt and pepper to taste - Fresh cilantro or parsley for garnish This salad packs a punch of health. Whole wheat pasta offers fiber for digestion. Chicken is a great source of lean protein, helping build and repair muscles. Avocado provides healthy fats that support heart health. Cherry tomatoes bring antioxidants that fight cell damage. Cucumber adds hydration and crunch. Greek yogurt boosts protein and probiotics, aiding gut health. Lime juice gives a fresh flavor and vitamin C. This mix makes a balanced meal! If you need to make swaps, it's easy! Use gluten-free pasta if you avoid gluten. For a plant-based option, replace chicken with chickpeas or tofu. Swap Greek yogurt with a dairy-free yogurt for a vegan choice. You can use lemon juice instead of lime if you prefer that flavor. Don't hesitate to play with the veggies too; bell peppers or spinach work well! Enjoy your cooking adventure with these fun swaps. First, you need to cook the whole wheat pasta. Use fusilli or rotini for best results. Bring a large pot of water to a boil. Add a pinch of salt to the water. Cook the pasta according to the package directions until it is al dente. This usually takes about 8 to 10 minutes. Once cooked, drain the pasta. Rinse it under cold water to stop the cooking process. This also helps cool the pasta down. Now, let’s prepare the salad. In a large mixing bowl, combine the shredded chicken, diced avocado, halved cherry tomatoes, diced cucumber, and chopped red onion. Make sure to mix these ingredients well. You want every bite to have a little bit of everything. This mix adds color and flavor. Remember, the avocado is soft, so handle it gently to keep it intact. Next, let’s make the dressing. In a small bowl, whisk together the Greek yogurt, lime juice, olive oil, garlic powder, salt, and pepper. Mix until it is smooth and creamy. This dressing adds a nice zing to the salad. Pour the dressing over the chicken mixture. Toss everything gently until all the ingredients are well coated. Finally, add the cooled pasta to the salad. Toss again to combine. Chill the salad in the refrigerator for about 30 minutes. This helps the flavors blend well. When you’re ready to serve, garnish with fresh cilantro or parsley. For the full recipe, check out the section above. To make your salad great, focus on the texture. Use whole wheat pasta. It adds a nice chew. Cook the pasta until it's al dente. This means it’s firm, not mushy. Rinse the pasta in cold water to stop cooking. This keeps the pasta from getting sticky. When you mix in the avocado, be gentle. You want it to stay chunky. Add more flavor with fresh herbs. You can use cilantro or parsley for a fresh taste. Lime juice brightens everything up. You can also add a pinch of chili flakes for heat. If you love garlic, use fresh minced garlic instead of garlic powder. This adds a punch. Taste your salad before serving. Adjust salt and pepper to make it perfect. You can make this salad ahead of time. Prepare the pasta and veggies a day before. Keep the dressing separate until serving. This helps the salad stay fresh. The flavors mix well if you let it sit for 30 minutes. Just remember to store it in the fridge. This keeps the ingredients crisp and tasty. For the full process, check out the Full Recipe. {{image_2}} You can swap out chicken for other proteins. Try grilled shrimp for a seafood twist. You might also use diced turkey or even canned tuna. For a vegetarian option, use chickpeas or black beans. Each protein adds its own flavor and texture. Feel free to get creative with your veggies. Bell peppers add crunch and color. Spinach or kale brings in a healthy boost. You can also use broccoli florets or snap peas for added fun. Mixing in different veggies will keep your salad fresh and exciting. The dressing can change with your mood or taste. Instead of Greek yogurt, try a tahini or avocado dressing for creaminess. A vinegar-based dressing with balsamic or apple cider vinegar gives a tangy twist. Add herbs like dill or basil for extra flavor. Each dressing option can transform the salad into something new. For the full recipe, check out Healthy Chicken Pasta Salad with Avocado. To keep your Healthy Chicken Pasta Salad with Avocado fresh, store it in an airtight container. Make sure to cool the salad before you seal it. This helps prevent condensation, which can lead to sogginess. If you have any leftover dressing, store it separately to keep the salad crisp. Use glass or BPA-free plastic containers for storage. Glass containers work well because they do not stain or hold odors. Choose containers that are the right size for your leftovers. This helps minimize air exposure, keeping your salad tasty. Your salad will last in the fridge for about 3 days. After that, it may lose its flavor and texture. Avoid freezing this salad, especially with the avocado. Freezing can change the avocado’s texture, making it mushy. If you want to enjoy this salad later, consider storing the ingredients separately. This way, you can combine them fresh when you're ready to eat. Yes, you can use regular pasta. Whole wheat pasta adds more fiber. It also gives a nutty taste. Regular pasta works just as well for this salad. You may want to cook it slightly less for a firmer bite. You can add many healthy options. Consider bell peppers, spinach, or olives. Chickpeas are a great protein boost. You can also toss in some grated carrots for extra crunch. Nuts like almonds or walnuts can add a nice texture. To stop the avocado from browning, use lime juice. The acid in lime slows down browning. You can also keep the pit in the bowl. Cover the salad tightly with plastic wrap if you store it. Yes, this recipe is very kid-friendly. Kids often love pasta and chicken. The creamy avocado and yogurt dressing add a fun taste. You can adjust the spices to suit their palates. Serve it in colorful bowls for extra fun. Absolutely! Swap the chicken for chickpeas or tofu. Use a plant-based yogurt instead of Greek yogurt. This way, you keep the creaminess while making it vegan. Add some nuts for protein to balance the salad. Check the Full Recipe for more tips. This blog post covered the key ingredients, their nutritional benefits, and dietary substitutions. I shared step-by-step instructions for cooking pasta, making the salad, and creating dressing. Tips for texture, flavors, and advance prep can elevate your dish. We explored variations with proteins, veggies, and dressings. Finally, I provided storage info, including leftovers and shelf life. In summary, this salad is easy, nutritious, and versatile. It’s a dish you can enjoy on any occasion.
    Healthy Chicken Pasta Salad with Avocado Delight
  • - Fresh lychee - Fresh mint leaves - Rose syrup - Lime juice - Sugar - Sparkling water - Ice cubes - Garnishes In this Lychee Rose Mojito, each ingredient brings something special. Fresh lychee adds a sweet, floral taste. You can find these in stores or markets, often in cans or jars if fresh ones are hard to get. Fresh mint leaves provide a cooling touch that brightens the drink. Rose syrup gives a lovely aroma and a hint of sweetness. Lime juice adds a zesty kick that balances the flavors. - Alternatives for fresh lychee: If you cannot find fresh lychee, canned lychee works well. Just drain and rinse them before use. You may also try fresh peaches or pears for a different twist. - Different types of mint to use: Spearmint is the classic choice, but you can use peppermint for a stronger mint flavor. If you want something unique, try chocolate mint for a fun taste. - Substitutes for rose syrup: If you cannot find rose syrup, you can use simple syrup with a few drops of rose water. Honey or agave syrup can add a sweet touch, too. For the full recipe, make sure to check the instructions above. Enjoy crafting this delightful summer drink! Muddling the Ingredients To start, take a sturdy glass or cocktail shaker. Add one cup of fresh lychee, peeled and pitted. Next, toss in half a cup of fresh mint leaves and one tablespoon of sugar. Use a muddler to press down gently on the lychee and mint. This releases their flavors and juices. You want a nice, well-combined mix, but don’t mash it into a pulp. Mixing and Serving After muddling, add two tablespoons of rose syrup and two tablespoons of freshly squeezed lime juice. Muddle the mixture gently again. This helps the mint aroma to pop. Now, fill a glass with ice cubes. Pour the lychee mixture over the ice. Then, top it off with sparkling water. Stir gently to mix everything well. Adjusting Sweetness Now it’s time to taste your drink. If you find it not sweet enough, add more sugar or lime juice. Just stir it in until you reach your preferred flavor. Ideal tools for muddling A good muddler can make a big difference. Look for one that is sturdy and fits well in your hand. You can also use a wooden spoon if you don’t have a muddler. It works just fine! Avoiding over-muddling Be careful not to over-muddle your ingredients. If you press too hard, you can break the mint leaves too much. This can make your drink taste bitter. Keep it light and gentle for the best flavors. For a complete guide on making this delightful drink, check the Full Recipe. Garnishing your Lychee Rose Mojito adds fun and flair. While mint and lychee are classic choices, think outside the box. Here are some creative ideas: - Use lemon or lime slices. They add color and a zesty kick. - Try edible flowers like pansies or nasturtiums. These look pretty and are safe to eat. - Add thin cucumber ribbons for a fresh look. This gives a crisp taste too. - Incorporate a sprig of rosemary for a unique twist. Its scent blends well with rose. These garnishes not only make your drink look beautiful but also enhance the flavor experience. To elevate your Lychee Rose Mojito, consider these flavor-enhancing techniques: - Adding extra herbs can boost the taste. Try basil or thyme for a new depth. - For a spice kick, add a pinch of ginger or cayenne. This adds warmth and excitement. - Customize sweetness by adjusting the sugar. Taste as you go to find your perfect level. - You can also swap the rose syrup for lavender syrup. This gives a floral twist that’s delightful. Experimenting with these techniques allows you to create a drink that suits your taste perfectly. For the complete recipe, check out the Full Recipe section. {{image_2}} For a fun twist, try a tropical lychee mojito. Replace mint with basil for a fruity kick. Use coconut water instead of sparkling water. This gives a smooth, creamy texture. You can taste the island vibes in every sip. Another option is the spicy lychee mojito with jalapeño. Add a few slices of fresh jalapeño when muddling. This adds heat and balance to the sweetness of lychee. The spicy and sweet combo will surprise your taste buds! In winter, make a winter-inspired lychee mojito. Use warm spices like cinnamon or nutmeg. Add a splash of apple cider for a cozy feel. This mix will warm you up during the cold months. For summer, add fruity twists to your mojito. Use fresh berries like strawberries or raspberries. Muddle them with the lychee for a burst of color and taste. You can even mix in some peach or watermelon for a refreshing touch. Explore these variations to keep your lychee rose mojito exciting all year. Check out the Full Recipe for more ideas! To keep fresh lychee tasty, store them in the fridge. Place them in a paper bag. This helps them stay fresh up to a week. Do not wash them until you are ready to eat. Washing can cause them to spoil faster. For mint leaves, place them in a glass of water. Cover the leaves with a plastic bag. This keeps them fresh for a few days. Make sure to change the water every day. If you want them to last longer, wrap them in a damp paper towel and store in the fridge. You can make the lychee and mint mixture in advance. Just muddle the fresh lychee with mint and sugar. Store this mixture in a sealed container in the fridge. It stays fresh for about two days. This way, you can whip up a drink in no time! For the final drink, it’s best to serve it right after mixing. If you have leftovers, store them in the fridge. However, the sparkling water may lose its fizz. To keep it bubbly, do not mix in the sparkling water until you are ready to serve. Enjoy your refreshing drink whenever you want! For the full recipe, check the details above. A Lychee Rose Mojito is a fresh cocktail that blends sweet and floral flavors. It uses lychee, a tropical fruit with a juicy and fragrant taste. The drink also includes mint, which adds a cool touch, and rose syrup for a sweet, floral note. Lime juice brings a zesty kick while sparkling water adds a light fizz, making this drink refreshing and fun. Yes, you can easily turn the Lychee Rose Mojito into a mocktail. Just skip the alcohol and use more sparkling water or soda. You can also add extra lychee juice for sweetness. This way, everyone can enjoy a delicious drink, even those who prefer not to have alcohol. To make a Lychee Rose Mojito for a crowd, simply multiply the ingredients by the number of servings you need. For example, if you want to serve four, use two cups of lychee, one cup of mint, and so on. Mix all the ingredients in a large pitcher. Just remember to keep the sparkling water separate until you are ready to serve. Many trendy bars and eateries serve unique cocktails like the Lychee Rose Mojito. Look for places that focus on craft cocktails or international drinks. Some Asian fusion restaurants may also have this refreshing drink on their menu. Always ask your server for their recommendations! This blog post explores the delightful Lychee Rose Mojito, highlighting key ingredients and preparation steps. We discussed ingredient substitutions, tips for muddling, and creative garnishes to enhance your drink. I shared recipes for exciting variations, from tropical twists to winter flavors. Finally, I covered storage and prep tips to make your mojito plans easier. Enjoy making your own Lychee Rose Mojito. It’s a fun drink to share with friends!
    Lychee Rose Mojito Refreshing Summer Cocktail Delight
  • - 1 pound beef sirloin, thinly sliced - 2 tablespoons fish sauce - 1 tablespoon lime juice - 1 tablespoon palm sugar (or brown sugar) - 1 clove garlic, minced - 1 teaspoon chili flakes (adjust to taste) - 2 cups mixed salad greens (arugula, spinach, and lettuce) - 1 cucumber, thinly sliced - 1 red bell pepper, thinly sliced - 1 carrot, julienned - 1/4 cup fresh cilantro, chopped - 1/4 cup fresh mint leaves, chopped - 1 tablespoon roasted peanuts, crushed (for garnish) To make the Thai Beef Salad, gather these fresh ingredients. Each one plays a key role in the dish's vibrant flavor. The beef sirloin gives the salad a hearty base. Fish sauce adds depth, while lime juice brightens every bite. Palm sugar balances the salty and sour notes. Garlic and chili flakes bring warmth and aroma. The mixed greens create a crunchy backdrop. The cucumber and bell pepper add refreshing crispness. Carrots provide a sweet crunch. Fresh herbs like cilantro and mint elevate the dish with their unique tastes. Finally, crushed peanuts give a satisfying crunch. This mix of ingredients results in a colorful and tasty meal. You can find the full recipe to create this delightful dish. Enjoy the bold flavors and fresh ingredients in your Thai Beef Salad! Start by whisking together these ingredients in a bowl: - 2 tablespoons fish sauce - 1 tablespoon lime juice - 1 tablespoon palm sugar (or brown sugar) - 1 clove garlic, minced - 1 teaspoon chili flakes (adjust to taste) This mixture is your marinade. It adds a lot of flavor to the beef. Next, place the thinly sliced beef in the bowl. Make sure each piece gets coated well. Let the beef sit in the marinade for at least 15 minutes. If you have time, one hour in the fridge gives better taste. While the beef marinates, get your salad ready. In a large bowl, combine these fresh ingredients: - 2 cups mixed salad greens (arugula, spinach, and lettuce) - 1 cucumber, thinly sliced - 1 red bell pepper, thinly sliced - 1 carrot, julienned Toss the greens and veggies gently. Set the bowl aside so the flavors can blend. Now, it's time to cook the beef. Heat a grill pan or skillet over medium-high heat. Take the marinated beef out and discard the leftover marinade. Grill or sauté the beef slices for about 2-3 minutes on each side. You want them cooked but still juicy. Once done, remove the beef from the heat. Let it rest for a minute. Then, slice the beef into thin strips. Add these strips to your salad bowl along with fresh cilantro and mint. Toss everything together gently. Serve immediately. If you want, top with crushed roasted peanuts for a nice crunch. For the full recipe, refer to the above instructions. Enjoy! To make your Thai Beef Salad shine, start with the marinade. Adjust the level of chili flakes for spice. If you love heat, add more flakes. For a milder taste, use less. Letting the beef marinate longer brings out great flavors. I recommend 15 minutes at room temperature or up to an hour in the fridge. This helps the beef soak up the flavors. When cooking the beef, use high heat. This gives it a nice sear and keeps it juicy. A cast iron skillet works well for even cooking. It holds heat well, so your beef cooks perfectly. Don’t overcrowd the pan; cook the beef in batches if needed. This step is key to achieving that perfect texture. Serve your Thai Beef Salad with jasmine rice or rice noodles for a satisfying meal. These sides complement the fresh flavors of the salad. For added taste, offer toppings like sliced avocado. It adds creaminess to the crunchy salad. You can also sprinkle crushed peanuts on top for extra crunch. Enjoy the burst of flavors in every bite! For the full recipe, check the main section. {{image_2}} You can easily change the main protein in this dish. Swap beef for grilled chicken or tofu for a tasty vegetarian option. This keeps the dish light and fresh. If you want a zesty boost, add lime zest to your marinade. This small change can brighten the whole dish. For a different twist, consider adding sesame oil or soy sauce to the dressing. Both options bring a nutty flavor that pairs well with the other ingredients. You can also try using fresh herbs like basil instead of cilantro or mint. This adds a unique touch that makes the salad your own. Using seasonal vegetables can make your salad even fresher. Think about adding crisp radishes or colorful cherry tomatoes. They not only taste great but also add visual appeal. For a sweet note, toss in seasonal fruits like mango. The sweetness from the fruit balances the lime and fish sauce perfectly. For the complete recipe, check out the [Full Recipe]. Store any leftovers in an airtight container. This keeps them fresh and tasty. For the best taste, eat them within 2 days. This way, you enjoy the full flavor of your Thai Beef Salad. If you want to save some for later, freeze the beef separately from the salad. This helps keep the salad fresh. When you're ready to eat, thaw the beef in the refrigerator. This slow method keeps the taste and texture just right. To reheat the beef, use a skillet or microwave. This warms it up nicely without drying it out. Do not reheat the salad greens. They lose their crunch and freshness if heated. Enjoy your meal at its best! For the complete recipe, check out [Full Recipe]. Thai Beef Salad is a fresh, vibrant dish from Thailand. This dish features tender beef, crisp veggies, and a zesty dressing. The flavors blend sweet, sour, salty, and spicy notes. Traditionally, it's enjoyed as a light meal or appetizer. Its origins stem from Thai street food, where balance in flavors is key. To add heat, you can increase the chili flakes in the marinade. Start with a teaspoon and add more if you like. Fresh Thai bird's eye chilies can also spice things up. Slice them thinly and mix them into the salad. Yes, you can prep elements in advance. Marinate the beef a few hours before cooking for better flavor. Chop the veggies and store them in the fridge to keep them fresh. Mix everything together just before serving for the best taste. This salad pairs well with jasmine rice or rice noodles. You can also serve it alongside spring rolls or satay skewers. These options complement the salad's flavors and make a complete meal. You can swap the beef for grilled chicken or tofu for a vegetarian dish. Add fruits like mango for sweetness or use lime zest for extra flavor. Play with herbs too; basil or cilantro can give it a unique twist. This salad is packed with nutrients. Beef adds protein and iron, while veggies provide vitamins and fiber. The dressing offers healthy fats from fish sauce and fresh herbs. Overall, it's a balanced dish that is both tasty and good for you. Enjoy this dish with the full recipe for a delightful experience! In this post, we covered how to make Thai Beef Salad. You learned about the key ingredients, marinating tips, and cooking steps. Remember, feel free to adjust spice levels and swap ingredients to suit your taste. Keep your leftovers fresh by storing them properly. Whether you're serving it with rice or adding seasonal fruits, this salad is versatile. Enjoy making it your own and impressing friends and family with bold flavors.
    Thai Beef Salad Flavorful and Fresh Delight
  • - Mixed Baby Greens: Use 4 cups of mixed baby greens, like arugula, spinach, and watercress. These greens offer a fresh base for the salad. They add texture and flavor, making each bite exciting. - Fresh Strawberries: Select 1 cup of fresh strawberries. Look for ripe, juicy berries. Hull and slice them before adding. The sweetness of strawberries pairs perfectly with the saltiness of prosciutto. - Burrata Cheese: Choose 1 ball of burrata cheese. This cheese should feel soft and creamy. Cut it into large pieces to showcase its rich inside. Handle it gently to keep its beautiful shape. - Prosciutto: Use 6 slices of high-quality prosciutto. Look for thinly sliced meat with a nice marbling. Tear it into bite-sized pieces for easy eating. The savory flavor complements the salad well. - Roasted Pistachios: Prepare 1/4 cup of roasted pistachios, roughly chopped. These nuts add a nice crunch. You can substitute them with almonds or walnuts if you prefer. - Dressing Ingredients: Use 2 tablespoons of balsamic glaze and 2 tablespoons of extra virgin olive oil. These dressings enhance the salad's flavor. Add salt and freshly cracked black pepper to taste for extra seasoning. For the full recipe, check out the details above. 1. In a large mixing bowl, take the mixed baby greens and sliced strawberries. Gently toss them together until they blend well. This step ensures every bite has a mix of flavors. 2. Next, drizzle the extra virgin olive oil over the salad mixture. Add some salt and freshly cracked black pepper. Toss lightly again to coat everything evenly. This adds a nice flavor boost. 3. For presentation, grab a large serving platter or individual plates. Artfully arrange the salad mixture on the platter. Create a little nest in the center for the burrata pieces. 4. Now, scatter the torn prosciutto pieces on top of the salad. This adds a savory touch that pairs perfectly with the sweetness of the strawberries. 5. Place the burrata pieces on the salad. Make sure they stand out, as they are the stars of the dish. 6. Drizzle balsamic glaze over the entire salad. This will add sweetness and depth, making every bite more delightful. 7. Finish off by sprinkling the roasted pistachios on top. They give a nice crunch. Add fresh basil leaves to garnish, giving the salad a vibrant look. - Serve the salad immediately to keep the greens fresh. The bright colors and flavors are best enjoyed right away. - You can plate the salad in elegant dishes for a special touch. Consider adding a drizzle of extra balsamic glaze around the platter. This enhances the visual appeal. - This salad works great as a light lunch or appetizer. You can pair it with crusty bread or a light white wine for a complete meal. For a detailed view of this recipe, check out the Full Recipe. To keep your greens fresh, wash them in cold water. Dry them well using a salad spinner or clean kitchen towel. Store them in a container with a paper towel inside to absorb moisture. This helps them stay crisp longer. For strawberries, it’s best to keep them in the fridge. Don't wash them until you're ready to eat. Store them in a breathable container, like a berry basket. This allows air to circulate and keeps them fresh. Burrata cheese needs careful handling. Keep it in its liquid until you are ready to use it. Store it in the fridge and consume it within a few days for the best taste and texture. To give your salad a gourmet look, use a large, shallow bowl. Arrange the greens and strawberries in a colorful pattern. Place burrata pieces in the center for a stunning focal point. You can impress guests by serving the salad on individual plates. Drizzle extra balsamic glaze around the plate for a fancy touch. Scatter the pistachios on top for added flair and crunch. Fresh basil leaves add a pop of color, making your dish even more appealing. {{image_2}} You can change the burrata cheese if you want. Try using fresh mozzarella or goat cheese. These swap outs still give you a creamy feel. They also add a nice twist to the flavor. When it comes to greens, you have options. Instead of mixed baby greens, use kale or romaine. Both add crunch and taste. You can even mix them for a more interesting salad. Spinach also works and is mild in flavor. Want to add some extra fruit? Peaches or figs work great. They add sweetness and a juicy bite. You can slice them thin and toss them in. If you want to switch up the dressing, try honey mustard or lemon vinaigrette. These dressings give a different flavor profile. They can brighten the dish without overpowering it. For more ideas, check out the Full Recipe. It offers tips and tricks to make this salad your own! To keep your Prosciutto Strawberry Burrata Salad fresh, store it properly. I recommend using an airtight container. This helps keep the flavors vibrant. Try to eat it within two days for the best taste. Store the salad without the dressing. Dressings can make greens soggy. If you have extra strawberries or burrata, keep them in separate containers. This way, they stay fresh longer. If your greens start to wilt, don't worry. You can refresh them! Rinse the greens gently in cold water. Pat them dry with a towel. This will help them regain some crunch. You can also reuse the salad components in other dishes. Toss leftover greens into a wrap or sandwich. Use the burrata as a topping for pasta or pizza. It’s all about being creative with your leftovers! To make a vegetarian version, simply leave out the prosciutto. You can replace it with a flavorful option like roasted chickpeas or marinated artichokes. Both add texture and taste. You can use the same ingredients and follow the recipe steps. This way, you keep the salad fresh and vibrant. Yes, you can prepare parts of the salad in advance. Wash and dry the greens, and store them in a sealed container. Slice the strawberries and keep them in the fridge. However, wait to add the burrata and prosciutto until serving. This keeps the salad fresh and tasty. Burrata cheese offers several health benefits. It is rich in calcium, which helps your bones. It also has protein, which is good for muscle growth. Moreover, burrata contains healthy fats, which can support heart health. Enjoy it in moderation for a tasty treat! For the full recipe, check out the detailed instructions above. This blog post covered how to make a delicious Prosciutto Strawberry Burrata Salad. You learned the best ingredients to use, their preparation, and tips for storage. I shared serving suggestions and variations to keep things fresh. Remember, using quality ingredients makes a big difference. Try different fruits or greens to find your perfect mix. Enjoy your salad and impress your guests with these easy steps.
    Prosciutto Strawberry Burrata Salad Fresh Delight
  • - 1 cup graham cracker crumbs - 1/4 cup unsalted butter, melted - 2 cups cream cheese, softened - 1/2 cup granulated sugar - 1/2 cup sour cream - 1 teaspoon vanilla extract - Zest of 1 lemon - 2 tablespoons lemon juice - 2 large eggs - 1 cup fresh blueberries The main ingredients create a rich and creamy base. The graham cracker crumbs form a buttery crust. Cream cheese gives the cheesecake its smooth texture. Granulated sugar adds sweetness, while sour cream contributes tang. Fresh lemon zest and juice bring a bright flavor. - 2 tablespoons blueberry jam - Fresh mint leaves For toppings, blueberry jam adds a fruity finish. Fresh mint leaves bring color and freshness. These toppings make the cheesecakes pop with flavor and look great. - Muffin tin - Mixing bowls - Electric mixer You will need a muffin tin to hold the mini cheesecakes. Mixing bowls help you combine the ingredients well. An electric mixer ensures a smooth batter without lumps. Having the right tools makes baking easier and more fun. For the full recipe, check out the detailed steps to create these delightful treats. 1. Preheat your oven to 325°F (160°C). This helps the cheesecakes bake evenly. 2. Line a muffin tin with paper liners. This makes it easy to remove the cheesecakes later. 3. In a medium bowl, mix 1 cup of graham cracker crumbs with 1/4 cup of melted unsalted butter. Stir until combined. 4. Press about a tablespoon of the crumb mixture into each muffin liner. Use the back of a spoon to pack it down firmly. 1. In a large mixing bowl, beat 2 cups of softened cream cheese until smooth using an electric mixer. 2. Add 1/2 cup of granulated sugar, 1/2 cup of sour cream, 1 teaspoon of vanilla extract, the zest of 1 lemon, and 2 tablespoons of lemon juice to the cream cheese. Mix until smooth. 3. Add 2 large eggs, one at a time. Mix on low speed until just combined. Do not overmix. 4. Gently fold in 1 cup of fresh blueberries into the cheesecake batter. Be careful to keep the blueberries intact for a lovely burst of flavor. 1. Evenly distribute the cheesecake batter over the prepared crusts in the muffin tin. Fill each liner about 3/4 full. 2. Bake in the preheated oven for 20-25 minutes. The centers should be set but still slightly jiggly. 3. Remove from the oven and let them cool at room temperature for about 10 minutes. 4. Refrigerate for at least 2 hours to set completely. For the complete recipe, check out the [Full Recipe](#). - Overmixing batter: This can make the texture tough. Mix just until smooth. - Not cooling properly: Let the cheesecakes cool before chilling. This helps set their shape. - Use room temperature ingredients: Cold cream cheese will not mix well. It needs to be soft. - Avoid overbaking: Bake until the centers are slightly jiggly. They will firm up as they cool. - Best served chilled: Chilling enhances the flavors and makes them refreshing. - Pair with homemade whipped cream: A dollop of whipped cream adds richness and a nice touch. Enjoy these tips to make the best mini lemon blueberry cheesecakes. Check out the Full Recipe for more details! {{image_2}} You can easily switch things up with your mini lemon blueberry cheesecakes. Instead of blueberries, try using raspberries or strawberries. These fruits add a nice twist to your dessert. You can also add chocolate chips or nuts. Dark chocolate adds richness, while nuts give a lovely crunch. Just fold them into the batter gently. If you need a gluten-free option, use gluten-free graham cracker crumbs. These work just like regular crumbs for the crust. For a dairy-free twist, substitute cream cheese with a dairy-free cream cheese. You can also use cashew cream for a smooth texture. These choices keep the flavor tasty for everyone. If you’re hosting a larger gathering, you can double the recipe. This will give you about 24 mini cheesecakes. To make one full cheesecake, use a 9-inch springform pan. Simply pour the batter into the pan after mixing. Bake it for 45-55 minutes instead of 20-25 minutes. This will create a lovely, creamy cheesecake that everyone will love. For more details, check the Full Recipe. To keep your mini lemon blueberry cheesecakes fresh, refrigerate them right away. Place them in an airtight container. This keeps moisture in and prevents them from drying out. They stay fresh for about 3 to 4 days. If you want to enjoy them longer, use plastic wrap before sealing. This adds an extra layer of protection. You can freeze mini cheesecakes for later enjoyment. First, let them cool completely. Then, wrap each cheesecake tightly in plastic wrap. After that, put them in a freezer-safe bag or container. This prevents freezer burn. They can last up to 2 months in the freezer. When you're ready to eat them, take them out and thaw in the fridge overnight. This keeps their texture smooth and creamy. Mini cheesecakes are best eaten within a week. After that, they may still be safe but lose quality. Look for changes in texture or smell to tell if they've gone bad. If they become watery or smell sour, it’s time to toss them. Enjoy these treats while they’re at their best! You can tell mini cheesecakes are done by looking for visual cues. The edges should be set, while the center may jiggle slightly. A toothpick test works well too; insert it into the center. If it comes out clean or with a few moist crumbs, they are ready. Keep an eye on the baking time. They usually bake for 20-25 minutes at 325°F (160°C). Yes, you can make the cheesecake batter in advance. Store it in the fridge for up to 24 hours. Just keep it in a sealed container. When you're ready to bake, give it a quick stir. This helps to mix any ingredients that may have settled. It's a great way to save time on busy days. If you need a substitute for sour cream, there are several options. Greek yogurt works well and gives a similar tang. You could also use cream cheese thinned with a bit of milk. Another option is buttermilk, which adds moisture and flavor. Choose what fits your taste or what you have on hand. This blog post shared how to make tasty mini cheesecakes. You learned about key ingredients, like graham cracker crumbs and cream cheese, and how fresh blueberries add flavor. I provided step-by-step instructions for perfecting your cheesecakes and offered tips to avoid common mistakes. Whether you're making variations for special diets or just for fun, you'll impress your friends. Remember to store them well for freshness. Enjoy your baking adventure and savor every bite of your delicious creation!
    Mini Lemon Blueberry Cheesecakes Irresistible Treat
  • To make these delightful Strawberry Lemonade Cookies, you will need: - 1 cup unsalted butter, softened - 1 cup granulated sugar - 1 egg - 2 tablespoons fresh lemon juice - 1 tablespoon lemon zest - 2 cups all-purpose flour - 1/2 teaspoon baking soda - 1/4 teaspoon salt - 1 cup finely chopped fresh strawberries - 1/2 cup powdered sugar (for dusting) You can swap unsalted butter for coconut oil for a dairy-free option. Granulated sugar can be replaced with brown sugar if you want a richer flavor. If you need a vegan version, use flaxseed meal mixed with water instead of the egg. For the lemons, bottled lemon juice works, but fresh juice is best for taste. Fresh strawberries and lemons bring bright flavors to these cookies. Strawberries add sweetness and moisture, making the cookies soft. They also provide a lovely red color. Fresh lemons give a zesty kick that balances the sweetness. The zest carries essential oils, enhancing the lemon flavor. Using fresh ingredients makes your cookies taste better and more vibrant. Start by preheating your oven to 350°F (175°C). This temperature is key for baking. Line a baking sheet with parchment paper. This helps the cookies not stick. You can use multiple sheets if you want to bake more at once. In a large mixing bowl, cream together 1 cup of softened butter and 1 cup of granulated sugar. Mix until it looks light and fluffy. Then, add in 1 egg, 2 tablespoons of fresh lemon juice, and 1 tablespoon of lemon zest. Stir well to combine. In a different bowl, whisk together 2 cups of all-purpose flour, 1/2 teaspoon of baking soda, and 1/4 teaspoon of salt. Gradually add this dry mix to the wet mix. Stir until just combined. Gently fold in 1 cup of finely chopped fresh strawberries. This step is fun and colorful. The strawberries will add a refreshing taste. Using a tablespoon or cookie scoop, drop rounded balls of dough onto your prepared baking sheet. Make sure to space them about 2 inches apart. Bake the cookies for 12-15 minutes. Look for edges that are lightly golden. This shows they are ready. Once done, remove them from the oven and let them cool on the sheet for 5 minutes. Then, transfer the cookies to a wire rack to cool completely. For an extra sweet touch, dust the cookies with powdered sugar. For the full recipe, check the earlier section. To get cookies that are soft and chewy, focus on your mixing. Cream the butter and sugar well. This step adds air and helps your cookies rise. Do not overmix after adding flour. Mix until just combined for the best texture. If your cookies spread too much while baking, try chilling the dough. Once you mix the dough, refrigerate it for 30 minutes. This helps the butter firm up. Also, ensure you measure your flour correctly. Too little flour can lead to flat cookies. Lemon zest gives a bright taste to your cookies. Use a microplane to get fine zest from fresh lemons. Just be careful not to get any white pith, as it can be bitter. Adding zest brightens the flavor and makes your cookies stand out. For a full flavor experience, don’t skip this step while making your Strawberry Lemonade Cookies. {{image_2}} You can add chocolate chips to your cookies for a rich twist. Mix in 1 cup of semi-sweet chocolate chips after folding in the strawberries. The chocolate adds depth to the sweet and tangy flavor. The cookies become even more delicious, blending fruity and chocolatey notes. Try adding herbs like basil or mint for a fresh flavor. Use 1 tablespoon of finely chopped herbs mixed into the dough. Basil pairs well with strawberries, giving a sweet and savory profile. Mint adds a cooling touch, making the cookies refreshing. For a gluten-free version, swap all-purpose flour with almond flour or a gluten-free blend. Ensure your baking soda is gluten-free too. For a vegan option, replace the egg with flaxseed meal. Mix 1 tablespoon of flaxseed with 2.5 tablespoons of water. Let it sit until it thickens. Use vegan butter instead of regular butter. These swaps keep the cookies tasty and inclusive. For more details, check the Full Recipe. To keep your strawberry lemonade cookies fresh, store them in an airtight container. This helps prevent moisture loss and keeps them soft. You can add a slice of bread in the container. This slice absorbs excess moisture, keeping the cookies from getting hard. Keep the container at room temperature, away from sunlight. You can freeze these cookies for later enjoyment. First, let them cool completely. Then, place them in a single layer on a baking sheet. Freeze them for about one hour. Once frozen, transfer the cookies to a freezer-safe bag. This helps keep them from sticking together. Make sure to label the bag with the date. You can freeze them for up to three months. When stored properly, these cookies last about one week at room temperature. If you freeze them, they last much longer. Just remember to thaw them at room temperature for a few hours before serving. They will taste just as good as fresh-baked cookies. Enjoy these sweet treats any time! You can make these cookies ahead of time by preparing the dough. After mixing, wrap the dough tightly in plastic wrap. Then, place it in the fridge for up to three days. When you are ready to bake, scoop and bake as instructed in the Full Recipe. This way, you enjoy fresh cookies anytime! If you don't have fresh strawberries, you can use frozen strawberries. Thaw them first and drain any excess juice. Chop them finely before adding to the dough. Dried strawberries also work but will change the cookie's texture. Keep in mind, fresh berries give the best flavor! Yes, you can add icing to these cookies. A simple lemon glaze works great. Just mix powdered sugar with lemon juice until smooth. Drizzle it over cooled cookies for a sweet touch. You can also use a cream cheese frosting for a richer flavor. In this blog post, we explored key ingredients for delicious strawberry lemonade cookies. We discussed how fresh strawberries and lemons enhance flavor. I shared step-by-step instructions to help you bake perfectly every time. Remember to use my tips for the right cookie texture and avoiding spreading. I also offered fun variations and smart storage info to keep your cookies fresh. Enjoy your baking adventure! These cookies will surely impress your friends and family.
    Strawberry Lemonade Cookies Refreshing Sweet Treat
  • Let’s dive into the ingredients for the Mediterranean Salad Bowl. Each one adds flavor and nutrition. You can find all these items at your local grocery store. - Quinoa - Fresh vegetables (cherry tomatoes, cucumber, red bell pepper, red onion) - Canned chickpeas - Kalamata olives and feta cheese - Dressing components (olive oil, lemon juice, oregano, salt, and pepper) Quinoa is a great base for this salad. It is light, fluffy, and packed with protein. The fresh vegetables bring color and crunch. Cherry tomatoes offer sweetness, while cucumber cools the dish. Red bell pepper gives a hint of warmth, and red onion adds a bit of bite. Chickpeas are a must for heartiness. They are full of fiber and keep you full longer. Kalamata olives add a briny flavor that balances the sweetness of the veggies. Feta cheese gives a creamy, tangy kick to each bite. Now, let’s talk about the dressing. Olive oil adds richness. Lemon juice brightens up the flavors and adds zest. Oregano gives an earthy note, while salt and pepper round everything out. For the full recipe, check out the details above, and get ready to create a fresh and flavorful Mediterranean Salad Bowl that you will love! First, grab a medium pot. Bring 2 cups of vegetable broth or water to a boil. I always use broth for added flavor. This step is quick and easy. Once boiling, add 1 cup of rinsed quinoa. Lower the heat to a simmer. Cover the pot and cook for about 15 minutes. The quinoa will absorb the liquid and become fluffy. After cooking, remove it from heat and let it cool. While the quinoa cools, get a large mixing bowl. In this bowl, mix together the following ingredients: - 1 cup cherry tomatoes, halved - 1 cucumber, diced - 1 red bell pepper, diced - ½ red onion, finely chopped - 1 cup canned chickpeas, drained and rinsed - ½ cup Kalamata olives, pitted and halved - ¼ cup fresh parsley, chopped Now, for the dressing! In a small bowl, whisk together: - 3 tablespoons olive oil - 2 tablespoons lemon juice - 1 teaspoon dried oregano - Salt and pepper to taste Make sure to whisk until smooth. This dressing will tie all the flavors together. Once the quinoa has cooled, add it to the vegetable mixture. Pour the dressing over everything and toss gently. You want to mix well but avoid breaking the quinoa. Finally, sprinkle ½ cup of crumbled feta cheese on top. Give it one last light toss. This adds flavor and creaminess. Taste it and adjust seasoning with salt and pepper if needed. For the full recipe, check out the Mediterranean Bliss Bowl. Enjoy your fresh and colorful salad bowl! To make the best Mediterranean salad bowl, focus on the quinoa first. - Achieving the right quinoa texture: Rinse your quinoa well before cooking. This removes bitterness. Cook it in vegetable broth for flavor. It should be fluffy, not mushy. Once done, let it cool before mixing. - Balancing flavors in the dressing: Mix olive oil and lemon juice for a bright taste. Add dried oregano for a hint of earthiness. Taste it before pouring over the salad. Adjust salt and pepper to your liking. - Mixing techniques for even distribution: Start by combining your vegetables in a big bowl. Once mixed, gently fold in the quinoa. Use a spatula to avoid breaking the feta. This keeps everything well distributed and looking pretty. A beautiful salad bowl makes your meal more inviting. - Serving suggestions for a beautiful display: Use clear glass bowls to show off the colors. Layer the ingredients to create a visual feast. - Garnishing with herbs or lemon wedges: Fresh parsley adds a pop of green. A lemon wedge on the side brightens the dish. It also invites people to squeeze some juice over the salad. - Bowl alternatives for serving: Try using rustic wooden bowls for a homey feel. You can also use large lettuce leaves as edible bowls. They add flavor and fun to your meal. These tips will help you create a Mediterranean salad bowl that impresses everyone. For full details on making this dish, check out the Full Recipe. {{image_2}} You can make your Mediterranean salad unique. Start by adding proteins. Grilled chicken or shrimp brings great flavor and fills you up. You can also mix in different vegetables. Try creamy avocado or sweet roasted red peppers. They add a nice twist to the bowl. If you prefer vegan options, no problem! You can leave out feta cheese or swap it for vegan cheese. This way, everyone can enjoy the salad, no matter their diet. This salad fits many diets. If you're gluten-free, quinoa is a perfect base. It has no gluten and is very nutritious. You can also make low-carb versions. Just skip the chickpeas or reduce the amount of quinoa. Key ingredients in this salad offer many benefits. Quinoa is high in protein and fiber. Fresh vegetables add vitamins and minerals. Chickpeas boost your energy and are great for your heart. Every bite is not just tasty; it's good for you too! For the full recipe, check out the Mediterranean Bliss Bowl 🥗. To keep your Mediterranean salad fresh, store it in an airtight container. This helps prevent sogginess. I recommend using glass or BPA-free plastic containers. They keep the taste and texture better than other options. You can store the salad in the fridge for up to three days. If you add dressing, eat it within two days. The veggies stay crisp when stored without dressing. This makes it easier to enjoy later. Can you freeze the Mediterranean salad? I don’t recommend freezing it. Freezing can change the texture of veggies and chickpeas. They may become mushy when thawed. If you still want to freeze it, leave out the fresh ingredients like tomatoes, cucumber, and feta cheese. These items do not freeze well. To thaw, place the container in the fridge overnight. Refresh the salad by adding fresh veggies and a splash of lemon juice before serving. This adds life back to your dish. To make a Mediterranean salad from scratch, follow these simple steps: 1. Cook the quinoa: Start by boiling vegetable broth or water. Add 1 cup of rinsed quinoa. Lower the heat, cover it, and simmer for 15 minutes. This makes the quinoa fluffy. 2. Prepare the veggies: While the quinoa cooks, chop fresh vegetables like cherry tomatoes, cucumber, red bell pepper, and red onion. 3. Mix ingredients: In a large bowl, combine the chopped veggies with canned chickpeas and Kalamata olives. 4. Make the dressing: In a small bowl, whisk together olive oil, lemon juice, dried oregano, salt, and pepper. 5. Combine everything: Once the quinoa cools, add it to the veggie mix. Drizzle the dressing over and toss gently. 6. Add feta: Sprinkle crumbled feta cheese on top and mix lightly. This approach gives you a fresh and tasty salad, perfect for any meal. You can find the full details in the [Full Recipe]. A Mediterranean salad features classic ingredients that bring vibrant flavors. Here’s an overview of the essentials: - Quinoa: This grain provides a healthy base and nutty flavor. - Fresh vegetables: Cherry tomatoes add sweetness, while cucumber and red bell pepper offer crunch. - Red onion: It gives a sharp bite to balance the flavors. - Canned chickpeas: These are packed with protein and add a creamy texture. - Kalamata olives: They add a briny taste that enhances the salad. - Feta cheese: This crumbly cheese provides a rich flavor and creaminess. - Dressing: Olive oil, lemon juice, oregano, salt, and pepper create a zesty finish. These ingredients combine to create a colorful and healthy dish. Yes, you can use different grains instead of quinoa! Here are some great substitutes: - Couscous: It cooks quickly and has a light, fluffy texture. - Bulgur: This grain is hearty and has a slightly nutty taste. - Farro: It adds a chewy texture and rich flavor. - Brown rice: This is a gluten-free option that works well too. Feel free to experiment with these grains while keeping the rest of your salad the same! This Mediterranean salad is fresh, tasty, and easy to make. You learned how to cook quinoa and mix it with vibrant veggies and chickpeas. The dressing adds a zesty kick while feta cheese gives richness. You can customize it with proteins or different veggies for variety. Remember to store leftovers correctly and enjoy them later! This salad fits many diets and flavors. Using my tips will help you make the perfect bowl. Enjoy your healthy creation!
    Mediterranean Salad Bowl Fresh and Flavorful Delight
  • - Japanese cucumbers and alternatives - Use 2 large Japanese cucumbers. They are crisp and sweet. You can use regular cucumbers if needed. Just slice them thinly. - Seasoning essentials - You need 1 teaspoon of salt. This draws out moisture and enhances flavor. - Add 1 tablespoon of rice vinegar. It gives a nice tang. - Include 1 tablespoon of sesame oil. This adds a rich, nutty flavor. - Additional flavor enhancers - Use 1 teaspoon of soy sauce for umami goodness. - Add 1 teaspoon of sugar. It balances the vinegar's tang. - Grate 1 teaspoon of ginger. It adds a fresh kick. - Optional garnishes - Toss in 1 tablespoon of toasted sesame seeds for crunch. - Add 2 green onions, finely chopped, for freshness. - Garnish with a few sprigs of fresh cilantro if you like. This simple ingredient list makes the Japanese cucumber salad both tasty and easy. Check out the Full Recipe for more details on how to bring these flavors together! Start by slicing your cucumbers thinly. I like to use Japanese cucumbers, but regular ones work too. Place the slices in a colander and sprinkle them with salt. This step helps pull out excess moisture. Let them drain for about 10 to 15 minutes. Removing moisture is key to keeping the salad crisp. If you skip this, the salad may become soggy. After draining, gently squeeze the cucumbers to get rid of more water. This makes a big difference in texture. Now, let’s make the dressing. In a small bowl, mix rice vinegar, sesame oil, soy sauce, sugar, and grated ginger. Whisk it well until everything is combined. The balance of flavors is important. The vinegar adds tang, while the sugar brings sweetness. Adjust the ingredients to your taste. If you like it sweeter, add more sugar. If you want more tang, add extra vinegar. Once your cucumbers are ready and the dressing is made, it’s time to assemble the salad. Place the drained cucumbers in a mixing bowl. Pour the dressing over the cucumbers and toss them gently. This ensures each slice is coated well. Next, add the toasted sesame seeds and chopped green onions. Toss again to mix everything together. It’s best to let the salad rest for about 10 minutes. This resting time helps the flavors develop. Just before serving, feel free to garnish with fresh cilantro if you like. Enjoy your crisp and tasty salad! To keep your salad crunchy, choose the right cucumbers. I recommend using firm, fresh Japanese cucumbers. They have thin skin and less water. If you can't find them, regular cucumbers work too. Just peel them if the skin is thick. Enhancing texture is key. After slicing the cucumbers, sprinkle them with salt. Let them sit in a colander for 10 to 15 minutes. This step draws out excess moisture and firms them up. After draining, gently squeeze the cucumbers to remove any remaining liquid. This keeps your salad from becoming soggy. Adding fresh herbs brightens your salad. I love using cilantro for its fresh taste. You can also try mint or basil if you prefer. Just chop them finely and sprinkle them in before serving. For more flavor, experiment with seasonings. Try adding a touch of chili oil for spice. You can also mix in a splash of lime juice for acidity. These options bring new life to the dish. Each addition can change the flavor profile, so have fun with it! {{image_2}} You can make this salad even better by adding other tasty things. Try slicing some carrots. Their sweetness adds a nice twist to the dish. You could also add radishes for a bit of crunch and spice. When it comes to dressings, feel free to experiment. You can try adding chili oil for heat. A splash of lemon juice can brighten the flavors. Japanese cucumber salad is just one of many great salads in Asia. You might enjoy Thai papaya salad, which has a spicy kick. Korean cucumber salad, known as (oi muchim), offers a different flavor with garlic and chili. The history of Japanese cucumber salad is rich. It showcases the Japanese love for fresh, crisp vegetables. This dish reflects the balance of flavors prized in Japanese cuisine. It’s a simple and healthy side that complements many meals. To store leftover salad, first let it cool. Place it in an airtight container. Make sure to squeeze out as much air as possible. This helps keep the salad fresh. If you have extra dressing, store it in a separate container. This prevents the salad from getting soggy. Always keep your salad in the fridge. How long does it last? The salad lasts about three days in the fridge. After that, the quality decreases. Signs that indicate spoilage include a slimy texture or an off smell. If you see any discoloration or wilting, it’s best to throw it away. Trust your senses; they often tell you if food is no longer good. Japanese cucumber salad is a fresh, light dish. It highlights the crispness of cucumbers. This salad has roots in Japanese cuisine, where it is often served as a side. The salad is simple and flavorful, making it a favorite for many. You can enjoy it with rice, fish, or grilled meats. The key ingredients are cucumbers, rice vinegar, and sesame oil. Together, they create a delightful taste that complements many meals. Yes, you can prepare this salad ahead of time. To do this, follow these tips: - Slice the cucumbers and salt them as directed. This helps them stay crisp. - Make the dressing and store it in a separate container. This keeps the flavors fresh. - Combine everything only when you are ready to serve. This way, the cucumbers stay crunchy. Aim to let the salad sit for about 10 minutes before serving. This enhances the flavors. Japanese cucumber salad has many health benefits. Here are some key insights: - Low in calories: This salad is light and perfect for those watching their weight. - High in water content: Cucumbers are about 95% water, helping you stay hydrated. - Rich in vitamins: Cucumbers provide vitamin K, which is great for bone health. - Ginger benefits: The ginger adds flavor and may aid digestion. This salad is not just tasty; it also supports a healthy lifestyle. This blog post covered how to make a tasty Japanese cucumber salad. We discussed key ingredients, from cucumbers to seasonings, and the step-by-step process for preparation and assembly. Crispiness and flavor tips ensure your salad stands out. You can mix in other ingredients for variety or explore regional twists for a fun twist. Remember to store your salad properly to keep it fresh. With these tips, you’re set to impress with a refreshing dish that’s both healthy and enjoyable!
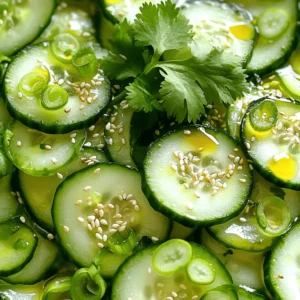
    Japanese Cucumber Salad Delicious and Simple Recipe
  • For this Lemon Basil Sorbet, fresh ingredients make all the difference. Here’s what you need: - 1 cup fresh lemon juice (about 4-6 lemons) - 1 cup sugar - 1 cup water - 1 cup fresh basil leaves, packed - Zest of 2 lemons - Pinch of salt - Optional garnish (1 tablespoon lemon zest) Using fresh lemon juice gives the sorbet a bright and zesty flavor. The sugar helps to balance the tartness and creates a sweet treat. Water is essential for creating the simple syrup that forms the base of the sorbet. Fresh basil adds an aromatic touch, while lemon zest enhances the citrus notes. A pinch of salt rounds out the flavors. If you want to make it extra special, add some lemon zest as a garnish when serving. If you're ready to make this delightful treat, check the Full Recipe for all the steps! To start, take a small saucepan. Add one cup of sugar and one cup of water. Place it over medium heat. Stir the mixture until the sugar dissolves completely. This creates your simple syrup. It is a key base for the sorbet. Next, remove the syrup from heat. Add one cup of fresh basil leaves into the warm syrup. Let the basil steep for about 30 minutes. This step is essential. It allows the basil to release its fresh flavor. After steeping, strain the syrup using a fine-mesh sieve. Press down with a spoon to extract every drop. Discard the basil leaves. Now, combine the basil-infused syrup with one cup of fresh lemon juice and the zest of two lemons. Add a pinch of salt to enhance the flavors. Mix well until everything blends smoothly. Pour the mixture into a shallow container and cover it. Place it in the freezer for about two hours until it starts to freeze. Check on it every 30 minutes. Use a fork to scrape the mixture. This keeps the sorbet fluffy and prevents ice crystals. Repeat this process for two to three hours. Once it has a light, fluffy texture, it’s ready to serve. Scoop it into dishes and enjoy your lemon basil sorbet! For the full recipe, refer to the ingredients and steps above. To get the best texture in your lemon basil sorbet, you need to scrape the mixture well. Scraping helps break up ice crystals and makes the sorbet light and fluffy. I recommend using a fork for this task. You should scrape the mixture every 30 minutes as it freezes. When it’s ready, the sorbet should look airy and soft, not hard and icy. Fresh lemon and basil make a big difference in flavor. Fresh lemons add bright zest, while fresh basil gives a lovely aroma. When choosing lemons, look for ones that feel heavy for their size. For basil, pick vibrant green leaves with no brown spots. These tips ensure you get the best taste from your sorbet. Garnishing your sorbet can make it even more special. A sprinkle of lemon zest on top adds a nice touch. You can also serve it in a chilled bowl for extra flair. This sorbet pairs well with light desserts or can be enjoyed alone. Consider adding a few fresh berries on the side for color and sweetness. {{image_2}} Lemon basil sorbet is fun to change. You can try different herbs, fruits, and sweeteners. Here are some tasty ideas. You can swap basil for mint or rosemary. Mint gives a cool taste. Rosemary adds a warm, earthy flavor. Both work well with lemon. You can also mix fruits with herbs. For example, try lemon with strawberries or peaches. These combos create new flavors that excite the taste buds. Want to make your sorbet pop? Add berries like raspberries or blueberries. They mix well with lemon and basil. You can also use different citruses like orange or lime for a zesty twist. Changing sweeteners can also change the taste. Use honey or agave syrup instead of sugar. Each sweetener brings its own flavor, making the sorbet unique. This lemon basil sorbet is already dairy-free and vegan. You can keep it that way easily. Just make sure to use plant-based sweeteners if you want. If you need substitutes, try maple syrup or coconut sugar. They add great flavor while keeping the recipe plant-based. Enjoy the fresh and flavorful delight of lemon basil sorbet with these variations! To keep your Lemon Basil Sorbet fresh, use an airtight container. A shallow dish works well too. This helps the sorbet freeze evenly. Avoid using plastic wrap alone. It doesn’t seal well and may lead to freezer burn. To prevent freezer burn, press a piece of parchment paper against the sorbet. Then, cover it with the lid. This extra layer protects against air. You can store Lemon Basil Sorbet for about two weeks in the freezer. After that, the flavor and texture may start to change. Signs that the sorbet has gone bad include ice crystals forming on top or a strange smell. If it looks or smells off, it’s best to toss it. If you have leftover sorbet, you can turn it into a fun sorbet cocktail. Just blend it with some sparkling water or use it as a topping on fresh fruit. If the sorbet has become too hard, let it sit at room temperature for a few minutes. Then, re-scoop it to serve. You can also refreeze sorbet after softening, but try to do this only once for the best texture. Sorbet is often made with fruit puree, water, and sugar. It is light and smooth. Sorbetto is the Italian version. It typically has more fruit and creaminess. Both are frozen desserts, but sorbetto is richer in flavor and texture. Yes, you can make Lemon Basil Sorbet without an ice cream maker. You just need a shallow container and a fork. After mixing the sorbet base, freeze it. Scrape it with a fork every 30 minutes. This breaks up ice crystals and makes it fluffy. To adjust sweetness, change the sugar amount. Start with less sugar and taste. You can add more later if needed. Another option is to use different sweeteners, like honey or agave. Remember to balance sweetness with the tartness of lemons. - What are the best ways to serve Lemon Basil Sorbet? Serve Lemon Basil Sorbet in small bowls or cups. You can garnish it with fresh basil or lemon zest. Pair it with shortbread cookies for added crunch. This makes a lovely presentation for guests. - Is it possible to use bottled lemon juice instead of fresh? You can use bottled lemon juice, but fresh juice is best. Fresh lemons have more flavor and brightness. If you use bottled juice, check for additives. Choose one with no extra ingredients for the best taste. In this article, we explored how to make Lemon Basil Sorbet from fresh ingredients. We covered everything from preparing the simple syrup to freezing and serving the sorbet. Remember, using fresh herbs and fruits enhances flavor and texture. Don’t shy away from trying variations, like mint or berry infusions. Store sorbet properly to keep it fresh longer. With these tips, you'll easily create a refreshing treat for any occasion. Enjoy experimenting with flavors, and savor every bite of your homemade sorbet!
    Lemon Basil Sorbet Fresh and Flavorful Delight
  • - 2 large heirloom tomatoes, sliced - 2 ripe peaches, pitted and sliced - 1 ball of fresh burrata cheese - 1/4 cup fresh basil leaves, torn - 2 tablespoons balsamic glaze - 2 tablespoons extra virgin olive oil - Salt and freshly cracked black pepper to taste If you can't find heirloom tomatoes, try using vine-ripened tomatoes. They have good flavor too. For cheese, you can use fresh mozzarella instead of burrata. It will still taste great! In different seasons, swap peaches for nectarines or even plums. Each fruit adds its own twist to the salad. To pick ripe peaches, look for ones that feel soft but not mushy. They should smell sweet. For burrata, choose cheese that feels soft and creamy. Fresh burrata should have a smooth surface. When selecting tomatoes, look for ones that are firm and have bright colors. Avoid any that feel too hard or have blemishes. First, wash the heirloom tomatoes and peaches under cold water. Make sure to remove any dirt. Pat them dry with a clean kitchen towel. This step helps keep your salad fresh and clean. Next, slice the heirloom tomatoes into thick rounds. For the peaches, cut them into wedges. This makes them easy to layer later. Now, let’s build the salad. On a large serving platter, alternate layering the sliced tomatoes and peaches. Create a circular pattern for a nice look. This makes for a beautiful presentation. Then, gently tear the burrata cheese into pieces. Place it right in the center of the platter. Let it ooze slightly for a creamy effect that everyone will love. To finish, drizzle balsamic glaze and extra virgin olive oil over the entire salad. This adds a rich flavor and shine. Don't forget to season it with salt and freshly cracked black pepper to taste. These final touches will enhance the taste and make it pop. For the full recipe, check out the complete guide to make this delightful dish. To impress your guests, focus on how you present the salad. Start with a large, white platter. This helps the colors pop. Arrange the tomato and peach slices in a circular pattern. Alternate colors for a striking look. Place the burrata cheese in the center. Let it ooze slightly for a creamy touch. Add torn basil leaves on top for a fresh green accent. Drizzle balsamic glaze and olive oil for a glossy finish. This not only looks good but adds flavor too! You can prep this salad ahead of time. Start by washing and slicing the tomatoes and peaches. Store them in separate containers in the fridge. This keeps them fresh and crisp. On the day you serve, layer the tomatoes and peaches on your platter. Add the burrata and basil last. Drizzle the oils and season just before serving. This keeps the salad looking fresh and vibrant. This salad pairs well with crusty bread or a light white wine. A chilled Sauvignon Blanc complements the sweetness of the peaches. You can serve it at summer picnics, family gatherings, or casual dinners. It’s a great dish for any occasion! Enjoy the bright flavors and fresh ingredients. The Tomato Peach Burrata Salad is sure to delight everyone at your table. For the complete recipe, check out [Full Recipe]. {{image_2}} You can change up the flavor of your salad easily. Adding nuts or seeds gives a nice crunch. I recommend using toasted pine nuts or sliced almonds. They add texture and flavor. You can also use sunflower seeds for a nut-free option. Herbs and spices can change the taste too. Try adding a sprinkle of chili flakes for heat. You can also use mint or arugula for a fresh twist. Each herb brings its own unique flavor to the dish. If you're vegan, you can swap the burrata cheese for tofu. Silken tofu works well for a creamy texture. Make sure to season it with some salt and lemon juice. This keeps the salad tasty and plant-based. For gluten-free options, this salad is naturally gluten-free! Just ensure your balsamic glaze does not contain any gluten. You can enjoy this dish without any worries. The best time to use summer produce is during peak season. Fresh peaches and tomatoes taste amazing when they are in season. You can also experiment with autumn fruits. Try pears or apples for a different flavor profile. Switching fruits based on the season keeps the salad fresh. Each season brings new tastes and colors. Use whatever is ripe and available for the best results. To keep your Tomato Peach Burrata Salad fresh, follow these steps: - Place any leftover salad in an airtight container. - Cover the salad tightly to keep out air. - Store in the fridge for best results. Avoid mixing the salad with the dressing if you want it to last longer. This salad lasts about 2 days in the fridge. Look for these signs to know if it has gone bad: - The tomatoes and peaches become mushy. - The burrata cheese smells sour. - The salad looks dry or discolored. You can repurpose leftover ingredients easily! Here are some fun ideas: - Mix leftover burrata into pasta for a creamy dish. - Use extra peaches in smoothies or desserts. - Toss leftover tomatoes into a quick omelette. These quick recipes make your leftovers shine! Burrata cheese is a fresh Italian cheese. It has a soft outer shell and a creamy inside. The flavor is rich and buttery, making it a perfect match for salads. When you slice it, the creamy center oozes out, adding a delightful texture. This cheese pairs well with fruits, like peaches and tomatoes, enhancing their sweetness. Yes, you can prepare the salad in advance. However, wait to add the burrata until right before serving. To keep the flavors fresh, store the tomatoes and peaches in a covered bowl. Add the dressing just before serving to avoid soggy fruit. This way, your salad stays crisp and tasty. For this salad, I love using a balsamic vinaigrette. It adds a sweet and tangy touch. You can also try a simple olive oil and lemon juice mix. Both options complement the flavors of the peaches and tomatoes. Feel free to experiment with herbs for extra flavor. When selecting peaches, look for a deep yellow or golden color. They should feel slightly soft when you gently press them. Avoid peaches with green spots, as they may not be ripe. A sweet aroma is also a good sign that they are ready to eat. This blog post covered the ingredients and steps for a fresh salad. You learned how to choose ripe peaches and fresh burrata, and we explored ingredient swaps. I shared tips for assembling and presenting the salad, plus variations to suit your taste. Consider trying different fruits or cheeses based on the season. Enjoy the flavors of summer with this bright dish. It’s easy to make and perfect for any gathering. Your kitchen can be a place of creativity and fun!
    Tomato Peach Burrata Salad Fresh and Tasty Delight
  • - 4 boneless chicken thighs - 1 cup pineapple juice - 2 tablespoons soy sauce - 2 tablespoons honey - 1 teaspoon grated ginger - 2 cloves garlic, minced - 1 teaspoon sesame oil - 1 bell pepper (red or yellow), sliced - 1 cup cherry tomatoes, halved - Fresh cilantro, for garnish - Salt and pepper to taste - 1 cup jasmine rice - 1 cup coconut milk - 1/2 cup water - Pinch of salt When I make Hawaiian chicken with coconut rice, I start with fresh, simple ingredients. Each one plays a big role in the dish. For the chicken, I use boneless thighs. They stay juicy and tender. Pineapple juice adds a sweet and tangy flavor. Soy sauce brings in some salty depth. Honey adds sweetness and helps caramelize the chicken. Grated ginger and minced garlic offer warmth and spice. Sesame oil gives a nutty taste. I love to add colorful bell peppers and cherry tomatoes for a fresh crunch. Finally, I always garnish with fresh cilantro for a burst of flavor. For the coconut rice, I choose jasmine rice. It has a lovely aroma and texture. The creamy coconut milk replaces water for cooking. A pinch of salt enhances the taste. This combination makes the rice rich and delicious. You can find the full recipe for Hawaiian chicken with coconut rice. I promise you will enjoy every bite! To start, gather your marinade ingredients. You will need pineapple juice, soy sauce, honey, grated ginger, minced garlic, and sesame oil. Mix these in a bowl. Once combined, add the boneless chicken thighs. Make sure the chicken is well-coated in the marinade. Cover the bowl and refrigerate it. Let it sit for at least 30 minutes. For more flavor, marinate for up to 2 hours. Now, it’s time to prepare the coconut rice. First, rinse the jasmine rice under cold water. Do this until the water runs clear. This step removes extra starch. Next, in a medium saucepan, combine coconut milk, water, and a pinch of salt. Bring this mixture to a gentle boil. After that, add the rinsed rice. Stir it once, then cover the pan. Reduce the heat to low and simmer for about 15-20 minutes. The rice should absorb all the liquid. When done, fluff the rice with a fork and let it sit. For the chicken, heat a grill pan or skillet over medium-high heat. Take the marinated chicken out of the fridge. Remove it from the marinade, but save that for later. Season the chicken with salt and pepper. Cook the chicken for about 5-7 minutes on each side. Use a meat thermometer to check that the internal temperature reaches 165°F (75°C). This ensures it is fully cooked. In the last few minutes of cooking, add sliced bell pepper and halved cherry tomatoes to the pan. Pour the reserved marinade over the chicken and veggies. This step boosts the flavor. Cook for another 2-3 minutes. The vegetables should soften slightly, and the sauce will thicken. To serve, take a plate and mound a portion of coconut rice in the center. Top it with the cooked chicken and colorful veggies. Drizzle any remaining sauce from the pan on top. Finally, garnish with fresh cilantro for a burst of flavor. Enjoy your Hawaiian Chicken with Coconut Rice! For the complete recipe, refer to the Full Recipe section. For the best flavor, marinate the chicken for at least 30 minutes. If you're in a hurry, 30 minutes works great. However, for the best taste, aim for up to 2 hours. This longer time allows the flavors to soak in deeply. You can use leftover marinade, but make sure to cook it well. Do not use it raw, as it touches raw chicken. You can grill or bake the chicken. Grilling gives it a smoky touch. Baking is a simple way too. If you grill, preheat the grill to medium-high heat. Cook the chicken for about 5-7 minutes on each side. For baking, set your oven to 375°F (190°C). Bake for 25-30 minutes. Always check the chicken's internal temperature. It should reach 165°F (75°C) for safety. To make your coconut rice light and fluffy, fluff it with a fork after cooking. This helps separate the grains. If you want creamier rice, add a bit more coconut milk. Adjust the coconut milk based on your taste. Start with 1 cup, and feel free to add a little more if you like. The balance of coconut milk and water is key to getting it just right. {{image_2}} If you want to mix things up, try different veggies. Instead of bell peppers, use zucchini or snap peas. They add great crunch and color. You can also swap cherry tomatoes for diced carrots or green beans. Seasonal veggies like asparagus or squash work well too. Just keep an eye on cooking times to ensure everything is tender. Feel free to change the protein! Tofu is a fantastic option for a vegetarian twist. Just press it to remove excess water, then cut it into cubes. Cook it for about 8-10 minutes until golden brown. Shrimp is another great choice. Add them to the pan for just 3-4 minutes until they turn pink. This keeps your meal fast and fresh! Want to add some flair? Consider spices like cumin or paprika for warmth. Fresh herbs like basil or mint can brighten the dish. For a sweet and savory twist, add mango or a drizzle of balsamic glaze. These changes can make your Hawaiian chicken with coconut rice even more exciting. Enjoy experimenting with flavors! For the full recipe, check [Full Recipe]. To keep your Hawaiian chicken and coconut rice fresh, store leftovers in the fridge. Place the chicken and rice in airtight containers. This helps keep out air and moisture. Aim to eat the leftovers within three days for the best taste. Use glass or plastic containers that seal well. If you want to save some portions for later, freezing is a great option. Divide the chicken and rice into single servings. Wrap each serving tightly with plastic wrap, then place them in freezer bags. Label each bag with the date. To thaw, move the portions to the fridge overnight. This method keeps the texture nice. When you're ready to eat, you can reheat chicken and rice easily. The best method is to use the stove. Heat a skillet over low heat and add a splash of water or broth to keep it moist. Stir the chicken and rice until warm. Avoid the microwave if you can, as it may dry out the food. Enjoy your delicious meal again! The cooking time for Hawaiian chicken is about 10 to 14 minutes. First, marinate the chicken for at least 30 minutes. After marinating, cook the chicken in a grill pan or skillet over medium-high heat for 5 to 7 minutes on each side. The chicken should reach an internal temperature of 165°F (75°C) for safety. This ensures the chicken stays juicy and flavorful. Yes, you can use brown rice instead of jasmine rice. However, brown rice takes longer to cook. You will need to increase the cooking time to about 40 to 45 minutes. Use a ratio of 1 cup of brown rice to 1 1/4 cups of coconut milk and 1/2 cup of water. This will help keep the rice moist and tasty. To make Hawaiian chicken gluten-free, substitute soy sauce with tamari or coconut aminos. Both options work well without the gluten. Check all other ingredients, like marinades and sauces, to ensure they are gluten-free. This way, you can enjoy your meal without worry. Canned coconut milk works great for this recipe. It adds rich flavor and creaminess. Just shake the can well before opening. Use it in the same amount as fresh coconut milk. For best results, choose a full-fat version for a creamier texture in your rice. For a complete meal, consider these sides: - Grilled vegetables like zucchini or asparagus - A fresh green salad with vinaigrette - Pineapple or mango salsa for a fruity kick - Steamed broccoli or green beans for color and crunch These sides complement the flavors of the Hawaiian chicken and coconut rice perfectly. For the full recipe, check out the earlier section! This blog post shares a simple and tasty Hawaiian Chicken with Coconut Rice recipe. You learned about essential ingredients, step-by-step instructions, and helpful tips for the best results. We also covered variations for flavors and how to store leftovers. By following these steps, you can create a meal that delights your taste buds. Enjoy cooking and experimenting with this dish! You’ll impress family and friends with your new skills.
    Hawaiian Chicken with Coconut Rice Flavorful Delight
  • Gathering the right ingredients makes cooking fun and easy. Here’s what you need for Pineapple Chicken Stir Fry: - 1 lb chicken breast, sliced into thin strips - 1 cup fresh pineapple, diced - 1 bell pepper (red or yellow), sliced - 1 cup snap peas - 1 small onion, sliced - 3 cloves garlic, minced - 1 tablespoon fresh ginger, grated - 1/4 cup soy sauce - 2 tablespoons honey - 1 tablespoon cornstarch mixed with 2 tablespoons water (slurry) - 2 tablespoons vegetable oil - 1 teaspoon sesame oil - Salt and pepper to taste - Cooked jasmine rice or quinoa (for serving) Each item brings a unique flavor. The chicken adds protein, while the pineapple gives sweetness. The bell pepper adds crunch, and the snap peas offer a fresh taste. Garlic and ginger give it a warm kick. The soy sauce and honey blend salty and sweet, creating a tasty sauce. You can find the full recipe [here](#). Enjoy gathering these ingredients, and let’s get cooking! First, take your chicken breast and slice it into thin strips. Toss the chicken with a pinch of salt and pepper. This helps to add flavor. Set the chicken aside for marination while you prepare the other ingredients. Next, heat a tablespoon of vegetable oil in a large skillet over medium-high heat. Once hot, add the marinated chicken. Stir-fry the chicken for about 5 to 7 minutes. You want it to be cooked through and golden brown. Remove the chicken and set it aside. In the same skillet, add the remaining tablespoon of vegetable oil. Toss in the sliced onion, minced garlic, and grated ginger. Sauté these for about 2 minutes until they smell great. Then, add the sliced bell pepper and snap peas. Stir-fry for 3 to 4 minutes. The veggies should be tender yet still crisp. Now, return the cooked chicken to the pan. Add the diced pineapple for a sweet touch. Pour in the soy sauce and honey, stirring everything together. Let the flavors mingle for a minute. To thicken the sauce, mix cornstarch with water to make a slurry. Stir this into the pan. Cook for about 2 minutes until the sauce coats the chicken and vegetables. This gives a nice glossy finish. Serve your delicious stir fry over cooked jasmine rice or quinoa for a hearty meal. Enjoy this quick and tasty dish! If you want to see the full recipe, check out the recipe section. Cooking at high heat is key for a great stir fry. It helps your chicken cook fast and stay juicy. When you use high heat, the veggies stay crisp and colorful. Always use fresh ingredients. Fresh chicken and vibrant vegetables boost the flavor and texture of your dish. To take your stir fry to the next level, think about spices. Add a pinch of red pepper flakes for heat. You could also use garlic powder or a splash of lime juice for a zesty kick. Don't forget to garnish! Chopped green onions and sesame seeds look pretty and add extra flavor. Stir-frying is quick and fun! Use a large skillet or wok to give the food room to move. Make sure to keep stirring so everything cooks evenly. If you want a smoky flavor, try grilling your chicken. It can add a lovely char that pairs well with the sweet pineapple. {{image_2}} You can change the protein in this dish. Instead of chicken, use tofu or shrimp. Tofu makes a great vegetarian choice. Shrimp adds a nice seafood twist. For vegetables, you can swap in broccoli or carrots. Broccoli gives a nice crunch. Carrots add sweetness and color. Mix and match to find your favorite combo! If you need a gluten-free option, choose gluten-free soy sauce. It has the same great taste without gluten. Looking for a lower-sugar dish? Use sugar-free alternatives for honey. You can try agave syrup or a sugar substitute. These keep your stir fry tasty without the extra sugar. Want to spice things up? Add chili flakes for a kick. Start with a little, then add more if you like heat. Incorporating tropical fruits can take your dish to the next level. Try adding diced mango for even more sweetness. It pairs nicely with the pineapple and gives a tropical vibe. For the full recipe, check out [Full Recipe]. When you finish your Pineapple Chicken Stir Fry, let it cool down. This step helps prevent condensation. Place it in an airtight container to keep it fresh. Glass or plastic containers work well. You can store it in the fridge for up to three days. To reheat your stir fry, use a skillet over medium heat. This method helps maintain the texture. You can add a splash of water or soy sauce to keep it moist. Stir it occasionally for even heating. If you prefer the microwave, use a microwave-safe dish. Heat it in short bursts and stir in between. You can freeze Pineapple Chicken Stir Fry for later. First, cool the dish completely. Then, pack it in a freezer-safe container or bag. Be sure to remove as much air as possible. This trick prevents freezer burn. It can last up to three months in the freezer. To enjoy it later, thaw it overnight in the fridge before reheating. This way, it stays tasty and fresh. Pineapple Chicken Stir Fry lasts about 3 to 4 days in the fridge. Store it in a sealed container. Look for signs of spoilage, like off-smells or changes in color. If it smells funny or looks strange, don't eat it. Yes, you can make Pineapple Chicken Stir Fry ahead of time. Cook it, let it cool, and store it in the fridge. When you're ready to eat, just reheat it on the stove or in the microwave. Make sure it’s hot all the way through. You can serve Pineapple Chicken Stir Fry with cooked jasmine rice or quinoa. Other good sides are steamed broccoli or fried rice. You can also add a simple salad for some crunch. Yes, Pineapple Chicken Stir Fry is healthy. It has lean chicken, fresh veggies, and pineapple. Chicken provides protein, while veggies add vitamins and minerals. Pineapple gives you fiber and natural sweetness, making this dish a balanced meal. To make it spicier, add chili flakes or sliced jalapeños. You can also use sriracha or another hot sauce in the mix. Start with a little, taste it, and add more if you like heat! Pineapple Chicken Stir Fry is simple and tasty. We covered ingredients and steps for cooking. Fresh veggies and fruits deliver great flavors. You can swap proteins or veggies based on taste. Remember to store leftovers properly for later. Meal prepping can save time too. Whether you enjoy spicy or sweet, this dish fits all. Happy cooking!
    Pineapple Chicken Stir Fry Flavorful and Easy Dinner
  • To make a fresh and tasty spring roll salad, gather these key ingredients: - 1 cup rice vermicelli noodles - 1 cup shredded cabbage (green or purple) - 1 cup shredded carrots - 1 cup cucumber, julienned - 1 red bell pepper, thinly sliced - 1/2 cup fresh mint leaves, chopped - 1/2 cup fresh cilantro, chopped - 1/2 cup green onions, sliced These ingredients offer a crisp texture and bright colors. They blend well, creating a salad that is fun to eat. For the creamy peanut sauce, you will need: - 1/3 cup creamy peanut butter - 2 tablespoons soy sauce - 1 tablespoon rice vinegar - 1 tablespoon lime juice - 1 tablespoon honey or maple syrup - 1 teaspoon sriracha or chili paste (adjust for heat) - 2-3 tablespoons warm water (to thin) This sauce packs a punch of flavor. Its smoothness pairs perfectly with the salad. You can enhance your dish with these garnishes: - 1/4 cup roasted peanuts, chopped (for garnish) - Lime wedges (for serving) These extras add crunch and a zesty finish to your meal. You can mix and match based on your taste. For the full recipe, check out the Spring Roll Salad Delight 🥗🥢. To start, bring a large pot of water to a boil. Add 1 cup of rice vermicelli noodles. Cook them for about 3 to 5 minutes. Stir gently to prevent sticking. When they are tender, drain the noodles. Rinse them under cold water to stop the cooking. This keeps them firm and perfect for your salad. While the noodles cook, wash and prepare your fresh vegetables. You need 1 cup of shredded cabbage, which can be green or purple. Shred 1 cup of carrots and julienne 1 cup of cucumber and 1 red bell pepper. Chop 1/2 cup of fresh mint and 1/2 cup of cilantro. Finally, slice 1/2 cup of green onions. This colorful mix adds great flavor and crunch. In a small bowl, whisk together your peanut sauce. Combine 1/3 cup of creamy peanut butter, 2 tablespoons of soy sauce, 1 tablespoon of rice vinegar, and 1 tablespoon of lime juice. Add 1 tablespoon of honey or maple syrup for sweetness. If you like heat, mix in 1 teaspoon of sriracha or chili paste. Gradually add 2 to 3 tablespoons of warm water to thin the sauce. Adjust the water until it reaches your desired thickness. In a large bowl, combine the cooled rice vermicelli noodles with the shredded cabbage, carrots, cucumber, red bell pepper, mint, cilantro, and green onions. Toss everything gently to mix the flavors together. You want a nice blend of colors and tastes in every bite. To serve, divide the salad mixture among plates or bowls. Drizzle the peanut sauce generously over the top. For a lovely finish, garnish with chopped roasted peanuts and serve lime wedges on the side. The lime adds a zesty kick that brightens the whole dish. Enjoy this fresh and tasty spring roll salad! When cooking rice vermicelli noodles, follow the package instructions closely. Boil water in a large pot and add the noodles. They usually need just 3-5 minutes. Watch them closely; you want them soft but not mushy. Drain the noodles and rinse them under cold water. This step stops the cooking and helps keep them from sticking. Prep your vegetables while the noodles cook. Shred the cabbage and carrots, julienne the cucumber, and slice the bell pepper. Chop the fresh herbs and green onions. By preparing these in advance, you save time and keep everything fresh. You can even store prepped veggies in the fridge for a day, keeping them crisp and ready to use. Fresh herbs are key to this salad. Mint and cilantro add bright flavors. They make the dish pop! Chop them finely to spread their taste evenly. If you want, try adding basil or parsley for a new twist. You can also mix different herbs to find your favorite combo. {{image_2}} You can boost the protein in your spring roll salad in tasty ways. If you want a plant-based option, try tofu. Use firm tofu, and press it to remove extra water. Cube it and pan-fry until golden. Shrimp adds a sweet, briny flavor. Cook shrimp until they turn pink and curl. Chicken is another great choice. Grill or poach chicken, then slice it thin. Each of these proteins works well with the fresh veggies and peanut sauce. For a vegetarian meal, use eggs as a protein source. Soft-boiled or poached eggs add richness. For vegan options, stick with tofu or add chickpeas for extra protein. Ensure your peanut sauce uses maple syrup instead of honey. This keeps the sauce sweet and vegan-friendly. You can also add more nuts or seeds for crunch and nutrition. If someone has a peanut allergy, swap peanut butter for sunflower seed butter. It gives a nice nutty taste. Use gluten-free soy sauce if you need a gluten-free option. For those allergic to soy, coconut aminos work well. If you're avoiding rice vermicelli, try quinoa or zucchini noodles. Both are great alternatives and add a new twist to the dish. Feel free to mix and match ingredients to fit your dietary needs. You can store leftover spring roll salad in an airtight container. Keep it in the fridge. It stays fresh for about two days. The noodles and veggies will lose some crunch, but the flavor remains great. If you plan to eat it later, store the peanut sauce separately. This keeps everything fresh and tasty. Freezing spring roll salad is tricky. The fresh veggies don’t freeze well. They become mushy when thawed. However, you can freeze cooked rice vermicelli noodles. Place them in a freezer bag, squeeze out the air, and seal it tight. They can last up to three months in the freezer. When you're ready to use them, thaw in the fridge overnight. Store peanut sauce in a jar or container with a tight lid. It can last in the fridge for about a week. If you want to keep it longer, freeze the sauce in ice cube trays. Once frozen, transfer the cubes to a freezer bag. This way, you can take out just what you need. When you want to use it, thaw the cubes in the fridge or microwave. For the full recipe, check out the delightful Spring Roll Salad Delight. Serve spring roll salad in bowls. This way, everyone can enjoy their own serving. Drizzle the peanut sauce on top and add lime wedges for extra flavor. You can also sprinkle chopped peanuts for a nice crunch. Yes, you can make the peanut sauce ahead of time. Store it in a sealed container in the fridge. It will stay fresh for about a week. Just give it a good stir before using, as it may thicken. Spring roll salad lasts about 2-3 days in the fridge. Keep it in an airtight container to maintain its freshness. The veggies may lose some crunch, but the flavors will still be tasty. Yes, this recipe is gluten-free. Just ensure that the soy sauce is gluten-free. Many brands offer gluten-free options, so read the label when shopping. You can use thin rice noodles or even zucchini noodles as a substitute. If you want a low-carb option, try spiralized veggies. They add a fresh twist while keeping the dish light and delightful. This blog post covered how to make a fresh spring roll salad. You learned about key ingredients, made a tasty peanut sauce, and mixed it all together. We shared helpful tips for cooking noodles and preparing ingredients. You also saw variations that suit many diets and storage tips for leftovers. Try this salad at home. It’s fresh, healthy, and easy to make. Enjoy tasty flavors and a fun cooking experience!
    Spring Roll Salad with Peanut Sauce Fresh and Tasty
  • - 4 salmon fillets - 2 cups cooked jasmine rice - 1 cup broccoli florets - 1 carrot, julienned - 1 cucumber, sliced - 2 green onions, chopped - Sesame seeds, for garnish - Fresh cilantro, for garnish Fresh ingredients bring life to your Honey Sriracha Salmon Bowls. Salmon fillets are the star. They provide rich flavor and healthy fats. I love using jasmine rice as the base. It pairs well with the sweet and spicy sauce. Broccoli adds a nice crunch, while the julienned carrot and cucumber bring color and freshness. Don’t forget the green onions and herbs. They add layers of taste and make the dish beautiful. - 2 tablespoons honey - 2 tablespoons sriracha sauce - 1 tablespoon soy sauce - 1 tablespoon sesame oil Pantry staples are key to this recipe. Honey gives sweetness, while sriracha adds heat. Soy sauce brings umami, and sesame oil adds a nutty flavor. Together, they create a perfect balance for the salmon. You can adjust these ingredients to suit your taste. Want it sweeter? Add more honey. Prefer it spicier? Add more sriracha. This flexibility makes it fun to experiment. - Calories: Approximately 450 per serving - Protein: 30g - Carbohydrates: 45g - Fat: 15g Each serving packs a punch of nutrients. This dish is rich in protein from the salmon. The carbs come from the jasmine rice, giving you energy. Healthy fats from the salmon and sesame oil help keep you full. This meal is not only tasty but also good for you. It fits well into a balanced diet. For a complete breakdown, refer to the Full Recipe. - Prepping the salmon and sauce: Start by mixing honey, sriracha, soy sauce, and sesame oil in a small bowl. This sauce will give your salmon a sweet and spicy kick. Brush the sauce over the salmon fillets. Save a bit of sauce for later. - Preparing vegetables: Cut your vegetables while the oven heats. Slice the cucumber, julienne the carrot, and chop green onions. This adds crunch and color to your bowl. Steam the broccoli until it's tender, about five to seven minutes. - Baking the salmon: Preheat your oven to 400°F (200°C). Place the salmon on a lined baking sheet, coated with the sauce. Bake for 12-15 minutes. The salmon should flake easily with a fork when done. - Steaming vegetables: While the salmon cooks, steam the broccoli. This keeps it bright and crunchy. Steaming is quick and helps preserve the nutrients. - Layering ingredients in bowls: Start with half a cup of jasmine rice in each bowl. Add equal amounts of steamed broccoli, carrots, and cucumbers on top. - Final touches before serving: Place a salmon fillet on top of the veggies. Drizzle the reserved honey sriracha sauce over everything. Finish with sesame seeds and chopped green onions. Add fresh cilantro for a burst of flavor. Feel free to check out the Full Recipe for more details and tips. Enjoy your colorful, tasty bowls! To achieve perfectly cooked salmon, bake at 400°F (200°C). Salmon cooks best when it is flaky but not dry. Keep an eye on it as it bakes. Cook for 12-15 minutes. Use a fork to test if it flakes easily. To adjust sweetness or spice levels, play with the honey and sriracha. Add more honey for sweetness or more sriracha for heat. Start with small amounts. Taste as you go to find your perfect balance. For an appealing dish, layer your ingredients in colorful sections. Place the jasmine rice at the bottom, then add veggies, and top with salmon. This makes each bowl look fresh and vibrant. Garnishing adds visual appeal. Use sesame seeds and chopped green onions. Fresh cilantro gives a nice pop of color and flavor. A lime wedge on the side adds a nice touch. Pair these bowls with a light drink like iced tea or a fruity soda. They also go well with a crisp salad on the side. For meal prep, pack the ingredients in separate containers. This keeps everything fresh. It’s perfect for family dinners too. Everyone can customize their bowl with their favorite toppings. {{image_2}} You can switch up the protein in your Honey Sriracha Salmon Bowls. If you don’t have salmon, try chicken or shrimp. Both options will soak up the sauce well and add great flavor. For a vegetarian option, use tofu or tempeh. They both absorb flavors nicely. Just marinate them in the honey sriracha sauce before cooking. This keeps the dish tasty and satisfying. Adding extra spices is a great way to change the flavor. Try garlic powder, ginger, or even a splash of lime juice. Each will bring a new twist to the dish. You can also change the base from rice to quinoa. Quinoa offers more protein and a nutty flavor. It’s a wonderful way to mix things up while still keeping it healthy. Using seasonal vegetables can make your bowl even better. In the spring, add asparagus or snap peas. In the fall, try roasted sweet potatoes or Brussels sprouts. Seasonal veggies can boost the dish’s flavor and nutrition. Garnishes can also be seasonal. Fresh herbs like basil or dill add a bright taste. You can also use radishes or microgreens to make your bowl pop. For the Full Recipe, check out the details above. To keep your Honey Sriracha Salmon Bowls fresh, store leftovers in an airtight container. Make sure to refrigerate them right away. This helps keep the salmon and veggies tasty. The dish lasts about three days in the fridge. After that, the quality may drop. When reheating, use the microwave or oven. If using the microwave, heat in short bursts. This helps avoid overcooking the salmon. If you choose the oven, preheat to 350°F. Cover the dish with foil to keep moisture in. This keeps the salmon juicy and the veggies crisp. You can freeze the salmon and veggies separately. This way, they maintain their flavor and texture. Place them in freezer-safe bags and remove as much air as possible. To defrost, place them in the fridge overnight. If you're in a hurry, use the microwave's defrost setting. This ensures the best results when you're ready to enjoy your meal again. Can I use frozen salmon for this recipe? Yes, you can use frozen salmon. Just thaw it first. Place it in the fridge overnight or under cold water for a quick thaw. Make sure it's fully thawed before cooking. This helps the salmon cook evenly and taste great. How can I make this dish gluten-free? To make it gluten-free, swap soy sauce for tamari or coconut aminos. These options taste similar but do not contain gluten. Check that your sriracha is also gluten-free, as some brands may add gluten-containing ingredients. What should I do if my salmon is overcooked? If your salmon is overcooked, don't worry too much. You can add a sauce or dressing to add moisture. A squeeze of lemon juice or a drizzle of olive oil can help. This boosts the flavor and makes it more enjoyable. How to tell when salmon is done cooking? Salmon is done when it flakes easily with a fork. The inside should be a light pink color, not raw. You can also use a food thermometer; it should reach 145°F (63°C) for safe eating. What can I substitute for sriracha? If you need a substitute for sriracha, try a mix of hot sauce and honey. This gives you the heat and sweetness. You could also use chili paste or sambal oelek if you have them on hand. Can I replace jasmine rice with another grain? Yes, you can replace jasmine rice with quinoa, brown rice, or cauliflower rice. Each option gives a different texture and taste. Quinoa adds protein, while cauliflower rice is lower in carbs. Choose what you like best! In this post, I shared key ingredients for a tasty salmon dish. We explored fresh items, pantry staples, and nutrition facts. Step-by-step, I guided you through preparation, cooking, and plating. Tips and variations helped enhance your cooking skills and make the meal your own. Cooking is all about experimenting and having fun. Enjoy your time in the kitchen and share your tasty results!
    Honey Sriracha Salmon Bowls Flavorful and Easy Meal
  • To create a vibrant Mediterranean brunch board, you need fresh and colorful ingredients. Here’s what you’ll need: - 1 cup hummus (store-bought or homemade) - 1 cup tzatziki sauce - 1 cup cherry tomatoes, halved - 1 cucumber, thinly sliced - 1 red bell pepper, sliced - 1 cup mixed olives (green and black) - 1 cup feta cheese, crumbled - 1 cup sliced salami or turkey (or roasted vegetables for a non-meat option) - 1 cup pita bread, cut into triangles - Fresh herbs for garnish (parsley or mint) If you choose to buy some items, I recommend a few trusted brands. For hummus, look for brands like Sabra or Tribe. Their flavors are rich and creamy. For tzatziki, try Fage or Oikos; they have great texture and taste. For olives, consider the Castelvetrano variety, which offers a sweet and mild flavor. These brands help keep your brunch board easy yet tasty. Fresh ingredients make a big difference. They add bright flavors and vibrant colors. Fresh vegetables like cucumbers and bell peppers are crunchier and more delicious. They also look great on the board. Fresh herbs bring an extra pop of flavor. Always choose the freshest options you can find. This ensures your brunch board is not only beautiful but also full of taste. Using quality ingredients makes your meal shine. When you take care in selecting your ingredients, your guests will notice! To start, grab a large wooden board or platter. This will be your serving space. Place it on the table where everyone can reach. Take a cup of hummus and a cup of tzatziki sauce. Add a big dollop of each in the center of the board. Make small wells in the dips to add flair. This makes it look nice and inviting. Next, it’s time to make it colorful. Place halved cherry tomatoes, sliced cucumbers, and red bell pepper around the dips. Keep it neat and pretty. Scatter mixed olives on the board. Use both green and black for variety. This adds color and flavor. After that, add crumbled feta cheese in little mounds. This adds a tangy taste that pairs well with the dips. If you like, take sliced salami or turkey and roll them into spirals. Place them on one side of the board. For a veggie option, roasted veggies like eggplant work great too. Finally, fill in any empty spots with pita bread triangles. This completes your board. Don’t forget to sprinkle fresh herbs on top to make it pop. Serve your Mediterranean brunch board right away. Let your guests dip, scoop, and create tasty bites. For the full recipe, check out the instructions above. For hummus, start with good quality chickpeas. You can use canned or dried. If using dried, soak them overnight. Blend chickpeas with tahini, lemon juice, garlic, and olive oil. For smoothness, add water as needed. Taste and adjust with salt or more lemon. For tzatziki, use fresh cucumbers. Grate them and squeeze out water. Mix with yogurt, garlic, lemon juice, and dill. Add salt to taste. This combo brings a cool, fresh flavor. Both dips should be creamy and flavorful. First, choose a large wooden board or platter. It adds warmth and style. Place dips in the center to create a focal point. Use small bowls for hummus and tzatziki. This keeps them neat and easy to scoop. Arrange colorful veggies around the dips. Use a mix of shapes and colors. For example, halved cherry tomatoes and sliced cucumbers look great together. Add olives and feta in small mounds. This adds texture and height. To finish, scatter fresh herbs like parsley or mint for a pop of green. It makes the board inviting and fresh. To save time, prep ingredients ahead. Chop veggies and store them in the fridge. You can also make hummus and tzatziki the day before. They taste even better overnight. Use store-bought hummus and tzatziki if you’re short on time. This still gives you great flavor. Cut pita bread into triangles right before serving. This keeps them fresh and crisp. With these tips, you can quickly assemble a stunning brunch board. Invite friends and enjoy a delicious spread. For the full recipe, check out the Mediterranean Brunch Board recipe. {{image_2}} For a vegetarian twist, skip the meat. Use roasted vegetables like zucchini, eggplant, or bell peppers. You can also add grilled artichokes for a fun flavor. For a vegan option, choose plant-based feta or skip the cheese entirely. Hummus and tzatziki are already vegan-friendly. They add lots of flavor! To make this board gluten-free, swap pita bread for gluten-free crackers or veggies. Carrot sticks and cucumber slices work well as dippers. Check the labels on your hummus and tzatziki to ensure they are gluten-free. Most store brands are safe, but it's best to be sure. Use seasonal ingredients to keep things fresh and exciting. In summer, add juicy peaches or fresh figs for sweetness. In fall, try roasted butternut squash or pomegranate seeds. Winter brings hearty greens like kale or roasted Brussels sprouts. Always aim for what’s in season for the best flavor! For the complete recipe, check out the Full Recipe section. To keep your Mediterranean brunch board fresh, store leftovers in airtight containers. Place dips like hummus and tzatziki in separate containers. Wrap any fresh veggies in damp paper towels, then place them in a bag. This helps them stay crisp. For cheese and meats, keep them in their own containers. This method prevents odors and helps maintain flavor. Always check your fridge's temperature. It should be at 40°F or lower. Store leftovers within two hours of serving to keep food safe. If you notice anything that looks off, toss it out. Freshness makes a big difference in flavor. You can also keep each ingredient separate. This method allows you to mix and match later. If you have cooked ingredients like salami or roasted veggies, reheat them gently. Use the oven at 350°F for about 10 minutes. If using a microwave, heat in short bursts. Stir in between to avoid hot spots. Always check that the food is warm all the way through. Enjoy your Mediterranean flavors again! For the full recipe, refer to the Mediterranean Brunch Board section above. You can serve many tasty items with a Mediterranean brunch board. Fresh fruit, like berries or melon, adds sweetness. You can also add nuts, like almonds or walnuts, for crunch. A simple green salad with lemon dressing pairs well, too. For drinks, think about herbal tea, fresh juice, or even a light sparkling wine. To make the brunch board heartier, add more proteins. Consider grilled chicken, shrimp, or chickpeas. You could also include hard-boiled eggs for an extra boost. Adding whole grain or flatbreads can help fill people up. For a twist, offer some spreads, like baba ganoush or muhammara, which are tasty and filling. Yes, you can prepare parts of the brunch board in advance. Slice vegetables and store them in the fridge a day ahead. You can also make dips, like hummus and tzatziki, a day before. Just be sure to assemble the board right before serving. This keeps everything fresh. For the full recipe, check the detailed instructions above. Creating a Mediterranean brunch board is simple and fun. We covered key ingredients, fresh options, and how to prepare. I shared tips for making great dips and stunning displays. You can even find variations for different diets. Remember to store leftovers properly to keep everything fresh. Enjoy making this tasty brunch board anytime! It brings friends and family together over good food. Your guests will love it!
    Mediterranean Brunch Board Flavorful and Fresh Spread
  • - 2 medium cucumbers, diced - 3 ripe tomatoes, diced - 1 small red onion, thinly sliced - 1 bell pepper (any color), diced - 1/4 cup fresh parsley, chopped - 2 tablespoons lemon juice - 1 tablespoon olive oil - 1 teaspoon honey (optional) - Salt and pepper to taste When you make this salad, the freshness of the ingredients really shines. The cucumbers give a nice crunch, while the tomatoes add sweetness and juiciness. The red onion offers a sharp flavor that balances well. Adding bell pepper gives it an extra layer of taste and color. The parsley adds a herbal note that brightens the dish. The dressing is simple yet zesty, made with lemon juice and olive oil, and honey is optional for a hint of sweetness. Don’t forget to season with salt and pepper to enhance all the flavors. - Avocado slices - Feta cheese crumbles - Olive slices Feel free to customize your salad! Adding avocado makes it creamy and rich. Feta cheese adds a salty kick, while olives bring a briny taste. Each add-in will give your salad a unique twist! - Calories per serving: 120 - Carbohydrates: 12g - Protein: 3g - Fats: 7g This salad is low in calories and packed with nutrients. It offers a good balance of carbs and healthy fats. Perfect as a light lunch or a side dish! You can find the full recipe [here](#). First, take a large mixing bowl. Combine the diced cucumbers, tomatoes, sliced red onion, and diced bell pepper in the bowl. This mix gives a great crunch and color. Next, add fresh parsley to the bowl. It adds a nice touch of green and fresh flavor to your salad. In a small bowl, whisk together the lemon juice, olive oil, and optional honey. This dressing will brighten up your salad. Make sure it is well combined, so every bite is tasty. Now, pour the dressing over the salad mixture. Gently toss everything together. You want to coat all the veggies without mashing them. Season with salt and pepper to taste. Toss again to spread the seasoning evenly. Let the salad sit for about 10 minutes. This allows the flavors to blend nicely. For the full recipe, check out the complete instructions. To make the best Easy Cucumber Tomato Onion Salad, start with fresh produce. - Tomatoes: Look for tomatoes that are firm but slightly soft. They should have a bright color and a sweet scent. - Cucumbers: Choose cucumbers that are dark green and firm. Avoid ones with wrinkles or soft spots. - Fresh Herbs: Use fresh parsley or any herb you love. Fresh herbs add bright flavors and color. Enhancing the flavor of your salad is simple and fun. - Spices and Herbs: You can add dill or basil for a twist. These herbs pair well with the salad's fresh taste. - Dressing Consistency: If your dressing is too thick, add a bit of water or extra lemon juice. This will help it coat the salad better. Serving your salad can make a big difference in enjoyment. - Temperature: This salad is best served chilled or at room temperature. It keeps the flavors fresh and vibrant. - Pairing Options: Serve it alongside grilled chicken or fish for a complete meal. It also works well with sandwiches or wraps. For more ideas, check out the Full Recipe. {{image_2}} You can easily change this salad to suit your taste. For a Mediterranean twist, add olives and feta cheese. This combination brings saltiness and creaminess. You can also try a Southwest flair. Adding black beans and corn will give it a hearty feel. Both options will make your salad exciting. Using seasonal veggies makes this dish even better. In summer, add zucchini or bell peppers for extra crunch. In winter, use diced celery or radish for a refreshing bite. Think about your meal setting too. For summer BBQs, serve it cold. In winter, you can enjoy it at room temperature. The dressing can change the entire salad. Try a vinegar-based dressing for a tangy kick. Balsamic or red wine vinegar works well. If you prefer something creamy, use a yogurt-based dressing. This will add a rich flavor while keeping it light. For the full recipe, check out the detailed instructions above. To keep your cucumber tomato onion salad fresh, store it in the fridge. Use an airtight container to prevent air from spoiling it. Glass or plastic containers work well. Avoid using metal containers, as they can react with the salad's ingredients. This salad stays fresh for about 2 to 3 days in the fridge. To prevent sogginess, keep the dressing separate until you're ready to eat. Add the dressing just before serving for the best taste and texture. You should not freeze this salad. The cucumbers and tomatoes lose their crispness when frozen. If you want to save it, consider freezing the dressing separately. When ready to use, thaw it in the fridge and mix it fresh with the salad ingredients. This will help maintain the salad's taste and texture. Yes, you can prep this salad ahead of time. To keep it fresh, store the ingredients separately. Cut the cucumbers, tomatoes, and bell pepper, but don’t mix them yet. Keep the dressing in a small jar. This way, you avoid soggy veggies. When ready to eat, combine everything and add the dressing. If you want a different sweetener, try maple syrup or agave nectar. Both add a nice touch. Maple syrup has a rich flavor, while agave is milder. You can also use stevia for a low-calorie option. Adjust the amount to taste, as some sweeteners are stronger than honey. To make this salad vegan, simply omit the honey. You can replace it with a touch of maple syrup or leave it out entirely. The salad will still taste great. All other ingredients are naturally vegan-friendly, so you're good to go! This salad pairs well with grilled chicken or fish. You could also serve it with pita bread and hummus for a light meal. For a heartier option, try it alongside quinoa or brown rice. The fresh flavors complement many main dishes. Yes, this salad is gluten-free! All the ingredients are safe for those avoiding gluten. You can enjoy it without worry. Just make sure any dressings or add-ins are also gluten-free. This salad is simple and packed with fresh flavors. We covered key ingredients, easy steps, and clever tips. You can personalize it with add-ins for different styles. Remember to use fresh produce for the best taste. Store leftovers properly to enjoy later. In the end, this salad fits any meal and is a healthy choice. Make it your own, and enjoy every bite!
    Easy Cucumber Tomato Onion Salad Fresh and Zesty Dish
  • - 3 ripe mangoes, peeled and diced - 1 cup heavy cream - 1 cup coconut milk - 3/4 cup sweetened condensed milk - 1 tablespoon lime juice - 1 teaspoon vanilla extract - Pinch of salt Choosing the right mango is key. Look for mangoes that are ripe. They should feel slightly soft when you gently squeeze them. A ripe mango has a sweet scent near the stem. You want to avoid mangoes with dark spots or wrinkles. Fresh mangoes will give your ice cream the best flavor. - How to choose ripe mangoes: Check for softness and smell. - Signs of freshness: Look for bright color and no blemishes. If you don’t have heavy cream, don’t worry! You can use whole milk or a blend of milk and butter. For a dairy-free option, swap heavy cream with coconut cream. Almond milk is also a good choice. Just keep in mind that these changes may alter the texture a bit. - Substitutes for heavy cream: Use whole milk or milk with butter. - Dairy-free options: Coconut cream or almond milk work well. - Blending the mixture To start, take your blender. Add the diced mangoes, heavy cream, coconut milk, sweetened condensed milk, lime juice, vanilla extract, and a pinch of salt. Blend it all together until the mix is smooth and creamy. You want it to be rich and vibrant. - Adjusting sweetness Now, taste your mix. If you want it sweeter, add more condensed milk or some sugar. Just blend again to mix it in. It’s all about your taste. Make it perfect for you! - Using an ice cream maker Next, pour the mango mix into your ice cream maker. Follow the maker's instructions for churning. This usually takes about 20 to 25 minutes. You want it to reach a soft-serve texture. - Tips for achieving the right texture Keep an eye on it! If it seems too soft, let it churn a bit longer. If it looks great, stop the machine. The right texture makes the ice cream dreamy! - Storing in an airtight container After churning, transfer the ice cream to an airtight container. This helps keep it fresh and prevents ice crystals from forming. - Time to firm up Now, freeze it for at least 4 hours. This step is key to making it firm and scoopable. Once it’s ready, it’s time to enjoy your delicious treat! To make creamy mango ice cream, fat content is key. Use heavy cream and coconut milk for richness. These fats help create a smooth texture. Churning is also important. If you churn too slowly, your ice cream may be icy. Aim for a consistent churn for about 20-25 minutes. This ensures it becomes fluffy and light. Serving mango ice cream can be fun! Try it in bowls, cones, or even as a cake layer. You can also make mango sundaes. Top them with diced mango or toasted coconut. Adding a drizzle of lime juice enhances the flavor. Fresh mint leaves also add a bright touch. If your ice cream is too hard, let it sit out for a few minutes before scooping. This softens it and makes serving easier. If you notice a grainy texture, this may mean it didn’t churn enough. Next time, churn a bit longer. This helps to break down ice crystals for a smoother finish. For the full recipe, check the earlier sections. {{image_2}} You can add fun twists to your creamy mango ice cream. Try mixing in some coconut or lime zest. This will boost the tropical vibe. For a unique treat, create a mango swirl by blending mango with raspberry or passion fruit. This adds color and a new taste! You can make a dairy-free version using coconut milk. Replace heavy cream with more coconut milk. This keeps it rich and creamy. You can also use alternative sweeteners like agave or maple syrup. This makes it sweet without using refined sugar. Get creative by adding fruits or nuts. Chopped strawberries, blueberries, or walnuts work well. You can also swirl in some chocolate or caramel sauce. This adds extra flavor and makes your ice cream even more special. To keep your creamy mango ice cream fresh, follow these simple tips. First, use an airtight container. This helps prevent ice crystals from forming. Place a piece of wax paper on top before sealing. This adds an extra layer of protection. Store the container in the coldest part of your freezer. Your ice cream will stay fresh for about two weeks. You can repurpose old ice cream containers for storage. Rinse them well before using. They are great for storing leftovers or snacks. Make sure to label the containers. Write the date and contents on the lid. This helps you find what you need quickly. To tell if your ice cream is still good, check for ice crystals on the surface. If you see a lot, it may taste icy. Smell it to ensure there are no off odors. If it smells strange, it’s best to throw it away. To prevent freezer burn, always keep it tightly sealed and stored properly. You can make creamy mango ice cream without an ice cream maker. Use a simple method: blend all your ingredients. Pour the mixture into a shallow pan. Place it in the freezer. Stir it every 30 minutes for about 2-3 hours. This helps break up ice crystals. When it gets thick and creamy, it’s ready to enjoy! Yes, frozen mangoes work well in this recipe. They are often picked at peak ripeness. However, they can have a different texture. Fresh mangoes tend to be creamier. If you choose frozen, let them thaw a bit before blending. This will help achieve a smooth consistency. You can lower the calories in creamy mango ice cream. Use light coconut milk instead of heavy cream. Swap sweetened condensed milk for a sugar substitute or honey. You can also reduce the amount of sweetener. This keeps the flavor while cutting calories. Many brands offer creamy mango ice cream. You can find it at grocery stores or specialty shops. Look for brands like Häagen-Dazs or Ben & Jerry's. Local ice cream shops often make their own, too. Check their flavors for a fresh option! Homemade ice cream takes about 4-6 hours to freeze fully. For the best texture, freeze it for at least 4 hours. This allows it to become firm but still creamy. If you want to scoop it easily, let it sit out for a few minutes first. You learned how to make creamy mango ice cream using simple steps and fresh ingredients. Choosing ripe mangoes enhances flavor, while alternatives keep it fun and flexible. Tips on texture, storage, and serving make it easy to enjoy. I encourage you to try different variations for a unique twist. Homemade ice cream is not just a treat; it's a way to impress friends and family. Celebrate your success in the kitchen as you savor each delicious scoop.
    Creamy Mango Ice Cream Delightful and Easy Recipe

Posts pagination

← Newer 1 … 12 13 14 15 16 … 28 Older →

Footer

↑ back to top

More information

  • Dinner
  • Drinks
  • Appetizers
  • Dessert
  • About
  • Contact Us

    Our Policies

    • Privacy Policy
    • Cookie Policy
    • Copyright Policy
    • Disclaimer
    • GDPR Policy
    • Terms Of Us

    Copyright © 2024 My Saved Recipe