• Recipes
    • Dinner
    • Dessert
    • Appetizers
    • Drinks
  • About
  • Contact Us
  • Privacy Policy
menu icon
go to homepage
  • Recipes
    • Dinner
    • Dessert
    • Appetizers
    • Drinks
  • About
  • Contact Us
  • Privacy Policy

search icon
Homepage link
  • Recipes
    • Dinner
    • Dessert
    • Appetizers
    • Drinks
  • About
  • Contact Us
  • Privacy Policy

×
Savannah

Savannah

Savannah is the creative force behind My Saved Recipe, a space where food becomes both art and adventure. A passionate home chef, she delights in exploring flavors from around the world while honoring timeless classics.

Savannah’s philosophy centers on the power of food to bring people together, spark creativity, and create lasting memories. Through thoughtfully crafted recipes and practical tips, she inspires cooks of all levels to embrace fresh ingredients, experiment with confidence, and find joy in the kitchen.

  • - 1 cup pumpkin puree (fresh or canned) - 1/2 cup cooked quinoa - 1/4 cup all-purpose flour (or chickpea flour for gluten-free) - 1/4 cup grated Parmesan cheese (or nutritional yeast for vegan option) - 1/4 teaspoon garlic powder - 1/4 teaspoon onion powder - 1 teaspoon smoked paprika - 1/2 teaspoon salt - 1/4 teaspoon black pepper - 1 egg (or flax egg for vegan option) - 2 tablespoons olive oil - Fresh parsley, chopped (for garnish) The key to great Baked Pumpkin Fritter Bites is using fresh, quality ingredients. Pumpkin puree brings a sweet and creamy base. Cooked quinoa adds protein and texture. You can use all-purpose flour for a classic taste or chickpea flour for a gluten-free option. For a savory touch, grated Parmesan cheese enhances flavors, while nutritional yeast suits a vegan diet. Seasoning is vital; garlic powder, onion powder, smoked paprika, salt, and black pepper create a delightful taste. - Dipping sauces recommendations: tzatziki or spicy aioli - Variations on cheese: feta or mozzarella can change the flavor profile Dipping sauces can elevate your fritters. Tzatziki adds a cool, creamy twist. Spicy aioli gives a kick. If you want to mix up the cheese, try feta for a tangy bite or mozzarella for a gooey texture. These options let you explore flavors and create a unique dish every time. {{ingredient_image_1}} 1. Preheat the oven and prepare the baking sheet Start by preheating your oven to 400°F (200°C). This step is vital for even cooking. Next, line a baking sheet with parchment paper. This keeps the fritters from sticking. 2. Mixing wet and dry ingredients In a large bowl, combine the pumpkin puree, cooked quinoa, flour, Parmesan cheese, garlic powder, onion powder, smoked paprika, salt, and black pepper. Mix well until all ingredients blend together. In another bowl, whisk the egg. If you want a vegan option, mix 1 tablespoon of ground flaxseed with 2.5 tablespoons of water. Let it sit for 5 minutes to thicken. Add the egg mixture to the pumpkin mix and stir until fully combined. The mix should be thick and easy to scoop. 1. Shaping the fritter mixture Use a tablespoon or a small cookie scoop to form the mixture into bite-sized balls. Place them evenly spaced on your prepared baking sheet. 2. Drizzling with olive oil Drizzle the tops of the fritters with olive oil. This helps them become golden and crispy while baking. 3. Baking instructions Bake the fritters in your preheated oven for 20-25 minutes. Flip them halfway through to ensure they cook evenly. They are done when they are golden brown and firm to touch. 1. Garnishing with parsley After baking, remove the fritters from the oven and let them cool slightly. Sprinkle fresh chopped parsley on top for a pop of color and flavor. 2. Recommended dipping sauces Serve the fritters warm with your favorite dipping sauce. Tzatziki or spicy aioli pairs nicely and adds a tasty kick. To get the best fritter texture, you need the right mixture thickness. Your mixture should feel thick and scoopable. If it’s too runny, add a bit more flour. If it’s too thick, add a little water or more pumpkin puree. Bake your fritters at 400°F (200°C) for 20 to 25 minutes. Flip them halfway through. This helps them cook evenly. You want them golden brown and firm to the touch. Adding spices can take your fritters to the next level. Try adding a pinch of nutmeg or a dash of cayenne for extra kick. Fresh herbs like thyme or rosemary can also add great flavor. If you want to experiment with cheese, try using feta or goat cheese. They will add a different taste and creaminess. For vegan adaptations, use a flax egg instead of a regular egg. Just mix one tablespoon of ground flaxseed with 2.5 tablespoons of water. Let it sit for five minutes to thicken. For gluten-free options, swap all-purpose flour for chickpea flour. This will keep your fritters tasty and safe for those avoiding gluten. Pro Tips Use Fresh Pumpkin: For the best flavor, consider using fresh pumpkin instead of canned. Roast a small pumpkin, scoop out the flesh, and puree it for maximum freshness. Texture Matters: If your mixture seems too wet, add more flour gradually until it's thick enough to hold its shape. This will help ensure your fritters hold together during baking. Experiment with Spices: Feel free to adjust the spices to your liking. Adding a pinch of cayenne pepper can give your fritters a delightful kick! Storage Tips: These fritters can be stored in an airtight container in the refrigerator for up to 3 days. Reheat in the oven for a couple of minutes to regain their crispiness. {{image_2}} You can switch things up with a sweet potato alternative. Sweet potatoes bring a rich taste and creamy texture. Simply replace pumpkin puree with equal parts sweet potato mash. This makes a tasty twist on the classic. Adding herbs can also boost flavor. Fresh herbs like thyme or rosemary enhance the taste of your fritters. You only need a tablespoon of chopped herbs mixed into the batter. This makes the fritters bright and fresh. When plating, use a colorful dish to make your fritters pop. A white plate works well to show off the golden color. Garnish with fresh parsley for a nice touch. You can also sprinkle some paprika for extra flair. For dipping sauces, think outside the box. Tzatziki is a cool and creamy choice. It pairs well with the warm fritters. Try a spicy aioli for a kick. Both sauces add a fun element to your dish. In fall, consider adding seasonal ingredients. Chopped apple or nutmeg can give your fritters a cozy vibe. These flavors make them perfect for autumn gatherings. For holidays, serve your fritters as appetizers. They are easy to share and look great on a platter. You could even place them next to a festive dip. This makes them a hit at any holiday party. To keep your baked pumpkin fritter bites fresh, follow these tips: - Refrigeration: Place leftover fritters in an airtight container. Store in the fridge for up to 3 days. To keep them crisp, avoid stacking them. Separate layers with parchment paper if needed. - Freezing: For longer storage, freeze the fritters. Allow them to cool completely. Then, place them in a single layer on a baking sheet. Freeze them for about an hour. Once frozen, transfer to a freezer-safe bag. They can last up to 3 months in the freezer. Reheating your fritters can be done in a few ways: - Oven Method: Preheat your oven to 350°F (175°C). Place fritters on a baking sheet. Heat for about 10-15 minutes. This method keeps them crispy. - Microwave Method: You can use the microwave for quick reheating. Place fritters on a microwave-safe plate. Heat for 30 seconds to 1 minute. Note that they may not stay crispy with this method. For the best results, I recommend the oven! Can I use fresh pumpkin instead of canned? Yes, you can use fresh pumpkin. Just roast it first. Cut the pumpkin into pieces, bake it until soft, and then puree it. This gives your fritters a fresh flavor. How do I prevent my fritters from falling apart? To keep your fritters from falling apart, make sure the mixture is thick. The right amount of flour and egg helps bind it. If it feels too loose, add a bit more flour. What can I substitute for quinoa? You can use cooked rice or even mashed beans. Both options give a nice texture. If you go with mashed beans, make sure they are well-drained for the best results. Baked pumpkin fritter bites are easy and fun to make. We covered key ingredients, steps, and pro tips. Remember to experiment with flavors and sauces to make them your own. Whether you serve them at a party or enjoy them as a snack, they will impress. Don't forget to store leftovers properly, so you can enjoy them later. With the right tricks, you’ll create tasty bites every time. Enjoy your cooking journey with these delicious fritters!
    Baked Pumpkin Fritter Bites Simple and Tasty Recipe
  • To make this tasty dish, gather these key items: - 1 pound store-bought gnocchi - 2 cups broccoli florets - 1 tablespoon olive oil - 1 small onion, finely chopped - 2 cloves garlic, minced - 3 cups vegetable broth - 1 cup heavy cream - 1 teaspoon Dijon mustard - 2 cups shredded sharp cheddar cheese - Salt and pepper to taste You can boost the flavor with these extras: - ¼ teaspoon red pepper flakes (for a kick) - Fresh parsley for garnish Using quality products makes a big difference. I suggest: - Fresh gnocchi for the best texture - Organic broccoli for the best taste - Good-quality sharp cheddar for rich flavor - Homemade or low-sodium vegetable broth for a healthier option Each ingredient plays a key role in creating a creamy and delicious dish. Quality matters, so choose wisely! First, gather all your ingredients. This makes cooking easier. You need: - 1 pound store-bought gnocchi - 2 cups broccoli florets - 1 tablespoon olive oil - 1 small onion, finely chopped - 2 cloves garlic, minced - 3 cups vegetable broth - 1 cup heavy cream - 1 teaspoon Dijon mustard - 2 cups shredded sharp cheddar cheese - Salt and pepper to taste - ¼ teaspoon red pepper flakes (optional) - Fresh parsley for garnish Next, chop the onion and mince the garlic. Set these aside. Rinse the broccoli and cut it into small florets. This helps them cook faster. To start cooking, heat the olive oil in a large pot over medium heat. Add the chopped onion and cook until it turns clear, about 3-4 minutes. Then, add the minced garlic and red pepper flakes if you want some heat. Cook for another 1-2 minutes until you smell the garlic. Now, add the gnocchi and broccoli florets to the pot. Stir everything together until well mixed. Pour in the vegetable broth and bring it to a simmer. Let it cook for about 5 minutes. You know it's ready when the gnocchi float to the top and the broccoli is tender. Reduce the heat to low. Carefully stir in the heavy cream and Dijon mustard. Mix until everything is well blended. Then, slowly add the cheddar cheese while stirring continuously. This keeps the cheese from clumping. You will see the sauce become creamy and rich. Finally, taste and add salt and pepper as needed. Serve hot and garnish with fresh parsley for a nice touch. To get the best creamy texture, use heavy cream. It blends well with the cheese. Stir constantly when adding cheese. This helps it melt smoothly. If the sauce is too thick, add a bit more broth or cream. For added flavor, try using sharp cheddar cheese. The sharper the cheese, the more flavor it adds. To make the best creamy one-pot broccoli cheddar gnocchi, keep a few things in mind. First, use fresh broccoli florets for the best flavor. You can also try adding a squeeze of lemon juice for bright taste. Always taste your dish as you cook. This helps you adjust flavors, especially salt and pepper. Cooking times matter in this recipe. When you add the gnocchi, watch closely. The gnocchi float when they are ready. This takes about five minutes. If you overcook them, they can get mushy. Once you mix in the cream and cheese, stir gently. This helps keep the gnocchi intact and the sauce smooth. Combine ingredients in the right order for a creamy sauce. Start with the onion and garlic. This builds flavor. Next, add the gnocchi and broccoli. Once everything simmers, add the cream and mustard. Finally, sprinkle in the cheese gradually. This ensures it melts evenly and creates a rich sauce. Don’t rush this step; it makes all the difference! {{image_2}} You can easily tweak this dish for different diets. For gluten-free gnocchi, look for brands made from potatoes or rice. These options keep the texture similar. If you want a vegan version, replace the heavy cream with coconut milk. Use vegan cheese instead of cheddar for a dairy-free alternative. Adding herbs and spices can boost the flavor of your dish. Fresh thyme or basil pairs well with the creamy sauce. A pinch of nutmeg adds warmth and depth. For a bit of heat, try adding more red pepper flakes. Just remember, a little goes a long way! You can make this meal heartier by adding protein. Cooked chicken or shrimp complements the creamy sauce nicely. For a vegetarian option, toss in some chickpeas or white beans. You can also add more veggies like spinach or bell peppers for added nutrition. Just make sure to adjust cooking times to keep everything tender. To store leftovers, let the dish cool first. Use an airtight container to keep it fresh. You can keep it in the fridge for up to three days. If you want to save it longer, freezing is a good option. When reheating, do it slowly. Use a pot on low heat. Add a splash of vegetable broth or cream to help keep it creamy. Stir often to avoid sticking. This way, the gnocchi and cheese stay flavorful. If you freeze the dish, use a freezer-safe container. It can last for up to three months. When you are ready to eat, thaw it overnight in the fridge. Reheat as mentioned before for the best taste. To make this creamy one-pot broccoli cheddar gnocchi vegan, swap the cheese and cream. Use a plant-based cream, like coconut or cashew cream. For cheese, look for dairy-free cheddar. These changes keep the dish creamy and tasty. You can also add nutritional yeast for a cheesy flavor. If you do not have heavy cream, use a mixture of plant milk and oil. Combine 1 cup of almond or soy milk with 2 tablespoons of olive oil. This mix mimics the richness of cream. You can also use full-fat coconut milk for a thicker texture. If your cheese does not melt smoothly, it may be the type of cheese. Pre-shredded cheese often contains anti-caking agents. These agents can affect melting. Use block cheese and shred it yourself for the best result. Also, add the cheese slowly to the warm sauce while stirring constantly. This helps it melt smoothly. In this post, we explored how to make creamy one-pot broccoli cheddar gnocchi. We discussed essential and optional ingredients, plus tips for creamy texture. You learned the cooking steps and tricks for success. We also touched on variations for dietary needs, storage options, and answered common questions. This recipe is easy and fun. You can customize it to your taste. I hope you enjoy making it!
    Creamy One-Pot Broccoli Cheddar Gnocchi Delight
  • - 4 slices of whole grain or sourdough bread - 4 tablespoons of unsalted butter, softened - 4 slices of sharp cheddar cheese - 8 slices of crispy cooked turkey bacon (or regular bacon) - 1 medium tomato, sliced - 1 cup fresh arugula or spinach - Salt and pepper to taste - Optional: 1 teaspoon garlic powder You can add extra flavor with garlic powder. It gives a nice kick. Cherry tomatoes also work well instead of regular tomatoes. For a spicy touch, try adding sliced jalapeños. If you want to switch up the bread, use rye or gluten-free options. For cheese, try mozzarella or gouda for a different taste. You can use veggie bacon or tempeh for a meatless choice. If you don't have arugula, fresh spinach or even mixed greens will fit nicely. {{ingredient_image_1}} 1. First, gather all your ingredients. This makes cooking easy and fun. 2. Preheat your skillet or griddle over medium heat. This helps cook the sandwich evenly. 3. Spread 1 tablespoon of softened butter on one side of each slice of bread. This gives it a nice flavor. 4. Place two slices of bread, buttered side down, onto the skillet. This creates the base of your sandwich. 5. On each slice, layer 2 slices of sharp cheddar cheese. This cheese melts well and adds great taste. 6. Next, add 4 slices of crispy cooked turkey bacon. You can use regular bacon if you prefer. 7. Top the bacon with 2-3 slices of tomato. Fresh tomatoes add juicy flavor. 8. Add a handful of fresh arugula or spinach on top. This gives extra crunch and nutrition. 9. Season with a pinch of salt, pepper, and garlic powder if you like. This boosts the taste. 10. Place another slice of cheese on top of each sandwich. This keeps the fillings together. 11. Finish by topping each sandwich with the remaining slices of bread, buttered side up. 1. Cook the sandwiches for about 4-5 minutes on medium heat. Watch for the bread to get golden brown. 2. Once the bottom is golden and the cheese starts to melt, carefully flip the sandwiches over. 3. Cook the other side for an additional 4-5 minutes. This ensures the bread is crispy and the cheese melts completely. 4. If you like, you can press down gently with a spatula. This helps the cheese melt faster. 1. Look for a golden brown crust on both sides of the sandwich. This means it is ready. 2. Gently press the sandwich with a spatula. If cheese oozes out, it's a good sign! 3. If unsure, use a thermometer. The cheese should be at least 160°F (71°C) to be fully melted. 4. Let the sandwiches sit for a minute after cooking. This makes them easier to slice and eat. To achieve that perfect crunch, use generous butter. Spread it on the bread before grilling. You can also add a sprinkle of garlic powder for a tasty twist. Another trick is to press the sandwich down with a spatula. This helps the bread toast evenly. Lastly, try using a cast-iron skillet. It holds heat well and gives a nice crispy finish. To boost the flavor, consider adding a few extras. Try thin slices of avocado for creaminess. A bit of hot sauce can add a kick. If you love herbs, sprinkle fresh basil or parsley. These will give your sandwich a fresh taste. Don't forget to season the tomato slices with salt and pepper. This makes the flavors pop. One common mistake is cooking on too high heat. This can burn the bread while the cheese stays cold. Make sure to keep the heat at medium. Also, avoid overstuffing the sandwich. Too many ingredients can make it fall apart. Lastly, let the grilled cheese sit for a minute after cooking. This helps the cheese firm up and makes for easier slicing. Pro Tips Use a Heavy Pan: A heavier skillet or griddle helps distribute heat evenly, ensuring that your grilled cheese cooks uniformly without burning. Don’t Rush the Flip: Wait until the bottom is perfectly golden brown before flipping to avoid a soggy sandwich and to achieve that perfect crispy texture. Experiment with Cheeses: While sharp cheddar is delicious, try mixing in other cheeses like mozzarella or gouda for a unique flavor profile and creamy texture. Let It Rest: Allowing the grilled cheese to sit for a minute after cooking helps the cheese set slightly, making it easier to slice without spilling out. {{image_2}} You can switch up the protein in your BLT grilled cheese. Turkey bacon works great, but you can also use chicken or even crispy prosciutto. If you want a lighter option, try smoked salmon. All these choices will add unique flavors. Feel free to mix and match to find your favorite! Cheese is key to a great grilled cheese. While sharp cheddar is my go-to, you can explore other cheeses too. Gouda adds a creamy touch, while pepper jack gives it a spicy kick. For a rich flavor, try fontina. You can even use a mix of cheeses for a cheesy masterpiece! If you prefer a plant-based version, it’s easy to adapt. Substitute the bacon with crispy tempeh or avocado slices. You can use vegan cheese or even a cashew cheese spread. For added health, throw in some bell peppers or mushrooms. This way, you can enjoy a tasty sandwich without animal products. To store leftover BLT grilled cheese, let it cool first. Place the sandwiches in an airtight container. Use parchment paper between layers if stacking. This keeps the bread from getting soggy. Store in the fridge for up to three days. When you're ready to eat leftovers, heat a skillet over medium. Place the sandwich in the pan. Cook for about 3-4 minutes on each side. This helps the cheese melt and the bread to crisp up again. You can also use a microwave, but it may not keep the crispiness. If you want to freeze your grilled cheese, wrap each sandwich tightly in plastic wrap. Then, place them in a freezer bag. They can stay in the freezer for up to a month. To eat, thaw in the fridge overnight, then reheat as mentioned above. Yes, you can use many types of bread. Whole grain and sourdough work well. You can also try white or rye bread for a twist. Each type gives a different taste and texture. Just make sure the bread is sturdy enough to hold the filling. You can serve many things with your BLT Grilled Cheese. A cup of tomato soup is a classic choice. It adds warmth and flavor. You can also pair it with a simple salad. A fresh side salad with arugula or spinach works great. Chips or pickles can add a nice crunch too. To make this dish healthier, consider these tips: - Use whole grain bread for more fiber. - Swap turkey bacon for regular bacon for less fat. - Add more veggies like avocado or cucumber. - Use less cheese or choose a low-fat cheese option. These changes keep the taste while making it better for you. Yes, you can prepare ingredients ahead of time. Slice the tomatoes and cheese and store them in the fridge. You can also cook the bacon in advance. Just reheat it quickly when you’re ready to cook. Having everything prepped makes cooking faster and easier. In this post, I covered ingredients, from key items to helpful substitutions. I shared step-by-step instructions for prep and cooking, ensuring perfect doneness. I offered tips for making your dish crispy and yummy, while avoiding common errors. We explored variations, like different proteins and dietary options, plus storage and reheating tips to save time. Remember, small changes can make a big difference. Enjoy experimenting and finding what works best for you!
    Savory BLT Grilled Cheese Simple Comfort Recipe
  • - 12 oz penne pasta - 2 tablespoons olive oil - 1 medium onion, diced - 3 cloves garlic, minced - 1 can (14 oz) crushed tomatoes - 1 cup heavy cream - 1 teaspoon dried basil - 1 teaspoon dried oregano - Salt and pepper to taste - ½ cup grated Parmesan cheese - Fresh basil leaves for garnish Using fresh ingredients makes a big difference. Choose ripe tomatoes when possible. If fresh basil is not available, use dried basil. For the Parmesan, a quality block is best. Grate it yourself for the best flavor. If you need a dairy-free option, use a non-dairy cream. You can also skip the cheese or replace it with nutritional yeast. This dish includes gluten and dairy. If you avoid gluten, choose gluten-free penne. To make it vegan, use non-dairy cream and skip the cheese. This recipe is rich and filling, perfect for a comfort meal. Always check labels for hidden allergens. Enjoy with a side salad for a balanced meal. {{ingredient_image_1}} Start by boiling water in a large pot. Add a good amount of salt. Once the water boils, add 12 oz of penne pasta. Cook it following the package directions until it is al dente. This usually takes about 8 to 10 minutes. When done, drain the pasta and set it aside in a bowl. In a large skillet, heat 2 tablespoons of olive oil over medium heat. Add a medium onion that you diced. Sauté the onion for 5 to 7 minutes until it becomes soft and clear. Next, add 3 cloves of minced garlic. Cook it for about 1 minute until you smell the garlic. Now, pour in a 14 oz can of crushed tomatoes. Mix in 1 teaspoon of dried basil, 1 teaspoon of dried oregano, and a pinch of salt and pepper. Let this simmer for 10 minutes. This helps all the flavors come together. Lower the heat and add 1 cup of heavy cream to the skillet. Stir it gently and let it simmer for another 5 minutes. This thickens the sauce. Now, add the cooked penne pasta to the sauce. Toss it well to coat every piece. If the sauce seems too thick, add a splash of the pasta water. Finally, stir in ½ cup of grated Parmesan cheese until it melts. Taste and adjust the salt and pepper if needed. Your Vodka-Free Pasta Rosa is ready to enjoy! To get the right sauce texture, start by simmering the crushed tomatoes. Let them cook for about 10 minutes. This helps blend the flavors well. When you add the heavy cream, keep the heat low. This makes it creamy without curdling. If the sauce gets too thick, add a splash of pasta water. This will help loosen it up. Always stir to mix everything nicely. Want to boost flavors? Try adding more herbs like thyme or fresh basil. A pinch of red pepper flakes gives heat. You can also mix in spinach or mushrooms for extra nutrition. Toss in some cooked chicken or shrimp for a protein kick. These options make your dish more exciting. Experimenting with flavors can make it uniquely yours. When reheating, use low heat to keep the cream nice. Add a bit of water or broth to help. This keeps it smooth and tasty. For serving, plate the pasta in bowls and top with fresh basil. A sprinkle of extra Parmesan cheese adds a nice touch. Enjoy it with a side salad or garlic bread for a complete meal. Pro Tips Use Fresh Basil: For the best flavor, use fresh basil leaves instead of dried. Add them at the end for a vibrant taste. Cook Pasta Al Dente: Ensure your pasta is cooked al dente to maintain its texture and prevent it from becoming mushy when mixed with the sauce. Adjust Creaminess: If you prefer a lighter sauce, you can substitute half of the heavy cream with vegetable or chicken broth. Save Pasta Water: Keep a cup of pasta cooking water before draining. It can be used to adjust the sauce consistency if needed. {{image_2}} You can easily make this dish vegan. Simply replace heavy cream with coconut cream or cashew cream. Use nutritional yeast instead of Parmesan cheese for a cheesy taste. This swap keeps the dish creamy while making it plant-based. If you need a gluten-free option, choose gluten-free penne. Many brands offer great pasta made from rice, quinoa, or chickpeas. These options cook well and hold the sauce nicely. Always check the package for cooking times. For extra protein, consider adding cooked chicken, shrimp, or tofu. You can mix these in when you combine the pasta and sauce. If you want to add vegetables, try spinach, bell peppers, or mushrooms. Add them during the sautéing step to keep them tender and flavorful. To store your Vodka-Free Pasta Rosa, let it cool down. Place it in an airtight container. This helps keep the flavors fresh. Store it in the fridge for up to three days. If you want to keep it longer, consider freezing. Freezing Pasta Rosa is simple. Use a freezer-safe container. Make sure to leave some space at the top. The sauce can expand when frozen. You can freeze it for up to three months. Remember to label the container with the date. To reheat, you can use a microwave or a stovetop. For the microwave, place your pasta in a bowl. Add a splash of water to keep it moist. Heat in 30-second intervals, stirring in between. For stovetop, warm it in a skillet over low heat. Stir often to prevent sticking. If it seems dry, add a bit of cream or water. Enjoy your comforting dish just as good as the first time! Pasta Rosa is a creamy pasta dish with tomato and basil flavors. It is rich, smooth, and comforting. In our vodka-free version, we focus on the creamy texture and fresh taste. The dish uses penne pasta, crushed tomatoes, and heavy cream to create a luscious sauce. It’s perfect for a cozy dinner or a quick meal any night. Yes, you can prepare this dish in advance. Cook the pasta and sauce separately. Store them in airtight containers in the fridge. When ready to serve, simply reheat the sauce, combine it with the pasta, and enjoy! This makes it easy to enjoy a home-cooked meal on busy days. If you want a lighter option, use half-and-half or whole milk. For a dairy-free choice, try coconut cream or cashew cream. These substitutes keep the dish creamy while changing the flavor slightly. Adjust the seasoning as needed to balance the taste. To spice up your Pasta Rosa, add red pepper flakes when sautéing the onions and garlic. You can also mix in diced jalapeños or a splash of hot sauce. Adjust these ingredients to your preferred heat level. A little spice enhances the flavors and brings a warm kick. In this article, we explored the tasty world of Vodka-Free Pasta Rosa. We covered the key ingredients and shared tips for making it just right. You learned about cooking techniques, variations for dietary needs, and how to store leftovers. This dish is easy, fun, and can fit many diets. You can enjoy a homemade meal that suits your taste. Try it out and impress your family and friends with your new cooking skills!
    Vodka-Free Pasta Rosa Flavorful Comfort Dish
  • - 2 pounds beef chuck roast - 1 large onion, diced - 3 cloves garlic, minced - 1 large carrot, diced - 1 celery stalk, diced - 1 can (28 ounces) crushed tomatoes - 2 tablespoons tomato paste - 2 teaspoons dried oregano - 1 teaspoon dried basil - 1 teaspoon red pepper flakes (optional) - Salt and pepper to taste - 3 cups beef broth - 2 tablespoons olive oil - Fresh parsley, chopped for garnish - 1 pound pasta of choice (like pappardelle or fettuccine) In this recipe, the main ingredients all come together to create a rich and hearty dish. The beef chuck roast is perfect for slow cooking. It becomes tender and flavorful over the long cooking time. The onion, garlic, carrot, and celery add depth and sweetness to the sauce. The crushed tomatoes and tomato paste give the ragu a rich, thick texture. Dried oregano and basil bring classic Italian flavors to the dish. A bit of red pepper flakes adds a gentle kick, but you can skip it for a milder ragu. Make sure to season well with salt and pepper. The beef broth adds richness and helps meld all the flavors together. Olive oil is key for sautéing the vegetables, adding a nice richness. Finally, fresh parsley makes for a vibrant garnish, adding both color and freshness. With these ingredients, you are on your way to a comforting meal that everyone will love. Don't forget to pair it with the perfect pasta for a complete dish! {{ingredient_image_1}} Start by searing the beef chunks. Heat two tablespoons of olive oil in a large skillet over medium-high heat. Season the beef chunks with salt and pepper. Place them in the hot skillet. Sear each side for about three to four minutes until browned. This step locks in flavor. Once done, transfer the beef to your slow cooker. Next, it’s time for the vegetables. Use the same skillet to save flavor. Add the diced onion, carrot, and celery. Sauté for about five minutes until they soften. Then, add three cloves of minced garlic. Cook for another minute until fragrant. This creates a nice base for your ragu. Now, pour the sautéed vegetables over the beef in the slow cooker. Add one can of crushed tomatoes and two tablespoons of tomato paste. Then, sprinkle in two teaspoons of dried oregano, one teaspoon of dried basil, and optional red pepper flakes for heat. Don’t forget to add three cups of beef broth. Stir gently to mix all the ingredients well. Cover the slow cooker and set it to cook. You can choose low for eight hours or high for four hours. The goal is to have tender beef that shreds easily. Check it at the end of cooking to ensure it’s just right. Once the cooking time is up, use two forks to shred the beef right in the sauce. Mix it well so every bit of beef is coated in that rich sauce. Taste it, and adjust the seasoning with more salt and pepper if needed. About 20 minutes before serving, cook your chosen pasta in a large pot of salted boiling water. Follow the package instructions for best results. Drain the pasta and set it aside. Finally, toss the cooked pasta with the beef ragu until well combined. Enjoy your meal! To make a great beef ragu, start by searing the beef. This step adds deep flavor. Heat olive oil in a skillet over medium-high heat. Season the beef chunks with salt and pepper. Sear the beef for about 3 to 4 minutes on each side. You want a nice brown color. This browning locks in juices and flavor. Next, adjust the seasoning for taste. After cooking, taste the ragu sauce. You may need more salt or pepper. Do not be shy to add more herbs! A pinch of red pepper flakes can add warmth if you like a bit of heat. Choose the right slow cooker setting. For tender beef, cook on low for 8 hours. If you're in a hurry, use the high setting for 4 hours. The low setting will give the best flavor and texture. Avoid overcooking by setting a timer. If you see the beef shredding easily, it’s done. Check it at the 4-hour mark if you use the high setting. Garnishing with fresh parsley makes your dish pop. Chop the parsley finely and sprinkle it on top before serving. This adds color and a fresh taste. When serving, toss the ragu with your pasta. I recommend using pappardelle or fettuccine. These types hold the sauce well. Serve it hot and enjoy a warm bowl of goodness! Pro Tips Choose the Right Cut: Beef chuck roast is ideal for slow cooking due to its marbling, which results in tender, flavorful meat. Avoid lean cuts as they can dry out. Enhance the Flavor: Consider adding a splash of red wine to the sauce for added depth and richness. Let it simmer for a few minutes before adding to the slow cooker. Don’t Rush the Shredding: Allow the beef to cool slightly before shredding. This makes it easier to handle and ensures you don’t burn your fingers! Store for Later: This ragu freezes beautifully! Portion leftovers in airtight containers for convenient meals in the future. Just reheat on the stovetop or microwave. {{image_2}} You can use different cuts of beef for your ragu. I like using beef chuck roast, but you can try brisket or short ribs. Each cut brings its own flavor and texture. If you want a quicker option, substituting with ground beef or turkey works well. Just adjust the cooking time. Ground meat cooks faster, so keep an eye on it. You can make a plant-based version of beef ragu. Replace the beef with mushrooms or lentils. Both options add great texture and flavor. For a heartier dish, you can use jackfruit or tempeh. These choices soak up the sauce nicely. Add extra veggies like zucchini or bell peppers for more depth. Adding red wine can give your ragu more depth of flavor. Just a cup adds richness. Make sure to let it reduce a bit before serving. You can also experiment with different herbs. Try thyme, rosemary, or even sage for a twist. Each herb can change the flavor profile and make the dish uniquely yours. After enjoying your meal, let the ragu cool down. This step helps keep it fresh. Place the ragu in airtight containers. Glass or plastic containers work well. Make sure to store it in the fridge. To enjoy your ragu again, gently reheat it. You can use the stove or microwave. If using the stove, heat it in a pot over low heat. Stir it often to prevent sticking. For the microwave, heat in short bursts. Stir in between to heat evenly. You can also freeze the ragu for later. Just store it in freezer-safe containers. It keeps well for up to three months. Your beef ragu lasts about 3 to 4 days in the fridge. After that, it may spoil. Always check for signs of spoilage. If it smells sour or has a strange color, do not eat it. When in doubt, throw it out! Yes, you can make Slow Cooker Beef Ragu ahead of time. First, cook the ragu as directed. Let it cool before storing. Place it in an airtight container. You can keep it in the fridge for up to three days. When you are ready to eat, just reheat it. You can use the stove or microwave for this. The flavors will meld even more as it sits. For beef ragu, I recommend using wide pasta. Pappardelle or fettuccine works great. The thick sauce clings well to these noodles. Their texture holds up against the rich ragu. If you prefer something different, try tagliatelle. It also pairs nicely with the beef. To thicken the sauce for beef ragu, try simmering it longer. This reduces the liquid and intensifies the flavor. You can also mix a little cornstarch with cold water. Stir this mixture into the sauce. Let it cook for a few more minutes to thicken. Traditional beef ragu is not gluten-free because of the pasta. However, you can make it gluten-free. Use gluten-free pasta options like rice or quinoa pasta. They work well with the ragu. Always check labels to ensure no gluten ingredients are present in the sauce. In this blog post, I covered how to make a delicious Slow Cooker Beef Ragu. We looked at key ingredients, easy steps, and tips for perfecting your dish. You can use alternatives like ground beef or even create a vegetarian version. Remember to store leftovers properly for best flavor. Making this ragu will impress your family and friends. It's a satisfying meal you can enjoy any time. Dive into this hearty recipe and enjoy every bite!
    Slow Cooker Beef Ragu Flavorful and Easy Meal
  • - 2 cups shredded cooked chicken - 1/2 cup buffalo sauce - 1/4 cup blue cheese dressing - 8 slider buns To make Buffalo chicken sliders, start with shredded cooked chicken. This gives a nice texture. Mix in buffalo sauce to add heat and flavor. The blue cheese dressing brings creaminess and cools the spice. Use fresh slider buns for a perfect base. - Sliced jalapeños - Olive oil - 1/4 cup diced celery - 1/2 cup shredded lettuce You can add sliced jalapeños for more heat. Brushing the buns with olive oil helps them grill nicely. Diced celery adds crunch, while shredded lettuce adds freshness. These optional ingredients enhance the taste and texture of your sliders. - 4 slices of cheddar cheese, cut in half - Blue cheese (for topping) Cheddar cheese melts well and adds a rich flavor. You can also top with blue cheese for a bold taste. Mix and match these cheeses based on your preference to make your sliders even more delicious. {{ingredient_image_1}} To start, mix the shredded chicken with buffalo sauce. This gives your sliders that classic spicy flavor. I suggest using 1/2 cup of buffalo sauce, but feel free to adjust it. If you like less heat, use less sauce. If more heat sounds good, add extra sauce or some sliced jalapeños. Next, preheat your grill or grill pan over medium heat. This step is key for getting those perfect buns. Lightly brush the cut sides of the slider buns with olive oil. This helps them grill up nice and crispy. Grill the buns for about 1-2 minutes until they are golden brown. Keep an eye on them to avoid burning. Now it’s time to assemble the sliders. Start by placing a big scoop of the buffalo chicken mixture on the bottom half of each slider bun. Then, add a half slice of cheddar cheese on top of the chicken. For a creamy touch, spoon some blue cheese dressing mixed with diced celery over the cheese. Finish with a handful of shredded lettuce for crunch. Top each slider with the other half of the bun. If you want, secure them with a toothpick. For an extra kick, add a slice of jalapeño on top. Serve immediately with extra blue cheese dressing on the side for dipping. Enjoy your flavorful party treat! To get the best bun texture, choose soft slider buns. Lightly grill them with olive oil for a crisp exterior. This step adds flavor and keeps your sliders from getting soggy. Balancing flavors is key. I like mixing blue cheese dressing with diced celery. It gives a nice crunch and creaminess. You can also add sliced jalapeños for extra heat. Adjust the buffalo sauce to match your taste. Buffalo chicken sliders pair well with a fresh salad or crispy fries. You can serve them with carrot and celery sticks for crunch. A cold drink like lemonade or iced tea complements the spicy flavor. For sides, think about coleslaw. It adds a cool contrast to the heat of the sliders. You could also serve potato chips for a fun crunch. If you have leftover sliders, store them in an airtight container. They will stay fresh for up to three days in the fridge. For reheating, use an oven or toaster oven. This keeps the buns crisp. Avoid the microwave, as it can make the buns chewy. Just warm them at 350°F for about 10 minutes. Pro Tips Adjust the Heat: Feel free to modify the amount of buffalo sauce based on your spice preference. Start with less and add more to taste. Perfectly Grilled Buns: Keep an eye on the slider buns while grilling to prevent them from burning. A minute or two is usually enough for a nice golden brown. Make Ahead: Prepare the buffalo chicken mixture in advance and store it in the fridge. This allows for quick assembly when you're ready to serve. Extra Flavor: Experiment with different cheeses like pepper jack for an added kick or mozzarella for a milder taste. {{image_2}} You can play with the flavor of your sliders. For a spicy kick, use a hot buffalo sauce. If you prefer mild, go for a milder sauce. This lets everyone enjoy the dish their way. For a vegetarian twist, replace chicken with shredded jackfruit or cauliflower. These options still soak up buffalo sauce well. They create a tasty and satisfying slider for non-meat eaters. Buffalo chicken sliders make great party appetizers. Their small size and big flavor please guests easily. You can serve them alongside extra blue cheese dressing for dipping. This adds another layer of flavor. You can also turn these sliders into a creamy dip. Mix the buffalo chicken with cream cheese and serve with chips or veggies. This fun twist makes it easy for guests to enjoy. If you love sliders, try other tasty variations. Think BBQ pulled pork sliders or classic cheeseburger sliders. Each offers a new flavor experience and is easy to make. You can also explore recipes for homemade sauces. A tangy ranch or zesty garlic sauce pairs well with many dishes. These sauces can elevate your party spread and keep guests coming back for more. Each Buffalo Chicken Slider has about 300 calories. This count includes different nutrients that make up the meal. Here's how it breaks down: - Carbohydrates: 28 grams - Protein: 18 grams - Fat: 15 grams These sliders pack a punch with flavor and nutrients. You can enjoy them without guilt, especially when serving at a party. Buffalo Chicken Sliders can fit into many diets. They are not gluten-free because of the slider buns. However, you can make them keto-friendly by skipping the buns or using lettuce wraps. Check the labels on your buffalo sauce and blue cheese dressing to ensure they fit your dietary needs. If you want to make your sliders lighter, consider these swaps: - Dressing Alternatives: Use Greek yogurt instead of blue cheese dressing for fewer calories. - Bun Choices: Try whole grain or low-carb buns for a healthier option. You can even use sweet potato slices as a base. These simple changes let you enjoy your sliders while keeping health in mind. Buffalo Chicken Sliders can last about 3 to 4 days in the fridge. For best results, store them in an airtight container. This keeps them fresh and tasty. If you notice any strange smell or mold, it's time to toss them out. Yes, using rotisserie chicken is a great idea! It saves time and adds flavor. The chicken is already cooked and juicy. Just shred it, mix it with buffalo sauce, and you’re ready to go. Here are some great sides to serve: - Celery sticks with ranch dressing - Sweet potato fries - A fresh garden salad - Chips and salsa - Cold drinks like soda or lemonade These dishes make a fun and tasty meal! To add heat without losing flavor, try these tips: - Increase the amount of buffalo sauce - Add sliced jalapeños on top - Mix in some crushed red pepper flakes - Use a hotter brand of buffalo sauce These options give you control over the spice level. Enjoy the heat! Buffalo Chicken Sliders are easy to make and full of flavor. We covered key ingredients, step-by-step instructions, and tips for perfect sliders. Remember to customize your meal with optional ingredients and variations. Balancing flavors is important for the best taste. With this guide, you're ready to impress guests or enjoy a tasty treat. Keep it simple, and have fun experimenting with your sliders. Enjoy your cooking and the delicious results!
    Buffalo Chicken Sliders Flavorful Party Treat
  • - 4 boneless, skinless chicken breasts - 1 cup cherry tomatoes, halved - 1 medium red onion, sliced - 2 cups zucchini, sliced into half-moons The chicken is the star of this dish. Use fresh, boneless chicken breasts for the best taste. Pair it with colorful veggies. Cherry tomatoes add sweetness. Red onions give a nice crunch. Zucchini adds a soft texture and absorbs flavors well. - 1/4 cup balsamic vinegar - 3 tablespoons olive oil - 2 tablespoons honey - 3 cloves garlic, minced The marinade makes the chicken juicy and full of flavor. Balsamic vinegar adds a tangy kick. Olive oil keeps the chicken moist. Honey brings out the sweetness. Minced garlic adds depth. Mix these well for the best taste. - 1 teaspoon dried oregano - Salt and pepper to taste - Fresh basil leaves for garnish Seasoning is key for flavor. Dried oregano adds an earthy note. Salt and pepper enhance all the tastes. Fresh basil leaves make a beautiful and tasty garnish. They add a fresh touch when serving. {{ingredient_image_1}} - Preheat your oven to 425°F (220°C). - Line a large sheet pan with parchment paper. This makes cleanup easy. - In a small bowl, whisk together balsamic vinegar, olive oil, honey, minced garlic, dried oregano, salt, and pepper. Mix until it combines well. - Place the chicken breasts in a large bowl. - Pour half of the balsamic mixture over the chicken. - Make sure each piece is well coated. - Let the chicken marinate for at least 15 minutes. This time boosts the flavor. - Take the marinated chicken and arrange it on one side of the sheet pan. - On the other side, spread the cherry tomatoes, red onion, and zucchini. - Toss the vegetables in the rest of the balsamic mixture to coat them evenly. - Place the sheet pan in the oven. - Bake for 25-30 minutes. - Check the chicken's internal temperature. It should reach 165°F (75°C). - The veggies should be tender when done. Marinating chicken is key to a great taste. It lets the flavors soak in. For this recipe, a marinating time of at least 15 minutes works well. You can even marinate it overnight for a deeper flavor. Try adding more spices, like paprika or thyme, to switch things up. A pinch of crushed red pepper can add a nice heat. Don't be afraid to experiment with herbs that you love. To keep chicken tender, avoid overcooking. Use a meat thermometer to check for an internal temperature of 165°F (75°C). That’s the sweet spot for juicy chicken. For the vegetables, cut them into even sizes. This helps them cook at the same rate. Toss them well in the marinade so they soak up all that balsamic goodness. Pair the chicken with sides like rice or a fresh salad. Roasted potatoes also work great. They complement the dish well. For a final touch, drizzle some of the pan juices over the chicken and veggies. This adds flavor and makes it look beautiful. Fresh basil leaves on top not only look nice, but they add a fresh taste as well. Pro Tips Marinate Longer for Flavor: For even more intense flavor, consider marinating the chicken for up to 2 hours in the refrigerator. Uniform Vegetable Size: Cut the zucchini and other vegetables into similar sizes to ensure they cook evenly and at the same rate. Use Fresh Herbs: Fresh basil or oregano can enhance the dish's flavor significantly compared to dried herbs; add them just before serving. Check Chicken Temperature: Always use a meat thermometer to check that the chicken reaches an internal temperature of 165°F (75°C) for safety. {{image_2}} You can change proteins if you want. Tofu works great for a plant-based meal. It absorbs flavors well and gives a nice texture. Pork is another option. Choose pork tenderloin for a juicy bite. For vegetables, you can switch things up too. Bell peppers add a sweet crunch. Broccoli or asparagus can bring a fresh taste. Use what you have on hand. The key is to keep it colorful. Want to try something new? Add unique ingredients to your dish. Fresh herbs like rosemary or thyme can boost flavor. Zest from a lemon or lime can add brightness. You can also play with marinades. Try a honey mustard mix for a sweet kick. A soy sauce base can give a different twist. Explore flavors that excite you. Each change can make this dish unique! To store leftover Sheet Pan Balsamic Chicken, first let it cool down. Then, place the chicken and vegetables in an airtight container. Make sure to separate the chicken from the veggies if you prefer. This helps keep them fresh. You can keep leftovers in the fridge for up to four days. If you want to keep them longer, freeze them. Frozen leftovers are good for up to three months. Just label your containers with the date. When you reheat the chicken, use the oven or microwave. The oven gives the best results. Preheat it to 350°F (175°C). Place the chicken and veggies on a baking sheet. Cover them with foil to keep moisture in. Heat for about 15-20 minutes, or until warmed through. If using a microwave, heat in short bursts. Check often to avoid drying out the chicken. Adding a splash of water can also help keep it juicy. Enjoy your meal again, just as good as the first time! You can serve this dish with many sides. Here are some great options: - Rice: Both white and brown rice pair well. - Quinoa: A protein-rich grain that adds texture. - Pasta: A simple pasta dressed in olive oil works nicely. - Salad: A fresh green salad adds crunch. - Bread: Crusty bread can help soak up the juices. Yes, you can make the marinade ahead of time. Here are some tips: - Mix the marinade and store it in the fridge. - Keep it in an airtight container for up to 3 days. - When ready, marinate the chicken for at least 15 minutes. - For deeper flavor, marinate for a few hours or overnight. Absolutely, this recipe is great for meal prep. Here are some tips: - Cook a double batch and store leftovers in containers. - Keep the chicken and veggies separate for best flavor. - Store in the fridge for 3 to 4 days. - Reheat in the oven or microwave when ready to eat. This article covered a simple, tasty recipe for Sheet Pan Balsamic Chicken. You learned about the key ingredients, like fresh chicken and veggies, and how to create a flavorful marinade. I shared tips on marinating, cooking, and serving. Remember, making this dish is easy! You can also try different proteins and veggies for variety. Storing leftovers properly ensures you enjoy them later too. Enjoy cooking and make this meal your own!
    Sheet Pan Balsamic Chicken Flavorful and Easy Meal
  • To make these tasty rolls, you need a few key items. Here is the list: - 6 slices of thick bread (like brioche or challah) - 1/2 cup cream cheese, softened - 1/4 cup brown sugar - 1 tablespoon ground cinnamon - 3 large eggs - 1/2 cup milk - 1 teaspoon vanilla extract - 1/4 cup maple syrup - 2 tablespoons butter (for frying) - Powdered sugar (for dusting) These ingredients blend well to create soft and sweet rolls. The cream cheese adds a rich taste. The cinnamon gives it a warm and cozy flavor. You can add some fun touches to your rolls! Consider these options: - Fresh berries (like strawberries or blueberries) for a bright look - Whipped cream for extra sweetness - Chocolate chips for a richer taste - Nuts for a crunchy texture These add-ins can make your rolls even more special. They add color and flavor too. Choosing the right bread is key to great rolls. Here are some top picks: - Brioche: This bread is soft and buttery. It makes rolls light and airy. - Challah: This bread has a rich flavor and holds up well when rolled. - Texas toast: This thicker bread gives more bite and holds the filling nicely. Using these types of bread will help your rolls turn out soft and delicious. {{ingredient_image_1}} First, grab a mixing bowl. Add 1/2 cup of softened cream cheese. Then, mix in 1/4 cup of brown sugar. Next, add 1 tablespoon of ground cinnamon. Stir until the mixture is smooth and creamy. This filling is rich and sweet. It adds a great flavor to the rolls. Now, take your slices of thick bread. I suggest using brioche or challah for the best taste. Use a rolling pin to flatten each slice gently. Spread a generous amount of the cream cheese filling on each slice. Roll each slice tightly from one end to the other. Make sure to pin it gently to keep it closed. Heat a non-stick skillet over medium heat. Add 2 tablespoons of butter and let it melt. In another bowl, whisk together 3 large eggs, 1/2 cup of milk, 1 teaspoon of vanilla extract, and 1/4 cup of maple syrup. Dip each roll in this egg mixture. Coat it well. Once the skillet is hot, place the dipped rolls seam-side down. Cook them for about 3-4 minutes on each side. Look for a golden brown color. This means they are done. Keep an eye on the heat so they don’t burn. When finished, remove them from the skillet. Dust with powdered sugar. Enjoy with extra maple syrup or fresh berries if you like! To ensure even cooking, keep the heat steady. Use medium heat on your skillet. It helps cook the rolls through without burning. When you place the rolls in the skillet, give them space. This way, heat can move around each roll. Turn them gently to check if they are golden brown. If they cook too fast, lower the heat. Cooking slowly makes them soft and tasty. Soggy rolls can ruin your treat. To avoid this, make sure to dip the rolls quickly in the egg mixture. Too long in the egg will make them soggy. Also, use thick bread like brioche or challah. Thicker bread holds up better during cooking. Ensure your skillet is hot enough before adding the rolls. This helps seal the outside and keeps the inside fluffy. Serve your cinnamon roll French toast rolls warm. Dust them with powdered sugar for a sweet touch. You can also drizzle extra maple syrup on top. For a fresh twist, add some berries on the side. Strawberries or blueberries work great. They add color and a burst of flavor. If you want something extra, serve them with whipped cream. This makes your breakfast feel special! Pro Tips Choose the Right Bread: For the best texture and flavor, use thick slices of brioche or challah. They hold up well when rolled and provide a rich taste. Flatten Evenly: When rolling the bread, ensure it's flattened evenly to prevent tearing and allow for an even spread of the cream cheese mixture. Monitor Heat: Keep the skillet at medium heat. Too high, and the outside will burn before the inside cooks through; too low, and it won't get that nice golden crust. Garnish Creatively: Add fresh berries or a dollop of whipped cream on top before serving for an extra touch of color and flavor. {{image_2}} You can switch up the filling in many fun ways. Try adding chocolate chips for a sweet twist. You could also mix in some chopped nuts for crunch. If you love fruit, spread some strawberry or raspberry jam instead of cream cheese. For a spicy kick, add a bit of pumpkin spice to your cinnamon mixture. The options are endless! You can make this dish a bit healthier if you want. Use whole wheat bread instead of white bread. It adds fiber and flavor. Replace the cream cheese with Greek yogurt for a lighter version. If you want less sugar, swap brown sugar with honey or maple syrup. You can also use almond milk instead of regular milk. These swaps keep the taste while cutting back on calories. Serve these rolls in fun ways to impress your family or friends. Stack them high on a platter and dust with powdered sugar. Drizzle some warm maple syrup over the top for a sweet touch. Add fresh berries on the side for a pop of color and flavor. You could also serve them with whipped cream for extra indulgence. Place a scoop of ice cream on top for a special treat! To store leftover cinnamon roll French toast rolls, let them cool completely. Place them in an airtight container. You can also wrap them tightly in plastic wrap. Keep them in the fridge for up to three days. This helps maintain their soft texture. To reheat the rolls, preheat your oven to 350°F (175°C). Place the rolls on a baking sheet. Cover them with foil to keep them from drying out. Heat for about 10-15 minutes. You can also microwave them for 30-60 seconds if you're in a hurry. For freezing, wrap each roll in plastic wrap and then in aluminum foil. This keeps them fresh for up to three months. When you want to enjoy them, let the rolls thaw in the fridge overnight. Then, reheat as directed above. This way, you can enjoy these tasty treats anytime! Yes, you can use different types of bread. Thick bread like brioche or challah works best. You can also try sourdough or whole wheat bread. Just remember to flatten the slices well. This helps in rolling them tightly. Using different bread can change the taste and texture. So, feel free to experiment! You can make this recipe ahead of time. First, prepare the rolls but do not cook them. After rolling, store them in the fridge for up to 24 hours. When ready, dip them in the egg mixture and fry. This saves time in the morning. You can enjoy fresh rolls without the hassle! If you need a substitute for cream cheese, use mascarpone cheese. It has a similar texture and taste. You can also use ricotta cheese for a lighter option. If you're lactose intolerant, try a dairy-free cream cheese. Just ensure it's spreadable for the best results. Enjoy the same creamy goodness with these swaps! In this blog post, we explored how to make cinnamon roll French toast rolls. We covered key ingredients, simple steps, and useful tips for perfecting your dish. Options for filling and garnishes make these rolls fun and tasty. Remember to store any leftovers properly to keep them fresh. Enjoy them warm or transform them into a healthier treat by swapping ingredients. Try these rolls for a delightful breakfast or snack. You can create amazing variations to suit your taste! Happy cooking!
    Cinnamon Roll French Toast Rolls Soft and Tasty Treat
  • - 4 large bell peppers - 1 pound ground turkey or chicken - 1 cup cauliflower rice - 1 cup shredded cheese (cheddar or mozzarella) - 1 small onion, diced - 2 cloves garlic, minced - 1 teaspoon taco seasoning - 1 tablespoon olive oil - Salt and pepper to taste - Fresh cilantro for garnish When making Keto Stuffed Bell Peppers, focus on fresh, quality ingredients. The bell peppers serve as a great base. Choose vibrant colors for a tasty look. Ground turkey or chicken keeps your dish lean while adding protein. Cauliflower rice is a smart twist. It lowers carbs and adds volume. Use shredded cheese for creaminess. Cheddar or mozzarella works best. The diced onion and minced garlic boost flavor. Taco seasoning brings warmth and spice. Olive oil adds richness. Salt and pepper enhance all the flavors. Fresh cilantro adds a nice touch. Each serving has about: - Calories: 350 - Fat: 18g - Protein: 30g - Carbohydrates: 10g This recipe packs a flavorful punch while fitting into your keto goals. You can enjoy a filling meal without the carbs. The balance of protein and healthy fats keeps you satisfied. {{ingredient_image_1}} To prep your bell peppers, first, wash them well. Next, cut the tops off each pepper. Use a knife to gently slice around the stem. Remove the seeds and membranes inside. This step keeps the peppers sweet and tender. Brush the outer sides with olive oil. This helps them cook evenly. Place them upright in a baking dish. You want them to stand straight to hold the filling. In a skillet, heat one tablespoon of olive oil over medium heat. Add the diced onion and cook until it turns clear, about 3-4 minutes. This step adds a nice flavor. Next, add two cloves of minced garlic. Stir it for a minute to release the aroma. Now, add one pound of ground turkey or chicken. Cook the meat until it's brown and no longer pink, which takes about 7-10 minutes. After that, stir in one cup of cauliflower rice. It gives the filling a great texture. Add one teaspoon of taco seasoning, salt, and pepper to taste. Mix everything well and cook for another 2-3 minutes. Finally, remove the skillet from heat and mix in half of the cup of shredded cheese. This makes the filling creamy and delicious. Now, it’s time to stuff the peppers. Take the turkey mixture and fill each pepper generously. Press down gently to pack it well. After that, sprinkle the remaining cheese on top of each stuffed pepper. Preheat your oven to 375°F (190°C). Cover the baking dish with aluminum foil and bake for 25 minutes. After 25 minutes, remove the foil and bake for an additional 10-15 minutes. This step helps the cheese melt and get golden. Once done, take them out of the oven and let them cool slightly. Garnish with fresh cilantro before serving for a pop of color and flavor. Enjoy your tasty, keto-friendly meal! When picking bell peppers, I suggest using large ones. They hold more filling. Try red, yellow, or green peppers. Each color has its own taste. Red peppers are sweet, while green ones have a stronger flavor. Make sure the peppers are firm and shiny. This means they are fresh and will hold up well when baked. To make the filling tasty, I add spices and moisture. Use ground turkey or chicken for lean protein. Cauliflower rice adds a great texture. You can also add diced tomatoes or chopped spinach for more flavor. Use taco seasoning to give a nice kick. Don’t forget to mix in some cheese. This keeps the filling moist and creamy. A great cheese topping makes a big difference. I like to use cheddar or mozzarella. For a crispy top, sprinkle cheese evenly over the filling. Cover the dish with foil at first, then uncover it. This helps the cheese melt and bubble. Bake until the cheese is golden and bubbly. That’s when the stuffed peppers are at their best! Pro Tips Choose Colorful Peppers: Using a mix of colored bell peppers not only enhances the presentation but also adds different flavors and nutrients to your dish. Pre-Cook the Cauliflower Rice: Lightly sauté the cauliflower rice before adding it to the filling. This will enhance its flavor and ensure it cooks evenly inside the peppers. Experiment with Seasoning: Feel free to customize the seasoning blend based on your taste preferences. Adding smoked paprika or cumin can elevate the flavor profile. Let them Rest: Allow the stuffed peppers to rest for a few minutes after baking. This helps the flavors meld and makes them easier to serve. {{image_2}} You can switch the ground turkey or chicken for other meats. Ground beef works well. It adds a rich taste. You can also try sausage for a spicy kick. If you prefer a vegetarian option, use lentils or black beans. Both add protein and fiber. Want to spice things up? Add extra flavors! Consider cumin or paprika for warmth. A splash of lime juice brightens the dish. You can also mix in chopped tomatoes or jalapeños for a fresh twist. Try adding herbs like parsley or oregano for depth. The options are endless! These stuffed peppers shine on their own. However, they pair well with a side salad. A green salad adds freshness and crunch. You can also serve them with avocado or guacamole for creaminess. If you crave something warm, try a side of cauliflower mash. It complements the peppers nicely! To keep your stuffed peppers fresh, let them cool first. Place cooked stuffed peppers in an airtight container. They stay good in the fridge for about 3-4 days. For uncooked peppers, store them in the fridge as well. These can last up to 2 days before cooking. Reheating is simple. You can use the oven or microwave. For the oven, preheat to 350°F (175°C). Place peppers in a dish with a splash of water. Cover with foil and heat for 15-20 minutes. If using a microwave, heat on medium for about 3-4 minutes. Check that they are hot all the way through. Freezing is a great meal prep option. Cooked stuffed peppers freeze well. Wrap each pepper in plastic wrap, then place in a freezer bag. They can last up to 3 months. For best results, thaw them in the fridge overnight before reheating. If you want to freeze uncooked peppers, stuff them and follow the same wrapping method. They can also last about 3 months in the freezer. Yes, stuffed bell peppers are keto-friendly. This recipe uses low-carb ingredients. Bell peppers are low in carbs and high in fiber. Ground turkey or chicken offers lean protein. Cauliflower rice is a great low-carb substitute for traditional rice. The cheese adds healthy fats, making this dish perfect for keto. Yes, you can make these stuffed peppers ahead of time. Prepare the filling and stuff the peppers. Cover them and store in the fridge for up to 24 hours. You can also freeze the stuffed peppers. Just bake them later when you’re ready to eat. This makes meal prep easy and quick. If you don’t have cauliflower rice, try these substitutes: - Finely chopped broccoli - Riced zucchini - Shredded cabbage These options keep the dish low in carbs. They also add different textures and flavors to your stuffed peppers. This article walked you through making delicious stuffed bell peppers. We covered the ingredients, simple steps for prep, and tips for perfecting your dish. I shared ways to adapt the recipe and store leftovers too. Stuffed peppers are a fun and healthy meal option. With some creativity, you can make them just right for your taste. So grab your ingredients, and try making your own! Enjoy your tasty creation!
    Keto Stuffed Bell Peppers Tasty and Simple Recipe
  • - 1 lb ground beef - 1 cup orzo pasta - 1 can (14 oz) crushed tomatoes - 1 cup heavy cream - 1 small onion, finely chopped - 3 cloves garlic, minced - 2 tablespoons olive oil - 1 teaspoon Italian seasoning - Salt and pepper, to taste - Fresh basil leaves, for garnish - Grated Parmesan cheese, for serving To make beef orzo in tomato cream sauce, gather these ingredients. Ground beef gives the dish its heartiness. Orzo pasta adds a fun texture that pairs well with the sauce. Crushed tomatoes create a rich base with a deep flavor. Heavy cream turns the sauce creamy and smooth. Onion and garlic are key for flavor. Olive oil helps to cook them and adds richness. Italian seasoning brings warmth and depth. Salt and pepper enhance all the flavors. Finally, fresh basil and Parmesan cheese are perfect for finishing touches. When you have all these ingredients ready, you can start cooking. Each item plays an important role in creating this delicious meal. {{ingredient_image_1}} - Sauté onion and garlic: Heat olive oil in a large skillet over medium heat. Add the finely chopped onion. Cook for about 3-4 minutes until it is soft and clear. Next, add the minced garlic and cook for 1 more minute. The kitchen will smell great! - Brown the ground beef: Add the ground beef to the skillet. Break it apart with a spatula. Cook it for 5-7 minutes. It should be brown and no longer pink. This step adds rich flavor to your dish. - Incorporating crushed tomatoes and seasoning: Stir in the can of crushed tomatoes and the Italian seasoning. Season with salt and pepper to taste. Let the sauce simmer for about 5 minutes. This helps the flavors mix well. - Cooking orzo and mixing with sauce: In a separate pot, cook the orzo according to the package instructions. Once cooked, drain it and set it aside. Reduce the heat on the beef mixture. Add the cooked orzo to the beef and sauce, stirring gently. Cook for another 2 minutes to make sure everything is warm. - Adding cream and combining ingredients: Pour in the heavy cream and stir until it is all mixed in. Let it simmer gently for 3-4 minutes. This will thicken the sauce and make it creamy. - Serving suggestions: Serve the beef orzo in shallow bowls. Top each bowl with fresh basil leaves and a sprinkle of grated Parmesan cheese. For a nice touch, add a side of crusty bread for dipping. Enjoy! To make this dish shine, sauté your onion and garlic well. This step builds a strong base of flavor. Cook them until the onion is soft and clear. This usually takes about 3-4 minutes. Then, add the garlic and cook for one more minute. Watch it closely so it doesn't burn. After that, brown the ground beef. This adds depth and richness to your sauce. Don’t rush the simmering time. Let the sauce simmer for about 5 minutes. This helps all the flavors mix together nicely. To keep your orzo from sticking, stir it well while cooking. Use plenty of water and salt, just like pasta. This helps it stay separate and fluffy. If you find your dish too thick, add a splash of water or broth. This will make the sauce creamy and smooth. Adjust the consistency to your taste. Garnish your dish with fresh basil and grated Parmesan cheese. This adds a pop of color and flavor. Serve the orzo in shallow bowls for a nice look. You can also add extra basil leaves on top. For a great meal, serve it with crusty bread. This bread is perfect for dipping into the creamy sauce. Pro Tips Use Fresh Herbs: Fresh basil adds a vibrant flavor that dried herbs can't replicate. Add it just before serving for the best aroma. Brown the Beef Well: Make sure to brown the ground beef thoroughly to develop a deeper flavor in the sauce. Adjust Creaminess: If you prefer a lighter dish, you can reduce the amount of heavy cream or substitute it with half-and-half. Perfectly Cooked Orzo: Stir the orzo occasionally while cooking to prevent it from sticking together, ensuring a fluffy texture. {{image_2}} You can switch out ground beef for turkey or ground chicken. This change makes the dish leaner. Turkey and chicken still taste great with the tomato cream sauce. You can enjoy a lighter meal without losing flavor. If you want a dairy-free option, try using coconut cream or almond milk. Both can replace heavy cream in the recipe. They add creaminess without the dairy. Just remember to adjust the seasoning as needed for the best taste. Adding different herbs can change the flavor. Consider using fresh thyme or oregano for a new twist. These herbs bring a fresh taste and can brighten the dish. You can also try spices like paprika or red pepper flakes for a little heat. Adding vegetables is another great way to boost nutrition. You can mix in spinach, bell peppers, or zucchini. Chopping them small helps them blend well in the sauce. This adds color and vitamins to your meal. You can make this dish into a baked meal. After mixing the orzo and sauce, transfer it to a baking dish. Top it with cheese and bake until golden. This gives a crunchy top layer that many people love. Another fun idea is to turn it into a casserole. Layer the beef orzo in a casserole dish, and add extra cheese on top. Bake until bubbly and serve hot. This option is perfect for gatherings or meal prep. To store leftovers, let the dish cool down first. Then, place it in an airtight container. This helps keep it fresh. You can store it in the fridge for up to three days. After that, the taste may change. For reheating, the best method is using the stove. Place the Beef Orzo in a pot over low heat. Stir it often to warm it evenly. You can add a splash of water or cream to keep the sauce smooth. Avoid reheating in the microwave, as it can make the orzo mushy. Yes, you can freeze this dish! Allow it to cool completely before packing it in a freezer-safe container. It can last up to three months in the freezer. When you're ready to eat, thaw it in the fridge overnight. Reheat it on the stove as described above for the best texture. - How long does it take to cook orzo? Cooking orzo usually takes about 8-10 minutes. Follow the package directions for the best results. Remember to check for doneness, as it should be tender but not mushy. - Can I make this dish ahead of time? Yes, you can make this dish ahead. Prepare it fully, then store in the fridge for up to three days. Reheat on the stove over low heat, adding a splash of cream if needed. - Is it gluten-free? No, traditional orzo is made from wheat. To make this dish gluten-free, use gluten-free orzo made from rice or corn. - How to make it low-carb? For a low-carb version, replace the orzo with zucchini noodles or cauliflower rice. This keeps the dish light and healthy while still being delicious. - What to serve with Beef Orzo in Tomato Cream Sauce? This dish pairs well with a fresh salad or crusty bread. You can also serve it with roasted vegetables for added nutrition. - Can you serve it cold? While Beef Orzo is best hot, you can serve it cold as a pasta salad. Just let it cool and add a drizzle of olive oil and some fresh herbs. This dish combines ground beef, orzo, and a creamy sauce for a comforting meal. You sauté the vegetables and brown the meat before mixing it all together. Don’t forget to add your favorite herbs or vegetables for extra flavor. Storing and reheating leftovers is easy, and there are many ways to change the recipe. You can even enjoy it as a baked dish. I hope you'll try this recipe and make it your own!
    Hearty Beef Orzo in Tomato Cream Sauce Recipe
  • To make Mediterranean quesadillas, gather these ingredients: - 4 large flour tortillas - 1 cup shredded mozzarella cheese - 1 cup crumbled feta cheese - 1 cup cooked spinach, drained and chopped - 1/2 cup sun-dried tomatoes, chopped - 1/2 cup black olives, sliced - 1/2 red onion, thinly sliced - 1 teaspoon dried oregano - 1 teaspoon garlic powder - 2 tablespoons olive oil - Salt and pepper to taste These ingredients blend well to create a tasty dish. The combination of cheese, vegetables, and spices adds depth. Adding fresh herbs can brighten your quesadilla. I suggest using: - Fresh parsley - Fresh basil - Fresh dill These herbs enhance flavor and bring freshness. Just chop them finely and mix them into your filling. While mozzarella and feta are great, you can try other cheeses too. Consider: - Goat cheese for a tangy flavor - Provolone for a smooth melt - Parmesan for a rich taste Experimenting with cheese can change the whole vibe. Choose what you love to make your quesadillas unique! {{ingredient_image_1}} To start, gather all your ingredients. You need cooked spinach, sun-dried tomatoes, black olives, and red onion. In a bowl, mix these with mozzarella cheese, feta cheese, dried oregano, and garlic powder. Add salt and pepper to taste. Stir until everything blends well. This filling is the heart of your Mediterranean quesadillas. Now, heat a large skillet on medium heat. Add one tablespoon of olive oil. Take one tortilla and spread half of the filling on one side. Fold the tortilla in half, making a half-moon shape. Place it in the skillet. Cook for about 3-4 minutes until it’s golden and the cheese melts. Flip it over and cook the other side. Repeat this with the remaining tortillas and filling. Once cooked, remove the quesadilla from the skillet. Let it cool for a moment, then cut it into wedges. For a great look, arrange the wedges in a fan shape on a plate. You can add fresh parsley or extra feta on top. Serve it with tzatziki or hummus for dipping. This adds a tasty touch and makes the meal even better. Enjoy your tasty creation! To make great quesadillas, heat your skillet well. A hot skillet helps create a crispy crust. Use just enough oil to coat the pan. This prevents sticking and adds flavor. When filling the tortilla, don’t overstuff it. Too much filling can spill out when you flip it. Fold the tortilla carefully. This keeps everything inside. You can swap cheeses for a different taste. Try goat cheese or mozzarella. If you want a spicy kick, add jalapeños. Fresh herbs like basil or parsley work well, too. For a crunch, use bell peppers or zucchini. If you don't have sun-dried tomatoes, use fresh tomatoes instead. Just remember to drain excess liquid. One common mistake is not draining the spinach. Wet spinach makes the quesadilla soggy. Also, don’t skip the seasoning. A pinch of salt and pepper makes a big difference. Remember to check the heat. Too high can burn the quesadilla outside while leaving it cold inside. Lastly, don’t forget to let them cool slightly before cutting. This helps keep the cheese from oozing out. Pro Tips Use Fresh Spinach: For a vibrant flavor and better texture, use fresh spinach instead of frozen. Just sauté it briefly to wilt before mixing with other ingredients. Experiment with Cheese: Feel free to mix different types of cheese like goat cheese or provolone for a unique twist on flavor. Don't Overfill: Avoid overfilling the quesadillas to prevent them from bursting while cooking. A generous but moderate amount will ensure they cook evenly. Serve with Dips: Enhance the Mediterranean experience by serving these quesadillas with tzatziki or hummus for dipping; it adds a creamy contrast to the crispy quesadilla. {{image_2}} You can make Mediterranean quesadillas vegetarian by using fresh veggies. Add bell peppers, zucchini, or artichokes for extra flavor. You can also use more spinach or swap in kale. These options keep the dish fresh and tasty. You still get that creamy cheese and savory taste. This way, everyone can enjoy a delicious meal. If you want to add protein, chicken or shrimp works well. Cook the chicken or shrimp first, then add to the filling mix. Chicken adds a nice chewiness, while shrimp gives a sweet taste. Both pair well with the cheese and veggies. Just make sure to season the protein with salt and pepper. This gives your quesadilla a hearty bite. For gluten-free quesadillas, switch to corn tortillas. These are easy to find in stores. They have a great taste and work well with the filling. You can also use lettuce wraps for a lighter option. This keeps the flavors intact while being gluten-free. Just be careful when cooking them, as they can tear more easily. To store leftover quesadillas, let them cool to room temperature. Place them in an airtight container. You can stack them with parchment paper between layers. This keeps them fresh. You can keep them in the fridge for up to three days. If you want to enjoy them later, freezing is a great option. To reheat quesadillas, use a skillet for the best results. Heat a non-stick skillet over medium heat. Place the quesadilla in the skillet for about 3-4 minutes. Flip it halfway through to heat evenly. You can also use a microwave if you’re short on time. Just heat it for about 30-60 seconds. However, this may make the quesadilla a bit soft. If you want to freeze your quesadillas, wrap each one in plastic wrap. Then, place them in a freezer bag. They can last for up to three months in the freezer. When you’re ready to eat, thaw them in the fridge overnight. Reheat them in a skillet or the oven for the best taste. Enjoy your tasty Mediterranean quesadillas anytime! A Mediterranean quesadilla is a tasty twist on the classic dish. It uses fresh, bold flavors from the Mediterranean region. You fill it with ingredients like spinach, feta, and sun-dried tomatoes. This quesadilla is cheesy and packed with flavor. It’s perfect for a quick meal or snack. Yes, you can make these quesadillas ahead of time. Prepare the filling and assemble the quesadillas. Store them in the fridge for up to two days. When you’re ready to eat, just cook them in a skillet. This saves time and gives you a quick meal. I recommend using large flour tortillas. They are soft and pliable, making them easy to fold. You can also use whole wheat tortillas for a healthier option. Corn tortillas work too, but they may crack when folded. Choose what you like best for your quesadilla. In this post, I covered how to make tasty Mediterranean quesadillas. We talked about the needed ingredients, tasty fillings, and how to cook them step by step. I shared tips to avoid mistakes and showed swaps for different diets. Remember, these quesadillas can be stored or frozen for later meals. Keep experimenting with flavors and ingredients to make your own unique dish. With these easy steps, you can enjoy a fun meal anytime.
    Mediterranean Quesadillas Flavorful and Easy Recipe
  • To make this beef barley stew, gather these ingredients: - 1 lb (450g) beef stew meat, cut into 1-inch cubes - 1 cup pearl barley, rinsed - 1 large onion, diced - 3 cloves garlic, minced - 3 medium carrots, sliced - 2 stalks celery, diced - 6 cups beef broth (or vegetable broth for a lighter version) - 1 teaspoon dried thyme - 1 teaspoon dried oregano - 2 bay leaves - 2 tablespoons olive oil - Salt and pepper to taste - Fresh parsley, chopped (for garnish) You can make this recipe your own by swapping ingredients. Here are some ideas: - Beef: Use lamb or chicken for different flavors. - Barley: Quinoa or brown rice works if you want a gluten-free option. - Broth: Homemade broth gives a rich taste, but store-bought is fine too. - Veggies: Add potatoes or peas for extra texture and taste. The quality of your ingredients makes a big difference. Here are some tips: - Beef: Choose meat with good marbling. This gives flavor and tenderness. - Barley: Use pearl barley for a quicker cook time. Avoid hull-less barley, as it takes longer. - Fresh Herbs: Always opt for fresh parsley over dried. It adds brightness to the dish. - Broth: Look for low-sodium broth. You can control the salt better this way. Using fresh, high-quality ingredients will elevate your dish. Enjoy cooking! {{ingredient_image_1}} Start by heating 2 tablespoons of olive oil in a large pot. Use medium-high heat for best results. Season 1 pound of beef stew meat with salt and pepper. Once the oil is hot, add the beef in batches. Sear the meat until it turns brown on all sides. This step adds great flavor. Once browned, remove the beef and set it aside. In the same pot, lower the heat to medium. Add 1 large diced onion and cook it until it softens, about 3 to 4 minutes. Next, add 3 cloves of minced garlic, 3 sliced carrots, and 2 diced celery stalks. Stir well and let them cook for another 4 to 5 minutes. The vegetables should start to soften and release their scents. Now it’s time to bring everything together. Return the browned beef to the pot. Add 1 cup of rinsed pearl barley and pour in 6 cups of beef broth. Sprinkle in 1 teaspoon of dried thyme, 1 teaspoon of dried oregano, and add 2 bay leaves. Stir everything and bring it to a gentle boil. Once boiling, reduce the heat to low and cover the pot. Let it simmer for about 1 hour. Stir occasionally and check if the beef is tender and the barley is cooked. If it needs more time, continue cooking for an extra 15 to 20 minutes. When done, take out the bay leaves and season the stew with more salt and pepper if needed. Serve hot and enjoy! To get tender beef, use good quality stew meat. Cut it into one-inch cubes for even cooking. Sear the meat in batches. Don't crowd the pot. This helps it brown well. Browning adds flavor. After searing, simmer the beef slowly in broth for about one hour. Then check if it’s tender. If not, let it cook a bit longer. Flavor is key in this dish. Start with fresh ingredients, especially the garlic and onions. They create a strong base. Add herbs like thyme and oregano for depth. You can also toss in a splash of red wine for richness. If you want some heat, add a pinch of red pepper flakes. Taste as you go to get it just right. Rinse the pearl barley before cooking. This removes any dust and helps it cook evenly. Add it to the pot with the broth and meat. Barley needs time to soften, so let it simmer at a low heat. Stir occasionally to keep it from sticking. Barley is done when it’s chewy but not mushy. If it absorbs too much liquid, just add more broth. Pro Tips Choose the Right Cut: Using chuck roast or brisket will yield tender and flavorful results, as these cuts break down beautifully during the slow cooking process. Perfect Barley Cooking: Rinse the pearl barley thoroughly before adding it to the pot; this helps remove excess starch and prevents it from becoming gummy. Add Depth of Flavor: For an extra layer of flavor, consider adding a splash of red wine to the pot after sautéing the vegetables, allowing it to reduce before adding the broth. Adjusting Thickness: If you prefer a thicker stew, simply remove the lid during the last 15 minutes of cooking to allow some of the liquid to evaporate. {{image_2}} You can make a lighter version by using vegetable broth. This swap cuts some fat. It also adds a fresh taste. The base flavor still shines through. Just follow the same steps in the recipe. The cooking time stays the same. This version is great for those avoiding red meat. It’s still hearty and filling. Feel free to add more veggies to your stew. This boosts nutrition and flavor. Consider using: - Potatoes, diced - Peas, fresh or frozen - Green beans, chopped - Mushrooms, sliced Just toss them in when you add the carrots and celery. They will cook down nicely. You can adjust the cooking time if you add heartier veggies like potatoes. This makes the stew colorful and fun. You can change the seasonings for new flavors. Try these options: - Cumin for a warm, earthy taste - Paprika for a smoky kick - Bay leaves can be replaced with rosemary Experimenting with spices can change the whole dish. Adjust to your taste and enjoy a new twist on this classic. Remember, small changes can lead to big flavors. After enjoying your beef barley stew, let it cool to room temperature. Transfer the stew into an airtight container. Store it in the fridge for up to three days. Make sure to label the container with the date. This way, you won’t forget when you made it. If you want to enjoy it later, freezing is a great option. To freeze your beef barley stew, first cool it completely. Then, use freezer-safe bags or containers. Leave some space at the top of the container because the stew will expand as it freezes. The stew can stay good for up to three months in the freezer. When you’re ready to eat, thaw it in the fridge overnight. To reheat, you can use the stove or microwave. If using the stove, pour the stew in a pot. Heat it on low, stirring until hot. This helps keep the flavors intact. If you prefer the microwave, place the stew in a microwave-safe bowl. Heat in short bursts, stirring in between. This way, it heats evenly. Always check the temperature before serving. Enjoy your savory delight again! Yes, you can use a slow cooker. First, brown the beef in a pan. Then, add all the ingredients to the slow cooker. Cook on low for 6 to 8 hours or on high for 3 to 4 hours. This method makes the beef super tender and lets the flavors mix well. Check the beef after one hour of cooking. It should break apart easily with a fork. If it is still tough, keep cooking. You may need an extra 15 to 20 minutes. The barley should also be soft and chewy. Beef barley stew pairs well with crusty bread. A simple green salad also works nicely. You can even serve it with mashed potatoes for a hearty meal. Don’t forget to sprinkle some fresh parsley on top for a pop of color and flavor! This article covered everything you need for a delicious Beef Barley Stew. We explored the key ingredients, smart substitutions, and tips for quality. You learned how to prepare and cook each component effectively. Plus, I shared methods for perfect tenderness and flavorful twists. We also discussed storage tips to keep your stew fresh. Remember, you can easily adapt the recipe to fit your taste. Dive in, enjoy cooking, and share this hearty dish with others!
    Pioneer Woman Beef Barley Copycat Savory Delight
  • Chicken and Dairy Ingredients - 2 boneless, skinless chicken breasts - 1 cup cream cheese, softened - 1 cup shredded mozzarella cheese - 1/2 cup grated Parmesan cheese Vegetables and Seasoning - 2 cups fresh spinach, roughly chopped - 1 cup mushrooms, sliced - 2 cloves garlic, minced - 1 teaspoon dried oregano - Salt and pepper to taste Additional Flavor Enhancements - 1 tablespoon olive oil - 1/4 cup chicken broth Gather these ingredients to create a dish that is both creamy and flavorful. The chicken offers a hearty base, while the spinach and mushrooms add nutrition and taste. The blend of cheeses provides richness, making every bite satisfying. The garlic and oregano bring depth to the dish, ensuring it bursts with flavor. Using fresh ingredients helps elevate the taste, making this meal feel special. Keep your pantry stocked with these staples for easy access when you crave this comfort food. {{ingredient_image_1}} 1. Preheating the Oven Start by heating your oven to 375°F (190°C). This step is vital for even cooking. 2. Cooking the Vegetables In a skillet, warm the olive oil over medium heat. Add the sliced mushrooms and minced garlic. Cook them for about 5 minutes until the mushrooms turn brown. This adds deep flavor. Then, mix in the chopped spinach. Cook it for another 2-3 minutes until it wilts. Season with salt, pepper, and oregano. Remove the skillet from the heat and set it aside. 3. Mixing the Cheese Filling In a large mixing bowl, combine the softened cream cheese, half of the mozzarella cheese, and half of the Parmesan cheese. Stir until the mixture is smooth. Then, add the cooked spinach and mushroom blend to the bowl. Mix them together until well combined. 1. Preparing the Baking Dish Grease a baking dish and lay the chicken breasts flat inside. Season each breast with salt and pepper. 2. Covering with Cheese Spread the spinach and mushroom cheese mixture evenly over the chicken. This layer adds moisture and flavor. Pour the chicken broth into the bottom of the dish. This keeps the chicken juicy while baking. 3. Baking Instructions Top the chicken with the remaining mozzarella and Parmesan cheeses. Cover the dish with aluminum foil. Bake it in the preheated oven for 25 minutes. After that, remove the foil and bake for an additional 10-15 minutes. The chicken is done when it is cooked through, and the cheese is bubbly and golden. Let the bake rest for a few minutes before serving. Ensuring Moist Chicken To keep your chicken moist, use chicken broth. Pour it into the dish before baking. This helps the chicken stay juicy as it cooks. Cover the dish with foil for the first part of baking. This traps steam and keeps the chicken tender. Achieving Perfect Cheese Melt For a perfect cheese melt, use a mix of cheeses. I love combining mozzarella with Parmesan. This mix gives a rich flavor and a nice texture. Add the cheese later in the baking process. This way, it gets bubbly and golden without burning. Spice and Herb Suggestions To boost flavor, try adding spices. A pinch of red pepper flakes can add heat. Fresh herbs like basil or thyme can brighten the dish. You can also swap oregano for Italian seasoning. These changes can make the dish more exciting. Fresh Ingredient Options Using fresh ingredients makes a big difference. Fresh spinach tastes better than frozen. If you have access to fresh mushrooms, use those instead of canned. They add a nice texture and flavor. You can even add sun-dried tomatoes for a twist. Pro Tips Use Fresh Ingredients: Opt for fresh spinach and mushrooms to enhance the flavor and nutritional value of the dish. Perfectly Cooked Chicken: Ensure the chicken is cooked to an internal temperature of 165°F (75°C) for optimal safety and tenderness. Customize Cheese Blend: Experiment with different cheeses like Gouda or cheddar for a unique twist on the flavor profile. Meal Prep Friendly: This dish can be prepared ahead of time and stored in the refrigerator, making it a great meal prep option. {{image_2}} Gluten-Free Options You can easily make this dish gluten-free. Use gluten-free cream cheese and check that your chicken broth is gluten-free. Both options keep the meal safe for those with gluten allergies. Low-Carb Alternatives To lower carbs, swap cream cheese for a low-carb cream cheese. You can also use less mozzarella. Serve it with a side of zucchini noodles or cauliflower rice. These swaps keep the meal tasty and healthy. Alternative Vegetables You can change the veggies based on your taste. Try using kale or Swiss chard instead of spinach. You can also add bell peppers or broccoli for extra crunch and flavor. Different Cheese Choices If you want a new flavor, switch cheeses. Use feta for a tangy taste or gouda for a smoky twist. You can also try a dairy-free cheese for a lactose-free meal. - Storing Leftovers: Place leftovers in an airtight container. This will keep them fresh for up to three days. Make sure to cool the dish before sealing. Label the container with the date. - Reheating Instructions: To reheat, use the oven or microwave. If using an oven, preheat to 350°F (175°C). Cover the dish with foil. Heat for about 20 minutes or until warm. For the microwave, heat in 1-minute intervals, stirring in between. - How to Freeze Properly: To freeze, let the dish cool completely. Cut into portions and wrap each piece tightly in plastic wrap. Place in a freezer-safe bag or container. Label with the date. This will keep it fresh for up to three months. - Best Practices for Thawing: Thaw in the fridge overnight for best results. If you need it faster, you can use the microwave. Never thaw at room temperature. This keeps the chicken safe to eat. This storage guide helps you enjoy your Spinach Mushroom Chicken Bake later. Can I use frozen spinach or mushrooms? Yes, you can use frozen spinach or mushrooms. Just make sure to thaw and drain them well. This will help avoid excess moisture in your dish. Frozen veggies can taste great, but fresh ones offer better flavor and texture. How do I know when the chicken is properly cooked? Check the internal temperature of the chicken. It should reach 165°F (75°C) for safe eating. You can also cut into the thickest part. The meat should be white and juices should run clear. If it’s still pink, cook it a bit longer. How can I make it spicier? To add some heat, sprinkle in red pepper flakes or diced jalapeños. You can also use a spicy cheese, like pepper jack. For a kick, consider adding some hot sauce to the cheese mixture. What sides pair well with Spinach Mushroom Chicken Bake? This dish pairs well with roasted vegetables, a fresh salad, or garlic bread. You can also serve it with rice or quinoa for a filling meal. These sides balance the flavors and add variety to your plate. This article covered everything you need for a tasty Spinach Mushroom Chicken Bake. We listed key ingredients and showed how to prepare and bake the dish step by step. You learned important tips for moist chicken and perfect cheese melt. We also explored variations for diet needs and offered storage tips for leftovers. Remember, cooking is all about trying new ideas. Enjoy experimenting and make this dish your own!
    Spinach Mushroom Chicken Bake Flavorful Comfort Meal
  • To make a tasty pasta salad, you need these main ingredients: - 2 cups rotini pasta - 1 cup cherry tomatoes, halved - 1 cup cucumber, diced - 1/2 cup black olives, sliced - 1/2 cup bell peppers (red and yellow), diced - 1/2 cup mozzarella balls, halved - 1/4 cup red onion, finely chopped - 1/2 cup Italian dressing (store-bought or homemade) - 1 teaspoon dried oregano - Salt and pepper to taste - Fresh basil leaves for garnish These ingredients work together to create a colorful and flavorful dish. The rotini pasta holds the dressing and veggies well, making each bite enjoyable. You can customize your pasta salad by adding some optional ingredients. Here are a few ideas: - Spinach or arugula for greens - Artichoke hearts for a tangy twist - Sun-dried tomatoes for added flavor - Grated Parmesan cheese for richness - Avocado for creaminess Use these options to make the salad your own. Feel free to mix and match based on what you like or have on hand. When it comes to dressing, you have two choices: store-bought or homemade. Store-bought Italian dressing is quick and easy. It saves time and still tastes good. Homemade dressing lets you control the flavor. You can mix olive oil, vinegar, herbs, and spices to create your perfect blend. Whichever you choose, the dressing brings all the flavors together. Don’t forget to pour it over the pasta and veggies before mixing! {{ingredient_image_1}} Start by filling a large pot with water. Add salt to the water for flavor. Bring the water to a boil over high heat. Once boiling, add 2 cups of rotini pasta. Cook it until it is al dente, which takes about 8-10 minutes. Stir the pasta occasionally to prevent it from sticking. When done, drain the pasta in a colander. Then, rinse it under cold water. This stops the cooking and cools the pasta. While the pasta cooks, you can prep your vegetables. Take 1 cup of cherry tomatoes and slice them in half. Dice 1 cup of cucumber into small pieces. Next, chop 1/2 cup of bell peppers, using both red and yellow for color. Slice 1/2 cup of black olives and 1/2 cup of mozzarella balls in half. Lastly, finely chop 1/4 cup of red onion. Keep all these veggies ready for mixing later. In a large mixing bowl, add your cooled pasta. Then, toss in the cherry tomatoes, cucumber, bell peppers, black olives, red onion, and mozzarella balls. Pour 1/2 cup of Italian dressing over this mixture. Sprinkle in 1 teaspoon of dried oregano, along with salt and pepper to taste. Now, use a spatula to gently toss everything. Ensure each piece gets coated with dressing for the best flavor. Cover the mixing bowl with plastic wrap or a lid. Place it in the fridge for at least 30 minutes. This chilling time allows the flavors to blend nicely. Just before serving, give the salad another quick toss. For a fresh touch, add some basil leaves on top. Enjoy your vibrant and tasty pasta salad! To cook pasta perfectly, use a large pot. Fill it with water and add salt. Bring the water to a boil before adding the rotini pasta. Stir it often to keep it from sticking. Check the package for cooking time. Taste the pasta a minute before the time is up. It should be firm but not hard. When done, drain the pasta and rinse it with cold water. This stops the cooking process and keeps it al dente. Store leftover pasta salad in an airtight container. Make sure it is completely cool before sealing it. This will keep it fresh and tasty. You can place it in the fridge for three to five days. If you want to keep it longer, consider freezing it. Just remember that the texture may change when thawed. If you need gluten-free pasta, use brown rice or quinoa pasta. These options work well and taste great. For a vegan twist, swap mozzarella with avocado or tofu. You can also choose a vegan Italian dressing. This way, everyone can enjoy the pasta salad, no matter their diet. Pro Tips Cook Pasta Al Dente: Make sure to cook the rotini pasta just until al dente to maintain a perfect texture in your salad. Overcooked pasta can become mushy when mixed with dressing. Chill for Maximum Flavor: Allow the salad to chill in the refrigerator for at least 30 minutes. This helps the flavors meld together, creating a more delicious dish. Customize Your Veggies: Feel free to add or substitute your favorite vegetables in the salad. Ingredients like artichokes, zucchini, or even baby spinach can add variety and flavor. Use Fresh Herbs: Enhance the salad's flavor by adding fresh herbs like basil or parsley just before serving. They add a burst of freshness that elevates the dish. {{image_2}} To make a Mediterranean pasta salad, start with the base of rotini pasta. You can add some sun-dried tomatoes, artichoke hearts, and feta cheese. These ingredients bring strong flavors and a tasty twist. For a zesty touch, include a squeeze of lemon juice. This variation offers a fresh taste that brightens the dish. Adding protein makes the salad heartier. You can mix in cooked chicken or canned tuna. Shredded rotisserie chicken works well and saves time. If you prefer seafood, tuna in olive oil adds great flavor. For a vegetarian option, try chickpeas or white beans. These proteins make your salad filling and satisfying. Using seasonal ingredients keeps your pasta salad exciting. In spring, try adding peas and asparagus. These vegetables add color and crunch. During summer, fresh corn and bell peppers shine. In fall, roasted butternut squash or pumpkin can add a warm touch. Winter calls for hearty greens like kale or spinach. Changing ingredients with the seasons keeps your salad fresh and flavorful. To keep your pasta salad fresh, use an airtight container. Spread the salad evenly in the container. Make sure to remove as much air as possible. This helps prevent sogginess. If you have extra dressing, store it separately. Pasta salad with Italian dressing lasts about three to five days in the fridge. After that, the veggies may lose their crunch. The taste might not be as fresh. Always check for signs of spoilage before eating. If it smells off or looks slimy, it's best to toss it. Freezing pasta salad is not ideal. The texture of the pasta and veggies changes. If you still want to freeze it, store it in a freezer-safe container. Keep the dressing separate. When ready to eat, let it thaw in the fridge overnight. Mix it well before serving. You can keep pasta salad with Italian dressing in the fridge for about three to five days. Make sure to store it in an airtight container. This keeps it fresh and tasty. If you see any changes in color or smell, it’s best to toss it out. Yes, you can make pasta salad a day ahead. In fact, it often tastes better the next day! The flavors mix well overnight. Just cover it tightly and place it in the fridge. Before serving, give it a quick stir to wake it up. Serve pasta salad cold or at room temperature. It makes a great side dish for picnics and barbecues. You can also serve it as a main dish. Add some grilled chicken or shrimp for protein. Garnish with fresh basil or extra cheese for a nice touch. Absolutely! You can use any pasta you like. Bowtie, penne, or fusilli all work well. Just make sure to cook it according to the package directions. Each pasta shape brings a new twist to the salad. Choose what you enjoy! Pasta salad is simple, tasty, and fun to make. You can choose fresh ingredients and dressings to fit your taste. Always cook your pasta perfectly for the best texture. Don’t forget to chill it for great flavor. Consider variations like Mediterranean styles or adding protein for a boost. With the right tips, your leftovers will stay fresh longer. Get creative with this dish, and enjoy every bite. Trust me, it's a meal you’ll love!
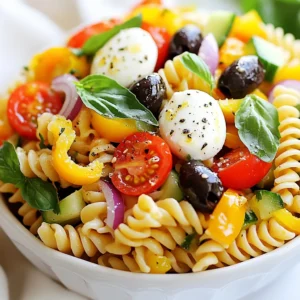
    Pasta Salad with Italian Dressing Simple and Delicious
  • - 300g egg noodles - 2 chicken breasts, sliced thinly - 4 tablespoons soy sauce - 2 tablespoons honey - 4 cloves garlic, minced - 1 tablespoon ginger, freshly grated - 1 tablespoon sesame oil - 2 tablespoons vegetable oil - 1 red bell pepper, sliced - 2 green onions, chopped - 1 tablespoon sesame seeds - Salt and black pepper to taste To make sticky garlic chicken noodles, you need simple and fresh ingredients. Start with 300 grams of egg noodles. They give the dish a great texture and soak up the sauce well. For protein, use two chicken breasts sliced thinly. This helps them cook quickly and evenly. The sauce needs four tablespoons of soy sauce and two tablespoons of honey. These two ingredients make the dish sweet and savory. You also need four cloves of minced garlic and one tablespoon of freshly grated ginger. These aromatics bring lots of flavor. For cooking, add one tablespoon of sesame oil and two tablespoons of vegetable oil to your pan. They help brown the chicken and add a nice taste. Don’t forget the veggies! Use one sliced red bell pepper and two chopped green onions for color and crunch. Finally, sprinkle one tablespoon of sesame seeds on top for a fun finish. Remember to season with salt and black pepper to taste. These ingredients create a tasty, balanced meal that you will love. {{ingredient_image_1}} 1. Start by bringing a large pot of water to a boil. This will ensure your noodles cook evenly. 2. Cook the egg noodles according to the package instructions. This usually takes about 4 to 6 minutes. 3. After cooking, drain the noodles in a colander. To prevent sticking, toss them with a tablespoon of sesame oil. This adds flavor and keeps them from clumping together. 1. In a small bowl, mix together four tablespoons of soy sauce, two tablespoons of honey, four minced garlic cloves, and one tablespoon of freshly grated ginger. 2. Stir until the mixture is well combined. This sticky sauce will coat the noodles and chicken beautifully. 1. Heat two tablespoons of vegetable oil in a large pan over medium-high heat. 2. Add the thinly sliced chicken breasts. Season them with salt and black pepper. 3. Cook for about 5 to 7 minutes until the chicken turns golden brown and is cooked through. 1. Lower the heat to medium. Add sliced red bell pepper to the pan with the chicken. 2. Stir-fry for about 3 minutes. You want the pepper to be slightly softened but still crisp. This gives the dish great texture. 1. Add the cooked noodles to the pan with the chicken and peppers. 2. Pour the sticky garlic sauce over the noodles. 3. Toss everything together gently until the noodles are well-coated and heated through. This is where the magic happens! 1. To finish, sprinkle a tablespoon of sesame seeds and chopped green onions on top. 2. Give everything a gentle stir to combine. This adds a nice crunch and fresh flavor. 3. Serve the sticky garlic chicken noodles in deep bowls. If you like, add an extra sprinkle of sesame seeds and a slice of lime for a zesty kick. To get your chicken golden brown, use high heat. Heat the vegetable oil until it shimmers. This helps the chicken sear nicely. Spread the chicken in the pan without crowding it. This allows even cooking and browning. Cook the chicken for about 5-7 minutes until it's no longer pink inside. Use a meat thermometer; it should read 165°F (75°C) for safety. To prevent overcooking the noodles, watch the clock. Follow the package instructions closely. Test the noodles a minute before the time ends. They should be firm but cooked. After draining, toss them with sesame oil. This keeps them from sticking together. Adjusting the sauce is key to a great taste. If you like it sweeter, add more honey. For a saltier flavor, increase the soy sauce. You can even add a splash of rice vinegar for tang. Taste the sauce before adding it to the noodles. This ensures it matches your preference perfectly. Pro Tips Use Fresh Ingredients: Fresh garlic and ginger will enhance the flavor of your sticky sauce significantly compared to dried or jarred versions. Adjust the Sweetness: Feel free to adjust the amount of honey based on your preference for sweetness. You can also substitute it with maple syrup for a different flavor. Protein Variations: This recipe works wonderfully with shrimp, tofu, or beef as alternatives to chicken, allowing for versatile meal options. Meal Prep Friendly: Make the sauce and prep the chicken and vegetables ahead of time. This will save you time on busy weeknights! {{image_2}} You can switch the chicken for shrimp or tofu. Shrimp cooks fast and adds a nice flavor. Just sauté the shrimp until pink. If you choose tofu, use firm tofu. Cube it and fry until golden for a tasty crunch. Both options give you a great protein boost. You can add more veggies for extra taste and color. Try broccoli, snap peas, or carrots. They keep the dish fresh and crunchy. You can also use seasonal veggies. In summer, add zucchini or bell peppers. In fall, think about using mushrooms or spinach. This way, you get a dish that changes with the seasons. Feel free to play with the sauce. Use maple syrup or agave instead of honey. You can mix in chili sauce for some heat. If you want a different flavor, try teriyaki or oyster sauce. These changes let you create new taste profiles and make the dish your own. To keep your sticky garlic chicken noodles fresh, store them in an airtight container. Make sure to let them cool down first. Place them in the fridge. They will last for about 3 to 4 days. If you want to keep them longer, consider freezing. When you're ready to eat, reheat the noodles gently. You can use a microwave or a skillet. If using a microwave, heat in short bursts. Stir between to avoid hot spots. If using a skillet, add a splash of water to keep noodles moist. This helps maintain their tasty texture and flavor. To freeze, divide the noodles into portions. Place them in freezer-safe bags or containers. Remove as much air as you can before sealing. They can last up to 2 months in the freezer. To defrost, move them to the fridge overnight. You can also use the microwave on the defrost setting. Reheat as mentioned earlier to enjoy a delicious meal later! If you need gluten-free options, you can use rice noodles or zucchini noodles. Rice noodles cook fast and soak up flavors well. Zucchini noodles, or zoodles, are fresh and light. They add a fun twist to your dish. To add heat, you can use crushed red pepper flakes or sliced fresh chili peppers. Another option is to add a dash of hot sauce. Start with a little and taste as you go. This way, you can find the right level of heat for your taste. Yes, you can meal prep Sticky Garlic Chicken Noodles. Cook a large batch and store it in airtight containers. Keep it in the fridge for up to three days. Reheat in a pan or microwave before serving. This makes for easy lunches or dinners. Leftovers last about three to four days in the fridge. Make sure to store them in a sealed container. If you want to keep them longer, you can freeze them. Frozen leftovers can last up to three months. This blog post shared a simple recipe for a tasty noodle dish. I broke down the key ingredients, including chicken and vegetables, along with making a sticky sauce. You learned step-by-step how to cook the noodles, chicken, and veggies. I also covered cooking tips, variations, and storage advice. Cooking can be fun and flavorful. You now have the tools to create your own version. Enjoy experimenting with flavors and ingredients!
    Sticky Garlic Chicken Noodles Tasty One-Pan Recipe
  • - 3 ripe bananas - 1/3 cup melted coconut oil - 1/2 cup brown sugar - 1 large egg - 1 teaspoon vanilla extract - 1 teaspoon baking soda - Pinch of salt - 1 1/2 cups all-purpose flour - 1/2 cup chocolate chips (plus extra for topping) - 1/4 cup chopped walnuts (optional) The main ingredients for chocolate chip banana bread are simple and easy to find. Ripe bananas are key for sweetness and moisture. They should be soft and have brown spots on the skin. The coconut oil adds a nice flavor and keeps the bread moist. Brown sugar gives a richer taste than white sugar. You will also need an egg and vanilla extract to bind and flavor the batter. Baking soda helps the bread rise, while a pinch of salt enhances all the flavors. All-purpose flour is the base for the bread. Chocolate chips are the star, bringing sweetness and richness. You can add walnuts if you like a little crunch. - Mixing bowls - Loaf pan (9x5 inch) - Measuring cups and spoons - Whisk or spatula - Wire rack for cooling For this recipe, you will need a few tools. A mixing bowl is great for combining your ingredients. A loaf pan, sized 9x5 inches, is perfect for shaping the bread. Measuring cups and spoons help you get the right amounts of each ingredient. You can use a whisk or spatula for mixing the batter. Finally, a wire rack lets the bread cool evenly after baking. Collecting all your ingredients and tools before you start will make baking easy and fun. {{ingredient_image_1}} First, preheat your oven to 350°F (175°C). This step is key for even baking. Next, grease a 9x5 inch loaf pan. You can also line it with parchment paper for easy removal. Now, take your ripe bananas and mash them in a large bowl. They should be soft and easy to blend. While mashing, melt 1/3 cup of coconut oil. This will add a nice flavor and moisture to your bread. In the bowl with the mashed bananas, add the melted coconut oil. Mix well to combine. Then, add 1/2 cup of brown sugar. Stir until it is fully mixed in. Next, beat in one large egg and 1 teaspoon of vanilla extract. Make sure everything is blended smoothly. Now, sprinkle 1 teaspoon of baking soda and a pinch of salt into the mixture. Stir until just combined. Gradually add 1 1/2 cups of all-purpose flour. Mix until there are no dry spots. Be careful not to over-mix; a gentle touch keeps the bread light. Now it’s time to fold in the fun stuff! Gently add 1/2 cup of chocolate chips and 1/4 cup of chopped walnuts, if you like. Make sure they are evenly distributed through the batter. Once combined, pour the batter into your prepared loaf pan. Smooth the top with a spatula. For an extra treat, sprinkle a few more chocolate chips on top. Place the loaf pan in the preheated oven. Bake for 55-60 minutes. You’ll know it’s done when a toothpick inserted in the center comes out clean. This is a great time to check for doneness. Once baked, remove the pan from the oven. Let it cool for about 10 minutes. Then, transfer the bread to a wire rack to cool completely. Enjoy the lovely smell wafting through your kitchen! - Use overripe bananas for sweetness. They give the bread its rich flavor. - Avoid over-mixing the batter. Mixing too much can make the bread tough. - Adding spices like cinnamon or nutmeg boosts flavor. A little goes a long way. - Using different types of chocolate chips, like dark, milk, or white, adds fun. Mix and match for new tastes. - Serve warm with butter or ice cream. This makes each slice a treat. - Garnish with additional chocolate chips on top. It looks great and tastes even better. Pro Tips Use Overripe Bananas: The riper the bananas, the sweeter and more flavorful your banana bread will be. Look for bananas with lots of brown spots for the best results. Don't Overmix: When adding the flour, mix just until there are no dry spots. Overmixing can lead to a dense and tough texture. Experiment with Mix-ins: Feel free to customize your banana bread by adding different mix-ins like dried fruits, nuts, or spices such as cinnamon or nutmeg for extra flavor. Storage Tips: To keep your banana bread fresh, store it in an airtight container at room temperature for up to 3 days or in the fridge for up to a week. You can also freeze it for longer storage. {{image_2}} If you're not a fan of nuts, you can easily make this banana bread nut-free. Just leave out the walnuts entirely. If you want a bit more texture, add extra chocolate chips. The more chocolate, the better, right? This keeps the bread sweet and chocolaty without the crunch of nuts. For those who need a gluten-free version, it's simple! Just swap out the all-purpose flour for a gluten-free flour blend. Many grocery stores sell these mixes. They work well in most recipes, including this one. Always check the blend for a good rise. You can get creative with flavors in your banana bread. Want to add more fruit? Toss in blueberries or strawberries to give it a fresh twist. They add a burst of flavor and color. Another fun idea is to swirl in peanut butter or Nutella. This adds a rich, creamy texture that pairs perfectly with bananas. Just spoon it into the batter and swirl with a knife before baking. Enjoy experimenting with these fun variations! To keep your banana bread fresh, place it in an airtight container. It stays tasty at room temperature for about 3 to 4 days. If you want it to last longer, consider freezing it. Wrap the cooled banana bread in plastic wrap. Then, place it in a freezer bag or container. This way, it remains fresh for up to 3 months. When you want to eat it, thaw it in the fridge overnight or at room temperature for a few hours. For the best taste, rewarm the banana bread in the oven. Preheat the oven to 350°F (175°C) and heat for 10-15 minutes. You can also use the microwave. Just heat it at 10-second intervals until warm. Enjoy your slice warm for the best flavor! Yes, you can use frozen bananas. First, take them out of the freezer. Let them thaw at room temperature. Once they are soft, peel and mash them in a bowl. The texture may change, but it will still work great in your banana bread. Frozen bananas add natural sweetness and moisture to the bread. You can skip the chocolate chips if you want. Instead, consider adding nuts, like walnuts or pecans, for crunch. You could also mix in dried fruits, like raisins or cranberries, for a different flavor. A dash of cinnamon can add warmth without extra sweetness. Dense banana bread often happens for a few reasons. Using too many bananas can make it heavy. Over-mixing the batter can also add density. To avoid this, mix just until you see no dry flour. Use ripe bananas but not overly squished ones. This keeps your bread light and fluffy. This blog post covered making delicious banana bread. You learned about the key ingredients, tools you'll need, and a clear step-by-step guide. I shared tips on enhancing flavor and texture and even offered variations. Always use ripe bananas for the best taste. Remember, you can store and freeze this yummy treat for later enjoyment. With practice, you’ll master banana bread and share it with others. Enjoy your baking journey!
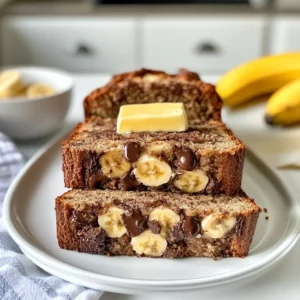
    Chocolate Chip Banana Bread Simple and Tasty Recipe
  • - 1 pound flank steak - 2 cups broccoli florets - 1 red bell pepper - Soy sauce - Oyster sauce - Cornstarch - 4 cloves garlic, minced - 2 tablespoons fresh ginger, minced - 2 tablespoons vegetable oil - 1 tablespoon sesame oil - Cooked jasmine rice for serving - Sesame seeds for garnish This recipe shines with simple, fresh ingredients. The star is flank steak, a flavorful cut that cooks quickly. Broccoli and red bell pepper add vibrant color and crunch. For the marinade, soy sauce and oyster sauce work together to give depth. Cornstarch helps tenderize the beef and thicken the sauce. You need garlic and ginger for a fragrant base. The vegetable oil is essential for cooking, while sesame oil brings a nutty finish. Finally, jasmine rice pairs perfectly to soak up the sauce. Gather these items before you start cooking. Having everything ready makes the process smooth and fun. {{ingredient_image_1}} To start, we need to marinate the flank steak. Slice it thinly against the grain. This helps make the meat tender. In a mixing bowl, add the steak with soy sauce, oyster sauce, and cornstarch. Mix well to coat every piece. Let it marinate for at least 20 minutes. This time is key for flavor and tenderness. Next, we will cook the beef. Heat 1 tablespoon of vegetable oil in a large skillet over medium-high heat. Once hot, add the marinated beef in a single layer. Sauté it for about 3-4 minutes until it turns a nice brown color. Make sure not to overcrowd the pan. This ensures a good sear. After browning, remove the beef from the skillet and set it aside. Now it's time to stir-fry the veggies. In the same skillet, add another tablespoon of vegetable oil. Toss in 4 cloves of minced garlic and 2 tablespoons of minced ginger. Cook for about 30 seconds until they smell great. Then, add 2 cups of broccoli florets and the sliced red bell pepper. Stir-fry these for about 3-4 minutes. You want them vibrant and slightly tender, but not mushy. Finally, let's bring it all together. Return the cooked beef to the skillet. Pour in the remaining marinade from the bowl. Stir everything together. Let it cook for about 2-3 minutes. This thickens the sauce and coats the beef and veggies nicely. Drizzle with sesame oil before serving. This adds a rich flavor. Enjoy your meal hot over cooked jasmine rice, garnished with sesame seeds for some crunch! Using high-quality ingredients is key for great taste. Choose fresh broccoli, tender flank steak, and good sauces. Soy sauce and oyster sauce add depth. You can try alternatives like tamari for gluten-free or hoisin for a sweeter touch. Cutting the beef correctly makes a big difference. Always slice the flank steak against the grain. This keeps the meat tender. Marinating the beef helps too. Use the marinade for at least 20 minutes. It adds flavor and softens the meat nicely. Garnishing with sesame seeds adds a nice touch. They give a bit of crunch and look great. Serve your beef and broccoli over fluffy jasmine rice. This makes the dish feel complete. You can also add a slice of lime for a pop of color and taste. Pro Tips Marinate for Flavor: Letting the flank steak marinate for at least 20 minutes infuses it with flavor and helps to tenderize the meat, enhancing the overall dish. High Heat for Searing: Use high heat when cooking the beef to achieve a nice sear. This locks in juices and gives the meat a delicious crust. Veggie Crunch: To maintain the broccoli's crunch, stir-fry it until just tender but still vibrant in color. This adds a fresh texture to the dish. Finish with Sesame Oil: Drizzling sesame oil at the end of cooking adds a fragrant finish to the dish, elevating the flavors. {{image_2}} You can switch up the veggies in this dish. Carrots add sweetness and color. Snap peas give a nice crunch. Mushrooms add a rich flavor. Feel free to use seasonal veggies, like zucchini in summer or bok choy in spring. If you want a change from beef, try chicken, tofu, or shrimp. Chicken cooks fast, so cut it thin. Tofu needs pressing to remove moisture. It soaks up the sauce well. Shrimp cooks quickly, so add it last to avoid overcooking. For a gluten-free meal, replace soy sauce with tamari or coconut aminos. Use cornstarch as a thickener, or try arrowroot powder for a lighter sauce. These swaps keep the dish tasty while catering to dietary needs. To keep your beef and broccoli fresh, use proper refrigeration techniques. First, let the dish cool down to room temperature. Then, transfer the leftovers into airtight containers. This helps prevent air from spoiling the food. I recommend using glass or BPA-free plastic containers. These materials are safe and keep your meal flavorful. When reheating, you want to keep the flavors and texture intact. The best method is the stovetop. Just add a little water or broth to a pan over low heat. Stir occasionally until warmed through. If you prefer the microwave, use it on a lower power setting. Heat for short bursts and stir between to avoid uneven heating. You can freeze both cooked and uncooked versions of this dish. For cooked beef and broccoli, cool it completely and then pack it into airtight containers or freezer bags. It will last up to three months in the freezer. If freezing uncooked beef, marinate it first and then freeze it. Use it within three months for best quality. Yes, you can! If you don't have flank steak, try these cuts: - Sirloin - Round steak - Ribeye These meats are tender and flavorful. You may need to adjust cooking times for different cuts. Here are some great sides to pair with this dish: - Steamed jasmine rice - Fried rice - Noodles - Egg rolls These sides will enhance your meal and add variety. To add heat, consider these options: - Red pepper flakes - Sriracha sauce - Spicy chili sauce Add them during cooking to control the heat level. Yes, you can easily make it vegetarian! Here are some tips: - Use tofu instead of beef. - Substitute soy sauce with a vegetarian alternative. - Add more veggies like bell peppers or carrots. These swaps keep the dish tasty and satisfying. You can explore different flavors by trying: - Teriyaki sauce - Hoisin sauce - Black bean sauce Each sauce brings a unique twist to your beef and broccoli dish! This post covered everything you need to make Chinese Beef and Broccoli. We explored main ingredients like flank steak, broccoli, and red bell pepper. You learned about the marinade and cooking steps. I shared tips for flavor, presentation, and variations to fit your taste. In conclusion, use high-quality ingredients and techniques for the best experience. Whether you stick to the classic recipe or try new proteins, you can enjoy this dish any way you like. Happy cooking!
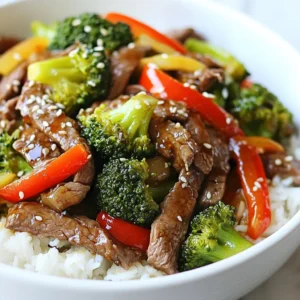
    Chinese Beef and Broccoli Flavorful Dinner Idea
  • - 1 lb boneless, skinless chicken thighs - 1 cup buttermilk (or dairy-free alternative) - 1 cup all-purpose flour - 1/2 cup cornstarch - 1 tsp garlic powder - 1 tsp onion powder - 1/2 tsp cayenne pepper (adjust to taste) - Salt and black pepper to taste - 1/2 cup mayonnaise - 2 tbsp sweet chili sauce - 1 tsp Sriracha sauce (adjust for heat) - 1 tsp lime juice - 1 cup cooked jasmine or basmati rice - 1 cup shredded iceberg lettuce - 1/2 cup shredded carrots - 1/2 cup cherry tomatoes, halved - 1/4 cup sliced green onions To make a Crispy Bang Bang Chicken Bowl, you need fresh and tasty ingredients. The chicken thighs provide great flavor. Soaking them in buttermilk makes them juicy. If you need a dairy-free version, choose a dairy-free milk like almond or oat. The coating is key for that crispy crunch. Flour and cornstarch blend together to create a perfect texture. The seasoning adds flavor. Garlic and onion powders bring depth. Cayenne gives a mild heat. Adjust it to your liking. The Bang Bang sauce adds a creamy and spicy touch. Mayonnaise is the base. Sweet chili sauce gives it sweetness. Sriracha adds heat, and lime juice gives brightness. Mix these to create the perfect sauce. Don’t forget the base and veggies! Cooked jasmine or basmati rice makes a great foundation. Shredded iceberg lettuce adds crunch. Shredded carrots and halved cherry tomatoes add color and nutrients. Green onions finish the bowl with a fresh kick. Gather these ingredients, and you'll be ready for a fun cooking adventure! {{ingredient_image_1}} - Marinate the Chicken: Start by soaking the chicken thighs in buttermilk. This is best done for at least 1 hour or overnight. The buttermilk makes the chicken tender and juicy. - Prepare the Coating: In a bowl, mix the flour, cornstarch, garlic powder, onion powder, cayenne pepper, salt, and black pepper. This mix gives the chicken a nice crunch. - Heat the Oil: In a deep skillet, add about 1 inch of vegetable oil. Heat it over medium-high heat until it shimmers. This means it’s ready for frying. - Coat the Chicken: Take the marinated chicken out of the buttermilk. Let any extra buttermilk drip off. Now, dredge each piece in your flour mixture. Make sure each piece is fully coated and shake off the extra flour. - Fry the Chicken: Carefully place the coated chicken in the hot oil. Fry for 5-7 minutes on each side until golden brown and cooked through. Use batches if needed. Place the fried chicken on a paper towel-lined plate to drain excess oil. - Make the Bang Bang Sauce: In a small bowl, mix the mayonnaise, sweet chili sauce, Sriracha, and lime juice. Stir well until it’s smooth. This sauce adds a tasty kick to your dish. - Assemble the Bowl: In each serving bowl, start with a scoop of rice. Then, add the crispy chicken pieces. Next, layer on the shredded lettuce, carrots, halved cherry tomatoes, and green onions. - Drizzle Sauce: Finish your bowl by drizzling the Bang Bang sauce generously over the top. Enjoy your vibrant and tasty meal! Soak the chicken thighs in buttermilk for at least one hour. For more flavor, soak overnight. This makes the chicken tender and juicy. If you want a dairy-free option, use almond milk or coconut milk mixed with a bit of lemon juice. This gives a similar tangy taste. Check the oil temperature before frying. Heat it until it shimmers, about 350°F (175°C). Use a thermometer for accuracy. Fry the chicken in small batches. This helps them cook evenly and stay crispy. Avoid crowding the pan, as this lowers the oil temperature. For garnishing, use sliced green onions and sesame seeds. They add color and crunch. Serve each bowl with a lime wedge on the side. A fresh squeeze of lime brightens the flavors. Keep the bowls colorful and fresh by layering veggies neatly. Pro Tips Marination Matters: Allowing the chicken to marinate in buttermilk overnight enhances tenderness and flavor, making for a juicier bite. Perfect Oil Temperature: Ensure your oil is hot enough (around 350°F) before frying to achieve a crispy coating and avoid greasy chicken. Batch Frying: Fry the chicken in small batches to maintain the oil temperature, which ensures even cooking and crispiness. Customize the Sauce: Adjust the spiciness of the Bang Bang sauce by modifying the amount of Sriracha, or substitute with your favorite hot sauce for a unique twist. {{image_2}} You can enjoy a healthier version of the Crispy Bang Bang Chicken Bowl. One great option is to bake the chicken instead of frying it. This cuts down on oil and keeps the chicken juicy. For a baked version: - Preheat your oven to 400°F (200°C). - Place the coated chicken on a baking sheet lined with parchment paper. - Bake for about 25-30 minutes, flipping halfway through, until golden and crispy. You can also offer gluten-free choices. Simply swap all-purpose flour with gluten-free flour or almond flour. This way, everyone can enjoy the meal without worry. You can customize the Bang Bang sauce to match your taste. If you like more heat, add extra Sriracha or chili sauce. For a sweeter sauce, increase the sweet chili sauce. Mixing in different veggies adds flair to your bowl. Try bell peppers, cucumbers, or snap peas for a crunch. You can also use herbs like cilantro or basil for fresh flavor. If you want a change from chicken, shrimp works well. Just adjust cooking time to avoid overcooking. For a plant-based option, use tofu. Firm tofu absorbs flavors nicely and adds a nice texture. You can also make a vegetarian bowl with all the veggies and rice. It’s a great way to enjoy the same flavors without meat. To keep your Crispy Bang Bang Chicken Bowl fresh, store leftovers properly. Place the chicken and rice in separate airtight containers. This helps keep the chicken crispy and the rice fluffy. Refrigerate them within two hours of cooking. For best results, use the fridge's colder sections. If you want to freeze leftovers, let them cool first. Wrap chicken pieces tightly in plastic wrap, then in foil. Store rice in a separate container. This keeps moisture out. Label containers with the date to track freshness. The best way to reheat crispy chicken is in an oven or air fryer. Preheat your oven to 375°F. Place the chicken on a baking sheet. Heat for about 10-15 minutes until crisp. If using an air fryer, set it to 375°F and heat for 5-8 minutes. Avoid using the microwave, as it can make the chicken soggy. To keep the rice moist, add a splash of water before reheating. Cover the dish with a damp paper towel and microwave for 1-2 minutes. When stored properly, the Crispy Bang Bang Chicken Bowl lasts 3-4 days in the fridge. If frozen, it can last up to 3 months. Always check for signs of spoilage. Look for off smells, changes in color, or a slimy texture. If you notice any of these, it's best to discard the dish. A Bang Bang Chicken Bowl is a tasty dish featuring crispy chicken, rice, and fresh veggies. It combines flavors from Asian cuisine, especially Thai and American. The name "Bang Bang" comes from the spicy sauce that adds a kick to the chicken. This dish is great for a quick meal that feels special. Yes, you can make the Bang Bang sauce ahead of time. Just mix mayonnaise, sweet chili sauce, Sriracha, and lime juice in a bowl. Store it in the fridge for up to three days. This way, you save time when preparing your meal. Just remember to give the sauce a good stir before using it. For this recipe, jasmine or basmati rice works best. Both types are fluffy and have a nice aroma. You can cook the rice in water or broth for extra flavor. Follow the package instructions for the best results. If you want to save time, you can use pre-cooked rice. You can easily adjust the heat level of the sauce. To make it milder, reduce the amount of Sriracha. For more heat, add extra Sriracha or a pinch of cayenne pepper. Taste the sauce as you mix it to get the right balance for your preference. This blog post showed you how to make a tasty Bang Bang Chicken Bowl. We covered the ingredients, preparation steps, cooking methods, tips for success, and options for variations. With easy steps and fun ideas, you can enjoy this dish any way you like. Remember, cooking is about trying new things. So, grab your ingredients, have fun, and make a meal you’ll love! Enjoy the process and share your creations with others.
    Crispy Bang Bang Chicken Bowl Flavorful Dinner Recipe
  • - 1 lb Italian-style chicken sausage (or your favorite sausage) - 3 cups fresh broccoli florets - 1 medium onion, thinly sliced - 3 cloves garlic, minced - 1 red bell pepper, sliced - 2 tablespoons olive oil - 1 teaspoon red pepper flakes (optional) - Salt and pepper to taste - 1 lemon, zested and juiced - 1/4 cup grated Parmesan cheese - Fresh parsley for garnish Gathering the right ingredients makes this dish shine. For the main part, I love using Italian-style chicken sausage. It brings a fantastic flavor. Fresh broccoli florets add a nice crunch and bright color. A thinly sliced onion and minced garlic round out the base. They give the dish a warm, inviting aroma. Sliced red bell pepper adds sweetness to balance the savory sausage. The additional ingredients are just as important. Olive oil helps cook everything evenly. A sprinkle of red pepper flakes can add a little spice, but it’s optional. Don't forget salt and pepper to enhance the flavors. The lemon zest and juice brighten the dish and make it fresh. Topping with grated Parmesan cheese adds a creamy finish. Finally, fresh parsley gives a pop of color and freshness to your meal. With this mix of ingredients, you will create a hearty, flavorful meal that everyone will love. {{ingredient_image_1}} - Heat 2 tablespoons of olive oil in a large skillet over medium heat. - Add 1 pound of sliced Italian-style chicken sausage. Cook for about 5-7 minutes. The sausage should be browned and cooked through. - Add 1 thinly sliced medium onion and 3 minced garlic cloves to the skillet. - Stir often for 3-4 minutes until the onion becomes translucent. This step adds a lot of flavor. You can also toss in salt and pepper to taste. - Toss in 1 sliced red bell pepper and 3 cups of fresh broccoli florets. - Cook for an additional 5-6 minutes. Stir often until the broccoli is bright green and tender-crisp. This ensures you keep a nice texture. These steps create a flavorful base for your dish. Enjoy the delightful mix of flavors as they come together! Choosing the best sausage matters for flavor. I love Italian-style chicken sausage for its taste. You can use pork, turkey, or even a plant-based sausage if you prefer. Each type adds a unique twist to the dish. If you want a spicy kick, try a hot sausage. For a milder flavor, go with sweet sausage. To ensure even cooking, cut the veggies into similar sizes. This helps them cook at the same rate. Start cooking the sausage first, then add the onion and garlic. This builds a great base flavor. When adding broccoli, cook just until bright green. Overcooked broccoli turns mushy and loses its crunch. Stir often to keep everything cooking evenly. Fresh herbs make a big difference. Try adding basil or thyme for a fresh taste. A sprinkle of fresh parsley right before serving brightens the dish. If you want more depth, consider spices like paprika or cumin. They can add warmth and richness to your skillet. Don't forget the lemon zest and juice; they add brightness and balance the flavors. Pro Tips Use Fresh Ingredients: Fresh broccoli and quality sausage will enhance the flavor and overall quality of the dish. Adjust Spice Level: Feel free to tweak the amount of red pepper flakes based on your spice tolerance; you can also omit it for a milder flavor. Cook Broccoli Perfectly: To keep broccoli tender-crisp, avoid overcooking. It should be bright green and still have a slight crunch. Garnish for Flavor: Fresh parsley not only adds color but also a fresh flavor that brightens the dish. Don't skip it! {{image_2}} You can make this dish gluten-free by using gluten-free sausage. Many brands offer tasty options. Check labels to ensure they fit your needs. For those who prefer a vegetarian option, swap the sausage for hearty beans or tofu. This change keeps the meal filling and nutritious. Want to mix things up? Add different vegetables like carrots, zucchini, or spinach. Each will bring its own taste and color. Cheese lovers can play with different cheeses. Try mozzarella, feta, or goat cheese. Each cheese adds a unique flavor twist. Pair this skillet meal with crusty bread or a fresh salad. The bread soaks up the juices nicely. For sides, consider serving steamed rice or quinoa. They add great texture and help balance the flavors. To store leftovers, let the skillet cool down first. Place the dish in an airtight container. This keeps flavors fresh and prevents spills. I recommend using glass or BPA-free plastic containers. They seal well and let you see what’s inside. For reheating, the best method is to use a skillet over medium heat. This warms the meal evenly. Stir it gently to keep it from sticking. You can add a splash of water or broth to help with moisture. If you want to keep the flavors strong, add a bit more lemon juice or cheese when reheating. If you want to freeze portions, let the dish cool completely first. Use freezer-safe containers or bags. Make sure to label them with the date. This way, you won’t forget how long they’ve been in there. When you’re ready to eat, thaw it overnight in the fridge. Reheat it in a skillet or microwave until hot. Yes, you can use frozen broccoli. Frozen broccoli is convenient and saves time. However, it may not have the same crispness as fresh. When using frozen broccoli, reduce cooking time. Add it to the skillet when you add the bell pepper. This way, it warms up without getting mushy. To spice it up, you have options! Add more red pepper flakes to the sausage. You can also use hot sausage for extra heat. Another choice is to mix in diced jalapeños with the onions. This will give your meal a nice kick! This dish pairs well with various sides. Here are some ideas: - Cooked rice or quinoa for a hearty base - Garlic bread to soak up the flavors - A fresh green salad for a light touch - Pasta for a filling meal option These sides will complete your hearty and flavorful meal! In this article, we explored a tasty Sausage and Broccoli Skillet dish. We covered the key ingredients, cooking steps, and helpful tips. I shared variations for different diets, storage methods, and answers to common questions. I hope this guide inspires you to try making this easy meal. With simple steps and fresh flavors, you will enjoy cooking and sharing it with others. Remember, cooking is a fun way to connect with food and people. Enjoy your delicious creation!
    Sausage and Broccoli Skillet Hearty Flavorful Meal
  • - 4 large bell peppers (any color) - 1 lb ground turkey or beef - 1 cup cauliflower rice (fresh or frozen) - 1 cup shredded cheddar cheese - 1/2 cup diced tomatoes (canned or fresh) - 1 small onion, finely chopped - 2 cloves garlic, minced - 1 teaspoon cumin - 1 teaspoon smoked paprika - Salt and pepper to taste - 1 tablespoon olive oil The main ingredients in this recipe are simple yet tasty. I love using bell peppers as they add color and crunch. Ground turkey or beef packs protein, which makes the dish hearty. Cauliflower rice keeps it low-carb while adding texture. For extra flavor, I use shredded cheddar cheese. It melts beautifully on top of the stuffed peppers. Diced tomatoes give a nice burst of freshness. Onion and garlic add depth to the filling. Seasoning is key. I like to use cumin and smoked paprika for warmth. Salt and pepper enhance all the flavors. A touch of olive oil helps sauté the veggies. These ingredients come together to create a meal that is both fresh and flavorful. You can customize the recipe based on what you have at home. Feel free to experiment and make it your own! {{ingredient_image_1}} 1. Preheat your oven to 375°F (190°C). This helps cook the peppers evenly. 2. Take four large bell peppers. Cut off the tops and scoop out the seeds. Set the empty peppers aside for later. 1. In a large skillet, pour one tablespoon of olive oil. Heat it over medium heat. 2. Add one finely chopped onion and two minced garlic cloves. Cook them until they turn soft and clear, about 3 to 4 minutes. 3. Next, add one pound of ground turkey or beef to the skillet. Cook it until it is browned, which takes about 5 to 7 minutes. Break the meat apart as it cooks. 1. Stir in one cup of cauliflower rice, half a cup of diced tomatoes, one teaspoon of cumin, one teaspoon of smoked paprika, and salt and pepper to taste. Mix it well and cook for another 4 to 5 minutes. Everything should be hot. 2. Turn off the heat and mix in half a cup of shredded cheddar cheese until it’s melted. 3. Now, stuff each bell pepper with the meat mixture. Press down gently to fill them well. 4. Place the stuffed peppers upright in a baking dish. Top each pepper with the rest of the cheddar cheese. 5. Cover the dish with foil and bake for 25 minutes. After that, remove the foil and bake for an extra 10 to 15 minutes until the peppers are soft and the cheese is golden. 6. Let the peppers cool a bit before serving. Sprinkle fresh parsley on top for a nice touch. To sauté well, always heat your pan first. Use medium heat for onion and garlic. This way, they soften nicely without burning. Stir often to keep them from sticking. For browning meat, break it into small pieces. This helps it cook evenly. Cook until it turns brown all over. Don't rush this step; it adds great flavor. If you want a change from ground turkey or beef, try ground chicken or pork. You can also use mushrooms for a tasty vegetarian option. They add great texture. For cauliflower rice, you can use shredded zucchini or broccoli rice. Both are low in carbs and will fit well in the dish. Just ensure you drain any excess moisture. Garnish your stuffed peppers with fresh parsley or cilantro. This will add a pop of color. You can also sprinkle some extra cheese on top right before serving. For serving, place the peppers on a colorful platter. This makes them look more inviting. Pair them with a green salad or some avocado slices for a balanced meal. Pro Tips Choose Colorful Peppers: Using a mix of colorful bell peppers not only makes the dish visually appealing but also adds different flavors and nutrients. Make it Ahead: Prepare the filling a day in advance and store it in the refrigerator. This will save you time on the day you plan to serve the dish. Add Extra Veggies: Feel free to sneak in extra vegetables like spinach or zucchini into the filling for added nutrition and flavor. Experiment with Cheese: Try using different types of cheese such as pepper jack or mozzarella for a unique twist on flavor. {{image_2}} You can swap the ground turkey or beef for chicken or pork. Both meats work well and bring unique flavors. If you want a lighter option, use ground chicken. It cooks quickly and stays juicy. For a savory twist, try ground pork. It adds a rich taste to the dish. If you prefer a vegetarian meal, substitute the meat with black beans or lentils. Both provide protein and fiber. You can also use quinoa for added texture. Mix in some chopped veggies for extra crunch and color. Cheese is a key player in these stuffed peppers. While cheddar is delicious, try mozzarella or pepper jack for a different taste. Mozzarella melts beautifully, giving a gooey texture. Pepper jack adds a nice kick with its spices. You can also play with herbs and spices. Fresh basil or oregano can brighten the dish. If you like heat, add red pepper flakes or cayenne pepper. Experiment with flavors to find your favorite blend. For a dairy-free version, skip the cheese or use a dairy-free alternative. Nutritional yeast is a great option that provides a cheesy flavor without dairy. If you're following Whole30 or paleo diets, make sure to use compliant ingredients. Avoid beans and grains, and stick to fresh veggies and meats. This way, you can still enjoy a filling meal that fits your diet. Keto stuffed peppers last about 3 to 4 days in the fridge. Store them in an airtight container. This keeps them fresh and tasty. If you want to save some for later, just cool them down first. This helps keep the peppers from getting soggy. To freeze stuffed peppers, wrap them well in plastic wrap. Then, place them in a freezer bag. This is the best way to store leftovers. They can last up to 3 months in the freezer. When you are ready to eat them, thaw them overnight in the fridge. Reheat in the oven at 350°F (175°C) for about 20 minutes. This brings back their tasty flavor and warm texture. You can make these stuffed peppers ahead of time. Prepare them up to the baking step. Just cover them and store them in the fridge. When you are ready to cook, bake them straight from the fridge. If you want quick meals, you can make a batch of stuffed peppers. Then, reheat them in the microwave. This way, you have a healthy meal ready in minutes! Yes, you can use different types of peppers. Bell peppers are the best choice for stuffing due to their size and shape. You can also use: - Poblano peppers for a deeper flavor - Anaheim peppers for a milder taste - Cubanelle peppers for a sweet touch These peppers add unique flavors and can make your dish more exciting. To add heat to your stuffed peppers, try these tips: - Add diced jalapeños or serrano peppers to the filling. - Mix in some red pepper flakes for extra spice. - Use spicy sausage instead of ground turkey or beef. These methods will boost the heat while keeping the dish flavorful. Stuffed peppers are filling, but some sides can complement them well. Here are a few ideas: - A fresh green salad for a light touch - Cauliflower mash for a creamy side - Roasted vegetables for added nutrients These sides balance the meal, making it more enjoyable. Stuffed peppers are a tasty and healthy choice. We explored main ingredients like ground turkey or beef, bell peppers, and cauliflower rice. We also looked at how to prepare, cook, and bake them with tips on presentation and storage. Remember, you can mix and match ingredients to fit your taste and dietary needs. These peppers are versatile and easy to customize. Enjoy making this dish as a fun meal for any day!
    Keto Stuffed Bell Peppers Fresh and Flavorful Recipe
  • - 4 boneless, skinless chicken thighs - 4 medium-sized baby potatoes, halved - 4 tablespoons unsalted butter - 4 cloves garlic, minced - 1 teaspoon dried thyme - 1 teaspoon paprika - Salt and pepper, to taste - Fresh parsley, chopped (for garnish) - Lemon wedges (for serving) Gathering the right ingredients is key to making garlic butter chicken and potatoes. The chicken thighs provide juicy flavor, while the baby potatoes add a nice texture. Unsalted butter gives that rich taste we love. I use garlic because it adds depth. Thyme and paprika bring warmth and earthiness to the dish. Don't forget salt and pepper, which help balance the flavors. Fresh parsley adds a pop of color and freshness. Serve with lemon wedges for a zesty kick that brightens the meal. This mix of ingredients makes each bite a delight. From savory to tangy, you get a full experience. The key is using fresh ingredients for the best taste. Trust me, every bite will make you smile! {{ingredient_image_1}} Start by patting the chicken thighs dry. This helps them brown better. Next, season both sides well. Use salt, pepper, paprika, and thyme. This mix adds great flavor. In a large skillet, melt two tablespoons of butter over medium heat. Add the halved baby potatoes, cut side down. Cook them for 10-12 minutes. You want them golden and crispy. Stir occasionally to help them cook evenly. Once done, remove the potatoes and set them aside. In the same skillet, add the rest of the butter. Let it melt, then add the chicken thighs. Cook each side for 5-7 minutes. They should be browned and cooked through. The internal temperature needs to reach 165°F (75°C). Reduce the heat to low. Add the minced garlic to the skillet. Sauté for 1-2 minutes. You want it fragrant but not burnt. This step brings a lovely aroma to the dish. Return the crispy potatoes to the skillet. Toss them with the chicken and garlic butter mix. Cook for an additional 2-3 minutes. This helps the flavors meld together nicely. Remove the skillet from heat. Garnish with freshly chopped parsley. Serve with lemon wedges on the side. The lemon adds a fresh, zesty flavor to the dish. To get the best chicken, always check the internal temperature. You want it to be 165°F or 75°C. Use a meat thermometer for accuracy. Cooking time can change based on how thick your chicken is. Thicker pieces need more time. Thin pieces cook faster, so keep an eye on them. For crispy potatoes, start by cutting them in half. Place them cut side down when cooking. This helps form a nice crust. Stir the potatoes while they cook. This action ensures they cook evenly and get that golden color you want. To boost flavor, add herbs like rosemary or oregano. They work well with garlic and butter. You can also try using fresh herbs instead of dried ones. For a twist, add garlic at different stages. You can roast it or even sprinkle garlic powder on the potatoes. These options give you a rich taste in every bite. Pro Tips Pat the Chicken Dry: This step helps to achieve a nice sear on the chicken, enhancing the flavor and texture. Use Fresh Garlic: Freshly minced garlic yields better flavor than pre-minced or jarred garlic, elevating the dish's taste. Don’t Overcrowd the Skillet: Cooking in batches if necessary ensures even cooking and browning of the chicken and potatoes. Adjust Seasonings to Taste: Feel free to tweak the salt, pepper, and spices according to your preference for a personalized flavor. {{image_2}} You can easily swap chicken thighs for chicken breasts. Chicken breasts cook a bit faster, so check them after five minutes on each side. You might also try pork chops or turkey cutlets. Make sure to cook these proteins to an internal temperature of 165°F. This keeps your meal safe and tasty. Adding more veggies makes this dish colorful and healthy. You can toss in green beans or bell peppers. Chop them into bite-sized pieces. Add them to the skillet with the chicken for the last five minutes. This way, they stay crisp and fresh. You can also try carrots or zucchini for more variety. Mixing up the seasonings can change the whole taste. Try adding rosemary or oregano instead of thyme. For a spicy kick, add red pepper flakes. You can also marinate the chicken in lemon juice or balsamic vinegar before cooking. Let it sit for at least 30 minutes for more intense flavor. To keep your garlic butter chicken and potatoes fresh, follow these steps: - Let the dish cool to room temperature. - Place it in an airtight container. - Store it in the fridge for up to three days. You can reheat your meal using two methods: - Oven: Preheat your oven to 350°F (175°C). Place the food in an oven-safe dish. Cover with foil and heat for about 15-20 minutes. - Skillet: Heat a skillet over medium heat. Add a splash of water or broth to keep it moist. Cook for about 5-7 minutes, stirring occasionally. If you want to save some for later, here’s how to freeze it: - Cool the dish completely before freezing. - Transfer it to a freezer-safe container or bag. - Make sure to remove as much air as possible. - It can stay frozen for up to three months. When ready to eat, thaw in the fridge overnight before reheating. Yes, you can use different potatoes. Russet potatoes work well, too. They take about 15-20 minutes to cook. Yukon Gold potatoes are also great. They need about the same time as baby potatoes. Just cut them into similar sizes for even cooking. To check if the chicken is done, use a meat thermometer. The internal temperature should reach 165°F or 75°C. You can also cut into the chicken. The meat should be white, not pink. Juices should run clear. You can prep ahead of time. Season the chicken and chop the potatoes a day before. Store them in the fridge. Cook them fresh when you’re ready. This keeps the meal tasty and warm. You can serve a green salad for freshness. Steamed broccoli or green beans add color and crunch. For a heartier meal, try bread rolls or rice. These sides balance the rich flavors of the chicken and potatoes. This dish combines tasty chicken thighs, crispy potatoes, and rich garlic butter. Follow the steps, tips, and variations for a delightful meal. Remember to focus on cooking times to ensure everything is perfect. Experiment with different proteins and veggies to make it your own. Storing and reheating leftovers is simple, too. Enjoy this easy recipe with friends and family for a great experience. Happy cooking!
    Garlic Butter Chicken and Potatoes Skillet Delight
  • - 1 tablespoon olive oil - 1 pound ground turkey or chicken - 1 can (28 oz) crushed tomatoes For this recipe, olive oil adds a nice flavor to the base. Ground turkey or chicken provides lean protein, making this soup hearty. Crushed tomatoes bring in the rich, classic taste of Italian cooking. - 2 teaspoons dried Italian herbs (oregano, basil, thyme) - 4 cups chicken or vegetable broth - 1 teaspoon red pepper flakes (optional) Dried Italian herbs give a warm, savory taste. You can use chicken or vegetable broth, which adds depth to the soup. Red pepper flakes give it a kick, but you can skip them if you prefer mild flavors. - 1 medium onion, diced - 3 cloves garlic, minced - 3 cups fresh spinach - 1 cup low-fat cottage cheese - 1 cup shredded mozzarella cheese Onion and garlic are key for a strong flavor base. Fresh spinach adds color and nutrients. Cottage cheese gives creaminess, while mozzarella provides that gooey, melty goodness. {{ingredient_image_1}} 1. Start by heating the olive oil in a large pot over medium heat. 2. Add the diced onion and sauté for 3-4 minutes until it is soft and clear. 3. Next, stir in the minced garlic. Cook it for another minute. Watch it closely so it does not burn. 4. Now, add the ground turkey or chicken to the pot. Break it apart with a spoon. 5. Cook until the meat is browned, which takes about 5-7 minutes. 1. Pour in the crushed tomatoes and broth. Mix well to combine. 2. Add the dried Italian herbs, red pepper flakes, salt, and pepper. Stir to blend all the flavors. 3. Bring the mixture to a simmer. Let it cook for 10 minutes. This helps the flavors come together. 1. Add the broken lasagna noodles to the pot. Cook for another 8-10 minutes until the noodles are tender. 2. Fold in the fresh spinach and cook until it wilts, about 2-3 minutes. 3. Stir in the cottage cheese. Make sure it is well mixed throughout the soup. 4. Ladle the soup into bowls. Top each serving with shredded mozzarella cheese. 5. Finally, garnish with fresh basil leaves before serving. Enjoy your protein-packed lasagna soup! To make this soup sing, use fresh herbs. Fresh basil adds a great twist. You can chop it and mix it in right before serving. For dried herbs, add them early in cooking. They need time to release their flavors. If you want heat, add red pepper flakes to taste. Start with a pinch, then add more if you like. When sautéing, heat your olive oil first. Add onions and give them 3 to 4 minutes. They should be soft, not brown. After that, add garlic for just a minute. This way, it stays fragrant and doesn’t burn. For the noodles, break them into pieces before adding them to the soup. This helps them cook evenly. Keep an eye on them. You want them tender, not mushy. Cook for about 8 to 10 minutes after adding. Serve your soup in deep bowls for a hearty look. Sprinkle extra mozzarella on top right before serving. This adds a creamy touch. Fresh basil leaves give a pop of color. For a complete meal, pair it with garlic bread. It’s perfect for dipping and adds crunch to your meal. Pro Tips Fresh Spinach Substitute: If fresh spinach is unavailable, you can use frozen spinach. Just thaw and drain it well before adding to the soup. Cheese Variations: For a creamier texture, replace cottage cheese with ricotta cheese. It adds a rich flavor to the soup. Make it Gluten-Free: Substitute the lasagna noodles with gluten-free pasta or use zucchini noodles for a low-carb option. Spice Level: Adjust the red pepper flakes according to your preference. Omit them for a milder flavor or add more for extra heat! {{image_2}} You can switch up the protein in your lasagna soup. Lean beef is a tasty option. It gives a rich flavor and pairs well with the tomatoes. If you prefer plant-based options, try using ground meat substitutes. They provide a similar texture without meat. Another great choice is beans or lentils. Adding canned beans boosts protein and fiber. Lentils cook quickly and absorb flavors well. You can mix and match to find what you love. If you need gluten-free options, look for gluten-free lasagna noodles. They come in many types, like rice or corn. These noodles will hold up well in the soup. For cheese lovers, vegan cheese is an excellent choice. There are many types, from almond to cashew cheese. They melt nicely and add creaminess to your soup without dairy. Adding extra vegetables can boost flavor and nutrition. Try bell peppers, zucchini, or carrots. They add sweetness and crunch. Spices also make a big difference. A dash of smoked paprika or garlic powder can enhance the taste. If you want more protein, toss in some chickpeas or chopped nuts. They add a nice crunch and a protein punch. Feel free to get creative with your lasagna soup! To keep your Protein-Packed Lasagna Soup fresh, store it in an airtight container. Place it in the refrigerator right after it cools. Make sure to consume it within 3 to 4 days for the best taste. For long-term storage, you can freeze the soup. Use freezer-safe containers or bags. Divide it into servings to make thawing easier. It can last up to 3 months in the freezer. When it comes to reheating, the stove is the best method. It warms the soup evenly and keeps the texture nice. Pour the soup into a pot and heat it on medium until hot. If you’re short on time, you can use a microwave. Place the soup in a microwave-safe bowl. Heat in short bursts of one minute, stirring in between. This helps avoid hot spots and keeps it creamy. In the fridge, your lasagna soup can last for about 3 to 4 days. After that, it may start to spoil. Always check for signs of spoilage before eating. Look for changes in color or smell. If it smells sour or looks off, it’s best to throw it away. Enjoy your soup while it’s fresh for the best flavor! Yes, this recipe is great for meal prep. You can make it ahead and enjoy it later. Store it in airtight containers. It keeps well in the fridge for up to five days. You can also freeze portions for longer storage. Just reheat when you're ready to eat. The flavors often improve after sitting for a day. This makes it a perfect choice for busy weeks. Absolutely! You can use lean ground beef or a plant-based meat alternative. Ground pork works well too, adding a different flavor. If you want a vegetarian option, try using lentils or beans. They add protein and fiber. Just adjust the cooking time for different meats. Make sure to cook them thoroughly to ensure safety. There are several ways to boost the protein in this dish. Here are some ideas: - Add more cottage cheese when mixing in the broth. - Stir in cooked quinoa or farro for extra protein and texture. - Top your soup with a sprinkle of hemp seeds or chia seeds. - Serve it with a side of Greek yogurt for extra protein. Each of these options enhances the dish while keeping it delicious. In this blog post, we explored the tasty soup recipe that combines key ingredients like olive oil, ground turkey, and crushed tomatoes. We walked through the simple steps for preparing the base, building the soup, and adding fresh veggies and cheese. I shared tips on enhancing flavors and suggested fun variations for different diets. Remember, proper storage and reheating can keep your soup fresh. Enjoy trying this recipe and making it your own! Cooking can be fun and a great way to stay healthy.
    Protein-Packed Lasagna Soup Delicious and Hearty Meal
  • To make Cheesy Loaded Meatloaf Casserole, you need some key ingredients. Here's what you'll need: - 1 pound ground beef - 1/2 pound ground turkey - 1 cup breadcrumbs - 1/2 cup grated Parmesan cheese - 1/2 cup shredded cheddar cheese - 1/4 cup milk - 1/4 cup ketchup - 1 large egg - 1 teaspoon garlic powder - 1 teaspoon onion powder - 1 teaspoon salt - 1/2 teaspoon black pepper - 1 cup diced bell peppers (assorted colors) - 1 cup corn kernels (fresh or frozen) - 1 cup shredded mozzarella cheese These ingredients blend together to create a hearty dish. The mix of ground beef and turkey gives a nice texture. The cheeses add creaminess and flavor. You can take your casserole to the next level with a few garnishes. I love to top it with fresh parsley for a pop of color. You can also serve extra ketchup on the side for dipping. For a complete meal, pair it with a simple green salad or some crusty bread. This adds freshness and crunch to your dinner. Having the right tools makes cooking easier. Here are some tools I recommend: - Large mixing bowl - 9x13 inch casserole dish - Cooking spray or olive oil for greasing - Measuring cups and spoons - Mixing spoon or spatula - Oven mitts for safety These tools help you mix, bake, and serve your Cheesy Loaded Meatloaf Casserole with ease. Make sure to have them ready before you start cooking! {{ingredient_image_1}} Start by preheating your oven to 350°F (175°C). This step is key for even cooking. Next, grab a large bowl. In this bowl, mix together 1 pound of ground beef and 1/2 pound of ground turkey. The blend gives a nice flavor and keeps your dish moist. Add 1 cup of breadcrumbs for texture and 1/2 cup of grated Parmesan cheese for a savory kick. Then, pour in 1/4 cup of milk and 1/4 cup of ketchup. These ingredients bind the meat and add moisture. Crack in 1 large egg. This helps hold everything together. Now, sprinkle in 1 teaspoon each of garlic powder and onion powder for flavor. Season with 1 teaspoon of salt and 1/2 teaspoon of black pepper. Mix until just combined. Be careful not to overmix; that can make the meat tough. Finally, fold in 1 cup of diced bell peppers and 1 cup of corn. These add color and crunch. Once your meat mixture is ready, transfer it to the greased casserole dish. Shape the mixture into a loaf. Make sure it is evenly spread in the dish. This allows for even cooking and makes for easy slicing later. Place the casserole in the oven and bake for 45-50 minutes. You want the meat to cook through and reach an internal temperature of 160°F (70°C). After the time is up, take it out and sprinkle 1 cup of shredded mozzarella cheese on top. Return the casserole to the oven for another 10 minutes. This will melt the cheese and make it bubbly. After baking, let it rest for 10 minutes. This helps the juices settle, making it easier to slice. To keep your meatloaf casserole moist, mix the ingredients gently. Overmixing can make it dry. Use a mix of ground beef and turkey for better flavor and texture. The egg and milk also help lock in moisture. Adding diced bell peppers and corn adds natural juiciness. Bake it until the internal temperature hits 160°F. For perfectly melted cheese, add it during the last 10 minutes of baking. This helps it melt evenly without burning. Use a mix of mozzarella and cheddar for a tasty top layer. If you want extra browning, broil the casserole for a couple of minutes at the end. Just watch it closely so it doesn’t burn. Serve slices on a bright platter to make it pop. A drizzle of extra ketchup adds a nice touch. Sprinkle fresh parsley on top for color and freshness. Pair it with a side salad or steamed veggies for a balanced meal. You could even serve with crusty bread to soak up any sauce! Pro Tips Choose Your Meats: Mixing ground beef with turkey keeps the meatloaf moist while adding a lighter texture. Feel free to experiment with other ground meats like chicken or pork for different flavors. Don’t Overmix: When combining the meat mixture, mix just until combined to ensure your meatloaf remains tender and does not become tough. Customize the Veggies: Add any vegetables you like, such as zucchini or carrots, to enhance nutrition and flavor. Just make sure they are diced small enough to cook evenly. Rest Before Serving: Allow the casserole to rest for at least 10 minutes after baking. This helps the juices redistribute, making for cleaner slices and better flavor. {{image_2}} You can easily swap out the ground beef and turkey for other meats. Try using ground chicken or pork for a different flavor. If you want a plant-based option, use lentils or black beans. These options still give you a hearty texture without meat. Cheese can change the whole dish. Instead of mozzarella, try using gouda or pepper jack for a kick. You can also mix different cheeses. Combine cheddar with fontina for a creamy texture. For toppings, crushed chips or breadcrumbs can add crunch. Just sprinkle them on top before the last bake. Adding veggies boosts flavor and nutrition. Try chopped spinach or mushrooms for depth. You can also add spices like paprika or cayenne for heat. Fresh herbs like thyme or basil can brighten the dish. Feel free to toss in some olives or jalapeños for extra zing. The key is to balance flavors to match your taste. To keep your Cheesy Loaded Meatloaf Casserole fresh, let it cool first. Use an airtight container. Cut the casserole into slices for easy storage. Store in the fridge for up to three days. Make sure to place a piece of parchment paper between layers if stacking. When it's time to enjoy leftovers, preheat your oven to 350°F (175°C). Place the slices in a baking dish. Cover with foil to keep it moist. Heat for about 20 minutes. You can also microwave slices for 1-2 minutes. Just cover them with a damp paper towel to prevent drying out. If you want to save some for later, freezing is a great option. Wrap individual slices in plastic wrap. Then, place them in a freezer-safe bag or container. This way, they stay fresh for up to three months. When ready to eat, thaw in the fridge overnight. Reheat as mentioned above for the best taste. Yes, you can make this casserole ahead. Prepare the meat mixture and shape it. Then, cover it tightly and store it in the fridge for up to 24 hours. When you're ready to bake, just pop it in the oven. This makes dinner easy on busy nights. If you don’t have breadcrumbs, try using crushed crackers or oats. Both options add texture and flavor. You can even use panko for a crunchier bite. Just make sure to adjust the amount of milk if needed to keep it moist. The best way to check is with a meat thermometer. Insert it into the center of the meatloaf. It should read 160°F (70°C) when done. If you don’t have a thermometer, cut into the meatloaf. The inside should not be pink, and juices should run clear. You’ve learned how to make a Cheesy Loaded Meatloaf Casserole. We covered key ingredients, easy steps, and useful tips for a moist dish. Variations let you customize flavors, and I showed you how to store leftovers. This dish is fun to make and share. I hope you try it soon! Enjoy every cheesy bite.
    Cheesy Loaded Meatloaf Casserole Easy Dinner Delight
  • - 12 mozzarella sticks - 1 cup all-purpose flour - 2 large eggs - 2 cups breadcrumbs (Panko works best) - 1 teaspoon garlic powder - 1 teaspoon paprika - 1 teaspoon cayenne pepper (adjust to taste) - 1 teaspoon smoked paprika - ½ teaspoon salt - ½ teaspoon black pepper - 1 cup buttermilk - ¼ cup hot chili oil (or homemade Nashville hot oil) - Fresh parsley for garnish (optional) To make Nashville hot mozzarella sticks, you need the right ingredients. Start with fresh mozzarella sticks. The cheese should be firm and cold. Flour coats the cheese to help the egg stick. Eggs and buttermilk combine for a rich dip. Panko breadcrumbs give a crispy texture. Garlic powder adds depth. Paprika and smoked paprika bring warmth and flavor. Cayenne pepper adds heat; adjust it for your taste. Salt and black pepper enhance all the flavors. For a spicy finish, use hot chili oil. You can make your own Nashville hot oil if you prefer. Lastly, fresh parsley adds color and freshness. Gather these ingredients, and you're ready to start the fun! {{ingredient_image_1}} - Freeze mozzarella sticks for at least 2 hours. This keeps them firm when frying. - Prepare your breading station: - In one bowl, add 1 cup of flour. - In a second bowl, whisk 2 large eggs with 1 cup of buttermilk. - In a third bowl, mix 2 cups of breadcrumbs with garlic powder, paprika, cayenne pepper, smoked paprika, salt, and black pepper. - Take each mozzarella stick from the freezer. - Coat each stick in flour, shaking off the extra flour. - Dip the floured stick into the egg mixture, letting the excess drip off. - Roll the stick in the seasoned breadcrumbs, pressing gently to help them stick. - After breading, freeze the mozzarella sticks again for 30 minutes. This helps them stay firm. - Heat oil in a deep frying pan or deep fryer to 350°F (175°C). - Carefully fry the mozzarella sticks in batches of 2-3. - Fry until they turn golden brown, about 1-2 minutes. - Use a slotted spoon to remove the sticks and drain them on a paper towel. To get the best texture for your Nashville hot mozzarella sticks, freezing is key. Start by freezing the mozzarella sticks for at least two hours. This keeps them firm during frying. It helps the cheese melt slowly, so you avoid a gooey mess. When frying, keep the oil hot, around 350°F (175°C). If the oil is too cool, the sticks will absorb oil and become soggy. Fry in small batches. This keeps the oil temperature steady and ensures crispiness. Adjusting spice levels is simple and fun. If you love heat, add more cayenne pepper. You can even mix in chili powder or hot sauce for a unique twist. Try different seasonings too. Instead of garlic powder, use onion powder for a different taste. You can also mix in some herbs like oregano or thyme for added depth. Experiment to find the flavor that you love best! Pro Tips Freeze for Perfect Shape: Freezing the mozzarella sticks for at least 2 hours before breading ensures they maintain their shape and melt evenly during frying. Double Coat for Crunch: For an extra crispy exterior, consider double coating the mozzarella sticks. After the first breading, dip them in the egg mixture again and coat with breadcrumbs a second time. Adjust the Heat: The amount of cayenne pepper can be adjusted according to your heat preference. Start with less if you're unsure, and add more for that signature Nashville kick. Drain Properly: After frying, let the mozzarella sticks drain on a paper towel-lined plate to remove excess oil, keeping them crispy and not greasy. {{image_2}} You can swap mozzarella for other cheeses. Cheddar gives a sharp taste. Pepper Jack adds a spicy kick. These cheeses melt well and bring new flavors. You can use gluten-free breadcrumbs for a different texture. Try spicy or herbed breadcrumb mixes for added flavor. Mix things up to make your sticks unique and fun. Dipping sauces make these sticks shine. Consider ranch or blue cheese for a creamy touch. You can serve them as tasty appetizers or snacks. They work great for parties or game days! To store your Nashville hot mozzarella sticks, let them cool first. Place the sticks in an airtight container. Keep them in the fridge for up to three days. This will help maintain their taste and texture. Reheat them in an oven or air fryer for best results. You want a crispy outside, just like when they were fresh. To freeze leftover mozzarella sticks, first, let them cool completely. Arrange them in a single layer on a baking sheet. Freeze them for about an hour. Once frozen, transfer them to a freezer bag. Remove as much air as possible to avoid freezer burn. They will stay good for up to three months. To reheat, bake them straight from the freezer. Set the oven to 400°F (200°C) and cook for 10-12 minutes. This keeps them crispy and warm. To make Nashville hot oil, you need simple ingredients. Start with ¼ cup of hot chili oil. Then, add in 1 tablespoon of cayenne pepper. Mix in 1 teaspoon of garlic powder and 1 teaspoon of smoked paprika. Heat the mixture gently in a pan for about 5 minutes. This will bring out the flavors. Let it cool before using. This oil adds the perfect spicy kick to your dishes. Yes, you can bake them! Preheat your oven to 400°F (200°C). Place the breaded mozzarella sticks on a baking sheet lined with parchment paper. Spray them lightly with cooking spray. Bake for about 10 to 12 minutes, flipping halfway through. They may not be as crispy as fried ones but will still taste great. Keep an eye on them to avoid burning. I love serving these with creamy ranch or blue cheese dressing. The coolness balances the heat perfectly. You can also try a classic marinara sauce for a tangy twist. If you want more heat, a spicy aioli or sriracha mayo works well too. Experiment with your favorites! You can store leftovers in the fridge for up to 3 days. Let them cool completely before placing them in an airtight container. For longer storage, freeze them for up to 1 month. Just make sure to wrap them well to avoid freezer burn. Reheat in an oven or air fryer for best results. Nashville hot flavors come from the city’s famous hot chicken. This dish mixes spices like cayenne pepper and paprika. The heat level is bold and unforgettable. It became popular in the early 20th century and has grown since then. Today, it inspires many recipes, including these mozzarella sticks. The flavors celebrate Nashville's culinary heritage and love for spicy food. You now know how to make Nashville hot mozzarella sticks with ease. We covered the ingredients, step-by-step cooking, and tips for the best results. Remember to freeze the sticks and adjust the spice to your taste. You can also try different types of cheese or breading for variety. Proper cooling and storage keep them fresh longer. Enjoy your homemade treat, and don’t hesitate to share your creations!
    Nashville Hot Mozzarella Sticks Crispy and Flavorful
  • - Whole Wheat Pasta: Whole wheat pasta offers more fiber than regular pasta. Fiber helps with digestion and keeps you full longer. It also adds a nutty flavor to the dish. - Lean Ground Beef: Lean ground beef packs a lot of protein. Protein is key for muscle growth and repair. This beef gives your meal its hearty base, making it filling and satisfying. - Dairy Options: Greek yogurt and cottage cheese are great dairy choices. Greek yogurt adds creaminess without too much fat. Cottage cheese boosts protein and keeps the sauce rich and smooth. - Flavor Enhancers: Garlic and onions are must-haves for depth. They add a warm aroma and taste. Oregano and paprika bring a hint of earthiness. Together, they create a balanced flavor profile. - Nutritional Boosters: Spinach and cherry tomatoes add color and nutrients. Spinach is full of vitamins and adds a fresh taste. Cherry tomatoes add sweetness and a pop of juiciness that brightens the dish. - Adding Fresh Herbs for Flavor: Fresh basil can elevate your dish. It adds freshness and a burst of flavor. You can sprinkle it on top before serving for a bright finish. - Suggested Protein Alternatives: If you want variety, try ground turkey or chicken. They are leaner options and still high in protein. For a vegetarian twist, use lentils or chickpeas to keep the protein boost. {{ingredient_image_1}} How to Cook Whole Wheat Pasta Al Dente To cook whole wheat pasta, start by boiling water in a large pot. Add a pinch of salt to the water. Once it boils, add 300g of whole wheat pasta. Cook according to the package instructions, usually about 8 to 10 minutes. You want the pasta firm yet tender. This is called al dente. Once done, drain the pasta and save a little pasta water for later. Tips for Perfect Pasta Texture To keep your pasta from sticking, stir it gently as it cooks. Use enough water in the pot. This helps the pasta move freely. Be careful not to overcook it. Overcooked pasta can turn mushy and lose its nice bite. Sautéing Onions and Garlic Properly In a large skillet, heat 1 tablespoon of olive oil over medium heat. Add 1 small onion, chopped finely. Cook the onion for about 3 to 4 minutes until it is soft and translucent. Then, add 3 cloves of minced garlic. Cook for another 1 to 2 minutes until the garlic smells nice. Cooking Lean Ground Beef: Best Practices Next, raise the heat to medium-high. Add 250g of lean ground beef to the skillet. Cook it for about 5 to 7 minutes. Break it apart with a wooden spoon. Make sure it is browned and cooked through. If there is extra fat, drain it away. How to Create a Creamy Sauce with Greek Yogurt and Cottage Cheese Now, add 1 teaspoon of dried oregano, 1 teaspoon of paprika, salt, and pepper. Stir it all together. Next, toss in 1 cup of chopped spinach and 1 cup of halved cherry tomatoes. Cook for 2 to 3 minutes until the spinach wilts. Then, lower the heat. Add 1 cup of Greek yogurt and 1 cup of low-fat cottage cheese. Mix well until it becomes creamy. If it is too thick, add a splash of the reserved pasta water. Folding in Pasta: Ensuring Even Coating Finally, gently fold in the cooked pasta. Make sure each piece is coated with the creamy sauce. Taste it and adjust the seasoning if needed. Serve hot, and if you like, garnish with fresh basil. Enjoy your high protein creamy beef pasta! Best Cooking Techniques for Ground Beef Start with a hot skillet. This helps to brown the beef well. Break it apart with a wooden spoon. Cook until it turns brown and no pink remains. Drain any extra fat to keep it lean. Avoiding Common Mistakes with Pasta Always cook pasta in a large pot of boiling water. Add salt to the water for flavor. Stir the pasta often to prevent sticking. Cook until al dente, so it has a slight bite. Reserve some pasta water to adjust your sauce later. Additions That Lift the Dish: Cheese, Herbs, and Seasoning Mix in cheese like Parmesan or mozzarella for extra creaminess. Fresh herbs like basil or parsley add bright flavors. Season well with salt, pepper, and herbs. Taste as you go to find the right balance. Adjusting Consistency for Creaminess If your sauce is too thick, add a splash of reserved pasta water. Stir it in slowly until you reach the perfect creamy texture. Greek yogurt and cottage cheese create a rich sauce without extra fat. Ideal Pairings with High Protein Creamy Beef Pasta This dish pairs great with a side salad or steamed veggies. Garlic bread adds a nice crunch. A light red wine can complement the flavors well, too. Creative Ways to Serve this Dish Consider serving it in a large bowl for a family-style meal. You could also use individual bowls for a fancy touch. Garnish with fresh basil for color and flavor. Pro Tips Use Fresh Ingredients: Always opt for fresh spinach and ripe cherry tomatoes to enhance the flavor and nutritional value of your dish. Customize Your Protein: Feel free to substitute lean ground beef with ground turkey or chicken for a lighter version of this dish. Adjust Creaminess: If you prefer a thicker sauce, add more Greek yogurt or cottage cheese. For a thinner sauce, stir in a bit more reserved pasta water. Perfect Seasoning: Always taste your dish before serving and adjust the seasoning with salt and pepper to ensure balanced flavors. {{image_2}} Gluten-Free Options: Recommended Pasta Types For a gluten-free meal, choose pasta made from rice, corn, or quinoa. These pasta types cook well and offer similar textures. Look for brands that are labeled gluten-free to ensure safety. Vegetarian Adaptations: Plant-Based Protein Sources To make this dish vegetarian, swap the ground beef for lentils or chickpeas. These options provide protein and add a nice texture. You can also use tofu for a different flavor and protein boost. Spicy Version: Adding Heat to the Recipe If you love spice, try adding crushed red pepper flakes or diced jalapeños. Mix these in with the garlic for the best flavor. Adjust the amount based on your heat preference for a kick. Alternative Herbs and Spices to Experiment With Feel free to swap out the oregano and paprika for herbs like thyme or rosemary. Fresh herbs can add bright flavors. Experiment with spices like cumin for a unique twist on this creamy dish. Adjusting for Different Diets: Meal Prep Ideas This recipe serves four. If you need more, simply double the ingredients. For smaller meals, divide the recipe in half. You can easily adjust the portion sizes based on your needs. Serving Suggestions for Family or Meal Prep Serve this dish with a side salad for a complete meal. For meal prep, store it in airtight containers. This way, you can enjoy it throughout the week without losing flavor. To keep your creamy beef pasta fresh, cool it first. Place it in a shallow bowl. This helps it cool quickly and evenly. Cover the bowl with plastic wrap or transfer it to an airtight container. Store it in the fridge for up to three days. To prevent sauce separation, mix in a bit of the reserved pasta water before storing. This keeps the sauce creamy. If you find the sauce thickens too much, add a little water when reheating. Reheating pasta can be tricky, but there are smart ways to do it. The best method is using the stove. Heat it in a pan over low heat. Stir often to keep it from sticking. Add a splash of water for creaminess. Microwaving is faster but may dry out the pasta. If you use the microwave, cover it with a damp paper towel. This helps keep the moisture in. Remember, both methods have their pros and cons. Yes, you can freeze high protein creamy beef pasta! First, let it cool completely. Then, divide it into portions. Use freezer-safe bags or containers. Press out as much air as possible to avoid freezer burn. To thaw, place the pasta in the fridge overnight. For a quicker option, you can microwave it straight from the freezer. Just remember to stir it often. This will help it heat evenly. What makes this pasta dish high in protein? This dish is high in protein because it uses lean ground beef and dairy. Lean ground beef has about 22 grams of protein per 100 grams. The Greek yogurt and cottage cheese add even more protein. Together, these ingredients create a creamy sauce packed with nutrients. Can I substitute Greek yogurt with other ingredients? Yes, you can use sour cream or silken tofu if you want a dairy-free option. Both will give a creamy texture. Just keep in mind that the taste will differ slightly, but they will still work well in the dish. How long does it take to prepare and cook this dish? This dish takes about 25 minutes from start to finish. You spend about 10 minutes prepping and 15 minutes cooking. It’s quick enough for a busy weeknight meal. How can I speed up the cooking process? To speed things up, cook the pasta while you prepare the sauce. You can also chop your vegetables ahead of time. Using pre-minced garlic and pre-chopped onions can help, too. What is the nutritional breakdown of High Protein Creamy Beef Pasta? A serving has around 450 calories, 35 grams of protein, and 15 grams of fat. It’s also high in fiber thanks to the whole wheat pasta. This makes it a filling meal that is good for your body. Is this dish suitable for meal prepping? Yes, this dish is great for meal prepping. You can store it in the fridge for up to four days. Just reheat it in the microwave or on the stove when you’re ready to eat. In this post, we explored how to make a high protein creamy beef pasta. We covered the main ingredients like whole wheat pasta, lean ground beef, and dairy options such as Greek yogurt. You learned cooking tips, flavor enhancers, and variations, ensuring your dish is delicious and nutritious. Remember, the key to a tasty meal is balancing flavors and textures. With these methods and tips, you can enjoy a healthy pasta dish that satisfies your cravings. Get cooking and enjoy every bite!
    High Protein Creamy Beef Pasta Recipe for Dinner
  • To make easy stuffed bell peppers, gather these items: - 4 large bell peppers (any color) - 1 cup cooked quinoa - 1 can (15 oz) black beans, drained and rinsed - 1 cup corn kernels (fresh, frozen, or canned) - 1 cup diced tomatoes (fresh or canned) - 1 teaspoon cumin - 1 teaspoon chili powder - 1/2 teaspoon garlic powder - Salt and pepper to taste - 1 cup shredded cheese (cheddar or Mexican blend) - Fresh cilantro, for garnish If you want to boost the flavor, you can try these extras: - 1/2 cup diced onion for sweetness - 1 jalapeño, finely chopped for heat - 1 teaspoon smoked paprika for depth - A squeeze of lime juice to brighten the dish You can easily swap ingredients to fit your needs: - Use brown rice or cauliflower rice instead of quinoa for a different base. - Replace black beans with kidney beans or lentils for variety. - For a dairy-free option, use vegan cheese or leave it out entirely. - If gluten-free is a must, ensure the quinoa and beans are certified gluten-free. These ingredients create a filling and tasty meal that everyone will enjoy. Feel free to mix and match based on what you love! {{ingredient_image_1}} Start by preheating your oven to 375°F (190°C). This step is key for even cooking. Next, take four large bell peppers in any color you like. Cut off the tops and remove the seeds and membranes. Make sure to keep the pepper shells intact. If they wobble, slice a tiny bit off the bottom. This helps them stand firmly. Once ready, place the peppers upright in a baking dish. In a big mixing bowl, combine one cup of cooked quinoa, one can of black beans (drained and rinsed), and one cup of corn kernels. You can use fresh, frozen, or canned corn. Next, add one cup of diced tomatoes, one teaspoon of cumin, one teaspoon of chili powder, and half a teaspoon of garlic powder. Season with salt and pepper to taste. Mix all the ingredients well until they are nicely combined. This mixture packs in flavor and is healthy too! Stuff each bell pepper generously with the quinoa filling. Press down gently to pack it in tight. After that, sprinkle one cup of shredded cheese on top of each stuffed pepper. Cover the baking dish with aluminum foil to keep moisture in. Bake in your preheated oven for 25 minutes. After 25 minutes, remove the foil and bake for another 10 to 15 minutes. The cheese should melt and bubble, and the peppers will become tender. Once they look perfect, take them out of the oven. Let them cool for a few minutes before serving. Enjoy your colorful and tasty stuffed bell peppers! To make your stuffed peppers just right, follow these tips: - Choose fresh peppers: Look for firm, shiny peppers. Avoid any with soft spots. - Cut the tops evenly: This helps the peppers stand well. A flat base is key. - Don’t overcook: Bake until tender but still firm. You want a slight crunch. - Season well: Add salt to the water when boiling the peppers. This helps enhance their flavor. You can prepare stuffed peppers ahead. Here’s how: - Prep the filling: Make the quinoa mixture a day before. Store it in the fridge. - Stuff the peppers: Fill the peppers and wrap them in plastic wrap. - Freeze without baking: You can freeze them for up to three months. Just thaw before baking. - Bake from frozen: If baking from frozen, add about 10-15 minutes to the cook time. Garnishing adds charm to your dish. Here are fun ideas: - Fresh herbs: Top with chopped cilantro or parsley for a fresh taste. - Citrus zest: Grate a bit of lime or lemon zest on top. It brightens the flavors. - Drizzle sauce: A little hot sauce or ranch dressing can give a nice touch. - Cheese variety: Try different cheeses for topping. Feta or goat cheese can add a new twist. Pro Tips Choose Colorful Peppers: Using a mix of bell pepper colors not only makes the dish visually appealing but also adds different flavors. Try red, yellow, and green for a vibrant presentation. Customize the Filling: Feel free to add other vegetables or proteins to the quinoa mixture, such as spinach, zucchini, or ground turkey, to suit your taste preferences. Layer Flavors: For an enhanced flavor profile, consider sautéing the vegetables before adding them to the quinoa mixture. This brings out their natural sweetness and adds depth to the dish. Garnish Creatively: In addition to cilantro, try topping the stuffed peppers with avocado slices or a dollop of sour cream for added creaminess and flavor. {{image_2}} You can make stuffed bell peppers with meat. Ground beef or turkey works great. Just brown the meat in a pan first. Mix it with the quinoa, beans, corn, and spices. This adds protein and a rich flavor. You can also add sausage for a spicy kick. If you want a heartier meal, try adding diced chicken or pork. If you want a vegetarian option, skip the meat. Use more beans or lentils for protein. You can also add chopped mushrooms for a meaty texture. Spinach or kale can bring in extra nutrients. Mix in some feta cheese for a tangy flavor. These options make the stuffed peppers still filling and tasty. To make this dish vegan, use plant-based cheese or skip the cheese. Replace the quinoa with brown rice or farro for variety. You can also add nuts or seeds for crunch. To enhance the flavor, use smoked paprika instead of chili powder. These small changes can make your stuffed peppers both vegan and delicious. To store leftover stuffed peppers, let them cool first. Place them in an airtight container. You can keep them in the fridge for up to 3 days. Make sure to separate layers with parchment paper to avoid sticking. If you have extra filling, store it in another container. Reheating stuffed peppers is easy. You can use the oven or the microwave. For the oven, preheat it to 350°F (175°C). Place the peppers in a baking dish and cover with foil. Heat for about 15-20 minutes until warm. For the microwave, place them on a microwave-safe plate. Heat them for 2-3 minutes or until hot. If you want to freeze stuffed peppers, do it before baking. Wrap each pepper in plastic wrap, then place them in a freezer bag. They can last up to 3 months in the freezer. When ready to eat, thaw in the fridge overnight. Bake them as usual, adding a few extra minutes to the cooking time. Yes, you can use many types of peppers. Bell peppers are popular because they are sweet and easy to stuff. You can also try poblano or Anaheim peppers for a spicy kick. Each pepper gives a unique flavor. Just remember to adjust the cooking time if the peppers are larger or smaller. The peppers are done when they are soft and tender. The cheese should melt and bubble on top. A fork should easily pierce the skin. Bake them until they look golden brown on top. If you prefer a firmer texture, check them a few minutes earlier. Stuffed peppers pair well with many sides. A fresh salad adds crunch and freshness. Rice or quinoa can make the meal heartier. You can also serve them with a side of guacamole or salsa for extra flavor. Enjoying them with tortilla chips is another fun option. This blog post guided you through making delicious stuffed bell peppers. You learned about ingredients, step-by-step cooking, and helpful tips. We covered variations for meat lovers, vegetarians, and vegans. I also shared storage info and answered common questions. Putting it all together, you can create a meal that suits everyone’s taste. Enjoy cooking and sharing this tasty dish!
    Easy Stuffed Bell Peppers Quick and Flavorful Recipe
  • To make delicious zucchini brownies, you need some key items: - 1 cup grated zucchini - 1/2 cup all-purpose flour - 1/2 cup unsweetened cocoa powder These main ingredients give your brownies a rich chocolate flavor and a soft texture. The grated zucchini adds moisture without changing the taste much. For sweetness and richness, gather these: - 1/2 cup granulated sugar - 1/4 cup brown sugar, packed - 1/3 cup vegetable oil Granulated sugar makes the brownies sweet. Brown sugar adds a nice hint of caramel flavor. Vegetable oil keeps them moist and tender. You can make your brownies even better with: - 1/2 cup chocolate chips (optional) - 1/4 cup chopped walnuts (optional) Chocolate chips give an extra chocolate burst. Chopped walnuts add a nice crunch and flavor. You can mix and match these add-ins to your taste. Check out the Full Recipe for all the steps to make these yummy brownies! 1. Preheating the oven Set your oven to 350°F (175°C). This helps the brownies bake evenly. 2. Preparing the baking pan Line an 8x8 inch baking pan with parchment paper. Leave some paper hanging over the sides. This will help you lift the brownies out later. 1. Combining zucchini and sugars In a medium bowl, mix 1 cup of grated zucchini with both sugars. Use 1/2 cup of granulated sugar and 1/4 cup of brown sugar. Stir until well blended. Let this sit for about 5 minutes. This step lets the zucchini release moisture. 2. Whisking dry ingredients In another bowl, whisk together 1/2 cup of all-purpose flour, 1/2 cup of cocoa powder, 1/2 teaspoon of baking powder, 1/4 teaspoon of baking soda, and 1/4 teaspoon of salt. Make sure everything is mixed well. 1. Incorporating wet and dry mixtures Add 1/3 cup of vegetable oil, 1 teaspoon of vanilla extract, and 1 large egg to the zucchini mix. Stir until smooth. Gradually add the dry mix to this wet mix. Stir gently until just combined. Avoid overmixing to keep the brownies soft. 2. Baking time and guiding tips Pour the brownie batter into the prepared pan. Spread it evenly. Bake for 25-30 minutes. A toothpick inserted in the center should come out with a few moist crumbs. After baking, let the brownies cool in the pan for 10 minutes. Lift them out using the parchment paper. Transfer to a wire rack to cool completely before cutting into squares. Enjoy your rich and fudgy zucchini brownies! For the full recipe, see above. - Avoiding overmixing: When you mix your batter, do it gently. Overmixing can make your brownies tough. Stir just until you see no dry flour. This keeps them soft and chewy. - Ensuring moisture balance: Zucchini adds moisture to your brownies. Use the right amount. If you add too much, your brownies can be too wet. Keep an eye on the texture as you mix. - How to grate zucchini properly: Use a box grater or food processor. Grate the zucchini until it’s fine. This helps it blend well into the batter. - Dealing with excess moisture: Zucchini can hold a lot of water. After grating, place it in a clean towel. Squeeze out the extra moisture. This prevents your brownies from being soggy. - Recommended spices: Adding spices can boost flavor. Try a pinch of cinnamon or a dash of nutmeg. These spices bring out the chocolate taste. - Serving suggestions: Serve your brownies warm. A scoop of vanilla ice cream on top makes it a treat. You can also dust with powdered sugar for a nice look. For the full recipe, check out the Chocolate Zucchini Bliss Brownies. Enjoy these tips to make your brownies delightful! {{image_2}} To make vegan zucchini brownies, you need to replace the egg and oil. Use flaxseed meal or applesauce as an egg substitute. A common ratio is 1 tablespoon of flaxseed meal mixed with 2.5 tablespoons of water to replace one egg. For oil, use unsweetened applesauce or a plant-based oil like coconut oil. This keeps the brownies moist and tasty. You may need to adjust the sweetness. Applesauce can add more sugar, so taste the batter before baking. If you think it needs more sweetness, add a little maple syrup or agave. This ensures your brownies remain flavorful and moist. For gluten-free zucchini brownies, swap regular flour for gluten-free flour blends. Almond flour or oat flour also works well. These flours add unique flavors and textures. Honeyville or Bob’s Red Mill offer great gluten-free options. Be cautious about cross-contamination. Always check labels to ensure your flour is certified gluten-free. If you use nuts, ensure they are also gluten-free. This way, everyone can enjoy the brownies without worry. If you want low-carb zucchini brownies, use sugar substitutes like erythritol or stevia. These sweeteners can cut down on carbs while keeping sweetness. Adjust the amount based on your taste; each sweetener has a different level of sweetness. Baking time may also change. Low-carb ingredients can bake faster, so check for doneness a few minutes early. Use a toothpick to test them. The toothpick should come out with a few moist crumbs for the best texture. For all these variations, be sure to follow the [Full Recipe] for a great base. Enjoy your baking adventure! You can store your zucchini brownies in the pantry or the refrigerator. If you keep them in the pantry, use an airtight container. This helps keep them fresh. If you prefer, you can refrigerate them to extend their life. Just remember to wrap them well to avoid drying out. To keep your brownies fresh, try these tips: - Place parchment paper between layers if stacking. - Avoid exposing them to light or heat. - For extra moisture, add a slice of bread in the container. Freezing your zucchini brownies is easy! First, let them cool completely. After that, cut them into squares. Wrap each square tightly in plastic wrap. Then, place them in a freezer bag. This keeps them from getting freezer burn. When you're ready to eat them, thaw the brownies. Leave them in the fridge overnight or let them sit at room temperature for a few hours. They will taste fresh again! Zucchini brownies last about 4 to 5 days in the pantry. In the fridge, they can last up to a week. If you freeze them, they can last about three months. Watch for signs of spoilage. If you see mold or if they smell off, toss them out. Always trust your senses! Enjoy your brownies at their best. For the full recipe, check out the delicious Chocolate Zucchini Bliss Brownies! Yes, you can use frozen zucchini. First, thaw it in the fridge overnight. After thawing, drain any excess water. This step helps keep your brownies from being too wet. If you skip this, your brownies may turn out soggy. You can then grate the zucchini as you would with fresh zucchini. This method still gives you that moist texture in your brownies. To make your brownies fudgier, use less flour. Try reducing the flour by a couple of tablespoons. You can also add more chocolate chips. This boosts the chocolate flavor and adds to the fudginess. Another tip is to bake them for a shorter time. Start checking at 20 minutes to avoid overbaking. This keeps the center soft and gooey. Yes, zucchini brownies are healthy! Zucchini adds moisture without many calories. It is low in fat and high in fiber. This helps you feel full and satisfied. Plus, you get vitamins A and C from zucchini. Using less sugar and whole grain flour can make them even healthier. This way, you can enjoy a sweet treat without the guilt. Try my Full Recipe for a delicious twist on dessert! Zucchini brownies blend health and taste. We covered key ingredients, steps, and tips. You can customize the recipe with add-ins or variations for different diets. Storing them well keeps your brownies fresh longer. In the end, zucchini brownies are a great way to enjoy dessert while sneaking in veggies. Try making them soon, and enjoy the rich flavor without guilt. You'll love how easy they are!
    Zucchini Brownies Delightful and Healthy Dessert Option
  • - 2 lbs beef chuck, cut into 1-inch cubes - 4 medium carrots, sliced - 3 potatoes, diced - 1 large onion, chopped - 3 cloves garlic, minced - 4 cups beef broth - 2 tablespoons tomato paste - 2 teaspoons dried thyme - 1 teaspoon rosemary - 1 teaspoon paprika - Salt and pepper to taste - 2 tablespoons olive oil The main ingredients create a rich and hearty beef stew. Beef chuck gives the stew its depth and flavor. The carrots and potatoes add sweetness and texture. Onion and garlic bring a strong aroma to the dish. Seasonings like thyme and rosemary add warmth and earthiness. The beef broth and tomato paste form a savory base. - 2 tablespoons cornstarch (optional, for thickening) - Fresh parsley, chopped (for garnish) - 1 cup frozen peas Optional ingredients can enhance your stew. Cornstarch helps thicken the gravy, giving it a nice body. Fresh parsley adds a pop of color and brightness. Peas introduce a sweet crunch, making the stew more interesting. You can mix and match these to suit your taste. {{ingredient_image_1}} To start, set your Instant Pot to the 'Sauté' function. Add two tablespoons of olive oil. Once the oil is hot, add the beef chuck cubes in batches. This helps them brown nicely. Make sure to brown each side for the best flavor. After browning, take the beef out and set it aside on a plate. This step builds a rich base for your stew. Now, it’s time to cook the veggies. Add the chopped onion to the pot. Cook until it becomes soft and clear, about three to four minutes. Next, add the minced garlic. Stir for about a minute until it smells great. Adding the onions and garlic at this stage brings out their flavors. It creates a nice, tasty base for your stew. Next, return the browned beef to the pot. Add the sliced carrots and diced potatoes. Sprinkle in the dried thyme, rosemary, paprika, and a pinch of salt and pepper. Stir everything well to coat with the seasonings. Then, mix in two tablespoons of tomato paste. This helps to deepen the flavor of the stew. Pour in four cups of beef broth. It’s important to scrape the bottom of the pot with a wooden spoon. This removes any bits stuck there. These bits add flavor, but you want to avoid the burn notice. Close the lid of the Instant Pot and set it to 'Manual' or 'Pressure Cook' on high for 35 minutes. Make sure the pressure valve is set to sealing. Once cooking is done, let the pressure release naturally for ten minutes. After that, do a quick release for any remaining pressure. This method keeps the stew tender. Now, stir in one cup of frozen peas for a pop of color and texture. If you want a thicker stew, mix two tablespoons of cornstarch with a little cold water. Stir this into the stew and let it simmer on 'Sauté' for a few minutes. Before serving, taste the stew. Adjust the seasoning if needed. Ladle the stew into bowls and sprinkle fresh chopped parsley on top for a nice look. This adds a fresh touch that makes your cozy stew even better. To boost the flavor of your stew, try adding more herbs. Fresh herbs like thyme and rosemary bring brightness. You can also use bay leaves for depth. If you want a little heat, add red pepper flakes. For browning beef, make sure the pot is hot. Sear the beef in batches to avoid steaming. This helps develop a rich, deep flavor. Don't rush this step; it’s key for a tasty stew. If you want to use different cuts of meat, adjust the cooking time. For tender cuts, like sirloin, 25 minutes is enough. Tougher cuts, like brisket, may need 45 minutes for best results. You can also adjust for tenderness. If you like your beef fall-apart tender, add 10 more minutes. For firmer chunks, stick to the original time. To avoid the burn notice, always scrape the bottom of the pot. This removes stuck bits that can burn. Add enough liquid, like broth, to keep it safe. Keep the pressure valve set to sealing for cooking. This ensures the pot builds pressure correctly. Also, don’t fill the pot too full; leave some space for steam to build. Pro Tips Brown the Beef Well: Searing the beef cubes until nicely browned adds depth of flavor to your stew, creating a rich and savory base. Use Fresh Herbs: If available, fresh thyme and rosemary can elevate the flavor profile of your stew significantly compared to dried herbs. Customize Your Veggies: Feel free to add other vegetables like mushrooms or bell peppers for more texture and flavor variety in your stew. Adjust Thickness: If you prefer a thicker stew, remember that adding the cornstarch slurry towards the end allows for better control over the texture. {{image_2}} You can switch out the beef in this stew. Chicken works well if you want a lighter dish. Just cut it into bite-sized pieces. Cook it the same way as the beef. Pork is another great choice. Use pork shoulder for a rich flavor. For a vegetarian option, try mushrooms or lentils. They add a hearty texture without meat. Beans like kidney or black beans can also boost protein. Seasonal veggies can change the stew's taste. Use butternut squash or sweet potatoes in the fall. In spring, add green beans or asparagus. You can also use frozen mixed vegetables when fresh ones are not available. Adding legumes like chickpeas or lentils adds protein and fiber. They make the stew filling and nutritious. Want to spice things up? Add red pepper flakes or cayenne for heat. You can also mix in some smoked paprika for a deeper flavor. If you want an Italian twist, add basil and oregano. For a Mexican flair, try cumin and chili powder. These variations keep the stew exciting and cater to your taste. To store leftover beef stew, let it cool first. Then, transfer it to an airtight container. This keeps your stew fresh and safe to eat. Use glass or plastic containers with tight seals. These are the best for preventing spills and odors. Store in the fridge for up to three days. To freeze beef stew, use freezer-safe containers or heavy-duty freezer bags. Make sure the stew is cool before packing it away. Leave some space at the top of the container. This allows room for expansion as the stew freezes. Beef stew can last for up to three months in the freezer. When ready to eat, thaw it in the fridge overnight. You can also use the microwave for faster thawing. For reheating, the stovetop is best. It warms the stew evenly and keeps the texture nice. Heat on low and stir often to avoid sticking. If you use a microwave, place the stew in a microwave-safe bowl. Cover it with a damp paper towel. Heat it in short bursts, stirring in between to ensure even warming. Enjoy your cozy stew just like new! Yes, you can use frozen beef, but it changes the cooking process. When you cook frozen beef, it needs longer time to reach safe temperatures. To avoid this, I suggest thawing the beef first. You can thaw beef overnight in the fridge or use the microwave on defrost. Thawed beef cooks evenly and makes your stew more flavorful. To thicken your beef stew, you have a few options. One way is to mix cornstarch with cold water, creating a slurry. Stir this into the stew while it simmers. Another method is to mash some of the potatoes in the stew. They will add creaminess and help it thicken naturally. You can also let the stew simmer longer without the lid to reduce the liquid. Instant Pot Beef Stew pairs well with many sides. Here are some great options: - Crusty bread or dinner rolls for dipping - Rice or quinoa for extra texture - A fresh green salad to balance the meal - Mashed potatoes for a comforting touch Yes, you can make this stew in advance. Cook it and let it cool before storing. Place it in an airtight container and store it in the fridge for up to three days. You can also freeze the stew for longer storage. Just make sure to leave some space in the container for expansion. Instant Pot Beef Stew lasts in the fridge for about three to four days. Make sure it cools down before you store it. Always use airtight containers to keep it fresh. If you’re unsure, check for any off smells or changes in texture before eating leftovers. In this post, I covered how to make Instant Pot Beef Stew. You learned about key ingredients like beef, vegetables, and seasonings. I shared steps to prepare the beef, cook vegetables, and pressure cook the stew. We explored tips to enhance flavor and variations, like using different proteins and vegetables. Finally, I provided storage tips to keep your stew fresh. Whether you enjoy this dish now or later, hungry bellies will love it!
    Instant Pot Beef Stew Cozy Style Comforting Recipe
  • - 1 ½ cups graham cracker crumbs - ½ cup unsalted butter, melted - 2 tablespoons brown sugar - 1 teaspoon ground cinnamon - 16 oz cream cheese, softened - 1 cup granulated sugar - 1 cup pumpkin puree - 1 teaspoon vanilla extract - 3 large eggs - 2 teaspoons pumpkin pie spice - 1 tablespoon all-purpose flour - Pinch of salt What can you use instead of graham cracker crumbs? You can try crushed cookies like digestive biscuits or vanilla wafers. These work well for a different flavor. If you need dairy-free options, look for cream cheese made from almonds or cashews. They taste great in this recipe too. For sugar, you can swap granulated sugar with coconut sugar or maple syrup. These options add a nice depth to the flavor. {{ingredient_image_1}} 1. First, preheat the oven to 325°F (160°C). Grease a 9-inch springform pan. 2. In a medium bowl, mix together: - 1 ½ cups graham cracker crumbs - ½ cup unsalted butter, melted - 2 tablespoons brown sugar - 1 teaspoon ground cinnamon 3. Stir until the crumbs are well-coated. This will form a tasty base. 4. Press the crumb mixture into the bottom of the pan tightly to make a solid crust. 5. Bake the crust for 10 minutes, then take it out and let it cool. 1. In a large bowl, beat 16 oz of softened cream cheese until creamy. 2. Gradually add in 1 cup of granulated sugar. Mix until smooth and well combined. 3. Next, add 1 cup of pumpkin puree, 1 teaspoon of vanilla extract, and 2 teaspoons of pumpkin pie spice. Mix well. 4. Add 3 large eggs one at a time. Mix slowly after each addition. This helps keep the texture light. 5. Sprinkle in 1 tablespoon of all-purpose flour and a pinch of salt. Mix until just combined, avoiding overmixing. 1. Pour the cream cheese mixture over the cooled crust in the springform pan. 2. Bake for 55-60 minutes. The center should be set and a little jiggly. It will firm up as it cools. 3. Turn off the oven after baking. Leave the cheesecake inside for another hour to cool slowly. 4. Once cooled, take it out and let it cool at room temperature. 5. Finally, refrigerate the cheesecake for at least 4 hours or overnight for the best taste. Before serving, enjoy topping it with whipped cream and a sprinkle of cinnamon! To make your pumpkin cheesecake shine, you need to focus on a few key points. Cracks on the surface can ruin the look. To avoid this, mix the batter gently. Overmixing adds air, which can cause cracks. When baking, place a pan of water in the oven. This adds moisture and helps prevent cracks. Next, ensure the cheesecake sets properly. Bake it until the center is slightly jiggly. It will firm up as it cools. After baking, leave the cheesecake in the oven with the door slightly open. This helps it cool slowly and reduces cracking. For better results, use a few recommended tools. A good springform pan makes it easy to remove the cheesecake. An electric mixer will give you a smooth filling. A spatula is great for scraping down the sides of the bowl. These tools will help you create a perfect dessert every time. When it comes to serving, whipped cream and spices can make your cheesecake pop. A dollop of whipped cream adds a nice touch. You can sprinkle some ground cinnamon on top for extra flavor. Consider serving your cheesecake with caramel sauce or nuts. Drizzle warm caramel over each slice. Chopped pecans or walnuts add a great crunch. These toppings make the dish feel special and festive. For gatherings, think about portioning ideas. Slice the cheesecake into small pieces. This makes it easy for guests to enjoy. You can also serve mini slices with different toppings. This way, everyone can try a little bit of everything! Pro Tips Room Temperature Ingredients: Make sure your cream cheese and eggs are at room temperature before mixing. This helps create a smoother batter and prevents lumps. Don't Overmix: When adding the eggs and flour, mix just until combined. Overmixing can lead to a dense cheesecake instead of a light and airy texture. Cool Gradually: Allowing the cheesecake to cool in the oven with the door slightly ajar helps prevent cracks on the surface by gradually reducing the temperature. Chill Overnight: For the best flavor and texture, refrigerate the cheesecake overnight. This allows the flavors to meld and the cheesecake to set perfectly. {{image_2}} - Adding chocolate or Nutella swirl You can mix chocolate into the filling for a rich twist. Just swirl in melted chocolate or Nutella before baking. This adds a nice contrast to the pumpkin flavor. - Incorporating different spices Try adding nutmeg, allspice, or even ginger. These spices will bring a new depth to your cheesecake. You can use them alone or in combination with pumpkin pie spice. - Swapping pumpkin for sweet potato or butternut squash If you want a different taste, use sweet potato or butternut squash. Both have a similar texture and flavor. They will give your cheesecake a unique twist while keeping it creamy. - Using ginger snap cookies or Oreo crumbs Instead of graham crackers, use crushed ginger snaps or Oreos. This change gives your crust a bold flavor. It pairs well with the pumpkin filling and adds a special touch. - Gluten-free crust options For a gluten-free version, use gluten-free graham crackers or almond flour. Mix them with melted butter and sugar. This keeps the crust tasty without gluten. - No-bake cheesecake alternatives If you prefer a no-bake cheesecake, skip the oven. Use a mixture of cream cheese, pumpkin, and sugar. Set it in the fridge to firm up. The result is a creamy dessert without baking. To store your pumpkin cheesecake, use the right methods. After it cools, cover it with plastic wrap or foil. This keeps it fresh. You can also use an airtight container. In the fridge, it lasts about 5 to 7 days. If you want to keep it longer, freeze it. Wrap the cheesecake tightly in plastic wrap and then foil. This helps prevent freezer burn. When frozen, it stays good for up to 3 months. When you are ready to eat frozen cheesecake, thaw it slowly. Move it to the fridge for a day. This keeps it from getting soggy. If you need it faster, let it sit at room temperature for a few hours. To reheat, use a low oven. Set it to 300°F (150°C) and warm for about 10 to 15 minutes. This method keeps the texture nice and creamy. Avoid using a microwave, as it can make the cheesecake soggy. How do you know when pumpkin cheesecake is done? You can tell when your pumpkin cheesecake is done by checking the center. It should be set and slightly jiggly. The edges will look firm, while the middle may still wobble a bit. After baking, let it cool gradually in the oven for the best texture. Can you make pumpkin cheesecake ahead of time? Yes, you can make pumpkin cheesecake ahead of time. In fact, it tastes better when chilled overnight. Just cover it well and store it in the fridge. This gives the flavors time to develop. What if my cheesecake cracks while baking? If your cheesecake cracks, don't worry! It happens sometimes. To avoid this, mix gently and avoid overbaking. If a crack does appear, you can cover it with whipped cream or a drizzle of caramel. Understanding serving sizes and calorie counts Each slice of pumpkin cheesecake has about 300 calories. This can vary based on serving size and toppings. A standard serving is one slice, which is about one-twelfth of the cheesecake. Healthier alternatives for the recipe You can make healthier swaps in your cheesecake. Try using low-fat cream cheese to cut calories. You can also use honey instead of sugar. This adds sweetness without all the calories. History of pumpkin cheesecake Pumpkin cheesecake has roots in American cuisine. It became popular in the 20th century. People enjoyed this rich dessert during fall and Thanksgiving. Popular variations around the world Different cultures have their own twists on pumpkin cheesecake. In some places, bakers add chocolate or caramel. Other regions might use spices like nutmeg or ginger for extra flavor. This blog post covered how to make a delicious pumpkin cheesecake from scratch. We discussed important ingredients and possible substitutions, plus step-by-step instructions for the crust and filling. I shared tips for perfecting your cheesecake and serving it well. You can even try fun variations and learn how to store your cheesecake properly. Get ready to impress your friends and family with this treat. Happy baking!
    Pumpkin Cheesecake Delight Simple and Tasty Recipe
  • - 250g udon noodles - 2 tablespoons vegetable oil - 4 garlic cloves, minced - 2 red chilies, finely sliced (adjust to taste) - 1 tablespoon fresh ginger, grated - 1 bell pepper, thinly sliced (any color) - 1 cup snow peas or snap peas - 3 tablespoons soy sauce - 1 tablespoon sesame oil - 1 tablespoon rice vinegar - 1 tablespoon honey or maple syrup - 2 green onions, chopped (for garnish) - Sesame seeds (for garnish) When making Chili Garlic Udon, you need a few key ingredients. First, get your udon noodles. These thick noodles hold sauce well and add a nice chew. They cook quickly and fill you up. Next, gather your spices and seasonings. You'll use garlic for flavor and red chilies for heat. Adjust the amount of chilies based on your spice level. Fresh ginger brings a warm taste that pairs well with the other flavors. For vegetables, grab a bell pepper and snow peas. The bell pepper adds sweetness, while the snow peas give a nice crunch. You can use any color of bell pepper. It brightens the dish and makes it look great. Finally, you will need soy sauce, sesame oil, rice vinegar, and honey or maple syrup. These ingredients create a balanced sauce. The soy sauce gives saltiness, while the vinegar adds tang. Honey or maple syrup provides sweetness, making the dish well-rounded. Having all these ingredients ready helps the cooking process go smoothly. Now, you're set to make a tasty Chili Garlic Udon! {{ingredient_image_1}} 1. Boiling method: Start by boiling a pot of water. Use enough water to let the noodles move freely. When the water is boiling, add 250g of udon noodles. Cook them according to the package instructions, usually around 8-10 minutes. Stir them gently to prevent sticking. 2. Setting aside: Once the noodles are tender, drain them in a colander. Rinse them with cold water to stop the cooking process. Set the noodles aside while you prepare the stir-fry. 1. Heating the oil: Take a large pan or wok and place it over medium heat. Add 2 tablespoons of vegetable oil. Let the oil heat up for a minute. 2. Sautéing garlic, chilies, and ginger: Add 4 minced garlic cloves, 2 finely sliced red chilies, and 1 tablespoon of grated ginger to the hot oil. Stir them quickly for about 1-2 minutes. You want them to become fragrant but not brown. 1. Stir-frying bell pepper and snow peas: Toss in 1 thinly sliced bell pepper and 1 cup of snow peas into the pan. Stir-fry these veggies for 3-4 minutes. They should be tender but still have a nice crunch. 2. Mixing everything together: Add the drained udon noodles to the pan. Pour in 3 tablespoons of soy sauce, 1 tablespoon of sesame oil, 1 tablespoon of rice vinegar, and 1 tablespoon of honey or maple syrup. Toss everything together gently. Make sure the noodles are well coated in the sauce. Stir-fry for another 2-3 minutes until everything is hot. Enjoy the vibrant flavors and textures in your Chili Garlic Udon! To cook udon noodles just right, boil water in a large pot. Follow the package instructions, usually about 8-10 minutes. Taste them a minute before the time is up. You want them tender but not mushy. Once they are ready, drain them well. To prevent stickiness, rinse the noodles in cold water. This helps separate them and cools them down quickly. You can customize the spice in your Chili Garlic Udon easily. Start with two red chilies. If you want more heat, add more chilies! You can also use sauces like sriracha or chili paste. Just mix a bit into the stir-fry to boost the flavor. Garnishes can really make your dish pop. Try adding fresh cilantro or a squeeze of lime for a zing. You can also sprinkle on sesame seeds for extra crunch. For more seasoning, consider a dash of chili oil or a sprinkle of garlic powder. These small changes can make your meal even better! Pro Tips Adjust the Heat: If you prefer a milder dish, reduce the number of red chilies or remove the seeds before slicing. This will lower the heat level without sacrificing flavor. Perfect Noodle Texture: To achieve the best texture, make sure not to overcook the udon noodles. They should be slightly chewy, so keep an eye on them as they boil. Enhance Umami Flavor: Consider adding a splash of mushroom sauce or a sprinkle of red pepper flakes for an extra depth of flavor and umami. Vegetable Variations: Feel free to swap in your favorite vegetables such as bok choy, carrots, or broccoli for a colorful and nutritious twist. {{image_2}} You can add protein to your Chili Garlic Udon to make it heartier. - Tofu: Use firm tofu for a tasty vegetarian option. Cut it into cubes and fry it until golden. Add it during the vegetable stage for a nice crunch. - Chicken or shrimp: Both chicken and shrimp work great. Cook them before adding the veggies. This gives the dish extra flavor and protein. Feel free to swap out the vegetables based on what you have. - Different bell pepper colors: Red, yellow, or green peppers all taste great. Each color adds its own sweetness and texture. - Other seasonal vegetables: Try zucchini, carrots, or broccoli. Use what is fresh and in season for the best taste. You can also change the sauce to suit your taste. - Using different vinegars: Instead of rice vinegar, try apple cider or balsamic vinegar. Each will add a unique twist. - Substituting sweeteners: Honey is great, but you can also use brown sugar or agave syrup. Adjust the amount to match your sweetness preference. To keep your Chili Garlic Udon fresh, store it in the fridge. Place the leftovers in an airtight container. This helps keep out air and moisture. You can store it for up to three days. Make sure it cools down first. This will help prevent sogginess. When it's time to heat up your udon, use a pan over medium heat. Add a splash of water or broth to help steam the noodles. This keeps them from getting dry. Stir often to heat everything evenly. You can also use a microwave. Cover the dish with a damp paper towel. This helps keep the moisture in. Heat for one to two minutes, checking often. Enjoy your tasty leftovers! If you can’t find udon noodles, don’t worry! You can use other noodles. Here are some options: - Soba noodles: These buckwheat noodles have a nice chewy texture. - Rice noodles: Great for gluten-free diets, they cook fast. - Spaghetti: A common choice, it’s easy to find and works well. For different diets, here are some ideas: - Zucchini noodles: Spiralized zucchini is a low-carb option. - Shirataki noodles: Made from konjac yam, they are very low in calories. Yes, Chili Garlic Udon can be vegan! However, always check your ingredients. Here are some tips: - Soy sauce: Most are vegan, but some have fish sauce. Check the label. - Honey: If you want it vegan, use maple syrup instead. For vegetarian options, use: - Tofu: Adds protein and absorbs the sauce well. - Vegetable broth: Instead of water for cooking, it adds flavor. You can easily prepare Chili Garlic Udon ahead of time. Here are some tips: - Cook the noodles: You can cook and store them. Just rinse them in cold water to stop cooking. - Prep the veggies: Chop and store them in the fridge. This keeps them fresh. To keep everything fresh: - Use airtight containers: This helps prevent moisture and keeps your meal tasty. - Mix the sauce just before cooking: This keeps flavors vibrant and fresh. We explored a simple way to make Chili Garlic Udon. You learned about key ingredients, like udon noodles, spices, and veggies. I shared step-by-step cooking methods, tips for perfect noodles, and how to adjust spice levels. You can customize your dish with proteins and sauces, making it your own. Remember to store your leftovers properly and reheat them well. Enjoy your delicious meal, and don't hesitate to experiment with new flavors. Cooking can be fun and rewarding, so dive in!
    Chili Garlic Udon Flavorful and Easy Stir-Fry Recipe
  • - 1 cup canned pumpkin puree - 1/2 cup vegetable oil - 1 cup brown sugar, packed - 1/2 cup granulated sugar - 2 large eggs - 1 teaspoon vanilla extract - 2 cups all-purpose flour - 1 teaspoon baking soda - 1/2 teaspoon baking powder - 1 teaspoon ground cinnamon - 1/2 teaspoon ground nutmeg - 1/4 teaspoon ground ginger - 1/4 teaspoon salt Canned pumpkin puree is the star here. It gives the muffins their lovely orange color. The vegetable oil adds moisture, making every bite soft. I mix brown sugar and granulated sugar for sweetness and depth. Eggs and vanilla bring richness and flavor. The flour and leavening agents help your muffins rise. Baking soda and baking powder work together to create light, fluffy muffins. - 1 cup chopped walnuts or pecans (optional) - 1/2 cup chocolate chips (optional) If you want to add texture, consider nuts or chocolate chips. Walnuts or pecans add crunch and a nutty taste. Chocolate chips bring sweetness and a fun twist. You can choose one or both! - 1 teaspoon ground cinnamon - 1/2 teaspoon ground nutmeg - 1/4 teaspoon ground ginger Spices are key to great flavor. Ground cinnamon gives warmth and sweetness. Nutmeg adds a hint of nutty depth. Ginger brings a bit of spice to the mix. Fresh spices make a big difference in taste. Always use fresh spices for the best flavor! {{ingredient_image_1}} First, preheat your oven to 350°F (175°C). This ensures even baking. While the oven heats, prepare your muffin tin. You can use paper liners or grease the tin lightly. This step helps prevent sticking and makes cleanup easy. In a large bowl, whisk together 1 cup of pumpkin puree, 1/2 cup of vegetable oil, 1 cup of brown sugar, and 1/2 cup of granulated sugar. Mix until the mixture is smooth. Next, add 2 large eggs and 1 teaspoon of vanilla extract. Whisk again until everything combines well. This mixture gives the muffins moisture and flavor. In another bowl, mix 2 cups of all-purpose flour, 1 teaspoon of baking soda, 1/2 teaspoon of baking powder, and spices. Use 1 teaspoon of ground cinnamon, 1/2 teaspoon of ground nutmeg, 1/4 teaspoon of ground ginger, and 1/4 teaspoon of salt. Stir these dry ingredients well. Gradually add this mix to the wet ingredients. Stir gently until just combined. Do not overmix, as this keeps your muffins light and fluffy. If you want to add extra texture, fold in 1 cup of chopped walnuts or pecans and 1/2 cup of chocolate chips. Then, evenly distribute the batter into your prepared muffin tin. Fill each cup about two-thirds full. Bake in the preheated oven for 18-20 minutes. Check for doneness by inserting a toothpick into the center of a muffin. If it comes out clean, your muffins are ready. Let them cool in the pan for about 5 minutes before transferring them to a wire rack. To get the best texture, do not overmix the batter. When you combine your wet and dry ingredients, stir gently. You want some lumps to remain. Overmixing leads to tough muffins. Make sure your oven is at the right temperature. Preheat to 350°F (175°C) before baking. An oven thermometer helps ensure accuracy. You can add more spices to boost flavor. Consider using allspice or cloves. These spices add warmth and depth. Serve your muffins warm. A pat of butter on top makes them extra tasty. Enjoy with coffee or tea for a perfect pairing. Store muffins in an airtight container. This keeps them fresh for up to three days. When reheating, use the microwave. Heat them for about 10 seconds. This warms them without drying them out. For a crispy top, pop them in the oven for a few minutes. Pro Tips Perfect Pumpkin Purée: Use 100% pure pumpkin purée for the best flavor; avoid pumpkin pie filling as it contains added sugars and spices. Mixing Method: Be careful not to overmix the batter; gently fold in the dry ingredients to keep your muffins light and fluffy. Nutty Additions: Toast your walnuts or pecans before adding them to enhance their flavor and add a delightful crunch to your muffins. Storage Tips: Store your muffins in an airtight container at room temperature for up to 3 days, or freeze them for longer freshness. {{image_2}} You can easily make these muffins gluten-free. Just swap the all-purpose flour with a gluten-free flour blend. Look for blends that contain xanthan gum. This helps mimic the texture of regular flour. You can use one-to-one ratios. This means if the recipe calls for two cups of flour, you use two cups of gluten-free blend. Your muffins will still be soft and tasty. To make these muffins vegan, you need to replace the eggs and dairy. Use flaxseed meal or chia seeds mixed with water as an egg substitute. One tablespoon of flaxseed meal and three tablespoons of water equal one egg. For dairy, use plant-based milk like almond or soy milk. You can also use coconut oil instead of vegetable oil. These swaps keep your muffins moist and flavorful. Want to add a twist? Try mixing in fresh cranberries, apples, or nuts. These ingredients bring a burst of flavor. You can also add spices like cardamom or cloves for a unique taste. Feel free to experiment. Each season brings a new chance to be creative. Enjoy your muffins with a cup of tea or coffee. To keep your muffins fresh for a few days, place them in an airtight container. This helps lock in moisture. You can also wrap them in plastic wrap. Always store them at room temperature. Avoid the fridge, as it can make them dry. If you want, add a slice of bread to help keep them soft. For long-term storage, freezing is your best option. First, let the muffins cool completely. Then, wrap each muffin in plastic wrap. Place them in a freezer bag or container. Remove as much air as you can. They can last up to three months in the freezer. To thaw, simply leave them on the counter for a few hours. You can also heat them in the microwave for about 20-30 seconds. This keeps the texture nice and soft. To check if muffins are still good, look for mold or off smells. Fresh muffins should smell sweet and spicy. If they feel dry or hard, they might not taste good. The best way to enjoy them is when they are fresh. If they pass the smell and feel test, you’re good to go! Classic pumpkin muffins stay fresh for about 3 to 5 days at room temperature. Store them in an airtight container. For longer storage, keep them in the fridge for up to a week. If you want to keep them longer, you can freeze the muffins. They last up to 3 months in the freezer. Just wrap them tightly in plastic wrap and place them in a freezer bag. To enjoy them later, thaw at room temperature or warm them in the microwave for a few seconds. Yes, you can make these muffins ahead of time. They taste great even after a day or two. Bake them, then cool completely before storing. Keep them in an airtight container. If you want to reheat, pop them in the microwave for about 10-15 seconds. You can also toast them lightly in an oven. This brings back that fresh-baked taste and warmth. If you can't find pumpkin puree, you can use other ingredients. Mashed sweet potatoes work well and give a similar flavor. You can also use butternut squash puree. If you want a lighter option, use applesauce. Just keep in mind that different substitutes can change the muffin's taste and texture a bit. Yes, you can use other sweeteners! Maple syrup or honey can replace granulated sugar. Use about 3/4 cup of sweetener for every cup of sugar. Coconut sugar is a nice swap for brown sugar. It adds a caramel-like flavor. Just know that these substitutes can change the muffin texture. They might be a bit denser or moister. Experiment to find what you like best! You’ve learned how to make classic pumpkin muffins from scratch. We covered the main ingredients, spices, add-ins, and even variations. I shared tips to achieve the perfect texture and enhance flavor. You can store these muffins for short and long periods, ensuring they stay fresh. Remember, don’t be afraid to make them your own with your favorite flavors. Now, grab your ingredients and start baking delicious muffins that everyone will love! Enjoy your creation!
    Classic Pumpkin Muffins Tasty and Simple Delight
  • To make pesto mozzarella stuffed chicken breasts, you need: - 4 boneless, skinless chicken breasts - 1 cup fresh basil pesto - 1 cup mozzarella cheese, shredded - 1/2 cup sun-dried tomatoes, chopped - 1/4 cup pine nuts, toasted - 2 cloves garlic, minced - Salt and pepper to taste - 2 tablespoons olive oil - Fresh basil leaves for garnish These ingredients create a tasty, flavorful dish. The chicken holds the filling well. The pesto gives a great taste, while the mozzarella adds creaminess. If you want to change things up, here are some swaps: - Use chicken thighs instead of breasts for more flavor. - Swap basil pesto for arugula pesto for a peppery kick. - Try goat cheese instead of mozzarella for a tangy twist. - Use fresh tomatoes if sun-dried tomatoes aren’t available. - Replace pine nuts with walnuts or almonds for a different crunch. These changes can keep the dish fresh and exciting. You can play with flavors to suit your taste. Adding some garnishes can elevate your dish: - Sprinkle fresh basil leaves on top for a bright look. - Drizzle balsamic glaze for a sweet touch. - Add grated Parmesan cheese for extra richness. - Serve with a side salad for a colorful plate. These garnishes enhance the dish's appeal. They make it look good and taste even better. Enjoy creating your perfect plate! {{ingredient_image_1}} First, gather your chicken breasts. You need four boneless and skinless pieces. Use a sharp knife to cut a pocket in each breast. Slice them horizontally but be careful not to cut all the way through. This pocket will hold the tasty filling later. In a medium bowl, combine the filling ingredients. Add one cup of shredded mozzarella. Next, mix in half a cup of chopped sun-dried tomatoes. Then, add a quarter cup of toasted pine nuts. Finally, stir in two minced garlic cloves. Season this mixture with salt and pepper to your taste. Now, it’s time to cook. Preheat your oven to 375°F (190°C). Take the stuffed chicken breasts and spoon in about 2-3 tablespoons of the filling into each pocket. Coat the outside of each chicken breast with one tablespoon of basil pesto. Heat two tablespoons of olive oil in a large oven-safe skillet over medium-high heat. Once hot, carefully add the stuffed chicken breasts. Sear them for about 3-4 minutes on each side until they turn golden brown. Next, transfer the skillet to the oven. Bake for 25-30 minutes. Check that the chicken reaches an internal temperature of 165°F (74°C). Once done, remove the skillet from the oven. Let the chicken rest for 5 minutes before serving. Garnish with fresh basil leaves for a nice touch. To stuff chicken breasts, start with a sharp knife. Cut a pocket in each breast, but do not cut all the way through. This keeps the filling inside. Use about 2-3 tablespoons of the filling mix for each breast. Press gently to seal the pocket after stuffing. This helps keep the delicious filling in place during cooking. To keep your chicken juicy, do not overcook it. Use a meat thermometer to check for doneness. The chicken should reach an internal temperature of 165°F (74°C). Searing the chicken before baking adds flavor and locks in moisture. Let the chicken rest for 5 minutes after cooking. This allows the juices to redistribute, ensuring each bite is tender and flavorful. Using the right tools makes cooking easier. Here are some must-haves: - Sharp knife for cutting pockets in chicken - Large oven-safe skillet for searing and baking - Meat thermometer for checking chicken doneness - Mixing bowl for combining filling ingredients Having these tools ready will help you create perfect pesto mozzarella stuffed chicken breasts with ease. Pro Tips Use Fresh Ingredients: Using fresh basil and high-quality mozzarella will enhance the flavors of your stuffed chicken, making it taste even more delicious. Don’t Overstuff: While it's tempting to add more filling, be careful not to overstuff the chicken breasts, as this can make them difficult to cook evenly. Let It Rest: Allowing the chicken to rest for a few minutes after baking helps the juices redistribute, resulting in a juicier and more flavorful dish. Experiment with Fillings: Feel free to customize the stuffing by adding other ingredients like spinach, artichokes, or different cheeses to suit your taste. {{image_2}} You can change the filling for a fresh taste. Instead of mozzarella, use crumbled feta cheese. Add a cup of chopped spinach to the mix. This gives a nice color and flavor. Spinach adds nutrients, making the dish healthier. The salty feta pairs well with the pesto. For a creamy twist, swap mozzarella for ricotta cheese. Ricotta is rich and smooth, giving a different texture. Mix the ricotta with the pesto and sun-dried tomatoes. This adds a delightful creaminess to your chicken. You will love the combination of flavors. If you need a gluten-free meal, this recipe is perfect! The chicken breasts are naturally gluten-free. Just ensure your pesto does not contain gluten. Most store-bought pestos are safe, but always check the label. This way, everyone can enjoy this tasty dish. To store leftover stuffed chicken, let it cool first. Place the chicken in an airtight container. This keeps moisture inside and prevents drying out. You can store the chicken in the fridge for up to three days. Make sure to label the container with the date. If you want to freeze the stuffed chicken, wrap each piece tightly in plastic wrap. Then, place the wrapped chicken in a freezer-safe bag. This helps avoid freezer burn. The chicken can last in the freezer for about three months. When you're ready, thaw it in the fridge overnight before reheating. To reheat, preheat your oven to 350°F (175°C). Place the chicken in a baking dish. Cover it with foil to keep it moist. Heat for about 20 minutes or until warmed through. You can also use a microwave, but this may dry it out. If using a microwave, heat on low power in short bursts. Enjoy your delicious meal again! Yes, you can use chicken thighs. Chicken thighs have more fat, which makes them juicy and tasty. They also stay moist during cooking. Just be sure to adjust the cooking time. Thighs may take a bit longer since they are thicker than breasts. Aim for the same internal temperature of 165°F (74°C) for safety. This dish takes about 50 minutes to cook. You will spend around 15 minutes prepping the ingredients. The cooking includes searing for 3-4 minutes on each side. Then, you bake the chicken for 25-30 minutes in the oven. Make sure to check the chicken’s temperature to ensure it’s fully cooked. While fresh basil pesto adds great flavor, you can use store-bought pesto. However, fresh basil pesto gives a bright taste. It also enhances the dish's aroma. If you want to make your own, it's simple. Blend fresh basil, garlic, pine nuts, olive oil, and cheese for a homemade touch. In this post, we explored making pesto mozzarella stuffed chicken breasts. We covered main ingredients, helpful tips, and fun variations. You learned how to prepare, cook, and store this dish. For your cooking journey, remember that creativity with ingredients can lead to amazing flavors. Enjoy experimenting with these ideas, and don't hesitate to make it your own! Happy cooking!
    Pesto Mozzarella Stuffed Chicken Breasts Delightful Meal
  • - Chickpeas and Vegetables - 1 can (15 oz) chickpeas, rinsed and drained - 1 cup cherry tomatoes, halved - 1 cucumber, diced - 1 bell pepper (red or yellow), diced - 1/4 red onion, finely chopped Chickpeas are the star in this salad. They bring a nice texture and protein. The cherry tomatoes add sweetness, while the cucumber gives crunch. The bell pepper adds color and flavor. The red onion gives a little bite. - Seasonings and Dressings - 1/2 cup Kalamata olives, pitted and halved - 1/2 cup feta cheese, crumbled - 2 tablespoons fresh parsley, chopped - 1 tablespoon fresh mint, chopped - 3 tablespoons olive oil - 2 tablespoons lemon juice - 1 teaspoon dried oregano - Salt and pepper to taste The olives add a briny taste. Feta brings creaminess that pairs well with the crunch. Fresh parsley and mint add bright notes. Olive oil and lemon juice create a tangy dressing. Oregano adds warmth and depth. - Optional Add-ins - You can add avocado for creaminess. - Try adding grilled chicken for extra protein. - Sunflower seeds add a nice crunch. These add-ins make your salad unique. They can change the texture and flavor. Experiment to find your favorite mix! {{ingredient_image_1}} Start by taking a large mixing bowl. Add one can of chickpeas that you rinsed and drained. Next, toss in one cup of halved cherry tomatoes. Then, add one diced cucumber and one diced bell pepper, either red or yellow. Finally, include a quarter of a finely chopped red onion. This mix of colors and textures makes the salad bright and fresh. In a small bowl, whisk together three tablespoons of olive oil and two tablespoons of lemon juice. Add one teaspoon of dried oregano, along with salt and pepper to taste. This dressing brings all the flavors together. Make sure to mix it well, so everything blends nicely. Now, pour the dressing over the vegetable mix. Gently toss everything until the salad gets coated evenly. Add in half a cup of pitted Kalamata olives, half a cup of crumbled feta cheese, two tablespoons of chopped fresh parsley, and one tablespoon of chopped fresh mint. These ingredients add a punch of flavor. Let the salad sit for at least 15 minutes. This time helps the flavors meld together. Before serving, give it one last gentle toss. Enjoy your fresh and tasty Mediterranean chickpea salad! Allowing Flavors to Meld After you mix the ingredients, let the salad sit. I suggest at least 15 minutes. This time helps the flavors blend well. You will notice how tasty it becomes. The longer it sits, the better it tastes. Adjusting Seasoning to Taste Taste the salad before serving. You might want more salt or pepper. Everyone's taste is different. You can also add more lemon juice if you like a zesty kick. Don't be shy; tweak it until it’s perfect for you. Chilling for Better Taste Chilling the salad enhances its flavor. If you have time, pop it in the fridge. Let it chill for about 30 minutes. The coolness makes it refreshing and even more delicious. Pro Tips Use Fresh Herbs: Fresh parsley and mint elevate the flavor of this salad. Don't skip them for the best taste! Chill Before Serving: Allow the salad to chill in the refrigerator for 30 minutes to enhance the flavors even more. Customize Your Veggies: Feel free to add or substitute other vegetables like avocado or radishes based on your preference. Make It Ahead: This salad can be made a day in advance; just keep the dressing separate until serving to maintain freshness. {{image_2}} You can easily adjust this salad to fit your needs. Here are some tasty options: - Vegan Options (Omit Feta): If you want a vegan salad, just leave out the feta cheese. The salad will still taste fresh and vibrant. You can replace the feta with avocado for a creamy feel. - Gluten-Free Considerations: This salad is naturally gluten-free. Just check your dressing ingredients to ensure they are gluten-free as well. - Adding Protein (Chicken or Tuna): For extra protein, add cooked chicken or canned tuna. This makes the salad a fuller meal. Just mix in your choice of protein after you toss the salad. These simple changes make the Mediterranean Chickpea Salad flexible for any diet or taste. Enjoy trying out these variations! Refrigeration Guidelines Store your Mediterranean chickpea salad in an airtight container. It keeps well in the fridge for about 3 to 5 days. Make sure you keep it cold, especially if you add feta cheese. When you are ready to eat, give it a good stir. This helps to mix the flavors again. Freezing Options I do not recommend freezing this salad. The texture of the veggies, olives, and cheese changes when frozen. They may become mushy when thawed. If you want to save it, stick to refrigeration. Reusing Leftovers in Other Dishes If you have leftover salad, you can use it in many ways. Try adding it to wraps or pita bread for a quick lunch. You can toss it into a grain bowl for more texture. Mixing it with pasta is also a tasty option. Use your creativity and enjoy the flavors! How long will the salad last in the fridge? This salad will last about three to five days in the fridge. Store it in an airtight container. The flavors will deepen over time, making it even tastier! Can I use dried chickpeas instead of canned? Yes, you can use dried chickpeas. Soak them overnight and cook until tender. This will add a fresh taste and texture to your salad. What are the best substitutes for Kalamata olives? If you can't find Kalamata olives, try black olives or green olives. They will still give a nice salty flavor. You can also skip olives if you prefer. This blog post gave you a clear guide on making Mediterranean chickpea salad. We covered the key ingredients, how to prepare and mix them, and practical tips for storage and flavor. You can adapt this salad to fit your diet or add protein as you like. Remember, the choice of fresh ingredients makes a big difference. Enjoying your homemade salad is easy, and it tastes great too! Now, go ahead and start creating your own tasty version.
    Savory Mediterranean Chickpea Salad Fresh and Tasty
  • - 1 lb ground chicken - 1/2 cup grated Parmesan cheese - 1 cup breadcrumbs - 2 cloves garlic, minced - 1/4 cup fresh parsley, chopped - 1/2 small onion, finely chopped - 2 tablespoons Worcestershire sauce - 1 teaspoon Italian seasoning - 1/2 cup marinara sauce - Salt and pepper to taste - Optional seasonings for customization When making Garlic Parmesan Chicken Meatloaf, the right ingredients matter a lot. Ground chicken is the star here. It makes the meatloaf juicy and light. The Parmesan cheese adds a rich, savory flavor. It also helps bind everything together. Breadcrumbs give the meatloaf a nice texture. Next, the additional ingredients bring the dish to life. Garlic adds a punch of flavor. Fresh parsley brings a burst of color and freshness. The onion gives a sweet note. Worcestershire sauce adds depth, while Italian seasoning brings warmth and spice. Don't forget the marinara sauce! It keeps the meatloaf moist and adds a lovely tang. Seasoning is crucial for flavor. Salt and pepper are your best friends. You can also add optional spices like paprika or red pepper flakes for a kick. Each ingredient works together to create a tasty and satisfying dish. {{ingredient_image_1}} 1. First, preheat your oven to 375°F (190°C). This helps cook the meatloaf evenly. 2. Next, line a baking sheet with parchment paper. This makes cleanup easy. 3. In a large mixing bowl, add the ground chicken, breadcrumbs, grated Parmesan, and chopped parsley. 4. Then, mix in the minced garlic, finely chopped onion, and the egg. 5. After that, pour in the Worcestershire sauce, Italian seasoning, salt, and pepper. 6. Mix all the ingredients well. Be careful not to overmix; you want a tender meatloaf. 1. Now, shape the meat mixture into a loaf. Make sure it’s even on all sides. 2. Place the meatloaf on the prepared baking sheet. 3. Spread the marinara sauce evenly over the top. This keeps it moist and adds flavor. 1. Bake the meatloaf in the preheated oven for about 45-50 minutes. 2. Check the internal temperature. It should reach 165°F (75°C) to be safe. 3. Once done, remove the meatloaf from the oven. 4. Let it rest for 5-10 minutes before slicing. This helps keep it juicy. To make the best meatloaf, keep a few things in mind. First, avoid overmixing the ingredients. If you mix too much, the meatloaf will turn out tough. Just stir until everything is combined. Next, focus on moisture retention. Adding a layer of marinara sauce on top keeps the meatloaf juicy. This sauce adds flavor and helps with texture. You can also use breadcrumbs for moisture. They soak up juices and create a tender bite. For added flavor, think about herbs and spices. Fresh parsley elevates the dish with its bright taste. You can also add a pinch of garlic powder or paprika for extra kick. Italian seasoning blends well with the chicken. Another fun way to enhance flavor is by adding veggies. Chopped bell peppers or grated zucchini can work wonders. They not only add taste but also boost nutrition. Just make sure to keep the veggie size small, so they mix well. When serving, think about sides that complement the meatloaf. Roasted vegetables or creamy mashed potatoes pair nicely. They add color and balance to the plate. For presentation, slice the meatloaf and arrange it on a platter. Garnish with fresh parsley for a pop of color. A sprinkle of extra Parmesan on top can impress your guests. This simple touch makes the dish look gourmet! Pro Tips Keep It Moist: Adding marinara sauce on top not only adds flavor but also helps keep the meatloaf moist during baking. Don’t Overmix: When combining the ingredients, mix just until combined to keep the meatloaf tender. Rest Before Slicing: Allow the meatloaf to rest for 5-10 minutes after baking. This helps retain the juices for a better texture. Customize Your Herbs: Feel free to experiment with different herbs like thyme or basil for a unique flavor profile. {{image_2}} You can easily swap ground chicken for turkey or beef. Turkey gives a leaner option, while beef adds rich flavor. Both variations work well in this recipe. If you want a dairy-free twist, try using nutritional yeast instead of Parmesan cheese. This keeps the cheese flavor without the dairy. Marinara sauce is great, but you can try barbecue sauce or a spicy ketchup if you want to change things up. These sauces add a fun twist. For cheese lovers, consider using mozzarella or cheddar on top. They melt beautifully and add a nice texture. Want to boost nutrition? Add spinach or other greens right into the mix. They blend in well and add vitamins. You can also use whole-grain breadcrumbs instead of regular ones. This makes the meatloaf healthier without losing flavor. Store your leftover garlic Parmesan chicken meatloaf in the fridge. Place it in an airtight container. This keeps the meatloaf fresh for up to three days. To reheat, slice the meatloaf and place it on a microwave-safe plate. Heat for 1-2 minutes until warm. You can also use an oven at 350°F for about 10-15 minutes. For long-term storage, freeze the meatloaf. Wrap it tightly in plastic wrap, then place it in a freezer bag. This method helps prevent freezer burn. You can freeze it for up to three months. When ready to eat, thaw the meatloaf overnight in the fridge. Reheat in the oven or microwave until it reaches 165°F. Garlic Parmesan chicken meatloaf stays fresh for about three days in the fridge. Signs of spoilage include a sour smell, change in color, or slimy texture. If you notice any of these signs, it’s best to toss it out. For frozen meatloaf, use it within three months for best taste. Always check for any signs before cooking. You can pair Garlic Parmesan Chicken Meatloaf with many delicious side dishes. Here are some great options: - Roasted vegetables, like carrots and Brussels sprouts - Creamy mashed potatoes or garlic mashed potatoes - A fresh green salad with a light vinaigrette - Steamed broccoli or green beans - Rice or quinoa for a hearty option These sides add flavor and balance to your meal. They complement the savory taste of the meatloaf well. Yes, you can make this meatloaf ahead of time! Here are some tips for prep and storage: - Prepare the meatloaf mixture and shape it. - Cover it well and store it in the fridge for up to 24 hours. - You can also freeze it before baking. Wrap it tightly in plastic wrap and foil. - Thaw frozen meatloaf in the fridge overnight before baking. These tips help save time on busy days and keep your meatloaf fresh. Knowing when your meatloaf is ready is simple. Here’s how to check: - Use a meat thermometer to check the internal temperature. It should reach 165°F (75°C). - Look for nice browning on the top. - The meatloaf should feel firm but not dry. These signs ensure your meatloaf is cooked perfectly and safe to eat. This blog post covered how to make a tasty Garlic Parmesan Chicken Meatloaf. We explored key ingredients, step-by-step instructions, and helpful tips for a perfect dish. You learned ways to customize and store your meatloaf. In summary, enjoy the process. Experiment with flavors and make it yours. Follow these steps for great results. Happy cooking!
    Garlic Parmesan Chicken Meatloaf Flavorful Delight
  • - 8 oz (225 g) pasta of your choice (fusilli or penne work well) - 2 cups broccoli florets - 1 tablespoon olive oil - 3 cloves garlic, minced - 1 cup heavy cream - 1 ½ cups shredded sharp cheddar cheese - ½ cup grated Parmesan cheese - Salt and pepper to taste - 1 teaspoon lemon zest - A pinch of red pepper flakes (optional) - Fresh parsley, chopped (for garnish) You can choose many types of pasta for this dish. Fusilli and penne are great choices. Both hold the cheese sauce well. You can also try rotini or shells for fun shapes. Each pasta type gives a different bite, making every forkful exciting. You can customize your dish easily. For added flavor, try sun-dried tomatoes or spinach. If you want more protein, add cooked chicken or shrimp. You can swap the heavy cream for half-and-half for a lighter version. For a dairy-free option, use cashew cream and vegan cheese. Don't forget to taste and adjust seasonings as you go! {{ingredient_image_1}} To start, fill a large pot with water. Add salt and bring it to a boil. Once boiling, toss in 8 oz of your favorite pasta, like fusilli or penne. Cook it as the package says until it's al dente. With just 3 minutes left, add 2 cups of broccoli florets. This way, the broccoli cooks perfectly without losing its bright color. Drain the pasta and broccoli together but save about ½ cup of that pasta water for later. Now, let’s add some flavor. In the same pot you used for the pasta, pour in 1 tablespoon of olive oil. Heat it over medium heat. Once hot, add 3 minced garlic cloves. Sauté for about 1 minute until it smells amazing. Be careful not to burn the garlic. If it starts to turn brown, lower the heat. Next, it’s cheese time! Lower the heat and pour in 1 cup of heavy cream. Stir it for 1-2 minutes to warm it up. Then, slowly mix in 1 ½ cups of shredded sharp cheddar cheese and ½ cup of grated Parmesan cheese. Keep stirring until it’s all melted and smooth. If the sauce seems too thick, add a bit of the reserved pasta water until it feels just right. This creamy sauce will coat the pasta and broccoli beautifully. Now you can combine everything. Add the pasta and broccoli back into the pot with the cheese sauce. Mix until every piece is coated. Season it with salt, pepper, and a teaspoon of lemon zest. If you like a kick, sprinkle in some red pepper flakes. Finally, serve your delicious broccoli cheese pasta in bowls. A bit of fresh parsley on top adds color and a fresh touch! To make a great cheese sauce, start with fresh cheese. I love sharp cheddar, but you can mix it up. Use a blend of cheeses for depth. Remember to add cheese slowly, stirring well. This way, it melts evenly. If your sauce is too thick, add a splash of pasta water. This will make it creamy and smooth. Cooking pasta to al dente means it should be firm but not hard. Follow the package instructions closely. Around 1-2 minutes before the time is up, add the broccoli to the pot. This way, both will be ready at the same time. Drain everything well but save some pasta water for your sauce. For a beautiful plate, serve pasta in deep bowls. Sprinkle extra cheese on top for a tasty finish. A touch of red pepper flakes adds color and a hint of spice. Add a wedge of lemon on the side. Not only does it look nice, but it adds a bright flavor too. Finish with fresh parsley for a pop of green. This makes your dish inviting and fun! Pro Tips Cheese Selection: Opt for a sharp cheddar for a stronger flavor contrast against the creaminess of the sauce. Broccoli Cooking: For vibrant green broccoli, add it to the pasta pot during the last few minutes of cooking instead of boiling it separately. Pasta Water Magic: The reserved pasta water can help adjust the sauce's consistency and add extra starch for creaminess. Garnish for Flair: Chopped fresh parsley not only adds a pop of color but also a fresh flavor that complements the creamy sauce. {{image_2}} You can make broccoli cheese pasta a bit different by adding more veggies. Try bell peppers, peas, or spinach. These not only add color but also boost the flavor. For a fun twist, toss in some sun-dried tomatoes. They bring a nice tangy taste. You can also switch the pasta to a whole grain or chickpea type for extra health benefits. If you want to make this dish heartier, add protein. Chicken or shrimp works well. Just cook them before adding the sauce. For a vegetarian option, try tofu or chickpeas. They soak up the cheese sauce flavor nicely. If you like beans, black or white beans add great taste and texture. Cheese is key in this dish. You can mix and match your cheeses for fun flavors. Gouda or fontina adds a smoky taste. For a sharper bite, try blue cheese or feta. You can also use mozzarella for a creamier texture. Just remember to adjust the balance of flavors based on your choice. Mixing cheeses can make each bite exciting! After enjoying your broccoli cheese pasta, store any leftovers in an airtight container. Let it cool first. Then, place it in the fridge. It should last for about three to four days. When you're ready to enjoy your leftovers, reheat them slowly. You can use a microwave or stovetop. If using the microwave, place the pasta in a bowl and cover it. Heat in short bursts, stirring in between. For stovetop, add a splash of water or cream in a pan. Stir on low heat until warm. If you want to save some for later, freezing is a great option. Allow the pasta to cool completely. Then, transfer it to a freezer-safe container. You can also use freezer bags. Press out any air before sealing. Broccoli cheese pasta can stay good for up to three months in the freezer. When ready to eat, thaw it overnight in the fridge before reheating. To make broccoli cheese pasta gluten-free, choose gluten-free pasta. Many brands offer options like rice or corn pasta. Follow the same cooking steps as regular pasta. You can enjoy the same creamy sauce with gluten-free pasta. Yes, you can use other veggies! Cauliflower, carrots, or peas work well. You can mix and match to suit your taste. Just remember to cook them until tender. This adds color and flavor to your dish. If your cheese sauce is too thick, add a bit of pasta water. Start with a small amount and stir until smooth. You can also add more cream for extra richness. Adjust it until you reach the perfect consistency. This blog post covered how to make delicious broccoli cheese pasta. We discussed key ingredients and the best pasta types to use. I shared clear steps to cook the pasta, sauté the garlic, and make a smooth cheese sauce. I also offered tips for perfecting your dish and variations to explore. In conclusion, you can enjoy this pasta your way. Experiment with different ingredients and make it your own. Whether serving fresh or storing for later, broccoli cheese pasta is a treat. Happy cooking!
    Broccoli Cheese Pasta Creamy and Comforting Delight
  • - 8 oz (225 g) pasta (fettuccine or penne) - 2 cups broccoli florets - 1 cup heavy cream - 1 cup grated Parmesan cheese - 2 tablespoons olive oil - 3 cloves garlic, minced - 1 teaspoon red pepper flakes (optional) - Salt and pepper to taste - Fresh parsley, chopped (for garnish) Gathering the right ingredients is key. Choose your pasta type first. Fettuccine or penne both work well. Next, you'll need fresh broccoli florets. They add a nice crunch and color. Heavy cream makes the sauce rich and smooth. Grated Parmesan cheese gives it a savory kick. You’ll need olive oil to sauté the garlic. Garlic adds a warm flavor that brightens the dish. If you like heat, add red pepper flakes. Adjust salt and pepper to your taste. Lastly, chop some fresh parsley for garnish. This gives your dish a fresh look. All these ingredients combine to create a tasty meal that pleases everyone. {{ingredient_image_1}} To cook the pasta, fill a large pot with salted water. Bring it to a boil over high heat. Add 8 ounces of pasta to the pot. Stir it well to prevent sticking. Cook the pasta according to the package instructions, usually around 8 to 10 minutes. Add 2 cups of broccoli florets during the last 2 minutes of cooking. This helps the broccoli stay bright and crisp. Once the time is up, drain the pasta and broccoli together. Set them aside while you make the sauce. In a large skillet, heat 2 tablespoons of olive oil over medium heat. Add 3 minced garlic cloves to the skillet. Sauté the garlic for about 1 minute. It should smell great but not brown. Next, pour in 1 cup of heavy cream. Bring it to a gentle simmer. Stir in 1 cup of grated Parmesan cheese. Mix until it melts and becomes creamy. If you like spice, add 1 teaspoon of red pepper flakes. Season with salt and pepper to taste. Now, add the drained pasta and broccoli to the creamy sauce. Toss everything well to coat. Let it cook for an additional 1 to 2 minutes. This helps all the flavors blend together. Serve it hot, garnished with chopped fresh parsley for a bright touch. Enjoy your creamy broccoli pasta! To make a creamy sauce, use heavy cream. It gives a rich texture that coats the pasta well. You can also mix in a little pasta water. This helps the sauce cling to the pasta better. For flavor, always taste your sauce. Add salt or pepper as needed. If you like heat, sprinkle in red pepper flakes. This adds a nice kick. To keep broccoli bright and crisp, cook it for a short time. Add the florets to the boiling pasta two minutes before draining. This way, they stay green and crunchy. If you want a different flavor, try roasting or steaming the broccoli. Roasting brings out a sweet taste. Steaming keeps it bright and fresh. Serve Creamy Broccoli Pasta right away for the best taste. You can top it with extra Parmesan cheese for more flavor. Fresh parsley adds color and freshness. If you want a side dish, a simple salad works well. For drinks, a light white wine pairs nicely. It balances the creaminess of the pasta. Pro Tips Perfect Pasta Texture: Make sure to cook the pasta al dente for the best texture. This will ensure it holds up well when mixed with the creamy sauce. Fresh Broccoli Boost: For vibrant color and added nutrients, blanch the broccoli briefly before adding it to the skillet. This will keep it bright green and crisp. Cheese Variations: Experiment with different cheeses like Pecorino Romano or a blend of cheeses for a unique flavor twist in your creamy sauce. Meal Prep Friendly: This dish can be made ahead of time and reheated. Just add a splash of cream or milk when reheating to bring back the creamy consistency. {{image_2}} You can easily add protein to your creamy broccoli pasta. Chicken, shrimp, or tofu all work well. - For chicken, use bite-sized pieces. Cook it in the skillet before adding garlic. - Shrimp cooks fast. Add it after the garlic until it turns pink. - For tofu, press and cube it first. Sauté it until golden before mixing in. Adjust the cooking time based on your choice. Chicken takes longer than shrimp or tofu. If you want a vegetarian or vegan version, there are simple swaps you can make. - Use vegetable broth instead of cream. It keeps the dish rich and tasty. - Swap Parmesan with nutritional yeast or a vegan cheese. This makes it dairy-free. You can still enjoy a creamy texture with these changes. Get creative by changing up the flavors in your pasta. - Different cheeses can change the taste. Try mozzarella or goat cheese for a twist. - Experiment with herbs and spices. Basil and oregano add nice notes. These variations can make each meal unique and exciting. Enjoy mixing and matching to find your favorite! To keep your creamy broccoli pasta fresh, store leftovers in an airtight container. Make sure it cools down first. This helps prevent sogginess. Place the container in the fridge. It stays good for about 3 days. When reheating, use the stove for best results. Add a splash of cream or water to keep it moist. Heat it slowly over low heat. Stir it often to prevent sticking. You can also use a microwave. Cover it loosely and heat in short bursts. Check often to avoid overcooking. If you want to freeze creamy broccoli pasta, start by letting it cool completely. Then, place it in a freezer-safe container. Make sure to remove as much air as possible. This helps to avoid freezer burn. It can last in the freezer for up to 2 months. To thaw, move it to the fridge overnight. Reheat it on the stove with a bit of cream or water. Heat it slowly until hot. Stir well to mix everything again. This way, your pasta stays creamy and delicious. What pasta works best for this recipe? You can use any pasta you like. I suggest fettuccine or penne. They hold the sauce well. Can I make this recipe ahead of time? Yes, you can prepare the sauce and cook the pasta earlier. Just mix them when ready to serve. How long can leftovers be stored in the fridge? Leftovers can last for about three days in the fridge. Store them in an airtight container. Is there a gluten-free option for this recipe? Absolutely! Choose gluten-free pasta for a tasty alternative. The sauce remains the same. This blog post covered how to make a creamy broccoli pasta dish. You learned about key ingredients, including pasta, broccoli, and cream. I shared steps for cooking the pasta, making the sauce, and combining everything. Tips for perfecting flavor and serving were also included. In summary, this dish is easy and flexible. You can switch up ingredients or flavors. Enjoy creating your own version of creamy broccoli pasta. Happy cooking!
    Creamy Broccoli Pasta Simple and Tasty Delight
  • To make a Nutella mug cake, you need simple ingredients. This recipe is quick and fun. Here’s what you will need: - 4 tablespoons all-purpose flour - 4 tablespoons granulated sugar - 2 tablespoons unsweetened cocoa powder - 1/8 teaspoon baking powder - 1/8 teaspoon salt - 3 tablespoons milk - 2 tablespoons vegetable oil - 2 tablespoons Nutella - 1/4 teaspoon vanilla extract - Optional: chocolate chips or chopped nuts for extra texture Each ingredient plays a key role. The all-purpose flour gives the cake structure. Granulated sugar adds sweetness, while cocoa powder brings rich flavor. Baking powder makes the cake rise, and salt balances the taste. The liquid ingredients are just as important. Milk adds moisture, while vegetable oil keeps it soft. Nutella is the star, adding that beloved hazelnut chocolate flavor. Lastly, vanilla extract enhances the overall taste. Feel free to add chocolate chips or nuts. They provide additional flavor and crunch. These ingredients come together to create a quick and tasty treat in no time. {{ingredient_image_1}} In your microwave-safe mug, you’ll start by adding the dry ingredients. First, add 4 tablespoons of all-purpose flour. Next, mix in 4 tablespoons of granulated sugar. Then, add 2 tablespoons of unsweetened cocoa powder. Now, sprinkle in 1/8 teaspoon of baking powder and 1/8 teaspoon of salt. Stir these together until they are well combined. This step is key to avoid clumps later. Now it's time to add the wet ingredients. Pour in 3 tablespoons of milk and 2 tablespoons of vegetable oil. Next, add 2 tablespoons of Nutella. Finally, include 1/4 teaspoon of vanilla extract. Stir the mixture vigorously. You want a smooth batter with no lumps. If you want to get fancy, fold in some chocolate chips or chopped nuts for added crunch. Place your mug in the microwave and cook it on high for 40-60 seconds. Cooking time can vary based on your microwave wattage. Start checking at 40 seconds. The cake should rise and look set in the center. Be careful to avoid overcooking, as this can lead to a rubbery texture. Once done, carefully remove the mug (it will be hot!). Let it cool for about a minute before enjoying your treat straight from the mug. Microwave wattage can change cooking time. A higher wattage cooks faster. Start with 40 seconds. Then, check for doneness. The cake should rise and be set in the center. If it’s still wet, cook in 10-second bursts. Avoid overcooking. A rubbery texture is not tasty. You can easily change the flavor of your mug cake. Add-ins make it fun! Try folding in chocolate chips or chopped nuts. You could also use different flavors of Nutella. Hazelnut or salted caramel Nutella works great too. If you want a fruity twist, add some mashed banana or fresh berries. Choosing the right mug is key to even cooking. Opt for a microwave-safe mug that holds at least 12 ounces. This size lets the cake rise well. A wide mug helps heat the batter evenly. Avoid thin mugs, as they can heat too quickly and crack. Pro Tips Choose the Right Mug: Make sure to use a microwave-safe mug that is large enough to allow the cake to rise without overflowing. Adjust Cooking Time: Since microwaves vary in power, keep an eye on your mug cake as it cooks. Start with 40 seconds and add time in small increments if needed. Experiment with Flavors: Feel free to customize your mug cake by adding different mix-ins like peanut butter, caramel, or various types of chocolate. Serve with Toppings: Enhance your Nutella mug cake by serving it with whipped cream, ice cream, or a drizzle of chocolate or caramel sauce. {{image_2}} You can get creative with Nutella! Try different flavors of Nutella, like hazelnut or chocolate. Adding toppings can make it fun, too. Consider a swirl of peanut butter or a dash of caramel. You can even mix in some crushed cookies or sprinkles for crunch. Each option adds a new layer of flavor to your mug cake. If you need a gluten-free mug cake, it's easy to adjust! Replace all-purpose flour with gluten-free flour blends. Almond flour or oat flour can work well, too. Just make sure to check the blend for best results. The cake may taste a bit different, but it will still be tasty and satisfying. Making this mug cake vegan is simple! Swap the milk for almond milk or any plant-based milk. You can use a vegetable oil like coconut oil or canola oil. For the egg, you can replace it with a tablespoon of applesauce or mashed banana. This way, you can enjoy a rich, chocolatey treat without any animal products. You should eat your Nutella mug cake right after making it. The warm cake tastes best. Scoop out the cake with a spoon and enjoy it straight from the mug. If you want, top it with whipped cream or extra Nutella for a treat. If you have leftover mug cake, store it in an airtight container. Keep it in the fridge for up to two days. To reheat, place the cake in the microwave for about 10-15 seconds. This will warm it up without drying it out. The mug cake is best fresh, but you can keep the dry ingredients mixed together for longer. Store them in a cool, dry place. They will stay fresh for several weeks. Once you mix in the wet ingredients, eat the cake right away for the best taste. Yes, you can use different types of chocolate. Dark chocolate adds a rich flavor. Milk chocolate gives a sweeter taste. White chocolate can add a creamy touch. You can also use chocolate syrup for a gooey effect. Just keep the same amount as Nutella. Experiment and find what you like best! If you don’t have a microwave, you can bake it in an oven. Preheat your oven to 350°F (175°C). Pour the batter into an oven-safe mug. Bake for about 15-20 minutes. Check if the cake is done with a toothpick. It should come out clean when ready. This method takes longer, but it gives a nice texture. To enhance flavors, you can add a pinch of cinnamon for warmth. A splash of espresso can deepen the chocolate taste. Consider adding nuts for crunch or sprinkles for fun. Top with whipped cream or ice cream for a treat. You can also drizzle chocolate or caramel sauce on top. Let your creativity shine! This blog post covered making a simple mug cake. You learned about the ingredients and step-by-step instructions. I shared tips for the best results and fun variations to try. Mug cakes are easy and quick to make. With a few simple steps, you can enjoy a tasty treat. Experiment with different flavors and add-ins. Enjoy creating your perfect mug cake!
    Ingredient Nutella Mug Cake Tasty and Quick Treat
  • - 2 pounds boneless, skinless chicken thighs - 1 tablespoon olive oil - 2 cups chicken broth (low sodium) - 2 tablespoons all-purpose flour - 1 medium onion, finely diced - 3 cloves garlic, minced - 1 teaspoon dried thyme - 1 teaspoon dried rosemary - 1/2 teaspoon black pepper - Salt to taste - Fresh parsley, chopped (for garnish) For this recipe, I love using boneless, skinless chicken thighs. They stay moist and tender during cooking. The olive oil helps to sauté the onion, giving it a nice flavor base. Chicken broth adds depth to the dish. I prefer low sodium to control the saltiness. The all-purpose flour thickens the gravy, making it rich and creamy. The diced onion and minced garlic enhance the taste of the dish. Thyme and rosemary bring in herbal notes that pair well with chicken. Black pepper adds warmth, while salt boosts all the flavors. Finally, fresh parsley adds a lovely touch of color and freshness. Gather these ingredients, and you'll be ready to make a tasty meal! {{ingredient_image_1}} 1. Heat 1 tablespoon of olive oil in a large skillet over medium heat. 2. Add 1 medium onion, finely diced. Sauté it until soft, which takes about 5 minutes. 3. Next, stir in 3 cloves of minced garlic, 1 teaspoon of dried thyme, 1 teaspoon of dried rosemary, and 1/2 teaspoon of black pepper. Cook these for 1 minute to let the flavors mix. 4. Now, add 2 pounds of boneless, skinless chicken thighs to the skillet. Pour in 2 cups of low-sodium chicken broth. Bring this to a gentle simmer. 5. Cover the skillet and let the chicken cook for 20-25 minutes. It should be cooked through and tender. 1. Take the chicken out of the skillet and place it on a cutting board. Use two forks to shred the chicken into bite-sized pieces. 2. In the same skillet with the broth, sprinkle 2 tablespoons of all-purpose flour over the liquid. Whisk it to avoid lumps. Cook this for about 5 minutes until the gravy thickens. 3. Return the shredded chicken to the skillet. Stir well to combine, and add salt to taste. 4. Let the mixture simmer for another 2-3 minutes to heat through. Adjust the seasoning if needed. 5. Serve the shredded chicken with gravy over rice, mashed potatoes, or bread. Enjoy your flavorful meal! - Ensure chicken is tender before shredding: Cook the chicken until it easily pulls apart. This usually takes about 20-25 minutes on a gentle simmer. Test it with a fork. If it tears apart easily, it is ready. - How to avoid lumps in gravy: To prevent lumps, sprinkle flour slowly while whisking the liquid. This way, the flour mixes well without clumping. Cook it for a few minutes to get a smooth texture. - Best tools for shredding chicken: Use two forks to shred the chicken. They help break the meat easily. You can also use a hand mixer on low speed for quick shredding! - Adding vegetables for extra nutrition: Toss in some diced carrots or bell peppers when cooking the onions. They add color, flavor, and nutrients to your dish. - Suggested spices for customization: Feel free to experiment with spices! Try adding paprika for a smoky taste or cayenne for a bit of heat. A pinch of cumin can give a nice twist too. - Adjusting seasoning for personal preference: Taste as you go! Add salt and pepper based on your liking. Don’t be afraid to make it your own. Each bite should be just right for you! Pro Tips Use Bone-In Chicken Thighs: For a richer flavor, consider using bone-in chicken thighs. They tend to be juicier and more flavorful than boneless cuts. Homemade Chicken Broth: If you have the time, use homemade chicken broth instead of store-bought for a more intense and personalized flavor in your gravy. Thicken the Gravy: If you prefer a thicker gravy, mix an additional tablespoon of flour with a bit of cold water to create a slurry, then whisk it into the simmering gravy. Herb Variations: Feel free to experiment with different herbs such as sage or oregano to customize the flavor profile of your dish. {{image_2}} You can change the main protein in this dish for variety. - Using chicken breasts instead: Chicken breasts are lean and can work well in this recipe. They will cook quickly. Just be sure not to overcook them. Keep an eye on the chicken and check for tenderness. - Substituting with turkey or beef: Turkey thighs can replace chicken for a unique twist. They add a rich flavor. If you prefer beef, use beef chuck. It shreds well and adds depth to the gravy. Making this meal fit your diet is easy with a few changes. - Gluten-free variations: To make this dish gluten-free, swap all-purpose flour for a gluten-free flour blend. You can also use cornstarch mixed with water as a thickener. It works great and keeps the gravy smooth. - Low-sodium options: If you need a low-sodium meal, choose low-sodium chicken broth. You can add herbs and spices to boost flavor without extra salt. This way, you keep the dish tasty and healthy. These variations let you enjoy shredded chicken with gravy in different ways. They also help you cater to your dietary needs while keeping every bite delicious. After making shredded chicken with gravy, I recommend storing leftovers in the fridge. You can keep them for up to four days. This helps keep the chicken fresh and tasty. Use airtight containers to store your meal. Glass or plastic containers work well. Just make sure they seal tightly to lock in moisture. If you want to freeze your shredded chicken with gravy, here’s how to do it right. Use freezer-safe bags or containers. Portion the chicken into meal-sized amounts. This makes it easy to thaw only what you need. Remove excess air from bags before sealing to prevent freezer burn. When you’re ready to eat, take the chicken out of the freezer. Thaw it overnight in the fridge. Reheat it in a pot over low heat. Stir occasionally to keep it from sticking. You can also use a microwave. Just heat it in short bursts, stirring in between to warm it evenly. Enjoy your meal as if it was just made! You can easily make shredded chicken with gravy in a slow cooker. Start by placing your chicken thighs in the slow cooker. Add the diced onion, minced garlic, thyme, rosemary, black pepper, and chicken broth. Set your slow cooker to low heat and cook for about 6-7 hours or on high for 3-4 hours. Once done, shred the chicken with two forks. For the gravy, mix flour with some broth from the slow cooker to make a slurry. Stir this into the slow cooker to thicken the gravy. Yes, this recipe is perfect for meal prep. You can make a big batch and store it in individual containers. The shredded chicken with gravy keeps well in the fridge for up to 4 days. You can also freeze it for up to 3 months. Just reheat it in the microwave or on the stove when you are ready to eat. Absolutely! You can use vegetable broth or beef broth if you prefer. Each type of broth adds a different flavor. Chicken broth gives a classic taste, while vegetable broth provides a lighter flavor. Beef broth adds richness, making the dish heartier. Choose what you like best! This blog post walked you through the basics of making shredded chicken with gravy. We covered the key ingredients, step-by-step instructions, and tips for success. I shared variations to suit different tastes and dietary needs, along with storage tips. With these details, you can easily prepare a tasty dish. Remember, cooking can be fun and simple. Enjoy your meal, and don’t hesitate to experiment with flavors! Your kitchen is a place for creativity and joy.
    Shredded Chicken with Gravy Simple and Tasty Meal
  • - 1 pound boneless, skinless chicken breast, sliced into thin strips - 2 cups mixed bell peppers (red, yellow, green), sliced - 1 cup broccoli florets - 1 cup snap peas - 3 cloves garlic, minced - 1-inch piece of ginger, grated - 3 tablespoons soy sauce - 1 tablespoon hoisin sauce - 1 tablespoon sesame oil - 1 tablespoon olive oil - 1 teaspoon cornstarch mixed with 2 tablespoons water (for thickening sauce) - Salt and pepper to taste - Cooked rice or quinoa, for serving - Sesame seeds and chopped green onions for garnish You can swap chicken for tofu or shrimp if you prefer. For veggies, try zucchini or carrots instead of bell peppers. Use tamari sauce for a gluten-free option. Coconut aminos also work well if you want a sweeter taste. Choose chicken that feels firm and is pink in color. Look for bell peppers that are bright and crisp. Broccoli should be deep green with tight florets. Snap peas should snap when you bend them. Always check for a fresh smell when buying garlic and ginger. Fresh ingredients make your stir fry taste great! {{ingredient_image_1}} Start by cutting the chicken breast into thin strips. This helps the chicken cook fast and evenly. Place the chicken in a bowl. Add two tablespoons of soy sauce, salt, and pepper. Mix well and let it sit for about 15 minutes. This step adds a lot of flavor to your chicken. Use a large non-stick skillet or wok for stir-frying. Heat one tablespoon of olive oil over medium-high heat. Once the oil is hot, add the marinated chicken. Cook it for about 5 to 7 minutes. Stir it often until the chicken turns golden brown and is cooked through. Remove the chicken from the skillet and set it aside. Now, add minced garlic and grated ginger to the same skillet. Sauté for about 30 seconds. This will make your kitchen smell great! Next, add sliced bell peppers, broccoli, and snap peas. Stir-fry these for 3 to 4 minutes. You want them to be bright and a bit crunchy. Finally, return the chicken to the skillet. Pour in the remaining soy sauce and hoisin sauce. Stir to mix everything well. To thicken the sauce, add the cornstarch slurry. Stir constantly for about 2 minutes until the sauce coats the chicken and veggies. Timing and temperature are key in stir-frying. Make sure your oil is hot before adding chicken. This helps the chicken brown nicely. Don’t overcrowd the skillet. If you do, the chicken will steam instead of fry. Stir everything quickly to keep it cooking evenly. This will give you a great texture and taste. To get juicy chicken, start by cutting the chicken breast into thin strips. Thin pieces cook faster and stay tender. Marinate the chicken for 15 minutes in soy sauce, salt, and pepper. This step adds flavor and moisture. Heat your skillet or wok before adding chicken. Cook it for about 5-7 minutes until golden brown. Make sure not to overcrowd the pan; this helps it cook evenly. Sauces are key to a great stir fry. Use soy sauce for saltiness and hoisin sauce for sweetness. Sesame oil adds a nutty flavor, making your dish richer. Don't forget the garlic and ginger! They give a fresh, aromatic taste. Mix cornstarch with water to thicken the sauce. This makes everything stick together and taste better. Taste your stir fry and adjust the seasoning if needed. One common mistake is overcooking the chicken. This can make it dry. Make sure to watch the time and remove it from the heat once it’s done. Another mistake is not prepping your ingredients ahead of time. Stir frying is fast! If you don’t have your veggies ready, they might cook too long. Lastly, avoid using too much sauce. This can make your stir fry soggy. Aim for balance for a perfect meal. Pro Tips Marinate for Flavor: Allow the chicken to marinate for at least 15 minutes to enhance its flavor and tenderness. High Heat is Key: Use medium-high heat for stir-frying to ensure the chicken cooks quickly and retains its juiciness. Keep Vegetables Crisp: Stir-fry the vegetables until they are vibrant and slightly tender to maintain their crunch and nutrients. Customize Your Sauce: Feel free to adjust the soy sauce and hoisin sauce according to your taste preferences for a more personalized flavor. {{image_2}} You can change up your stir fry by adding other veggies. Try carrots, zucchini, or mushrooms. Each vegetable adds its own taste and texture. For a colorful mix, use purple cabbage or baby corn. Just cut them into small pieces for quick cooking. Stir-frying keeps veggies crunchy and bright. This makes your meal not only tasty but also fun to look at. If you want to switch proteins, try beef, shrimp, or tofu. Thinly sliced beef cooks quickly and adds a rich flavor. Shrimp is light and cooks fast, too. For a plant-based option, use firm tofu; it absorbs flavors well. Just remember to press tofu to remove excess water before cooking. This helps it get a nice texture in the pan. For gluten-free options, use tamari instead of soy sauce. Tamari has a similar taste but is safe for gluten-free diets. You can also swap rice for cauliflower rice to cut carbs. Cauliflower rice is low in calories and still fills you up. This way, you enjoy a hearty meal without the extra carbs. These easy swaps help you meet your dietary needs while staying delicious. To store your chicken stir fry, let it cool down first. Place it in an airtight container. You can keep it in the fridge for up to 3 days. Make sure to separate the rice or quinoa if you have any left. This keeps everything fresh. When you are ready to eat, take the stir fry out of the fridge. You can reheat it on the stove or in the microwave. If using the stove, warm it in a pan over medium heat. Stir often until it's hot. If using a microwave, cover the bowl and heat for 1-2 minutes. Stir once and check if it’s warm enough. You can freeze the chicken stir fry for later use. Place it in a freezer-safe container. It will stay good for up to 3 months. When you are ready to eat, thaw it overnight in the fridge. Then, reheat as mentioned above. This makes meal prep easy and saves time! The best type of chicken for stir fry is boneless, skinless chicken breast. It cooks fast and stays tender. I like to slice it into thin strips. This helps it cook evenly and soak up flavors. Yes, you can make this stir fry in advance. Cook it fully and let it cool. Store it in an airtight container in the fridge for up to three days. You can also freeze it for up to three months. Just reheat it in a pan or microwave before serving. To make your stir fry less oily, use less oil when cooking. You only need a tablespoon of olive oil for this recipe. You can also use a non-stick skillet to reduce the amount of oil needed. Lastly, drain any excess oil before serving. In this blog post, we walked through the key ingredients and their fresh alternatives for your stir-fry. We shared techniques for marinating and stir-frying chicken, focusing on timing and temperature. You learned tips for achieving perfectly cooked chicken and enhancing flavor. We also discussed variations with vegetables and protein options, plus storage tips. Stir-frying is an easy and fun way to cook. With practice, you will master this healthy dish. Enjoy your cooking journey!
    Best Chicken Stir Fry Flavorful and Quick Dinner Guide
  • - 6 large eggs - 1/2 cup cottage cheese - 1/2 cup shredded cheddar cheese - 1/4 cup bell pepper, finely diced - 1/4 cup cooked spinach, chopped - 1/4 cup cooked and crumbled turkey sausage - 1 tablespoon chives, finely chopped - Salt and pepper to taste - Cooking spray or silicone muffin liners These ingredients come together to create a tasty breakfast. Eggs are the main star, providing protein and a fluffy texture. Cottage cheese adds creaminess and moisture, while cheddar cheese gives a sharp taste. The bell pepper and spinach offer color and nutrition. Turkey sausage adds flavor and protein, making these bites filling. Chives add a fresh, onion-like taste that brightens the dish. Using cooking spray or silicone muffin liners makes for easy cleanup. You can change ingredients to match your taste or what you have at home. The key is to keep the egg base and add your favorite mix-ins. Enjoy cooking! {{ingredient_image_1}} - Preheat your oven to 350°F (175°C). - Spray a muffin tin with cooking spray or use silicone muffin liners. - In a medium bowl, whisk together 6 large eggs and 1/2 cup cottage cheese. - Add salt and pepper to your taste. Whisk until well mixed and slightly frothy. - Now, stir in 1/2 cup shredded cheddar cheese, 1/4 cup diced bell pepper, and 1/4 cup cooked spinach. - Add 1/4 cup crumbled turkey sausage and 1 tablespoon chopped chives to the bowl. - Mix everything until well combined. - Pour the egg mixture into each muffin cup, filling them about 3/4 full. This allows room for rising. - Place the muffin tin in the oven and bake for 20-25 minutes. - Check for doneness. The egg bites should be set and springy to the touch. - When done, remove the muffin tin from the oven and let it cool for a few minutes. - Use a knife to gently run around the edges of each egg bite, which helps release them from the tin. - Serve warm or let cool completely before storing in an airtight container. They last up to 5 days in the fridge. To get the best egg bites, it’s key to mix the eggs and cottage cheese well. Use a medium bowl to whisk them together. You want a smooth mix that feels light. The cottage cheese adds creaminess. Filling your muffin cups correctly matters too. Fill them about 3/4 full. This allows the egg bites to rise without spilling over. If you fill them too much, they may overflow. If you fill them too little, they won’t be fluffy. To boost flavor, think about adding spices or herbs. A pinch of paprika or a dash of garlic powder can add warmth. Fresh herbs like basil or parsley also work great. For more protein, you can swap turkey sausage for ham or bacon. You can also use cooked veggies like mushrooms or zucchini. This makes your egg bites more fun and tasty. Pro Tips Use Fresh Ingredients: Fresh vegetables and quality protein will enhance the flavor and nutritional value of your egg bites. Customize Your Fillings: Feel free to experiment with different vegetables and proteins such as mushrooms, zucchini, or feta cheese for variety. Store Properly: Allow egg bites to cool completely before storing in an airtight container to maintain their texture and flavor. Reheat with Care: When reheating, use a microwave-safe dish and cover with a damp paper towel to keep them moist and prevent drying out. {{image_2}} You can easily change up your egg bites with different cheeses or dairy options. Try feta, mozzarella, or even goat cheese for a new twist. If you want a dairy-free version, use silken tofu or a nut-based cheese. Substituting veggies is also simple. If you don't have bell peppers, try mushrooms, zucchini, or even tomatoes. Fresh herbs like basil or parsley can add extra flavor. Remember, use what you have on hand. This keeps the recipe flexible and fun! You can make these egg bites in several ways. An Instant Pot works great for a quick cook. Use the steam function and a silicone mold for best results. This method keeps them moist and fluffy. If you prefer the stovetop, use a non-stick pan. Just pour the mixture in and cover. Cook on low heat until set. Watch closely so they don’t burn. For an air fryer, set it to 300°F (150°C). Cook for about 12-15 minutes. This method gives your bites a nice crisp on the outside while keeping them soft inside. It’s a great option if you want a quicker way to enjoy your egg bites! To keep your egg bites fresh, use airtight containers. Glass or plastic containers with tight lids work well. This keeps moisture out and flavor in. Place the cooled egg bites in a single layer. If you stack them, use parchment paper between layers. This prevents sticking. Store them in the fridge for up to five days. Always label your containers with the date. For the best taste, reheat your egg bites in the microwave. Place one or two bites on a microwave-safe plate. Heat for about 30 seconds. Check if they are warm inside. If not, heat for another 15 seconds. You can also use the oven for reheating. Preheat your oven to 350°F (175°C). Place the egg bites on a baking sheet. Heat for about 10-15 minutes, until warm. This method keeps them nice and fluffy. Enjoy your tasty egg bites any time! How do I make egg bites without a muffin tin? You can use small ramekins instead of a muffin tin. Just grease the ramekins with cooking spray. Fill them with the egg mixture, leaving some space for rising. Place the ramekins in a baking dish filled with water. This creates a gentle steam that helps cook the egg bites evenly. Can I freeze these egg bites for later? Yes, you can freeze these egg bites. Let them cool completely first. Then, wrap each egg bite in plastic wrap or place them in an airtight container. They will stay fresh in the freezer for up to three months. To enjoy, thaw them in the fridge overnight and reheat in the microwave. What are the nutritional values of these egg bites? These egg bites are packed with protein and nutrients. Each egg bite has about 70 calories, with 5 grams of protein and 4 grams of fat. The addition of cottage cheese and veggies boosts their nutritional value. You can adjust the ingredients to fit your dietary needs. In this article, we explored how to make delicious egg bites with simple ingredients. You learned the steps to combine eggs, veggies, and cheese, then bake them perfectly. We discussed tips for texture and flavor, variations for customization, and storage methods for freshness. Now you can enjoy these tasty bites anytime. Experiment with flavors and share with friends. These egg bites are perfect for busy mornings or meal prep. Enjoy your cooking!
    Starbucks Copycat Egg Bites Tasty and Easy Recipe
  • - 4 boneless, skinless chicken breasts - 2 tablespoons olive oil - 4 cloves garlic, minced - 1 cup fresh spinach, chopped For this dish, chicken breasts are the star. They provide a great base for the creamy sauce. I use boneless and skinless chicken to keep it simple and healthy. Olive oil helps to cook the chicken perfectly. Garlic delivers a strong flavor that pairs well with spinach. Fresh spinach adds color and nutrition to the meal. - 1 cup heavy cream - 1/2 cup grated Parmesan cheese Heavy cream gives the sauce its rich and creamy texture. You want a nice balance of creaminess and flavor. Parmesan cheese adds a salty and nutty taste that enhances the overall dish. These two creamy elements create a sauce that clings to the chicken perfectly. - 1 teaspoon Italian seasoning - Salt and pepper - Fresh parsley for garnish Italian seasoning brings warmth and aroma to the dish. Salt and pepper enhance the flavors, making the meal pop. Fresh parsley adds a bright touch on top, making the dish look inviting. This simple combination of seasonings elevates the creamy spinach garlic chicken to a new level. {{ingredient_image_1}} Seasoning the chicken Start by seasoning the chicken breasts. Sprinkle salt and pepper on both sides. This simple step adds great flavor. Cooking the chicken Heat two tablespoons of olive oil in a large skillet over medium heat. Once hot, add the seasoned chicken. Cook for about 6-7 minutes on each side. Look for a golden brown color. When cooked through, remove the chicken from the skillet and set it aside. Sautéing garlic and spinach In the same skillet, add four minced garlic cloves. Sauté for about one minute. Be careful not to burn the garlic, as it can taste bitter. Next, reduce the heat to low and add one cup of chopped fresh spinach. Cook for 2-3 minutes until the spinach wilts down. Incorporating heavy cream and cheese Pour in one cup of heavy cream and stir well. Then, add half a cup of grated Parmesan cheese along with one teaspoon of Italian seasoning. Mix until the cheese melts and the sauce becomes creamy. Returning chicken to the skillet Return the cooked chicken breasts to the skillet. Spoon the creamy sauce over the chicken. This step coats the chicken in rich flavor. Simmering and adjusting seasoning Let the dish simmer for 3-4 minutes to heat through. Taste the sauce and adjust the seasoning if needed. Add more salt or pepper for extra flavor. - Avoiding burnt garlic: Keep an eye on the garlic. It cooks quickly. When you add it to the pan, stir often. If it turns brown, it will taste bitter. Remove it from heat as soon as it smells good. - Properly cooking chicken breasts: Cook chicken over medium heat. This keeps it juicy. If you cook on high heat, the outside may burn. Flip the chicken after 6-7 minutes. It should be golden brown. Make sure it is cooked through by checking the center. - Suggested additional seasonings: You can add a pinch of red pepper flakes for heat. A dash of lemon juice brightens the dish. Fresh thyme or basil also adds great flavor. Try different herbs to find your favorite mix. - Pairing options for sides: Creamy Spinach Garlic Chicken goes well with rice or pasta. A side salad adds freshness. You can serve it with garlic bread for a hearty meal. Roasted vegetables also make a great choice. - Garnishing ideas: Fresh parsley adds color and freshness. Chop it finely and sprinkle on top. You can also use lemon wedges for a pop of color. Consider adding a sprinkle of extra Parmesan for a rich look. - Serving suggestions: Serve the chicken on a large platter. Pour the creamy sauce over the chicken. Arrange the sides around it for a beautiful spread. This makes the meal look inviting and delicious. Pro Tips Perfectly Cooked Chicken: Ensure your chicken breasts are of even thickness for uniform cooking. You can pound them slightly if needed. Fresh Spinach Substitute: If fresh spinach is not available, you can use frozen spinach. Just make sure to thaw and drain it well before adding it to the skillet. Make It Lighter: For a lighter version, substitute heavy cream with half-and-half or a low-fat cream alternative. Flavor Boost: To enhance the flavor, consider adding a splash of white wine or lemon juice to the sauce before adding the cream. {{image_2}} You can easily swap ingredients in this dish. Try using different greens. Kale and Swiss chard are great options. They add unique flavors and nutrients. For proteins, you can switch to shrimp or tofu. Both work well with the creamy sauce. Shrimp cooks fast and adds a nice touch. Tofu is a great choice for a vegan meal. To change the flavor, consider adding sun-dried tomatoes. They bring a sweet and tangy taste. Just chop them and stir them in with the spinach. Mushrooms also make a tasty addition. They add a meaty texture and earthy flavor. Sauté them with the garlic for the best result. If you need a dairy-free version, use coconut cream instead of heavy cream. This keeps it creamy while adding a hint of coconut flavor. For low-carb options, skip the heavy cream and use cauliflower puree. It still gives a rich, creamy texture without the carbs. You can enjoy a lighter meal that still tastes great. You can store leftovers in the fridge. First, let the chicken cool down. Place it in an airtight container. This helps keep the dish fresh. Glass or plastic containers work well. They keep moisture in and flavors strong. If you want to freeze the chicken, it's easy. Wrap the cooked chicken tightly in foil or plastic wrap. Place it in a freezer-safe bag. Press out excess air to prevent freezer burn. When you're ready to eat, thaw it in the fridge overnight. Reheat the chicken in a skillet over low heat. Add a splash of cream to keep it moist. You can also use the microwave. Heat it in short bursts, stirring often. In the fridge, this dish lasts about 3-4 days. Make sure to check for signs of spoilage. If it smells strange or looks off, it's best to discard it. In the freezer, it can last up to 3 months. After that, the quality may decline. Always trust your senses when it comes to food safety. Yes, you can use frozen spinach. Just make sure to thaw and drain it well. Frozen spinach can save time and still taste great. However, it may release more water. Adjust the sauce if needed to keep it creamy. This dish pairs well with several sides. Here are some ideas: - Rice or quinoa for a hearty base - Mashed potatoes for a creamy touch - Pasta to soak up the sauce - Steamed vegetables for a healthy crunch - Salad for a fresh contrast To add heat, try these methods: - Add red pepper flakes when cooking the garlic. - Mix in a dash of hot sauce with the cream. - Use spicy Italian sausage instead of chicken. - Incorporate jalapeños or fresh chili peppers into the sauce. Feel free to experiment to find your perfect spice level! This blog post covers a tasty Creamy Spinach Garlic Chicken recipe. You learned about key ingredients like chicken, garlic, and cream, and how to cook them step by step. I shared helpful tips for cooking, flavor boosts, and ways to switch things up with variations. Remember to store leftovers properly and check for spoilage signs. This dish is not just simple; it’s also adaptable for different tastes and diets. Enjoy creating this meal, and make it your own!
    Creamy Spinach Garlic Chicken Flavorful Dinner Idea
  • - 1 cup graham cracker crumbs - 1/4 cup sugar - 1/2 cup unsalted butter, melted - 2 (8 oz) packages cream cheese, softened - 1/2 cup sugar - 1 teaspoon vanilla extract - 2 large eggs - 2 cups diced apples (preferably Granny Smith) - 1 teaspoon cinnamon - 1/4 teaspoon nutmeg - 1 cup caramel sauce (plus extra for drizzling) Use a standard measuring cup for the graham crackers and sugar. For butter, melt it in a microwave or stove until it’s liquid. Cream cheese should be soft but not warm, making it easier to mix. Diced apples should be about half an inch in size. This keeps them tender but not mushy when baked. - Graham Crackers: You can swap these for crushed cookies, like vanilla wafers or Oreos, for a different flavor. - Apples: Try using different apple varieties like Honeycrisp or Fuji for added sweetness. - Sweetener: You can use brown sugar instead of white sugar for a deeper flavor. - Spices: Add a pinch of cloves for extra warmth and depth to the flavor. - Caramel Sauce: Consider making your own caramel sauce for a richer taste, or use a store-bought version for convenience. These variations can change the taste and texture while still keeping the bars delicious and fun! {{ingredient_image_1}} Start by preheating your oven to 325°F (160°C). Grab an 8x8 inch baking pan. Line it with parchment paper, leaving some paper hanging over the edges. This will help you lift the bars out later. In a bowl, mix 1 cup of graham cracker crumbs, 1/4 cup of sugar, and 1/2 cup of melted unsalted butter. Stir the mixture until it is well combined. Press this mixture firmly into the bottom of your lined baking pan. Make sure it forms an even layer. In a large bowl, beat together two packages of softened cream cheese and 1/2 cup of sugar. You want this mixture to be smooth and creamy. Add in 1 teaspoon of vanilla extract and mix until blended. Add 2 large eggs to the cream cheese mixture, one at a time. Mix just until blended after each egg. Next, gently fold in 2 cups of diced Granny Smith apples, 1 teaspoon of cinnamon, and 1/4 teaspoon of nutmeg. Make sure the apples and spices are evenly mixed into the batter. Pour the cheesecake mixture over the baked crust in the pan. Smooth it out evenly with a spatula. Bake this in your preheated oven for 30 to 35 minutes. You will know it’s done when the center is set and the edges look lightly golden. After baking, let the cheesecake bars cool to room temperature. Then, place them in the fridge for at least 2 hours. For the best results, chill them overnight. This helps the bars set fully. Once chilled, lift the bars out of the pan using the parchment paper. Cut them into squares. Drizzle with caramel sauce before serving. For a nice touch, sprinkle some cinnamon on top and add a few thin apple slices. Enjoy your delicious bars! To get a smooth and creamy cheesecake, start with softened cream cheese. This helps it mix well. Beat the cream cheese and sugar until there are no lumps. Add eggs one at a time, mixing gently. Overmixing can make the texture too airy. Bake until the center is set but still a bit wobbly. Let it cool fully before chilling in the fridge. You can make this dessert a bit lighter. Use low-fat cream cheese instead of regular cream cheese. You can substitute sugar with a sweetener like stevia or monk fruit. For a crust, try using almond flour instead of graham cracker crumbs. If you want fewer carbs, you can skip the crust altogether and just bake the filling. For a perfect caramel drizzle, warm the sauce slightly. This makes it easier to pour. Use a spoon or a squeeze bottle for more control. Start from one corner and move in quick, back-and-forth motions. For a fancier look, drizzle in a zigzag pattern. This method makes your bars look even more tempting. Pro Tips Use Room Temperature Ingredients: Ensure your cream cheese is at room temperature for a smooth filling without lumps. Choose the Right Apples: Granny Smith apples provide the perfect tartness that complements the sweetness of the caramel and cheesecake. Don't Overmix: Mix the eggs into the batter just until combined to keep the cheesecake bars light and fluffy. Chill for Best Results: Let the cheesecake bars chill overnight for the best flavor and texture before serving. {{image_2}} You can easily add nuts for extra crunch. Chopped walnuts or pecans work well. Just fold in about 1/2 cup of your chosen nuts after mixing in the apples and spices. This adds a rich flavor and a nice texture. To make these bars gluten-free, swap graham cracker crumbs for gluten-free crumbs. You can find these at most stores. The rest of the recipe stays the same. Your dessert will still taste amazing! For a vegan version, replace cream cheese with a plant-based cream cheese. Use flax eggs instead of regular eggs. Mix 1 tablespoon of ground flaxseed with 2.5 tablespoons of water for each egg. Choose a dairy-free caramel sauce to drizzle on top. Enjoy a delicious treat that fits your diet! To keep your caramel apple cheesecake bars fresh, store them in the fridge. Place the bars in an airtight container. This prevents them from drying out or absorbing other odors. You can also cover them tightly with plastic wrap. They will stay fresh for up to five days in the fridge. You can freeze these bars for longer storage. Cut the bars into pieces before freezing. Wrap each piece in plastic wrap and then place them in a freezer-safe bag. Make sure to remove as much air as possible. They can last up to three months frozen. When ready to eat, thaw them overnight in the fridge. These cheesecake bars taste best when served cold. For the best flavor, let them chill in the fridge for at least two hours. If you freeze them, allow them to thaw fully before serving. Drizzle with extra caramel sauce just before serving for a delightful treat. Enjoy these bars as a sweet end to any meal! Yes, you can make these bars a day or two ahead. Just store them in the fridge. This allows the flavors to mix well. Plus, you save time on the day you serve them. The cheesecake is done when the edges are golden. The center should be set but slightly jiggly. It will firm up as it cools. Keep an eye on it to avoid overbaking. Granny Smith apples work best for this recipe. They add a nice tart flavor. Other options are Honeycrisp or Fuji apples. These also bring sweetness and crunch. Yes, store-bought caramel sauce is a great option. It saves time and still tastes good. You can drizzle it on top or use it in the recipe. To cut the bars neatly, use a sharp knife. Dip it in hot water before each cut. Wipe the knife after each cut to keep the edges clean. When using parchment paper, leave overhang on the sides. This makes it easy to lift the bars out of the pan. Press the paper into the corners to avoid gaps. In this blog post, we explored how to make delicious caramel apple cheesecake bars. We covered essential ingredients, step-by-step baking instructions, and helpful tips. We also shared variations to suit different diets and storage advice to keep them fresh. Remember, the right ingredients and techniques bring out the best flavors. Enjoy making these bars, and don’t hesitate to get creative. Happy baking!
    Caramel Apple Cheesecake Bars Delectable Dessert Recipe

Posts pagination

← Newer 1 … 30 31 32 33 Older →

Footer

↑ back to top

More information

  • Dinner
  • Drinks
  • Appetizers
  • Dessert
  • About
  • Contact Us

    Our Policies

    • Privacy Policy
    • Cookie Policy
    • Copyright Policy
    • Disclaimer
    • GDPR Policy
    • Terms Of Us

    Copyright © 2024 My Saved Recipe