• Recipes
    • Dinner
    • Dessert
    • Appetizers
    • Drinks
  • About
  • Contact Us
  • Privacy Policy
menu icon
go to homepage
  • Recipes
    • Dinner
    • Dessert
    • Appetizers
    • Drinks
  • About
  • Contact Us
  • Privacy Policy

search icon
Homepage link
  • Recipes
    • Dinner
    • Dessert
    • Appetizers
    • Drinks
  • About
  • Contact Us
  • Privacy Policy

×
Savannah

Savannah

Savannah is the creative force behind My Saved Recipe, a space where food becomes both art and adventure. A passionate home chef, she delights in exploring flavors from around the world while honoring timeless classics.

Savannah’s philosophy centers on the power of food to bring people together, spark creativity, and create lasting memories. Through thoughtfully crafted recipes and practical tips, she inspires cooks of all levels to embrace fresh ingredients, experiment with confidence, and find joy in the kitchen.

  • - 2 cups all-purpose flour - 1 tablespoon baking powder - 1 teaspoon salt - ½ cup cold butter, cubed - ¾ cup shredded mozzarella cheese - ½ cup ricotta cheese - 1 cup pizza sauce (store-bought or homemade) - 1 cup assorted toppings (pepperoni, bell peppers, mushrooms, olives, etc.) - 1 egg (for egg wash) - 1 tablespoon Italian seasoning - Olive oil for brushing To make cheesy pizza pockets, you need simple ingredients. The flour and baking powder form the dough base. Cold butter makes the dough flaky. You use mozzarella and ricotta cheese for a rich cheesy filling. Pizza sauce adds flavor and moisture. Assorted toppings can make each pocket unique. I love mozzarella for its meltiness. Ricotta adds creaminess. You can also try provolone or cheddar. Mixing cheeses gives more flavor. Feel free to experiment! Just keep the cheese blend balanced. You can add many fun toppings. Think pepperoni, bell peppers, or mushrooms. Other options include olives, spinach, or sausage. Customize each pocket to your taste. You can also make them vegetarian or even vegan. Use plant-based cheese and veggies for a twist. {{ingredient_image_1}} To make the dough, start with a large bowl. Combine 2 cups of all-purpose flour, 1 tablespoon of baking powder, and 1 teaspoon of salt. Next, add ½ cup of cold butter, cubed. Use your fingers or a pastry cutter to mix until it looks like coarse crumbs. This step is key; it helps create flaky pockets. Then, add about ¼ cup of cold water to form a dough. Be careful not to overwork it. Wrap your dough in plastic wrap and chill it in the fridge for 30 minutes. This makes it easier to roll out later. Now, let’s focus on the cheese. In the same bowl, stir in ¾ cup of shredded mozzarella and ½ cup of ricotta cheese. Mix gently to distribute the cheese evenly throughout the dough. This step gives your pockets that wonderful cheesy flavor. Make sure all the cheese is well mixed to avoid any clumps. You want every bite to be full of delicious cheese. After the dough has chilled, preheat your oven to 400°F (200°C). On a floured surface, roll out the dough to about ¼-inch thick. Use a large biscuit cutter or a glass to cut out circles, about 4 inches in diameter. Aim for 8-10 circles. To assemble, place one circle on a baking sheet. Scoop a tablespoon of pizza sauce into the center. Add your choice of toppings—like pepperoni, bell peppers, or mushrooms—and sprinkle some Italian seasoning. Top this with more mozzarella cheese. Now, take another circle of dough and place it on top. Press the edges to seal them tight. Use a fork to crimp the edges, which adds a nice design too. For a golden finish, beat 1 egg and brush it on top of the pockets. Finally, bake them for 15-20 minutes until they turn golden brown and feel firm. Let them cool a bit before serving. Enjoy them warm with extra pizza sauce for dipping! To get the dough just right, mix your dry ingredients first. Use a large bowl to combine 2 cups of all-purpose flour, 1 tablespoon of baking powder, and 1 teaspoon of salt. Add ½ cup of cold, cubed butter. Mix until it looks like coarse crumbs. This step is key for a flaky crust. When adding water, use just enough to bring it together. Too much water makes the dough tough. Preheat your oven to 400°F (200°C) before baking. This ensures your pizza pockets bake evenly. Line your baking sheet with parchment paper to prevent sticking. Bake for 15-20 minutes until they are golden brown and firm. Check them a few minutes early to avoid over-baking. For a lovely golden color, use an egg wash. Beat 1 egg in a bowl. With a pastry brush, coat the tops of your pizza pockets before baking. This simple step makes them look more appealing. Don’t skip this; the shine adds to the overall look! Pro Tips Chill Your Ingredients: Keeping your butter and dough cold is crucial for achieving a flaky texture in your pizza pockets. Experiment with Fillings: Don’t hesitate to mix and match your toppings; this recipe is perfect for using up leftovers in your fridge. Make Ahead: You can prepare the dough and fillings a day in advance. Just assemble and bake when you’re ready to serve! Perfect Egg Wash: For a shiny finish, ensure your egg wash is evenly applied and consider adding a sprinkle of sea salt or herbs on top before baking. {{image_2}} You can easily make vegetarian cheesy pizza pockets. Use a mix of fresh veggies like bell peppers, mushrooms, and spinach. Replace the mozzarella with vegan cheese for a dairy-free option. Look for brands that melt well. You can also add nutritional yeast for a cheesy flavor. For protein, try adding chickpeas or lentils. This will make your pockets filling and tasty. To make gluten-free cheesy pizza pockets, swap all-purpose flour with a gluten-free blend. Be sure to choose a mix that works for baking. Add a bit of xanthan gum if your blend does not include it. The dough may feel different, so don't be alarmed. Roll it out gently, and follow the same steps as the original recipe. Use gluten-free cheese varieties to keep it safe for those who avoid gluten. Get creative with your fillings! Try adding fruits like pineapple or figs for a sweet twist. You can also use cooked chicken, bacon, or even crab meat for added flavor. Go for unique cheeses like feta or goat cheese to change things up. The beauty of pizza pockets is their versatility. You can mix and match as you like, so explore different flavors and textures. To keep your leftover pizza pockets fresh, store them in an airtight container. Make sure they cool down first. Place a piece of parchment paper between layers to avoid sticking. You can keep them in the fridge for up to three days. If you want to save them longer, freezing is a great choice. To freeze pizza pockets, wrap each one in plastic wrap. Then, place them in a freezer bag. This helps prevent freezer burn. Label the bag with the date. They can stay in the freezer for up to three months. When ready to eat, thaw them overnight in the fridge before reheating. For the best taste, reheat pizza pockets in the oven. Preheat your oven to 375°F (190°C). Place them on a baking sheet lined with parchment paper. Heat for about 10-15 minutes or until warm. You can also use the microwave, but the oven gives a better crisp. Enjoy that gooey cheese and flaky crust! The best way to reheat cheesy pizza pockets is in the oven. Preheat your oven to 350°F (175°C). Place the pockets on a baking sheet lined with parchment paper. Heat them for about 10-15 minutes. This keeps the crust crispy while warming the cheese. If you're in a hurry, you can use the microwave. Heat them on high for about 30 seconds to 1 minute. However, the crust may turn soft. Yes, you can use store-bought dough for this recipe. It saves time and effort. Look for pizza dough or biscuit dough in the store. It works well and tastes great. Just follow the cooking instructions on the package for the best results. You can still fill the dough with your favorite toppings and cheese. To make cheesy pizza pockets ahead of time, prepare the dough and filling as described in the recipe. After sealing the pockets, place them on a baking sheet. Cover them with plastic wrap and refrigerate for up to 24 hours. You can also freeze them. Just make sure to wrap them well. When ready to cook, bake them straight from the fridge or freezer. Adjust the baking time if frozen. You learned how to make tasty cheesy pizza pockets from scratch. We covered the best ingredients to choose, step-by-step instructions, and helpful tips to get your dough just right. You also saw fun variations to fit your diet and how to store leftovers for later. These pockets are easy to make and share. Enjoy trying new toppings and flavors. Keep experimenting, and you will master this fun dish!
    Cheesy Pizza Pockets Easy and Delicious Recipe Guide
  • - 4 large russet potatoes - 1 pound ground beef or turkey - 1 packet taco seasoning - 1 cup black beans - 1 cup corn - 1 cup shredded cheddar cheese - 1 cup diced tomatoes - 1/2 cup sour cream - 1/4 cup chopped fresh cilantro - Olive oil, salt, and pepper - Baking tray - Large skillet - Fork When making cheesy taco potatoes, gathering the right ingredients is key. Start with four large russet potatoes. They are perfect for baking and hold up well. Next, choose one pound of ground beef or turkey. Both options work and taste great. You will also need one packet of taco seasoning to add that signature flavor. Black beans and corn will add fiber and texture. Use one cup of each. For that cheesy goodness, grab one cup of shredded cheddar cheese. You can’t forget the freshness of one cup of diced tomatoes, either. Lastly, add a half cup of sour cream and a quarter cup of chopped fresh cilantro for a burst of flavor. Don’t forget olive oil, salt, and pepper for taste. With these ingredients ready, you will create a flavorful meal that everyone will love! {{ingredient_image_1}} First, scrub the potatoes well. This removes dirt and gives them a nice clean surface. Next, pierce each potato with a fork. This step helps steam escape while baking. Then, drizzle olive oil over the potatoes. Be sure to coat them lightly. After that, sprinkle salt on top. This adds flavor to the skin. Now, heat a large skillet over medium heat. Add the ground beef or turkey to the skillet. Cook it until it turns brown, which takes about 5-7 minutes. If there is extra fat, drain it. Next, add the taco seasoning to the meat. Mix in the black beans and corn. Pour in a splash of water, about 1/4 cup. This helps the spices stick and makes a nice sauce. Let it simmer for 3-5 minutes. Stir occasionally until everything is heated through. Once the potatoes are baked, take them out of the oven. Carefully cut each potato open lengthwise. Create a pocket for the filling. Use a fork to fluff the insides gently. Spoon the taco mixture generously into each potato. Make sure to fill them well. Top each potato with diced tomatoes and shredded cheddar cheese. If you want the cheese melted, place them back in the oven or skillet for a few minutes. Finally, add a dollop of sour cream and a sprinkle of chopped cilantro on top. This adds freshness and a pop of color. To tell when potatoes are fork-tender, use a fork. If it slides in easily, they are done. Keep an eye on the time, around 45-60 minutes works well. You want your potatoes soft and fluffy inside. To prevent potatoes from drying out, drizzle them with olive oil before baking. This adds moisture and helps the skin crisp up nicely. Also, consider covering them with foil for part of the baking time. This keeps the steam in and helps with tenderness. You can add spices to the taco mix for more flavor. Try chili powder or cumin for a kick. If you like heat, add some diced jalapeños too. Mixing in some chopped bell peppers can add sweetness and crunch. Choosing the right cheese for melting makes a big difference. Cheddar is great, but try Monterey Jack or a Mexican blend for a twist. These cheeses melt well and bring extra flavor to your dish. Get creative with how you serve the cheesy taco potatoes. Try placing them on wooden boards for a rustic look. Add lime wedges on the side for a pop of color and a zesty finish. For garnishing, sprinkle extra chopped cilantro and cheese on top. A dollop of sour cream adds a creamy touch. Arrange the potatoes on plates with colorful toppings to make them more appealing and fun to eat. Pro Tips Choose the Right Potatoes: For the best texture and flavor, use large russet potatoes as they have a fluffy interior that pairs well with the cheesy taco filling. Customize Your Filling: Feel free to add other ingredients like diced bell peppers or jalapeños for additional flavor and heat in your taco mixture. Let the Cheese Melt: For a gooey cheese topping, place the stuffed potatoes back in the oven for a few minutes after adding the cheese, or cover them with a lid in the skillet to trap steam. Garnish for Flavor: Fresh cilantro and a squeeze of lime juice enhance the dish's flavor profile, adding a refreshing contrast to the richness of the cheese and sour cream. {{image_2}} You can make Cheesy Taco Potatoes without meat. Just use mushrooms or more beans. Mushrooms add a nice texture and flavor. You can use black beans, pinto beans, or kidney beans. This way, you keep the taste rich and hearty. Cheddar cheese is great, but you can try other kinds too. Mozzarella gives a nice stretch, while pepper jack adds a spicy kick. You can even mix cheeses for a deeper flavor. Experimenting with cheese lets you find your favorite blend. Toppings can change your dish. Guacamole is creamy and fresh. Salsa adds a nice kick. You can also use diced avocados or jalapeños for fun. For sides, try a light salad or tortilla chips with salsa. These pair well and make your meal complete. Store leftover Cheesy Taco Potatoes in an airtight container. This keeps them fresh. You can store them in the fridge for up to three days. Make sure they cool down before sealing. If you want, you can add a layer of plastic wrap for extra protection. Reheat your Cheesy Taco Potatoes in the oven. Preheat it to 350°F (175°C). Place the potatoes in a baking dish. Cover them with foil to keep them moist. Heat for about 15-20 minutes. You can also use the microwave. Just heat for 1-2 minutes. Check if they are warm all the way through. You can freeze Cheesy Taco Potatoes, but do it before adding toppings. Wrap each potato in plastic wrap and then in foil. Store them in a freezer bag for up to two months. To defrost, place them in the fridge overnight. Reheat them in the oven or microwave as mentioned above. Yes, you can use sweet potatoes! Sweet potatoes taste sweeter and have a creamier texture. They take about the same time to bake, but you may need to adjust for size. If using larger sweet potatoes, you might need to cook them a bit longer. Just pierce them and check for tenderness with a fork. Cooked Cheesy Taco Potatoes can last for about 3 to 5 days in the fridge. Store them in an airtight container to keep them fresh. Always check for any off smells or signs of spoilage before eating. If you see mold, it's best to throw them away. Absolutely! You can prepare the filling a day or two ahead. Cook the meat and mix in the taco seasoning, beans, and corn. Let it cool, then store it in the fridge. When you're ready to serve, just reheat the filling and stuff it into your baked potatoes. This saves time on busy nights! In this blog post, we explored how to make Cheesy Taco Potatoes from start to finish. You learned about the main ingredients, easy steps to prep and cook, and tips for perfect results. We also shared variations, storage info, and answers to common questions. Now, you can create a fun and tasty meal for any occasion. Get creative with flavors and enjoy your cooking journey!
    Cheesy Taco Potatoes for a Flavorful Dinner Delight
  • To make Hot Honey Feta Chicken, you need simple, fresh ingredients. Each one plays a key role in creating bold flavors. Here’s what you will need: - Chicken: Use 4 boneless, skinless chicken breasts. They cook evenly and stay juicy. - Feta Cheese: One cup of crumbled feta cheese gives a rich and tangy taste. - Hot Honey: You need 3 tablespoons of hot honey. It adds sweetness and heat. You can mix honey with red pepper flakes if you want. - Olive Oil: Two tablespoons of olive oil keep the chicken moist while baking. - Garlic: Four cloves of minced garlic add depth and aroma to the dish. - Spices and Seasonings: Use 1 teaspoon each of dried oregano and paprika. Add salt and pepper to taste. - Garnish: Fresh parsley, chopped, adds a pop of color and fresh flavor. These ingredients combine to create a delicious meal. Each one enhances the others, making every bite enjoyable. Don't skip any, as they all matter in this recipe! {{ingredient_image_1}} To make homemade hot honey, mix honey with red pepper flakes. Use about 3 tablespoons of honey. Adjust the heat to your liking. If you want a quicker option, use pre-made hot honey. It saves time and still packs a punch. Combine crumbled feta cheese, minced garlic, olive oil, dried oregano, and paprika in a bowl. Season with salt and pepper. Mix until smooth. This creamy feta topping adds flavor and texture to the chicken. Preheat your oven to 400°F (200°C). Line a baking dish with parchment paper. Place the chicken breasts in the dish. Drizzle the hot honey over each piece. Spread the feta mixture on top, pressing it down a bit. Bake for 25–30 minutes. Check doneness by ensuring the chicken's internal temperature reaches 165°F (75°C). Let it rest for 5 minutes before serving. To ensure juicy chicken, brine it for 30 minutes in saltwater. This helps keep the chicken moist. Use a meat thermometer to check the doneness. Aim for 165°F (75°C) inside. For the best feta topping, mix the feta with garlic, olive oil, oregano, and spices. This creates a creamy blend that sticks well to the chicken. Press it down slightly so it stays put while baking. Pair your Hot Honey Feta Chicken with roasted vegetables or a fresh green salad. These sides add a nice crunch and balance the dish's sweetness. You can also serve it with rice or quinoa for a hearty meal. For garnishing, sprinkle fresh parsley on top. Add a drizzle of hot honey for extra flavor. This makes the dish pop on the plate. Avoid overcooking the chicken. It can dry out quickly. Stick to the cooking time and check the internal temperature. Don't forget to season properly. A pinch of salt and pepper enhances the flavor. If the seasoning is off, the whole dish can taste bland. Pro Tips Choose Quality Chicken: Always opt for fresh, organic chicken breasts for the best flavor and texture. Customize the Heat: Adjust the amount of hot honey or red pepper flakes according to your spice preference. Let it Rest: Allow the chicken to rest for 5 minutes after baking; this helps retain juices for a more tender bite. Serve with Sides: Pair with roasted vegetables or a crisp salad for a balanced and colorful meal. {{image_2}} You can switch up the protein in this dish. Turkey and pork work well with hot honey and feta. Both meats absorb flavors nicely. For a vegetarian option, use firm tofu or chickpeas. Marinate them in the hot honey mix for the same sweet and spicy taste. Change the honey type for a new twist. Try clover, wildflower, or even lavender honey. Each brings its unique sweetness. You can also add vegetables to the dish. Bell peppers, zucchini, or cherry tomatoes roast well and add flavor. Toss them in olive oil, salt, and pepper before baking. If you need gluten-free options, use gluten-free breadcrumbs instead of feta. You can also swap the feta with a dairy-free cheese. Look for brands made from nuts or soy. They melt well and can mimic the creamy texture of feta. To store your leftover hot honey feta chicken, let it cool first. Place it in an airtight container. This helps keep the chicken fresh. Make sure to store it in the fridge. You can keep it for up to three days. If you want to enjoy it later, don’t forget to label the container with the date. When you’re ready to eat your leftovers, reheating is key. The best way to reheat chicken is in the oven. Preheat the oven to 350°F (175°C). Place the chicken in a baking dish. Cover it with foil to keep it moist. Heat for about 15-20 minutes or until hot. You can also use a microwave. Heat it in short bursts, about 1-2 minutes at a time. Check the chicken to avoid overcooking. If you want to freeze the hot honey feta chicken, start by cooling it completely. Wrap each piece in plastic wrap. Then, place them in a freezer bag or container. Make sure to squeeze out the air. You can freeze it for up to three months. For best results, freeze the chicken without the feta topping. Add the feta mixture when you reheat it for a fresh taste. If you don’t have hot honey, you can mix regular honey with red pepper flakes. This gives you that sweet and spicy kick. You can also try agave nectar or maple syrup with a sprinkle of cayenne pepper for heat. For a different twist, consider using sriracha mixed with honey. Each option brings a new flavor, so be creative! Cooking chicken breasts at 400°F (200°C) takes about 25 to 30 minutes. Always check that the internal temperature reaches 165°F (75°C). If you use thicker breasts, they may need a few extra minutes. Always let the chicken rest for about 5 minutes after baking. This helps keep the juices in, making the chicken tender and juicy. Yes, you can prepare this dish in advance. You can season the chicken and add the hot honey and feta topping. Cover it and store it in the fridge for up to 24 hours. When you’re ready, just bake it straight from the fridge. This makes meal prep easy and quick for busy days! Hot Honey Feta Chicken is a flavorful dish that combines simple ingredients, like chicken and feta cheese, with the sweet heat of hot honey. You can make it easily using homemade or store-bought hot honey and perfectly bake the chicken for a juicy result. Remember to avoid overcooking and season well. There are also fun ways to change the dish based on your tastes. Store leftovers properly to enjoy later. Overall, this dish is simple, delicious, and perfect for any meal. Give it a try!
    Hot Honey Feta Chicken Flavorful and Easy Recipe
  • To make a tasty Crockpot Vegetarian Tortilla Soup, gather these ingredients: - 1 can (15 oz) black beans, drained and rinsed - 1 can (15 oz) corn kernels, drained - 1 can (14.5 oz) diced tomatoes with green chilies - 1 bell pepper (any color), diced - 1 medium onion, chopped - 2 cloves garlic, minced - 4 cups vegetable broth - 1 teaspoon ground cumin - 1 teaspoon smoked paprika - 1 teaspoon chili powder - Salt and pepper to taste - 1 avocado, diced (for topping) - Fresh cilantro, chopped (for garnish) - 1 lime, cut into wedges (for serving) - Corn tortilla strips (for serving) This mix of beans, veggies, and spices gives the soup its rich flavor. Each ingredient adds texture and nutrients. Black beans offer protein; corn brings sweetness. Diced tomatoes with chilies add a nice kick. Bell pepper and onion boost the soup's aroma. Garlic enhances the taste while vegetable broth ties it all together. Spices like cumin, paprika, and chili powder create a warm, comforting bowl. For toppings, avocado adds creaminess, and cilantro brightens the dish. Lime gives a fresh, zesty finish. Corn tortilla strips bring a delightful crunch. As you prepare, think of how each ingredient will complement the others. Enjoy the process! {{ingredient_image_1}} 1. In a crockpot, combine the following ingredients: - 1 can black beans, drained and rinsed - 1 can corn kernels, drained - 1 can diced tomatoes with green chilies - 1 diced bell pepper - 1 chopped medium onion - 2 minced garlic cloves 2. Pour in 4 cups of vegetable broth. Stir everything well. 3. Add spices to boost the flavor: - 1 teaspoon ground cumin - 1 teaspoon smoked paprika - 1 teaspoon chili powder - Salt and pepper to taste 4. Mix it all together before cooking. Cover the crockpot. 5. Choose your cooking method: - Low setting for 6-8 hours - High setting for 3-4 hours - Cooking on low takes 6-8 hours. This lets the flavors meld. - Cooking on high takes 3-4 hours. Your soup will still taste great. 1. When the soup is ready, ladle it into bowls. 2. Top each bowl with: - Diced avocado - Chopped fresh cilantro - A squeeze of lime juice 3. Serve with crispy corn tortilla strips on the side. They add a nice crunch. Enjoy your delicious meal! To boost the flavor of your tortilla soup, consider adjusting the spice levels. If you like heat, add more chili powder or even a dash of cayenne pepper. You can also add a pinch of salt with each taste test. This will help you find the right balance. Adding fresh herbs can elevate the taste. Consider using cilantro, which adds brightness. You can mix it in during cooking or sprinkle it on top before serving. Fresh lime juice also brightens flavors nicely. To avoid mushy vegetables, choose firm veggies like bell peppers. Cut them into larger pieces so they hold up well during cooking. Stir the soup gently just once in a while. This helps keep the veggies intact and prevents them from breaking down too much. Stirring is important, but do it with care. Too much stirring can make your soup cloudy. Aim to keep the soup's base clear and inviting. Pair your tortilla soup with a side of warm cornbread or tortilla chips. This adds crunch and makes it a filling meal. You can also serve it with a fresh salad for a balanced dish. For toppings, the options are endless. Try adding shredded cheese, sour cream, or jalapeños for extra flavor. You can also switch up the toppings based on your taste. Go for diced radishes, diced tomatoes, or even pickled onions for added zest. Pro Tips Use Fresh Ingredients: Fresh vegetables enhance the flavor of the soup. Consider using seasonal produce for the best taste. Adjust Spice Levels: If you prefer a spicier soup, add diced jalapeños or increase the chili powder to your liking. Make it Creamy: For a creamier texture, blend a portion of the soup before serving or add a dollop of sour cream or yogurt on top. Meal Prep Friendly: This soup freezes well, so consider making a double batch to enjoy later. Just store it in airtight containers. {{image_2}} You can boost the protein in your soup easily. Adding other beans works great. Try kidney beans or pinto beans for variety. Tofu or tempeh are also excellent choices. Both soak up flavors well and add a nice texture. Cut tofu into cubes, and add it during the last hour of cooking. Tempeh can be crumbled and mixed in early. This way, it absorbs all those tasty spices. Feel free to swap out vegetables based on what you have. Zucchini, carrots, or spinach can work well too. You can also add sweet potatoes for a sweet touch. If you need gluten-free options, use corn tortillas or skip them altogether. Just make sure your broth is gluten-free if you use store-bought. To give your soup new life, play with spices. Add more chili powder for heat or smoked paprika for depth. You can even try fresh herbs like oregano or thyme. For broth, switch to spicy vegetable broth for a kick. You can also use coconut milk for a creamy twist that adds sweetness. These small changes can make a big difference in flavor. After you enjoy your soup, let it cool down. Store leftovers in airtight containers. Use glass or BPA-free plastic containers for safety. Make sure to label them with the date. This helps you track how long they've been in the fridge. The soup keeps well for about 3 to 4 days. To freeze the soup, first let it cool completely. Pour it into freezer-safe bags or containers. Leave some space at the top for expansion. You can freeze it for up to 3 months. When you're ready to eat, thaw the soup overnight in the fridge. For a quicker method, place it in a bowl of cold water. When reheating, use a pot over medium heat for best flavor. Stir it often to heat evenly. If you want to microwave it, use a microwave-safe bowl. Heat in short bursts, stirring in between. After reheating, add fresh toppings like diced avocado, cilantro, or a squeeze of lime. This boosts the flavor and makes it look great! To add heat to your tortilla soup, consider these ideas: - Add chopped jalapeños for fresh spice. - Mix in a pinch of cayenne pepper. - Include hot sauce per your taste. - Use spicy diced tomatoes instead of regular ones. These options will boost the heat while keeping the flavors balanced. Yes, you can cook this soup on the stove. Here’s how: 1. In a large pot, sauté the onion and garlic until soft. 2. Then, add the bell pepper and cook for a few more minutes. 3. Stir in the black beans, corn, and diced tomatoes. 4. Pour in the vegetable broth and spices. 5. Bring to a boil, then reduce heat. 6. Simmer for 20-30 minutes, stirring occasionally. This method gives you a quick and tasty soup without the wait. Your soup will stay fresh in the fridge for about 4-5 days. - Store it in an airtight container. - Make sure it cools before sealing. If you want to keep it longer, consider freezing it. It can last up to 3 months in the freezer. Just remember to thaw it in the fridge overnight before reheating. This blog post covered how to make a delicious soup with simple ingredients and steps. You learned about essential ingredients, cooking times, and how to enhance flavors. The tips provided will help you avoid common mistakes, and the variations let you get creative. This soup is tasty and easy to store. I hope you try it and enjoy the process. Remember, cooking is fun and a great way to share with friends and family!
    Crockpot Vegetarian Tortilla Soup Flavor Boost Recipe
  • To make Cottage Cheese Stuffed Shells, you need a list of great ingredients. Here’s what you will need: - 12 jumbo pasta shells - 2 cups cottage cheese - 1 cup ricotta cheese - 1 cup shredded mozzarella cheese, divided - 1 cup grated Parmesan cheese, divided - 1 egg, lightly beaten - 2 cups fresh spinach, roughly chopped - 2 garlic cloves, minced - 1 teaspoon dried oregano - 1 teaspoon dried basil - Salt and pepper to taste - 2 cups marinara sauce - Fresh basil leaves for garnish Each ingredient adds a special touch to this dish. The jumbo pasta shells hold the creamy filling well. Cottage cheese and ricotta give a rich, smooth texture. The mozzarella and Parmesan add a lovely cheesy flavor. Fresh spinach brings in some green goodness. Garlic, oregano, and basil create a burst of taste. Marinara sauce ties everything together with its tangy sweetness. When prepping, use fresh ingredients for the best flavor. This mix of cheeses and herbs gives a classic Italian taste. You won’t just be feeding your family; you’ll be treating them to a flavorful meal they will love. {{ingredient_image_1}} Making cottage cheese stuffed shells is simple. You start by cooking the pasta, then make the filling. After that, you stuff the shells, layer the sauce, and bake them. It’s a fun process that leads to a tasty meal. - Preheating the Oven Set your oven to 375°F (190°C). This step is key for a good bake. - Cooking the Pasta Boil a large pot of salted water. Cook the jumbo shells until they are al dente. This usually takes around 8-10 minutes. Drain and set them aside to cool. - Preparing the Filling In a big bowl, mix together cottage cheese, ricotta cheese, half the mozzarella, and half the Parmesan. Add the beaten egg, chopped spinach, minced garlic, oregano, basil, salt, and pepper. Stir until all ingredients blend well. - Stuffing the Shells Take each cooked shell and fill it with about 2 tablespoons of the cheese mixture. Make sure to pack it in well. - Layering the Sauce Spread a thin layer of marinara sauce on the bottom of a 9x13 inch baking dish. This prevents the shells from sticking. - Arranging the Shells Place the stuffed shells in the dish with the open side facing up. Pour the remaining marinara sauce over all the shells. - Adding Cheese Sprinkle the rest of the mozzarella and Parmesan cheese on top. This will create a nice cheesy crust. - Baking Process Cover the dish with foil and bake for 25 minutes. After that, remove the foil and bake for another 10-15 minutes. Look for bubbly and golden cheese. - Garnishing and Serving Once done, take the dish out of the oven. Let it cool for a few minutes. Add fresh basil leaves on top before serving. Enjoy your meal! To make great cottage cheese stuffed shells, watch the pasta. Cook it until it’s al dente. If you overcook it, the shells may break. Be gentle when filling them. Use a spoon to avoid tearing. Don’t skip the marinara sauce layer. It keeps the shells from sticking to the dish. Lastly, cover the dish with foil while baking. This helps the cheese melt evenly. For a rich taste, mix in fresh herbs. Try adding parsley or thyme to the cheese filling. You can also mix in some cooked ground meat for extra flavor. For a kick, add red pepper flakes to the marinara sauce. If you like a tangy flavor, increase the amount of Parmesan cheese. Taste your filling before stuffing. Adjust salt and pepper to your liking for the best flavor. You need a few tools for this dish. A large pot helps cook the pasta. Use a mixing bowl for the filling. A 9x13 inch baking dish is perfect for layering. A spoon or spatula helps to stuff the shells. For baking, a cover or foil prevents drying out. A sharp knife can help chop herbs and garlic. These simple tools make the process smooth and easy. Pro Tips Use Fresh Ingredients: Fresh spinach and high-quality cheeses can make a significant difference in flavor and texture. Adjust Seasoning: Taste your filling mixture before stuffing the shells and adjust the salt and pepper as needed to ensure a well-seasoned dish. Make Ahead: You can prepare the stuffed shells in advance and refrigerate them. Just add a few extra minutes to the baking time if baking from cold. Experiment with Herbs: Feel free to add other herbs like thyme or parsley to the cheese mixture for a unique twist! {{image_2}} You can change the filling for stuffed shells. Add different cheeses like feta or goat cheese. You may also use vegetables such as mushrooms or zucchini. If you want meat, ground turkey or sausage works well. Mix in a bit of fresh herbs like parsley or thyme for more flavor. While marinara is popular, you can try other sauces. A creamy Alfredo sauce gives a rich taste. Pesto sauce adds a fresh, herby flavor. For a spicy kick, use arrabbiata sauce. Experimenting with sauces can bring new life to this dish. To make this dish gluten-free, use gluten-free pasta shells. For a vegan option, replace the cheeses with cashew cheese or tofu. You can also skip the egg and replace it with a flaxseed mixture. These swaps keep the meal tasty and friendly for all diets. Store any leftover Cottage Cheese Stuffed Shells in an airtight container. Place them in the fridge. They will stay fresh for about 3 to 5 days. If you want, cover the dish tightly with foil or plastic wrap instead. To reheat, place the stuffed shells in a baking dish. Cover them with foil to keep moisture in. Heat in a preheated oven at 350°F (175°C) for about 20 minutes. You can also use a microwave. Heat on medium power in short bursts. Check and stir to avoid hot spots. To freeze, let the stuffed shells cool completely. Place them in a freezer-safe container or wrap them tightly with foil. They can stay in the freezer for up to 3 months. When you’re ready to eat, thaw them overnight in the fridge. Then, reheat as described above. Yes, you can use different cheeses. You might try using goat cheese or feta for a tangy flavor. Cream cheese can also work if you want a richer taste. Just keep the texture in mind when you mix your filling. This recipe is already vegetarian, as it uses no meat. You can add more veggies, like mushrooms or bell peppers, to boost the flavor. Just chop them small and mix them in with the cheese filling. Cottage cheese stuffed shells pair well with a fresh salad or garlic bread. A simple side of steamed veggies also adds color and nutrition. You can even serve it with a glass of red wine for a nice touch. Stuffed shells can last about 3 to 5 days in the fridge. Store them in an airtight container to keep them fresh. Just reheat them in the oven or microwave when you're ready to eat. Yes, you can prepare the dish ahead of time. Stuff the shells and layer them in the dish, then cover and refrigerate. Bake them the next day, adding a few extra minutes to the cooking time if they are cold. Cottage cheese stuffed shells are tasty and easy to make. You learned about the key ingredients and how to prepare them step by step. Tips and tricks help you avoid mistakes, while variations keep things interesting. Proper storage tips ensure your leftovers stay fresh. Remember, you can customize this dish to fit your taste. Enjoy sharing it with family and friends. Your kitchen will smell wonderful, and everyone will love it.
    Cottage Cheese Stuffed Shells Flavorful Family Meal
  • To make Greek chicken meatballs with lemon orzo, you need the following ingredients: - 1 lb ground chicken - 1/4 cup breadcrumbs - 1/4 cup feta cheese, crumbled - 1/4 cup fresh parsley, chopped - 2 cloves garlic, minced - 1 teaspoon dried oregano - 1 teaspoon salt - 1/2 teaspoon black pepper - 1 egg, beaten - 1 tablespoon olive oil (for cooking) - 1 cup orzo pasta - 2 cups chicken broth - 1 lemon (zest and juice) - Fresh mint leaves (for garnish) This mix of ingredients brings a burst of flavor. Ground chicken gives the meatballs a light texture. The feta cheese adds a creamy touch. Fresh parsley and garlic brighten the dish. Oregano gives it a classic Greek taste. The orzo pasta pairs well with the meatballs. Cooking it in chicken broth makes it richer. The lemon zest and juice add a fresh kick. Don’t forget the fresh mint leaves for garnish. They add color and a lovely aroma. Gather these ingredients, and you are ready to create a delightful meal! {{ingredient_image_1}} 1. In a large bowl, gather your ingredients. You need ground chicken, breadcrumbs, feta cheese, parsley, garlic, oregano, salt, pepper, and a beaten egg. 2. Mix these ingredients together gently. Be careful not to overmix, as it can make the meatballs tough. 3. Once combined, form the mixture into small meatballs. Aim for about 1 inch in diameter. This size cooks evenly and makes for nice bites. 1. Heat olive oil in a skillet over medium heat. You want the oil hot enough for frying but not smoking. 2. Add the meatballs in batches. Cook them until golden brown on all sides. This takes about 8 to 10 minutes. Make sure they are cooked through. Once done, remove them from the skillet and set aside. 1. In a saucepan, bring chicken broth to a boil. This broth adds great flavor to the orzo. 2. Add the orzo pasta to the boiling broth. Cook it according to the package instructions. This usually takes about 8 to 10 minutes. 3. When the orzo is tender, drain any excess liquid. Stir in lemon zest and juice. This adds a bright, fresh taste. Season with salt and pepper to your liking. 4. To serve, place the cooked orzo on plates. Top with the Greek chicken meatballs and garnish with fresh mint leaves. Enjoy this delightful dish! Avoiding overmixing When making your meatballs, mix just enough. Overmixing makes them tough. I like to combine the ground chicken, breadcrumbs, and spices gently. You want a nice texture, not a mush. Ensuring even cooking Cook meatballs in batches. This way, they get brown all over. Heat your skillet to medium. Use a little olive oil. Cook for about 8 to 10 minutes, turning them often for even cooking. Suggestions for herbs and spices To boost flavor, add more fresh herbs. Try dill or mint for a twist. If you want heat, add a pinch of red pepper flakes. These small changes can make a big difference. Adjusting lemon flavor Lemon is key in this dish. Zest the lemon for a bright taste. If you like it tart, add more lemon juice. Taste as you go, and adjust to your liking. Presentation tips For a great look, plate the orzo in the center and top with meatballs. Sprinkle some fresh parsley or mint for color. This makes your dish pop and invites everyone to dig in. Complementary side dishes Pair these meatballs with a simple salad. A Greek salad with tomatoes and cucumbers works well. You can also serve it with warm pita bread for a complete meal. Pro Tips Don’t Overmix: When combining the ingredients for the meatballs, mix until just combined to ensure a tender texture. Use Fresh Herbs: Fresh parsley and mint enhance the flavor significantly, so opt for fresh over dried when possible. Cooking Time: Ensure meatballs are cooked through by checking that they reach an internal temperature of 165°F (75°C). Serve with Extra Lemon: A squeeze of fresh lemon juice right before serving brightens the dish and adds a zesty kick. {{image_2}} If you want to switch things up, try using turkey instead of chicken. Turkey gives a leaner option while keeping the flavor nice. For gluten-free choices, use gluten-free breadcrumbs. You can also try quinoa or chickpea flour for a healthy twist. Adding veggies can boost flavor and nutrition. Chopped spinach or bell peppers mix well with meatballs. You can also stir in some diced zucchini. For cheese lovers, try adding goat cheese or Parmesan. Each cheese adds a unique taste to the meatballs. To save time, you can make these meatballs ahead. Form and cook them, then store them in the fridge. They last for about three days. For the orzo, cook it fresh when you’re ready to eat. You can also freeze the meatballs. Just thaw them overnight in the fridge before reheating. To keep your Greek chicken meatballs fresh, follow these tips: - Refrigeration: Place the meatballs in an airtight container. Store them in the fridge for up to 3 days. Make sure they cool down first to avoid steam and sogginess. - Freezing: If you want to keep them longer, freeze the meatballs. Use freezer bags or airtight containers. They can last up to 3 months this way. For best results, freeze them before cooking. When it’s time to enjoy those leftovers, you have two good options: - Microwave: Place the meatballs on a microwave-safe dish. Cover them with a damp paper towel. Heat in short bursts, checking every 30 seconds. This method can dry them out if you’re not careful. - Stovetop: Heat a little olive oil in a skillet over medium heat. Add the meatballs and cover. Cook for about 5-7 minutes, turning occasionally. This method helps keep them moist and flavorful. - To maintain moisture, add a splash of broth or water to the pan while reheating. How long can you keep those tasty leftovers? - In the fridge, Greek chicken meatballs stay good for about 3 days. - In the freezer, they can last up to 3 months. Just remember to label your containers with dates. This way, you’ll know when to use them! Yes, you can. Make the meatballs a day before. Store them in the fridge. This helps save time on busy days. To cook, just heat them up in a pan. You can also freeze the meatballs. Place them in a freezer bag. They can last up to three months. Lemon Orzo pairs well with many sides. Here are some great options: - Grilled vegetables - Greek salad - Tzatziki sauce - Roasted potatoes - Steamed broccoli These sides add color and flavor to your meal. Yes, this recipe is perfect for freezing. Store the meatballs and orzo separately. Use airtight containers or freezer bags. This keeps them fresh. When ready to eat, thaw them overnight in the fridge. Reheat in a pan or microwave. This way, you enjoy a quick, tasty meal anytime. This blog post covered a flavorful Greek chicken meatball recipe with lemon orzo. We explored the key ingredients, simple steps, and useful tips for making the perfect meatballs. I highlighted variations and storage tips to help you enjoy this dish at its best. Overall, these meatballs are easy to make and tasty to enjoy. Try them out; they will add fresh flavor to your meals!
    Greek Chicken Meatballs with Lemon Orzo Delight
  • To make this tasty Slow Cooker Buffalo Chicken Dip, you will need: - 2 cups cooked chicken, shredded - 1/2 cup cream cheese, softened - 1/2 cup sour cream - 1/2 cup ranch dressing - 1/2 cup buffalo sauce (adjust to taste) - 1 cup shredded cheddar cheese - 1/2 cup crumbled blue cheese (optional) - 1/4 teaspoon garlic powder - 1/4 teaspoon onion powder - Fresh chives or green onions, chopped (for garnish) You can swap some ingredients for a different flavor. If you want to cut fat, use low-fat cream cheese and sour cream. For a dairy-free option, try vegan cream cheese and sour cream. You can use Greek yogurt in place of sour cream for a tangy twist. If you dislike blue cheese, leave it out or replace it with more cheddar cheese. Garnishes can make your dish pop! Chopped chives or green onions add a fresh touch. You might also sprinkle some extra cheese on top before serving. A drizzle of buffalo sauce can give it an eye-catching look. Serve with crunchy veggies or tortilla chips for a fun twist! {{ingredient_image_1}} Start with 2 cups of cooked chicken. I like to use rotisserie chicken for ease. Just shred it into small pieces. This step is key for a smooth dip. If you have leftover chicken, that works too! Make sure it is tender and easy to shred. In a large bowl, mix the shredded chicken with cream cheese, sour cream, ranch dressing, and buffalo sauce. Use 1/2 cup of each of the cream cheese, sour cream, and ranch dressing. Adjust the buffalo sauce to your taste. Next, add 1 cup of shredded cheddar cheese and 1/2 cup of crumbled blue cheese if you like. Then, sprinkle in 1/4 teaspoon of garlic powder and onion powder. Mix everything well until it is smooth and creamy. After mixing, transfer the dip into your slow cooker. Spread it evenly across the bottom. Cover the slow cooker and set it to low for 2 hours, or high for 1 hour. Stir occasionally, so it heats evenly. You want it hot and bubbly. When time is up, stir well and adjust the buffalo sauce if needed. Serve your warm dip with tortilla chips, celery sticks, or veggie sticks. This gives a nice crunch and balances the heat. For a fresh touch, garnish with chopped chives or green onions. They add color and flavor. Enjoy your tasty buffalo chicken dip with friends or family! To shred chicken well, use two forks. Hold one fork in each hand. Grab a piece of cooked chicken with one fork. Pull it apart with the other fork. You can also use your hands if the chicken is cool. Shredded chicken should be in small pieces. This helps it mix well in the dip. You can change the spice level of your dip. If you like it mild, use less buffalo sauce. Start with 1/4 cup and taste it. Add more if you want more heat. You can also mix in some cream cheese for a milder flavor. For extra kick, add a bit of hot sauce or cayenne pepper. This dip is great for meal prep. You can make it a day ahead. Just mix all the ingredients and store it in the fridge. When you’re ready, put it in the slow cooker. Cook it on low for two hours or high for one hour. This saves you time on game day or at parties. Pro Tips Adjust the Heat: If you prefer a milder dip, reduce the amount of buffalo sauce or use a milder version. You can always add more heat later. Cheese Variations: Experiment with different cheese blends such as pepper jack or mozzarella for a unique twist on flavor and texture. Make Ahead: You can prepare the dip a day in advance. Just store it in the refrigerator and reheat it in the slow cooker before serving. Serving Suggestions: Serve with a variety of dippers like tortilla chips, celery sticks, or sliced bell peppers for a colorful presentation. {{image_2}} You can make a tasty vegetarian version of Buffalo dip. Swap the chicken for 2 cups of shredded jackfruit or chickpeas. Both options give a great texture. Mix in the same creamy ingredients. This way, you get that rich flavor without meat. Serve it with veggies or chips. Friends will love this twist! Cheese brings a lot to this dip. You can change the cheese to fit your taste. Try pepper jack for a spicy kick. Use mozzarella for a milder flavor. If you love blue cheese, add more or skip it entirely. Each choice will change the dip’s taste. Experiment and find your perfect mix! Want to boost the flavor? Add a dash of hot sauce for more heat. A squeeze of lemon juice gives a fresh zing. You can also mix in some diced jalapeños for extra spice. For a smoky touch, try smoked paprika. Each of these will make your Buffalo dip even better. Have fun creating your own flavor! After enjoying your buffalo chicken dip, let it cool down. Transfer it to an airtight container. Make sure to seal it well to keep it fresh. You can store it in the fridge for up to four days. If you want it to last longer, consider freezing it. When you’re ready to eat the dip again, there are easy ways to reheat it. You can use a microwave or the stovetop. If using the microwave, heat it in short bursts. Stir after each burst to ensure even heating. For the stovetop, warm it over low heat, stirring often. This keeps the dip creamy and tasty. If you freeze buffalo chicken dip, it can last up to three months. To freeze, place it in a freezer-safe container. Make sure to leave some room for expansion. When you want to use it, thaw it in the fridge overnight. Reheat it slowly to maintain the flavor and texture. You should not use raw chicken for this dip. The recipe calls for cooked chicken. Using raw chicken can lead to food safety issues. Cook the chicken first, then shred it. This will ensure the dip is safe to eat and full of flavor. Buffalo chicken dip pairs well with many snacks. Here are some tasty options: - Tortilla chips - Celery sticks - Carrot sticks - Crackers - Sliced baguette Each of these adds a nice crunch and complements the creamy dip. Buffalo chicken dip lasts about three to four days in the fridge. Store it in an airtight container. To enjoy it again, just reheat it gently on the stove or in the microwave. Make sure it heats all the way through before serving. In this article, we explored all aspects of making Buffalo Chicken Dip. We listed ingredients and swapped ideas, and provided tips for cooking and shredding chicken. You learned how to store leftovers and heat them up later. We even shared variations, like a vegetarian option. Buffalo Chicken Dip is fun to make and share. Try it out, and you’ll surely impress your friends. Enjoy your cooking adventure!
    Slow Cooker Buffalo Chicken Dip Easy and Delicious Dish
  • To make classic Buffalo chicken dip, you will need a few key ingredients. These will create a rich and flavorful dish that everyone will love. Here’s the list of ingredients: - 2 cups cooked chicken, shredded - 1/2 cup cream cheese, softened - 1/2 cup sour cream - 1/2 cup mayonnaise - 1/2 cup buffalo sauce - 1 cup shredded cheddar cheese - 1/2 cup blue cheese crumbles (optional) - 1 tablespoon garlic powder - 1 teaspoon onion powder - Salt and pepper to taste - Chopped green onions for garnish - Tortilla chips or celery sticks for serving These simple ingredients come together to make a creamy and spicy dip. The shredded chicken gives it protein, while the cream cheese and sour cream add a smooth texture. Buffalo sauce brings the heat, making it a perfect snack for parties or game days. Don’t skip the blue cheese; it adds a nice tang if you like bold flavors. {{ingredient_image_1}} 1. Preheating the oven Start by preheating your oven to 350°F (175°C). This step gets your oven ready for baking and helps the dip cook evenly. 2. Mixing the base ingredients In a large mixing bowl, combine the softened cream cheese, sour cream, and mayonnaise. Mix these until they are smooth and creamy. This creamy base is vital for a rich dip. 3. Adding chicken and seasonings Next, add the shredded chicken, buffalo sauce, garlic powder, and onion powder to your bowl. Stir well to ensure all ingredients blend evenly. This is where the dip gets its bold flavor. Don't forget to season with salt and pepper to taste. 1. Transferring to baking dish Transfer your mixture into an oven-safe baking dish. Make sure to spread it out evenly. This helps it cook well and get that nice golden top. 2. Baking duration and temperature Bake your dip in the preheated oven for 20-25 minutes. Look for it to be bubbly and golden on top. This shows that it is ready to enjoy! 1. Cooling and garnishing Once baked, remove it from the oven. Let it cool for a few minutes. This step helps prevent burns and allows the flavors to settle. Garnish with chopped green onions for a fresh touch. 2. Recommended dippers Serve your warm dip with tortilla chips or celery sticks. Both options offer a nice crunch and bring out the dip's flavor. Enjoy every bite! Shredding chicken can be tricky. To make it easy, use two forks. Simply pull apart the cooked chicken. You can also use a stand mixer with a paddle attachment. Just mix on low speed for a few seconds. This gives you nice, even shreds. Adjusting heat in buffalo sauce is key. If you like it mild, use less sauce. You can start with 1/4 cup and taste as you go. For a spicier kick, add more. Just remember, you can always add more heat, but you can't take it away! Preparing in advance can save time. You can mix all the dip ingredients a day before. Just store it in the fridge. This helps the flavors blend better. For storage before baking, cover your dish well. Use plastic wrap or foil. It keeps everything fresh. You can bake it straight from the fridge. Just add a few extra minutes to the baking time. Overmixing can ruin your dip. Mix just until everything is combined. This keeps the texture nice and creamy. Baking time can vary. Check your dip often. If it looks bubbly and golden, it's ready. If it needs more time, bake a few extra minutes. Just watch closely to avoid burning. Pro Tips Use Rotisserie Chicken: For a quicker option, use store-bought rotisserie chicken to save time on cooking and shredding. Adjust the Spice Level: Feel free to modify the amount of buffalo sauce based on your heat preference; start with less and add more as needed. Cheese Variations: Experiment with different cheeses like pepper jack or mozzarella for a unique flavor twist. Make Ahead: Prepare the dip a day in advance, store it in the fridge, and bake it just before serving for an easy party appetizer. {{image_2}} You can change the flavor of your buffalo chicken dip in fun ways. If you like more heat, try a spicy buffalo chicken dip. Just add extra buffalo sauce. This will make it hotter and more exciting. If you want a milder taste, consider a creamy ranch dip option. Swap out some buffalo sauce for ranch dressing. This makes the dip smooth and tasty. You can also swap ingredients to fit your needs. For alternative cheeses, try using pepper jack or gouda. These cheeses add a unique twist to your dip. If you want healthier substitutes, use Greek yogurt instead of sour cream or mayonnaise. This keeps the dip creamy but lowers the fat. How you serve your dip can make it more fun. Try unique serving styles like using a hollowed-out bread bowl. This looks great and adds flavor. You can also serve the dip in individual ramekins. This way, each person has their own portion. To enhance flavor, garnishes are key. Chopped green onions on top add color and crunch. You can also sprinkle some extra cheddar cheese before baking for a tasty crust. After enjoying your buffalo chicken dip, you may have some left. Store it in an airtight container. Place it in the fridge right away. It will stay fresh for about three to four days. If you want to keep it longer, consider freezing it. Use a freezer-safe container or bag. Make sure to remove as much air as you can. This way, it can last for up to three months. When you’re ready to enjoy your dip again, reheating is simple. The best method is to use an oven. Preheat it to 350°F (175°C). Place your dip in an oven-safe dish and cover it with foil. This keeps it moist. Heat for about 15 to 20 minutes. If you prefer, you can also use a microwave. Heat in short bursts, stirring in between. This keeps the texture nice and smooth. Leftover buffalo chicken dip is tasty, but it does have a limit. Keep it in the fridge for three to four days. If you freeze it, you can enjoy it for up to three months. Always check for signs of spoilage. If it smells off or has mold, toss it out. Trust your senses; they will guide you. You can easily swap cream cheese with Greek yogurt. Greek yogurt adds creaminess without the fat. You can also use cottage cheese blended until smooth. These options keep the dip rich and tasty. Yes, rotisserie chicken works great! It saves time and adds flavor. Just shred the chicken right off the bone. Look for plain or mildly seasoned chicken to keep the dip balanced. Use about two cups for the recipe. Buffalo chicken dip pairs well with many things. Tortilla chips and celery sticks are classic choices. You can also use pita chips or carrot sticks for a crunchy bite. Consider serving with sliced bell peppers for color and flavor. This blog post covered a delicious buffalo chicken dip recipe. You learned about the key ingredients, how to prepare and bake, and some helpful tips. I also shared variations and storage info to keep it fresh. In conclusion, this dip is simple and fun for gatherings. With easy adaptations, you can make it your own. Enjoy the tasty rewards of your hard work!
    Classic Buffalo Chicken Dip Flavorful and Easy Recipe
  • - 1 cup jasmine rice - 1 can (13.5 oz) coconut milk - 2 chicken breasts, diced - 1 tablespoon olive oil - 1 tablespoon fresh ginger, minced - 2 cloves garlic, minced - 1 small red bell pepper, sliced - 1 cup snap peas, trimmed - 2 tablespoons soy sauce - 1 tablespoon lime juice - 1 teaspoon curry powder - Salt and pepper to taste - Fresh cilantro, for garnish - Lime wedges, for serving To make a Minute Coconut Chicken Rice Bowl, gather your ingredients. This dish is quick and full of flavor. I love using jasmine rice because it cooks fluffy and has a nice aroma. The coconut milk adds a sweet creaminess that makes this dish special. You’ll need fresh chicken breasts. Dice them into small pieces for even cooking. Olive oil keeps the chicken moist and helps it brown nicely. Ginger and garlic give a warm, aromatic flavor. For color and crunch, add a red bell pepper and snap peas. They make the dish pop and add nutrition too. Don’t forget soy sauce and lime juice! They bring out the flavor of all the ingredients. A bit of curry powder adds warmth without being too spicy. Finally, sprinkle fresh cilantro on top for a burst of freshness. Serve with lime wedges on the side. The lime juice brightens every bite. Enjoy your cooking! {{ingredient_image_1}} To start, grab a medium saucepan. Add 1 cup of jasmine rice and 1 can of coconut milk. Bring it to a boil over medium heat. Once boiling, lower the heat to low. Cover the pot and let it simmer for 15 minutes. The rice will absorb the milk and become tender. After 15 minutes, remove it from heat and let it sit covered for 5 more minutes. This step ensures fluffy rice. While the rice cooks, heat 1 tablespoon of olive oil in a large skillet on medium-high heat. Add 2 diced chicken breasts to the pan. Season with salt and pepper. Cook the chicken for 5-7 minutes. You want it to turn golden brown and be cooked all the way through. Once the chicken is ready, stir in 1 tablespoon of minced fresh ginger and 2 minced garlic cloves. Cook this mixture for 1 minute until you smell the great aroma. Next, add 1 sliced small red bell pepper and 1 cup of trimmed snap peas to the skillet. Stir-fry everything together for 3-4 minutes. The veggies should be bright and tender-crisp. Now it’s time to add flavor! Drizzle 2 tablespoons of soy sauce and 1 tablespoon of lime juice over the chicken and vegetables. Sprinkle in 1 teaspoon of curry powder. Toss everything together for another 1-2 minutes to combine the flavors evenly. Fluff the coconut rice gently with a fork. Spoon the rice into serving bowls. Top each bowl with the chicken and vegetable mix. This step makes your meal look colorful and inviting. Finish off by sprinkling fresh cilantro on top. Add a lime wedge on the side for extra brightness. This last touch adds great flavor when you squeeze it on your bowl. Enjoy your Minute Coconut Chicken Rice Bowl! For this dish, I love using jasmine rice. Its soft texture and sweet aroma make it perfect. You can substitute it with basmati rice if you prefer. Just remember, basmati may cook a bit faster. Rinse your rice before cooking to remove excess starch. This step helps keep the grains from sticking together. Dicing the chicken into uniform pieces helps them cook evenly. I recommend using fresh chicken breasts for the best flavor. Season them well with salt and pepper before cooking. This simple step makes a big difference in taste. Cook the chicken until golden brown, which usually takes about 5-7 minutes. This way, you get a nice crust that adds texture. Adding ginger and garlic brings bright notes to the dish. Sauté them for just a minute before adding vegetables. This helps release their full flavor. For an extra kick, consider adding a pinch of red pepper flakes. If you like a hint of sweetness, a teaspoon of honey can enhance the dish beautifully. Serve your coconut chicken rice bowl warm. Top it with fresh cilantro for a burst of color and flavor. Lime wedges on the side add a zesty touch. You can also serve this dish with a simple side salad. A mix of greens can balance the rich coconut flavors nicely. Pro Tips Use Fresh Ingredients: Fresh ginger and garlic can elevate the flavor profile of your dish, making it more aromatic and delicious. Adjust Spice Levels: If you prefer a spicier kick, consider adding a pinch of red pepper flakes or a dash of hot sauce when seasoning the chicken. Customize Your Veggies: Feel free to substitute or add any vegetables you like, such as broccoli or carrots, to make the dish even more colorful and nutritious. Perfect Coconut Rice: Letting the rice sit covered after cooking allows it to steam and enhances the texture, making it fluffy and perfect. {{image_2}} You can switch out chicken for other proteins. Shrimp works great in this bowl. Just cook it for 3-4 minutes until pink. Tofu is another choice. Use firm tofu, diced and sautéed until golden. It soaks up flavors well. Don’t have snap peas? Try broccoli or zucchini instead. Both add a nice crunch. You can also use carrots or green beans. These veggies cook fast and taste great. Feel free to mix and match based on what you have. Spices can change the whole dish. Want more heat? Add chili flakes or sriracha. For a sweeter taste, try adding pineapple chunks. You can also use different sauces like teriyaki instead of soy sauce. Each tweak brings a new flavor. You can store leftovers in an airtight container. Make sure to cool it first. Place the coconut chicken rice bowl in the fridge within two hours. It stays fresh for up to three days. When ready to eat, check for any off smells or changes in texture. If you want to freeze it, use freezer-safe bags or containers. Divide the bowl into single servings. Remove as much air as possible before sealing. This dish freezes well for up to three months. Remember to label the bags with the date. To reheat, use the microwave or stovetop. If using a microwave, cover the bowl to keep moisture in. Heat in short bursts, stirring in between. On the stovetop, add a splash of coconut milk or water to prevent drying out. Cook over medium heat until warmed through. Enjoy your meal fresh and tasty! You can easily make this dish vegetarian by swapping chicken for tofu. Use firm tofu and cube it. Sauté it in olive oil until golden brown. You can also add more vegetables like mushrooms or carrots for extra flavor. Yes, you can use brown rice instead of jasmine rice. Keep in mind that brown rice takes longer to cook. Adjust the cooking time to about 40-45 minutes. You may need to use more coconut milk or water to ensure the rice cooks well. To spice up this dish, add sliced jalapeños or red pepper flakes. You can also use a spicy curry powder or add a dash of hot sauce. Taste as you go to find the right amount for your taste buds. Store leftovers in an airtight container in the fridge. They can last up to three days. For longer storage, freeze the chicken and rice mix in a freezer-safe container. Reheat in the microwave or on the stove when you're ready to eat. This recipe combines jasmine rice, fresh chicken, and vibrant veggies for a tasty meal. We explored simple steps to cook each ingredient perfectly. Remember to customize flavors with spices and herbs. For storage, refrigerate leftovers or freeze them for later. Don't hesitate to try variations with different proteins or veggies. With these tips, you can easily enjoy a healthy, flavorful dish any time. Happy cooking!
    Minute Coconut Chicken Rice Bowl Flavorful and Quick
  • - 1 cup cooked quinoa - 1 can (15 oz) chickpeas, drained and rinsed - 1 cup edamame, shelled - 1 bell pepper, diced (any color) - 1 cup cherry tomatoes, halved - 1 avocado, diced - ½ cup cucumber, chopped - ½ cup Greek yogurt (for dressing) - 2 tablespoons tahini - 1 tablespoon lemon juice - 1 teaspoon garlic powder - Salt and pepper to taste - Fresh parsley or cilantro for garnish Each serving of this bowl packs about 20 grams of protein. The protein comes from quinoa, chickpeas, and edamame. A balanced bowl has around 400 calories. Each ingredient adds unique health benefits. Quinoa is a complete protein. Chickpeas provide fiber, and edamame offers essential amino acids. Fresh veggies bring vitamins and minerals, making this bowl a healthy choice. You can add fresh herbs like parsley or cilantro for taste. Toppings like seeds or nuts add crunch. Consider pumpkin seeds or walnuts for added texture and nutrition. They boost healthy fat content and make the dish more filling. {{ingredient_image_1}} First, take your cooked quinoa. Place it in a large bowl. This quinoa is the heart of your meal. It adds fiber and protein. Using cooked quinoa is key. It makes the bowl filling and satisfying. Next, add chickpeas and edamame. Spread them evenly over the quinoa. These ingredients boost protein and texture. Chickpeas offer crunch, while edamame adds creaminess. Together, they make the bowl hearty. Now, it’s time to add veggies. Diced bell pepper, halved cherry tomatoes, diced avocado, and chopped cucumber should go on top. Use bright colors for a fun look. Arrange them artfully. This adds flavor and makes your bowl pop. In a small bowl, mix Greek yogurt, tahini, lemon juice, garlic powder, salt, and pepper. Stir until smooth. Taste the dressing and adjust the seasoning. You want it to be bright and zesty. This dressing ties the whole bowl together. Drizzle the dressing over your bowl. Use a spoon to make it pretty. Let it flow over the veggies. This adds flavor in every bite. Serve the bowls right away for the best taste. Finally, finish with fresh herbs. Sprinkle parsley or cilantro on top. This gives your bowl a fresh touch. You can also pack it for meal prep. These bowls are perfect for lunch all week. Preparing your ingredients in advance makes lunch easy. Cook a large batch of quinoa. Store it in the fridge for up to five days. Rinse and drain chickpeas ahead. This saves time when you are ready to eat. Portion your lunch bowls into containers. This makes grabbing a meal quick. Use clear containers for easy viewing. You will see what you have and avoid waste. Spices and seasonings can change your lunch bowl's taste. Try adding cumin for warmth. You can also mix in smoked paprika for a hint of smokiness. Fresh herbs like cilantro or parsley brighten the dish. Mix and match your veggies too. Swap bell peppers for zucchini. Add roasted sweet potatoes for a twist. The more colorful your bowl, the more fun it is to eat! To keep your lunch bowls fresh, choose the right containers. Use airtight glass containers. They help to lock in flavor and keep out moisture. Store cut veggies separately from dressing. This keeps them crisp and crunchy. For the best taste, eat within three days. Look for signs of spoilage, like an off smell or discoloration. Pro Tips Perfect Quinoa: To achieve fluffy quinoa, rinse it under cold water before cooking to remove any bitterness from the saponins. Chickpea Magic: For crispier chickpeas, roast them in the oven for 20-30 minutes at 400°F (200°C) after draining and rinsing. Veggie Variations: Feel free to mix and match your favorite vegetables or use seasonal produce for a fresh twist. Meal Prep Tips: Store the dressing separately from the bowls to keep the ingredients fresh and prevent sogginess. {{image_2}} For a protein boost, you can try other legumes. Lentils, black beans, and kidney beans pack a punch too. Each of these beans adds unique flavors and textures. You can mix and match to keep it interesting. If you want a quinoa substitute, consider farro or brown rice. Both options provide a chewy texture and are packed with nutrients. You can make simple vegan dressings to suit your taste. Try using olive oil and balsamic vinegar for a zesty kick. Another great option is a tahini-based dressing. For flavor enhancements, add fresh herbs, like basil or dill. A dash of mustard or a sprinkle of nutritional yeast can elevate your dressings too. Experimenting with spices like cumin or smoked paprika adds depth. You can adjust your ingredients based on what’s in season. In summer, use fresh corn or zucchini. In fall, swap in roasted sweet potatoes or apples. Local produce not only tastes better, but it also supports your community. Always check your local farmer's market for fresh options. This way, your bowl stays vibrant and exciting throughout the year. To keep your lunch bowls fresh, use airtight containers. Glass or BPA-free plastic works well. I recommend dividing the ingredients. Store proteins and veggies separately to keep them crisp. Add a paper towel to absorb moisture. This helps prevent sogginess in your veggies. To safely reheat the bowls, use the microwave. Heat in short bursts of 30 seconds. Stir between heating to ensure even warmth. If you prefer, you can use a stovetop. Just warm over low heat until hot. Serve with a drizzle of extra dressing for added flavor after reheating. You can store these bowls in the fridge for up to four days. Look for signs of spoilage. If the veggies become slimy or off-smelling, it’s time to toss them. Freshness is key for great taste and nutrition. The best high-protein vegetarian foods include: - Chickpeas - Lentils - Quinoa - Edamame - Tofu - Greek yogurt Chickpeas and lentils are great legumes. They pack protein and fiber. Quinoa is a grain that contains all nine essential amino acids. Edamame offers a fun, crunchy bite. Tofu is excellent for soaking up flavors. Greek yogurt adds creaminess and protein to any dish. You can easily personalize your lunch bowl. Here are some ideas: - Swap chickpeas for black beans or lentils. - Use brown rice instead of quinoa. - Add your favorite veggies, like spinach or roasted beets. - Experiment with different dressings, like a spicy sriracha mix. Mixing flavors and colors makes it exciting. Try new ingredients based on your taste. You can also adjust the protein levels by adding nuts or seeds. Yes, you can make this recipe vegan! Here are some substitutions: - Replace Greek yogurt with dairy-free yogurt. - Use tahini or a nut-based cream instead. - Ensure your dressing is free of any dairy. These swaps will keep the dish creamy and tasty. You can enjoy all the flavors while sticking to a vegan diet. Absolutely! These lunch bowls are great for meal prep. Here are some tips: - Prepare ingredients in advance and store them separately. - Layer the ingredients in containers to keep them fresh. - Use airtight containers to maintain crispness. These bowls can last in the fridge for up to four days. Pack them for work or school, and you'll have a healthy meal ready to go! In this article, we explored how to create delicious vegetarian high-protein lunch bowls. We covered key ingredients, from quinoa and chickpeas to fresh veggies and dressings. Each component offers unique health benefits, boosting nutrient intake. I shared step-by-step instructions and useful tips for meal prep and flavor enhancement. Remember to experiment with variations and keep your bowls fresh. These lunch bowls are not just healthy—they fit any lifestyle. Enjoy crafting your perfect lunch bowl and make it your own.
    Vegetarian High Protein Lunch Bowls for Energy Boost
  • - 8 oz elbow macaroni - 1 lb ground beef or turkey - 1 can diced tomatoes with green chilies - 1 packet taco seasoning - 1 cup shredded cheddar cheese - 1 cup sour cream - ¼ cup chopped fresh cilantro - Salt and pepper to taste - 1 cup corn kernels When I make Cheesy Taco Pasta, I rely on a few key ingredients. The base starts with elbow macaroni. This pasta is perfect for holding all the cheesy goodness. I use either ground beef or turkey as my protein. Both options work well and add flavor. Next, I add a can of diced tomatoes with green chilies. This gives the dish a nice kick. For flavor, I use taco seasoning. It adds that classic taco taste that everyone loves. Cheddar cheese is a must-have. I use a whole cup to make it creamy and rich. Sour cream adds a nice tang and makes the pasta smooth. I like to jazz it up with optional garnishes. Fresh cilantro adds a pop of color and flavor. A sprinkle of salt and pepper boosts everything. Corn kernels bring sweetness and texture. These ingredients come together for a meal that is quick, easy, and full of flavor. {{ingredient_image_1}} To cook elbow macaroni, start by bringing a large pot of salted water to a boil. Once the water is boiling, add 8 ounces of elbow macaroni. Cook it according to the package instructions until it is al dente, which means it should have a slight bite to it. This usually takes about 7-9 minutes. After cooking, drain the pasta in a colander and set it aside. Make sure not to rinse the macaroni, as you want it to keep some of its starch. In the same pot, add 1 pound of ground beef or turkey over medium heat. Cook it for about 6-8 minutes, breaking it apart with a spoon as it cooks. You want the meat to be browned all over. Next, add 1 small diced onion and 2 minced cloves of garlic to the pot. Sauté these for 3-4 minutes until the onion looks translucent. This step adds great flavor to the meat. Now it's time to add some flavor! Stir in 1 packet of taco seasoning until the meat and veggies are fully coated. Then, pour in 1 can of diced tomatoes with green chilies, along with 1 cup of beef broth. Stir this mixture well and let it simmer for a few minutes. Once it starts to bubble, add the cooked macaroni, 1 cup of corn kernels, and 1 cup of sour cream. Mix everything together until it's warm and well combined, which should take about 3-5 minutes. Finally, sprinkle in 1 cup of shredded cheddar cheese. Stir until the cheese melts and makes everything creamy. Enjoy your flavorful dish! To make perfect Cheesy Taco Pasta, cook your macaroni until it is al dente. This means it should be firm to the bite. Follow the package instructions, but check a minute or two early. Drain it well and set it aside. This step makes sure the pasta holds its shape when mixed with the other ingredients. When browning the meat, heat your pot over medium heat. Add the ground beef or turkey and break it apart with a spoon. Cook for about 6-8 minutes until it is browned evenly. Stir often to avoid burning. This helps to keep the meat juicy and tasty. Adjusting seasoning is simple. After adding the taco seasoning, taste the mix. If you want it spicier, add a pinch of chili powder or a dash of hot sauce. For a milder flavor, add more sour cream to balance it out. Always remember, you can add but can't take away, so start small. Choosing the right cheese can elevate your dish. While I love cheddar cheese, you can mix it up! Try Monterey Jack for a creamier taste or pepper jack for extra heat. Mixing cheeses adds depth and richness to your meal. Serving your Cheesy Taco Pasta in colorful bowls makes it more fun. Use vibrant dishes to highlight the dish's colors. Add extra cheese on top for a cheesy look. Garnish with chopped cilantro for a pop of green. A squeeze of lime just before serving adds a zingy touch and brightens the dish. Pro Tips Perfect Pasta: Always cook your pasta al dente to prevent it from becoming mushy when combined with the sauce. Flavor Boost: Add a splash of lime juice before serving to enhance the flavors and add a zesty kick. Meat Alternatives: For a healthier twist, substitute ground turkey or chicken for the beef, or make it vegetarian by using black beans. Cheesy Goodness: For an extra cheesy experience, mix in different types of cheese like Monterey Jack or Pepper Jack along with the cheddar. {{image_2}} You can switch the ground beef with ground chicken or turkey. Both options work great. If you want a plant-based dish, use lentils or crumbled tofu. They soak up all the taco flavors. For a vegetarian option, try black beans or chickpeas. These add protein and fiber. If you need gluten-free pasta, look for brands made from rice or corn. They cook well and taste good too. For those avoiding dairy, many stores sell dairy-free cheese. Look for options made from nuts or soy. You can use non-dairy sour cream to keep the dish creamy. Want more heat? Add spices like cayenne pepper or chili powder. You can also pour in your favorite hot sauce. For extra crunch, toss in bell peppers or zucchini. Fresh spinach or kale adds nutrients without changing the taste much. Don't be afraid to mix your favorite veggies! To store leftover Cheesy Taco Pasta, let it cool first. Place the pasta in an airtight container. This keeps it fresh and tasty. In the fridge, it lasts about 3 to 4 days. Always check for any signs of spoilage before eating. To freeze Cheesy Taco Pasta, first cool it completely. Then, transfer it into a freezer-safe container or bag. Make sure to remove as much air as possible. It can stay frozen for up to 3 months. When you're ready to eat it, take it out of the freezer and let it thaw in the fridge overnight. To avoid dry pasta, add a splash of beef broth or water when reheating. This keeps it moist and creamy. You can reheat it on the stove or in the microwave. If using the microwave, cover the dish with a lid or a damp paper towel. This traps steam and helps keep your pasta from drying out. Stir occasionally to heat evenly. Yes, you can make Cheesy Taco Pasta ahead of time. To prep for the week, cook the pasta and meat mixture as usual. Let it cool completely before storing. Place the pasta in an airtight container in the fridge for up to three days. When ready to eat, reheat it on the stove or microwave. Stir in a bit of water or broth to keep it moist. If you don’t have sour cream, you have options. You can use Greek yogurt for a similar tangy taste. Cream cheese also works well, making the dish creamy. For a lighter choice, try cottage cheese. Each option keeps the dish rich and tasty. Yes, making this dish vegetarian is easy! Swap the ground beef or turkey for a plant-based protein, like lentils or black beans. You can also use diced bell peppers or mushrooms for added texture. Just follow the same steps in the recipe for a delicious meatless meal. This blog post covered how to make tasty Cheesy Taco Pasta. You learned about the key ingredients, step-by-step cooking, and useful tips. We also explored variations for different diets and how to store leftovers. Enjoying this dish is easy and fun. You can mix flavors and make it your own. This recipe fits many tastes and meal plans. Now, grab your ingredients and get cooking! Your kitchen is ready for a delicious adventure.
    Cheesy Taco Pasta Flavorful and Easy Weeknight Meal
  • - Chicken and Pasta Components - 2 chicken breasts, boneless and skinless - 8 ounces fettuccine pasta - Sauce Ingredients - 1 cup cherry tomatoes, halved - 1 cup heavy cream - 1/2 cup parmesan cheese, grated - 2 tablespoons olive oil - 3 cloves garlic, minced - Seasoning and Garnish - 1 teaspoon dried basil - 1 teaspoon oregano - Salt and pepper to taste - Fresh basil leaves for garnish The ingredients for Marry Me Chicken Pasta are simple yet flavorful. You will need chicken breasts and fettuccine pasta as the base. The sauce shines with heavy cream and parmesan, making it rich and creamy. Cherry tomatoes add sweetness and brightness to the dish. Fresh garlic gives it a lovely aroma. For seasoning, dried basil and oregano bring out the Italian flavors. You can adjust the salt and pepper to your taste. Finally, use fresh basil leaves as a garnish for a pop of color and extra flavor. Gather these ingredients, and you're ready to make a dish that will impress anyone! {{ingredient_image_1}} To cook the fettuccine, follow the package directions. This usually takes about 10-12 minutes. You want the pasta to be al dente, which means it should still have a slight bite to it. Before you drain the pasta, remember to reserve 1/2 cup of the pasta water. This water adds flavor and helps the sauce cling to the pasta. While the pasta cooks, season your chicken breasts. Use salt, pepper, dried basil, and oregano. Rub these seasonings all over the chicken for great flavor. Next, heat 2 tablespoons of olive oil in a large skillet over medium-high heat. Once hot, place the chicken breasts in the skillet. Sear them for 5-7 minutes on each side. Look for a golden brown color and ensure they are cooked through. After cooking, remove the chicken and let it rest. This keeps it juicy. In the same skillet, add 3 cloves of minced garlic. Sauté for about 1 minute until it smells great. Then, add 1 cup of halved cherry tomatoes. Cook them for 3-4 minutes. You want them to soften but not fall apart. Now, lower the heat and pour in 1 cup of heavy cream. Gently bring it to a simmer. Whisk in 1/2 cup of grated parmesan cheese. Keep stirring until the sauce is creamy and smooth. If it seems too thick, add some of that reserved pasta water. This will help reach your desired consistency. Once your sauce is ready, toss the cooked fettuccine into the skillet. Mix well to coat the pasta in the creamy sauce. For a lovely presentation, slice the rested chicken breasts and lay them over the pasta. To finish, garnish with fresh basil leaves. This adds a nice touch and flavor. Serve the dish in deep bowls, and consider adding extra parmesan and a drizzle of olive oil on top. Enjoy your meal! - Ensuring Juicy Chicken Breasts: Start by brining the chicken for 15 to 30 minutes. Use salt water to help keep the meat moist. Always let the chicken rest for a few minutes after cooking. This helps the juices stay inside. - Avoiding Overcooking: Use a meat thermometer to check the chicken. Aim for an internal temperature of 165°F. Cook on medium heat to prevent burning while ensuring it cooks through. - How to Avoid Sticky Pasta: Stir the pasta often while cooking. Add a little salt to the water before boiling. This helps keep the pasta from sticking together. - Tips for Choosing the Right Pasta: Fettuccine works best for this dish. It holds sauce well. You can try penne or rigatoni if you prefer. - Flavor Boosts with Additional Ingredients: Add spinach or mushrooms for extra flavor and nutrition. You can also include crushed red pepper for a spicy kick. - Adjusting Consistency for Personal Preference: If the sauce is too thick, whisk in some reserved pasta water. For a thicker sauce, add more cheese. Adjust until it feels just right for you. Pro Tips Marinating the Chicken: For extra flavor, marinate the chicken breasts in olive oil, garlic, and herbs for at least 30 minutes before cooking. Choosing the Right Pasta: You can substitute fettuccine with other pasta types like penne or farfalle if you prefer a different shape. Adjusting Creaminess: If you like a lighter sauce, substitute half of the heavy cream with chicken broth for a delicious, creamy yet lighter dish. Fresh Basil Substitute: If you don’t have fresh basil, dried basil can work in a pinch, but use less since it's more concentrated in flavor. {{image_2}} You can make a tasty vegetarian version of Marry Me Chicken Pasta. Simply swap the chicken for plant-based proteins like tofu or tempeh. These options add protein and flavor to your dish. For the sauce, you can use vegetable broth in place of chicken. This change keeps the creamy texture while adding a fresh taste. You can also use cashew cream for a nutty flavor. While fettuccine is great, you can explore other types of pasta too. Try penne, rigatoni, or even spaghetti. Each shape holds sauce differently and can change the dish's vibe. If you need gluten-free options, you can use rice pasta or chickpea pasta. Both are widely available and provide a satisfying texture. To make your dish more exciting, think about adding spices or vegetables. Bell peppers, spinach, or mushrooms can boost the flavor and nutrition. Add them to the sauce as it cooks for a tasty twist. You can also mix in different cheeses. While parmesan gives a nice flavor, try mozzarella or goat cheese for a creamy touch. These variations let you customize your dish to suit your taste! To keep your Marry Me Chicken Pasta fresh, follow these simple steps: - Let the pasta cool down to room temperature. - Store it in an airtight container to keep moisture out. - Place the container in the fridge. This way, it can last for up to 3 days. Use glass or plastic containers that seal well. They help keep flavors intact. When it is time to enjoy leftovers, reheat them properly: - Place the pasta in a skillet over low heat. - Add a splash of water or cream to prevent drying out. - Stir gently until warmed through. For a quick fix, you can use the microwave. Heat it in short bursts of 30 seconds. Stir in between to ensure even heat. Want to save some for later? Freezing is a great option: - Make sure the pasta is completely cool. - Use freezer-safe containers or bags. Remove as much air as possible. - Label the container with the date. It can last for about 2 months. When you are ready to eat, thaw it in the fridge overnight. To reheat, use the same method as above, adding liquid if needed. Enjoy your delicious pasta anytime! Marry Me Chicken Pasta is a creamy dish that features tender chicken and fettuccine. It combines rich flavors with fresh ingredients, like cherry tomatoes and basil. The sauce is made with heavy cream and parmesan, creating a delightful taste that many love. People often say this dish is so good it could inspire a marriage proposal! The recipe likely originated from home cooks wanting to impress their loved ones with a special meal. Yes, you can prepare Marry Me Chicken Pasta in advance. To do this, cook the pasta and chicken but keep the sauce separate. This way, you can mix everything just before serving. For meal prep, store the chicken and pasta in airtight containers in the fridge. You can keep it for 3 to 4 days. When ready to eat, just reheat the chicken and sauce together, then toss with the pasta. To lighten up Marry Me Chicken Pasta, swap heavy cream for half-and-half or milk. You can also use less cheese or choose a lower-fat version. For a healthier touch, add more vegetables, like spinach or zucchini. Modifying cooking techniques can help, too. Try grilling the chicken instead of pan-frying it in oil. This keeps the flavor while reducing calories. This article covered how to make Marry Me Chicken Pasta step by step. We explored all the key ingredients, cooking methods, and seasoning tips. I shared ways to enhance your dish and suggested tasty variations as well. Remember, perfecting this recipe takes practice and patience. Don’t hesitate to get creative with flavors. You can even customize it to suit your taste. Whether you are cooking for yourself or someone special, enjoy the process. Cooking is all about love and joy, after all!
    Marry Me Chicken Pasta Savory and Simple Recipe
  • To make the ultimate baked ziti, you will need a few key ingredients. Here’s the list: - 12 oz ziti pasta - 2 tablespoons olive oil - 1 small onion, chopped - 3 cloves garlic, minced - 1 lb ground beef (or turkey for a lighter option) - 1 can (28 oz) crushed tomatoes - 1 can (15 oz) tomato sauce - 2 teaspoons dried oregano - 2 teaspoons dried basil - 1 teaspoon red pepper flakes (adjust for spice preference) - Salt and pepper to taste - 15 oz ricotta cheese - 1 egg - 2 cups shredded mozzarella cheese, divided - 1 cup grated Parmesan cheese - Fresh basil leaves for garnish (optional) Each ingredient plays a big role in the flavor and texture of the dish. The ziti pasta provides a great base, while the ground meat adds richness. The tomato products bring acidity and sweetness, and the herbs and spices enhance the overall taste. The cheeses create a creamy, cheesy layer that makes this dish irresistible. {{ingredient_image_1}} - Preheat the oven Set your oven to 375°F (190°C). This step ensures even cooking. - Cook the ziti pasta Boil water in a pot. Add the ziti and cook until al dente. Drain the pasta and set it aside. - Sauté onion and garlic Heat 2 tablespoons of olive oil in a large skillet. Add 1 small chopped onion and 3 minced garlic cloves. Stir until the onion turns soft, about 3 to 5 minutes. - Brown the ground meat Add 1 pound of ground beef (or turkey) to the skillet. Cook until it turns brown. Drain any excess fat. - Simmer the tomato sauce Pour in 28 ounces of crushed tomatoes and 15 ounces of tomato sauce. Add 2 teaspoons of dried oregano, 2 teaspoons of dried basil, and 1 teaspoon of red pepper flakes. Season with salt and pepper. Let this mixture simmer for 10 to 15 minutes. - Combine ziti with meat sauce In a large mixing bowl, mix the cooked ziti with the meat sauce. Make sure the pasta is well coated. - Layer ingredients in baking dish In a 9x13 inch baking dish, spread half of the ziti mixture on the bottom. Add half of the ricotta cheese mixture, then sprinkle 1 cup of shredded mozzarella on top. - Cover and bake Add the rest of the ziti mixture on top. Spread the rest of the ricotta cheese and 1 cup of mozzarella evenly. Sprinkle grated Parmesan cheese on top. Cover the dish with aluminum foil. - Uncover and finish baking Bake covered for 25 minutes. Then, remove the foil and bake for another 15 to 20 minutes. The cheese should bubble and turn golden brown. - How to achieve al dente pasta To get the best pasta, cook ziti until it's slightly firm. Follow the package time but check a minute early. The pasta will finish cooking in the oven. - Best type of meat to use Ground beef works well for rich flavor. If you want a lighter dish, try ground turkey. Both options give great taste to the baked ziti. - Adjusting spice levels Spice can make or break your dish. Start with one teaspoon of red pepper flakes. Taste the sauce and add more if you like it spicy. - Preventing sticking while baking To avoid sticking, cover the dish with foil. Spray the foil with cooking spray. This keeps the cheese from sticking and helps it melt evenly. - Ensuring even cheese melt When layering cheese, use both mozzarella and Parmesan. Sprinkle mozzarella evenly on top. This helps create a smooth and bubbly finish. - Perfecting the golden crust Remove the foil in the last 15-20 minutes. This allows the cheese to brown nicely. Keep an eye on it to prevent burning. Pro Tips Perfect Pasta: Cook the ziti just until al dente, as it will continue to cook in the oven. This prevents mushy pasta. Flavor Boost: For an extra depth of flavor, consider adding a splash of red wine to the meat sauce while it simmers. Cheese Variations: Mix different types of cheese, such as provolone or fontina, for a unique taste and texture. Make Ahead: Assemble the baked ziti a day in advance and refrigerate it. Just add a few extra minutes to the baking time when ready to serve. {{image_2}} You can make baked ziti healthier. Use ground turkey or chicken instead of beef. This cuts fat and adds lean protein. Choose whole grain or gluten-free pasta for more fiber. You still get the same tasty dish, but it’s better for you. If you want a meatless dish, try tofu or lentils. These options add protein and texture. For cheese lovers, use dairy-free cheese. There are many brands available now that melt well. This way, you can enjoy baked ziti without meat or dairy. Want to boost the flavor? Add vegetables like spinach or mushrooms. They add nutrients and taste. You can also try different herbs and spices. Fresh basil or oregano can brighten up the dish. Experiment to find your perfect mix! After enjoying your baked ziti, let it cool down. This helps avoid steam. Place the leftover ziti in a container with a tight lid. You can use glass or plastic containers. Glass is safer for reheating. Keep the leftovers in the fridge for up to three days. If you want to store it longer, freeze it. Wrap it well in plastic wrap and then foil. This helps keep the flavor and texture intact. To reheat baked ziti, use the oven for the best results. Preheat the oven to 350°F (175°C). Place the ziti in an oven-safe dish. Add a splash of water or sauce on top. Cover the dish with foil to keep it moist. Heat for about 20 minutes. If you want to use a microwave, add some water and cover the dish. Heat in short bursts, stirring in between. This method helps avoid dryness. Enjoy your warm and cheesy meal! How long to cook baked ziti? You should bake the ziti for about 40-45 minutes. Cover it for the first 25 minutes. Then, uncover it and bake for an additional 15-20 minutes. This gets the cheese bubbly and golden. Can I make baked ziti ahead of time? Yes, you can prepare baked ziti a day in advance. Just cover it and store it in the fridge. Bake it when you are ready to eat. You may need to add a few extra minutes to the cooking time. What to serve with baked ziti? Baked ziti pairs well with a fresh salad or garlic bread. You can also serve it with steamed veggies. This adds color and nutrition to your meal. Can I freeze baked ziti? Absolutely! Baked ziti freezes well. Just let it cool down, then wrap it tightly. You can freeze it for up to three months. Thaw it overnight in the fridge before baking. Substitutes for ricotta cheese? If you need a ricotta substitute, try cottage cheese. You can also use mascarpone cheese. Both options work great in baked ziti. How to add more flavor to the sauce? To boost flavor in the sauce, try adding fresh herbs like parsley or thyme. You can also mix in sautéed mushrooms or bell peppers. A splash of red wine can deepen the taste too. Baked ziti is a fun, easy dish to make. You now know the key ingredients and how to cook and bake them just right. I shared helpful tips and tricks to improve flavor and texture. Whether you're cooking for family or trying vegan options, there’s a way for everyone to enjoy it. Store leftovers well and reheat properly for the best taste. With this guide, you are ready to make a tasty baked ziti that everyone will love. Go ahead and enjoy your cooking adventure!
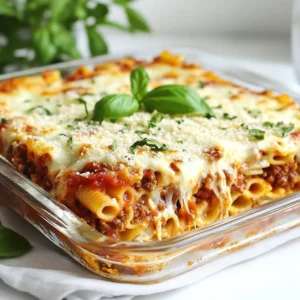
    Ultimate Baked Ziti Delicious and Easy Family Meal
  • - 1 lb chicken breast - 2 cups cooked brown rice - 1 cup black beans, rinsed and drained - 1 cup corn kernels - 1 red bell pepper, diced - 1 avocado, diced - 1/2 cup cherry tomatoes, halved - 1/4 cup red onion, finely chopped - 1 cup shredded iceberg lettuce - 1/2 cup shredded cheddar cheese - 1/4 cup cilantro, chopped - Juice of 2 limes - 2 tablespoons olive oil - 1 teaspoon cumin - 1 teaspoon chili powder - Salt and pepper to taste The key to a great Chicken Burrito Bowl is in the ingredients. Choose high-quality chicken breast for the best flavor. I love using brown rice for its nutty taste and health benefits. Black beans add protein and fiber, making this meal hearty. Fresh ingredients are also important. Red bell pepper brings sweetness and color. Avocado adds creaminess, while cherry tomatoes give a juicy pop. Don't forget the red onion for a bit of bite, and iceberg lettuce for crunch. Each of these adds a layer of flavor. For seasonings, I like to keep it simple yet bold. Lime juice brightens everything up. Olive oil keeps the chicken moist and flavorful. Cumin and chili powder add warmth and depth. Always season with salt and pepper to enhance the taste. These ingredients come together to create a vibrant, satisfying meal. You can mix and match to suit your taste, too! {{ingredient_image_1}} To marinate chicken, mix diced chicken breast with olive oil, lime juice, cumin, chili powder, salt, and pepper. Stir well to coat all pieces. Let the chicken sit for at least 30 minutes. This time helps the flavors soak in. Grill the marinated chicken on medium-high heat. Cook for about 7-9 minutes until it is fully cooked. Check that the internal temperature reaches 165°F. After grilling, let the chicken rest for a few minutes. This resting time keeps it juicy. Then, dice the chicken into bite-sized pieces. If you didn’t cook the brown rice, follow the package instructions. Once cooked, fluff it with a fork to make it light. This step helps the rice remain separate and not clumpy. In a large bowl or individual bowls, layer the rice first. This rice base holds all the toppings well. It also makes the bowl look colorful and inviting. On top of the rice, add the grilled chicken, black beans, corn, diced red bell pepper, diced avocado, cherry tomatoes, and shredded lettuce. This order makes sure the chicken stays warm under the toppings, and the fresh veggies stay crisp. For a nice touch, add a wedge of lime on the side. This adds zest and a pop of color. Serve your burrito bowls right away while everything is fresh. Enjoy the mix of colors and flavors! To grill chicken perfectly, start with even pieces. This helps the chicken cook evenly. Preheat your grill to medium-high heat before adding the chicken. Grill for about 7-9 minutes per side. Check that the inside is no longer pink. Let it rest for a few minutes before dicing. This makes it juicy. Marination is key. It adds flavor and makes the chicken tender. I recommend marinating for at least 30 minutes. Use lime juice, olive oil, cumin, chili powder, salt, and pepper. This blend gives the chicken a zesty kick. Want to customize your bowl? Try adding spices like paprika or garlic powder. These spices can enhance the taste. If you like heat, add a dash of cayenne or smoked paprika. Hot sauce or salsa can elevate your bowl. A good salsa adds freshness. You can use mild, medium, or hot based on your taste. Keep a bottle of your favorite hot sauce nearby for an extra kick. Pair your Chicken Burrito Bowl with side dishes. Chips and guacamole make a great match. A light salad or Mexican street corn can also work well. For drinks, serve with iced tea or a light beer. To create a festive atmosphere, use colorful bowls. Add lime wedges for garnish. Play some lively music to set the mood. This makes your meal not just tasty, but fun and memorable. Pro Tips Marinate for Maximum Flavor: Allow the chicken to marinate for at least 30 minutes, but if you have more time, marinating it for a few hours or overnight will deepen the flavor even further. Fresh Ingredients Matter: Use fresh ingredients like ripe avocados and juicy tomatoes to enhance the vibrant colors and flavors of your burrito bowl. Customize Your Bowl: Feel free to add other toppings such as diced jalapeños, sour cream, or your favorite hot sauce to personalize your burrito bowl. Serving Suggestions: Serve your burrito bowl with lime wedges on the side for guests to add a fresh burst of acidity to their dish. {{image_2}} You can swap proteins in this dish. If you want a lighter option, use tofu or shrimp. Both bring great flavor and texture. You can also try grilled fish for a fresh twist. For a gluten-free choice, switch to quinoa instead of brown rice. Quinoa cooks fast and adds a nice crunch. It also boosts the protein in your bowl. Adding regional flavors makes your burrito bowl unique. For a Mexican twist, try adding pico de gallo or salsa. You can mix in some jalapeños for heat. For a Tex-Mex style, use taco seasoning instead of cumin and chili powder. When it comes to cheese, don't stick to just cheddar. You can use queso fresco or pepper jack for a spicy kick. Each cheese brings its own flavor profile. To make a burrito bowl vegan, skip the chicken and use more beans. Black beans or pinto beans are great options. They add protein and fiber. You can also add roasted veggies like zucchini or bell peppers. These will give your bowl more depth. Instead of cheese, try avocado or a dollop of guacamole for creaminess. Store leftovers in airtight containers. This keeps your food fresh and safe. You can enjoy the Chicken Burrito Bowl for up to four days in the fridge. If you have leftover grilled chicken, it lasts about three days. Cooked rice should also be used within four days for best taste. To freeze, separate the chicken, rice, and veggies. Use freezer-safe bags or containers. Label them with the date. When you want to eat, thaw in the fridge overnight. For reheating, use a microwave or stovetop. Heat until piping hot. Use glass or BPA-free plastic containers for meal prep. They help keep flavors and freshness. When reheating, add a splash of water to keep the rice moist. Cover the container to trap steam. This helps everything heat evenly and stay tasty. A Chicken Burrito Bowl is a vibrant dish filled with flavors. It combines various ingredients, making it a hearty meal. Key components include: - Cooked brown rice - Grilled chicken breast, diced - Black beans - Corn kernels - Fresh veggies like red bell pepper and avocado - Shredded lettuce - Cheddar cheese - Cilantro and lime juice for zest Each bite gives you a mix of textures and tastes. Yes, you can prepare this recipe ahead of time. Follow these tips: - Cook rice and chicken: Make these a day before. Store them in the fridge. - Prep toppings: Chop veggies and store them in airtight containers. This keeps them fresh. - Assemble before serving: Layer your bowl just before eating. This keeps everything crisp. This way, your meal stays fresh and tasty! Toppings add variety and fun. Here are some great options: - Sliced jalapeños for heat - Sour cream for creaminess - Salsa for a spicy kick - Fresh corn salsa for sweetness - Pickled onions for tang - Crushed tortilla chips for crunch Feel free to mix and match to suit your taste! You can easily boost the flavor and heat. Consider these ideas: - Add spices: Mix in cayenne pepper or smoked paprika. - Hot sauce: Drizzle your favorite hot sauce over the top. - Fresh herbs: Toss in fresh basil or oregano for a twist. - Chili peppers: Add diced chipotle or serrano peppers for more kick. Experiment and find what excites your taste buds! You can create a delicious chicken burrito bowl by using simple ingredients and steps. We covered main and fresh ingredients, plus tips for marinating and cooking. The bowl assembles beautifully with layers of flavor. Variations let you customize to your taste, whether you prefer meat or plant-based options. Remember, meal prep keeps meals easy all week. With the right storage, your leftovers stay fresh. Try different toppings for each serving to keep things fun. Enjoy making your burrito bowls; they are tasty and satisfying!
    Chicken Burrito Bowl Fiesta Flavorful Meal Guide
  • To make Copycat Minestrone Soup, gather these key ingredients: - 1 tablespoon olive oil - 1 medium onion, diced - 2 garlic cloves, minced - 2 medium carrots, diced - 2 celery stalks, diced - 1 zucchini, diced - 1 cup green beans, trimmed and cut into 1-inch pieces - 1 can (14.5 oz) diced tomatoes, with juice - 4 cups vegetable broth - 1 can (15 oz) kidney beans, rinsed and drained - 1 can (15 oz) cannellini beans, rinsed and drained - 1 cup small pasta (like ditalini or elbow) - 1 teaspoon dried oregano - 1 teaspoon dried basil - Salt and pepper to taste - 1 cup fresh spinach or kale, chopped For garnish, you might enjoy: - Grated Parmesan cheese - Fresh basil leaves These ingredients blend to create a hearty and flavorful soup. Each one adds a unique taste and texture. Feel free to adjust the veggies based on what you have. This soup is all about using fresh, seasonal produce. {{ingredient_image_1}} 1. Heat the Olive Oil: Start by heating 1 tablespoon of olive oil in a large pot over medium heat. This helps to build flavor. 2. Sauté the Onion: Add 1 medium diced onion to the pot. Cook for about 3-4 minutes until it turns translucent. This step adds a nice base to your soup. 3. Add Garlic and Veggies: Next, stir in 2 minced garlic cloves, 2 diced carrots, and 2 diced celery stalks. Cook for 5 more minutes, stirring occasionally. This mix enriches the soup's flavor. 4. Incorporate Zucchini and Green Beans: Now, add 1 diced zucchini and 1 cup of trimmed, cut green beans. Cook for an additional 5 minutes. This step adds color and texture. 5. Pour in Tomatoes and Broth: Pour in 1 can of diced tomatoes (with juice) and 4 cups of vegetable broth. Mix well to combine. This forms the soup's heart. 6. Add Beans and Seasoning: Add 1 can of rinsed kidney beans, 1 can of rinsed cannellini beans, 1 teaspoon of dried oregano, 1 teaspoon of dried basil, salt, and pepper to taste. Stir to combine. Bring the soup to a boil, then reduce the heat and let it simmer for 20 minutes. This melds the flavors together. 7. Cook the Pasta: Add 1 cup of small pasta, like ditalini or elbow, to the soup. Simmer until the pasta is tender, about 10-12 minutes. This makes the soup hearty. 8. Stir in Greens: Before serving, stir in 1 cup of chopped fresh spinach or kale. Let it wilt for 2-3 minutes. This adds freshness and color. 9. Taste and Adjust: Finally, taste your soup and adjust seasoning as needed. This ensures the flavors are just right. To serve, ladle the minestrone soup into deep bowls. You can sprinkle some grated Parmesan cheese on top for flavor. A few fresh basil leaves also add color and aroma. Don’t forget a slice of crusty bread on the side! Enjoy your delicious creation! To make a flavorful minestrone soup, follow these best practices: - Use fresh veggies: Fresh produce boosts the soup's taste. Choose ripe tomatoes, crisp carrots, and vibrant zucchini. - Sauté aromatics: Start by cooking onions and garlic in olive oil. This step adds a rich flavor base. - Season wisely: Add salt and pepper during cooking. Taste often to adjust flavors. For dietary preferences, this soup is easy to modify: - Vegan option: Use vegetable broth and skip the Parmesan cheese. - Gluten-free option: Choose gluten-free pasta. Many brands offer great alternatives. Pair your minestrone soup with these tasty options: - Bread: Serve with crusty bread or a warm baguette. This adds a nice crunch and helps soak up the soup. - Salad: A simple side salad with lemon vinaigrette complements the soup well. For a beautiful presentation, try these ideas: - Garnish: Top the soup with grated Parmesan cheese and fresh basil leaves. This adds color and flavor. - Bowls: Use deep bowls to show off the soup's vibrant colors. A sprinkle of black pepper can add some flair too. Pro Tips Use Fresh Herbs: Fresh basil and oregano can elevate the flavor of your minestrone soup compared to dried herbs. Add them towards the end of cooking for a vibrant taste. Customize Your Veggies: Feel free to swap in any seasonal vegetables you have on hand, like bell peppers or spinach, to make the soup even more colorful and nutritious. Perfect Pasta Timing: To prevent the pasta from becoming mushy, add it to the soup during the last 10-12 minutes of cooking, ensuring it’s perfectly al dente. Enhance with Cheese: For an extra depth of flavor, stir in a Parmesan rind while the soup simmers. Remove it before serving for a rich, cheesy undertone. {{image_2}} You can switch out veggies in this soup. Try using squash instead of zucchini. Spinach can replace kale, too. For beans, use black beans or pinto beans. If you want a different pasta, farro or barley work great. You can even use rice if you prefer. Each swap changes the taste and texture. To add a twist, mix in spices like red pepper flakes or smoked paprika. Fresh herbs like thyme or parsley can boost flavor. For a protein kick, add cooked chicken or Italian sausage. You can also toss in some crispy bacon for a smoky note. Each option can make your soup unique and tasty. To keep your Minestrone Soup fresh, cool it to room temperature first. Use airtight containers for storage. Glass or BPA-free plastic containers work well. This soup lasts about three to four days in the fridge. When you want to eat it again, just reheat on the stove or in the microwave. Stir it well before serving to ensure even heat. You can freeze Minestrone Soup for up to three months. To do this, let it cool completely. Then, pour it into freezer-safe bags or containers. Leave some space at the top since the soup will expand when it freezes. When ready to eat, thaw it in the fridge overnight. Reheat it on the stove over low heat. Add a splash of vegetable broth or water if it seems too thick. Stir well to keep the texture nice and smooth. Enjoy a warm bowl any time! What type of beans work best in Minestrone soup? I recommend kidney beans and cannellini beans. Both add great texture and flavor. You can also try other beans like black beans or chickpeas. Can I make this soup ahead of time? Yes, you can! This soup tastes even better the next day. Just store it in the fridge in a sealed container. How do I thicken the soup if it's too watery? If your soup is too thin, you can add more pasta or some mashed beans. Simmer it longer to reduce excess liquid. What is the origin of Minestrone soup? Minestrone soup comes from Italy. It is a rustic dish that uses seasonal vegetables. Each region in Italy has its own version, making it very unique. Is this soup suitable for meal prepping? Absolutely! This soup is perfect for meal prep. It holds up well in the fridge and can be frozen for later. Just reheat before serving. You now have all you need to make a delicious Copycat Minestrone Soup. We covered key ingredients, detailed steps, and helpful tips to ensure great flavor. You learned how to adapt the recipe for different diets and explore tasty variations. Don't forget about effective storage and reheating methods for your leftovers. Embrace your creativity with this soup, and enjoy it with friends or family. Your next meal can be both easy and satisfying. Dive in and have fun cooking!
    Copycat Minestrone Soup Simple and Flavorful Recipe
  • - 2 lbs boneless, skinless chicken breasts - 1 can (15 oz) black beans, rinsed and drained - 1 can (15 oz) corn, drained - 1 can (10 oz) diced tomatoes with green chilies - 1 bell pepper, diced - 1 small red onion, chopped - 2 cloves garlic, minced - 1 tablespoon taco seasoning - 1 teaspoon cumin - Salt and pepper to taste - Fresh cilantro, chopped (for garnish) - Lime wedges (for serving) To make Crockpot Fiesta Chicken, gather these ingredients first. Start with chicken breasts, which provide a great base. Black beans and corn add texture and protein. Diced tomatoes with green chilies bring a nice kick. Fresh veggies, like bell pepper, red onion, and garlic, add flavor and color. Taco seasoning and cumin spice it up, while salt and pepper balance everything. Finally, cilantro and lime wedges brighten each serving. When selecting ingredients, look for high-quality products. Fresh vegetables make a big difference in taste. Choose low-sodium beans and tomatoes for a healthier dish. This mix of flavors creates a meal everyone will love. {{ingredient_image_1}} Start by placing the boneless chicken breasts in the bottom of your crockpot. Make sure they are flat and not stacked. This helps them cook evenly. In a large bowl, combine these veggies and beans: - 1 can (15 oz) black beans, rinsed and drained - 1 can (15 oz) corn, drained - 1 can (10 oz) diced tomatoes with green chilies - 1 bell pepper, diced - 1 small red onion, chopped - 2 cloves garlic, minced Then, add the spices: - 1 tablespoon taco seasoning - 1 teaspoon cumin - Salt and pepper to taste Stir everything well. You want each piece to get coated with spices. Spoon the vegetable mix over the chicken in the crockpot. Make sure the chicken is covered well. Cover the crockpot. Set it to cook on low for 6-8 hours or high for 3-4 hours. When it's done, shred the chicken with two forks in the crockpot. Stir everything together to mix the flavors. Enjoy your tasty meal! To boost the taste of your Crockpot Fiesta Chicken, consider these tips: - Add more spice: You can use smoked paprika for a smoky flavor. - Fresh herbs: Toss in fresh oregano or thyme for added depth. - Toppings: Try avocado slices, shredded cheese, or sour cream on top. - Zesty kick: A splash of hot sauce can spice things up! To shred the cooked chicken easily, follow these steps: 1. After cooking, use two forks. 2. Hold one fork steady and pull the chicken apart with the other. 3. Shred right in the crockpot to mix flavors. This method saves time and keeps the chicken juicy. Pair your fiesta chicken with these sides: - Rice or tortillas: Serve over white rice or in corn tortillas. - Salad: A fresh green salad balances the meal. - Guacamole: Creamy guacamole adds a fun twist. - Chips: Tortilla chips are great for dipping! These ideas make your meal more fun and tasty. Enjoy! Pro Tips Perfect Shredding: For easier shredding, let the chicken cool slightly before using two forks to shred it in the crockpot. This helps to retain moisture and flavor. Customize Your Spice Level: Adjust the amount of taco seasoning and diced tomatoes with green chilies to suit your heat preference. You can also add fresh jalapeños for an extra kick! Make It a Meal: Serve the fiesta chicken over rice, quinoa, or in tortillas for a complete meal. Add toppings like avocado, sour cream, or shredded cheese for extra flavor. Leftover Magic: This dish makes excellent leftovers! Store any extra in an airtight container in the fridge for up to 3 days, or freeze for up to 3 months for a quick meal later. {{image_2}} You can easily change some ingredients in this recipe. For beans, use pinto or kidney beans instead of black beans. If you want more color, try adding yellow or orange bell peppers. You can also toss in some zucchini or carrots for extra crunch. For protein, you can swap chicken for turkey or even tofu. If you like it milder, skip the diced tomatoes with green chilies. You can use regular diced tomatoes instead. To make it spicier, add jalapeños or a pinch of cayenne pepper. Adjust the taco seasoning to your taste. Always taste as you go! You can cook Fiesta Chicken in many ways. Use a stove-top by browning the chicken first, then add the veggies. Simmer on low heat for 30-40 minutes. If you prefer the oven, preheat to 350°F. Cook it in a covered dish for about 1 hour. Each method gives you that delicious flavor! After you enjoy your Crockpot Fiesta Chicken, you can store leftovers in the fridge. Place the chicken in an airtight container. Make sure it cools down first before sealing. This way, it stays fresh. Leftovers will last 3 to 4 days in the fridge. If you want to enjoy it later, proper storage is key. To freeze your Crockpot Fiesta Chicken, start by letting it cool fully. Transfer it to a freezer-safe container. You can also use freezer bags for easy storage. Squeeze out as much air as possible to prevent freezer burn. It will keep well for up to three months. When you are ready to eat, just thaw it in the fridge overnight. When reheating, you want to keep the flavors fresh. For best results, heat it on the stove. Use a non-stick pan over medium heat, adding a splash of broth or water. This helps it heat evenly. Stir occasionally until it is hot. You can also use the microwave. Just cover the bowl with a lid or wrap to keep moisture in. Heat in short bursts, stirring in between. This way, your meal tastes just as good as the first time. Yes, you can use frozen chicken for this recipe. Just keep in mind that it will take longer to cook. If you use frozen chicken, cook it on high for about 4-5 hours. Always check that the chicken reaches an internal temperature of 165°F. This ensures it is safe to eat. You can tell the chicken is done when it is tender and easily shreds with a fork. The internal temperature should be 165°F. If you have a meat thermometer, use it for accuracy. Shredding the chicken will mix all the flavors and make the dish even better. Crockpot Fiesta Chicken pairs well with many sides. Here are some ideas: - Rice (white or brown) - Tortillas (for tacos or wraps) - Avocado slices - Shredded cheese - Fresh salsa - A green salad Choose sides that add color and flavor to your meal. Yes, you can make this recipe in advance! You can prepare it the night before. Just place all the ingredients in the crockpot and store it in the fridge. In the morning, set the crockpot to cook. This saves time on busy days. Leftovers will last in the fridge for about 3-4 days. Make sure to store them in an airtight container. This keeps the flavors fresh. You can enjoy the fiesta chicken as a quick lunch or dinner later in the week. This blog post covered the important steps to make Crockpot Fiesta Chicken. We explored the ingredients, like chicken, black beans, and diced tomatoes. I shared tips for mixing flavors and serving ideas. You can adjust spices for your taste and choose different cooking methods. Remember to store leftovers well to keep them fresh. Cooking can be fun and easy with this recipe. Enjoy your tasty Fiesta Chicken and make it your own!
    Crockpot Fiesta Chicken Flavorful and Easy Dinner Recipe
  • To make Cream Cheese Pumpkin Muffins, you need: - 1 cup pumpkin puree (canned or fresh) - 1/2 cup cream cheese, softened - 1/2 cup sugar - 1/2 cup brown sugar, packed - 1/2 cup vegetable oil - 3 large eggs - 1 1/2 cups all-purpose flour - 1 teaspoon baking powder - 1 teaspoon baking soda - 1 teaspoon ground cinnamon - 1/2 teaspoon ground nutmeg - 1/2 teaspoon ground ginger - 1/2 teaspoon salt - 1/2 cup chopped walnuts or pecans (optional) - 1 teaspoon vanilla extract You can make these muffins even better with some add-ins. Consider adding: - Chocolate chips for a sweet touch - Dried cranberries for a tart flavor - Chopped apples for extra fruitiness These add-ins can change the taste and texture of your muffins. Feel free to mix and match based on what you like! If you don’t have some ingredients, here are easy swaps: - Use applesauce instead of vegetable oil for a lighter muffin. - Swap cream cheese for Greek yogurt to cut down on fat. - Replace eggs with flaxseed meal mixed with water for a vegan option. These substitutions help you enjoy the recipe with what you have at home. Don’t be afraid to get creative! {{ingredient_image_1}} Start by preheating your oven to 350°F (175°C). This temp helps the muffins rise perfectly. Next, grab your muffin tin. Line it with paper liners or lightly grease it with cooking spray. This step keeps your muffins from sticking. It also makes cleanup easier later. In a medium bowl, place the softened cream cheese. Add half a cup of sugar and half a cup of brown sugar. Beat these together until the mixture is smooth and creamy. This step adds a rich flavor. Then, mix in the cup of pumpkin puree, half a cup of vegetable oil, three large eggs, and one teaspoon of vanilla extract. Stir until everything is combined well. The mix should look creamy and inviting. In a separate bowl, whisk together one and a half cups of all-purpose flour, one teaspoon of baking powder, one teaspoon of baking soda, one teaspoon of ground cinnamon, half a teaspoon of ground nutmeg, half a teaspoon of ground ginger, and half a teaspoon of salt. This mix adds flavor and structure. Gradually add this dry mix to your wet ingredients. Stir gently until just combined. Be careful not to over-mix; a few lumps are okay. If you like, fold in half a cup of chopped walnuts or pecans for extra crunch. Now, spoon the batter into your prepared muffin tin, filling each cup about three-quarters full. The muffins need room to rise. To get moist muffins, use room temperature cream cheese. This helps blend smoothly. Also, mix the wet and dry ingredients gently. Over-mixing can make muffins tough. Fill the muffin cups about three-quarters full. This allows room for rising without spilling. One common mistake is not measuring the flour correctly. Too much flour can lead to dry muffins. Always spoon flour into the measuring cup and level it off. Another mistake is forgetting to preheat the oven. A hot oven helps muffins rise well. Lastly, don't skip the cooling step. Let them cool for a few minutes in the tin. Spices make these muffins special. Ground cinnamon is a must, but try adding more nutmeg or ginger. You can also mix in cloves for warmth. If you want a fun twist, add a hint of allspice. Each spice brings out the pumpkin flavor, making every bite delicious. Pro Tips Use Fresh Pumpkin: If you can, use fresh pumpkin puree instead of canned for a richer flavor. Just roast and puree your pumpkin before measuring. Check Doneness Early: Start checking your muffins a couple of minutes before the suggested baking time to prevent overbaking. Every oven is different! Mix Gently: When combining wet and dry ingredients, mix just until incorporated. Overmixing can lead to dense muffins. Add a Crunch: For extra texture, consider adding some chocolate chips or a sprinkle of oats on top before baking. {{image_2}} You can add chocolate chips to the batter for a sweet twist. Use about 1 cup of semi-sweet or dark chocolate chips. Mix them into the batter before you spoon it into the muffin tin. The chocolate melts and adds a rich flavor that pairs well with pumpkin. You’ll love the surprise of chocolate in every bite. To make these muffins gluten-free, swap out all-purpose flour for a gluten-free blend. Look for a mix that includes xanthan gum. This helps bind your muffins, keeping them fluffy. You can find many blends at stores. Just use the same amount as you would for regular flour. You can change up the nuts or seeds for more flavor. Instead of walnuts or pecans, try almonds or sunflower seeds. Each nut adds a unique taste and crunch. Chop them into smaller pieces for better mixing. Add about 1/2 cup to the batter. This simple swap keeps your muffins exciting and new. To keep your cream cheese pumpkin muffins fresh, let them cool first. Place them in a container with a lid. You can also wrap them in plastic wrap. Store them at room temperature for up to three days. If you want to store them longer, the fridge is a good option. Just remember, they may lose some soft texture in the cold. When you want to enjoy a muffin again, reheating is easy. You can use the microwave or the oven. For the microwave, place one muffin on a plate and heat for about 15-20 seconds. Check if it's warm enough. If not, heat for a few more seconds. For the oven, preheat it to 350°F (175°C). Wrap the muffin in foil and heat for about 10 minutes. This keeps the muffin soft and tasty. Freezing muffins is a great way to save them for later. After they cool completely, wrap each muffin tightly in plastic wrap. Then, place them in a freezer bag. Label the bag with the date. Muffins can stay fresh in the freezer for up to three months. When you’re ready to eat one, just take it out and let it thaw at room temperature or reheat it. Yes, you can use fresh pumpkin. To do this, roast or boil the pumpkin. Once soft, mash it into a puree. Make sure to drain any excess water. This gives a fresher taste to your muffins. Muffins are done when a toothpick inserted in the center comes out clean. The tops should also look golden brown. If they still feel wet, bake them a few more minutes. Keep an eye on them, as each oven is different. You can use applesauce or mashed banana as an egg substitute. Use 1/4 cup for each egg. This keeps the muffins moist and adds some sweetness. Another option is to use flaxseed meal mixed with water. Mix 1 tablespoon of flaxseed with 2.5 tablespoons of water for one egg. Let it sit until it thickens. You learned about key ingredients, step-by-step instructions, and useful tips for baking muffins. I highlighted how to get moist muffins and avoid common mistakes. You can also explore various tasty options, like adding chocolate chips or making gluten-free muffins. Remember, proper storage helps keep your muffins fresh. With these insights, you can bake delicious muffins with ease. Enjoy your baking journey and share your tasty results!
    Cream Cheese Pumpkin Muffins Warm and Tasty Treat
  • - 1 cup unsalted butter, softened - 1 cup brown sugar, packed - 1/2 cup granulated sugar - 2 large eggs - 1 teaspoon vanilla extract - 2 1/2 cups all-purpose flour - 1 teaspoon baking soda - 1/2 teaspoon salt - 1 cup pecans, chopped - 1 cup mini chocolate chips (optional) - 1/2 cup corn syrup To make these pecan pie cookies, you need a mix of sweet and nutty flavors. The unsalted butter gives a rich taste, while the brown sugar adds a deep sweetness. Granulated sugar helps balance it out. The eggs bind everything together, and vanilla extract gives a warm note. You can add mini chocolate chips if you want a twist. They add a nice touch of sweetness. Using chopped pecans is key for that classic pecan pie taste. If you don’t have them, you can also try walnuts. Feel free to experiment! You can swap out the granulated sugar for coconut sugar or use maple syrup instead of corn syrup. These changes can give your cookies a fun new flavor. {{ingredient_image_1}} 1. Preheat the Oven: Set your oven to 350°F (175°C). This step is key. A hot oven helps the cookies rise and bake evenly. 2. Mix the Butters and Sugars: In a large bowl, mix the softened butter, brown sugar, and granulated sugar. Use a hand mixer or a wooden spoon. Mix until it is light and fluffy. This usually takes about 3 minutes. 3. Add the Eggs: Beat in the eggs one at a time. This helps the mixture blend well. Then, add the vanilla extract. 4. Mix Dry Ingredients: In another bowl, whisk together the flour, baking soda, and salt. This step ensures that the baking soda and salt mix evenly in the cookies. 5. Combine Mixtures: Gradually add the dry mix to the wet mix. Stir until just combined. Do not overmix! Overmixing can make the cookies tough. 6. Fold in Pecans and Chocolate Chips: Gently fold in the chopped pecans and mini chocolate chips if you choose to add them. This adds a nice crunch and flavor. 7. Prepare Corn Syrup Mixture: In a small saucepan, heat the corn syrup and the rest of the chopped pecans over low heat. Stir until warm. This will create a nice topping for the cookies. 1. Scoop the Dough: Use a tablespoon to scoop out cookie dough balls. Place them on prepared baking sheets, leaving about 2 inches between each ball. 2. Make Indentations: Use a teaspoon to make a small indentation in the center of each dough ball. This is where you will add the pecan-corn syrup mix. 3. Add the Corn Syrup Mixture: Drizzle a small amount of the warm pecan-corn syrup into the indentation of each cookie. 4. Bake the Cookies: Place the baking sheets in the preheated oven. Bake for 10-12 minutes. Keep an eye on the edges; they should be lightly golden when done. 5. Cool the Cookies: Let the cookies cool on the baking sheet for about 5 minutes. Then transfer them to a wire rack to cool completely. These steps will give you soft, chewy pecan pie cookies. Enjoy the sweet smell as they bake! To get the perfect cookie texture, follow these steps: - Cream your butter and sugars well. This makes your cookies light and fluffy. - Don’t overmix once you add flour. Mix until just combined to keep cookies tender. - Chill your dough for 30 minutes if it's too sticky. This helps shape the cookies. Some common mistakes to avoid: - Using cold butter can lead to dense cookies. Always use softened butter. - Skipping the parchment paper may cause sticking. It makes cleanup easy too. - Not measuring ingredients accurately can ruin the texture. Use a scale for best results. To present your pecan pie cookies beautifully: - Dust with powdered sugar after they cool. It adds a nice touch. - Serve on a decorative platter. A simple plate can elevate your cookies. - Garnish with whole pecans for a rustic look. It shows off the star ingredient. For optional toppings or glaze: - Drizzle with chocolate for extra sweetness. It pairs well with the pecans. - Add a light caramel sauce on top for a rich flavor. It brings that pie essence to life. Pro Tips Use Room Temperature Ingredients: Ensure that your butter and eggs are at room temperature before starting. This helps to create a smooth batter and ensures even baking. Chill the Dough: For thicker cookies, chill the dough in the refrigerator for about 30 minutes before baking. This prevents the cookies from spreading too much in the oven. Adjust Baking Time: Keep an eye on your cookies as they bake; ovens can vary. Remove them when the edges are golden but the centers still look slightly soft for the best texture. Experiment with Mix-Ins: Feel free to customize the cookies by adding different mix-ins like dried cherries or white chocolate chips for a unique twist on classic flavors. {{image_2}} You can make these pecan pie cookies with different ingredients. If you want a dairy-free option, try using coconut oil instead of butter. For sugars, you can use coconut sugar or maple syrup. Both will change the flavor a bit but will still be tasty. If you need nut-free cookies, simply leave out the pecans. You can replace them with pumpkin seeds or sunflower seeds for a crunchy bite. For a chocolate-free version, skip the mini chocolate chips. The cookies will still be sweet and delicious. Adding spices can take these cookies to the next level. A pinch of cinnamon or nutmeg enhances the flavor profile wonderfully. If you enjoy a bit of zest, try adding lemon or orange extract. You can also mix in dried fruits like cranberries or raisins for a chewy texture. If you love coconut, adding shredded coconut can give a tropical twist. Feel free to experiment with your favorite flavors to make these cookies your own! To keep your pecan pie cookies fresh, store them in an airtight container. This helps prevent them from drying out. You can layer parchment paper between the cookies. This keeps them from sticking together. If you want to freeze cookies, first let them cool completely. Then, place them in a single layer on a baking sheet. Freeze for about an hour until solid. After they are frozen, put them in a freezer bag. Remove as much air as you can before sealing. These cookies can last in the freezer for up to three months. At room temperature, pecan pie cookies can last for about a week. They will stay soft and tasty when stored correctly. Look for signs of staleness to know if they're still good. If they feel hard or crumbly, it’s time to toss them. If you see any mold, throw them away right away. Always trust your senses; if they don’t smell right, don’t eat them. How do I make pecan pie cookies without corn syrup? You can use maple syrup or honey instead of corn syrup. Both options offer a sweet flavor and a similar texture. Adjust the amount to match the sweetness of corn syrup. You may need to reduce other liquids in the recipe slightly for the best results. Can I make these cookies gluten-free? Yes, you can! Substitute all-purpose flour with a gluten-free flour blend. Look for a blend that includes xanthan gum for better texture. This will help the cookies hold together and taste great. What can I serve with pecan pie cookies? Pecan pie cookies pair well with vanilla ice cream or whipped cream. You could also serve them with a cup of coffee or hot chocolate. The warm drinks enhance the cookie's flavors. How to soften butter quickly for this recipe? To soften butter fast, cut it into small cubes and let it sit at room temperature for 10-15 minutes. You can also microwave it for 5-10 seconds. Be careful not to melt the butter, as this can change the cookie texture. To sum up, we covered how to make tasty pecan pie cookies. I shared ingredient details, step-by-step prep, and baking tips. You learned how to avoid common mistakes and add your twist. Plus, we discussed how to store cookies for lasting freshness. Lastly, I answered some frequent questions. These cookies are perfect for any occasion. Enjoy baking and share your delicious results!
    Pecan Pie Cookies Irresistible and Simple Treat
  • - 1 pound large shrimp, peeled and deveined - 2 avocados, diced - 2 cups corn kernels (fresh or frozen) - 1 red bell pepper, diced - 1 small red onion, finely chopped - 1 lime, juiced - 2 tablespoons olive oil - 1 teaspoon chili powder - 1 teaspoon garlic powder - Salt and pepper to taste - Fresh cilantro, chopped (for garnish) - Optional: tortilla chips (for crunch) To marinate the shrimp, mix the shrimp with olive oil, lime juice, chili powder, garlic powder, salt, and pepper. Make sure all shrimp are well coated. Let them rest for about 20 minutes. This helps the shrimp soak up all the flavors. Next, preheat your grill or grill pan over medium-high heat. Thread the marinated shrimp onto skewers. Grill the shrimp for about 2-3 minutes per side. You want them to turn pink and opaque. Once done, take them off the grill and keep warm. For the corn, you have two choices. If you use fresh corn, grill the cobs for about 8-10 minutes until they are charred. Then cut the kernels off. For frozen corn, sauté it in a pan over medium heat for 5-7 minutes. This way, it gets warm and slightly caramelized. {{ingredient_image_1}} To avoid overcooking shrimp, watch the cooking time closely. Shrimp cook fast. Grill them for just 2-3 minutes per side. You want them pink and opaque. If they curl tightly, they are overdone. For even charring on corn, turn the cobs every few minutes. This way, all sides get that nice char. If you use frozen corn, sauté it until it's golden. This adds good flavor without the grill. To add extra flavor, consider spices like smoked paprika or cumin. Fresh herbs like cilantro or parsley can brighten the dish. Fresh lime juice is key. It adds zing and balances the flavors. Squeeze some over the shrimp and corn mixture. You can add more to taste. Just remember, lime juice can be strong, so start small. Each serving has around 400 calories. This dish is high in protein from shrimp and healthy fats from avocado. It fits well for gluten-free and keto diets. The shrimp and veggies provide essential nutrients. Plus, the avocado adds fiber. It’s a tasty choice for many dietary needs. You can easily change the main protein in this dish. If you don't like shrimp, try chicken. Just marinate it like the shrimp. You can also use tofu for a plant-based option. For vegetables, feel free to mix it up. You can add diced zucchini, cherry tomatoes, or even black beans. These swaps will bring new textures and tastes to your bowl. This dish is great on its own, but some sides can make it even better. Consider adding a fresh salad or a side of rice. Tortilla chips add a nice crunch too. For parties, set up a build-your-own bowl station. Have bowls of shrimp, corn, and toppings. Let guests create their own tasty meals. This way, everyone can customize their dish just how they like it. To keep your leftovers fresh, store them in an airtight container. Place the shrimp and corn mixture in the fridge right after your meal. It will taste best if used within three days. When you're ready to eat leftovers, reheat them gently. You can use a skillet over low heat. This method keeps the shrimp and corn moist. Stir often to make sure everything heats evenly. Avoid high heat to keep the flavors and texture just right. Pro Tips Marinate Longer for Flavor: For a deeper flavor, consider marinating the shrimp for at least 30 minutes instead of just 20. This allows the spices to penetrate the shrimp more thoroughly. Perfect Grill Timing: Keep an eye on the shrimp while grilling; they cook quickly. As soon as they turn pink and opaque, they are done to perfection. Fresh vs. Frozen Corn: If using fresh corn, grilling it adds a wonderful smoky flavor. However, frozen corn can be just as delicious when sautéed until caramelized. Customize Your Bowls: Feel free to add other toppings like diced tomatoes, jalapeños, or even a drizzle of your favorite hot sauce for an extra kick! {{image_2}} To check if shrimp is done, look for color and texture. Cooked shrimp turns pink and opaque. They should curl into a "C" shape. If they stay straight, they may be overcooked. The shrimp should feel firm but not hard. This simple check helps ensure you get juicy shrimp every time. Yes, you can make parts of this dish ahead of time. Marinate the shrimp a few hours before cooking. You can also prepare the corn and veggie mix early. Just store them in the fridge until you are ready to assemble. For best taste, grill the shrimp just before serving. This keeps them fresh and tasty. There are many tasty options to serve with these bowls. You can add a fresh green salad for extra crunch. Cornbread pairs well if you want something warm. For drinks, try a cold lemonade or a light beer. These pairings enhance the meal and make it even more enjoyable. This blog post shared how to create grilled shrimp avocado corn bowls. We covered key ingredients, like shrimp, avocados, and corn. I explained how to marinate and grill the shrimp for best flavor. You learned tips to perfect your grill technique and enhance taste with spices. We also explored variations and storage methods for leftovers. In the end, these bowls are easy to make and tasty. Customize them to match your style or dietary needs. Enjoy this fun and healthy meal with friends or family!
    Grilled Shrimp Avocado Corn Bowls Fresh and Tasty Meal
  • To make Easy Creamy Lasagna Soup, gather these items: - 1 tablespoon olive oil - 1 medium onion, chopped - 3 cloves garlic, minced - 1 pound ground beef or Italian sausage - 1 teaspoon dried oregano - 1 teaspoon dried basil - ½ teaspoon red pepper flakes (optional) - 1 can (28 ounces) crushed tomatoes - 4 cups chicken or vegetable broth - 8 lasagna noodles, broken into bite-sized pieces - 1 cup heavy cream - 1 cup ricotta cheese - 1 cup shredded mozzarella cheese - Salt and pepper to taste - Fresh basil or parsley for garnish You can swap some ingredients to fit your taste or needs: - Use turkey or chicken instead of beef or sausage. - Replace heavy cream with half-and-half for less fat. - For a vegan option, try plant-based sausage and non-dairy cream. - If you don’t have ricotta, cottage cheese works too. This soup offers comfort and nutrition. Here’s a rough breakdown per serving: - Calories: 450 - Protein: 25g - Carbohydrates: 30g - Fat: 27g - Fiber: 2g This soup is hearty and filling, making it a great weeknight meal. Enjoy the flavor while nourishing your body! {{ingredient_image_1}} Start by gathering your ingredients. You need: - 1 tablespoon olive oil - 1 medium onion, chopped - 3 cloves garlic, minced - 1 pound ground beef or Italian sausage - 1 teaspoon dried oregano - 1 teaspoon dried basil - ½ teaspoon red pepper flakes (optional) - 1 can (28 ounces) crushed tomatoes - 4 cups chicken or vegetable broth - 8 lasagna noodles, broken into bite-sized pieces - 1 cup heavy cream - 1 cup ricotta cheese - 1 cup shredded mozzarella cheese - Salt and pepper to taste - Fresh basil or parsley for garnish Chop the onion and mince the garlic. Break the lasagna noodles into smaller pieces. This will help them cook evenly. Heat the olive oil in a large pot over medium heat. Add the chopped onion. Cook for about 3-4 minutes until it’s soft and clear. Then, add the minced garlic. Cook for one more minute. The smell will be amazing! Next, add the ground beef or Italian sausage. Cook it for about 5-7 minutes. Break it up with a spoon as it cooks. You want it browned and crumbly. Stir in the oregano, basil, and red pepper flakes. Cook for one minute to wake up those spices. Pour in the crushed tomatoes and broth. Stir everything well and bring it to a simmer. Now, add the broken lasagna noodles. Cook for 10-12 minutes. You want them to be al dente, or firm to the bite. Reduce the heat to low. Stir in the heavy cream and ricotta cheese. Mix until smooth. Let it warm, but don’t let it boil. Finally, mix in the shredded mozzarella cheese. Stir until it melts and makes the soup creamy. Taste it and add salt and pepper if needed. Serve the soup hot. Garnish with fresh basil or parsley. This adds color and flavor. You can also serve it with crusty bread or a side salad. Enjoy this comforting bowl of lasagna soup! To get a creamy texture, use heavy cream. It adds richness and smoothness. Stir in the cream slowly after cooking the noodles. This will keep the soup from boiling. Adding ricotta cheese also helps create a velvety mouthfeel. Mix it in gently until it's fully blended. You want every bite to feel rich and inviting. Timing is key for perfect noodles. Add the broken lasagna noodles after the soup simmers. Cook them for about 10 to 12 minutes. This ensures they stay al dente. If you cook them too long, they will turn mushy. Keep an eye on them. Stir occasionally to prevent sticking. To boost flavor, always sauté the onion and garlic first. This step brings out their natural sweetness. Don't skip the dried herbs like oregano and basil. They add depth to your soup. If you like a little heat, sprinkle in red pepper flakes. Taste and adjust with salt and pepper at the end. Fresh herbs like basil or parsley make great garnishes, adding aroma and color. Pro Tips Use Fresh Herbs: Fresh basil or parsley can elevate the flavor of your lasagna soup. Add them right before serving for the best taste. Customize Your Protein: Feel free to swap the ground beef or sausage for turkey or a plant-based alternative to suit your dietary preferences. Thicken the Soup: If you prefer a thicker soup, reduce the amount of broth or add an extra tablespoon of ricotta cheese for creaminess. Make It Ahead: This soup can be made in advance and stored in the fridge. Just reheat gently before serving to prevent the noodles from becoming too soft. {{image_2}} You can easily make this soup vegetarian. Just skip the meat. Use lentils or mushrooms for protein. They add a nice texture and flavor. Swap chicken broth for vegetable broth. For a vegan twist, use coconut cream instead of heavy cream. Substitute ricotta cheese with tofu or cashew cheese. This keeps the creamy taste without dairy. Ground turkey or chicken works well if you want leaner meat. You can also try plant-based sausage for a meat-like flavor. If you prefer seafood, shrimp adds a unique touch. Cook it just before serving to keep it tender. No matter your choice, season the protein well for the best taste. Spice up your soup with more herbs. Add thyme or rosemary for extra flavor. If you like heat, increase the red pepper flakes. You can also mix in spinach or kale for added nutrients. Toss in some diced bell peppers for a sweet crunch. Feel free to experiment with your favorite spices to make this dish your own! Storing your Easy Creamy Lasagna Soup is simple. First, let it cool down to room temperature. Then, grab an airtight container. Pour the soup into the container, leaving some space at the top. Seal it tightly. Store it in the fridge for up to three days. This way, you can enjoy the soup again without losing its flavor. Want to keep the soup longer? Freezing is a great option. Use freezer-safe containers or bags. Make sure to leave some space for expansion. You can freeze the soup for up to three months. When you're ready to eat, thaw it in the fridge overnight. To reheat, heat it on the stove over low heat. Stir it often to keep it creamy. Add a splash of broth if it seems too thick. The shelf life of the ingredients varies: - Ground beef or Italian sausage: Use within one to two days if fresh. If frozen, use within three to four months. - Heavy cream: Lasts about one week in the fridge after opening. Freeze it for up to three months. - Ricotta cheese: Best within a week after opening. Freeze for about two months. - Lasagna noodles: Can last for one to two years if stored dry in a cool place. By keeping track of these times, you can make the most of your ingredients and enjoy this comforting dish for many meals to come. Yes, you can use store-bought marinara sauce. It saves time and effort. Choose a brand you love. Just pour it in when you add the crushed tomatoes. This swap keeps the flavor rich and tasty. To make this dish gluten-free, use gluten-free lasagna noodles. Many brands offer good options. You can also use rice noodles or even zucchini strips. Check the labels to be sure they are gluten-free. Adjust the cooking time if needed, as some may cook faster. Lasagna soup pairs well with simple side salads. A green salad with light dressing works great. Garlic bread is another tasty choice. You can also serve it with crusty rolls for dipping. These sides complement the soup's rich flavors nicely. You now have a clear path to making a delicious lasagna soup. We covered the key ingredients and smart substitutions. You learned step-by-step how to prepare, cook, and serve the dish. I shared tips for a creamy texture and perfect noodles, along with ways to boost flavor. We explored variations and how to store leftovers properly. Enjoy experimenting with this recipe. It’s easy to make and fun to share. Dive in and savor every bowl!
    Easy Creamy Lasagna Soup Comforting Weeknight Meal
  • - 12 jumbo pasta shells - 2 cups fresh spinach, chopped - 1 cup ricotta cheese - 1 cup shredded mozzarella cheese (plus extra for topping) - 1/2 cup grated Parmesan cheese - 1 egg, beaten - 2 cups marinara sauce - 1 teaspoon garlic powder - 1 teaspoon onion powder - Salt and pepper to taste - Fresh basil leaves, for garnish This dish serves about four people. Each serving contains: - Calories: 450 - Protein: 22g - Carbohydrates: 45g - Fat: 20g - Fiber: 3g - Sugars: 5g You can easily adjust the filling. Try adding cooked chicken or mushrooms for extra protein. If you need a dairy-free option, use tofu instead of ricotta. For spice lovers, add crushed red pepper flakes to the marinara sauce. You can also use different cheeses, like goat cheese or feta, for a unique taste. Want a veggie boost? Mix in some chopped bell peppers or zucchini. Feel free to make this dish suit your family's tastes! {{ingredient_image_1}} First, gather all your ingredients. You need jumbo pasta shells, spinach, ricotta cheese, mozzarella, Parmesan, an egg, marinara sauce, garlic powder, onion powder, salt, and pepper. I find it helpful to chop the spinach finely. Next, preheat your oven to 375°F (190°C). Cook the jumbo pasta shells as the package says. Boil them until they are al dente. After that, drain the shells and let them cool. In a large bowl, mix the chopped spinach, ricotta, mozzarella, and Parmesan. Add the beaten egg, garlic powder, onion powder, salt, and pepper. Stir until everything combines well. This filling is creamy and packed with flavor. Now, fill each pasta shell with a generous scoop of the spinach and ricotta mix. Press the filling gently so it stays inside the shell. This step is key for a hearty bite. Once filled, take a baking dish and spread half of the marinara sauce on the bottom. Place the stuffed shells in the dish, open side up. Pour the rest of the marinara sauce over the shells. Make sure they are fully coated. This keeps them moist while baking. Sprinkle extra mozzarella cheese on top of the shells. This will create a delicious, cheesy crust. Cover the dish with aluminum foil and bake for 25 minutes. After that, remove the foil and bake for another 10-15 minutes. You want the cheese to be bubbly and golden. Once it’s ready, let the dish rest for a few minutes. This helps the sauce settle. Before serving, add fresh basil leaves for a pop of color and flavor. Enjoy your perfect Spinach Ricotta Stuffed Shells! To make great stuffed shells, cook them just right. Follow the package directions to keep them al dente. This means they should be firm but not hard. After cooking, drain and cool the shells. This helps them hold their shape when you fill them. Want to boost flavor? Add some herbs! Fresh basil or parsley can brighten the dish. You can also mix in a pinch of red pepper flakes for heat. If you love garlic, a bit of minced fresh garlic can take it to the next level. Don't forget to taste and adjust the salt and pepper in the filling. One big mistake is overcooking the shells. If they are too soft, they break when stuffed. Another mistake is not packing the filling in well. Make sure to press it gently into the shells. If you skip the foil at first, the cheese can burn. Always cover the dish until the last few minutes of baking. Pro Tips Use Fresh Spinach: Fresh spinach adds vibrant flavor and nutrition. If using frozen spinach, be sure to thoroughly drain it to avoid excess moisture. Cheese Variations: Experiment with different cheeses like feta or goat cheese for a unique twist on the filling. Make Ahead: Prepare the stuffed shells a day in advance and store them in the refrigerator. Just bake them when you're ready to serve! Perfect Marinara: Use homemade marinara sauce if possible for the best flavor. Otherwise, choose a high-quality store-bought option. {{image_2}} You can change the filling in many fun ways. Mix in sautéed mushrooms for a rich taste. Try adding cooked ground turkey or beef for extra protein. For a twist, use different cheeses like goat cheese or feta. You can also add artichoke hearts for a unique touch. Each option brings a new flavor to the dish. If you want a vegan version, swap the ricotta for tofu. Blend firm tofu with lemon juice, nutritional yeast, and herbs. This mix gives you a creamy texture. Use a dairy-free cheese for the mozzarella. You can find many brands that melt well. Make sure your marinara sauce is also dairy-free. This way, everyone can enjoy the meal. Serve your stuffed shells with a fresh salad on the side. A simple green salad pairs well with the cheesy dish. Add garlic bread for a crunchy touch. If you like, sprinkle some extra fresh basil on top. This adds color and flavor. You can also serve them alongside steamed veggies for a healthy touch. To store any leftovers, place the stuffed shells in an airtight container. Make sure to cover the shells completely with marinara sauce. This helps keep them moist. You can store them in the fridge for up to three days. Label the container with the date for easy tracking. When you are ready to enjoy your leftovers, preheat your oven to 350°F (175°C). Place the stuffed shells in a baking dish. Pour a little marinara sauce on top if they seem dry. Cover the dish with foil to keep the shells from drying out. Heat for about 20 minutes or until warm. You can also microwave them for 2-3 minutes, but the oven gives better results. If you want to save some for later, freezing is a great option. First, cool the stuffed shells completely. Then, place them in a single layer in a freezer-safe container. You can separate layers with parchment paper to avoid sticking. They will last in the freezer for up to three months. To cook from frozen, bake at 375°F (190°C) for about 45 minutes. Check if they're hot all the way through before serving. To stop shells from sticking, cook them until they are al dente. This means they should still have a firm bite. After cooking, rinse the shells under cold water. This cools them down and removes excess starch. You can also toss them lightly in a bit of olive oil. This will keep them separate and ready for filling. Yes, you can prepare these shells ahead of time. Stuff the shells and place them in the baking dish. Cover the dish with plastic wrap or foil. Store it in the fridge for up to 24 hours. This makes dinner easy on busy days. Just add a little extra cooking time when baking from the fridge. Many side dishes complement spinach ricotta stuffed shells. A simple green salad with a light vinaigrette works well. Garlic bread adds a nice touch and soaks up the marinara sauce. Roasted vegetables also make a great side. Try zucchini or asparagus for a fresh flavor. These sides enhance your meal and make it more filling. This blog post covered everything you need for Spinach Ricotta Stuffed Shells. We discussed ingredients and their nutrition, plus how to customize your dish. You learned step-by-step preparation and cooking methods. I shared useful tips for perfecting your shells and avoiding common mistakes. We explored tasty variations and smart storage tips. Remember, this dish is flexible and can fit your needs. Enjoy making it your own, and savor every bite!
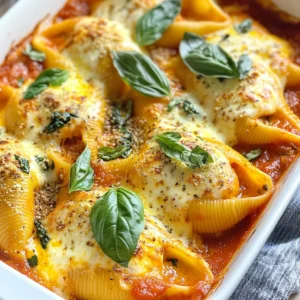
    Spinach Ricotta Stuffed Shells Tasty Family Meal
  • - 1 cup cream cheese, softened - 1/2 cup heavy whipping cream - 1/4 cup powdered erythritol (or preferred sweetener) - 1 teaspoon vanilla extract - 1/4 cup ground beef jerky, finely chopped - 1 tablespoon gelatin powder (optional) - Pinch of salt This recipe uses simple ingredients. First, we need cream cheese. It gives the mousse its rich, creamy base. Heavy whipping cream adds fluffiness and a smooth texture. Sweetener balances the flavors and keeps it low in carbs. Vanilla extract adds a warm flavor, making each bite delightful. Next, we have ground beef jerky. This unique twist gives the mousse a savory punch. It packs protein and adds a fun texture. If you want a thicker mousse, use gelatin. It helps bind everything together. Finally, a pinch of salt enhances all the flavors. Gather these ingredients before starting. Freshness matters, so use the best you can find. Now that you have everything ready, you can create this tasty dish. Enjoy the balance of sweet and savory in each spoonful! {{ingredient_image_1}} - Step 1: In a mixing bowl, combine 1 cup of softened cream cheese, 1/4 cup of powdered erythritol, and a pinch of salt. Beat with an electric mixer until the mix is smooth and creamy. This step sets the base of our mousse. - Step 2: In another bowl, whip 1/2 cup of heavy whipping cream until you see soft peaks. This step adds air and makes the mousse light and fluffy. - Step 3: Gently fold the whipped cream into the cream cheese mixture. Use a spatula to mix carefully, so you keep the fluffiness. - Step 4: If you want a thicker mousse, dissolve 1 tablespoon of gelatin powder according to package instructions. Fold this into the mixture for a firmer texture. - Step 5: Mix in 1/4 cup of finely chopped ground beef jerky. This adds a unique flavor and texture to the mousse. - Step 6: Spoon the mousse into serving glasses or bowls. Chill in the refrigerator for at least 30 minutes before serving. This step allows the flavors to blend well and the mousse to set. Enjoy this fun and savory treat! To make a great mousse, use softened cream cheese. This helps it blend smoothly. Cold cream cheese will clump and ruin your texture. When you whip the cream, aim for soft peaks. This means the cream should hold its shape but still be soft. Use a clean bowl and beaters to get the best results. When mixing, fold the whipped cream slowly into the cream cheese mix. This keeps air in and gives you fluffiness. For garnishing, top your mousse with more chopped beef jerky. You can also add a dollop of whipped cream for extra richness. The mousse works well with savory snacks, like cheese crisps or meat chips. You can also pair it with fresh veggies for a fun twist. Pro Tips Use High-Quality Jerky: Opt for premium beef jerky without preservatives for the best flavor and texture in your mousse. Chill Thoroughly: Ensure the mousse is chilled for at least 30 minutes to allow it to set and enhance the flavors before serving. Customize Sweetness: Adjust the amount of erythritol or your preferred sweetener to match your taste preferences. Garnish Creatively: Enhance presentation by topping with fresh herbs or a drizzle of sugar-free chocolate sauce along with the whipped cream. {{image_2}} You can enjoy this mousse even if you avoid dairy. For cream cheese, try using a dairy-free cream cheese. Nut-based cream cheese is a great choice. For heavy cream, use coconut cream. Chill a can of coconut milk overnight. Scoop out the cream for a rich texture. This will give you a creamy base without dairy. If you want to swap the sweetener, you have options. You can use stevia or monk fruit. Both are low-carb and sweet. Adjust the amount based on your taste. For a more natural sweetener, consider honey or maple syrup. Just know these will add some carbs. You can make this mousse even better with flavors. Cocoa powder adds a rich chocolate taste. Just mix in a tablespoon or two. If you want something fruity, a few drops of lemon or orange extract work well. You can also add spices like cinnamon or nutmeg for warmth. Get creative with your flavors! To keep your Minute Carnivore Cheesecake Mousse fresh, use airtight containers. Glass jars work great. They seal well and show off the pretty layers. If you use plastic, choose BPA-free containers. Always let the mousse cool before sealing. This helps avoid moisture buildup. Your mousse will stay fresh in the fridge for about three days. After that, it may lose some flavor and texture. If you see any signs of spoilage, like an off smell, throw it away. For the best taste, enjoy it within the first two days. Carnivore cheesecake mousse is a rich dessert that blends cream cheese with meat. It uses beef jerky for a unique flavor. This mousse is creamy and sweet, making it a fun twist on classic cheesecake. Yes, you can make this recipe ahead of time. It tastes even better after chilling. Just store it in the fridge, and it will be ready when you are. Using fresh meat is not recommended for this recipe. Fresh meat may not blend well and could affect the mousse's texture. Stick with jerky for the best results. To make it thicker without gelatin, use more cream cheese. You can also whip the cream longer. This will add more air and firmness to the mousse. You can use various toppings to enhance your mousse. Consider more chopped jerky, a dollop of whipped cream, or even a sprinkle of cocoa powder. Get creative and enjoy! This blog post explains how to make a unique carnivore cheesecake mousse. You learned the ingredients, steps to prepare, and tips for success. We also explored storage and variations for different diets. In conclusion, this mousse is versatile and can fit many tastes. It’s easy to whip up and fun to serve. Enjoy experimenting with flavors and toppings to make it your own!
    Minute Carnivore Cheesecake Mousse Decadent Delight
  • To make a tasty Mediterranean chicken pasta salad, you need these key ingredients: - 2 cups penne pasta - 1 lb boneless, skinless chicken breast, grilled and cubed - 1 cup cherry tomatoes, halved - 1 cup cucumber, diced - 1/2 cup Kalamata olives, pitted and sliced - 1/2 cup feta cheese, crumbled - 1/4 cup red onion, finely chopped - 1/4 cup fresh parsley, chopped - 1/4 cup olive oil - 2 tablespoons lemon juice - 1 teaspoon dried oregano - Salt and pepper to taste These ingredients blend together to create a fresh and vibrant dish. The penne pasta gives it a nice bite, while the chicken adds protein. The vegetables bring color and crunch, making every bite exciting. You can enhance your salad with these optional add-ins: - Grilled bell peppers for sweetness - Artichoke hearts for a tangy twist - Avocado for creaminess - Roasted garlic for depth of flavor These additions can elevate your salad and make it even more delicious. Feel free to mix and match to suit your taste. When selecting ingredients, aim for the best quality: - Choose fresh, firm tomatoes and cucumbers. Look for vibrant colors. - Opt for organic chicken for better flavor and nutrition. - Use good-quality olive oil. It adds richness to your salad. - Select Kalamata olives that are plump and flavorful. High-quality ingredients make a big difference in taste. Take your time to choose the best, and your Mediterranean chicken pasta salad will shine. {{ingredient_image_1}} Start by bringing a large pot of salted water to a boil. This step is key for flavor. Add 2 cups of penne pasta to the boiling water. Cook it according to package instructions until it is al dente. Once done, drain the pasta and rinse it under cold water. This cools it down and stops the cooking process. Set the pasta aside in a large bowl. Next, take 1 pound of boneless, skinless chicken breast. Season it with salt and pepper. Drizzle a bit of olive oil over the chicken to add flavor. Grill the chicken over medium heat for about 6 to 7 minutes on each side. You want it fully cooked and juicy. After grilling, let the chicken rest for a few minutes. Then, cube it into bite-sized pieces. In a large mixing bowl, add 1 cup of halved cherry tomatoes, 1 cup of diced cucumber, and 1/2 cup of pitted, sliced Kalamata olives. Add 1/4 cup of finely chopped red onion and 1/4 cup of fresh parsley. Mix these fresh veggies together. In a separate bowl, whisk together 1/4 cup of olive oil, 2 tablespoons of lemon juice, 1 teaspoon of dried oregano, and some salt and pepper. This dressing will tie all the flavors together. Now, combine the cooled pasta and cubed chicken into the bowl with the mixed vegetables. Pour the dressing over everything. Toss gently to combine all the flavors. Be careful not to break the pasta or chicken pieces apart too much. Finally, fold in 1/2 cup of crumbled feta cheese. Cover the salad with plastic wrap or a lid. Place it in the refrigerator for at least 30 minutes. This chilling time helps the flavors meld together, making each bite delicious. Serve this fresh and vibrant Mediterranean Chicken Pasta Salad in a large bowl or in individual portions. Enjoy! To grill chicken well, start with good cuts. I recommend boneless, skinless chicken breast. First, season the chicken with salt, pepper, and olive oil. This adds great flavor. Preheat your grill to medium heat. Grill the chicken for 6-7 minutes on each side. You want it cooked through but still juicy. Let the chicken rest for a few minutes before cubing it. This helps keep the juices inside. For the best pasta, use penne. Bring a big pot of water to a boil. Add salt to the water; this enhances the pasta's taste. Cook the penne according to the package instructions until it is al dente. This means it should be firm but not hard. After cooking, drain the pasta and rinse it under cold water. This stops the cooking process and cools it quickly. To boost flavor, think about adding fresh herbs. Parsley and oregano work well in this salad. Fresh lemon juice adds a bright note, making it taste fresh. You can also try a splash of balsamic vinegar for depth. Don’t forget the feta cheese; it adds creaminess and tang. If you like it spicy, add a pinch of red pepper flakes. Mix everything gently so you keep the textures nice. Pro Tips Perfectly Cooked Pasta: Make sure to cook the pasta just until al dente. This ensures it holds its shape and texture when mixed with the other ingredients. Flavorful Chicken: Marinating the chicken in olive oil, lemon juice, and herbs for at least 30 minutes before grilling can enhance its flavor remarkably. Fresh Ingredients: Use fresh vegetables and herbs for the best flavor and nutrition. Ingredients like ripe tomatoes and crisp cucumbers make a significant difference. Chill for Flavor: Allowing the salad to chill in the refrigerator for at least 30 minutes helps the flavors meld together beautifully, making each bite more delicious. {{image_2}} To make a vegetarian version, swap chicken for chickpeas or tofu. Both add protein and texture. You can also use extra veggies like bell peppers or zucchini. These additions keep the salad fresh and bright. Don't forget to add more herbs like basil or mint for a pop of flavor. For an Italian twist, add artichokes and sundried tomatoes. These ingredients offer rich, bold flavors. You can use jarred artichokes for convenience, and chop them into bite-sized pieces. Sundried tomatoes can add sweetness and depth. Just slice them thin and mix them in with the other veggies for a vibrant look. If you need gluten-free options, use gluten-free penne or other pasta. Many brands offer great alternatives made from rice or chickpeas. Cook them just like regular pasta, but check the package for timing. This way, everyone can enjoy the tasty Mediterranean flavors without worry. To keep your Mediterranean chicken pasta salad fresh, place it in an airtight container. This helps to lock in flavor and moisture. Make sure to press out any extra air before sealing. If you don’t have an airtight container, use plastic wrap over a bowl. You can also divide it into smaller portions for easy access. For best taste, enjoy this salad cold. If you prefer it warm, heat only the chicken in a skillet. Avoid microwaving the salad, as it can make the pasta mushy. If you serve it cold, give it a quick toss with a splash of olive oil and lemon juice. This revives the flavors and keeps it bright. Stored properly, your salad can last up to three days in the fridge. However, for the best taste and texture, aim to eat it within two days. After that, the vegetables may lose their crunch and the pasta can become soggy. Always check for any off smells or changes in texture before eating. Yes, you can use other pasta shapes. Bowtie, fusilli, or rotini work well. Choose any pasta you enjoy. Just remember to adjust the cooking time if needed. If you don’t have feta, you can use goat cheese or ricotta. For a dairy-free choice, try nutritional yeast or a vegan cheese. Each will add a unique taste. You can prepare the salad a day in advance. Mix all ingredients, except the dressing and feta. Store in the fridge. Add the dressing and feta just before serving for freshness. Yes, this salad is great for meal prep. It holds up well in the fridge. Just pack it in containers, and it makes a healthy lunch or dinner option. To make it gluten-free, swap penne for gluten-free pasta. For a low-carb option, use zucchini noodles. Adjust ingredients based on allergies or personal preferences for a tailored dish. This blog post covered everything you need for a great Mediterranean Chicken Pasta Salad. We explored essential and optional ingredients, and I shared tips for choosing the best ones. I provided step-by-step cooking instructions and helpful tricks for grilling chicken and cooking pasta perfectly. You learned fun variations and important storage tips to keep your salad fresh. Remember, make it your own by adjusting flavors and ingredients. Enjoy crafting this delicious salad that fits your taste!
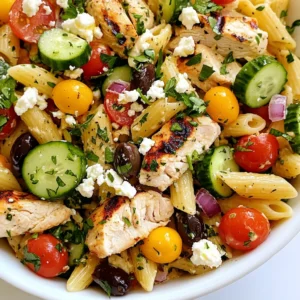
    Mediterranean Chicken Pasta Salad Fresh and Flavorful
  • - 8 oz (225g) penne pasta - 2 tablespoons olive oil - 1 pound (450g) sweet Italian sausage, casings removed - 1 red bell pepper, sliced - 1 yellow bell pepper, sliced - 1 green bell pepper, sliced - 3 cloves garlic, minced - 1 can (14 oz) diced tomatoes, undrained - 1 teaspoon dried oregano - 1 teaspoon chili flakes (optional, for a bit of heat) - Salt and pepper to taste - Fresh basil leaves for garnish - Grated Parmesan cheese (optional, for serving) Penne pasta is great for this dish. Its shape holds the sauce well. Sweet Italian sausage gives a nice flavor. You can choose mild or spicy, depending on your taste. Bell peppers add color and sweetness. They soften nicely when cooked. Garlic adds a nice aroma and depth to your sauce. Diced tomatoes bring moisture and tang. Oregano gives a lovely herb taste. Chili flakes add heat but are not a must. Fresh basil makes the dish pop with freshness. And Parmesan cheese? It’s a delicious finishing touch. You can swap penne for any pasta shape you like. Fusilli or spaghetti work well too. If you want a lighter option, try turkey or chicken sausage. For a vegetarian option, use plant-based sausage or mushrooms. You can mix different bell peppers for more colors. Canned tomatoes can be replaced with fresh diced tomatoes if you prefer. If you don’t have oregano, try Italian seasoning instead. For a creamier dish, add a splash of heavy cream at the end. {{ingredient_image_1}} First, get a large pot. Fill it with water and add salt. Bring the water to a boil. Once it boils, add 8 oz of penne pasta. Cook it according to the package directions until it is al dente. This usually takes about 8-10 minutes. When it's ready, drain the pasta in a colander and set it aside. Next, grab a large skillet and heat 2 tablespoons of olive oil over medium heat. Once the oil warms up, add 1 pound of sweet Italian sausage. Make sure to remove the casings before adding it. Break the sausage up with a wooden spoon. Cook it for about 6-8 minutes until it turns brown and is fully cooked. This step adds great flavor to your dish. Now, add the sliced bell peppers to the skillet. Use 1 red, 1 yellow, and 1 green bell pepper for color and taste. Sauté the peppers for about 5 minutes until they soften. Next, add 3 cloves of minced garlic and cook for another minute. The garlic should smell great! Then, stir in a can of diced tomatoes, including the juices. Add 1 teaspoon of dried oregano and chili flakes if you like heat. Season with salt and pepper to your taste. Let everything simmer for 5-7 minutes. This helps the flavors blend well. Finally, add the cooked penne pasta to the skillet. Toss it all together to coat the pasta with the sauce. Cook for an extra 2-3 minutes to heat everything through. Now, your dish is almost ready to serve! To make great pasta, use a large pot with plenty of water. Add salt to the water. This helps the pasta taste better. Cook the penne until it is al dente, which means it has a slight bite. Drain it well, but keep a little pasta water. It helps to make the sauce creamy. Fresh herbs add a lot of flavor. Use fresh basil as a top garnish. It brings a bright taste to the dish. You can also use dried oregano for warmth. If you like heat, add chili flakes. Just a pinch gives a nice kick. One common mistake is overcooking the pasta. Keep an eye on the cooking time. Another mistake is not seasoning the sauce enough. Taste it as you cook and adjust the salt and pepper. Lastly, don’t skip the fresh basil! It makes the dish pop with flavor. Pro Tips Choose the Right Sausage: For the best flavor, opt for high-quality sweet Italian sausage. Fresh sausage can enhance the dish and provide a richer taste. Perfectly Cooked Pasta: Make sure to cook the penne pasta until al dente. This ensures it holds its shape and texture when mixed with the sauce. Customize Your Peppers: Feel free to mix and match different colored bell peppers or use other vegetables like zucchini or mushrooms for added flavor and nutrition. Garnish for Flavor: Fresh basil not only adds color but also brightens the dish. Finish with a sprinkle of grated Parmesan cheese for extra richness. {{image_2}} You can easily make this dish vegetarian. Swap the sweet Italian sausage for plant-based sausage. Many brands offer tasty options that mimic the flavor and texture. You can also use mushrooms for a hearty base. Sauté them until they are golden before adding the peppers and garlic. This adds umami and depth to your dish. If you enjoy heat, add more chili flakes. Start with half a teaspoon and taste as you go. For a milder dish, skip the chili flakes entirely. You can also add a pinch of smoked paprika for a different flavor without the heat. If you want a kick, try adding fresh jalapeños or cayenne pepper. Adjust according to your taste and enjoy! Feel free to get creative with your ingredients. You can use any pasta shape you like, such as fusilli or rigatoni. Use seasonal vegetables, like zucchini or asparagus, instead of bell peppers. You can also change up the herbs; try thyme or rosemary for a fresh twist. If you want a creamier sauce, add a splash of heavy cream or cream cheese. These swaps can make the dish feel fresh each time you cook it! You can store Sweet Pepper Sausage Pasta in the fridge. Let it cool first. Place it in an airtight container. It will stay fresh for up to three days. Before serving, check for any signs of spoilage. To freeze this pasta, let it cool completely. Transfer it to a freezer-safe bag or container. Make sure to remove as much air as possible. This dish can last in the freezer for up to three months. When you're ready to eat, thaw it overnight in the fridge. Reheat your pasta on the stove for best results. Add a splash of water or broth to keep it moist. Stir it over medium heat until warmed through. You can also use the microwave. If using the microwave, cover it loosely and heat in short bursts. Stir in between to avoid hot spots. Enjoy your flavorful dish again! To make Sweet Pepper Sausage Pasta gluten-free, swap the penne pasta with a gluten-free variety. Many brands offer great pasta made from rice, corn, or lentils. Always check the package to ensure it is truly gluten-free. Follow the cooking time on the package, as it may differ. This simple change allows everyone to enjoy this dish without gluten. Yes, you can use different types of sausage. Try chicken sausage for a leaner option. Turkey sausage is another good choice. If you like spice, chorizo adds heat and flavor. Just remember to adjust the cook time based on the sausage type. Each will give your pasta a unique taste. Several side dishes match well with Sweet Pepper Sausage Pasta. A simple green salad with a light vinaigrette adds freshness. Garlic bread is always a favorite for soaking up sauce. Roasted vegetables like zucchini or asparagus also work nicely. For a light touch, serve some steamed broccoli. These sides balance the meal and enhance your dining experience. This blog post covered key ingredients, clear steps, and helpful tips for your dish. You learned about combining flavors and avoiding common mistakes. I shared fun variations and easy storage methods to keep your meal fresh. Keep these ideas in mind when you cook. Remember, cooking is about creativity and joy. Trust yourself and enjoy every bite. Happy cooking!
    Sweet Pepper Sausage Pasta Flavorful and Easy Dish
  • - Pre-made or homemade pizza crust - 1 cup refried beans - 1 cup cooked ground beef or turkey - 1 cup shredded cheddar cheese - 1/2 cup salsa - 1 small red onion, thinly sliced - 1 medium tomato, diced - 1/2 cup black olives, sliced - 1 avocado, diced - 1/4 cup chopped fresh cilantro - 1 tablespoon sour cream (optional) - 1 tablespoon olive oil - Salt and pepper to taste When I make this Mexican pizza, I love using fresh ingredients. They make a big difference in taste. The first key ingredient is the pizza crust. You can buy it or make it at home. Homemade crust is fun but can take time. Next, I spread refried beans on the crust. Beans add creaminess and flavor. After that, I layer in cooked ground beef or turkey. I season the meat with taco spices. This step adds a rich, savory taste. Cheddar cheese is next. I use shredded cheese for a good melt. Salsa adds a zesty touch. Fresh veggies like red onion, tomato, and black olives bring crunch and color. I also love adding avocado for creaminess and cilantro for freshness. Don't forget the olive oil. It helps the pizza crust crisp up nicely. Lastly, season with salt and pepper. You can also add optional toppings like sour cream and extra salsa. This gives your pizza a fun twist and even more flavor. {{ingredient_image_1}} 1. Preheat your oven. Set it to 425°F (220°C). This step gets the oven hot for a great bake. 2. Prepare your pizza crust. If you use a homemade crust, roll it out. Make it your desired thickness. Place it on a pizza stone or baking sheet. 3. Spread refried beans. Use 1 cup and spread it evenly on the crust. Leave a small border at the edge. 4. Layer ground meat. Take 1 cup of cooked ground beef or turkey. Spread it over the beans evenly. 5. Add salsa and cheese. Pour 1/2 cup of salsa over the meat. Then, sprinkle 1 cup of shredded cheddar cheese on top. 6. Include vegetables and seasonings. Add sliced red onion, diced tomato, and black olives on top. Drizzle with 1 tablespoon of olive oil. Lightly season with salt and pepper. - Bake time and temperature. Place the pizza in the oven. Bake for about 12-15 minutes. - Visual indicators of doneness. Look for bubbly cheese and a golden-brown crust. - Cooling and garnishing tips. Let the pizza cool for a few minutes after baking. - Serving suggestions. Top with diced avocado and fresh cilantro. You can add sour cream if you like. Serve it hot with extra salsa on the side! You can easily make this Mexican pizza your own. For a vegetarian option, skip the meat and add extra beans. You can use black beans or pinto beans for added texture. Also, consider adding more veggies like bell peppers or corn. If you want to adjust the spice, add jalapeños or hot salsa. You can also use mild salsa if you prefer less heat. When choosing a crust, you have two main options: store-bought or homemade. If you use store-bought, look for a high-quality crust. It should be thick enough to hold all your toppings. If you make your own, roll it out to your preferred thickness. A thicker crust gives a nice chew, while a thinner one gets crispy. Pre-baking the crust for a few minutes helps it stay firm with all those toppings. For cheese, shredded cheddar is a great choice. It melts well and has a rich flavor. You can also mix in Monterey Jack or pepper jack for a twist. For toppings, think beyond basics. Consider adding fresh jalapeños for heat, or pineapple for a sweet touch. You can also try different herbs, like oregano or basil, for a fresh finish. Don't forget the avocado and cilantro; they add a burst of freshness! Pro Tips Use Fresh Ingredients: Fresh vegetables and herbs will elevate the flavor of your pizza, making it more vibrant and delicious. Customize Your Toppings: Feel free to swap out ingredients based on your preferences; try adding jalapeños for heat or corn for sweetness. Perfect the Crust: For a crispy crust, pre-bake your pizza crust for a few minutes before adding toppings. Garnish Generously: Don't skimp on the toppings after baking; fresh avocado and cilantro add a refreshing touch just before serving. {{image_2}} You can switch the meat in your pizza. Ground beef or turkey works great. But you can also use chicken or pork. If you want to skip meat, try adding more beans. This keeps it filling and tasty. You can even mix different meats for extra flavor. Choose what you love most! If you want a plant-based pizza, look for a vegan crust. Many stores sell gluten-free crusts too. For cheese, try dairy-free options. There are many brands that melt well. These choices let everyone enjoy the pizza. It’s all about finding what works for you. Spice up your pizza by adding herbs and spices. Cilantro, cumin, or chili powder can add a kick. You can also try extra sauces. Hot sauce or a drizzle of BBQ sauce can change the flavor. Get creative with what you have! Enjoy the fun of mixing flavors and making it your own. To keep your Mexican pizza fresh, you should refrigerate it. Wrap the pizza in plastic wrap or foil. Place it in an airtight container to avoid drying out. This helps keep the flavors intact. Leftovers will last about 3 to 4 days in the fridge. You can reheat your pizza in two ways: the oven or the microwave. The oven gives you a crispy crust. Preheat the oven to 350°F (175°C). Place the pizza on a baking sheet. Heat it for about 10 minutes. The microwave is faster but can make the crust soft. If using the microwave, heat it for 30 seconds at a time. Add a cup of water in the microwave to help keep the crust crispy. To freeze your pizza, first, let it cool completely. Wrap each slice tightly in plastic wrap. Then, place the slices in a freezer bag. Remove as much air as possible. This will keep your pizza fresh for 2 to 3 months in the freezer. To thaw, place the pizza in the fridge overnight. For reheating, use the oven for best results. Heat at 350°F (175°C) for about 15 minutes. This will make your crust nice and crispy again! A Mexican pizza is a fun twist on traditional pizza. It blends classic pizza tastes with Mexican flavors. Picture a crispy crust topped with refried beans, seasoned meat, salsa, and cheese. You get a layered dish full of zest and crunch. Each bite is a mix of savory beans, meat, and fresh veggies. It's a delicious way to enjoy two cuisines in one meal. Yes, you can easily make this recipe vegetarian! Simply swap the meat for plant-based options. Use black beans or lentils for protein. You can also add more veggies, like bell peppers or mushrooms. These choices keep the flavor strong and satisfying. Making pizza crust from scratch is simple! Here’s a basic recipe: - 2 cups all-purpose flour - 1 packet (2 1/4 tsp) active dry yeast - 3/4 cup warm water - 1 tsp salt - 1 tsp sugar - 1 tbsp olive oil Mix the yeast, sugar, and warm water. Let it sit for 5 minutes. Then, add salt and olive oil. Gradually mix in the flour until a dough forms. Knead for 5 minutes, then let it rise for about 30 minutes. Roll it out, and it’s ready for toppings! If you want to spice up your Mexican pizza, try these options: - Add jalapeños, either fresh or pickled. - Sprinkle cayenne pepper or red pepper flakes on top. - Use a spicier salsa with more heat. These additions kick up the flavor and heat without changing the overall dish. Pairing sides can enhance your meal! Here are some great options: - A fresh garden salad with lime vinaigrette. - Chips and guacamole for a crunchy side. - Mexican street corn (elote) for a tasty treat. These sides balance the pizza and add color to your plate. This blog post covered how to make a tasty Mexican pizza. We discussed the ingredients, like refried beans and fresh veggies. You learned step-by-step instructions for preparation and baking. We shared tips on customizing your pizza and ensuring a perfect crust. Don't forget about storage options for leftovers and ways to reheat them. Enjoy creating your delicious masterpiece! With so many flavors and options, each bite can be new and exciting. Happy cooking!
    Mexican Pizza Copycat Flavorful and Easy Recipe
  • To make a warm bowl of ham and bean soup, gather these key items: - 1 cup dried navy beans (or any white beans), rinsed and soaked overnight - 2 cups diced ham (use leftover ham or a ham steak) - 1 medium onion, chopped - 2 cloves garlic, minced - 2 carrots, diced - 2 celery stalks, diced - 4 cups low-sodium chicken broth - 1 bay leaf - 1 teaspoon dried thyme - 1 teaspoon smoked paprika - Salt and pepper to taste - 2 tablespoons olive oil - Fresh parsley for garnish You can enhance the taste with these extras: - A splash of Worcestershire sauce - A pinch of red pepper flakes for heat - Chopped spinach for more greens - A squeeze of lemon juice for brightness When shopping, choose fresh, firm veggies. This makes your soup taste better. Look for ham with rich flavor. Avoid any that seem too dry. For beans, pick those that are whole and not cracked. Always check the date on your broth. Fresh broth makes a big difference! {{ingredient_image_1}} To make ham and bean soup, start with the beans. Soak 1 cup of dried navy beans overnight. This helps them cook faster. Rinse the beans under cool water before using. Next, chop your vegetables. Dice 2 carrots, 2 celery stalks, and 1 medium onion. Mince 2 cloves of garlic. If you have leftover ham, chop 2 cups of it into small pieces. You can also use a ham steak. In a large pot, heat 2 tablespoons of olive oil over medium heat. Add the chopped onion, carrots, and celery. Sauté these for 5-7 minutes until they soften. Stir in the minced garlic and cook for 1 more minute. This brings out the garlic's flavor. Next, add the diced ham to the pot. Mix everything well and let it cook for another 2-3 minutes to warm the ham. Drain the soaked beans and add them to the pot. Pour in 4 cups of low-sodium chicken broth, and add 1 bay leaf, 1 teaspoon of dried thyme, and 1 teaspoon of smoked paprika. Bring the soup to a boil, then lower the heat to a simmer. Cover the pot and cook for 1 to 1.5 hours or until the beans are tender. Stir occasionally and add water if the soup gets too thick. Once the beans are soft, season the soup with salt and pepper to taste. Don’t forget to remove the bay leaf before serving! Ladle the hot soup into bowls. For a fresh touch, sprinkle some chopped fresh parsley on top. This adds color and flavor. Enjoy your hearty ham and bean soup with some crusty bread or a simple salad on the side! To make the best ham and bean soup, start with dried navy beans. Soak them overnight to soften. This step helps them cook faster. When cooking, heat olive oil first. Sauté the onion, carrots, and celery until soft. This mix forms a solid base for flavor. Add garlic next for a nice aroma. Stir in the diced ham to warm it up. Then, combine soaked beans and broth. A bay leaf, thyme, and smoked paprika add depth. One common mistake is not soaking the beans. This can lead to tough beans in your soup. Another mistake is adding salt too early. Wait until the end to season with salt and pepper. Also, don’t skip stirring the soup while it cooks. This prevents sticking and ensures even flavor. Lastly, remember to remove the bay leaf before serving. It’s not tasty and can spoil the soup. You only need a few tools to make this soup. A large pot or Dutch oven is best for cooking. A cutting board and knife help with chopping the veggies. You’ll also need a stirring spoon for mixing. A ladle is handy for serving the soup. If you like, use a measuring cup for precise liquid amounts. A timer can keep track of cooking time, ensuring beans are perfectly tender. Pro Tips Soaking Beans: Soak your beans overnight to reduce cooking time and enhance their digestibility. Adding Flavor: For a deeper flavor, consider adding a piece of smoked ham hock or a splash of Worcestershire sauce while cooking. Adjusting Consistency: If the soup is too thick, add a bit more broth or water to reach your desired consistency. Garnish for Freshness: Always finish with fresh herbs like parsley or thyme to brighten the dish and add freshness before serving. {{image_2}} You can switch up the beans in your soup. Navy beans work well, but you can also try great northern or pinto beans. Each bean adds its own flavor and texture. If you want to mix things up, use black beans for a twist. They give the soup a nice color and taste. While ham is the star, you can use other meats too. Leftover turkey or chicken can add great flavor. If you prefer a meatless option, try adding tofu or tempeh. They soak up the soup's flavors nicely. For a smoky taste, add some diced smoked sausage. Boost your soup with extra veggies and herbs. Spinach or kale adds nutrients and a pop of color. You can also toss in some corn for sweetness. Fresh herbs like thyme or rosemary can enhance the taste. If you like heat, add a pinch of cayenne pepper. This gives the soup a nice kick. Once you finish your soup, let it cool. Then, pour it into a container. Seal it tightly to keep air out. Store it in the fridge. It will stay fresh for about 3 to 4 days. If you want to save some for later, freezing works well. First, let the soup cool completely. Then, use freezer-safe bags or containers. Leave some space at the top, as soup expands when frozen. This soup will last in the freezer for up to 3 months. To reheat, take the soup from the fridge or freezer. If frozen, let it thaw overnight in the fridge. Heat it in a pot on the stove over medium heat. Stir often and check the temperature. You can add water or broth if it’s too thick. For the best taste, enjoy it warm, topped with fresh parsley. Ham and bean soup lasts about three to four days in the fridge. Store it in an airtight container. Make sure it cools down before putting it in the fridge. This keeps the soup fresh and safe to eat. Yes, you can make ham and bean soup in a slow cooker. Start by sautéing the onions, carrots, and celery in a pan. Then, add all the ingredients to the slow cooker. Cook on low for 6-8 hours or on high for 3-4 hours. This method lets the flavors blend well and makes the soup very tasty. Ham and bean soup pairs well with crusty bread, cornbread, or a fresh salad. You can also serve it with a side of pickles for a nice crunch. These sides add texture and flavor to your meal, making it even more enjoyable. In this article, we explored all aspects of making ham and bean soup. We discussed key ingredients, step-by-step cooking instructions, and helpful tips for success. We also looked at various ways to personalize your soup and how to store leftovers properly. Remember, choosing quality ingredients and avoiding common mistakes can elevate your dish. With these insights, you can make a delicious and hearty soup that your family will love. Enjoy your cooking journey!
    Savory Ham and Bean Soup Easy Recipe to Enjoy
  • - 1 lb flank steak, cut into bite-sized pieces - 1 cup long grain rice - 2 cups beef broth - 1 cup diced tomatoes with green chilies - 1 cup shredded queso cheese (like Chihuahua or Monterey Jack) - 1 medium onion, diced - 2 cloves garlic, minced - 1 teaspoon chili powder - 1/2 teaspoon cumin - Salt and pepper to taste Gathering the right ingredients is key to making this Steak Queso Rice Skillet a success. First, I always choose flank steak. It has great flavor and cooks well. Next, I use long grain rice because it absorbs the broth nicely. The beef broth is crucial, as it adds depth to the dish. For a kick, I add diced tomatoes with green chilies. They bring both heat and flavor. Shredded queso cheese melts beautifully on top. I often go for Chihuahua or Monterey Jack for their creamy texture. Don't forget the onion and garlic. They add a savory base that makes every bite tasty. For seasonings, I stick with chili powder and cumin. They enhance the steak's natural flavors. Finally, I always keep salt and pepper close. They help balance the dish perfectly. With these ingredients, you set the stage for a flavorful meal that everyone will love. {{ingredient_image_1}} 1. Heating olive oil and cooking onion Start by heating one tablespoon of olive oil in a large skillet over medium heat. Add one diced medium onion and cook it for about 2-3 minutes. The onion should soften and become fragrant. 2. Adding garlic and steak to the skillet Next, stir in two minced garlic cloves. Cook this mixture for one more minute, stirring to avoid burning. Then, add one pound of bite-sized flank steak pieces. Sprinkle salt, pepper, one teaspoon of chili powder, and half a teaspoon of cumin over the steak. Sear the steak for about 4-5 minutes until it turns a nice brown color. 1. Incorporating rice and toasting Now it’s time to add one cup of long grain rice. Stir the rice into the skillet, making sure it gets coated with all the delicious flavors. Let it toast in the skillet for about a minute to enhance its nutty flavor. 2. Adding tomatoes and beef broth Pour in one cup of diced tomatoes with green chilies, along with two cups of beef broth. Bring this mixture to a gentle simmer. Once you see bubbles, reduce the heat to low, cover the skillet, and let it cook for 20 minutes. The rice will soak up most of the liquid and become tender. 1. Melting cheese and garnishing When the rice is done, remove the skillet from the heat. Sprinkle one cup of shredded queso cheese on top. Cover the skillet and let it sit for about 5 minutes. This will allow the cheese to melt perfectly. 2. Fluffing the rice and serving Finally, fluff the rice with a fork to mix in the melted cheese. Garnish with fresh cilantro. If you like, you can also serve this dish with sour cream and avocado slices for extra creaminess and flavor. Enjoy your delicious Steak Queso Rice Skillet! - How to achieve the best sear on the steak: Start with a hot skillet. Heat the olive oil before adding the steak. This helps create a nice crust. Make sure not to overcrowd the pan. If the pieces touch, they won’t sear well. Sear each side for about 4-5 minutes. You want a rich brown color. - Importance of resting the cheese: After cooking, let the cheese rest for about 5 minutes. This helps it melt evenly. If you cut into it right away, the cheese will slide off. Letting it sit keeps it creamy and gooey. - Best toppings to enhance flavors: Top your skillet with fresh cilantro for a burst of brightness. You can add sour cream for creaminess. Slices of avocado add a rich texture. You can even sprinkle some extra chili powder for heat. - Ideal side dishes to pair with the skillet: Serve with tortilla chips for crunch. A side salad with lime vinaigrette adds freshness. You could also enjoy it with grilled corn for a sweet contrast. Pro Tips Let the Steak Rest: After searing the steak, let it rest for a few minutes before adding it to the skillet. This allows the juices to redistribute, resulting in a more tender and flavorful bite. Customize the Heat: Adjust the level of spice by using mild or hot diced tomatoes with green chilies, or by adding more or less chili powder to suit your taste. Use a Lid: Keeping the skillet covered while the rice cooks helps trap steam, ensuring the rice cooks evenly and absorbs all the delicious flavors. Experiment with Cheese: While queso cheese adds a creamy texture, feel free to mix in other types of cheese like cheddar or pepper jack for additional flavor variations. {{image_2}} You can swap out flank steak for other meats. Chicken and shrimp are great choices. They cook fast and soak up flavors well. Just make sure to adjust the cooking time. For a vegetarian twist, try tofu or beans. Tofu adds protein and takes on the taste of spices. Beans like black or pinto can make this dish hearty and filling. Changing up the cheese can take this dish to new levels. You can try pepper jack for a spicy kick. Or go for a sharp cheddar for a bold flavor. Adding spices like smoked paprika or cayenne can give a nice depth. You can also experiment with different tomatoes. Fire-roasted tomatoes add a sweet, smoky taste. This small change can really brighten the dish. To store leftovers of your steak queso rice skillet, let it cool. Place the dish in an airtight container. This helps keep it fresh and prevents odors from mixing. Store it in the fridge for up to 3 days. To reheat, use the stovetop for best results. Heat a skillet over low heat. Add a splash of beef broth to keep the dish moist. Stir often until heated through. For longer storage, you can freeze the skillet. Wait for it to cool, then transfer it to a freezer-safe container. It can last up to 3 months. To thaw, move it to the fridge overnight before reheating. Can I use brown rice instead of long grain rice? Yes, you can use brown rice. Brown rice adds a nutty taste and is healthier. Just remember it needs more cooking time. Use 2 ½ cups of beef broth and cook for about 30-35 minutes. How do I substitute for queso cheese? If you cannot find queso cheese, use Monterey Jack or cheddar. Both melt well and add great flavor. Cream cheese can also work for a creamy texture. Can I make this dish ahead of time? Yes, you can prepare it ahead. Cook the steak and rice, then cool them down. Store in the fridge for up to three days. Reheat when ready to serve. What to do if the rice is not cooking properly? If the rice is still hard, add a bit more beef broth. Cover the skillet and cook for a few more minutes. Check often to avoid burning. In this blog post, we covered how to make a flavorful skillet dish using flank steak, rice, and rich seasonings. You learned about key ingredients, detailed steps, and helpful tips for the best results. I shared variations for different proteins and flavors to fit your taste. Finally, we looked at storage tips to keep your meal fresh. With this knowledge, you can create a delicious dish your family will love. Enjoy cooking and experimenting with your own flavors!
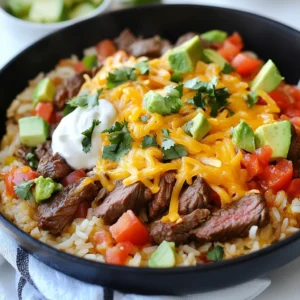
    Steak Queso Rice Skillet Flavorful and Easy Recipe
  • - Fresh spinach: Use 2 cups of chopped spinach. Fresh spinach gives great flavor and color. - Greek yogurt options: Choose 1 cup of plain Greek yogurt. You can pick non-fat or full-fat based on your taste. - Cream cheese selection: You need 1/2 cup of softened cream cheese. This helps make the dip creamy and rich. - Other flavor enhancers: Include 1/4 cup of mayonnaise for smoothness. You will also need a small red onion, 2 cloves of garlic, and 1 tablespoon of fresh lemon juice. Add 1/2 teaspoon of paprika for a hint of spice. Don't forget salt and pepper to taste! If you like, 1/4 cup of crumbled feta cheese can add a nice touch. Lastly, use 1 tablespoon of olive oil to sauté the spinach. These ingredients come together to make a fresh and tasty dip. Each part plays a role in flavor and texture. I love how combining them creates a delightful snack for any gathering! {{ingredient_image_1}} Start by heating the olive oil in a large skillet over medium heat. The oil should shimmer but not smoke. Add the chopped spinach to the skillet. Cook it for about 2 to 3 minutes. Stir the spinach as it cooks. You want it to wilt down nicely. Once wilted, remove it from heat and let it cool slightly in a bowl. In a separate mixing bowl, combine the Greek yogurt, cream cheese, and mayonnaise. Use a spatula or a whisk to mix them well. Aim for a creamy and smooth texture. This mixture is the base of your dip. It adds richness and tang. Now, add the cooled spinach to the dip base. Toss in the finely chopped red onion, minced garlic, fresh lemon juice, paprika, salt, and pepper. Mix everything together until it is well blended. If you like, fold in crumbled feta cheese for an extra flavor burst. The feta adds a nice salty touch. Next, transfer the dip to a serving bowl. Cover the bowl with plastic wrap. Chilling is key for this dip. It lets the flavors meld together. Let it chill in the fridge for at least 30 minutes. This step makes a big difference in taste. When ready to serve, enjoy it cold with your favorite dippers! To modify the seasoning, start with salt and pepper. Taste as you go. Add a pinch of paprika for warmth. If you want a zesty kick, add more lemon juice. You can also try mixing in herbs like dill or parsley. These will elevate the flavor and make it pop. For creaminess, use full-fat Greek yogurt and cream cheese. They create a rich base. Blend them well to avoid lumps. If you want it even creamier, add a bit more cream cheese. You can also mix in a splash of milk if it's too thick. This will make the dip smooth and spreadable. The best dippers for this dip are pita chips, fresh veggies, and crackers. Carrot sticks, cucumber slices, and bell pepper strips add crunch. You can also use tortilla chips for a fun twist. For a heartier option, serve it with toasted bread or mini bagels. Pro Tips Use Fresh Spinach: Fresh spinach not only enhances the flavor but also adds a vibrant color to your dip. Avoid using frozen spinach to keep the texture creamy. Chill Before Serving: Allowing the dip to chill for at least 30 minutes helps the flavors meld together, making each bite more delicious and impactful. Experiment with Cheese: While feta adds a tangy flavor, try mixing in other cheeses like Parmesan or goat cheese for a different taste profile. Perfect Dippers: Pita chips, fresh vegetables, and whole grain crackers are excellent choices for dipping. Consider toasting the pita chips for extra crunch! {{image_2}} You can change the flavor of your Greek yogurt spinach dip by adding different cheeses. For a richer taste, try using shredded mozzarella or sharp cheddar. These cheeses melt well and blend nicely with the yogurt. If you want a tangy kick, adding goat cheese can work wonders. Each cheese brings a unique taste, so feel free to mix and match! If you want to make this dip lighter, you can use low-fat or dairy-free options. Low-fat Greek yogurt is a great choice. It keeps the creaminess but cuts down on fat. For a dairy-free version, swap the cream cheese for cashew cream or tofu. These options still give you a smooth texture without the dairy. Want to spice things up? You can add a bit of heat to your dip. Try including diced jalapeños or a splash of hot sauce. This will add a nice kick! You can also mix in fresh herbs like dill or basil. These herbs brighten up the flavor and make the dip more fragrant. Experiment and find the perfect flavor for your taste! To keep your Greek yogurt spinach dip fresh, use an airtight container. Glass or plastic containers work well. Make sure the lid seals tightly to avoid air getting in. Always store the dip in the refrigerator. Avoid leaving it out for long periods. This keeps it safe to eat and tasty. In the fridge, your dip lasts about 3 to 5 days. If you notice any off smells or changes in texture, it's best to throw it out. Always check before you dig in. Enjoying it fresh makes all the difference in taste. You can freeze your Greek yogurt spinach dip for up to 2 months. To freeze, place the dip in a freezer-safe container. Leave some space at the top, as it may expand. When you're ready to eat it, move it to the fridge to thaw overnight. Stir well before serving. The dip may change a bit in texture but will still taste great! Yes, you can use frozen spinach. Thaw it first and drain any extra water. This keeps the dip from being too watery. Frozen spinach can save time and is still tasty. Just make sure to chop it finely before adding it to the mix. To make this dip vegan, swap Greek yogurt and cream cheese for plant-based options. Use soy yogurt or coconut yogurt instead of Greek yogurt. For cream cheese, look for a vegan brand. You can also skip mayonnaise or use a vegan version. This way, you still get a creamy texture and great taste. For a fun snack, serve this dip with a variety of dippers. Here are some great options: - Pita chips - Fresh veggies like carrot sticks, cucumber slices, and bell pepper strips - Crackers - Breadsticks - Tortilla chips These choices add crunch and flavor, making your snack spread even better! This blog post covered everything about making a tasty Greek yogurt spinach dip. We looked at fresh ingredients like spinach and yogurt. You learned step-by-step how to cook and mix it. Remember to chill your dip for the best taste. I shared tips for flavor and texture. You also explored fun variations and proper storage. Now, it's time to enjoy this dip with your favorite snacks. Make it yours with different flavors! Happy dipping!
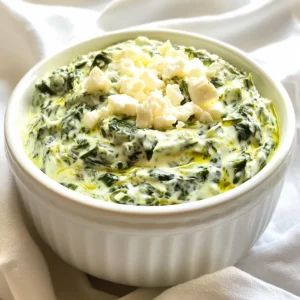
    Greek Yogurt Spinach Dip Refreshing and Flavorful Snack
  • Here are the key ingredients for the Five-Ingredient Creamy Cajun Chicken Pasta. Each one plays a vital role in creating a rich, flavorful dish. - 2 boneless, skinless chicken breasts, diced - 8 ounces fettuccine pasta - 1 cup heavy cream - 2 tablespoons Cajun seasoning - 1 cup cherry tomatoes, halved Each ingredient brings something special to the table. The chicken adds protein and texture. The fettuccine gives a nice base that holds the creamy sauce well. Heavy cream makes everything rich and smooth. Cajun seasoning brings heat and depth. Finally, the cherry tomatoes add a burst of freshness. When you gather these ingredients, think about quality. Fresh chicken and ripe tomatoes make a big difference. Using good Cajun seasoning will elevate the dish. I recommend looking for a blend with a good mix of spices. This way, you can enjoy a truly delicious meal. {{ingredient_image_1}} Boil salted water in a large pot. Add the fettuccine once the water bubbles. Cook the pasta as per the package instructions. This usually takes about 8-10 minutes. Drain the pasta when done, but save a bit of pasta water. This water helps later with the sauce. In a large skillet, pour in a drizzle of olive oil. Heat this over medium. Once hot, add the diced chicken breasts. Sprinkle the Cajun seasoning over the chicken. Cook until it turns golden brown, about 5-7 minutes. Make sure the chicken is fully cooked. You want it juicy and flavorful. Turn the heat down to low. Now, stir in the heavy cream with the chicken. Mix well to combine everything. Let it simmer gently for a few minutes. If the sauce gets too thick, add a few tablespoons of that reserved pasta water. This will help you achieve the right creamy texture. To get the best chicken, start with the right heat. Use medium heat for a nice sear. This helps the chicken stay juicy. Season the chicken well with Cajun spices. Make sure to cover all sides. Cook it until golden brown, about 5-7 minutes. This gives a lovely flavor to the dish. The sauce should be creamy but not too thick. If it is too thick, add a bit of reserved pasta water. Just a few tablespoons will help. Stir it in slowly until you reach the right creaminess. The heavy cream is the key, so don’t rush this step. For a great look, plate the pasta nicely. Use a large bowl or a plate with a bit of depth. Garnish with a sprinkle of Cajun seasoning on top. You can also add some fresh herbs like parsley. This adds color and freshness to your dish. Serve it hot for a perfect meal! Pro Tips Use Fresh Ingredients: Fresh chicken and ripe cherry tomatoes will enhance the flavor of your dish significantly. Adjust the Spice: If you prefer a milder dish, start with less Cajun seasoning and add more to taste as you cook. Reserve Pasta Water: Always reserve a bit of pasta water before draining; it’s great for adjusting the consistency of your sauce. Garnish Wisely: A sprinkle of fresh herbs like parsley or basil can add a burst of color and freshness to your dish before serving. {{image_2}} You can swap out chicken and cream if you like. For a lighter dish, try turkey breast instead of chicken. It cooks similarly and tastes great. If you need a dairy-free option, use coconut cream or almond milk. Both will give a nice creaminess. Adding veggies makes the dish even better. Try bell peppers, spinach, or zucchini. These add color and taste. You can sauté them with the chicken for more flavor. For a fresh touch, add some peas or broccoli at the end. Adjusting the spice level is easy with Cajun seasoning. If you prefer less heat, use just one tablespoon or even half. You can add more if you like it spicy. Taste as you go to find your perfect balance. To keep your creamy Cajun chicken pasta fresh, store it in an airtight container. Place it in the fridge within two hours of cooking. This prevents bacteria growth. It stays good for up to three days. If you packed it well, it should taste great when you eat it later. When it's time to enjoy leftovers, heat the pasta gently. I recommend using a skillet. Add a splash of water or cream to help keep it moist. Stir over low heat until it's warm all through. This helps avoid dry pasta and keeps the sauce creamy. You can freeze this pasta dish for later. First, let it cool completely. Then, place it in a freezer-safe container. It can last for up to three months in the freezer. When you're ready to eat, thaw it in the fridge overnight. Reheat it in a skillet with a bit of cream or water to regain its creamy texture. Yes, you can make this dish ahead of time. Store the pasta and sauce separately. Let the pasta cool before putting it in a container. Keep the sauce in a different container. In the fridge, they will last for up to three days. When you want to eat, reheat the sauce in a pan. Add a splash of cream or pasta water to loosen it. Then, toss in the pasta until warm. You can serve this creamy dish with many sides. A simple side salad adds freshness. Garlic bread is great for soaking up the sauce. You could also try steamed broccoli or green beans for some crunch. For a heartier meal, a side of roasted potatoes works well too. Yes, you can use whole wheat pasta. It will change the flavor and texture a bit. Whole wheat pasta has more fiber and nutrients, making it a healthier choice. Cook it the same way as regular pasta. Just check the package for cooking time, as it may differ. The creamy sauce will still taste great with it! This blog post covered Cajun chicken pasta from start to finish. You learned about the key ingredients and step-by-step instructions. I shared tips for cooking perfect chicken and adjusting sauce consistency. We explored variations for ingredients and spice levels, plus storage and reheating tips. Remember, cooking is fun and allows for creativity. Try different veggies or spice levels to make it your own. Enjoy making this dish your special creation!
    Five-Ingredient Creamy Cajun Chicken Pasta Delight
  • - 2 cups cooked chicken breast, shredded - 1 cup broccoli florets - 1 cup cauliflower rice - 1 cup spinach, chopped - 1 cup cream cheese, softened - 1 cup shredded cheddar cheese - ½ cup sour cream - 1 teaspoon garlic powder - 1 teaspoon onion powder - 1 teaspoon Italian seasoning - Salt and pepper to taste - 1 tablespoon olive oil - ¼ cup green onions, sliced (for garnish) In this low-carb chicken casserole, I focus on fresh and healthy ingredients. The shredded chicken adds protein, while broccoli and spinach bring vitamins and minerals. The cauliflower rice gives a great texture without the carbs. Cream cheese and cheddar cheese make this dish creamy and rich. Sour cream adds a slight tang that balances the flavors. I use garlic powder, onion powder, and Italian seasoning for a punch of taste. For cooking, I recommend olive oil. It adds healthy fat without overpowering the dish. Finally, green onions make a bright garnish, bringing color and a mild onion flavor. This casserole is low in carbs, perfect for those watching their intake. Each serving includes a good amount of protein and healthy fats. - Dairy-free alternatives: Use coconut cream and dairy-free cheese. - Gluten-free considerations: All ingredients here are gluten-free. Feel free to mix and match based on your needs. This recipe is flexible and can cater to various diets. {{ingredient_image_1}} 1. Preheat your oven to 375°F (190°C). This heat helps cook the casserole evenly. 2. In a large skillet, heat 1 tablespoon of olive oil over medium heat. Add 1 cup of broccoli florets and 1 cup of cauliflower rice. Sauté for about 3 minutes. This step will make them slightly tender. 3. Next, add 1 cup of chopped spinach to the skillet. Cook for 2 more minutes until the spinach wilts. Once done, remove it from the heat and set it aside. 1. In a mixing bowl, combine 1 cup of softened cream cheese and ½ cup of sour cream. Add 1 teaspoon of garlic powder, 1 teaspoon of onion powder, and 1 teaspoon of Italian seasoning. Mix until smooth. 2. Now, fold in half of the 1 cup of shredded cheddar cheese. This mixture should be creamy and well blended. 1. In a large casserole dish, combine 2 cups of shredded cooked chicken, sautéed veggies, and the cream cheese mixture. Gently fold everything together until well coated. 2. Spread the mixture evenly in the dish. Top it with the remaining shredded cheddar cheese. 3. Bake in the preheated oven for 25-30 minutes. Look for it to be hot, bubbly, and slightly golden on top. 4. Once baked, take it out and let it cool for a few minutes. Garnish with ¼ cup of sliced green onions before serving. To get the perfect texture for your low carb chicken casserole, make sure your chicken is cooked and shredded well. This helps it blend nicely with the creamy mixture. When you sauté the broccoli and cauliflower rice, do not overcook them. You want them tender but still slightly crisp. This adds a great bite to your dish. For even cooking, spread the mixture evenly in the casserole dish. This ensures that every bite gets the same great flavor. When you bake it, keep an eye on the cheese. You want it melted and slightly golden, but not burnt. This casserole pairs well with low-carb sides. Consider serving it with a fresh salad or steamed green beans. You can also add a side of roasted zucchini for more veggies. These sides balance the meal and keep it healthy. When reheating leftovers, use the oven for the best results. Preheat it to 350°F (175°C). Place the casserole in an oven-safe dish. Cover it with foil to keep it moist. Heat for about 15-20 minutes or until warm. You can also use the microwave, but be careful not to dry it out. Heat in short bursts, stirring in between. Pro Tips Use Rotisserie Chicken: For a quicker prep time, consider using store-bought rotisserie chicken instead of cooking your own. It saves time without sacrificing flavor. Customize Your Veggies: Feel free to mix in or substitute other vegetables such as bell peppers or zucchini to suit your taste preferences or to use up leftovers. Make It Ahead: You can prepare this casserole a day in advance. Just cover it tightly and store it in the fridge. When ready to bake, add a few extra minutes to the cooking time. Garnish for Flavor: Don’t skip the green onion garnish! It adds a fresh flavor and a nice crunch that elevates the dish. {{image_2}} You can easily change up the veggies in this dish. Instead of broccoli, use zucchini or bell peppers. Both add color and crunch. Cauliflower rice can be swapped for shredded cabbage or even diced eggplant. These choices keep your casserole fresh and fun. For cheese, cheddar is great, but you can try mozzarella or pepper jack. Mozzarella gives a nice stretch, while pepper jack adds a kick. Mixing in some cream cheese or goat cheese can also give it a creamy touch. Adding spices makes your casserole exciting. Try cumin or smoked paprika for a warm flavor. Herbs like thyme or basil can add depth. They are easy to find and bring out the best in your dish. Want some heat? Add diced jalapeños or a dash of hot sauce. This will give your casserole a spicy twist. You can also sprinkle red pepper flakes on top right before serving. If you follow a keto diet, stick with the original recipe. The chicken and low-carb veggies fit perfectly. You can reduce the cream cheese for fewer calories, too. For a vegetarian version, skip the chicken. Use chickpeas or lentils for protein instead. Make sure to adjust the cooking time if using raw veggies. This way, you still get a filling and tasty meal. To store leftovers properly, let the casserole cool first. Use a glass or plastic container with a lid. Make sure to cover it tightly. This keeps the dish fresh longer. Refrigerate within two hours of cooking. Your casserole will last about three to four days in the fridge. To freeze the casserole, let it cool completely. Then, cut it into portions. Wrap each portion in plastic wrap. Place the wrapped portions in a freezer-safe bag. Remove as much air as you can. This helps prevent freezer burn. You can freeze it for up to three months. In the fridge, the casserole lasts three to four days. If frozen, it can stay good for about three months. For best taste, eat it within this time. Always check for any signs of spoilage before reheating. Can I make this casserole ahead of time? Yes, you can make this casserole ahead of time. Just prepare it and store it in the fridge. Cover it with plastic wrap or foil. It will stay fresh for up to two days. When ready to bake, let it sit out for 30 minutes. Then bake as directed. Is this recipe suitable for meal prep? Absolutely! This casserole is great for meal prep. You can portion it into containers after baking. It will keep well in the fridge for about four days. Reheat single servings in the microwave for a quick meal. What’s the best way to cook chicken for this dish? The best way to cook chicken is to bake or poach it. Baking gives it a nice flavor and keeps it juicy. Poaching is quick and keeps the chicken tender. Shred the chicken after cooking for easy mixing. Can I use raw chicken instead of cooked? You can use raw chicken, but it will take longer to cook. If you choose this method, cut the chicken into small pieces. Sauté it first in the skillet for about 5-7 minutes. Then add the veggies and follow the rest of the recipe. Is this recipe gluten-free? Yes, this recipe is gluten-free. All the ingredients are safe for a gluten-free diet. Just make sure to check the labels on your cheese and sour cream. How can I adapt it for a low-sodium diet? To adapt this recipe for a low-sodium diet, use low-sodium cheese and sour cream. Also, skip the added salt. Use fresh herbs for flavor instead. This will keep your dish tasty without the extra sodium. This recipe provides a tasty way to enjoy chicken while staying low-carb. I shared easy steps to make a creamy casserole packed with healthy veggies. You can customize the dish with swaps and add-ons. Remember to follow storage tips for leftovers to keep them fresh. This dish fits well into many diets and meal plans. Get creative with flavors and enjoy every bite. Happy cooking!
    Low Carb Chicken Casserole Simple and Delicious Meal
  • - 2 cups elbow macaroni - 1 cup cherry tomatoes, halved - 1 cup black beans, rinsed and drained - 1 cup sweet corn, canned or frozen - 1/2 red onion, finely diced - 1/2 cup cilantro, chopped - 1 avocado, diced - 1 cup shredded cheddar cheese To make a vibrant Mexican macaroni salad, you need fresh and colorful ingredients. Elbow macaroni serves as the base, giving a comforting feel. Cherry tomatoes add sweetness and a burst of color. Black beans bring protein and fiber. Sweet corn adds a touch of sweetness and crunch. Red onion gives a nice bite, while cilantro adds freshness. Avocado provides creaminess and richness. Lastly, shredded cheddar cheese brings a savory flavor. Each ingredient plays a role in making this dish tasty and appealing. - 1/4 cup mayonnaise - 1/4 cup plain Greek yogurt - 2 tablespoons lime juice - 1 teaspoon chili powder - Salt and pepper, to taste The dressing brings everything together. Mayonnaise gives a rich base, while Greek yogurt adds creaminess and tang. Lime juice brightens the flavors and adds zest. Chili powder adds a hint of heat, making it exciting. Don’t forget to season with salt and pepper for balance. - Servings: 6 - Estimated calories per serving: 300 This salad serves about six people. Each serving is around 300 calories. It makes a great side dish for gatherings or a light meal for any day. Enjoy it chilled for a refreshing taste! {{ingredient_image_1}} To start, grab a large pot. Fill it with water and add a pinch of salt. Bring the water to a boil. Add 2 cups of elbow macaroni. Cook it according to the package directions until it is al dente. This usually takes about 7 to 9 minutes. Once done, drain the macaroni in a colander. Rinse it under cold water to stop the cooking process. This also cools it down quickly. Set the macaroni aside while you prepare the dressing. Next, take a small bowl. In this bowl, mix 1/4 cup of mayonnaise and 1/4 cup of Greek yogurt. Add 2 tablespoons of lime juice, 1 teaspoon of chili powder, and a pinch of salt and pepper. Whisk these ingredients together until they are smooth and creamy. This dressing adds a zesty kick to your salad. Now, grab a large mixing bowl. Add the cooled macaroni, 1 cup of halved cherry tomatoes, 1 cup of rinsed black beans, 1 cup of sweet corn, and 1/2 finely diced red onion. Toss in 1/2 cup of chopped cilantro too. Carefully mix these ingredients together. Once they are well combined, pour the dressing over the mixture. Stir gently until everything is nicely coated. To finish, fold in 1 diced avocado and 1 cup of shredded cheddar cheese. Be gentle so you don’t mash the avocado. Cover the bowl with plastic wrap and place it in the fridge. Let the salad chill for at least 30 minutes. This helps the flavors mix well together. When you're ready to serve, give the salad a gentle toss to ensure everything is evenly combined. Enjoy! To make the best macaroni salad, cook the pasta just right. Use a large pot and lots of water. Add a pinch of salt to the water for flavor. Cook the elbow macaroni until it's al dente, which means it’s firm but not hard. This usually takes about 7 to 10 minutes. After cooking, drain the macaroni and rinse it with cold water. This stops the cooking process. It also helps cool it down for the salad. You can change up the ingredients to fit your taste. If you want more protein, add cooked chicken, shrimp, or tofu. For extra crunch, toss in diced bell peppers or cucumbers. If you like spice, try adding jalapeños or a dash of hot sauce. You can also swap black beans for kidney beans or garbanzo beans. Don't be afraid to get creative! The dressing is key to great flavor. If you want a creamier salad, add more mayonnaise or yogurt. For a tangy kick, squeeze in more lime juice. If you like it spicy, increase the chili powder. Taste the dressing before adding it to the salad. Adjust the salt and pepper to your liking. This way, you can make the salad just the way you want! Pro Tips Cook Pasta Al Dente: Make sure to cook the elbow macaroni until just al dente to ensure it maintains a nice texture in the salad. Chill for Best Flavor: Allow the salad to chill for at least 30 minutes before serving to let the flavors meld together beautifully. Fresh Ingredients Matter: Use fresh lime juice and ripe avocados for the best flavor and texture in your salad. Customize Your Add-ins: Feel free to add other ingredients like bell peppers, jalapeños, or even diced chicken for extra flavor and protein. {{image_2}} You can boost your Mexican macaroni salad with protein. Try adding cooked chicken or shrimp for a heartier meal. Tofu is a great choice for a plant-based option. Just make sure to cube it and toss it in with the other ingredients. Each protein brings a new taste and texture to the salad. Want more heat? Add diced jalapeños or a splash of hot sauce to the dressing. This will give the salad a spicy kick. If you prefer it mild, reduce the chili powder. You can always taste and adjust, so find the perfect balance for your palate. To make this salad vegan, swap the mayonnaise and Greek yogurt for a plant-based alternative. Use avocado or a vegan mayo for creaminess. For gluten-free, ensure your elbow macaroni is gluten-free. These changes keep the flavor and texture while meeting dietary needs. To keep your Mexican macaroni salad fresh, follow these steps: - Place the salad in an airtight container. - Make sure to cover it tightly to prevent air exposure. - Store it in the fridge for best results. Refrigerating the salad helps maintain its crispness and flavor. I recommend enjoying it within three days for the best taste. Freezing this salad is possible, but it requires some care: - First, place the salad in a freezer-safe container. - Leave space at the top for expansion. - Avoid freezing the avocado, as it can become mushy. When ready to eat, thaw the salad overnight in the fridge. Then, stir it well and enjoy. The shelf life of your Mexican macaroni salad varies: - In the fridge, it stays fresh for about 3 days. - If frozen, it can last up to 2 months. Always check for off smells or changes in texture before you eat. This salad is best enjoyed fresh but can still be delicious if stored properly. You can use plain Greek yogurt instead of mayonnaise. It adds creaminess and tang. Other options include avocado or hummus for a different flavor. These alternatives make the salad lighter while still being tasty. Yes, you can make this salad ahead of time. It’s best to prepare it a few hours before serving. This allows the flavors to blend well. Just keep it covered in the fridge. If you add avocado, wait until you serve to add it. This keeps it fresh and green. This salad stays fresh in the fridge for about three days. After that, the ingredients may start to lose their crunch. If you notice any strange smells or colors, it’s best to throw it away. Always check for freshness before eating. This article shared a simple and tasty pasta salad recipe. We explored the main ingredients, the easy dressing, and cooking steps. You learned tips for perfecting your pasta and even customizing your salad. We suggested options for adding protein or adjusting spice levels. Lastly, I gave you storage tips to keep your dish fresh. With this knowledge, you can create a delightful salad that suits your taste! Enjoy your cooking adventure!
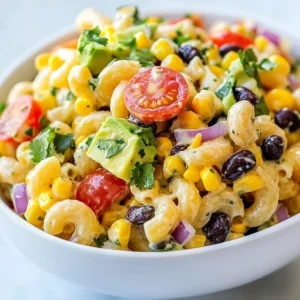
    Mexican Macaroni Salad Tasty and Colorful Dish
  • - 2 cups cooked chicken, shredded - 1 cup black beans, drained and rinsed - 1 cup corn kernels (fresh or frozen) - 1 cup shredded cheese (cheddar or Monterey Jack) - 1 small onion, finely chopped - 2 cloves garlic, minced - 1 teaspoon ground cumin - 1 teaspoon chili powder - 1/2 teaspoon smoked paprika - 1/4 teaspoon salt - 1/4 teaspoon black pepper - 4 large flour tortillas - 2 tablespoons olive oil - 1/4 cup fresh cilantro, chopped (for garnish) - Salsa and sour cream (for serving) Each serving of baked chicken chimichangas contains about: - Calories: 450 - Protein: 30g - Carbohydrates: 40g - Fat: 20g - Fiber: 8g These numbers can vary based on your specific ingredients. To make these chimichangas, you will need: - Large mixing bowl - Baking sheet - Parchment paper - Brush for oil - Knife and cutting board - Measuring cups and spoons With these ingredients and tools, you're set for a tasty cooking adventure! These baked chicken chimichangas are easy to make and full of flavor. Enjoy the process! {{ingredient_image_1}} Start by preheating your oven to 400°F (200°C). This temperature helps the chimichangas get nice and crispy. While the oven heats, line a baking sheet with parchment paper. This makes for easy clean-up and keeps the chimichangas from sticking. In a large mixing bowl, combine 2 cups of shredded chicken, 1 cup of drained black beans, and 1 cup of corn. Add 1 cup of shredded cheese, such as cheddar or Monterey Jack. Next, mix in 1 small finely chopped onion and 2 minced garlic cloves. For flavor, add 1 teaspoon of ground cumin, 1 teaspoon of chili powder, 1/2 teaspoon of smoked paprika, 1/4 teaspoon of salt, and 1/4 teaspoon of black pepper. Stir everything until it is mixed well. Take a large flour tortilla and lay it flat on a clean surface. Place a generous scoop of the chicken filling in the center. Fold the sides of the tortilla in, then roll it from the bottom up. This will help keep the filling inside. Repeat this process with the remaining tortillas and filling. Carefully place the rolled chimichangas seam-side down on the lined baking sheet. Brush the tops with about 2 tablespoons of olive oil. This step is key for getting that golden, crispy texture you want. Bake the chimichangas in the oven for 20-25 minutes. Flip them halfway through so they brown evenly. When they are golden brown, take them out and let them cool for a minute. Add a sprinkle of fresh chopped cilantro on top for flavor. Serve these warm with salsa and sour cream on the side for dipping. Enjoy your tasty creation! To get your chimichangas really crispy, brush them well with olive oil. Use a pastry brush for even coverage. Flip them halfway through baking for even crispness on all sides. You can also bake them on a wire rack set over a baking sheet. This lets air flow around them, making them crispier. If you want to change things up, try using ground turkey or beef instead of chicken. You can also use different beans, like pinto or kidney beans. Adding diced bell peppers or jalapeños gives a nice kick. For cheese, mix in pepper jack for extra flavor. Fresh avocado or guacamole makes a great topping too! One common mistake is overfilling the tortillas. Use just enough filling to wrap snugly. If the tortillas are too dry, they may crack. Warm them slightly in the microwave to make them flexible. Lastly, don’t skip the oil brush! It helps the chimichangas get that golden, crispy finish we all love. Pro Tips Use Leftover Chicken: Utilize leftover rotisserie or grilled chicken to save time and add great flavor to your filling. Customize Your Fillings: Feel free to add other ingredients like diced bell peppers, jalapeños, or different types of beans to suit your taste. Test Crispiness: If you prefer extra crispy chimichangas, broil them for the last 2-3 minutes of baking, watching closely to prevent burning. Make Ahead: Assemble the chimichangas ahead of time, store them in the fridge, and bake them fresh when you're ready to serve. {{image_2}} You can easily make a vegetarian version. Just skip the chicken. Use these ingredients: - 1 cup black beans - 1 cup corn kernels - 1 cup shredded cheese - 1 small onion, finely chopped - 2 cloves garlic, minced - 1 teaspoon ground cumin - 1 teaspoon chili powder - 1/2 teaspoon smoked paprika - 1/4 teaspoon salt - 1/4 teaspoon black pepper Mix these items in a bowl. Follow the same steps for assembly and baking. This option packs a punch with flavor and is meat-free. If you love heat, add spice to your chicken chimichangas. Here’s how to make them spicy: - Add 1-2 diced jalapeños to the filling. - Increase chili powder to 1 1/2 teaspoons. - You can also use pepper jack cheese for extra heat. This variation makes every bite a flavorful thrill. Adjust the spice level to suit your taste. For cheese lovers, a cheese-only version is a great treat. Use these ingredients: - 2 cups shredded cheese (like cheddar or Monterey Jack) - 1 small onion, finely chopped - 2 cloves garlic, minced - 1 teaspoon ground cumin - 1 teaspoon chili powder - 1/4 teaspoon salt - 1/4 teaspoon black pepper Mix the cheese with the onion, garlic, and spices. This option is creamy and cheesy, perfect for a quick meal. To store leftovers, let the chimichangas cool down first. Place them in an airtight container. This keeps them fresh for up to three days in the fridge. If you have extra salsa or sour cream, store those in separate containers. When you're ready to enjoy leftovers, you can reheat them easily. Preheat your oven to 350°F (175°C). Place the chimichangas on a baking sheet and heat for about 15-20 minutes. This method keeps them crispy. You can also use a microwave, but they may lose some crunch. If you want to freeze chimichangas, wrap each one tightly in plastic wrap. Then, place them in a freezer-safe bag. They can stay frozen for up to three months. To cook from frozen, bake them straight from the freezer at 375°F (190°C) for about 30-35 minutes. Enjoy a taste of home-cooked goodness anytime! Yes, you can use different proteins. Ground beef or turkey works well. You can also use shredded pork or even tofu for a vegetarian option. Just cook the protein before adding it to the filling. Baked chicken chimichangas last about three to four days in the fridge. Store them in an airtight container for the best results. If they smell off or look strange, it’s best to toss them. Yes, you can make chimichangas ahead of time. Assemble them and store them in the fridge for up to a day. You can also freeze them before baking. Just make sure to wrap them tightly. You can serve chimichangas with salsa and sour cream for dipping. A simple side salad or some rice also pairs well. Guacamole and tortilla chips make a great addition too. Baked chicken chimichangas are easy to make and taste great. We covered the ingredients, step-by-step cooking, and helpful tips. You can also try variations like vegetarian or spicy options. With the right storage and reheating tips, leftovers stay tasty. Enjoy making this dish for your next meal. You will impress everyone with your skills!
    Baked Chicken Chimichangas Simple and Tasty Meal
  • - 1 lb boneless, skinless chicken thighs, diced - 1 cup uncooked brown rice - 1 ½ cups chicken broth - ½ cup honey - ½ cup BBQ sauce (your choice) - 1 tablespoon olive oil - 1 red bell pepper, diced - 1 cup corn (frozen or fresh) - 1 small red onion, diced - 2 cloves garlic, minced - 1 teaspoon smoked paprika - Salt and pepper to taste - Fresh parsley or green onions for garnish Using boneless, skinless chicken thighs adds great flavor. They stay juicy and tender. Brown rice gives a nutty taste and is healthier than white rice. Feel free to mix in some fresh veggies. Diced red bell pepper adds color and crunch. Use low-sodium chicken broth to control salt levels. If you like a little kick, add some cayenne pepper. The honey and BBQ sauce mix brings sweetness and tang. You can pick any BBQ sauce you enjoy. You can swap chicken thighs for chicken breasts if you prefer. They will cook faster, so watch the time. If you want a veggie dish, use tofu or chickpeas instead of chicken. Try using quinoa instead of brown rice for a different taste. If you have other veggies, toss them in too! Broccoli or zucchini work well. Fresh herbs like cilantro or basil can also add a nice touch. {{ingredient_image_1}} First, grab a large skillet and set it on medium heat. Add one tablespoon of olive oil. Once the oil heats up, introduce one pound of diced, boneless chicken thighs. Season the chicken with salt, pepper, and one teaspoon of smoked paprika. Cook the chicken for about five to seven minutes. Stir it often to get an even brown color. The chicken should be cooked through and no longer pink inside. Next, it's time to add some color and flavor. Toss in one small diced red onion and two cloves of minced garlic. Cook this mixture for another two to three minutes. You want the onion to turn soft and translucent. This step builds a great base for your dish. In a small bowl, mix together half a cup of honey and half a cup of your favorite BBQ sauce. Pour this sweet and tangy mix over the chicken in the skillet. Sauté for an additional two minutes. This will let the flavors meld beautifully. Now, stir in one cup of uncooked brown rice, one cup of corn, and one and a half cups of chicken broth. Make sure the rice is well mixed and fully submerged in the broth. Bring the skillet to a gentle simmer. Reduce the heat to low, cover, and let it cook for about 30 to 35 minutes. The rice will absorb the liquid and become tender. Stir occasionally to avoid sticking. After cooking, remove the skillet from heat and let it sit covered for five minutes. Fluff the rice with a fork before serving. For juicy and tasty chicken, use boneless, skinless chicken thighs. They cook quickly and stay moist. Dice them into small pieces for even cooking. Heat your skillet over medium heat and add olive oil before adding chicken. Season with salt, pepper, and smoked paprika for extra flavor. Cook until browned and cooked through, about 5-7 minutes. Stir often to avoid burning. Use brown rice for a wholesome meal. It takes longer to cook but adds fiber. Combine uncooked rice with chicken broth in the skillet. Bring to a simmer, then lower the heat and cover. Let it cook for 30-35 minutes. Stir occasionally to keep it from sticking. Once done, let it sit covered for 5 minutes before fluffing. To boost flavor, mix honey and BBQ sauce before adding it to the chicken. This adds a sweet and tangy taste. Don't forget to sauté red onion and garlic with the chicken. Their aroma adds depth to the dish. Feel free to add diced red bell peppers and corn for color and nutrients. For a fresh touch, garnish with parsley or green onions. Pro Tips Use High-Quality BBQ Sauce: Choosing a good quality BBQ sauce can significantly enhance the flavor of your dish. Look for sauces that are made with natural ingredients and have a flavor profile you enjoy. Let the Chicken Marinate: For an extra layer of flavor, consider marinating the chicken thighs in the honey and BBQ sauce mixture for 30 minutes before cooking. Check Rice for Doneness: Since different brands of brown rice may require varying cooking times, check the rice a few minutes before the suggested time to ensure it doesn’t overcook. Garnish for Freshness: Always finish your dish with a sprinkle of fresh herbs like parsley or green onions. This not only adds color but also a burst of fresh flavor that complements the richness of the dish. {{image_2}} You can switch the chicken for other proteins. Try turkey, pork, or tofu. Each option brings its unique taste. If you choose turkey, use ground turkey for a quick cook. For pork, diced tenderloin works well. Tofu is great for a plant-based meal. Just make sure to press it first to remove excess water. Want to make it meat-free? Load up on veggies instead! Use a mix of mushrooms, zucchini, and bell peppers. You can also add spinach or kale for extra greens. Just sauté them with the garlic and onion. This adds flavor and makes the dish heartier. Remember, more veggies mean more color and nutrients! Brown rice is tasty, but you can try other grains. Quinoa adds protein and cooks quickly. Jasmine or basmati rice gives a fragrant touch. If you prefer white rice, it will cook faster. Adjust the liquid amounts based on the rice you use. Always check the cooking times for best results. To keep your Honey BBQ Chicken and Rice Skillet fresh, start by letting it cool down. Once cool, transfer it to an airtight container. Store it in the fridge for up to four days. Make sure to label the container with the date. This helps you remember when you made it. When you are ready to enjoy leftovers, you can reheat them easily. Place the rice and chicken mix in a skillet over medium heat. Add a splash of chicken broth or water to keep it moist. Stir often until it's hot all the way through. You can also use the microwave. Place the food in a microwave-safe dish and cover it. Heat for 1-2 minutes, stirring halfway. Check that it’s hot before serving. If you want to save some for later, freezing is a great option. Portion the Honey BBQ Chicken and Rice Skillet into freezer-safe bags or containers. Make sure to remove as much air as possible. Label each bag with the date. It can last up to three months in the freezer. When ready to eat, thaw it in the fridge overnight. Then reheat as instructed above. This way, you can enjoy a quick meal anytime! Yes, you can use brown rice. Brown rice needs more time to cook. It adds a nutty flavor and more fiber. Just adjust the cooking time to about 30-35 minutes. Make sure you have enough broth to cook it fully. The chicken is fully cooked when it reaches 165°F. You can use a meat thermometer to check. The chicken should be golden brown on the outside. Cut into a piece; it should be white, not pink. Use your favorite BBQ sauce for great taste. Sweet sauces like honey BBQ work well. Spicy sauces can add a kick. Look for sauces that are thick and rich for the best flavor. This post covered the key steps for making a great Honey BBQ Chicken meal. We explored the ingredients, cooking methods, and tips for perfect rice. I shared ways to customize your dish, plus how to store and reheat leftovers. Remember, cooking is fun! With some practice, you can master this recipe. Don't hesitate to get creative and try new flavors. Enjoy your cooking journey!
    Honey BBQ Chicken and Rice Skillet Quick Meal Idea
  • Here is what you need to make apple cider pound cake. Gather these items first. - 2 cups all-purpose flour - 1 teaspoon baking powder - 1/2 teaspoon baking soda - 1/2 teaspoon salt - 1 teaspoon ground cinnamon - 1/2 teaspoon ground nutmeg - 1/2 cup unsalted butter, softened - 1 cup granulated sugar - 1/2 cup brown sugar, packed - 3 large eggs - 1 teaspoon vanilla extract - 1 cup apple cider - 1 cup diced apples (peeled) - 1/2 cup chopped walnuts (optional) Each ingredient plays a key role. The all-purpose flour gives the cake its structure. Baking powder and baking soda help it rise. Salt brings out the flavors. Cinnamon and nutmeg add warmth and spice. Butter and sugars create a rich base. Eggs bind everything together. Vanilla adds sweetness. Apple cider gives moisture and flavor. Diced apples bring texture. Walnuts add crunch, but they are optional. With these ingredients ready, you can create a delicious cake that fills your home with a warm, inviting aroma. {{ingredient_image_1}} Start by preheating your oven to 350°F (175°C). This step is key for a perfect bake. Next, take a 9x5-inch loaf pan and grease it well. You can also dust it with flour or line it with parchment paper. This will help the cake release easily after baking. In a mixing bowl, whisk together 2 cups of all-purpose flour, 1 teaspoon of baking powder, 1/2 teaspoon of baking soda, and 1/2 teaspoon of salt. Add 1 teaspoon of ground cinnamon and 1/2 teaspoon of ground nutmeg for flavor. Mix these dry ingredients well and set them aside. This blend gives the cake its structure and flavor. In a large bowl, cream together 1/2 cup of softened unsalted butter, 1 cup of granulated sugar, and 1/2 cup of packed brown sugar. Use an electric mixer for about 3-4 minutes. The mixture should become light and fluffy. This step adds air to your batter, making it nice and soft. Now, add 3 large eggs to the butter mixture, one at a time. Mix well after each addition. Stir in 1 teaspoon of vanilla extract for extra flavor. Gradually add the dry mixture to this bowl. Alternate with 1 cup of apple cider. Start and end with the flour mixture. Mix until just combined. Don’t overmix, as this can make the cake tough. Gently fold in 1 cup of diced apples, making sure to peel them first. If you like, add in 1/2 cup of chopped walnuts. This adds texture and flavor. Make sure the apples and walnuts are evenly distributed throughout the batter. Pour the batter into your prepared loaf pan. Smooth the top with a spatula. Bake for 55-65 minutes. Check for doneness by inserting a toothpick into the center. If it comes out clean, your cake is ready. Once baked, let it cool in the pan for 10-15 minutes. Then transfer it to a wire rack to cool completely. Enjoy the sweet smell as it fills your kitchen! When making apple cider pound cake, avoid these common errors: - Not measuring ingredients properly: Use dry measuring cups for flour and sugar. - Overmixing the batter: Stir just until combined to keep it light. - Skipping the cooling time: Let the cake cool in the pan before moving it. This helps it stay moist. To get a soft and fluffy texture: - Use room temperature ingredients: Soften the butter and eggs before mixing. - Cream butter and sugars well: Mix for about 3-4 minutes until fluffy. - Alternate dry and wet ingredients: Add flour and apple cider in turns. This keeps the batter smooth. Enjoy your cake in a few fun ways: - Dust with powdered sugar: This adds a sweet touch. - Serve with whipped cream: A dollop on top makes it extra special. - Pair with ice cream: A scoop of vanilla ice cream works wonders. These tips ensure your apple cider pound cake is a hit! Pro Tips Use Fresh Apples: For the best flavor, use fresh, seasonal apples. They will add moisture and sweetness to your pound cake. Don’t Overmix: When combining the wet and dry ingredients, mix just until incorporated. Overmixing can lead to a dense cake. Check for Doneness: Ovens can vary, so start checking your cake a few minutes before the suggested baking time to avoid overbaking. Store Properly: To keep your pound cake fresh, store it in an airtight container at room temperature for up to 3 days or refrigerate for longer shelf life. {{image_2}} You can change up the flour in this recipe. Try using whole wheat flour for more fiber. Almond flour adds a nutty taste and is gluten-free. If you want a light texture, use cake flour. Each option gives a new twist to the cake. Feel free to get creative with fruits! You can add pears or cranberries for a new flavor. Dried fruits like raisins or apricots also work well. If you want a crunch, use pecans or hazelnuts instead of walnuts. These changes make your cake unique and fun. A glaze can make your cake shine! Mix powdered sugar with apple cider for a sweet glaze. You can also try a cream cheese frosting for a richer taste. For a festive touch, top your cake with caramel sauce. These options add flavor and make your cake look beautiful. To keep your apple cider pound cake fresh, store it in an airtight container. This helps to lock in moisture and flavor. Place the cake at room temperature if you plan to eat it within a few days. If you want it to last longer, refrigerate it. Wrap the cake tightly in plastic wrap to prevent it from drying out. You can freeze apple cider pound cake if you want to save some for later. First, let the cake cool completely. Then, wrap it tightly in plastic wrap. After that, place it in a freezer bag or container. The cake can stay frozen for up to three months. When you are ready to enjoy it, thaw it in the fridge overnight. To reheat leftover apple cider pound cake, slice a piece and place it on a microwave-safe plate. Heat it in the microwave for about 15 to 20 seconds. This warms the cake nicely without drying it out. You can also reheat slices in the oven. Just wrap them in foil and warm them at 350°F (175°C) for about 10 minutes. Enjoy your slice warm for a cozy treat! Yes, you can use homemade apple cider. It adds a fresh taste to the cake. Just make sure it is unsweetened or adjust the sugar in your recipe. Homemade cider can enhance the flavor in a unique way. The cake stays fresh for about 3 to 5 days at room temperature. Store it in an airtight container to keep it moist. If you want to keep it longer, refrigerate it for up to a week. Yes, you can make it dairy-free by using a dairy-free butter substitute. For gluten-free, replace all-purpose flour with a gluten-free blend. Check that your apple cider is also gluten-free. If you don’t like walnuts, you can use pecans or almonds. You can also skip the nuts altogether for a nut-free option. Chopped dried fruits like cranberries or raisins can add extra flavor too. To check if the cake is done, insert a toothpick into the center. If it comes out clean, the cake is ready. If there’s wet batter on the toothpick, bake for a few more minutes. Keep an eye on it to avoid overbaking. You now know how to make a delicious apple cider pound cake. We covered important ingredients, step-by-step methods, and helpful tips. Variations can make the cake even more fun. Proper storage keeps it fresh longer, and answered common questions help you feel confident baking. Enjoy this treat at your next gathering or just for yourself. Trust your skills, have fun in the kitchen, and share this cake with others for a memorable experience. Happy baking!
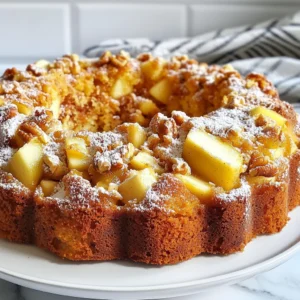
    Apple Cider Pound Cake Simple and Delicious Recipe
  • - 1 pound boneless, skinless chicken breasts, diced - 1 large bell pepper (red or green), sliced - 1 medium onion, sliced - 2 cloves garlic, minced - 1 tablespoon olive oil - 1 teaspoon ground cumin - 1 teaspoon smoked paprika - 1 teaspoon chili powder - 1 teaspoon oregano - Salt and pepper to taste - 1 can (14 oz) diced tomatoes, drained - 1 cup shredded cheddar cheese For this low carb chicken fajita casserole, I start with chicken breasts. They provide protein and are great for any meal. Next, I add bell peppers and onions for a fresh crunch and flavor. I love the colors they bring to the dish. Garlic adds a nice aroma, while olive oil helps everything cook well. The spices are key. Ground cumin gives warmth. Smoked paprika adds depth, and chili powder brings a hint of heat. Oregano rounds out the flavors. Salt and pepper enhance everything, making sure it all pops. Finally, I mix in drained diced tomatoes for juiciness and texture. - 1/2 cup sour cream or Greek yogurt (for topping) - Fresh cilantro, chopped (for garnish) - Shredded cheese variations After baking, I like to top the casserole with cheese. Cheddar melts beautifully and adds richness. You can also try other cheese varieties, like Monterey Jack or pepper jack for a kick. For a creamy touch, I choose sour cream or Greek yogurt. Both add tang and coolness to the dish. Fresh cilantro gives a pop of color and flavor. It brightens the meal and makes it look great on the table. {{ingredient_image_1}} 1. Preheat your oven to 375°F (190°C). This step is key for even baking. 2. Prepare the chicken and vegetables. Start by dicing the chicken breasts into small pieces. Then slice the bell pepper and onion. You want these to be bite-sized for easy eating. 3. Cook the fajita mix in a skillet. Heat one tablespoon of olive oil over medium heat. Add the diced chicken. Cook it until browned, which takes about 5-7 minutes. Once browned, add the sliced bell pepper, onion, and minced garlic. Sauté for 5-6 minutes until the veggies soften. Next, stir in cumin, smoked paprika, chili powder, oregano, salt, and pepper. Cook for another 2 minutes to wake up the spices. Finally, mix in the drained diced tomatoes. 1. Transfer to the baking dish. Grease a 9x13-inch baking dish and pour in the chicken mixture. Spread it out evenly. Top with one cup of shredded cheddar cheese. 2. Baking time and temperature. Place the dish in your preheated oven. Bake for 20-25 minutes until the cheese is melted and bubbly. Keep an eye on it to avoid burning. 3. Final steps before serving. After baking, let the casserole cool for a few minutes. Then, drizzle a dollop of sour cream or Greek yogurt on top. Garnish with fresh cilantro for a pop of color and flavor. This low carb chicken fajita casserole is simple and full of flavor! - Ensuring the chicken is cooked thoroughly: Cook the chicken until it's no longer pink. Use a meat thermometer to check that it reaches 165°F. This keeps your dish safe and tasty. - Best practices for sautéing vegetables: Start with a hot skillet and keep stirring. This helps the veggies cook evenly. Wait until the bell peppers and onions are soft but not mushy. - Spice adjustments for personal taste: Feel free to add more chili powder for heat or more cumin for depth. Trust your taste buds to get it just right. - Pairing with sides: Serve with a fresh salad or cauliflower rice. This keeps the meal light and low-carb while adding crunch. - Garnishing ideas: Top with fresh cilantro and a squeeze of lime. This adds a bright flavor that complements the dish. - Presentation tips for serving: Serve in a colorful dish to make it pop. A sprinkle of cheese on top right before serving makes it look even more tempting. Pro Tips Use Fresh Ingredients: Always opt for fresh bell peppers and onions for the best flavor and texture. Fresh veggies enhance the overall taste of your casserole. Don't Overcook the Chicken: Cook the chicken just until browned to avoid drying it out in the oven. It will continue cooking while baking with the other ingredients. Customize Your Spice Level: Adjust the amount of chili powder and smoked paprika to suit your heat preference. You can also add jalapeños for an extra kick! Make Ahead: This casserole can be prepared ahead of time and stored in the fridge. Just bake it when you're ready to serve for a quick and easy meal! {{image_2}} You can swap regular chicken with ground turkey or beef. They work well in this dish. For a meat-free option, try beans or tofu. These choices still pack a good punch of protein. If you want fewer carbs, use zucchini or cauliflower instead of beans. They add texture and soak up flavors. You can also replace the diced tomatoes with fresh tomatoes or tomato sauce. Each choice brings a unique taste to your casserole. Adding more veggies can boost flavor and nutrition. Try corn, spinach, or mushrooms. These will enhance the taste and make your casserole colorful. You can also mix in some black olives for a salty twist. Cheese is key in this dish. If you want a different taste, swap cheddar for Monterey Jack or pepper jack. These cheeses melt well and add a nice kick. For spice lovers, add jalapeños or crushed red pepper flakes. This will give your casserole a fiery kick. Adjust the spice to your liking for a dish that truly fits your taste. To store leftovers, let the casserole cool completely. Then, place it in an airtight container. You can also cover the dish tightly with plastic wrap. This keeps the flavors fresh. The shelf life in the fridge is about 3 to 4 days. It’s best to eat it within this time for quality and taste. Always check for any signs of spoilage before eating. The best methods for reheating are in the oven or microwave. If using the oven, preheat it to 350°F (175°C). Cover the casserole with foil to keep it moist. Bake for about 15-20 minutes. For the microwave, place a portion in a microwave-safe dish. Heat it on medium power for 2-3 minutes. Stir halfway through to ensure even heating. To avoid drying out, add a splash of water or broth before reheating. This keeps the casserole juicy and tasty. What is the best way to make this casserole low-carb? To keep this casserole low-carb, focus on using fresh vegetables. You can swap out some of the tomatoes for extra bell peppers or zucchini. These veggies add flavor and cut carbs. Use low-carb cheese as well, like mozzarella, for a tasty topping. Can I prep this dish ahead of time? Yes, you can prep this dish ahead! Cook the chicken and veggies, then store them in the fridge. This makes it easy to bake later. You can also assemble the casserole and cover it with foil. Just pop it in the oven when you’re ready to eat. How can I make this recipe dairy-free? To make this casserole dairy-free, skip the cheese and sour cream. Use a dairy-free cheese alternative for topping. For a creamy texture, you can add avocado or use a dairy-free yogurt. This keeps the dish tasty and still low-carb. Carbohydrate count and health benefits This casserole is low in carbs, with about 8 grams per serving. The veggies add fiber and vitamins. This dish helps you feel full without adding extra carbs. It's a smart choice for those on low-carb diets or looking to eat healthier. Macronutrient breakdown Each serving has around 30 grams of protein, 25 grams of fat, and 8 grams of carbs. This balance helps keep your energy steady. The protein from chicken also helps build muscle, while healthy fats support your body’s needs. How to incorporate into weekly meal prep You can include this casserole in your meal prep by making a large batch. Divide it into single servings. This makes lunch or dinner easy all week long. Just heat up a portion when you need a quick meal. Freezing options for long-term storage You can freeze this casserole too! Just make sure it cools down first. Place it in an airtight container. It can last up to three months in the freezer. When you're ready to eat, thaw it overnight in the fridge before reheating. In this blog post, we covered everything for making a delicious chicken fajita casserole. You learned about the main ingredients like chicken, peppers, and spices, along with optional toppings. We walked through preparation and baking steps for perfect results. I shared tips for cooking, serving, and even variations to fit your taste. Finally, we discussed storage and meal prep ideas to keep leftovers fresh. Enjoy your cooking journey and try new flavors. With these insights, you can create a dish that satisfies everyone at the table!
    Low Carb Chicken Fajita Casserole Quick and Easy Meal
  • The key to great Keto Stuffed Bell Peppers lies in the right mix of ingredients. Here’s what you need: - 4 large bell peppers (any color) - 1 pound ground turkey or chicken - 1 cup cauliflower rice (fresh or frozen) - 1 cup shredded cheese (cheddar or mozzarella) - 1 small onion, finely chopped - 2 cloves garlic, minced - 1 teaspoon ground cumin - 1 teaspoon smoked paprika - Salt and pepper, to taste - 1 cup diced tomatoes (canned or fresh) - Fresh cilantro or parsley, for garnish Each ingredient plays an important role. The bell peppers serve as a tasty, low-carb vessel. Ground turkey or chicken provides protein. Cauliflower rice keeps this dish keto-friendly while adding texture. Cheese brings creaminess, while onion and garlic add flavor. Cumin and smoked paprika create warmth and depth. Diced tomatoes add moisture and a hint of acidity. Finally, cilantro or parsley brightens the dish with freshness. When you gather these ingredients, you set yourself up for a delicious and satisfying meal that fits perfectly into your keto lifestyle. Enjoy the process of cooking and the joy of eating! {{ingredient_image_1}} 1. Preheat your oven to 375°F (190°C). This helps cook the peppers evenly. 2. Slice the tops off the bell peppers. Make sure to remove all seeds and membranes. This keeps your filling safe and tasty. 1. In a large skillet, add a splash of olive oil over medium heat. 2. Sauté the chopped onion for about 3-4 minutes. You want it to turn translucent. 3. Add minced garlic to the skillet. Stir for about one minute. This releases a great aroma. 4. Now, add the ground turkey or chicken. Cook until it turns brown. This takes about 5-7 minutes. Break it up with a spatula while cooking. 5. Mix in cauliflower rice, diced tomatoes, ground cumin, smoked paprika, salt, and pepper. Stir well and cook for another 3-4 minutes. This warms everything up and blends the flavors. 6. Remove from heat and stir in half of the shredded cheese. Mix until it melts and combines well. 1. Stuff each bell pepper with the meat and cauliflower mix. Press down gently to make sure it fits well. 2. Top each stuffed pepper with the remaining shredded cheese. 3. Cover the baking dish with foil and bake for 25 minutes. 4. After 25 minutes, remove the foil and bake for an additional 10 minutes. This makes the cheese bubbly and golden. 5. Once done, take them out of the oven. Let them cool for a bit. Garnish with fresh cilantro or parsley before serving. To get the best flavor, mix all the filling ingredients well. It helps to combine the ground turkey or chicken, cauliflower rice, and spices. This ensures every bite packs a punch. When you stuff the peppers, pack the filling tightly. This way, the peppers hold their shape and don’t fall apart. For a creamy and melty topping, I recommend cheddar or mozzarella cheese. Both melt nicely and add rich flavor. If you are lactose intolerant, try vegan cheese or nutritional yeast as alternatives. These options give you a cheesy taste without the dairy. Even cooking is key for great stuffed peppers. Make sure your oven is at 375°F (190°C) before baking. This helps the peppers cook evenly. To check if they are done, poke a pepper with a fork. If it feels soft and tender, they are ready to eat. Enjoy your delicious meal! Pro Tips Choose Colorful Peppers: Using a mix of red, yellow, and green bell peppers not only adds visual appeal but also a variety of flavors to your dish. Pre-cook the Filling: For a more flavorful filling, consider pre-cooking the ground turkey or chicken with spices before mixing it with the other ingredients. Experiment with Cheese: Try different types of cheese like pepper jack or feta for a unique twist on the classic stuffed pepper recipe. Serve with a Sauce: Drizzle some avocado sauce or a dollop of sour cream on top before serving to add creaminess and enhance the flavors. {{image_2}} You can swap ground turkey or chicken for other meats. Beef is a tasty choice. It adds a rich flavor to the dish. You can also try pork or lamb. For a light option, turkey is great. If you want a plant-based choice, use lentils or black beans. These options offer unique flavors and texture. Each meat brings its own taste to the stuffed peppers. If you want to replace cauliflower rice, try using shredded zucchini. It keeps your meal light and fresh. Another great swap is riced broccoli. It adds crunch and nutrients. You can also include other low-carb veggies. Think about spinach, mushrooms, or bell pepper bits. These ingredients add color and flavor while keeping it keto-friendly. To spice things up, try adding diced jalapeños. They bring heat and flavor to your dish. You can also use red pepper flakes for a kick. For added depth, mix in fresh herbs like basil or oregano. Garlic powder and onion powder can also enhance the taste. Don't forget to experiment with spices! Cumin and smoked paprika already make the filling great. Adding more spices can create a unique flavor experience. To store leftover stuffed peppers, first let them cool. Place them in an airtight container. This keeps the peppers fresh and tasty. You can safely eat them within three to four days. If you notice any odd smells or colors, it's best to toss them out. Freezing stuffed peppers is simple. Wrap each pepper in plastic wrap, then place them in a freezer bag. This helps keep out air and prevents freezer burn. You can freeze them for up to three months. When you're ready to eat, thaw them in the fridge overnight. Reheat in the oven at 350°F (175°C) for about 20 minutes. This way, they stay warm and keep their flavor. Making stuffed peppers ahead of time is great for busy nights. You can prepare them and store them in the fridge. They stay good for up to three days. When serving, just heat them in the oven or microwave. Pair them with a fresh salad or some avocado for balance. This makes a healthy and filling meal that is also easy to grab. Yes, stuffed peppers are keto-friendly. They are low in carbs and high in protein. Here’s a quick look at the nutritional breakdown per serving: - Calories: Approximately 350 - Carbohydrates: About 8 grams - Fiber: Roughly 3 grams - Protein: Around 30 grams - Fat: About 20 grams These numbers can vary based on the ingredients you use. For example, swapping meats or cheese may change the fat content. But overall, stuffed peppers fit well into a keto diet. Yes, you can make this recipe vegetarian. Here are some great protein options: - Black beans: A good source of plant-based protein. - Lentils: Packed with fiber and protein, lentils work well. - Tofu: Firm tofu can absorb flavors well and adds protein. - Tempeh: A fermented soy product that’s rich in protein. Mix these with your favorite veggies and spices. You can still enjoy a tasty and filling dish! You can tell when your stuffed peppers are done by checking their color and texture. Look for these cues: - Color: The peppers should be bright and slightly wrinkled. - Texture: They should feel tender when pierced with a fork. - Cheese: The cheese on top should be bubbly and golden. If you see these signs, your stuffed peppers are ready to eat! Pairing your keto stuffed bell peppers with the right sides can make your meal complete. Here are some great options: - Salad: A fresh green salad adds crunch and balance. - Zucchini noodles: They are a nice low-carb alternative to pasta. - Cauliflower mash: Creamy and filling, this adds a great texture. - Riced broccoli: Another veggie option that fits well with keto. Choose any of these to create a well-rounded meal! Stuffed peppers are a tasty and healthy meal choice. This blog post covered the main ingredients, step-by-step instructions, and helpful tips. We explored variations for different diets and storage options for meal prep. Remember, you can tweak the recipe to fit your taste and needs. Whether you like spicy, cheesy, or plant-based options, these stuffed peppers are easy to make and satisfying. Give this recipe a try, and enjoy a nutritious dish that your whole family will love!
    Keto Stuffed Bell Peppers Flavorful and Easy Recipe
  • - 4 chicken thighs, bone-in, skin-on - Salt and pepper to taste - 3 tablespoons unsalted butter - 4 cloves garlic, minced - Zest and juice of 1 large lemon - 1 teaspoon dried thyme - 1 teaspoon dried oregano - Fresh parsley, chopped (for garnish) The first step is choosing the right chicken. I love using bone-in, skin-on thighs. They stay juicy and have great flavor. You will want to season them well with salt and pepper. This makes a big difference in taste. Next, I focus on the flavor. I melt unsalted butter in a skillet. The smell of butter is so inviting. After it melts, I add minced garlic. I cook it just until it becomes fragrant. Then, I mix in lemon zest and juice. This brightens the dish so much! Now, dried herbs play a key role. I use thyme and oregano. They add depth to the flavor. You can also experiment with other herbs if you like. Finally, a sprinkle of fresh parsley adds a pop of color. It makes the dish look beautiful and fresh. These ingredients come together to make a rich, zesty meal that you will love. {{ingredient_image_1}} 1. Preheat your oven to 375°F (190°C). 2. Dry the chicken thighs with a paper towel. This helps the skin get crispy. 3. Season both sides of the chicken generously with salt and pepper. This brings out the flavor. 1. Melt the butter in an oven-safe skillet over medium heat. 2. Add minced garlic to the melted butter. Cook it for about 30 seconds. You want it fragrant, not browned. 3. Stir in lemon zest, juice, thyme, and oregano. Let this cook for one minute. This mix adds a fresh taste. 1. Place the chicken thighs in the skillet, skin side down. 2. Sear the chicken for 5-7 minutes. Look for crispy, golden skin. 3. Flip the chicken over. Spoon some garlic butter on top. 4. Transfer the skillet to the oven. Roast the chicken for 25-30 minutes. Check that it reaches 165°F (75°C) inside. 5. Remove the skillet from the oven. Let the chicken rest for 5 minutes. 6. Garnish with fresh parsley before serving. This adds color and flavor. To get perfect, crispy skin on your chicken thighs, start with drying them well. Use paper towels to pat each thigh dry. This step removes moisture, which helps the skin crisp up when cooked. After drying, season them with salt and pepper. This also helps draw out moisture. Sear the chicken in a hot skillet, skin side down. Cook for about 5-7 minutes. You want the skin to turn golden brown. This method locks in flavor and gives a nice crunch. For extra flavor, consider adding fresh herbs like rosemary or basil. You can also add a pinch of red pepper flakes for a bit of heat. If you like citrus, try using lime or orange juice along with the lemon. Taste the garlic butter sauce as you cook. Adjust the seasoning with more salt or pepper if needed. You want the chicken to burst with flavor, so don’t be shy! One big mistake is overcooking the chicken thighs. This can make them dry. Use a meat thermometer to check the internal temperature. It should be 165°F (75°C). Another common error is not letting the chicken rest after cooking. Resting for 5 minutes allows the juices to redistribute. This makes each bite more juicy and tender. Enjoy the process and watch your chicken shine! Pro Tips Use Fresh Ingredients: Fresh garlic and lemon zest will elevate the flavor of the dish significantly compared to dried or bottled versions. Let it Rest: Allow the chicken to rest for a few minutes after cooking to ensure the juices redistribute, keeping the meat moist and flavorful. Customize Seasoning: Feel free to add your favorite herbs or spices to the garlic butter mixture for a personal touch, such as rosemary or smoked paprika. Check Temperature: Use a meat thermometer to ensure the chicken thighs reach an internal temperature of 165°F (75°C) for safe consumption. {{image_2}} You can change the chicken thighs for chicken breasts. Chicken breasts are leaner and cook faster. They still absorb the lemon and garlic flavors well. If you want a lighter dish, use less butter. You could swap some butter for olive oil. This change keeps the taste while cutting down on fat. Want to spice things up? Add red pepper flakes to the garlic butter mix. This gives your dish a nice kick. You can also play with citrus flavors. Try lime or orange juice instead of lemon. Each fruit offers a unique zest and aroma. Air frying is a quick way to cook this dish. It makes the skin crispy without much oil. For a smoky flavor, grill the chicken instead. Grilling adds a nice char and depth to the dish. Both methods can create a tasty meal. Choose what suits your time and style best! To store leftovers properly, place the chicken in an airtight container. Make sure it cools to room temperature before sealing. This helps keep it fresh. The shelf life in the fridge is about 3 to 4 days. Always check for any off smells or changes in texture before eating. For freezing cooked chicken, wrap the thighs tightly in plastic wrap. Then, place them in a freezer-safe bag. This will protect the chicken from freezer burn. Best practices suggest using the chicken within 2 to 3 months for best flavor. When you thaw, place it in the fridge overnight. This helps maintain the chicken's juicy texture. To reheat without drying it out, the oven is best. Preheat it to 350°F (175°C). Place the chicken in an oven-safe dish and cover it with foil. Bake for about 15-20 minutes until heated through. The microwave is quicker but may dry out the chicken. If you use it, heat in short bursts and check often. You can serve many sides with Lemon Garlic Butter Chicken Thighs. Here are some great options: - Roasted vegetables: Carrots, asparagus, or Brussels sprouts add color and nutrition. - Mashed potatoes: Creamy potatoes soak up the tasty sauce. - Rice: White or brown rice works well to balance the dish. - Quinoa: This grain adds protein and a nice crunch. - Salads: A crisp green salad with a simple vinaigrette complements the rich flavors. Each of these sides creates a full meal that your family will love. Yes, you can use boneless chicken thighs. Here’s what to know: - Cooking time: Boneless thighs cook faster than bone-in. Reduce cooking time by 10 minutes. - Texture: Bone-in thighs have a richer flavor and stay juicier. Boneless can dry out if overcooked. Choose based on your preference and cooking style. To check if your chicken is done, follow these tips: - Internal temperature: Use a meat thermometer. The chicken must reach 165°F (75°C). - Juices: When you cut the chicken, the juices should run clear, not pink. - Texture: Cooked chicken should feel firm but not tough. These methods will help you ensure a safe and delicious meal. This guide covered all the steps to make Lemon Garlic Butter Chicken Thighs. From seasoning to roasting, you learned how to achieve flavorful, crispy chicken. Remember to avoid common mistakes like overcooking and resting your meat. Feel free to customize with your favorite herbs or cooking methods. Store leftovers properly and reheat them right to keep them delicious. Enjoy your tasty meal and share it with others to enhance their cooking skills!
    Lemon Garlic Butter Chicken Thighs Flavorful Delight
  • - 2 cups cooked brown rice - 1 lb boneless chicken breast, diced - 1 can (15 oz) black beans, rinsed and drained - 1 cup corn (fresh or frozen) - 1 red bell pepper, diced - 1 small red onion, finely chopped - 1 avocado, diced - 1 cup cherry tomatoes, halved - 1/2 cup shredded cheese (cheddar or Mexican blend) - 1/4 cup fresh cilantro, chopped - Juice of 1 lime - 2 tablespoons olive oil - 1 tablespoon chili powder - 1 teaspoon cumin - Salt and pepper to taste - Sour cream - Salsa - Jalapeños A serving of this chicken burrito bowl is packed with nutrients. It offers protein from chicken and beans. The brown rice adds fiber to keep you full. Plus, the veggies and avocado provide vitamins and healthy fats. One bowl contains about 500 calories, depending on your toppings. This dish is balanced, tasty, and a great choice for a healthy meal. {{ingredient_image_1}} Start by gathering your diced chicken breast. Place it in a large bowl. Add 2 tablespoons of olive oil. Then, sprinkle in 1 tablespoon of chili powder. Next, add 1 teaspoon of cumin. Don't forget to squeeze in the juice of 1 lime. Season with salt and pepper to taste. Mix everything well to coat the chicken evenly. Let it marinate for 15 minutes. This step adds a lot of flavor. While the chicken marinates, heat a skillet over medium heat. Once hot, add the marinated chicken. Cook it for about 6-8 minutes. Stir often until it turns golden brown and is fully cooked. Check that the inside is no longer pink. Once done, remove the chicken from heat and set it aside. Now, take individual serving bowls. Layer 2 cups of cooked brown rice as the base. On top of the rice, add the cooked chicken. Then, add 1 can of rinsed black beans. Next, include 1 cup of corn and the diced red bell pepper. Toss in the halved cherry tomatoes for color. Don't forget the diced avocado. Lastly, sprinkle 1/2 cup of shredded cheese on top. For a fresh touch, add 1/4 cup of chopped cilantro. Serve with lime juice and optional toppings like sour cream or salsa. Enjoy your delicious burrito bowl! To cook chicken just right, start with fresh, boneless chicken breast. Cut the chicken into small, even pieces. This helps it cook evenly. Use a skillet and heat it over medium heat. Add some olive oil. Once the oil is hot, add the marinated chicken. Cook it for about 6-8 minutes. Stir it often. Look for a golden-brown color and no pink inside. Use a meat thermometer to check. It should read 165°F to be safe. To boost the flavor of your burrito bowl, try these tips: - Marinate the chicken longer, if you can. This adds more taste. - Add fresh herbs like cilantro or parsley before serving. - Squeeze extra lime juice on top for a zesty kick. - Consider adding spices like smoked paprika or garlic powder for depth. - Mix in some diced jalapeños if you like heat. When serving your chicken burrito bowl, think about layering. Start with a base of brown rice. Then, pile on the cooked chicken and beans. Add corn and colorful veggies. Top with diced avocado and cheese. For a fun twist, serve with tortilla chips on the side. You can also offer toppings like sour cream or salsa. These extras let everyone customize their bowl! Pro Tips Marinate for Flavor: Allow the chicken to marinate for at least 30 minutes or even overnight for a deeper flavor profile. Rice Cooking Tip: Use vegetable or chicken broth instead of water when cooking the brown rice to enhance its flavor. Fresh Ingredients: Opt for fresh vegetables when possible, as they provide better texture and flavor compared to frozen ones. Customizable Bowls: Feel free to add other toppings like diced jalapeños, olives, or different types of cheese to personalize your burrito bowl. {{image_2}} You can easily swap the chicken with veggies or tofu. Use two cups of mixed veggies like zucchini and mushrooms instead. This keeps the bowl filling and tasty. Adding black beans gives protein, while quinoa boosts the fiber. Top with avocado and cheese for creaminess. You can change the flavors to suit your taste. For a smoky touch, add smoked paprika or chipotle powder. If you like heat, toss in some jalapeños or hot sauce. For a fresh twist, mix in lime zest or fresh herbs like basil. Feel free to mix and match your ingredients. Instead of brown rice, use quinoa or cauliflower rice for a lighter option. Swap black beans for pinto or chickpeas based on what you have. You can also choose different cheeses like feta or pepper jack for unique flavors. To store leftovers, let the chicken burrito bowl cool down first. Use an airtight container to keep the food fresh. Place the chicken, rice, and toppings in separate containers. This helps maintain their taste and texture. Store them in the fridge for up to three days. If you mix everything, it may not taste as good later. If you want to freeze the burrito bowl, it’s best to separate the ingredients. Cooked chicken and rice freeze well. Place them in freezer-safe bags or containers. Make sure to remove as much air as possible to stop freezer burn. You can store them in the freezer for up to three months. Toppings like avocado and tomatoes do not freeze well, so add them fresh when you serve. To reheat your bowl, take it out of the fridge or freezer. If you froze it, let it thaw in the fridge overnight. For best results, heat the chicken and rice in a skillet over medium heat. Stir often until it warms up. You can also use a microwave, but be careful not to overheat. Add fresh toppings like avocado and cheese just before serving. This keeps everything tasty and fresh. Yes, you can use white rice instead of brown rice. White rice cooks faster and has a softer texture. Just remember to adjust the cooking time for the rice. You want it fluffy, not sticky. Both options taste great with the other ingredients. To spice up your Chicken Burrito Bowl, add more chili powder. You can also use fresh jalapeños or spicy salsa. Another option is to mix in hot sauce. Start with a little, then taste and add more if you want more heat. This way, you control the spice level. Yes, this Chicken Burrito Bowl is perfect for meal prep. You can cook everything in advance and store it in separate containers. Keep the rice, chicken, and toppings separate until you are ready to eat. This helps keep everything fresh and tasty for days. This blog post covered how to make a Chicken Burrito Bowl. We went over the key ingredients, step-by-step cooking, and optional toppings to enhance flavor. I shared tips for perfect chicken and creative variations for different diets. Don't forget about storing leftovers properly. By following these steps, you can enjoy a tasty and healthy meal anytime. Embrace these tips to make your cooking fun and delicious. Enjoy making your own Burrito Bowl today.
    Chicken Burrito Bowl Flavorful and Easy Recipe
  • To make a great chocolate banana bread, gather these key ingredients: - 3 ripe bananas, mashed - 1/2 cup unsweetened cocoa powder - 1/2 cup granulated sugar - 1/4 cup brown sugar, packed - 1/3 cup melted coconut oil - 2 large eggs - 1 teaspoon vanilla extract - 1 teaspoon baking soda - 1/2 teaspoon salt - 1 1/2 cups all-purpose flour - 1/2 cup semi-sweet chocolate chips These ingredients work together to create a moist and rich bread. The ripe bananas add natural sweetness. Cocoa powder brings in the chocolate flavor. Coconut oil keeps the bread tender. You can customize your chocolate banana bread with these mix-ins and toppings: - 1/4 cup chopped walnuts (optional) - 1/4 cup chopped pecans - 1/4 cup dried fruit like raisins or cranberries - A sprinkle of sea salt on top Adding walnuts or pecans gives a nice crunch. Dried fruit can add a sweet twist. A sprinkle of salt can enhance the chocolate flavor. If you need to swap some ingredients, here are some good substitutes: - Coconut oil: Use vegetable oil or melted butter. - Granulated sugar: Brown sugar or coconut sugar can work. - All-purpose flour: Use whole wheat flour or oat flour for a different taste. These substitutes can change the flavor or texture a bit. Always remember to adjust cooking times if needed. {{ingredient_image_1}} First, you must prepare your loaf pan. Preheat your oven to 350°F (175°C). Grease a 9x5-inch loaf pan with a little oil. You can also line it with parchment paper. This will help the bread come out easily after baking. Make sure the pan is ready before you mix your batter. Next, grab a large mixing bowl. Add three ripe bananas that you have mashed. They should be soft and sweet. Then, pour in 1/3 cup of melted coconut oil. This oil will add moisture and a nice flavor. Now, add 1/2 cup of granulated sugar and 1/4 cup of packed brown sugar. Stir these ingredients together until they blend well. Crack in two large eggs and add 1 teaspoon of vanilla extract. Mix everything until smooth and well combined. Now, it’s time to add the dry ingredients. Sprinkle in 1/2 cup of unsweetened cocoa powder. This gives the bread its rich chocolate taste. Then, add 1 teaspoon of baking soda and 1/2 teaspoon of salt. Stir this mixture until you see no more dry bits. Gradually mix in 1 1/2 cups of all-purpose flour. Do not overmix; just until it is combined. Finally, fold in 1/2 cup of semi-sweet chocolate chips and, if you like, 1/4 cup of chopped walnuts. This will add extra flavor and texture. Pour the batter into the loaf pan and smooth the top. Bake for 55-60 minutes. Check with a toothpick; it should come out clean. Let it cool for 10 minutes before moving it to a wire rack. To get the best texture, use ripe bananas. Ripe bananas are soft and sweet. They help the bread stay moist. Mash them well, but not too smooth. A few small lumps add nice texture. Also, don’t overmix the batter. Stir until just combined. Overmixing can make the bread tough. Lastly, let the bread cool in the pan for a bit. This helps it set and gives it the right texture. Store your chocolate banana bread in an airtight container. This keeps it moist and fresh. If you have a lot left, slice it first. Place parchment paper between slices for easy access. You can keep it at room temperature for up to three days. If you want to store it longer, freeze it. Wrap it tightly in plastic wrap and then in foil. It can last up to three months in the freezer. One common mistake is not measuring ingredients correctly. Use a kitchen scale or measuring cups for accuracy. Another mistake is skipping the cooling time. Cutting into the bread too soon can make it fall apart. Also, check your oven temperature. An oven that is too hot can burn the outside while leaving the inside raw. Lastly, don’t forget to check for doneness. Use a toothpick to test if the center is cooked through. Pro Tips Use Overripe Bananas: The riper the bananas, the sweeter and more flavorful your bread will be. Look for bananas with brown spots for the best results. Don’t Overmix the Batter: To keep your bread light and fluffy, mix just until the flour is incorporated. Overmixing can lead to a dense texture. Experiment with Add-Ins: Feel free to customize your bread with other mix-ins like shredded coconut, dried fruit, or different nuts for a unique twist. Check for Doneness: Ovens can vary, so check your bread a few minutes before the end of the baking time. It’s done when a toothpick inserted in the center comes out clean. {{image_2}} You can make a gluten-free version of this bread. Use gluten-free flour instead of all-purpose flour. Look for blends that work well in baking. Make sure to check the ingredients on the package. Some blends contain xanthan gum, which helps with texture. This bread will still taste rich and moist. To make this bread vegan, swap the eggs for flax eggs. Mix one tablespoon of flaxseed meal with three tablespoons of water. Let it sit for five minutes to thicken. Replace coconut oil with applesauce for moisture. Use dairy-free chocolate chips for a fully vegan treat. This will give you a tasty, plant-based dessert. You can add extra flavors to your chocolate banana bread. Try adding spices like cinnamon or nutmeg for warmth. A splash of almond extract can add a lovely twist. You can also mix in different nuts or dried fruits. This will give your bread unique tastes and textures. Each variation can make your bread special and fun! To keep your Chocolate Banana Bread fresh, wrap it tightly in plastic wrap or foil. Place it in an airtight container. This method keeps it moist for up to four days. Store it at room temperature, away from sunlight. If you live in a humid area, refrigerate it to prevent spoilage. To freeze Chocolate Banana Bread, first, let it cool completely. Then, slice the bread for easy serving. Wrap each slice in plastic wrap, then in aluminum foil. Place the wrapped slices in a freezer bag. This way, you can enjoy a slice anytime. It can last in the freezer for about three months. To reheat your Chocolate Banana Bread, remove it from the fridge or freezer. If frozen, let it thaw in the fridge overnight. For the best taste, warm slices in a toaster or oven. Heat at 350°F (175°C) for about 10 minutes. This brings back its soft, moist texture and rich flavor. Enjoy your warm treat! Yes, you can make this bread without eggs. Use mashed bananas or applesauce instead. About 1/4 cup of either works well. This keeps the bread moist. The taste will stay great too. You can also try flaxseed meal. Mix 1 tablespoon of flaxseed with 2.5 tablespoons of water. Let it sit until it thickens. This mix acts like an egg in the recipe. To make the bread less sweet, reduce the sugars. Use only 1/4 cup of granulated sugar. You can skip the brown sugar too. The ripe bananas add natural sweetness. If you want a richer chocolate flavor, add more cocoa powder. This will balance the sweetness and give a deeper taste. If your bread is too dense, it might be overmixed. Mix the batter just until combined. Avoid stirring too much. Check your baking soda too. It should be fresh. Old baking soda won't help the bread rise. Lastly, make sure you measure flour correctly. Too much flour can cause density. Spoon flour into your measuring cup, then level it off. You learned the key ingredients for making chocolate banana bread. I shared tips for mixing, baking, and storing it. You can even try gluten-free or vegan options. Avoid common mistakes to get the best texture. In the end, you can enjoy this bread in many ways. Remember to store and reheat it properly for the best taste. Get creative with flavors, and have fun baking!
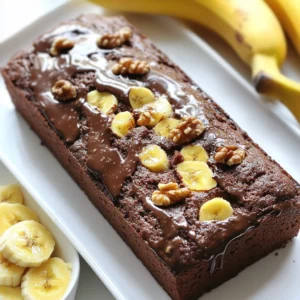
    Chocolate Banana Bread Rich and Moist Delight Recipe

Posts pagination

← Newer 1 … 31 32 33

Footer

↑ back to top

More information

  • Dinner
  • Drinks
  • Appetizers
  • Dessert
  • About
  • Contact Us

    Our Policies

    • Privacy Policy
    • Cookie Policy
    • Copyright Policy
    • Disclaimer
    • GDPR Policy
    • Terms Of Us

    Copyright © 2024 My Saved Recipe