• Recipes
    • Dinner
    • Dessert
    • Appetizers
    • Drinks
  • About
  • Contact Us
  • Privacy Policy
menu icon
go to homepage
  • Recipes
    • Dinner
    • Dessert
    • Appetizers
    • Drinks
  • About
  • Contact Us
  • Privacy Policy

search icon
Homepage link
  • Recipes
    • Dinner
    • Dessert
    • Appetizers
    • Drinks
  • About
  • Contact Us
  • Privacy Policy

×
Savannah

Savannah

Savannah is the creative force behind My Saved Recipe, a space where food becomes both art and adventure. A passionate home chef, she delights in exploring flavors from around the world while honoring timeless classics.

Savannah’s philosophy centers on the power of food to bring people together, spark creativity, and create lasting memories. Through thoughtfully crafted recipes and practical tips, she inspires cooks of all levels to embrace fresh ingredients, experiment with confidence, and find joy in the kitchen.

  • - 1.5 pounds turkey tenderloin - 4 cloves garlic, minced - 1/4 cup grated Parmesan cheese For this dish, I use turkey tenderloin as the main star. It is tender and juicy, perfect for air frying. I love adding garlic for its bold flavor. Minced garlic gives a wonderful aroma and taste. Grated Parmesan cheese adds a rich, savory note that makes each bite special. - 2 tablespoons olive oil - 1 teaspoon dried Italian herbs (oregano, basil, thyme) - 1 teaspoon paprika Olive oil helps the marinade stick to the turkey. It also keeps the meat moist while cooking. I use a mix of dried Italian herbs for a classic flavor. This blend of oregano, basil, and thyme works wonders together. Paprika adds a mild warmth and beautiful color to the dish. - Fresh parsley, chopped (for garnish) - Salt and pepper to taste Fresh parsley not only brightens the dish but also adds a pop of color. A sprinkle of salt and pepper enhances all the flavors. Make sure to taste your marinade and adjust as needed. - Preheat the air fryer: Set your air fryer to 400°F (200°C). This helps cook the turkey evenly and gives it a nice, crispy outside. - Prepare the marinade: In a bowl, mix 2 tablespoons of olive oil, 4 minced garlic cloves, 1/4 cup of grated Parmesan cheese, 1 teaspoon of dried Italian herbs, 1 teaspoon of paprika, and salt and pepper to taste. Stir until you have a thick mixture. This marinade adds great flavor to the turkey. - Coat the turkey tenderloin with the marinade: Take your 1.5 pounds of turkey tenderloin and pat it dry with paper towels. Coat it well with the marinade. Make sure every part is covered. This step is key for flavor. - Place and cook in the air fryer: Put the marinated turkey tenderloin in the air fryer basket. Make sure it has space around it for hot air to circulate. Cook it for 20-25 minutes. Flip it halfway through. The turkey is done when it reaches an internal temperature of 165°F (74°C). It should look golden and crispy. - Resting time and slicing: After cooking, take the turkey out and let it rest for 5 minutes. This helps keep it juicy when you slice it. - Garnishing before serving: Slice the turkey tenderloin into pieces. For a fresh look, sprinkle chopped parsley on top. This adds color and a nice taste. Enjoy your delicious meal! To make sure your turkey tenderloin cooks just right, check the internal temperature. Use a meat thermometer. Aim for 165°F (74°C) for safe and tasty results. For even cooking, pat your turkey dry before marinating. This helps the flavors stick well. Also, remember to turn the tenderloin halfway through cooking. This way, all sides get crispy and golden. Marinating adds great flavor. I like to marinate the turkey for at least 30 minutes. If you have time, let it sit overnight in the fridge. The longer it sits, the more flavor it gains. If you want to switch things up, try different seasonings. Lemon zest can add brightness. You could use smoked paprika for a deeper taste. Fresh herbs like rosemary or thyme can also elevate the dish. Set your air fryer to 400°F (200°C) for the best results. This high heat helps achieve that lovely crispiness. Avoid overcrowding the basket. If you stack the turkey, it won’t cook evenly. Give each piece space to breathe. This ensures a nice, even cook and a crisp finish. {{image_2}} You can swap turkey tenderloin for chicken tenderloin. It cooks fast and stays juicy. Just use the same marinade for great flavor. Pork tenderloin is another tasty choice. It has a rich taste that pairs well with garlic and Parmesan. Adjust the cooking time since pork may need a bit longer. Try adding citrus flavors for a zesty twist. Lemon juice or lime juice can brighten the dish. Just mix it into the marinade. You can also explore different herbs. Basil or rosemary gives a unique taste. Feel free to mix and match to find your favorite. If you want gluten-free options, check your Parmesan cheese. Most brands are gluten-free, but always read the label. For low-carb options, skip the breadcrumbs if you see them in your other recipes. You can enjoy this dish without losing flavor or texture. To store leftovers, let the turkey cool first. Place it in an airtight container. This keeps it fresh in the fridge. You can also wrap the tenderloin in plastic wrap. Make sure it is tight to avoid air. For freezing, cut the tenderloin into smaller pieces. Use a freezer-safe bag or container. Remove as much air as possible before sealing. This helps prevent freezer burn. To reheat in the air fryer, set it to 350°F (175°C). Place the turkey in the basket. Heat for about 5 to 8 minutes. Check the internal temperature. It should reach 165°F (74°C) for safety. You can also reheat in the oven. Set it to 350°F (175°C) and bake for 10 to 15 minutes. For the microwave, use a microwave-safe dish. Heat in 30-second intervals until warm. In the fridge, turkey tenderloin lasts for about 3 to 4 days. Make sure to keep it sealed. For frozen storage, it can last for up to 3 months. Label the container with the date. This helps track how long it has been frozen. Always check for signs of spoilage before eating. What’s the best way to thaw turkey tenderloin? The best way to thaw turkey tenderloin is in the fridge. This keeps it safe and fresh. It will take several hours or overnight. If you need it faster, you can use cold water. Just place it in a sealed bag and submerge it in cold water. Change the water every 30 minutes until thawed. Can I use fresh garlic instead of minced? Yes, you can use fresh garlic instead of minced. Just crush the cloves with a knife or garlic press. Fresh garlic gives a strong flavor and aroma. You may need to adjust the amount to your taste. How long should I cook turkey tenderloin in the air fryer? Cook the turkey tenderloin in the air fryer for 20 to 25 minutes. Make sure to flip it halfway through. This helps it cook evenly and get crispy on all sides. What should the internal temperature be for safe consumption? The internal temperature should reach 165°F (74°C). This ensures the turkey is safe to eat. Use a meat thermometer to check the temperature in the thickest part. What sides pair well with turkey tenderloin? Great sides to pair with turkey tenderloin include roasted vegetables, mashed potatoes, or a fresh salad. These add flavor and color to your plate. How can I make this dish more visually appealing? To make this dish more appealing, add chopped fresh parsley on top. This gives a nice green color. You can also serve it on a colorful plate or add lemon wedges for brightness. This blog post guides you on making a tasty air fryer turkey tenderloin. You learned about the key ingredients, like turkey, garlic, and Parmesan cheese. Our step-by-step instructions help you prep, cook, and garnish your meal perfectly. I shared tips for even cooking and how to adapt the recipe. With proper storage methods, leftovers can last longer. Now, you have all the tools to create a delicious dish that impresses. Enjoy cooking and experimenting with new flavors!
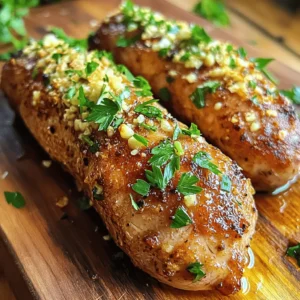
    Air Fryer Garlic Parmesan Turkey Tenderloin Delight
  • - 200g halloumi cheese, sliced - 1 medium zucchini, sliced into half-moons - 1 red bell pepper, diced - 1 carrot, julienned - 1 cup cherry tomatoes, halved - 1 cup cooked quinoa - 1 avocado, sliced (for topping) - Greek yogurt (for drizzling) - 1 cup fresh parsley, chopped Za’atar is a Middle Eastern spice blend. It usually includes thyme, oregano, sesame seeds, and sumac. This mix brings a tangy and herbal flavor to your dish. You can find za’atar at most grocery stores or spice shops. You can also make it at home. Just mix dried thyme, oregano, sesame seeds, and a pinch of sumac. For this recipe, you will need: - 3 tablespoons olive oil, divided - 1 tablespoon lemon juice - Salt and pepper to taste Using fresh ingredients makes a big difference. The olive oil adds richness, while lemon juice brightens the dish. Adjust salt and pepper to your taste. These simple but key elements enhance the flavors of the veggies and halloumi. First, preheat your oven to 400°F (200°C). This temperature will make your veggies nice and tender. Line a baking sheet with parchment paper. This keeps food from sticking and makes clean-up easy. Next, grab a bowl and add your sliced zucchini, diced red bell pepper, and julienned carrot. Pour in 2 tablespoons of olive oil. Sprinkle on 2 tablespoons of za’atar, and add salt and pepper. Toss everything well, so the veggies are fully coated. Spread the seasoned vegetables on the baking sheet in one layer. Roast them in the oven for about 20 minutes. You want them to be tender and slightly caramelized. Look for a golden color and a sweet smell. These signs mean they are done. While the veggies roast, heat a non-stick skillet over medium heat. Add 1 tablespoon of olive oil once the skillet is hot. Place the halloumi slices in the skillet. Cook them for 2-3 minutes on each side. You want them golden brown and crispy. A good crust makes all the difference! Now you can mix everything together for a delicious meal. Enjoy your Za’atar Veggie & Halloumi Bowls! To make your bowls look stunning, start with a deep plate. Layer the quinoa and veggies first, then place the crispy halloumi on top. Add sliced avocado for color and creaminess. A drizzle of Greek yogurt adds a nice touch. Finish with a sprinkle of za’atar for a pop of flavor and visual appeal. If you want to swap halloumi, try feta cheese or a vegan cheese. Both add great taste. For veggies, feel free to mix things up. Use eggplant, spinach, or even sweet potatoes. The goal is to keep it colorful and fun. Adjusting seasoning is key. Taste your dish and add more salt, pepper, or za’atar if needed. For extra depth, drizzle a bit more lemon juice or a nice sauce. A tahini or yogurt sauce can balance the flavors well, giving each bite a creamy finish. {{image_2}} You can swap quinoa for other grains. Bulgur is quick to cook and has a nice chew. Farro offers a nutty taste and adds great texture. Each grain brings unique nutrients to your bowl. For example, farro is higher in fiber. Bulgur is great for quick meals. Try them for a new twist! If you want a dairy-free option, try using vegan cheese. Brands like Daiya or Violife melt well and taste great. You can also add plant-based proteins like chickpeas or black beans. They boost protein and keep the meal hearty. Tofu is another great choice. It soaks up flavors well and adds texture. This recipe is flexible with the seasons. In summer, add fresh corn or bell peppers. In fall, try roasted squash or sweet potatoes. You can change the za’atar mix too. In winter, use hearty greens like kale. Each season brings new flavors and colors. Explore what’s fresh in your market! After making Za’atar Veggie & Halloumi Bowls, store leftovers in an airtight container. This keeps them fresh and tasty. You can refrigerate prepared bowls for up to three days. If you have the components stored separately, they may last longer. You can freeze the roasted veggies and cooked quinoa. Just let them cool first. Place them in freezer bags or containers. Press out the air before sealing. For halloumi, I recommend cooking it fresh. Thaw frozen veggies and quinoa in the fridge overnight. Reheat them in a skillet or microwave until warm. Each ingredient has its own shelf life. Cooked quinoa lasts about a week in the fridge. Roasted veggies stay fresh for three to four days. Halloumi cheese can last up to three weeks unopened. Once opened, use it within a week. Store avocado slices in lemon juice to prevent browning. Yes, you can use different cheeses. Feta is a great choice. It adds a nice tang. Goat cheese also works well. It melts nicely and has a creamy texture. For a firmer option, try paneer. Each cheese brings its own taste and texture. To make this dish gluten-free, focus on your grain. Quinoa is naturally gluten-free and works perfectly. Always check labels on any packaged ingredients. For added safety, use gluten-free spices. Most za’atar blends are gluten-free, but it's best to confirm. For a balanced meal, serve these bowls with fresh sides. A simple green salad pairs well. You could also try roasted sweet potatoes. They add sweetness and fiber. For crunch, serve pita chips or crispy chickpeas. These options enhance the meal without overpowering it. In this blog post, we explored the delicious Za’atar Veggie & Halloumi Bowls. You learned about key ingredients like halloumi, fresh veggies, and the za’atar spice mix. We covered step-by-step instructions, tips for presentation, customization options, and variations for different diets. Lastly, we discussed storage tips and answered common FAQs. Now, you’re ready to create a tasty meal that everyone will enjoy. With a few simple changes, you can make it yours. Have fun cooking!
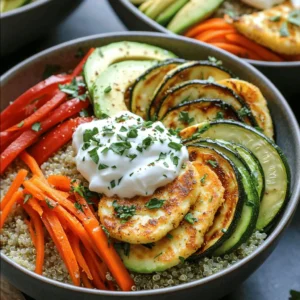
    Za’atar Veggie & Halloumi Bowls Flavorful Healthy Meal
  • - 1 lb (450g) chicken breast, cut into bite-sized pieces - 2 cups fresh basil leaves - ½ cup roasted sunflower seeds - ½ cup grated Parmesan cheese - 1 teaspoon red pepper flakes - ¼ cup extra virgin olive oil - 2 cloves garlic, minced - Juice of 1 lemon - Salt and pepper to taste The main ingredients in this dish are simple yet full of flavor. The chicken breast provides a great source of protein. Fresh basil leaves add a sweet and aromatic touch. Roasted sunflower seeds give a nice crunch and nutty taste, making them perfect for pesto. If you want to add more flavor, you can include Parmesan cheese. It adds creaminess and a savory kick. For those who like some heat, red pepper flakes can spice things up. You will also need olive oil, garlic, lemon juice, salt, and pepper. Olive oil helps in cooking the chicken. Garlic brings depth to the pesto, and lemon juice adds brightness. Salt and pepper are essential for flavoring the dish perfectly. When you gather these ingredients, you will set yourself up for a tasty meal. First, gather your ingredients for the pesto. You will need fresh basil leaves, roasted sunflower seeds, minced garlic, and olive oil. - In a food processor, combine: - 2 cups fresh basil leaves - ½ cup roasted sunflower seeds - 2 cloves minced garlic - ¼ cup extra virgin olive oil - Juice of 1 lemon - Salt and pepper to taste Blend these ingredients until they form a smooth paste. Taste it and adjust the seasoning if needed. You want the flavors to pop! Next, heat a drizzle of olive oil in a large skillet over medium heat. - Add your chicken breast pieces, cut into bite-sized chunks: - 1 lb (450g) chicken breast Season the chicken with salt, pepper, and optional red pepper flakes for a little heat. Cook the chicken for about 5 to 7 minutes. Stir it often until it turns golden brown and is fully cooked. Once the chicken is done, it’s time to add some color and nutrition. - Toss in: - 2 cups halved cherry tomatoes - 1 cup fresh spinach Cook everything together for about 3 to 4 minutes. You want the cherry tomatoes to soften and the spinach to wilt nicely. Now, remove the skillet from the heat and mix in your sunflower pesto. Stir until all the chicken and veggies are coated in that vibrant, green goodness. If the pesto feels thick, add a splash of water to loosen it up. This dish is now ready to serve and enjoy! - Selecting the best basil: Choose fresh, vibrant basil leaves. Look for bright green color and no dark spots. Sweet basil works great for a rich taste. You can even mix in some other herbs like parsley for a twist. - Balancing flavors with lemon and salt: The lemon juice adds a bright kick to your pesto. Start with half a lemon and taste it. If it needs more zing, add a bit more. Salt enhances all the flavors, so sprinkle a little in, taste, and adjust. - Tips for accurate cooking time: Cooking the chicken for 5-7 minutes should get it just right. Cut the chicken into small, even pieces to ensure uniform cooking. Always check that it’s no longer pink inside. - Preventing dryness: Use medium heat to avoid overcooking. If you notice the chicken sticking to the pan, that’s a sign it might be getting dry. Stir often and remove it from heat as soon as it’s cooked. - Garnishing ideas: For a lovely touch, sprinkle extra sunflower seeds on top. Fresh basil leaves also make a nice garnish. A drizzle of olive oil can add shine and flavor. - Pairing with sides: This dish pairs well with a side of crusty bread or a light salad. You could also serve it over whole grain pasta or quinoa for a hearty meal. This adds texture and makes it filling. {{image_2}} You can change the nuts or seeds in the pesto. For instance, try using walnuts or pumpkin seeds. Each nut gives a unique taste. You can also switch the fresh basil for other herbs like cilantro or parsley. This keeps the dish fresh and fun. When it comes to veggies, you have options too. Zucchini, bell peppers, or even asparagus can work. They add color and nutrition. Just chop them into bite-sized pieces to mix well. If you prefer baking, that works too! Preheat your oven to 400°F (200°C). Spread the chicken and veggies on a baking sheet. Drizzle with olive oil and season. Bake for about 20-25 minutes. This method lets the chicken cook evenly and stay juicy. Grilling chicken is another tasty choice. Marinate the chicken in the sunflower pesto for added flavor. Grill over medium heat for about 6-8 minutes per side. This gives you a smoky taste that pairs well with the pesto. For a vegan or vegetarian meal, replace the chicken with chickpeas or tofu. They soak up the sunflower pesto nicely. You can also skip the Parmesan cheese or use a plant-based version. If you need a gluten-free dish, ensure all your ingredients are certified gluten-free. Use gluten-free pasta as a base if you want a heartier meal. This way, everyone can enjoy this delicious dish! To keep your sunflower pesto chicken fresh, store it in the fridge. Use an airtight container to prevent air from spoiling the food. Make sure to cool the dish to room temperature before sealing. This helps keep it tasty for a longer time. If you want to save leftovers for later, freezing is a great option. Portion the chicken skillet into smaller, airtight containers. This makes it easy to thaw just what you need. When you are ready to eat, take it out of the freezer. Let it thaw in the fridge overnight. To reheat, warm it in a skillet over low heat until hot. You can also use the microwave, but stir it well for even heating. The sunflower pesto chicken stays fresh in the fridge for about three days. If frozen, it can last for up to three months. Always check for signs of spoilage. If it smells off or looks strange, it's best to toss it. Safe storage ensures you enjoy this dish at its best flavor. Cooking the chicken takes about 5 to 7 minutes. Heat olive oil in the skillet over medium heat. Add the chicken pieces and season them with salt and pepper. Stir the chicken often. You want it to be browned and fully cooked. Check the chicken's color; it should be white and not pink inside. Yes, you can make the pesto a day or two in advance. Store it in an airtight container in the fridge. To keep it fresh, add a thin layer of olive oil on top. This helps prevent browning. When you're ready to use it, just stir it well. This recipe is great for meal prep! You can cook a big batch and store it. Divide the chicken skillet into portions. Use airtight containers to keep it fresh in the fridge. Simply reheat it when you're ready to eat. It tastes just as good the next day! This blog post guides you in making Sunflower Pesto Chicken Skillet, packed with flavor and nutrients. We discussed key ingredients, from chicken breast to basil and sunflower seeds. I shared step-by-step instructions for making pesto and cooking chicken perfectly. You learned tips for variations, storage, and meal prep. Incorporating these ideas can elevate your cooking. Experiment with flavor swaps and cooking methods to make this dish your own. Enjoy your time in the kitchen, and let your creativity shine!
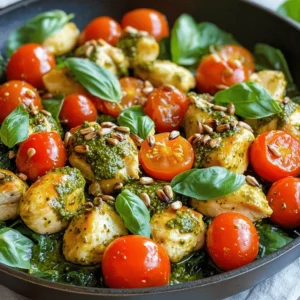
    Sunflower Pesto Chicken Skillet Flavorful Dinner Idea
  • For this tasty dish, you will need: - 1 pound large shrimp, peeled and deveined - 1 cup cooked quinoa - 1 cup cherry tomatoes, halved - 1 cup corn kernels (fresh or frozen) - 1 ripe avocado, sliced - Fresh cilantro, for garnish - Additional lime wedges, for serving These ingredients create a fresh and colorful bowl. The shrimp brings protein, while quinoa adds a nutty flavor. Tomatoes and corn offer sweetness, and avocado adds creaminess. The key flavors come from these seasonings: - 2 tablespoons olive oil - Zest and juice of 2 limes - 2 teaspoons chili powder - 1 teaspoon garlic powder - 1/2 teaspoon cumin - Salt and pepper to taste These seasonings make the shrimp bold and zesty. Lime juice and zest give a bright taste. Chili powder adds heat, while garlic powder and cumin round out the flavor. To enhance your bowls, consider these sides: - Extra lime wedges for squeezing - A dollop of sour cream or yogurt - Crumbled feta or cotija cheese These additions add creaminess or tanginess. The lime wedges boost the flavor and freshness of each bite. Enjoy mixing and matching to suit your taste! Start by gathering your ingredients. In a bowl, mix together the olive oil, lime juice, and lime zest. Add the chili powder, garlic powder, cumin, salt, and pepper. Whisk until the mix is smooth and well-blended. Once combined, add the shrimp. Toss them gently to coat evenly with the marinade. Let them sit for at least 15 minutes. If you want a stronger flavor, marinate them for up to 30 minutes. Now, heat your grill or grill pan to medium-high. If using a grill pan, spray it lightly with non-stick spray. When hot, lay the marinated shrimp on the grill. Cook for 2-3 minutes on each side. The shrimp will turn pink and opaque when done. Remove them from the heat once cooked. This step is crucial for keeping the shrimp tender and juicy. Take serving bowls and layer the cooked quinoa as the base. Next, place the grilled shrimp on top. Add a handful of halved cherry tomatoes and some corn. Finish the bowls with sliced avocado. For a fresh touch, sprinkle fresh cilantro on top. Serve with extra lime wedges for that zesty kick. Enjoy your vibrant and tasty Chili Lime Grilled Shrimp Bowls! To make your Chili Lime Grilled Shrimp Bowls even better, consider adding herbs. Fresh basil or mint can bring a new taste. You can also try different spices. Smoked paprika adds a nice depth. For a kick, add a pinch of cayenne pepper. If you want a sweeter touch, try adding a bit of honey to the marinade. This will balance the heat from the chili powder. Experiment with these options to find what you love best! If you have leftover shrimp, keep it safe. Store it in an airtight container in the fridge. It will last for up to two days. For toppings like avocado and tomatoes, use them fresh. They taste best when you eat them right away. If you want to save quinoa, it can go in the fridge too. It will stay good for about five days. Just make sure to keep everything separate to maintain freshness. Grilling shrimp is quick and easy. Make sure your grill is hot before cooking. This helps to sear the shrimp and lock in the juices. If you don’t have a grill, you can use a skillet. Just heat some olive oil in the pan. Cook the shrimp over medium-high heat for the same 2-3 minutes on each side. They should turn pink and opaque. Keep an eye on them, as overcooking can make shrimp tough. Always aim for that juicy, tender bite! {{image_2}} If shrimp isn’t your thing, don’t worry! You can easily swap it out. Chicken breast works great. Just cut it into bite-sized pieces. You can also use firm tofu for a plant-based option. Make sure to marinate these proteins the same way as shrimp for the best flavor. While quinoa is a nutritious base, other grains can work well too. Brown rice is a fantastic choice. It has a nice chew and adds fiber. You could also use farro or barley for a heartier bowl. Just cook them according to package directions before adding to your meal. Using seasonal ingredients makes your dish taste even better. In summer, swap cherry tomatoes for diced peaches or mango. Their sweetness pairs well with the chili lime flavor. In the fall, consider adding roasted butternut squash instead of corn. It adds a lovely creaminess and warmth to your bowl. Always check what's fresh at your local market! Store leftover shrimp in an airtight container. Keep it in the fridge for up to three days. Make sure the shrimp is cooled before sealing the container. This helps keep it fresh and safe to eat later. You can freeze cooked shrimp. Place it in a freezer-safe bag or container. Remove as much air as possible. Shrimp can last in the freezer for about three months. Quinoa, corn, and tomatoes can also be frozen. Just cook and cool them first. To reheat shrimp, use a skillet over medium heat. This helps keep the shrimp juicy. Add a dash of lime juice for extra flavor. You can also microwave shrimp for quick warming. Just heat in short bursts to avoid overcooking. Enjoy your meal even after storing! You should marinate shrimp for at least 15 minutes. This time allows the shrimp to soak in the zesty flavors. If you want a stronger taste, marinate for up to 30 minutes. Avoid longer marination, as it can make the shrimp mushy. Yes, you can use frozen shrimp. Just make sure to thaw them first. Place them in the fridge overnight or run cold water over them. Once thawed, peel and devein if needed. This way, you still get that fresh taste. You can serve several tasty sides with these bowls. Here are some great options: - A fresh green salad for a crunchy contrast. - Cilantro lime rice for added flavor. - Grilled vegetables for a colorful touch. - Black beans for extra protein and fiber. These sides will make your meal even more delicious and filling. Chili Lime Grilled Shrimp Bowls are easy and fun to make. We covered key ingredients, seasonings, and how to grill shrimp right. Remember, flavor comes from a good marinade and fresh sides. You can even swap shrimp with other proteins or grains to mix it up. Make sure to store leftovers properly for later enjoyment. With these tips, you can impress anyone at your table. Enjoy creating your bowls!
    Chili Lime Grilled Shrimp Bowls Flavorful Meal Idea
  • - 4 chicken thighs, skin-on and bone-in - 4 medium potatoes, cut into wedges - 1 large red onion, quartered - 4 cloves garlic, smashed - 2 lemons (1 for juice, 1 for slices) - 1/4 cup olive oil - 2 teaspoons dried oregano - 1 teaspoon paprika - Salt and pepper to taste - Fresh parsley, chopped (for garnish) I love using chicken thighs because they have a lot of flavor. The skin keeps them juicy. Potatoes add a nice heartiness, making this dish filling. I prefer medium potatoes for their perfect size. The red onion gives a sweet touch that works well with the chicken. Garlic brings a wonderful aroma. I use four cloves, but you can add more if you love garlic. Lemons are key in this recipe. One lemon gives juice, while the other adds slices for flavor. Olive oil ties everything together and keeps it moist. Dried oregano and paprika add depth. They give the chicken and potatoes a lovely color and taste. Don’t forget to season with salt and pepper. They help bring out all the flavors. Finally, fresh parsley is a must. It adds a burst of color and freshness just before serving. Each ingredient plays a role, making this dish a delight! To make the marinade, mix the olive oil, juice of one lemon, dried oregano, paprika, salt, and pepper in a bowl. This blend adds great flavor to the chicken. Marinating is key. It helps the chicken soak in all those tasty flavors. Let the chicken sit in the marinade for about 15 minutes. This short wait makes a big difference! Next, prepare the vegetables. Cut the potatoes into wedges. Quarter the red onion and smash the garlic cloves. In a separate bowl, toss the potatoes, onion, and garlic with olive oil, salt, and pepper. This simple seasoning is all they need. Now, arrange the marinated chicken on a large baking tray. Place the seasoned potatoes and onion around the chicken. Scatter the smashed garlic on top for extra flavor. Set your oven to 400°F (200°C). This temperature ensures the chicken cooks well and the potatoes get crispy. Bake the tray for 40 to 45 minutes. To check if it’s done, the chicken should reach an internal temperature of 165°F (75°C). The potatoes should look golden and crispy. If they are not, let them bake a bit longer. To keep chicken juicy, avoid overcooking. Chicken thighs need heat but not too much. Use a meat thermometer. Aim for 165°F (75°C). This ensures it's safe to eat. Always let the chicken rest after cooking. Resting allows juices to settle. This makes each bite tender and moist. You can boost flavor with extra herbs. Fresh herbs like thyme or rosemary add depth. They pair well with lemon and garlic. If you use dried herbs, keep them fresh. Store them in a cool, dark place. Fresh ingredients offer brighter flavors, while dried ones provide convenience. Experiment to find what you like best. For crispy potatoes, cut them evenly. This helps them cook at the same rate. Toss them with olive oil, salt, and pepper. This adds flavor and aids crispiness. Bake them alongside the chicken. You can also use an air fryer for extra crunch. Adjust cooking time as needed. Enjoy that golden, crispy texture! {{image_2}} You can change the chicken in this dish. Try using pork chops or turkey thighs. Both meats work well with the lemon and herbs. For a vegetarian twist, use firm tofu or tempeh. Both can absorb the marinade nicely. You can also use chickpeas for a hearty option. They add protein and texture. Feel free to add your favorite seasonal veggies. Carrots, zucchini, or bell peppers can add color and taste. You can also switch up the potatoes. Sweet potatoes give a nice sweetness. They pair well with lemon and spices. Cut them into wedges, just like regular potatoes. Citrus fruits can boost the taste even more. Instead of lemons, try limes or oranges. They bring a new flavor to the dish. You can also add cheese or olives for extra richness. Feta cheese crumbles add a salty kick. Olives bring a briny taste that pairs great with the chicken. After you finish the Greek Lemon Chicken & Potato Traybake, let it cool. Place leftovers in an airtight container. Store them in the fridge. They stay fresh for up to three days. Make sure to label your container with the date. You can freeze the traybake for longer storage. Cut it into portions before freezing. Wrap each piece tightly in plastic wrap. Then, put them in a freezer-safe bag. This way, it stays good for up to three months. When you’re ready to eat, thaw it overnight in the fridge. Reheat it in the oven at 350°F (175°C) until hot. If you want to bulk prepare this dish, marinate several chicken thighs at once. Cut your potatoes and veggies ahead of time. Store them in separate containers. This makes it easy to grab and cook. Portion out your meals into single servings. This helps with quick dinners during busy weeks. It takes about 40 to 45 minutes to cook chicken thighs in the oven at 400°F (200°C). Make sure the internal temperature reaches 165°F (75°C). This ensures the chicken is safe to eat and juicy. Using a meat thermometer helps you check the doneness easily. Yes, you can use boneless chicken thighs. They cook faster, usually in about 30 to 35 minutes. However, bone-in thighs stay juicier and have more flavor. Boneless thighs are easier to eat but may lack that rich taste. Great side dishes include a fresh Greek salad or roasted vegetables. You could also serve warm pita bread or tzatziki sauce for dipping. These sides add freshness and balance to the rich flavors of the traybake. This blog post guides you through making a delicious Greek Lemon Chicken and Potato Traybake. We examined the key ingredients, like chicken thighs, potatoes, and herbs. I shared step-by-step instructions for marinating and baking, plus useful tips to ensure juicy chicken and crispy potatoes. You can also explore variations and storage options for leftovers. With this easy recipe, you can create a tasty meal that fits any occasion. Enjoy cooking, and let your flavors shine!
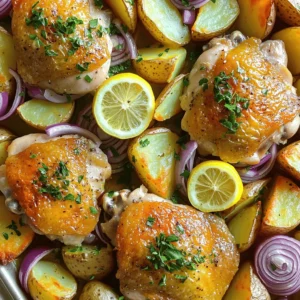
    Greek Lemon Chicken & Potato Traybake Delight
  • - 1 lb ground beef - 4 medium potatoes, thinly sliced - 1 medium onion, chopped - 2 cloves garlic, minced The main ingredients make this dish hearty and filling. Ground beef gives a rich flavor. Potatoes add creaminess. Onion and garlic bring a savory kick. These basics set the stage for a great meal. - 1 can (15 oz) diced tomatoes, undrained - 1 cup shredded cheddar cheese - 1 cup beef broth - 1 teaspoon Italian seasoning - 1 teaspoon paprika - Salt and pepper to taste The additional ingredients boost flavor and texture. Diced tomatoes add moisture. Cheddar cheese melts into gooey goodness. Beef broth ties everything together, while spices enhance the taste. This mix ensures a well-rounded dish. - 2 cups fresh spinach (optional for added nutrition) - Additional toppings Adding fresh spinach helps make the casserole healthier. You can also use other toppings for more flavor. Consider adding breadcrumbs or extra cheese. These options let you customize the dish to your taste. 1. Browning the beef: Heat a skillet over medium heat. Add 1 lb of ground beef. Cook it until it turns brown. This usually takes about 5 to 7 minutes. Stir it often to break up clumps. 2. Draining excess fat: Once the beef is browned, pour it into a colander. Let the fat drain off. This step keeps your casserole from being greasy. 1. First layer: Start with half of the potatoes. Place them in the bottom of your crockpot. Next, add half of the chopped onion and minced garlic. Then, layer half of the browned beef on top. 2. Second layer: Pour half of the can of diced tomatoes over the beef. Sprinkle half of the Italian seasoning, paprika, salt, and pepper on top. This adds great flavor. 1. Pouring the beef broth: Now, take 1 cup of beef broth. Pour it evenly over all the layers in the crockpot. Make sure it soaks down to the bottom. 2. Cooking time and settings: Cover the crockpot. Cook on low for 6 to 8 hours or on high for 4 to 5 hours. Check for tenderness in the potatoes. They should be soft and easy to pierce with a fork. To make your casserole just right, you need to ensure even cooking. Layer your ingredients well. This helps the heat spread through the dish. I like to use a spatula to press down the layers gently. It helps everything cook together. Next, testing potato tenderness is key. To check, pierce a potato slice with a fork. If it goes in easily, it’s ready. If not, give it more time. Remember, slow cooking works magic, so don't rush this step. Garnishing ideas can really elevate your dish. I love to sprinkle extra shredded cheese on top. It melts beautifully and looks inviting. Fresh herbs, like parsley or chives, add color and freshness. For pairing options, serve your casserole with crusty bread. It soaks up the tasty juices. A simple green salad on the side also complements the richness of the casserole. One common mistake is overloading the crockpot. Stuffing too much in can lead to uneven cooking. Stick to the recipe’s layers for the best results. Another mistake is not layering properly. Each layer should be distinct and not mixed. This keeps the flavors separate and allows each ingredient to shine. Follow the layering steps closely for a perfect dish. {{image_2}} You can switch up the meat in this dish. Try ground turkey or chicken for a leaner option. You can also use pork if you want a different taste. For veggies, swap potatoes with sweet potatoes or even cauliflower. These swaps add new flavors and keep your meals exciting. Adding sauces brings new life to your casserole. Try barbecue sauce for a sweet twist or hot sauce for some heat. You can also mix in Worcestershire sauce for depth. Different cheeses can change the vibe too. Use mozzarella for a stretchier texture or pepper jack for a spicy kick. Just remember to keep the cheese amount in check. To cut fat, use less cheese or switch to a low-fat version. This way, you still enjoy the flavor but with fewer calories. Pack in more veggies too. Carrots, bell peppers, or zucchini add vitamins and fiber. You can even toss in some leafy greens like kale or more spinach for a nutrient boost. To keep your casserole fresh, use airtight containers. Glass or plastic containers work well. Make sure to let the casserole cool before sealing it. Store it in the fridge for up to three days. Avoid leaving it out for more than two hours. The best way to reheat this casserole is in the oven. Preheat your oven to 350°F. Place the casserole in an oven-safe dish. Cover it with foil to keep it moist. Heat for about 20 to 30 minutes. You can also use the microwave if you need a quicker option. Heat in short bursts, stirring in between, until warm. To freeze the casserole, let it cool completely. Cut it into portions for easy meals later. Wrap each portion tightly in plastic wrap. Place wrapped portions in a freezer bag for extra protection. Label the bags with the date. For reheating, thaw overnight in the fridge. Heat in the oven or microwave until hot. You can cook the casserole on low for 6 to 8 hours. If you are in a hurry, use the high setting for 4 to 5 hours. The cooking time can vary, so check if the potatoes are tender before serving. Yes, you can use frozen vegetables or meat. If using frozen meat, cook it until it reaches a safe temperature. For frozen veggies, you can toss them in without thawing. Just make sure to add extra time to the cooking process. Yes, you can easily make this casserole vegetarian. Swap the ground beef for a plant-based meat substitute or use lentils. Replace beef broth with vegetable broth for added flavor. You can also add more veggies like bell peppers or mushrooms for a hearty meal. Crockpot Hamburger Potato Casserole is simple and satisfying. We explored key ingredients like beef, potatoes, and cheese. You learned how to prep the dish with clear steps, from browning the beef to cooking it in the crockpot. Don't forget the tips on perfecting texture and avoiding common mistakes. This dish is versatile, allowing ingredient swaps and healthier options. With proper storage, you can enjoy leftovers easily. Experiment with different flavors and enjoy. This casserole is sure to become a favorite in your home!
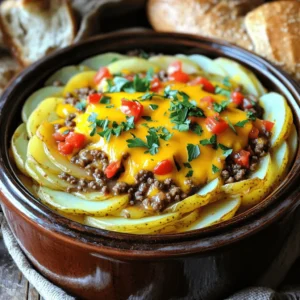
    Crockpot Hamburger Potato Casserole Hearty and Easy Meal
  • - 1 cup dried green or brown lentils - 2 large potatoes - 1 large onion - 2 carrots - 2 celery stalks - 3 cloves garlic - 6 cups vegetable broth - 1 can diced tomatoes - Ground cumin - Smoked paprika - Salt and pepper - Olive oil - Bay leaf - Fresh parsley (for garnish) The ingredients for Hearty Lentil Potato Soup are simple yet powerful. Lentils give you protein and fiber. They also add a nice texture. Potatoes bring creaminess and heartiness to the soup. Onions, carrots, and celery create a great base flavor. Garlic adds a punch of zest. When it comes to broth, I always choose vegetable broth. It keeps the soup vegan and flavorful. Diced tomatoes add a touch of sweetness and acidity. Spices like cumin and smoked paprika give warmth. Don’t forget salt and pepper to taste. For cooking, olive oil helps sauté the vegetables. The bay leaf adds depth to the broth. Fresh parsley is perfect for a bright finish. Each ingredient plays a role in making this soup a wholesome and nourishing dish. - Rinse 1 cup of dried green or brown lentils under cold water. This removes dust and dirt. - Dice 2 large potatoes into small cubes. - Dice 1 large onion, 2 carrots, and 2 celery stalks. Keep the pieces small for even cooking. - Heat 2 tablespoons of olive oil in a large pot over medium heat. - Add the diced onion, carrots, and celery. Sauté for 5-7 minutes until softened. - Stir in 3 cloves of minced garlic and cook for another minute until you smell it. - Add the diced potatoes and rinsed lentils to the pot. Mix them well with the other vegetables. - Pour in 6 cups of vegetable broth and 1 can of diced tomatoes, with all the juices. - Add 1 teaspoon of ground cumin and 1 teaspoon of smoked paprika. Season with salt and pepper. Stir everything together. - Bring the soup to a boil, then reduce the heat to low. Cover the pot. - Let it simmer for 30-40 minutes. Stir a few times until the lentils and potatoes are tender. - Once cooked, taste the soup and adjust seasoning if needed. Remove the bay leaf before serving. - Ladle the hot soup into bowls and garnish with freshly chopped parsley. Enjoy your warm, hearty soup! To make your soup taste amazing, adjust the spices. Add more cumin for warmth or smoked paprika for a smoky flavor. Taste as you go to find what works best for you. To enhance texture, blend a portion of the soup. This makes it creamy while leaving some chunks for bite. Prepping ingredients in advance saves time. Chop your onions, garlic, and veggies the day before. Store them in the fridge until you’re ready to cook. You can also use an Instant Pot or slow cooker. This method makes it easy to set and forget. Just add all ingredients and let your gadget do the work. For the best pairings, serve the soup with crusty bread or a fresh salad. A slice of sourdough complements the flavors well. You can also add toppings like croutons, shredded cheese, or a dollop of yogurt. Fresh parsley adds a nice touch, too. {{image_2}} You can make this soup unique by changing some ingredients. Try using sweet potatoes instead of regular potatoes for a sweeter taste. You can also add spinach or kale for extra greens. These veggies boost nutrition and add color. If you want more protein, add cooked chicken or sausage. Tofu is another great choice for a plant-based option. These swaps make the soup heartier and more filling. To change the flavor, think about herbs and spices. Italian herbs like basil and oregano add a nice twist. You can also sprinkle in some red pepper flakes for heat. For a spicy kick, chop fresh chili peppers and stir them in. Experimenting with flavors keeps things fresh and exciting. You’ll find new favorites every time you make this soup! This soup is already a great option for many diets. It’s naturally gluten-free since it uses lentils and veggies. If you want to keep it vegan, just skip any meat. For those who avoid animal products, this soup is a perfect choice. It’s rich in flavor and nutrition without any animal ingredients. Enjoy a bowl knowing it fits your dietary needs! To keep your soup fresh, store it in an airtight container. Let the soup cool down first. Place it in the fridge for up to four days. For longer storage, freeze the soup. Use freezer-safe bags or containers. Leave some space for expansion as it freezes. You can reheat soup in two ways: in the microwave or on the stove. For the microwave, use a microwave-safe bowl. Heat in short bursts, stirring in between. On the stove, pour the soup into a pot. Heat over medium heat until warm, stirring often. This keeps the flavor strong and tasty. In the fridge, your hearty lentil potato soup lasts about four days. If you freeze it, it stays good for three months. Just label your container with the date. This way, you’ll know when to use it. Can I use canned lentils instead? Yes, you can use canned lentils. Just drain and rinse them well. Add them later in the cooking process to avoid overcooking. This saves time and still gives a great taste. How to thicken the soup? You can thicken the soup by mashing some of the lentils and potatoes. Alternatively, blend a portion of the soup in a blender, then stir it back in. This adds creaminess and a nice texture. Is this soup suitable for meal prep? Absolutely! This soup stores well. You can keep it in the fridge for up to five days. It also freezes well for about three months. Just make sure to cool it fully before storing. Caloric content One serving of this hearty lentil potato soup has about 220 calories. This makes it a filling meal without being too heavy. Health benefits of lentils and potatoes Lentils are a great source of protein and fiber. They help with digestion and keep you full. Potatoes provide vitamins and minerals, like potassium and vitamin C. Together, they make a nutritious and balanced dish. What to serve with the soup? This soup pairs well with a simple green salad. You can also serve it with a dollop of yogurt or sour cream for extra creaminess. Best bread or sides to pair with lentil potato soup Crusty bread is perfect for dipping. Try sourdough or whole grain bread. You can also serve it with a side of garlic bread for a tasty treat. This blog post takes you through making a hearty lentil potato soup. We covered essential ingredients like lentils, vegetables, and seasonings. I shared step-by-step instructions for preparation and cooking. You learned tips for enhancing flavor and time-saving techniques. We also explored variations and storage info to extend your soup's life. Soup is easy to make and full of flavor. Enjoy this healthy dish with friends and family. It’s comforting, nutritious, and perfect for any meal. Dive into this recipe and make it your own!
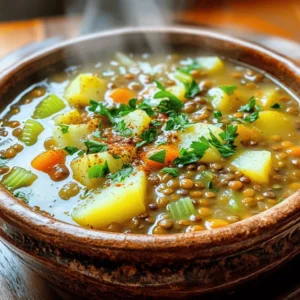
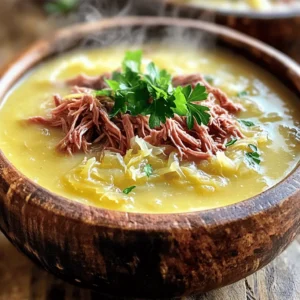
    Hearty Lentil Potato Soup Wholesome and Nourishing Dish
  • To create tasty low-cal pizza rolls, gather these key ingredients: - 1 cup whole wheat flour - 1 teaspoon baking powder - 1/4 teaspoon salt - 1/2 cup Greek yogurt (nonfat) - 1/2 cup marinara sauce (low-sugar) - 1/2 cup shredded part-skim mozzarella cheese - 1/4 cup diced bell peppers (any color) - 1/4 cup sliced black olives - 1 teaspoon dried oregano - 1 teaspoon garlic powder - Cooking spray These ingredients form the base for your pizza rolls. Whole wheat flour gives a healthy twist. Greek yogurt replaces heavy fats and adds protein. Low-sugar marinara keeps it light. Mozzarella cheese adds rich flavor without too many calories. Bell peppers and olives bring color and crunch. - Whole wheat flour: This flour adds fiber and helps you feel full. It has more nutrients than white flour. - Baking powder: This helps the dough rise, making pizza rolls fluffy. - Salt: A small amount enhances the flavors. It keeps the dish balanced. - Greek yogurt: This is low in fat and high in protein. It gives the rolls a nice texture. - Marinara sauce: Low-sugar options cut down on calories, while still adding flavor. - Mozzarella cheese: Part-skim cheese lowers fat while keeping your rolls cheesy and delicious. - Bell peppers: These are full of vitamins and add a pop of color. - Black olives: They add healthy fats and a briny taste. - Dried oregano: This herb brings a classic pizza flavor. It also has antioxidants. - Garlic powder: This adds depth to your rolls without extra calories. Feel free to switch up the ingredients to match your taste: - Flour: Try almond flour or gluten-free flour for a different base. - Yogurt: Use low-fat sour cream if you like a tangy flavor. - Cheese: Swap mozzarella for cheddar or a dairy-free cheese. - Veggies: Add spinach, mushrooms, or zucchini for more nutrients. - Sauce: Experiment with pesto or a spicy sauce for a kick. These swaps can keep your low-cal pizza rolls fresh and exciting! Making low-cal pizza rolls is fun and simple. You need a few basic steps to get started. First, gather your ingredients. Preheat your oven to 400°F (200°C) while you mix your dough. This saves time and helps with baking. 1. In a mixing bowl, combine 1 cup whole wheat flour, 1 teaspoon baking powder, and 1/4 teaspoon salt. Stir well to mix these dry ingredients. 2. Next, add 1/2 cup nonfat Greek yogurt to the bowl. Mix until a dough forms. 3. Knead the dough for a few minutes. It should feel smooth and soft. 4. On a floured surface, roll out the dough into a rectangle. Aim for about 1/4 inch thick. 5. Spread 1/2 cup low-sugar marinara sauce over the dough. Leave a little space at the edges. 6. Sprinkle 1/2 cup shredded part-skim mozzarella cheese on top. Then add 1/4 cup diced bell peppers and 1/4 cup sliced black olives. 7. Add 1 teaspoon dried oregano and 1 teaspoon garlic powder for flavor. Spread them evenly. 8. Starting at one edge, roll the dough tightly into a log. Pinch the ends to seal it well. 9. Slice the log into bite-sized rolls, around 1-2 inches thick. Place them on a parchment-lined baking sheet. 10. Lightly spray the tops with cooking spray. This makes them golden. 11. Bake for 15-18 minutes. Look for a golden brown color to know they are done. 12. Let your pizza rolls cool for a few minutes before serving. - Use whole wheat flour for a healthy base. It adds fiber and taste. - Knead your dough well. This gives it a nice texture. - Roll the dough evenly. Aim for the same thickness throughout. - Don’t skip the resting time. It helps the dough relax, making it easier to roll. Following these steps will help you make delicious low-cal pizza rolls. Enjoy them with a side of marinara for dipping! When making low-cal pizza rolls, watch out for a few key errors. First, do not overwork the dough. This can make it tough. Knead the dough just enough to be smooth. Second, don’t skip the cooking spray. It helps your rolls get that nice golden color. Lastly, avoid using too much sauce. A thin layer works best, so the dough cooks evenly. To bake your pizza rolls evenly, use a lined baking sheet. This helps heat spread uniformly. Place the rolls apart on the sheet. Give them space; they expand as they bake. Preheat your oven fully before putting in the rolls. This step ensures they cook through and stay soft inside. Rotate the sheet halfway through baking for the best results. For a fun and tasty presentation, serve your pizza rolls on a bright platter. Add a small bowl of marinara sauce for dipping. You can also sprinkle fresh parsley on top for color. This makes the dish pop and look inviting. If you want to impress, add some colorful bell peppers around the rolls on the platter. This adds a nice touch and makes it even more appealing. {{image_2}} When making low-cal pizza rolls, you can play with the fillings. Try using different cheeses, like feta or cheddar. You can also swap the veggies. Think about adding spinach, mushrooms, or even artichokes. For meat lovers, turkey pepperoni or diced chicken works well too. Each filling adds a fun twist to the rolls. If you need a gluten-free option, use gluten-free flour. Almond flour or a store-bought blend will work great. This change keeps the rolls tasty while meeting dietary needs. Just make sure to check the flour’s baking instructions. Some gluten-free flours need more liquid. Adjust the yogurt or add a splash of water to get the right dough texture. For a vegetarian treat, simply skip the meat. Use extra veggies for a colorful mix. For a vegan version, replace the Greek yogurt with a plant-based yogurt. You can find good non-dairy cheese options too. These swaps keep the flavors bold and the rolls enjoyable for everyone. Don’t lose the taste; just change the ingredients! To keep your low-cal pizza rolls fresh, place them in an airtight container. You want to cool them first. Let them sit at room temperature for about 30 minutes. Then, cover them tightly and store in the fridge. They can last for up to three days. I always recommend using parchment paper between layers to prevent sticking. When you’re ready to enjoy the leftovers, reheating is simple. Preheat your oven to 350°F (175°C). Place the pizza rolls on a baking sheet. Heat for about 10-15 minutes or until they are warm. This method keeps them crispy. You can also use a microwave for quick reheating. Just microwave for 30 seconds to 1 minute, but they may turn soft. If you want to save some for later, freezing is a great option. Let the pizza rolls cool completely. Arrange them in a single layer on a baking sheet, then freeze for 1-2 hours. Once frozen, transfer them to a freezer bag. Make sure to remove as much air as possible. They can last in the freezer for up to three months. When ready to eat, bake them straight from the freezer, adding a few extra minutes to the cooking time. To add heat to your pizza rolls, try using spicy marinara sauce. You can also add red pepper flakes or diced jalapeños to the filling. Another option is to mix in some spicy sausage or pepperoni. These small changes will give your rolls a nice kick without adding too many calories. Yes, you can use various cheeses! For a sharp flavor, try using cheddar or pepper jack. If you want a creamier texture, you can add ricotta or cream cheese. Just keep in mind that different cheeses may change the overall taste and texture. Experiment to find your favorite combo. These pizza rolls pair well with many sides. A fresh garden salad makes a light and healthy option. You can also serve them with extra marinara sauce for dipping. If you enjoy crunch, try adding some carrot or celery sticks. These sides balance the richness of the rolls and add more flavor. This post shared how to make tasty and low-cal pizza rolls. We covered key ingredients, their benefits, and fun ways to customize your rolls. I provided easy steps for perfect dough and cooking. You learned about common mistakes and presentation ideas. We explored various filling options and ways to make them gluten-free or vegan. Finally, I detailed storage tips for leftovers. Now, you can create your own delicious pizza rolls any time! Enjoy experimenting with flavors and impressing your friends.
    Ingredient Low-Cal Pizza Rolls Healthy and Tasty Treat
  • - 4 cups frozen hash browns, thawed - 1 cup shredded cheddar cheese - 1 cup diced bell peppers - 1 cup diced cooked ham or plant-based alternative - 6 large eggs - 1 cup milk (dairy or plant-based) - Spices: garlic powder, onion powder, salt, black pepper, paprika - Fresh parsley for garnish These ingredients make a filling dish. The hash browns form a great base. I like to use thawed hash browns for a better texture. The cheese adds a creamy flavor, while the bell peppers give a nice crunch. For protein, I often choose cooked ham. You can also use a plant-based version if you prefer. Eggs and milk form the heart of the dish, giving it richness. Spices are key here. Garlic powder and onion powder add depth. Salt and black pepper enhance all the flavors. A touch of paprika gives a hint of smokiness. Lastly, fresh parsley brightens the dish and adds color. With these ingredients, you set the stage for a delicious breakfast that everyone will enjoy. - Preheat the oven to 350°F (175°C). - In a large bowl, break up the thawed hash browns. - Add half of the shredded cheddar cheese to the hash browns. - Mix well to combine the hash browns and cheese. - Grease a 9x13-inch baking dish with cooking spray or olive oil. - Press the hash brown mixture evenly into the bottom of the dish. - Sprinkle the diced bell peppers over the hash brown crust. - Add the diced cooked ham evenly on top of the peppers. - In another bowl, whisk together the eggs and milk. - Add garlic powder, onion powder, salt, black pepper, and paprika. - Whisk until the egg mixture is well combined. - Carefully pour the egg mixture over the layered ingredients. - Cover the casserole with aluminum foil and refrigerate overnight. - In the morning, let it sit at room temperature for about 20 minutes. - Bake it in the preheated oven for 45-50 minutes. - The eggs should be set and the top golden brown. - Remove from the oven and let it cool for a few minutes. - Garnish with fresh parsley before slicing and serving. To make your casserole the night before, follow these simple steps: - Layer Properly: Spread the hash browns in the greased dish. This makes a good base. - Cover Well: Use aluminum foil to cover the dish. This keeps moisture in and flavors fresh. - Chill: Refrigerate overnight. This helps the flavors blend and the casserole sets well. To ensure the casserole sets properly, use enough eggs and let it sit at room temp for 20 minutes before baking. This helps it cook evenly. If you want different cheese options, here are a few ideas: - Monterey Jack: It melts nicely and adds a creamy taste. - Swiss Cheese: It gives a nutty flavor and pairs well with ham. - Goat Cheese: Adds tanginess and works well with veggies. For dairy-free options, try: - Nutritional Yeast: It gives a cheesy flavor without dairy. - Vegan Cheese: Look for brands that melt well. They often use almond or soy. This casserole is great on its own, but you can enhance it with these ideas: - Fresh Fruit: Serve with slices of melon or berries for a bright touch. - Light Salad: A mixed greens salad adds crunch and freshness. - Herb Garnish: Top with parsley or chives for color and flavor. For presentation, cut into squares and arrange on a platter. Add extra bell pepper slices for a pop of color. This makes your meal look inviting! {{image_2}} You can easily change the vegetables in this casserole. Try using spinach, mushrooms, or zucchini. These add color and flavor. For meat, swap the ham for cooked bacon or sausage. If you prefer a plant-based option, use tofu or tempeh. For cheese, you can use mozzarella or feta for a different taste. Adding spices can make your casserole even tastier. Try a pinch of cayenne for heat or switch garlic powder for fresh minced garlic. You can also mix in herbs like thyme or basil for a fresh twist. These small changes can transform the flavor profile and make it uniquely yours. While a baking dish works great, you can use other pans. A cast-iron skillet gives a nice crust. If you want to slow cook, use a slow cooker. Just layer the ingredients and set it on low. It will cook while you go about your morning routine, giving you a warm meal when you're ready. To keep your casserole fresh, store leftovers in an airtight container. Make sure it cools to room temperature before sealing. This helps keep it moist. You can store it in the fridge for up to three days. After that, the texture and taste might change. If you want to save some for later, freezing is a great option. First, let the casserole cool completely. Then, cut it into portions. Wrap each piece in plastic wrap, then place them in a freezer bag. Squeeze out as much air as possible. Your casserole will stay good in the freezer for up to three months. To reheat frozen portions, take one out and let it sit in the fridge overnight. This makes it easier to heat. For the best texture, reheat in the oven. Preheat the oven to 350°F (175°C). Place the casserole slice in an oven-safe dish. Cover it with foil to keep it from drying out. Heat for about 20 minutes. Check if it’s warm in the center. If not, give it a few more minutes. You can also use a microwave, but it might make the texture less fluffy. Heat on medium power for two to three minutes, checking regularly. Yes, you can make the casserole without eggs. Here are some great substitutes: - Silken tofu: Blend it until smooth. Use about 1/4 cup per egg. - Chia seeds: Mix 1 tablespoon of chia seeds with 3 tablespoons of water. Let it sit for a few minutes until it thickens. - Flaxseed meal: Use 1 tablespoon of flaxseed meal mixed with 3 tablespoons of water as a binder. - Unsweetened applesauce: Use 1/4 cup per egg for moisture. These options help bind the casserole while keeping it tasty. The casserole can last in the fridge for about 3 to 4 days. To keep it fresh: - Store it in an airtight container. - Make sure it cools before putting it in the fridge. - If you see any signs of spoilage, it’s best to discard it. This way, you can enjoy your meal safely. Here are some tasty sides and drinks to pair with your casserole: - Fresh fruit: Slices of melon, berries, or citrus add a sweet touch. - Light salad: A simple green salad with vinaigrette is refreshing. - Toast: Serve with whole-grain or sourdough toast for crunch. - Coffee or tea: A warm drink can complement the meal well. These options make your breakfast hearty and satisfying. This blog post guides you through making a delicious hash brown egg casserole. We covered the key ingredients, simple preparation steps, and cooking tips. You learned about variations, storage info, and answers to common questions. This dish is flexible and perfect for any meal. You can adjust flavors and ingredients to fit your taste. Enjoy your cooking and savor every bite of this tasty casserole!
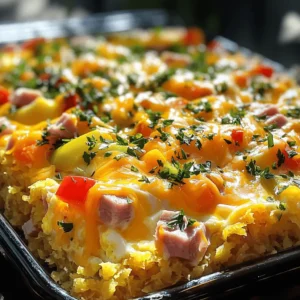
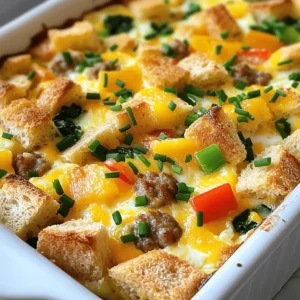
    Overnight Hash Brown Egg Casserole Hearty Morning Dish
  • - 4 slices of thick bread (sourdough or whole grain) - 4 large eggs - 1 cup shredded cheddar cheese - ½ cup cherry tomatoes, halved - 2 tablespoons fresh basil, chopped - 1 tablespoon olive oil - Salt and pepper to taste - Optional: red pepper flakes for a kick For Cheesy Egg Toast, you have two great bread choices: sourdough or whole grain. Both give a nice crunch and flavor. I prefer sourdough for its tangy taste, but whole grain adds more fiber. Cheddar cheese is the star here. It melts well and adds a rich flavor. You can also try other cheeses like mozzarella or gouda if you want a twist. - Suggested seasonings: red pepper flakes, salt, and pepper - Fresh herbs and toppings: basil and cherry tomatoes To spice things up, add red pepper flakes. They give a nice heat without being too strong. Don’t forget the salt and pepper to enhance the taste. Fresh herbs like basil add a bright touch. I love how they pair with the eggs. Cherry tomatoes are a fun addition too. Their sweetness balances the cheese and egg flavors perfectly. 1. First, preheat your oven to 375°F (190°C). This helps cook the eggs just right. 2. Next, heat a skillet over medium heat. Add one tablespoon of olive oil to the pan. 3. Place the bread slices in the skillet. Toast each side for about 2 minutes until they turn golden brown. 4. After toasting, carefully take the bread out and set it on a baking sheet. You want a sturdy base for your toppings. 1. Now, crack one egg on each slice of bread. Keep the yolk intact for a lovely look. 2. Evenly sprinkle the shredded cheddar cheese on top of each egg. This adds a rich flavor. 3. Add the halved cherry tomatoes around the eggs. They give color and freshness. 4. Season with salt, pepper, and red pepper flakes if you like some heat. 5. Put the baking sheet in the preheated oven. Bake for 10 to 12 minutes. You want the egg whites set but the yolks soft. 6. When done, take the baking sheet out and sprinkle chopped basil on top. This adds a nice, fresh taste. Enjoy your Cheesy Egg Toast, a quick and delicious breakfast idea! To get the best eggs, you need to know about yolks. Do you like a soft yolk that runs? Or do you prefer a firmer yolk? If you want a soft yolk, bake for 10 minutes. For firmer yolks, go for 12 minutes. This way, you control the texture. Choosing the right bread is key, too. I love thick sourdough or whole grain. They hold the egg well and make a hearty bite. Toast your bread until it’s golden brown. This adds crunch and flavor. Perfect for holding all those yummy toppings. Making your Cheesy Egg Toast look good is fun. Place each toast on a bright plate. Drizzle a bit of olive oil on top. This adds shine and flavor. Sprinkle fresh basil over the toast for a pop of color. Serve with extra cherry tomatoes on the side. They not only look nice but taste great, too. A colorful plate makes the meal more inviting. You want to make every bite special! {{image_2}} You can switch up the bread for your Cheesy Egg Toast. Try gluten-free bread for a different texture. Whole grain bread adds a nutty flavor. Both are great options! For cheese, if you want a change, use mozzarella or feta. Vegan cheese works too. It melts well and is tasty. Adding veggies makes this dish even better. Spinach adds color and nutrition. Bell peppers bring a sweet crunch. Avocado slices on top add creaminess. You can also get creative with toppings. Try drizzling pesto for a fresh taste. A splash of hot sauce gives it a nice kick. These twists let you customize your toast to your liking. To keep your Cheesy Egg Toast fresh, store it in the fridge. Use an airtight container to prevent sogginess. The toast stays good for up to three days. When you reheat, use an oven or toaster oven. This helps keep the bread crispy. Heat at 350°F (175°C) for about 10 minutes. Check the eggs to make sure they warm through. If you want to freeze the egg toast, first let it cool. Wrap each piece in plastic wrap. Then place them in a freezer bag. This helps avoid freezer burn. You can store them for up to a month. For best results, freeze the components separately. Store the bread, eggs, and toppings in different bags. This way, you can mix and match when ready to eat. Just thaw in the fridge overnight before cooking. You can make Cheesy Egg Toast on the stove. Use a skillet instead of the oven. After toasting the bread, crack the eggs on top. Cover the skillet with a lid. Cook on low heat until the eggs set. This will take about 5 to 8 minutes. Yes, you can use any cheese you like. Mozzarella or feta can work well too. For vegetables, try adding spinach, bell peppers, or even avocado. Mix and match to find your favorite flavors. Pair your toast with fresh fruit or a green salad. You can also add yogurt for protein. This will create a filling and balanced breakfast or lunch. Cheesy Egg Toast stays good in the fridge for up to three days. Store it in an airtight container. When ready to eat, reheat it in a skillet or the microwave. Enjoy it warm for the best taste. Cheesy Egg Toast is a fun and tasty recipe. You start with good bread and cheese, then add tasty toppings. With tips for texture and serving ideas, your dish will shine. Don’t forget the fun variations like gluten-free options. Store leftovers properly for later enjoyment, and your dish will stay great. This recipe is simple and offers many ways to make it your own. Enjoy creating your version of Cheesy Egg Toast!
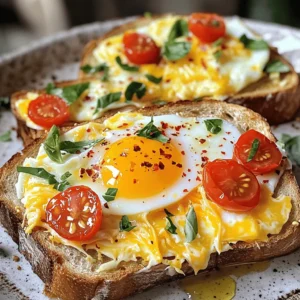
    Cheesy Egg Toast Quick and Delicious Breakfast Idea
  • - 3 ripe bananas, mashed - 1/2 cup unsalted butter, melted - 3/4 cup brown sugar, packed - 1/4 cup granulated sugar - 2 large eggs, at room temperature - 1 teaspoon vanilla extract - 1 teaspoon baking soda - 1/4 teaspoon salt - 1 1/2 cups all-purpose flour - 1/2 cup sour cream or Greek yogurt - 1/2 cup chopped walnuts or pecans (optional) - 1/4 cup dark chocolate chips (optional) You need ripe bananas for this recipe. They add sweetness and moisture. The butter gives a rich taste, while both sugars balance the flavors. The eggs help bind the batter. Vanilla makes it taste better. Baking soda is the leavening agent. It helps the bread rise. Salt enhances the taste and balances the sweetness. All-purpose flour gives the right texture. Sour cream or yogurt adds moistness and flavor. You can add nuts for crunch. They also add a nutty flavor. Dark chocolate chips can make it extra special. They melt and create pockets of chocolate. This recipe is flexible. You can mix and match based on your taste. Overall, these ingredients come together to create a rich, soft banana bread. It’s perfect for breakfast or a snack. - Preheat your oven to 350°F (175°C). This ensures your banana bread bakes evenly. - Prepare a 9x5 inch loaf pan. Grease it with butter or line it with parchment paper. This helps the bread come out easily. - In a large bowl, combine three ripe bananas with half a cup of melted unsalted butter. Mash them well until they are smooth and creamy. - Next, add three-fourths cup of brown sugar and a quarter cup of granulated sugar. Mix them until the mixture is smooth and well combined. - Now, incorporate two large eggs, one at a time. Mix well after each egg. Then, add one teaspoon of vanilla extract and blend until it is mixed in. - Sprinkle one teaspoon of baking soda and a quarter teaspoon of salt over the mixture. Gently fold these into the batter until just combined. - Gradually fold in one and a half cups of all-purpose flour. Mix until you no longer see dry flour. Be careful not to overmix, as this can affect the texture. - If you want extra flavor, fold in half a cup of sour cream or Greek yogurt. You can also add half a cup of chopped walnuts or pecans and a quarter cup of dark chocolate chips, if you like. - Pour the batter into your prepared loaf pan. Smooth the top with a spatula to make it even. - Bake in the preheated oven for 60 to 70 minutes. Check if it’s done by inserting a toothpick in the center. It should come out clean. - Once baked, let the banana bread cool in the pan for 10 to 15 minutes. Then, move it to a wire rack to cool completely. To make your banana bread moist, always use ripe bananas. Ripe bananas have more sugar and a sweeter taste. Look for bananas with brown spots. They are perfect for baking. Sour cream or Greek yogurt adds creaminess and moisture. It helps the bread rise and stay soft. You can choose either, but both work well. Mixing the batter is key. When you add flour, stir gently. Overmixing can make your bread tough. You want to combine ingredients just enough to mix them well. Use a spatula to fold in dry ingredients. This keeps the batter light and fluffy. Remember to be gentle with your mixing. Slice your banana bread after it cools. Serve it warm or at room temperature. For an elegant touch, add powdered sugar on top. You can also serve it with butter or nut butter. This adds richness and flavor. Enjoy your beautiful banana bread! {{image_2}} You can add nuts to your banana bread for a nice crunch. Here are some options: - Walnuts - Pecans - Almonds Each nut gives a different flavor. Walnuts add earthiness, while pecans offer sweetness. Almonds bring a light, buttery taste. Choose your favorite or mix them for fun! Chocolate makes banana bread even better. You can use chocolate chips or chunks. Here’s how they differ: - Chocolate chips melt less and keep shape. - Chocolate chunks melt more and give a gooey texture. For sweetness, try dark or semi-sweet chocolate. Dark chocolate adds a rich taste, while semi-sweet is classic and milder. Adding spices can brighten your banana bread. Try these: - Cinnamon - Nutmeg Both spices pair well with bananas. They add warmth and depth. You can also mix in other fruits. Blueberries or raspberries add a fresh twist. Just fold them in gently! To keep your banana bread fresh, consider these tips: - Room Temperature: Store it in an airtight container. This keeps moisture in. - Refrigeration: Only refrigerate if you plan to keep it longer than a week. The fridge can dry it out. - Freezing: For longer storage, wrap the bread tightly in plastic wrap. Then place it in a freezer bag. This will help it last for up to three months. Banana bread can last: - At Room Temperature: About 3 to 4 days in an airtight container. - In the Fridge: About 1 week. - In the Freezer: Up to 3 months. If you see mold or notice an off smell, it’s time to throw it away. To enjoy your banana bread warm, try these methods: - Microwave: Heat a slice for 10 to 15 seconds. This warms it without drying it out. - Oven: Preheat to 350°F (175°C). Wrap the bread in foil and heat for 10-15 minutes. This keeps it moist. - Toaster: For a crispy edge, toast a slice on low heat. This adds a nice texture. Yes, you can use frozen bananas. First, thaw them in the fridge or at room temperature. This will make them soft and easy to mash. Frozen bananas may be a bit more watery. To fix this, drain excess liquid before mixing. The flavor remains sweet and rich. Your banana bread will still be delicious! To make banana bread healthier, reduce sugar and fat. You can cut the brown sugar by a quarter. Replace some butter with applesauce to lower fat. Use whole grain flour instead of all-purpose flour. This adds fiber and nutrients. Your banana bread will still taste great but be more wholesome! If you want a vegan option, use flaxseed meal or applesauce. For one egg, mix one tablespoon of flaxseed meal with three tablespoons of water. Let it sit for five minutes. You can also use 1/4 cup of applesauce as a substitute. These swaps change the texture a bit but keep the bread moist and tasty. In this post, you learned how to make delicious banana bread. We covered ingredients, step-by-step instructions, and helpful tips. Use ripe bananas for the best flavor and moisture. Remember to mix gently to keep your bread light. You can add nuts, chocolate, or spices to change the taste. Store it right to keep it fresh longer. With these insights, you can create a perfect loaf every time. Enjoy baking and sharing your banana bread with friends and family!
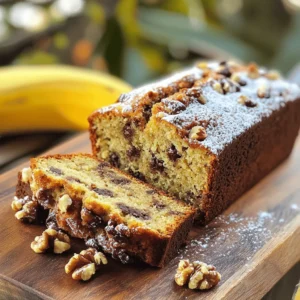
    Rich Banana Bread Flavorful and Soft Recipe
  • - 1 tablespoon olive oil - 1 onion, chopped - 2 cloves garlic, minced - 4 cups vegetable broth - 3 cups fresh spinach, chopped - 1 cup fresh parsley, chopped - 1 cup fresh basil, chopped - 1/2 cup fresh dill, chopped - 1 tablespoon lemon juice - Salt and pepper to taste - Optional: 1/4 cup cream or coconut milk for creaminess - Croutons for garnish When I make Green Goddess Herb Soup, I love using fresh herbs. They bring a bright taste to the dish. Olive oil adds richness, while onion and garlic give a warm base. Vegetable broth keeps it light and healthy. I chop three cups of fresh spinach. It makes the soup vibrant and packed with nutrients. Fresh parsley, basil, and dill also enhance the flavor. Together, they create a fresh, herbaceous taste. Lemon juice adds a zesty kick. Just a tablespoon brightens the whole soup. Salt and pepper round out the flavors perfectly. If you want a creamier soup, add a splash of cream or coconut milk. Finally, croutons add a fun crunch. They make each bite more exciting. This soup is not just good for you; it’s also tasty and satisfying. First, heat 1 tablespoon of olive oil in a large pot over medium heat. Add the chopped onion. Sauté it for about 5 minutes until it looks translucent. This step adds a sweet base to our soup. Next, add 2 cloves of minced garlic. Cook it for just 1 minute. Stir often to prevent burning. Now, pour in 4 cups of vegetable broth. Bring this mixture to a boil. Once the broth boils, lower the heat to a simmer. Add 3 cups of chopped spinach, 1 cup of chopped parsley, 1 cup of chopped basil, and 1/2 cup of chopped dill. Cook these greens for 5 to 7 minutes. You want them to be tender but still bright in color. This is where the fresh flavors shine. Now comes the fun part! Use an immersion blender to blend the soup until it is smooth. If you don’t have one, you can carefully transfer the soup in batches to a blender. Stir in 1 tablespoon of lemon juice for a zesty touch. If you want a richer taste, add 1/4 cup of cream or coconut milk. Season with salt and pepper to your liking. Serve the soup hot and enjoy the flavors! To make your Green Goddess Herb Soup shine, focus on balancing the seasonings. Start with salt and pepper. Taste as you go. This helps you adjust the flavors to your liking. For a creamy texture, add cream or coconut milk. Stir it in after blending the soup. This creates a rich and smooth finish. If you want a lighter version, skip the cream entirely. The soup still tastes great without it. For a smooth soup, a good blender is key. I recommend an immersion blender. It makes blending easy right in the pot. If you prefer a traditional blender, that works too. Just blend in batches to avoid spills. Choose a sturdy pot for cooking. A heavy-bottomed pot heats evenly. This helps prevent burning the garlic and onions as you sauté them. A large pot is best, as it gives you space to stir. Garnishing with croutons adds a nice crunch. Sprinkle them on top just before serving. This gives each bowl a fun texture. Pair the soup with crusty bread or a fresh salad. The bread helps soak up the soup. A salad adds a crisp contrast and keeps the meal light. You can even serve the soup in a bread bowl for a fun twist! {{image_2}} You can play with herbs in this soup. Try using chives or cilantro instead of parsley. Each herb brings a new taste. If you want a bolder flavor, add tarragon or thyme. For the creaminess, you can choose cream or coconut milk. Cream adds richness and a smooth texture. Coconut milk gives a light, sweet taste. Choose what fits your style best! To make this soup dairy-free, skip the cream. Use only coconut milk or leave it out. You can still enjoy a creamy soup without dairy. Add blended nuts for more texture and flavor. If you want protein, mix in beans or lentils. These added ingredients will make the meal more filling and healthy. They bring a nice texture too. Use seasonal greens to keep the soup fresh. In spring, add young kale or arugula. In fall, try using Swiss chard or collard greens. Each season offers different flavors. You can also adapt the recipe for your climate. In hot weather, serve it cold. Blend in a bit of yogurt for a refreshing twist. In cooler months, enjoy it hot with crusty bread. You can store the Green Goddess Herb Soup in the fridge for up to five days. To keep it fresh, use airtight containers. Glass jars or plastic containers with tight seals work best. This way, the soup stays tasty and avoids spills. To freeze the soup, let it cool completely first. Pour it into freezer-safe bags or containers. Leave some space at the top for expansion. Label the bags with the date. When you're ready to eat, thaw it in the fridge overnight. You can also use the microwave for a quick thaw. For the best taste, reheat the soup slowly. Warm it on the stove over low heat. Stir it often to avoid burning. You can also use a microwave, heating in short bursts. Just make sure to stir in between. This way, you keep the flavors bright and fresh! Green Goddess Herb Soup is a bright, green soup filled with fresh herbs and greens. The name comes from the famous Green Goddess dressing, which uses similar herbs. This soup offers a tasty way to enjoy nutrient-rich ingredients like spinach, parsley, basil, and dill. It is a comforting dish with roots in California cuisine. Chefs created it to highlight the flavors of fresh herbs. You can serve it warm or chilled, making it a versatile option. Yes, you can use dried herbs, but the flavor will change. Dried herbs have a more concentrated taste. This means you need less when using them. Typically, use one-third of the amount of dried herbs compared to fresh. The texture of the soup will also differ. Fresh herbs provide a vibrant look and a fresh bite. Dried herbs do not offer the same visual appeal. For best results, stick with fresh herbs when you can. To add heat, try a few simple tips. You can add red pepper flakes to the soup while it cooks. Start with a small pinch and taste as you go. Another option is to use fresh jalapeños or serrano peppers. Chop them finely and sauté with the onion and garlic. If you like a smoky flavor, add a dash of smoked paprika. Remember, heat levels can vary, so adjust to your liking. Enjoy the process of finding your perfect spice level! This article covers the recipe for Green Goddess Herb Soup. You learned about fresh ingredients, preparation steps, and tips for flavor. Remember, using fresh herbs gives your soup a vibrant taste. You can easily adapt the recipe to meet your needs, whether vegan or creamy. Proper storage helps you enjoy leftovers later. Keep experimenting with flavors and enjoy your new favorite dish. This soup not only nourishes but also delights. Happy cooking!
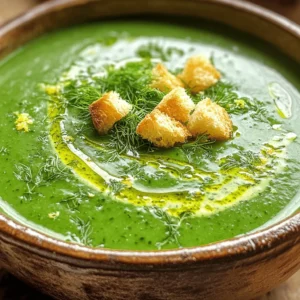
    Green Goddess Herb Soup Nourishing and Flavorful Meal
  • - 2 boneless, skinless chicken breasts - 1 cup shredded mozzarella cheese - 1/2 cup cream cheese, softened - 3 cloves garlic, minced - 1 teaspoon dried Italian herbs (oregano, basil, thyme) I love starting with fresh chicken breasts. They are the heart of the wrap. The mozzarella and cream cheese add rich flavor and creaminess. Garlic gives the dish a bold taste. The dried herbs bring in a lovely aroma and depth. - 4 large tortillas (whole wheat or flour) - 1 cup spinach leaves - 1/2 cup sliced bell peppers (any color) - 2 tablespoons olive oil - 1/2 teaspoon paprika - Salt and black pepper, to taste Tortillas hold everything together. Spinach adds a nice crunch and nutrition. Bell peppers give color and sweetness. Olive oil is key for cooking the chicken. Paprika adds a slight kick, while salt and pepper enhance all flavors. - Fresh parsley, chopped (for garnish) Fresh parsley adds a pop of color and freshness. It makes the wraps look even more appealing. You can use it to brighten up your plate. {{ingredient_image_1}} How do I season the chicken? First, take two boneless, skinless chicken breasts. Sprinkle salt, black pepper, and paprika on both sides. This gives the chicken great flavor. How do I cook the chicken in the skillet? Heat two tablespoons of olive oil in a skillet over medium heat. Add the seasoned chicken. Cook for 6-7 minutes on each side. The chicken should be golden brown and no longer pink inside. Once done, remove it from the heat and let it cool for a few minutes. What goes into the garlic mixture? In a medium bowl, combine 1/2 cup of softened cream cheese with 3 cloves of minced garlic. Add 1 teaspoon of dried Italian herbs. Mix it all together until smooth. This mixture adds a creamy texture and rich flavor to the wraps. How do I spread the garlic mixture? Grab a large tortilla. Spread a generous layer of the garlic cream cheese mixture all over it. Make sure to cover the entire surface for the best flavor. What should I add next? On top of the garlic mixture, add a handful of fresh spinach leaves. Then, shred the cooled chicken and sprinkle it over the spinach. Next, add some sliced bell peppers for a pop of color and crunch. Finish with a handful of shredded mozzarella cheese. How do I cook the wraps until crispy? Wipe the skillet clean and place it back on medium-low heat. Lay the wraps seam-side down in the skillet. Cook for about 2-3 minutes on each side. You want them to be golden brown and crispy, with the cheese melted inside. - Ensuring chicken is fully cooked Cook the chicken until it reaches 165°F inside. Use a meat thermometer for best results. This ensures your chicken is safe to eat and full of flavor. Look for no pink in the center. - Alternative cooking methods You can grill or bake the chicken for a different taste. Grill it over medium heat for 6-8 minutes per side. If baking, place it in a preheated oven at 375°F for 20-25 minutes. Both methods keep the chicken juicy and tender. - Accompaniments for wraps Pair these wraps with a fresh salad or some crispy fries. You can also serve with a side of salsa or ranch dressing for dipping. These add fun flavors and texture to your meal. - Presentation ideas Cut the wraps in half to show off the colorful filling. Arrange them on a platter with a sprinkle of fresh parsley for a pop of color. This simple touch makes your meal look fancy and inviting. - Dietary substitutions For a gluten-free option, use corn tortillas. You can also swap chicken for tofu or beans for a vegetarian choice. This keeps the flavors while fitting different diets. - Flavor variations Want to spice things up? Add jalapeños or hot sauce to the garlic mix. You can also try different herbs like cilantro or dill for a fresh twist. Each change brings a new taste to your wraps! Pro Tips Use Fresh Garlic: Freshly minced garlic will give your wraps a more robust flavor compared to pre-minced options. Experiment with Cheese: Feel free to mix different types of cheese like cheddar or pepper jack for a unique twist. Customize Your Veggies: Add your favorite vegetables such as zucchini or mushrooms for extra nutrition and flavor. Perfectly Crispy Wraps: Ensure the skillet is hot enough before placing the wraps to achieve that golden, crispy exterior. {{image_2}} You can switch up the meat in your wraps for a new spin. Try using turkey or lean pork for a tasty twist. Grilled shrimp also works well if you want seafood. If you're looking for vegetarian options, consider using black beans or grilled tofu. Both are filling and add great texture. You could even use roasted veggies like zucchini or mushrooms for a flavorful wrap. While mozzarella is a favorite, don’t be afraid to try other cheeses. Cheddar adds a nice sharp taste. Pepper jack gives a spicy kick. Cream cheese is also great for a creamy texture. Mixing cheeses can create a unique flavor. Try blending mozzarella with gouda for a rich taste. The right cheese can change your whole wrap experience. Spices can really boost your wraps. Try adding chili powder for heat or cumin for a warm flavor. A dash of lemon juice can brighten everything up. You can also add sauces. A drizzle of ranch or barbecue sauce can elevate each bite. For a fresh touch, try a sprinkle of fresh herbs like cilantro or basil. These small changes can make a big difference in taste. To keep your Cheesy Garlic Chicken Wraps fresh, place them in an airtight container. This helps keep moisture in and air out. Store the wraps in the fridge for up to three days. If you have extra filling, store it separately. This way, you can enjoy your wraps later without losing flavor. Freezing is a great option for future meals. First, wrap each Cheesy Garlic Chicken Wrap in plastic wrap. Then, place them in a freezer-safe bag. Make sure to squeeze out as much air as possible. You can freeze them for up to three months. When you're ready to enjoy, you can thaw them in the fridge overnight. To reheat without losing texture, use a skillet. Warm the skillet over low heat. Place the wraps seam-side down and cook for about 3-4 minutes on each side. This method keeps the wraps crispy and the cheese melty. If you're in a rush, a microwave will work too, but they may not stay as crispy. To make these wraps healthier, consider these tips: - Use whole wheat tortillas instead of regular ones. They add more fiber. - Swap cream cheese for Greek yogurt. It gives a creamy texture with less fat. - Add more vegetables like zucchini or mushrooms for extra nutrients. - Choose lean chicken or use turkey to cut down on calories. - Limit cheese to half a cup or use low-fat options. These swaps help keep the flavors while making your meal lighter. Yes, you can prepare these wraps in advance. Here’s how: - Prep the chicken and garlic mixture the day before. Store them in the fridge. - Assemble the wraps but do not heat them. Wrap each in foil or plastic wrap. - Store in the fridge for up to 24 hours. This keeps them fresh. - Before serving, you can heat them in a skillet or microwave. This way, you save time and enjoy a quick meal. These wraps go well with many sides. Here are some great options: - Fresh salad with mixed greens and a light dressing. - Steamed veggies like broccoli or green beans for a bright touch. - Chips or fries for a crunchy contrast. - Fruit salad for a sweet and refreshing side. These sides enhance the meal and make it more filling. In this blog post, we explored how to make Cheesy Garlic Chicken Wraps. We covered essential ingredients like chicken, cheese, and fresh veggies. I shared step-by-step instructions to help you cook and assemble your wraps. You learned helpful tips for flavor and storing leftovers, plus ideas for variations and healthier swaps. Try these wraps for a tasty meal that’s easy to customize. Enjoy experimenting with new flavors and ingredients! Happy cooking!
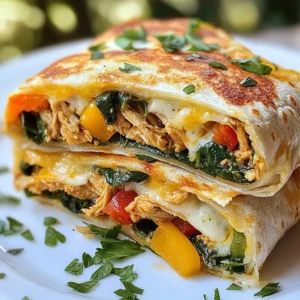
    Cheesy Garlic Chicken Wraps Flavorful and Easy Meal
  • - 1.5 lbs boneless, skinless chicken thighs, cut into bite-sized pieces - 1 medium onion, finely chopped - 4 cloves garlic, minced - 1 tablespoon fresh ginger, grated - 1 can (15 oz) tomato sauce - 1 can (13.5 oz) coconut milk - 1 tablespoon garam masala - 1 teaspoon ground cumin - 1 teaspoon ground coriander - 1 teaspoon turmeric - 1 teaspoon paprika - 1 teaspoon chili powder (adjust to taste) - Salt to taste - 2 tablespoons butter - Fresh cilantro for garnish - Cooked basmati rice or naan for serving I love using fresh ingredients for this dish. Fresh garlic and ginger give a bright taste. You can use canned tomato sauce and coconut milk for ease. Both options are tasty and save time. For chicken, I prefer boneless, skinless thighs. They stay juicy and tender. Breast meat can dry out too quickly in the slow cooker. If you can't find garam masala, you can make your own. Mix equal parts of cumin, coriander, and turmeric. Adding a pinch of cinnamon can enhance the flavor. If you want a lighter dish, you can swap coconut milk with low-fat yogurt. This change gives a nice creaminess, but adjust the heat to prevent curdling. For a vegan option, replace chicken with chickpeas or tofu. 1. Start by chopping one medium onion into small pieces. 2. Mince four cloves of garlic. 3. Grate one tablespoon of fresh ginger. 4. Cut 1.5 pounds of boneless, skinless chicken thighs into bite-sized pieces. 5. Gather all your ingredients in one spot for easy access. 1. Place the chopped onion, minced garlic, and grated ginger at the bottom of your slow cooker. 2. Add the bite-sized chicken thighs on top of the onion mixture. 3. In a bowl, mix one can of tomato sauce with one can of coconut milk. 4. Add one tablespoon of garam masala, one teaspoon each of ground cumin, ground coriander, turmeric, paprika, and chili powder into the bowl. 5. Whisk these ingredients until smooth, then pour the sauce over the chicken. 6. Dot the top with two tablespoons of butter. 7. Cover the slow cooker with its lid. 8. Cook on low for 6 to 8 hours or high for 3 to 4 hours. 9. When done, taste the dish and add more salt or spices if needed. 10. Serve over cooked basmati rice or with naan. 11. Top with fresh cilantro before serving. - If you are short on time, use the high setting for quicker cooking. - For more tender chicken, let it cook on low for the full time. - Check for doneness; chicken should be tender and juicy. - Adjust cooking times based on your slow cooker’s heat level. - Always taste before serving to ensure the flavor is just right. To make your butter chicken shine, use fresh ingredients. Fresh garlic and ginger add a lot of taste. You can also try marinating the chicken in spices for a few hours. This step boosts the flavor. When cooking, make sure to taste the sauce before serving. Adjust spices as needed for your taste. Adding a pinch of sugar can balance the acidity of the tomato sauce. One common mistake is overcooking the chicken. It can become dry and tough. Stick to the cooking times in the recipe. Another mistake is not mixing the sauce well. Ensure all spices are blended into the tomato and coconut milk. Lastly, don’t skip the butter. It adds richness and a smooth finish to the dish. You will need a reliable slow cooker for this recipe. A large one is best for even cooking. A good knife will help you chop the onion and garlic finely. A whisk is essential for mixing the sauce smoothly. Lastly, keep measuring cups handy for accuracy with your ingredients. {{image_2}} You can change the heat in butter chicken easily. If you like it spicy, add more chili powder. Start with one teaspoon. Taste the dish as it cooks. If you want more heat, add small amounts until you find your perfect flavor. For milder butter chicken, reduce the chili powder. You can also use sweet paprika instead. This keeps the dish tasty without the heat. Chicken thighs are great, but you can use other proteins. Try chicken breast for a leaner choice. You can also use shrimp or tofu for a twist. If you prefer beef, use tender cuts like sirloin. Cook times may change, so check for doneness. Remember, each protein adds a unique flavor and texture. To make this dish dairy-free, replace butter with oil. Coconut milk is already a great choice for creaminess. For a vegan option, use tofu or chickpeas instead of chicken. Keep the same spices and sauce. This way, you still enjoy the rich taste of butter chicken without any animal products. After cooking your slow cooker butter chicken, let it cool. You can store it in an airtight container. Place it in the fridge for up to four days. This helps keep the flavors fresh. If you want to save some for later, make sure to label your container with the date. This way, you will know how long it's been stored. To freeze your butter chicken, let it cool completely. Use freezer-safe containers or bags. You can store it for up to three months. When you're ready to eat it, just take it out of the freezer. Allow it to thaw in the fridge overnight for best results. This way, the chicken stays juicy and the sauce remains creamy. When it’s time to reheat, use the stovetop or microwave. For the stovetop, heat in a pan over medium heat. Stir often to ensure even heating. If you use the microwave, place the chicken in a bowl and cover it. Heat in short bursts, stirring in between. This keeps the chicken from drying out. Always check that it’s heated all the way through before serving. Enjoy your delicious butter chicken again! Yes, you can make Slow Cooker Butter Chicken ahead of time. Prepare the dish, then store it in the fridge for up to three days. The flavors deepen as it sits. Just reheat it before serving. This makes it perfect for busy weeknights or meal prep. To thicken the sauce, you have a few options. One way is to remove the lid during the last hour of cooking. This allows steam to escape and the sauce to reduce. Another option is to add a slurry. Mix 1 tablespoon of cornstarch with 2 tablespoons of cold water. Stir it into the sauce and cook for about 15 minutes. Butter Chicken pairs well with several sides. Here are some great options: - Cooked basmati rice - Naan bread - Steamed vegetables - Raita for a cooling effect - Side salad for freshness Each of these sides balances the richness of the butter chicken. Enjoying it with naan is a favorite, as you can scoop up the sauce! In this post, we explored all you need for a great Slow Cooker Butter Chicken. We covered key ingredients and how to choose fresh or canned options. You learned tips for preparing and cooking in a slow cooker, along with ways to enhance flavor and avoid mistakes. We also discussed variations like spice levels and protein choices. Lastly, we shared storage tips to keep your meal fresh. With these insights, you can confidently make this dish your own. Enjoy the cooking process and savor every bite!
    Savory Slow Cooker Butter Chicken Easy and Flavorful
  • - 1 cup unsalted butter, softened - 1 cup brown sugar, packed - 1/2 cup granulated sugar - 2 large eggs - 1 teaspoon vanilla extract - 2 cups all-purpose flour - 1/2 teaspoon baking soda - 1/2 teaspoon salt - 1/2 cup brewed espresso, cooled - 1 1/2 cups semi-sweet chocolate chips - 1/2 cup toasted pecans, chopped (optional) For these espresso chocolate chip cookies, you need simple yet rich ingredients. First, the unsalted butter gives a creamy base. Brown sugar adds a deep, caramel taste, while granulated sugar provides a nice balance. Next, you will use eggs for moisture and structure. Vanilla extract brings warmth, enhancing the cookie's flavor. All-purpose flour forms the backbone of the dough. Baking soda helps the cookies rise, creating a soft texture. Salt enhances sweetness, making each bite delightful. The cooled brewed espresso is the star, lending a bold coffee flavor. Finally, semi-sweet chocolate chips provide a sweet contrast. If you like nuts, toasted pecans add crunch and depth. Each ingredient plays a role in making these cookies rich and flavorful. 1. Prepping the oven and baking sheets: First, set your oven to 350°F (175°C). This heat is perfect for baking. Next, line two baking sheets with parchment paper. This step helps the cookies not stick. 2. Creaming butter and sugars: In a large bowl, add 1 cup of softened unsalted butter, 1 cup of packed brown sugar, and 1/2 cup of granulated sugar. Use a mixer or a sturdy spoon to mix until it becomes light and fluffy. This process adds air, making your cookies soft. 3. Adding eggs and espresso: Now, crack in 2 large eggs, one at a time. Mix well after each egg. Then stir in 1 teaspoon of vanilla extract and 1/2 cup of cooled brewed espresso. This espresso gives the cookies a rich flavor. 1. Combining flour, baking soda, and salt: In a different bowl, whisk together 2 cups of all-purpose flour, 1/2 teaspoon of baking soda, and 1/2 teaspoon of salt. These ingredients are key for structure and rise in your cookies. 2. Incorporating dry with wet ingredients: Gradually add the dry mix into your wet ingredients. Stir gently until just combined. Be careful not to overmix; this keeps the cookies tender. 1. Scooping dough onto baking sheets: Use a cookie scoop or a tablespoon to drop rounded balls of dough onto your lined baking sheets. Space them about 2 inches apart. This space allows them to spread during baking. 2. Baking time and temperature considerations: Place the sheets in the oven. Bake for 10-12 minutes. Look for golden edges, while the centers should still appear soft. This balance is key for delicious cookies. 3. Cooling process and transferring to wire rack: Once done, take the cookies out. Let them cool on the sheets for 5 minutes. Then, carefully move them to a wire rack to cool completely. This step helps them firm up and keeps them from becoming too soft. Using cool espresso is key for great flavor. Hot espresso can change the dough. It can melt the butter too much and make cookies flat. Let your espresso cool fully before adding it. The creaming technique matters for fluffiness. Cream the butter and sugars well. This step adds air and lightens the dough. Mix until it's light and creamy. You want a smooth blend before adding other ingredients. Overmixing the dough is a common mistake. Mix just until the ingredients combine. Overmixing can make cookies tough. You want them soft and chewy. Underbaking can also lead to chewy cookies. Keep an eye on the time. Bake until the edges are golden, but the center stays soft. They will firm up as they cool. Serve these cookies warm on a rustic plate. A wooden platter adds charm. Pair them with a cup of coffee for a perfect match. For an appealing look, dust with powdered sugar. You can also drizzle melted chocolate on top. This makes your cookies look extra special. {{image_2}} To make these cookies vegan, you need good substitutes for eggs and butter. You can use flaxseed meal mixed with water as a great egg replacement. Mix 1 tablespoon of flaxseed meal with 2.5 tablespoons of water. Let it sit for about 5 minutes until it thickens. For butter, use coconut oil or vegan butter. Both will keep the cookies rich and tasty. If you need gluten-free cookies, choose the right flour. Almond flour works well and adds a nice flavor. You can also try oat flour or a gluten-free all-purpose blend. Make sure the mix contains xanthan gum for better texture. This will help the cookies hold together and not fall apart. You can change the flavor of these cookies easily. Adding spices like cinnamon or nutmeg gives them a warm touch. Just a sprinkle can make a big difference. You might also want to try different types of chocolate. Dark chocolate or white chocolate can create a new taste. Mix and match to find your favorite combination! To keep your Espresso Chocolate Chip Cookies fresh, store them at room temperature. Place them in an airtight container to maintain their soft texture. If you want to keep them longer, refrigeration works too. Just remember, cold can affect the taste and texture. Here are some tips for best practices: - Use a container that seals tightly. - Separate layers with parchment paper to prevent sticking. - Keep cookies away from direct sunlight and heat. Freezing cookie dough is a great way to save time. Here’s how you can do it: 1. Prepare the cookie dough as you normally would. 2. Scoop dough balls onto a baking sheet. 3. Freeze them for about an hour until firm. 4. Place the frozen dough balls in a freezer-safe bag or container. For reheating frozen cookies, follow these steps: - Preheat your oven to 350°F (175°C). - Place the frozen cookies on a baking sheet. - Bake for about 10-12 minutes until warm and soft. Now, you can enjoy fresh cookies anytime! Yes, you can use coffee instead of brewed espresso. A strong brewed coffee works best. I suggest using a dark roast for a richer flavor. Brew it strong, about 1.5 times your usual amount. This swap keeps the cookie's taste strong and bold. To make your cookies chewier, try these tips. First, reduce the baking time by a minute or two. Remove them from the oven when the edges are golden but centers are still soft. Second, add an extra egg yolk. It adds moisture and keeps them soft. Finally, use brown sugar instead of granulated sugar. This adds more moisture, making your cookies chewy and flavorful. You can use dark chocolate instead of semi-sweet. This change makes your cookies richer and less sweet. If you prefer darker chocolate, adjust the amount slightly. Use about 1 cup of dark chocolate chips instead of 1.5 cups of semi-sweet. This keeps the balance just right for a delicious treat! In this post, we explored how to make delicious espresso chocolate chip cookies. We covered essential ingredients, prep steps, and tips for success. You learned about variations for dietary needs and how to store them for later. Remember, the key lies in your techniques, like using cool espresso and avoiding overmixing. With these steps, you can enjoy cookies that delight everyone. Now, get baking and savor each bite!
    Espresso Chocolate Chip Cookies Rich and Flavorful Treat
  • Here’s what you need for the Crack Breakfast Casserole: - Crusty sourdough bread - Large eggs - Milk - Shredded sharp cheddar cheese - Cooked breakfast sausage - Baby spinach - Onion - Bell pepper - Garlic powder - Seasoning (salt and pepper) - Fresh chives for garnish (optional) Gathering these ingredients is fun. You can find crusty sourdough bread at most bakeries. I love the flavor it brings. Large eggs and milk form the base of the dish. They help bind everything together. Shredded sharp cheddar cheese gives a rich taste. I recommend using fresh cheese, as it melts better. The cooked breakfast sausage adds savory goodness. You can use turkey sausage for a lighter option. Baby spinach is great for a pop of color and nutrition. Onions and bell peppers add sweetness and crunch. Don't forget the garlic powder for depth of flavor. Season with salt and pepper to your liking. If you want, fresh chives add a nice touch on top. This mix of ingredients creates a dish full of flavor. It’s hearty and satisfying for breakfast or brunch! 1. Preheat your oven to 350°F (175°C). Grease a 9x13 inch baking dish. 2. In a large bowl, whisk together 8 eggs and 2 cups of milk. Add 1 teaspoon of garlic powder, salt, and pepper to taste. 3. In the greased dish, layer the cubed sourdough bread evenly on the bottom. 1. Sprinkle the cooked sausage, chopped spinach, onion, and bell pepper over the bread. 2. Pour the egg mixture evenly over the layers. Press down gently to soak the bread. 3. Top with 1 cup of shredded cheddar cheese. Cover with foil and bake for 30 minutes. 4. After 30 minutes, remove the foil. Bake uncovered for another 15-20 minutes until set and the cheese is golden brown. 1. Let the casserole cool slightly before slicing. 2. You can garnish with fresh chives if you wish. Enjoy! To get the best flavor, make sure the bread is soaked well. This helps it absorb the egg mixture. I like to let it sit for a few minutes. This gives the bread a chance to soak up the goodness. For a golden cheese topping, add the cheese last and bake uncovered. This way, the cheese gets bubbly and brown. If you want a twist, try using different breads. Challah or whole grain bread can work nicely. You can also change up the veggies. Zucchini or mushrooms can add great taste. For meats, turkey sausage or bacon are tasty swaps. You can prepare this casserole the night before. Just follow the steps up to pouring the egg mixture. Cover it well and store in the fridge. This way, you save time in the morning. For overnight storage, use plastic wrap or a lid. This keeps it fresh and ready to bake. {{image_2}} You can easily make a vegetarian version of the Crack Breakfast Casserole. Simply swap out the cooked breakfast sausage. Use extra veggies instead. Consider adding mushrooms, zucchini, or sun-dried tomatoes. You can also add plant-based sausage if you want a similar taste. This keeps the dish hearty and full of flavor without meat. For those who love heat, add jalapeños or hot sauce. Thinly slice fresh jalapeños and layer them with the veggies. If you prefer, mix hot sauce into the egg and milk mix. This will give the casserole a nice kick. Adjust the amount based on your heat tolerance for the best experience. Change up the cheeses for a new taste. Instead of sharp cheddar, try mozzarella for a milder flavor. Gouda brings a creamy texture and richness. Feta adds a tangy bite that pairs well with the veggies. Feel free to mix and match your favorite cheeses to create a unique flavor profile. To store leftovers, let the casserole cool first. Then, cover it tightly with plastic wrap or foil. You can also use an airtight container. This keeps it fresh for up to three days in the fridge. If you want to enjoy it later, store it in smaller portions. This makes it easy to reheat just what you need. You can freeze the cooked casserole for longer storage. Once it cools, cut it into slices. Wrap each slice in plastic wrap, then place them in a freezer bag. Make sure to squeeze out as much air as you can. The casserole will keep well for up to three months in the freezer. To thaw, place it in the fridge overnight before reheating. To reheat, I recommend using the oven for the best texture. Preheat your oven to 350°F (175°C). Place the casserole in an oven-safe dish and cover it with foil. Heat for about 20 minutes. If you want a crispy top, remove the foil for the last five minutes. You can also use the microwave for quick reheating, but it may not be as crispy. Heat slices in 30-second intervals until warm. Yes, you can use many types of bread. Sourdough works great, but others can too. Try French bread, whole wheat, or even rye. Each bread adds its own flavor. Just remember to cube it for even cooking. You can store the casserole in the fridge for about four days. Make sure to cover it well. If you want to keep it longer, freeze it. It can last for about three months in the freezer. Just let it cool before storing. Absolutely! Doubling the recipe is easy. Just use two loaves of bread, double the eggs, and the rest. Ensure your baking dish is large enough. You may need to bake it a bit longer. Check for doneness before serving. This recipe for a breakfast casserole stands out with its rich flavors and easy steps. We explored ingredients like sourdough, eggs, and cheddar cheese. Each step, from preparation to baking, builds a tasty dish. Tips for perfecting the casserole and creative variations add fun. You can adapt this recipe to fit your taste or make it ahead. Storing leftovers is also simple. With this guide, you'll impress everyone with your cooking skills. Enjoy creating your unique version of this breakfast delight!
    Crack Breakfast Casserole Hearty and Simple Recipe
  • - 1 pound flank steak, thinly sliced - 1 cup jasmine rice - 2 cups beef broth - 1 red bell pepper, sliced - 1 green bell pepper, sliced - 1 onion, thinly sliced - 2 tablespoons soy sauce - 1 tablespoon cornstarch - 1 tablespoon chili garlic sauce - 1 teaspoon sugar - Salt and pepper to taste - Green onions, sliced - Sesame seeds - Salt and pepper When making Crispy Chili Beef Rice, you need the right ingredients for great flavor. Start with flank steak. It is tender and cooks well. Slice it thinly for the best texture. Jasmine rice is a must. It is fluffy and fragrant. Using beef broth to cook the rice adds rich flavor. Next, bell peppers and onions brighten the dish. They add color and crunch. For seasoning, soy sauce brings salty depth. Cornstarch helps create a crispy crust on the beef. Chili garlic sauce adds heat and zest, while sugar balances the spice. Remember to season with salt and pepper to enhance all the flavors. Finally, garnishes like green onions and sesame seeds make your dish look pretty. They also add a fresh taste. With these ingredients, you are ready to create a delicious meal! First, rinse the jasmine rice under cold water. Do this until the water runs clear. This step helps remove excess starch, making the rice fluffy. Next, combine the rinsed rice and beef broth in a medium pot. Bring it to a boil over high heat. Once boiling, reduce the heat to low. Cover the pot and let it simmer for about 15 minutes. This will allow the rice to absorb all the flavors. When it’s done, remove it from the heat and set it aside. Now, let’s focus on the beef. In a bowl, toss the thinly sliced flank steak with soy sauce, cornstarch, and a pinch of salt and pepper. Mixing these ingredients helps the beef soak up flavor. Let it marinate for at least 10 minutes. This marination time is key for tenderness and taste. Heat vegetable oil in a large skillet or wok over medium-high heat. Add the marinated beef to the hot oil. Cook it without stirring for about 2-3 minutes. This will help the beef get crispy. After that, flip the beef and cook for another 2 minutes until it’s browned. Once done, remove the beef from the pan and set it aside. In the same skillet, add sliced onions and bell peppers. Sauté them for about 3-4 minutes until they begin to soften. Then, add the minced garlic and cook for one more minute. This will enhance the flavor of the veggies. Next, return the crispy beef to the skillet. Drizzle chili garlic sauce and sugar over the mixture. Stir everything to combine well. Cook for another 2 minutes to ensure the beef is well coated and heated through. Finally, serve the chili beef mixture over a scoop of the jasmine rice. Garnish with sliced green onions and sesame seeds to add flavor and make your dish look great. Enjoy your crispy chili beef rice! To get that perfect crispy beef, do not stir it while cooking. Let it sit in the hot oil. This helps the meat form a nice crust. Cook the beef on high heat. This high temperature makes it sizzle and brown quickly. If your pan is not hot enough, the beef will steam instead of crisp. You can use different types of rice for this dish. Jasmine rice is soft and fragrant. However, basmati or long grain rice also works well. For more flavor, cook the rice in beef broth instead of water. This adds a rich taste and enhances the dish’s overall flavor. Do not hesitate to add extra spices to boost flavors. Try red pepper flakes or a pinch of black pepper for more heat. You can also mix in some ginger for a fresh touch. Pair your dish with sauces like teriyaki or hoisin for a sweet twist. These enhancements make your meal even more delicious! {{image_2}} You can switch the beef for chicken or tofu. For chicken, use boneless thighs or breasts. Cut them into thin strips just like the beef. Cook them for about 5-7 minutes until they are golden and cooked through. If you choose tofu, press it first to remove extra water. Cut the tofu into cubes and cook for about 4-5 minutes until crispy on all sides. Adjust the cooking time based on the protein you use. If you want to try something new, use quinoa or cauliflower rice. Quinoa cooks well and adds a nutty flavor. Use the same amount of broth for quinoa. For cauliflower rice, sauté it in the pan for about 3-4 minutes. This will keep it fresh and tasty. You may need to adjust the flavors. Use a bit more soy sauce or chili garlic sauce to make sure it tastes great. Adding more veggies can make your meal even better. You can toss in carrots, snap peas, or broccoli. These add color and crunch to your dish. Choose seasonal veggies for the best taste. For spring, try asparagus or peas. In winter, use hearty vegetables like carrots or Brussels sprouts. This way, you make your Crispy Chili Beef Rice even more nutritious and delicious. To keep your Crispy Chili Beef Rice fresh, place leftovers in an airtight container. Make sure the beef and rice cool down first. This helps keep the flavors intact. Store in the fridge for up to three days. After that, the beef may lose its crispiness and taste. When you're ready to eat, you can reheat the dish in a few ways: - Skillet: Heat a skillet over medium heat. Add the beef and rice. Stir gently until everything warms up. This method helps keep the beef crispy. - Microwave: Place the rice and beef in a microwave-safe dish. Cover it loosely with a microwave-safe lid or wrap. Heat for one to two minutes, stirring halfway through. This method is quick but may soften the beef. If you want to save some for later, freezing is an option. Here’s how to do it: - Let the dish cool completely. - Use freezer-safe containers or heavy-duty freezer bags. This prevents freezer burn. - Label the containers with the date. Store for up to three months. To reheat, thaw overnight in the fridge and use the skillet method for the best results. Yes, you can make Crispy Chili Beef Rice ahead of time. Here are some tips for meal prep: - Cook the Rice: You can prepare the jasmine rice and store it in the fridge. It stays fresh for about four days. - Prepare the Beef: Marinate the flank steak in advance. This adds flavor and saves time. - Store Separately: Keep the beef and vegetables separate from the rice. This helps prevent sogginess. - Reheat Carefully: When ready to eat, reheat the rice and beef separately. Use a pan to keep the beef crispy. You can pair Crispy Chili Beef Rice with several tasty side dishes: - Steamed Vegetables: Broccoli or snap peas add crunch and color. - Spring Rolls: These add a fun, crispy element to your meal. - Cucumber Salad: A cool salad balances the heat of the beef. - Egg Rolls: A savory option that complements the rice. Crispy Chili Beef Rice can be spicy. The chili garlic sauce gives it heat. Here’s how to adjust spice levels: - Mild Version: Use less chili garlic sauce. Start with half a tablespoon. - Add Sweetness: A little sugar can balance the heat. - Serve with Cool Sides: Pair with yogurt or sour cream to tone down the spice. - Taste Test: Always taste as you go. Adjust the heat to your preference. Crispy Chili Beef Rice is a simple, tasty dish that you can make at home. We covered the main ingredients and their flavors. Marinating the beef really makes a difference. I shared tips for making the beef crispy and how to cook the rice perfectly. You can even mix in different proteins and veggies. With proper storage, leftovers can last and be reheated well. Overall, this meal is flexible and fun. You've got all the tools to make a delicious dish. Enjoy your cooking adventure!
    Crispy Chili Beef Rice Flavorful and Easy Recipe
  • - Puff Pastry Sheet - Deli Ham - Shredded Cheese - Dijon Mustard - Egg for Egg Wash - Seasoning (Salt and Pepper) - Fresh Chives Gather these ingredients before you start. Using fresh ingredients makes your dish even better. Here’s a closer look at what each item brings to the table: - Puff Pastry Sheet: This is the star of the dish. It puffs up nice and golden when baked. Choose a good quality sheet for the best results. - Deli Ham: I like using diced deli ham for its rich flavor. It adds a savory element to the puffs. You can use any ham you prefer. - Shredded Cheese: Cheddar or Gruyère works best. Both melt nicely and add that gooey texture everyone loves. Feel free to mix cheeses for a unique taste. - Dijon Mustard: This gives a tangy kick. It enhances the flavor of the ham and cheese without being overpowering. - Egg for Egg Wash: Beaten egg helps the pastries turn golden brown. It makes them look shiny and appetizing. - Seasoning (Salt and Pepper): A sprinkle of salt and pepper brings out the flavors in your filling. Adjust to your taste. - Fresh Chives: Chopped chives add a nice touch. They bring color and a mild onion flavor to finish off the dish. Having all these ingredients ready will set you up for success in making your ham and cheese puff pastries. Enjoy the process and the delicious end result! Preheating the Oven First, preheat your oven to 400°F (200°C). This heat will make the pastries puff up nicely. Preparing the Puff Pastry Next, take the thawed puff pastry sheet and place it on a clean surface. Lightly flour the surface to prevent sticking. Roll the pastry out gently to smooth it. Cut it into 4 equal squares. Making the Filling In a bowl, mix together the diced deli ham, shredded cheese, and Dijon mustard. Add salt and pepper to taste. Stir until all the ingredients blend well. Assembling the Pastries Place a generous tablespoon of the filling in the center of each square. Fold the corners over the filling to form a triangle. Press the edges firmly to seal each pastry. Egg Wash Application Use a beaten egg to brush the tops of the pastries. This gives them a golden brown color when baked. Baking Time and Temperature Place the filled pastries on a lined baking sheet. Bake them in your preheated oven for about 15 to 20 minutes. Keep an eye on them until they turn golden brown and puff up. Cooling Instructions Once baked, take the pastries out of the oven. Let them cool on a wire rack for about 5 minutes. This helps them firm up a bit. Garnishing Tips Before serving, sprinkle chopped chives on top for a fresh touch. You can also serve them with a small bowl of mustard for dipping. Enjoy your Cheesy Ham Delight Puffs! Rolling and Cutting Techniques To roll the puff pastry, use a lightly floured surface. This keeps the dough from sticking. Roll it out gently to smooth it. Cut the dough into four equal squares. Each square should be about 4-5 inches. This size works best for filling. Achieving Flakiness Flakiness comes from how you handle the dough. Keep it cold before baking. This helps the layers stay separate. When baking, the steam creates those lovely layers. Avoid pressing down too hard when sealing the edges. Alternative Cheese Options While cheddar is classic, try Gruyère or mozzarella for a softer taste. You can even mix cheeses for a unique flavor. A sharper cheese adds a nice kick. Additional Seasonings Dijon mustard adds zest to the filling. Try adding garlic powder or onion powder for extra flavor. Fresh herbs like thyme or rosemary can elevate the taste too. Serving Suggestions Serve the Cheesy Ham Delight Puffs on a wooden board. This gives a rustic look. You can also use a colorful platter to catch the eye. Plating Ideas Garnish with chopped chives for a pop of color. You can also place a small bowl of mustard nearby for dipping. This makes the dish not just tasty but also visually appealing. {{image_2}} You can mix and match the filling for your Ham & Cheese Puff Pastry. For a twist, add vegetables. Spinach, mushrooms, or bell peppers work well. Just sauté them first to remove extra moisture. This keeps your pastries from getting soggy. You can also try different meats. Swap deli ham for turkey or chicken. You can even use bacon for a smoky flavor. Each meat brings a new taste to the dish. Want a vegetarian option? Simply leave out the meat. You can add more cheese or use a mix of cheeses. Try ricotta, mozzarella, or feta for added depth. If you need a gluten-free pastry, look for gluten-free puff pastry sheets. Many brands offer this option. Just follow the same steps to fill and bake. Mix sweet and savory for a fun flavor. Add a touch of honey or fig jam to the filling. This adds a nice contrast to the salty ham and cheese. You can also explore international flavors. Try adding some pesto for an Italian vibe. Or, you can mix in curry powder for an Indian twist. These options open a world of flavor. To keep your Ham & Cheese Puff Pastry fresh, store leftovers in the fridge. Place them in an airtight container. This helps maintain their crispness. They stay good for about 2-3 days. If you notice any sogginess, try reheating them briefly. Want to save some for later? You can freeze them! Allow the pastries to cool completely. Then, wrap each one tightly in plastic wrap. Place the wrapped pastries in a freezer bag. They freeze well for up to 2 months. When you’re ready to enjoy, just thaw them in the fridge overnight. To reheat your puff pastries, preheat the oven to 350°F (175°C). Place the pastries on a baking sheet. Bake for about 10-15 minutes. This keeps them nice and crispy. You can also use an air fryer. Set it to 350°F (175°C) for 5-7 minutes. Enjoy your delicious treat! How do I keep puff pastry from getting soggy? To stop puff pastry from being soggy, avoid adding too much filling. Make sure to seal the edges well. Baking them right after assembling also helps. If you bake them until golden brown, they will stay crisp. Can I use store-bought puff pastry? Yes, you can use store-bought puff pastry. It saves time and effort. Just thaw it according to the package instructions. This option works great for quick snacks or meals. How long can I store cooked ham & cheese puff pastries? You can store cooked pastries in the fridge for up to three days. Place them in an airtight container. This keeps them fresh and tasty for later enjoyment. What is the best cheese for puff pastries? Cheddar and Gruyère are great choices for puff pastries. They melt well and add rich flavor. Feel free to mix cheeses for more taste, too. Can I make these pastries in advance? Yes, you can prepare the pastries ahead of time. Assemble them and keep them in the fridge. Bake them just before serving for the best results. What can I serve with ham & cheese puff pastries? These pastries pair well with a fresh salad or a cup of soup. You can also serve them with mustard for dipping. This adds a nice kick to each bite. This blog post guided you through making delicious ham and cheese puff pastries. We explored ingredients, preparation steps, baking, and how to enhance flavors. You learned tips for perfecting puff pastry and various filling options. Storing and reheating leftovers was also covered. I hope you feel inspired to try this recipe. Enjoy making these tasty treats for yourself or your loved ones!
    Ham & Cheese Puff Pastry Delight with Easy Steps
  • To make this tasty sauce, gather these main ingredients: - 1/2 cup Greek yogurt (plain, non-fat) - 2 tablespoons honey - 1 tablespoon Dijon mustard - 1 tablespoon apple cider vinegar - 1/2 teaspoon garlic powder - 1/2 teaspoon smoked paprika - Salt and pepper to taste These ingredients work together to create a creamy, sweet, and tangy flavor. Greek yogurt gives it a nice base, while honey adds sweetness. Dijon mustard gives a bit of kick, and apple cider vinegar adds a tangy twist. Garlic powder and smoked paprika round out the flavor. You can add some fun ingredients to make this sauce even better. Consider these options: - A dash of hot sauce for heat - A teaspoon of lemon juice for brightness - Chopped fresh herbs like parsley or dill These add-ins can tweak the flavor to fit your taste. If you like spicy, hot sauce is great. Lemon juice can boost freshness, and herbs can add a pop of color and flavor. Each ingredient brings health benefits to the table: - Greek yogurt: High in protein and low in fat. - Honey: A natural sweetener with antioxidants. - Dijon mustard: Low in calories and adds flavor. - Apple cider vinegar: May help with digestion. - Garlic powder: Known for its immune-boosting properties. - Smoked paprika: Adds flavor without extra calories. Using these ingredients, you get a sauce that is not just tasty but also good for you. This healthy Chick-Fil-A sauce is a great addition to many meals. {{ingredient_image_1}} To make this sauce, start with a medium mixing bowl. In it, combine 1/2 cup of Greek yogurt, 2 tablespoons of honey, 1 tablespoon of Dijon mustard, and 1 tablespoon of apple cider vinegar. These ingredients give the sauce its creamy base and sweet tang. Next, add 1/2 teaspoon of garlic powder and 1/2 teaspoon of smoked paprika. These spices boost the flavor profile. Use a whisk to mix everything together until it’s smooth and creamy. This should only take a minute or two. Finally, taste the sauce and add salt and pepper to your liking. Whisking is key for a smooth texture. If you find lumps, keep whisking until everything blends well. You can also use a hand mixer if you prefer. This will make the job easier and faster. For an even smoother sauce, you can blend it in a food processor. Just remember to scrape down the sides to mix everything evenly. After mixing, transfer your sauce to an airtight container. It’s best to refrigerate it for at least 30 minutes. This waiting time allows the flavors to mix and deepen. If you can, let it sit longer, like a few hours or overnight. The sauce will taste even better! When you’re ready to serve, just give it a quick stir. To change the sweetness of your sauce, add more honey. You can also try maple syrup for a different taste. If you find it too sweet, a splash of apple cider vinegar can balance it. Taste as you mix. This lets you find your perfect flavor. If you want a dairy-free sauce, swap Greek yogurt with silken tofu. For a low-calorie option, use a sugar-free honey alternative. You can also use yellow mustard instead of Dijon for a milder taste. The key is to keep the same texture, so choose smooth ingredients. This sauce pairs well with grilled chicken or roasted veggies. You can also use it as a dip for fries or fresh veggies. Spread it on sandwiches for extra flavor. It adds a nice kick to wraps and salads too. Serve it chilled for a refreshing taste! Pro Tips Use Fresh Ingredients: Fresh ingredients enhance the flavor profile of your sauce. Opt for high-quality honey and fresh apple cider vinegar for the best results. Adjust Sweetness: Depending on your taste preference, you can adjust the amount of honey. For a less sweet sauce, start with one tablespoon and add more as needed. Experiment with Spices: Feel free to experiment by adding other spices like cayenne pepper or cumin for a different flavor twist that suits your palate. Let It Chill: Allowing the sauce to chill for at least 30 minutes helps the flavors meld together, creating a more harmonious taste experience. {{image_2}} To make a spicy version of this sauce, add hot sauce. Start with one teaspoon and taste. You can always add more if you like it hotter. Another option is to mix in cayenne pepper. A pinch can add a great kick. This spicy twist works well with chicken or veggies. For a vegan version, swap the Greek yogurt for silken tofu or a plant-based yogurt. Use maple syrup instead of honey to keep it sweet. The rest of the ingredients stay the same. This way, you can enjoy the same great flavor without animal products. To cut calories, use low-fat Greek yogurt instead of non-fat. You can also reduce the honey to one tablespoon or less. Try replacing apple cider vinegar with lemon juice for a fresh taste. These swaps keep the sauce tasty while lightening it up. To keep the sauce fresh, place it in an airtight container. This will stop air from getting in and keep the flavors strong. If you don’t have a container, you can also use a glass jar with a lid. In the fridge, this sauce lasts about one week. If you want to store it longer, freeze it. In the freezer, it can last up to three months. Just remember to thaw it in the fridge before using it again. This sauce tastes best cold, so you don’t need to heat it. However, if you prefer it warm, gently warm it in a pan on low heat. Stir while it warms to keep it smooth. You can serve this sauce with chicken, veggies, or salads. It adds great flavor to many dishes! Yes, this sauce is gluten-free. All the ingredients, like Greek yogurt and honey, do not contain gluten. Always check labels to ensure products are certified gluten-free. Using Dijon mustard is safe, but some brands may add gluten. Yes, you can use other sweeteners. Maple syrup or agave can work well. Each sweetener may change the taste slightly. Adjust the amount to your liking for the best flavor. This healthy version is lighter and has fewer calories. It swaps oil and sugar for Greek yogurt and honey. You get a creamy texture with added protein from yogurt. The taste stays close, with a tangy and sweet flavor. You can pair this sauce with many dishes. It goes well with grilled chicken, veggies, and salads. Try it as a dip for fries or a spread on sandwiches. This sauce adds a tasty twist to any meal. In this post, we explored how to make a healthy Chick-Fil-A sauce. We looked at the main ingredients, optional add-ins, and their nutritional benefits. I shared steps for making and mixing the sauce, plus tips for adjusting flavors. You learned about tasty variations, storage tips, and answered common questions. This sauce is not just safe to enjoy; it’s flavorful too. Try it on your favorite dishes. You'll add a nutritious twist to your meals. Enjoy your homemade sauce!
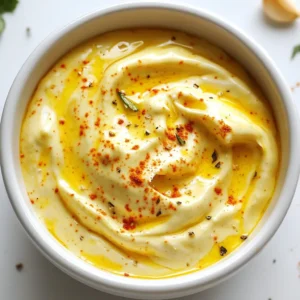
    Healthy Chick-Fil-A Sauce Simple and Flavorful Recipe
  • To make this tasty dish, you will need: - 2 cups pasta of your choice (fusilli or penne work well) - 2 chicken breasts, boneless and skinless - 1 cup fresh basil leaves - ½ cup fresh parsley leaves - ¼ cup pine nuts (or walnuts) - 1 garlic clove - ½ cup olive oil - ¼ cup grated Parmesan cheese (plus extra for serving) - Salt and pepper to taste - Cherry tomatoes, halved, for garnish - Fresh basil leaves, for garnish I like to use fusilli or penne pasta for this recipe. They hold the pesto well. You can also try spaghetti or farfalle. Each type adds a unique twist to your dish. If you have dietary needs, don’t worry. You can swap out chicken for tofu or grilled veggies. For gluten-free options, use chickpea or rice pasta. If you're dairy-free, skip the cheese or use a vegan substitute. These changes still keep the dish flavorful! To start, fill a large pot with water. Add a good amount of salt. Bring the water to a rolling boil. Once boiling, add 2 cups of your chosen pasta, like fusilli or penne. Cook it according to the package instructions. You want the pasta to be al dente. This means it should still have a slight bite. Drain the pasta, but save a little pasta water. Set the pasta aside in a bowl. While the pasta cooks, it's time to make the pesto. Grab your food processor and add 1 cup of fresh basil leaves, ½ cup of parsley, ¼ cup of pine nuts, and 1 garlic clove. Blend these until finely chopped. Next, with the processor running, slowly pour in ½ cup of olive oil. This will make your pesto smooth. Finally, mix in ¼ cup of grated Parmesan cheese. Season with salt and pepper to taste. Now, let’s focus on the chicken. Preheat your grill or grill pan to medium-high heat. Take 2 boneless, skinless chicken breasts and season them with salt and pepper on both sides. Place them on the grill. Grill each side for about 6 to 7 minutes. You know they’re done when the juices run clear. Once cooked, remove the chicken and let it rest for a few minutes. Then, slice it into strips. In a large mixing bowl, add the drained pasta. Pour the fresh pesto over the pasta. Toss it well so every piece of pasta is coated. Now, serve the pesto pasta onto plates. Top each plate with a generous amount of grilled chicken strips. For a pop of color, add some halved cherry tomatoes. Finish with a sprinkle of extra Parmesan cheese and a few fresh basil leaves. Enjoy your delicious meal! To make smooth pesto, use a food processor. Start by adding the basil, parsley, pine nuts, and garlic. Pulse these ingredients until they are finely chopped. Slowly pour in the olive oil while the machine runs. This helps blend the oil in well. Stop to scrape down the sides if needed. For the best texture, add the Parmesan cheese last. This way, it mixes in perfectly. Taste your pesto and adjust salt and pepper to your liking. Grilling chicken can be easy with a few tips. First, always start with room temperature chicken. Season the breasts with salt and pepper before grilling. Preheat your grill or pan to medium-high heat. This helps sear the chicken, keeping it juicy. Grill each side for about 6-7 minutes. Look for clear juices to know it’s done. Let the chicken rest for a few minutes before slicing. This step keeps the juices locked inside. Serving your pesto pasta nicely makes it more appealing. Use a large, shallow bowl for the pasta. This allows the colors to shine. Top the pasta with grilled chicken strips. Add halved cherry tomatoes for a pop of color. Finish with a sprinkle of Parmesan cheese and fresh basil leaves. For an added touch, drizzle a little olive oil on top. This creates a beautiful dish that everyone will enjoy. {{image_2}} You can make this dish meat-free by skipping the chicken. Just toss the pasta with pesto and enjoy. This option keeps the flavors rich and fresh. You still get a tasty meal without the meat. Add some extra cheese for an added flavor boost. Adding veggies makes your pesto pasta even better. Toss in some peas for a pop of color and sweetness. Fresh spinach adds a nice green touch and boosts nutrition. You can also add zucchini, sliced thin or spiralized. Each of these options brings a new layer of flavor. You don’t have to stick with pine nuts for your pesto. Walnuts are a great choice too. They give a rich, earthy taste. Almonds can also work, adding a slight sweetness. Each nut changes the flavor slightly, so feel free to experiment! Store your pesto pasta and grilled chicken in airtight containers. This keeps them fresh and flavorful. Let the pasta cool to room temperature before sealing. If you have extra chicken, slice it first to fit better in the container. Keep it in the fridge for up to three days. To reheat, gently warm the pasta in a skillet over low heat. Add a splash of olive oil or water if it seems dry. Stir often to heat evenly. For chicken, you can use the microwave. Heat in short bursts to avoid drying it out. Aim for just warm, not hot. Freezing pesto is a great way to save it. Pour the pesto into ice cube trays for easy portions. Once frozen, pop the cubes into a freezer bag. It will keep well for about three months. When you're ready to use it, thaw in the fridge overnight or use directly in warm pasta. Yes, you can use store-bought pesto. It saves time and is tasty. Look for a brand with fresh ingredients. The flavor may differ from homemade but can still be good. I recommend boneless, skinless chicken breasts. They cook evenly and stay juicy. You can also use thighs for extra flavor. Just remember to adjust the cooking time. Store leftover pesto pasta in an airtight container. It lasts 3 to 5 days in the fridge. For best taste, eat it within a few days. Reheat gently to avoid drying it out. You can use walnuts or sunflower seeds. Both add a nutty flavor. If you're nut-free, try pumpkin seeds. They work well in pesto and keep it creamy. This post covered making pesto pasta with grilled chicken. You learned about key ingredients, how to cook pasta and chicken, plus tips for great results. We explored variations for dietary needs and how to store leftovers. Pesto pasta is simple, fun, and full of flavor. You can easily adjust it to fit your taste and enjoy every bite. Happy cooking!
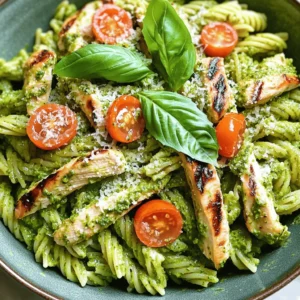
    Savory Pesto Pasta with Grilled Chicken Delight
  • For this easy dish, you'll need these key ingredients: - 1 pound ground beef - 1 medium onion, diced - 2 garlic cloves, minced - 1 can (15 oz) diced tomatoes with green chilies - 2 cups frozen mixed vegetables (carrots, peas, corn) - 1 cup uncooked macaroni pasta - 2 cups beef broth - 1 tablespoon Worcestershire sauce - 1 teaspoon dried oregano - 1 teaspoon smoked paprika - Salt and pepper to taste - 1 cup shredded cheddar cheese - Fresh parsley, chopped (for garnish) These ingredients work together to create a warm, hearty meal. If you need a substitute for ground beef, try these options: - Ground turkey for a leaner choice - Ground chicken for a lighter flavor - Plant-based meat for a vegetarian option Each substitute changes the dish slightly, but they still taste great. Make sure you have these pantry staples on hand: - Dried oregano adds a nice herbal taste. - Smoked paprika gives warmth and depth. - Worcestershire sauce adds umami flavor to the mix. These staples enhance the flavor and make your casserole delicious. Start by gathering all your ingredients. You will need: - 1 pound ground beef - 1 medium onion, diced - 2 garlic cloves, minced - 1 can (15 oz) diced tomatoes with green chilies - 2 cups frozen mixed vegetables - 1 cup uncooked macaroni pasta - 2 cups beef broth - 1 tablespoon Worcestershire sauce - 1 teaspoon dried oregano - 1 teaspoon smoked paprika - Salt and pepper to taste - 1 cup shredded cheddar cheese - Fresh parsley, chopped Make sure to wash your hands and clean your workspace. This step makes cooking safe and fun. Dice the onion and mince the garlic. Measure your frozen vegetables, pasta, and broth. Having everything ready helps the cooking flow. Heat a large skillet over medium heat. Add the ground beef. Cook it for about 5-7 minutes, stirring until it’s browned. Drain any excess fat. This keeps your dish from being greasy. Next, add the diced onion and minced garlic to the skillet. Cook them for 3-4 minutes until the onion turns soft and clear. This adds great flavor. Then, stir in the diced tomatoes, frozen vegetables, uncooked macaroni, beef broth, Worcestershire sauce, oregano, smoked paprika, salt, and pepper. Mix everything well so each bite is tasty. Pour the beef mixture into a greased 9x13-inch casserole dish. Spread it out evenly. This helps it cook well. Cover the dish with foil and bake it in a preheated oven at 375°F (190°C) for 25 minutes. After 25 minutes, take off the foil. Sprinkle the shredded cheddar cheese on top. Put it back in the oven, uncovered, for 10-15 minutes. This melts the cheese and makes it bubbly. Once done, let the casserole sit for 5 minutes before serving. This cools it down a bit. Garnish with fresh parsley for a nice touch. Enjoy your meal! To enhance the flavor of your Hobo Ground Beef Casserole, use fresh ingredients. Fresh onions and garlic add a nice kick. You can also try adding herbs like thyme alongside oregano. A splash of hot sauce can give it some heat, if you like spice. Don't forget to taste as you cook. Adjust salt and pepper to your liking. Oven temperatures may vary. If your oven runs hot, check the casserole a bit early. It should be bubbly and golden on top. If your oven runs cool, you may need extra time. Always use an oven thermometer for the best results. Trust your eyes; the cheese should look melted and slightly crispy. For a lovely presentation, serve the casserole straight from the dish. Top with fresh parsley for a pop of color. Pair it with a side salad for freshness. You can also add garlic bread for a crunchy contrast. A dollop of sour cream on top can add creaminess and flavor. {{image_2}} You can make a tasty vegetarian hobo casserole easily. Just swap out the ground beef. Use one can of chickpeas or black beans instead. You can also add more veggies like bell peppers, zucchini, or spinach. This gives you protein and flavor. Replace beef broth with vegetable broth for a perfect flavor balance. To make this dish gluten-free, simply choose gluten-free pasta. Many brands offer great options. You can also check the broth and Worcestershire sauce for gluten. Some brands make gluten-free versions. This way, everyone can enjoy the meal without worry. Want to boost the flavor? Add some chopped bell peppers or mushrooms. You can also mix in some corn for sweetness. For heat, try adding jalapeños or crushed red pepper. If you love cheese, add more shredded cheddar or mix in pepper jack for spice. Each addition makes this dish unique and fun! To keep your leftover Hobo Ground Beef Casserole fresh, let it cool first. Place the casserole in an airtight container. Make sure to cover it tightly. Store it in the fridge for up to three days. If you want to save it longer, freezing is a great option. When you’re ready to eat the leftovers, preheat your oven to 350°F (175°C). Transfer the casserole to an oven-safe dish. Cover it with foil to keep it moist. Bake for about 20-25 minutes or until it’s hot all the way through. You can also reheat it in the microwave. Heat it in short bursts, stirring in between, until hot. To freeze your casserole, let it cool completely. Cut it into portions for easy serving. Wrap each portion tightly in plastic wrap. Place the wrapped portions in a freezer bag or container. Label with the date and type of dish. You can freeze it for up to three months. When you’re ready to eat, thaw it in the fridge overnight before reheating. Hobo Ground Beef Casserole lasts about 3 to 4 days in the fridge. To keep it fresh, put it in an airtight container. Make sure to let it cool down first before sealing it. This will help keep the moisture in and prevent sogginess. Always check for any signs of spoilage before eating leftovers. Yes, you can make this casserole ahead of time. You can assemble it and store it in the fridge for up to 24 hours before baking. Just cover it tightly with foil. When you are ready, bake it straight from the fridge. You may need to add a few extra minutes to the cooking time. This is great for busy days when you want a quick meal. Hobo Casserole works well with many sides. Here are some tasty ideas: - Green salad: A fresh salad adds crunch and balance. - Garlic bread: This is great for dipping into the casserole. - Steamed broccoli: Adds color and nutrition to your meal. - Coleslaw: A tangy slaw gives a nice contrast to the warm casserole. Feel free to mix and match to find your favorite pairings! Hobo Ground Beef Casserole is easy to make and full of flavor. We covered key ingredients, cooking steps, and useful tips. You can even switch ingredients for your needs. This dish is great for family meals or as leftovers. Storing and reheating are simple, too. With just a few changes, you can make it vegetarian or gluten-free. This recipe adapts well to your taste. Enjoy making it your own!
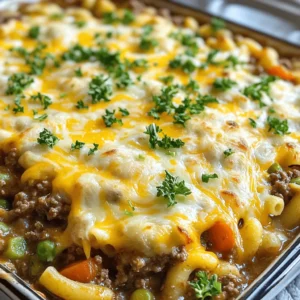
    Hobo Ground Beef Casserole Quick and Tasty Meal
  • For this tasty treat, you need a few key ingredients: - 1 cup almond flour - 2 tablespoons coconut flour - 1 teaspoon baking powder - 1/4 teaspoon salt - 1/4 cup erythritol (or your favorite keto-friendly sweetener) - 1 large egg - 3 ounces cream cheese, softened - 1/2 teaspoon vanilla extract - 1 tablespoon lemon juice - 1 tablespoon butter, melted These core ingredients give the danish its soft texture and rich taste. You can add some optional items to make your Danish even better. Consider these: - 1 tablespoon chia seeds for crunch - Chopped nuts for added flavor Adding these bits can enhance both taste and texture, giving you more ways to enjoy this recipe. Each serving of Keto Cream Cheese Danish is packed with flavor while staying keto-friendly. Here’s a breakdown: - Calories: 180 - Fat: 15g - Protein: 6g - Net Carbs: 3g This means you can indulge in a sweet treat without worrying about breaking your keto goals! Start by gathering all your ingredients. You will need: - 1 cup almond flour - 2 tablespoons coconut flour - 1 teaspoon baking powder - 1/4 teaspoon salt - 1/4 cup erythritol (or your favorite keto-friendly sweetener) - 1 large egg - 3 ounces cream cheese, softened - 1/2 teaspoon vanilla extract - 1 tablespoon lemon juice - 1 tablespoon butter, melted - Optional: 1 tablespoon chia seeds or nuts for crunch Preheat your oven to 350°F (175°C). Line a baking sheet with parchment paper. This keeps your Danishes from sticking and makes cleanup easy. In a mixing bowl, combine the almond flour, coconut flour, baking powder, salt, and erythritol. Stir well to mix and break up any lumps. In another bowl, beat the large egg. Add the softened cream cheese, vanilla extract, and lemon juice. Mix until creamy and smooth. Now, gradually add the dry mixture to the wet mixture. Mix until a dough forms. If your dough feels too sticky, add a little more almond flour. Divide the dough into four equal pieces. Shape each piece into a rectangle on the prepared baking sheet. Press down gently to flatten them. In a small bowl, mix the melted butter with optional chia seeds or nuts for added crunch. Brush this mixture on top of each Danish to give them extra flavor. Bake in the preheated oven for 15-20 minutes. Keep an eye on them until they turn golden brown on the edges. Once baked, let them cool slightly. Enjoy warm or at room temperature! To get the right dough, mix your dry and wet ingredients well. Start with the almond flour and coconut flour. Make sure there are no lumps. Add baking powder, salt, and your sweetener. In a separate bowl, beat the egg first. Then mix in softened cream cheese, vanilla, and lemon juice. Blend until creamy. When you combine the two mixtures, do it slowly. If your dough feels sticky, just add a bit more almond flour. This will help it hold shape. For the best bake, preheat your oven to 350°F (175°C). Use parchment paper on your baking sheet. This keeps the Danishes from sticking. Bake for 15-20 minutes. Watch for the edges to turn golden brown. If they look pale, give them a few more minutes. Don’t rush this step. Let them cool a bit before you serve. This helps them set. Serve your Keto Cream Cheese Danishes warm. Lay them on a pretty platter for a nice touch. For a sweet look, dust them with powdered erythritol. You can also add berries on the side for color. A drizzle of sugar-free glaze can make them pop. If you want crunch, sprinkle chia seeds or nuts on top before baking. These little extras make your Danishes even more fun and tasty. {{image_2}} You can make your Keto Cream Cheese Danish even better. Try adding fruits like berries or slices of apples. They give a burst of flavor and a nice sweetness. You can also use flavored extracts. Almond or coconut extracts can add a unique twist. Just a few drops will change the taste. Feel free to mix in some lemon zest for a fresh touch. This way, you can create different flavors for every mood. Savory options are great too! You can add herbs like rosemary or thyme for a warm, earthy taste. A sprinkle of garlic powder can give it a nice kick. You might even try some grated cheese. Cheddar or feta can enhance the flavor and make it rich. Mixing in spices like paprika or cumin adds depth. These savory changes can make your Danishes perfect for brunch or a light meal. If you want a vegan version, you can swap out the cream cheese. Use a plant-based cream cheese instead. There are many options made from nuts or coconut. For the egg, you can use flaxseed meal. Just mix one tablespoon of flaxseed meal with three tablespoons of water. Let it sit until it thickens. This mix works great as an egg replacement. Make sure your sweetener is also vegan-friendly. This way, everyone can enjoy these tasty Danishes! To keep your keto cream cheese Danishes fresh, place them in an airtight container. Store them in the fridge for up to three days. This helps maintain their taste and texture. If you notice any moisture, add a paper towel inside to absorb it. If you want to save your Danishes for later, freezing is a great option. Wrap each Danish in plastic wrap, then place them in a freezer bag. You can freeze them for up to two months. This method locks in the flavor and keeps them safe from freezer burn. When you're ready to enjoy your Danishes again, reheating them is easy. Preheat your oven to 350°F (175°C). Place the Danishes on a baking sheet and heat for 5-10 minutes. This will make them warm and crispy again. Avoid using the microwave, as it can make them soggy. Enjoy your tasty treat just as fresh as the first day! Yes, you can try coconut flour. However, use less of it. Coconut flour absorbs more liquid. Start with 1/4 cup and adjust as needed. You can also use a mix of both flours for a unique taste. To make the Keto Cream Cheese Danish dairy-free, swap cream cheese for vegan cream cheese. You can find it at many grocery stores. For butter, use coconut oil or a dairy-free margarine. This keeps the dish creamy and tasty without dairy. Erythritol is a great choice for keto desserts. It has no carbs and no calories. Other good options include monk fruit sweetener and stevia. Both are low in carbs and can add sweetness without the sugar spike. Use them in similar amounts as erythritol for best results. You learned how to make delicious keto cream cheese danishes from this article. We covered key ingredients, step-by-step instructions, and helpful tips. You can even explore sweet and savory variations. Remember, this treat fits perfectly in your low-carb diet. Store them right, and they'll stay fresh. Try new flavors or make them vegan. Enjoy baking and sharing these delightful danishes! You'll impress friends and family with your skills. Keep experimenting for tasty results that work for you.
    Keto Cream Cheese Danish Easy and Tasty Recipe
  • - 1 lb boneless chicken thighs, cut into bite-sized pieces - 1 cup jasmine rice, rinsed - 1 can (15 oz) pineapple chunks, with juice - 1 red bell pepper, diced - 1 cup snap peas - 1 onion, chopped - 3 cloves garlic, minced - 2 tablespoons soy sauce - 1 tablespoon sesame oil - 1 teaspoon ginger, grated - Salt and pepper to taste - Fresh cilantro, chopped (for garnish) Gathering fresh ingredients makes this dish pop with flavor. I love using boneless chicken thighs for their tenderness. They cook evenly and soak up all the tasty juices. Jasmine rice adds a lovely aroma and fluffy texture. Rinsing the rice is crucial for removing excess starch. This keeps it from becoming sticky. Pineapple chunks bring a sweet twist. They give a juicy burst that balances the savory chicken. I often use red bell pepper for a splash of color and crunch. Snap peas add a nice snap, while onion, garlic, and ginger provide depth to the dish. Don’t forget the soy sauce! It adds umami and saltiness. Sesame oil gives a nutty flavor, enhancing the dish. Season with salt and pepper to your taste. Finally, fresh cilantro brightens up the meal, adding a nice finish. To start, prepare the chicken and vegetables. Take 1 pound of boneless chicken thighs and cut them into bite-sized pieces. Next, chop one onion, dice one red bell pepper, and prepare 1 cup of snap peas. These will add color and crunch to your dish. Now, rinse 1 cup of jasmine rice under cold water. This step removes excess starch, making the rice fluffier. Drain it well and set it aside for now. Heat 1 tablespoon of sesame oil in a large skillet over medium heat. Let the oil warm up. Once hot, add the chopped onion. Sauté it until it becomes translucent, about 3 to 4 minutes. Next, add 3 minced garlic cloves and 1 teaspoon of grated ginger to the pan. Stir for about 30 seconds until you smell the lovely aroma. Now, increase the heat to medium-high and add the chicken pieces. Season them with salt and pepper. Cook for about 5 to 7 minutes. You want the chicken to brown and cook through. After that, stir in the diced red bell pepper and snap peas. Cook them for another 3 to 4 minutes until they start to soften. Then, add the rinsed jasmine rice to the pan. Mix everything together well. Pour in 1 can of pineapple chunks with its juice. Add 2 tablespoons of soy sauce and stir to combine. This will bring a sweet and savory flavor to your dish. Bring the mixture to a boil. Once boiling, reduce the heat to low. Cover the pan with a lid and let it simmer for about 15 to 20 minutes. The rice will absorb the liquid and become tender. Once the rice is cooked, remove the lid and fluff the mixture with a fork. Taste it and adjust the seasoning with salt and pepper if needed. Finally, garnish the dish with fresh chopped cilantro before serving. This adds a burst of freshness and color to your meal. Enjoy your savory One-Pan Pineapple Chicken and Rice! To ensure chicken is cooked properly, cut the chicken into small, bite-sized pieces. This helps it cook evenly and quickly. Use a meat thermometer to check the internal temperature. It should reach 165°F (74°C) to be safe to eat. The best way to rinse rice is to put it in a fine mesh strainer. Rinse it under cold water until the water runs clear. This removes excess starch and keeps your rice fluffy. For more flavor, try adding spices like paprika or cumin. Fresh herbs like basil or thyme can also brighten the dish. Adjust the sweetness with pineapple juice. If you want it sweeter, add a bit more juice from the can. Use a large skillet or pan for this dish. A non-stick skillet works well, as it prevents sticking and makes cleanup easier. Essential tools include a sharp knife for chopping, a cutting board, and a fine mesh strainer for rinsing the rice. {{image_2}} You can switch out the chicken thighs for chicken breast if you prefer leaner meat. Tofu is also a great option for a plant-based meal. It absorbs flavors well and adds protein, making it a tasty choice. When it comes to rice, jasmine rice is classic, but you can use brown rice for more fiber. Quinoa is another healthy option that cooks fast and adds a nutty flavor. To add a fun crunch, try mixing in some nuts or seeds like cashews or sesame seeds. They give a great texture and extra taste. You can also experiment with different fruits. Mango brings a sweet touch, while diced tomatoes add freshness and acidity. If you need gluten-free options, use tamari instead of soy sauce. It has the same rich flavor without gluten. For those who prefer vegetarian or vegan meals, replace chicken with tofu and use vegetable broth instead of water for cooking the rice. This keeps all the delicious flavors while meeting dietary needs. To keep leftovers fresh, use airtight containers. Glass containers work well, as they don’t stain. If you want to use plastic, make sure it is BPA-free. Store your One-Pan Pineapple Chicken and Rice in the fridge. It stays good for up to three days. To reheat, use the microwave for quick results. Place the dish in a bowl and cover it. Heat in short bursts of one minute. Stir between heating to ensure even warmth. If you want the best texture, heat it on the stove. Use low heat and add a splash of water. This keeps the rice from drying out. To freeze, let the dish cool completely. Then, portion it into freezer-safe containers. Make sure to leave some space, as the rice expands. Seal tightly and label with the date. It will last for up to three months in the freezer. When ready to eat, thaw it overnight in the fridge. Reheat on the stove or in the microwave. Add a little water if needed, to keep it moist. Enjoy the same great taste after freezing! How long does it take to cook One-Pan Pineapple Chicken and Rice? The total time is about 35 minutes. This includes 10 minutes for prep and 25 minutes for cooking. You will love how quick and easy it is. Can I make this recipe ahead of time? Yes, you can make it ahead. Cook it, then cool it down. Store it in the fridge for up to three days. Just reheat before serving. What can I serve with this dish? This dish pairs well with a fresh salad or steamed vegetables. You can also serve it with extra pineapple slices for added flavor. What can I use instead of soy sauce? You can use coconut aminos for a soy-free option. It offers a similar salty taste. Tamari is a great gluten-free choice too. Is it necessary to use jasmine rice? No, you can use any rice you like. Brown rice or basmati rice works well. Just note that cooking times may vary. Is this dish gluten-free? If you use gluten-free soy sauce or coconut aminos, then yes, it can be gluten-free. Check your labels to be sure. How can I make it lower in calories? You can swap chicken thighs for chicken breast. Using less oil and adding more veggies also helps lower calories. This blog post guides you through making a delicious One-Pan Pineapple Chicken and Rice. We covered all you need: ingredients, preparation, cooking steps, and tips. You can mix and match flavors or substitute ingredients to fit your taste. Storing leftovers and reheating are easy with the right methods. Enjoy your cooking journey, and don't hesitate to explore variations that excite your palate. Happy cooking!
    Savory One-Pan Pineapple Chicken and Rice Delight
  • - 1 cup whole wheat flour - 1/2 cup cocoa powder (unsweetened) - 1/2 teaspoon baking soda - 1 teaspoon baking powder - 1/4 teaspoon salt - 1/3 cup maple syrup or honey - 1 cup plain Greek yogurt - 2 large eggs - 1 teaspoon pure vanilla extract - 1/2 cup dark chocolate chips (dairy-free if desired) - 1/4 cup almond milk or any milk of choice - Whole wheat flour: This flour adds fiber. Fiber helps with digestion and keeps you full longer. - Cocoa powder: It is rich in antioxidants. Antioxidants help fight free radicals in our bodies. - Baking soda and baking powder: They help the muffins rise. This gives them a light and fluffy texture. - Salt: A small amount enhances the flavor. It brings out the sweetness of the muffins. - Maple syrup or honey: These natural sweeteners add flavor and nutrients. They provide energy without refined sugar. - Greek yogurt: It adds creaminess and protein. Protein helps build and repair muscles. - Eggs: They provide protein and healthy fats. Eggs help with the structure of the muffins. - Vanilla extract: This adds a pleasant aroma and flavor. It makes the muffins taste sweeter naturally. - Dark chocolate chips: They provide richness and sweetness. Dark chocolate also has health benefits when eaten in moderation. - Almond milk: A dairy-free option that adds moisture. It keeps the muffins soft and tender. - Choose whole wheat flour that is fresh. Check the date on the package for the best quality. - Use unsweetened cocoa powder for a rich chocolate taste. Look for brands without added sugar. - Opt for pure maple syrup or raw honey. These are better than processed sweeteners. - Select plain Greek yogurt with live cultures. This helps with gut health and digestion. - Pick eggs that are free-range or organic for better flavor. They often have more nutrients. - Use dark chocolate chips with a high cocoa content. This means less sugar and more health benefits. - Choose almond milk that is unsweetened and free from additives. This keeps the recipe healthy and clean. These tips can help you make the best muffins. Using quality ingredients makes a big difference in taste and nutrition! First, set your oven to 350°F (175°C). This step is key for a great bake. Next, grab a muffin tin. You can use paper liners or grease it lightly with oil. This helps the muffins come out easily after baking. In a large bowl, mix together the wet ingredients. Start with 1/3 cup of maple syrup or honey. Add in 1 cup of plain Greek yogurt, 2 large eggs, and 1 teaspoon of pure vanilla extract. Whisk these until they are smooth and creamy. This mix gives your muffins moisture and flavor. Now, take another bowl for the dry ingredients. Here, you will whisk together 1 cup of whole wheat flour, 1/2 cup of cocoa powder, 1/2 teaspoon of baking soda, 1 teaspoon of baking powder, and 1/4 teaspoon of salt. Make sure these are mixed well. This step adds structure to your muffins. Slowly add the dry mix to the wet mix. Stir gently until just combined. Do not overmix. Overmixing makes your muffins tough. Then, fold in 1/2 cup of dark chocolate chips and 1/4 cup of almond milk. This makes the batter rich and chocolaty. Next, fill each muffin cup about 3/4 full with the batter. Bake for 18-20 minutes. Check with a toothpick; it should come out clean. Let them cool in the tin for 5 minutes, then move them to a wire rack. Enjoy your healthy double chocolate muffins! To avoid overmixing, mix gently. After adding dry ingredients, stir until just combined. You want a few lumps in the batter. Overmixing makes muffins tough. This is key for soft, fluffy muffins. Use a preheated oven at 350°F (175°C). Line your muffin tin with paper liners. This helps muffins release easily. Fill each cup about 3/4 full for even baking. Bake for 18-20 minutes. Check for doneness with a toothpick. For the best texture, use whole wheat flour and Greek yogurt. Whole wheat adds fiber and nutty flavor. Greek yogurt keeps muffins moist. Add dark chocolate chips for richness. Let muffins cool on a wire rack for the best taste. {{image_2}} You can boost these muffins with fun add-ins. Try adding nuts for crunch. Walnuts or pecans work great. Dried fruits like cherries or raisins add sweetness. You can also mix in peanut butter for a twist. If you love spice, a dash of cinnamon gives warmth. Feel free to get creative and make them your own! You can swap some ingredients for healthier options. Use honey or agave instead of maple syrup for a different sweetness. Instead of whole wheat flour, use almond flour for a nutty taste. You can also replace Greek yogurt with dairy-free yogurt. This keeps the muffins creamy while making them lighter. To make these muffins gluten-free, simply use gluten-free flour. Almond flour or coconut flour are great choices. Adjust the liquid slightly, as gluten-free flours absorb more moisture. Add a bit of xanthan gum to help with texture. These muffins will still taste rich and chocolatey without the gluten! I like to store my Healthy Double Chocolate Greek Yogurt Muffins in an airtight container. This keeps them moist and fresh. You can place a paper towel at the bottom of the container. This will help absorb any excess moisture. Store them at room temperature for the best taste and texture. To freeze muffins, let them cool completely first. Then, wrap each muffin in plastic wrap. Place the wrapped muffins in a freezer-safe bag or container. This way, they stay fresh for up to three months. When you want to eat one, simply thaw it at room temperature or warm it in the microwave. These muffins last about 3 to 5 days when stored at room temperature. If you refrigerate them, they can last about a week. However, the texture may change. For the best flavor and softness, enjoy them within the first few days. Yes, you can use regular yogurt in place of Greek yogurt. However, Greek yogurt gives these muffins a nice thick texture. If you use regular yogurt, the muffins may be a bit lighter. You can also try plant-based yogurts for a dairy-free option. Just make sure they are plain and unsweetened. You have many options! You can use chopped dark chocolate, chocolate chunks, or cacao nibs. You can also try dried fruits like raisins or cherries for a fruity twist. For a nutty flavor, add chopped nuts or seeds. This can change the taste but still keeps the muffins delicious. To make these muffins vegan, you can replace the eggs with flax eggs. Mix one tablespoon of ground flaxseed with three tablespoons of water. Let it sit for a few minutes until it thickens. You can keep the Greek yogurt or use a plant-based yogurt. Make sure to use maple syrup instead of honey. The best way to check is by using a toothpick. Insert it into the center of a muffin. If it comes out clean, the muffins are done. If it has batter on it, bake them a few more minutes. You can also check if the tops bounce back when gently pressed. In this article, we covered the key steps to bake muffins. We discussed ingredients, nutritional benefits, and tips for choosing quality items. I shared step-by-step instructions to make baking easy. You learned how to avoid overmixing and achieve the best texture. We explored various flavor options and healthy substitutions. Finally, I provided storage tips to keep your muffins fresh. Remember, great muffins start with good ingredients and careful baking. Enjoy the process and feel free to experiment!
    Healthy Double Chocolate Greek Yogurt Muffins Delight
  • To make savory hashbrown chaffles, you need: - 2 cups frozen hashbrowns, thawed - 1 large egg - 1/2 cup shredded cheese (cheddar or mozzarella) - 1/4 cup green onions, chopped - 1/4 teaspoon garlic powder - 1/4 teaspoon onion powder - Salt and pepper to taste - Cooking spray or oil for the waffle maker These ingredients come together to create a crispy and flavorful treat. The hashbrowns form the base, while the egg binds everything. The cheese adds creaminess, and the green onions bring a fresh crunch. Seasoning with garlic and onion powder rounds out the taste. You can customize your chaffles by adding: - Cooked bacon or sausage for extra protein - Diced bell peppers for a sweet crunch - Spinach or kale for added greens - Different cheeses like pepper jack for heat Feel free to experiment with flavors. Adding various ingredients can change the taste and make each batch unique. To prepare your savory hashbrown chaffles, you will need: - A waffle maker for that perfect chaffle shape - A large mixing bowl for combining ingredients - A fork or tongs to remove the chaffles safely - A measuring cup for accurate portions Having the right tools makes cooking easier and more fun. A good waffle maker ensures even cooking and crispy edges. First, gather all your ingredients. You will need: - 2 cups frozen hashbrowns, thawed - 1 large egg - 1/2 cup shredded cheese (cheddar or mozzarella) - 1/4 cup green onions, chopped - 1/4 teaspoon garlic powder - 1/4 teaspoon onion powder - Salt and pepper to taste - Cooking spray or oil for the waffle maker Next, preheat your waffle maker. Follow the instructions from the maker's manual. This step is key to getting a crispy chaffle. In a large bowl, mix the thawed hashbrowns, egg, and cheese. Add the chopped green onions, garlic powder, and onion powder. Stir until everything blends well. Once your batter is ready, season it with salt and pepper. Taste it to make sure the flavor is just right. Now, spray the waffle maker with cooking spray or brush it with oil. This will help prevent sticking. Scoop about 1/2 to 3/4 cup of the mixture onto the center of the preheated waffle maker. Close the lid and cook for 5 to 7 minutes. You want it to be golden brown and crispy. When done, use a fork or tongs to carefully remove the chaffle. Repeat this for the rest of the mixture until you have four chaffles. Serve the chaffles right away for the best taste. Stack them on a plate and add some extra green onions on top. For a tasty touch, add a dollop of sour cream or a slice of avocado. You can also pair them with salsa for some extra flavor. These chaffles are perfect for breakfast or a snack. Enjoy every bite! To get a great texture, use thawed hashbrowns. Drain any extra moisture. This step is key. Add cheese for a nice, cheesy crisp. Cheese melts and gives that golden finish. When mixing, ensure all ingredients blend well. This helps the chaffle hold together. One common mistake is using too much moisture. If your hashbrowns are wet, your chaffle may turn soggy. Another mistake is not preheating the waffle maker. If it isn’t hot enough, your chaffle won’t crisp. Lastly, don’t overfill the waffle maker. A half to three-quarters cup of mixture works best. Every waffle maker cooks differently. For stovetop models, keep the heat low. This helps cook the inside without burning outside. For electric ones, follow the manufacturer’s guide. Adjust cooking time as needed. If your chaffles stick, use enough cooking spray. This ensures easy removal and a perfect shape. {{image_2}} You can make your chaffles even better with tasty add-ins. Here are a few ideas: - Cooked bacon bits: They add a nice crunch and smoky flavor. - Diced bell peppers: These brighten up the dish with color and taste. - Spicy jalapeños: For those who like heat, add some chopped jalapeños. - Fresh herbs: Try adding chopped parsley or cilantro for freshness. Mix any of these into your hashbrown mixture before cooking. You’ll be amazed at how simple changes can boost flavor. If you need a gluten-free meal, this recipe is already on your side. The main ingredients are gluten-free. Just check your hashbrowns to ensure they fit your needs. Look for labels that say “gluten-free” to be safe. You can enjoy these chaffles without worry. Want to make a vegetarian version? No problem! This recipe is already meat-free. You can keep it simple by adding more veggies. Consider adding: - Sliced mushrooms: They add a savory depth. - Spinach: Fresh or cooked spinach brings color and nutrients. - Zucchini: Grated zucchini can add moisture and flavor. Mix these veggies into your hashbrowns to create a tasty meal that satisfies vegetarians. Enjoy experimenting with flavors! To store leftover chaffles, let them cool first. Once cool, place them in an airtight container. You can keep them in the fridge for up to three days. If you want to keep them longer, freezing is a great option. To reheat chaffles, use a toaster or oven. Preheat the toaster to medium heat. Place the chaffle in the toaster and heat for about 3-5 minutes. If using an oven, set it to 350°F (175°C). Heat for about 10 minutes, until crispy again. To freeze chaffles, wrap each one in plastic wrap. Then place them in a freezer bag or container. They can stay fresh in the freezer for up to two months. When ready to eat, thaw in the fridge overnight before reheating. Chaffles are a mix of cheese and eggs cooked in a waffle maker. They are crispy and light. Regular waffles use flour and have more carbs. Chaffles are low-carb and perfect for a quick meal. They also hold toppings well, making them versatile. Yes, you can use fresh hashbrowns! Just make sure to shred them finely. Fresh hashbrowns can give a different texture. They may also need a little more cooking time. Drain any excess moisture to avoid soggy chaffles. You have many tasty topping options! Sour cream adds creaminess. Salsa brings a fresh zing. Avocado gives a smooth texture. You can also try cheese or diced tomatoes. Green onions on top add color and flavor. Your choice! In this article, we explored how to make savory hashbrown chaffles step by step. We covered the key ingredients and recommended tools. You learned preparation steps and cooking tips for great results. We also shared variations for flavor and options for gluten-free and vegetarian diets. Lastly, we discussed how to store and reheat leftovers. Hashbrown chaffles are fun to make and easy to enjoy. You can customize them to fit your tastes. Now, grab your tools and start cooking!
    Savory Hashbrown Chaffle Quick and Flavorful Recipe
  • To make this dish, gather the following ingredients: - 1 can (15 oz) chickpeas, drained and rinsed - 2 cups broccoli florets - 2 tablespoons sesame oil - 1 tablespoon fresh ginger, grated - 3 cloves garlic, minced - 1/4 cup soy sauce or tamari for gluten-free - 2 tablespoons honey or maple syrup - 1 tablespoon rice vinegar - 1 tablespoon cornstarch - 2 tablespoons sesame seeds - 2 green onions, chopped - Salt and pepper to taste These ingredients create a tasty and vibrant dish that is both healthy and satisfying. If you want to boost the taste, consider adding: - A pinch of red pepper flakes for heat - Fresh cilantro for a fresh touch - Lime juice for a zesty finish These extras can add a punch and make the dish more exciting. You can easily swap ingredients if needed: - Use canned lentils instead of chickpeas for a different texture. - Swap soy sauce with coconut aminos for a soy-free option. - Maple syrup can replace honey for a vegan choice. These substitutions help you customize the recipe to your taste and dietary needs. Start by heating 1 tablespoon of sesame oil in a large skillet over medium heat. Add the drained and rinsed chickpeas to the skillet. Sauté them for about 5 minutes. You want them to be slightly crispy. Season with a pinch of salt and pepper to taste. Once done, remove the chickpeas from the skillet and set them aside. This step adds a nice texture to the dish. In the same skillet, add the remaining tablespoon of sesame oil. Once hot, toss in the broccoli florets. Sauté for 3 to 4 minutes. The broccoli should turn a vibrant green and become slightly tender. Season it with a bit of salt and pepper. This ensures the broccoli stays crunchy and fresh. Now, grab a small bowl to make the sticky sesame sauce. Whisk together soy sauce, honey or maple syrup, rice vinegar, cornstarch, grated ginger, and minced garlic. Mix until smooth. This sauce brings all the flavors together and coats the chickpeas and broccoli perfectly. Return the crispy chickpeas to the skillet with the broccoli. Pour the prepared sauce over the top. Stir gently to coat everything evenly. Cook for an additional 2 to 3 minutes. This helps the sauce thicken and ensures everything is heated through. Once the dish is ready, sprinkle sesame seeds over the top. Give it a gentle stir to mix them in. Remove the skillet from the heat and garnish with chopped green onions. This adds a nice pop of color and flavor. Serve the dish warm for the best taste. Enjoy your delicious sticky sesame chickpeas and broccoli! To make crispy chickpeas, start with drained and rinsed canned chickpeas. Dry them well with a towel. Heat sesame oil in a skillet over medium heat. Add chickpeas and stir them often. Cook for about 5 minutes until they are golden and crisp. Season with salt and pepper for flavor. If you want extra crunch, try roasting them in the oven. Spread them on a baking sheet and bake at 400°F for 20 minutes. For bright, tender broccoli, use fresh florets. Start by washing them under cool water and cutting them into uniform pieces. This ensures even cooking. Sauté the broccoli in sesame oil for 3 to 4 minutes. You want them to stay bright green and slightly firm. Avoid overcooking to keep the nutrients intact. A pinch of salt helps enhance the natural flavor. To change the sauce thickness, mix cornstarch with a bit of water before adding it. This helps avoid lumps. If you like a sweeter sauce, add more honey or maple syrup. For a tangy taste, increase the rice vinegar. Taste your sauce as you mix. Adjust it until you find the perfect balance for your dish. This personal touch makes your meal special. {{image_2}} You can easily add more veggies to this dish. Try bell peppers, carrots, or snap peas. These will add color and crunch. You can sauté them with the broccoli. Just make sure they are tender but still crisp. This way, you keep all the great flavors. You can also use frozen vegetables if you’re short on time. Just add them to the skillet while cooking the broccoli. If you want more protein, tofu or tempeh works great. For tofu, press it to remove extra water. Cut it into small cubes and sauté it until golden. Add it to the chickpeas and broccoli when you mix everything. For tempeh, slice it thin and steam it for a few minutes. Then, sauté it until it’s brown. Both options will soak up the sauce well and add a nice texture. To make this dish gluten-free, just use tamari instead of soy sauce. It has a similar flavor without gluten. For vegan options, replace honey with maple syrup. This will keep the dish sweet and delicious. Make these simple swaps, and you can enjoy this dish with everyone. It’s a tasty and healthy meal that fits many diets! To keep your sticky sesame chickpeas and broccoli fresh, let them cool first. Use an airtight container for storage. Place the leftovers in the fridge. They will stay good for about three days. If you want to keep them longer, consider freezing them. To reheat, use a skillet on medium heat. Add a splash of water or oil to help them heat evenly. Stir often to avoid sticking. You can also use the microwave. Place the meal in a microwave-safe dish and cover it. Heat for one to two minutes, stirring halfway through. For freezing, pack the chickpeas and broccoli in a freezer-safe bag. Remove as much air as possible before sealing. They will last for about three months in the freezer. When ready to eat, thaw them in the fridge overnight. Reheat in a skillet or microwave as mentioned above. The best way to cook chickpeas is to use canned ones. They save time and are very easy to use. First, drain and rinse the chickpeas. This removes extra salt and makes them taste fresh. Sauté them in sesame oil until they get crispy. This adds a great texture and flavor. Yes, you can make this dish ahead of time. You can cook the chickpeas and broccoli and mix them with the sauce. Store everything in the fridge for up to three days. When you're ready to eat, just reheat it in a skillet. This keeps the flavors fresh and tasty. Sticky sesame chickpeas and broccoli pair well with many dishes. You can serve them over rice or quinoa for a hearty meal. Noodles are another great option. Adding a side of crispy tofu or a fresh salad can also make a nice meal. Adjusting the recipe is simple. For gluten-free options, use tamari instead of soy sauce. If you're vegan, swap honey for maple syrup. You can also add more veggies to fit your diet. Bell peppers or carrots work well and add more color. This blog post covered the key ingredients and steps for making sticky sesame chickpeas and broccoli. You learned about required and optional ingredients, cooking methods, and how to store leftovers. Variations gave you creative options, while tips ensured the best results. I hope this dish becomes a new favorite in your kitchen. Enjoy the flavors and have fun adapting it to your taste!
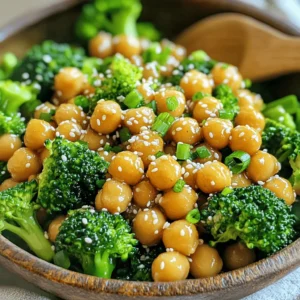
    Sticky Sesame Chickpeas and Broccoli Tasty Delight
  • To make the best zucchini bread, you need some key ingredients. Here’s what you will need: - 2 cups all-purpose flour - 1 teaspoon baking soda - 1/2 teaspoon baking powder - 1 teaspoon ground cinnamon - 1/2 teaspoon nutmeg (optional) - 1/2 teaspoon salt - 3/4 cup granulated sugar - 1/4 cup brown sugar, packed - 1/2 cup vegetable oil - 3 large eggs - 1 teaspoon vanilla extract - 2 cups grated zucchini (about 2 medium zucchinis) - 1/2 cup chopped walnuts or pecans (optional) - 1/2 cup chocolate chips (optional) These ingredients work together to create a soft, moist bread. The zucchini adds moisture without a strong taste. The sugars give it sweetness, while the spices add warmth. You can make this zucchini bread your own by adding extras. Here are some fun ideas: - Chopped nuts: Walnuts or pecans add crunch. - Chocolate chips: These bring sweetness and richness. - Dried fruits: Raisins or cranberries add a chewy texture. - Coconut flakes: Shredded coconut adds a tropical twist. - Spices: Try ginger or allspice for a different flavor. Feel free to mix and match these options to suit your taste. If you need to swap ingredients, here are some easy changes: - Flour: Use whole wheat flour for a nuttier taste. - Oil: Replace vegetable oil with applesauce for a lighter bread. - Sugar: Use honey or maple syrup instead of granulated sugar. - Eggs: You can use flax eggs as a vegan option. These substitutions can change the flavor and texture slightly, but they work well. You can adjust to fit your dietary needs or preferences. For the full recipe, check out the Ultimate Zucchini Bread 🥒. Start by getting your ingredients ready. Gather these items: - 2 cups all-purpose flour - 1 teaspoon baking soda - 1/2 teaspoon baking powder - 1 teaspoon ground cinnamon - 1/2 teaspoon nutmeg (optional) - 1/2 teaspoon salt - 3/4 cup granulated sugar - 1/4 cup brown sugar, packed - 1/2 cup vegetable oil - 3 large eggs - 1 teaspoon vanilla extract - 2 cups grated zucchini (about 2 medium zucchinis) - 1/2 cup chopped walnuts or pecans (optional) - 1/2 cup chocolate chips (optional) Make sure your zucchinis are washed and grated. This gives your bread both flavor and moisture. Preheat your oven to 350°F (175°C). Grease a 9x5-inch loaf pan or line it with parchment paper. In a large bowl, mix the dry ingredients. Whisk together the flour, baking soda, baking powder, cinnamon, nutmeg, and salt. This step is key for even flavor and rising. In another bowl, blend the sugars, vegetable oil, eggs, and vanilla extract. Whisk well until the mix is smooth. Now, add the grated zucchini to this mixture and stir until combined. Carefully add the dry mix to the wet ingredients. Fold gently to combine. Do not overmix; a few lumps are okay. If you want, fold in chopped nuts or chocolate chips for extra texture. Pour the batter into your prepared loaf pan. Smooth the top with a spatula. Place the pan in your preheated oven and bake for 50 to 60 minutes. Check for doneness by inserting a toothpick into the center. If it comes out clean, your bread is ready. Once baked, take the pan out of the oven. Allow the zucchini bread to cool in the pan for about 10 minutes. Then, transfer it to a wire rack to cool completely. Enjoy the wonderful aroma as it cools! One common mistake is using too much water from the zucchini. Always squeeze out the excess moisture. If you don’t, your bread may turn out soggy. Another mistake is overmixing the batter. Mix just until combined. This keeps your bread light and fluffy. Lastly, don't skip greasing your pan. This will help your bread come out easily. To get the best texture, use fresh zucchini. Grate it right before you mix it in. This keeps the moisture just right. Also, consider adding a mix of sugars. Using both granulated and brown sugar adds depth. Brown sugar contributes to a softer crumb. If you want a lighter bread, use cake flour instead of all-purpose flour. You can boost the flavor by adding spices. Cinnamon is a classic choice. Nutmeg gives warmth, too. If you want something different, try adding fresh herbs. Chopped basil or mint can add a surprising twist. A pinch of ginger creates a warm spice note. Don’t forget to taste the batter. Adjust the spices to suit your liking. You can find the Full Recipe to guide you through these delicious steps. {{image_2}} To make a gluten-free zucchini bread, swap the all-purpose flour for a gluten-free blend. Look for a blend that contains xanthan gum. This will help the bread rise and hold together. Use the same amount of gluten-free flour as the recipe calls for. Your bread will still be moist and tasty! If you want to make vegan zucchini bread, you can replace eggs with flax eggs. To make a flax egg, mix 1 tablespoon of ground flaxseed with 2.5 tablespoons of water. Let it sit for a few minutes until it thickens. You can also use applesauce or mashed bananas instead of eggs. For the oil, use melted coconut oil or unsweetened applesauce for a lighter option! Zucchini bread is a great base for flavor twists! Consider adding spices like cardamom or ginger for a warm touch. You can mix in nuts like almonds or pecans for crunch. For a sweet twist, add dried fruits like raisins or cranberries. Got a sweet tooth? Toss in chocolate chips for a rich flavor! You can even swirl in peanut butter or Nutella for a fun surprise. Explore these ideas in your next batch for unique tastes! To keep your zucchini bread fresh, store it at room temperature. Use an airtight container or wrap it in plastic wrap. This method helps retain moisture and flavor. If you plan to eat it within a few days, this works great. For longer storage, consider freezing. To freeze zucchini bread, first let it cool completely. Wrap it tightly in plastic wrap, then in aluminum foil. This double layer helps prevent freezer burn. You can store it in the freezer for up to three months. When you’re ready to enjoy it, just thaw it in the fridge overnight. To reheat zucchini bread, preheat your oven to 350°F (175°C). Place the bread in the oven for about 10-15 minutes, or until warm. If you want it softer, cover it with foil. You can also use a microwave. Heat a slice for 15-20 seconds on medium power. Pair it with some cream cheese for a tasty treat! For the full recipe, check out the Ultimate Zucchini Bread. The secret to moist zucchini bread lies in the moisture of the zucchini. Use fresh, grated zucchini in your recipe. Make sure to squeeze out excess water before adding it to the batter. This helps keep the bread light and fluffy. Another tip is to use oil instead of butter. Oil keeps the bread moist longer. Adding a bit of yogurt or sour cream can also help boost moisture. Yes, you can use yellow squash instead of zucchini. They have a similar texture and flavor. The bread will still taste great. Just like zucchini, grate the yellow squash and remove excess water. This swap works well for those who want to try something different. You may notice a slight change in color, but the taste remains delicious. To know when your zucchini bread is done, insert a toothpick into the center. If it comes out clean or with a few crumbs, the bread is ready. If the toothpick has wet batter, it needs more time. Bake it for another 5-10 minutes. Keep an eye on the top; it should be golden brown. Trust your senses, and your bread will be perfect! For the complete recipe, be sure to check the Ultimate Zucchini Bread 🥒 section. You’ve learned how to make the best zucchini bread. We covered key ingredients, step-by-step instructions, and useful tips. I shared ingredient swaps and fun variations, like gluten-free or vegan options. You now know how to store, freeze, and reheat your bread as well. Making zucchini bread can be easy and fun. Experiment with flavors to find your favorite. Enjoy baking!
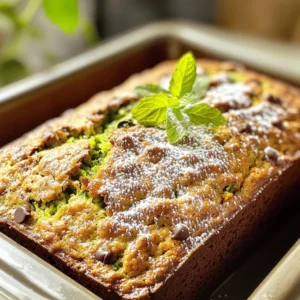
    Best Zucchini Bread Recipe Simple and Delicious Guide
  • To make Chinese Pepper Steak with Onions, gather these fresh items: - 1 lb flank steak, sliced thinly against the grain - 2 tablespoons soy sauce - 1 tablespoon cornstarch - 1 tablespoon sesame oil - 1 bell pepper (red or green), sliced thinly - 1 large onion, thinly sliced - 3 cloves garlic, minced - 1 teaspoon ginger, minced - 1 tablespoon oyster sauce - 1 teaspoon black pepper - 2 tablespoons vegetable oil - Green onions, chopped (for garnish) If you can't find an ingredient, here are some swaps: - Flank steak can be replaced with sirloin or skirt steak. - Soy sauce can be swapped for tamari for a gluten-free option. - Sesame oil may be replaced with olive oil if needed. - Bell peppers can be any color, or you can use snow peas for a crunch. - Oyster sauce can be omitted or replaced with soy sauce for a lighter flavor. Using fresh ingredients makes a big difference in flavor. Here's what to look for: - Choose flank steak that is bright red with a bit of marbling. - Pick bell peppers that are firm and shiny with no blemishes. - Select onions that are heavy for their size with dry, papery skins. - Fresh garlic should be firm and plump, while ginger should be smooth and unblemished. - Always check the expiration dates on sauces and oils for the best taste. {{ingredient_image_1}} First, take your flank steak and slice it thinly. Cutting against the grain helps it stay tender. Place the sliced steak in a bowl. Add 2 tablespoons of soy sauce and 1 tablespoon of cornstarch. Mix well so all the pieces get coated. Let it marinate for about 15 to 20 minutes. This step adds flavor and helps tenderize the meat. Next, heat 1 tablespoon of sesame oil in a large skillet or wok over medium-high heat. Once hot, add the marinated steak. Spread it out in a single layer. Let it sear for 2 to 3 minutes until it turns brown. This step locks in the juices and gives a nice flavor. After browning, remove the steak from the skillet and set it aside. In the same skillet, add 2 tablespoons of vegetable oil. Once the oil is hot, toss in the sliced onions and bell pepper. Add 3 cloves of minced garlic and 1 teaspoon of minced ginger. Sauté these for 4 to 5 minutes. You want the veggies to become tender but still crisp. This stage adds color and texture to your dish. Now, it’s time to bring everything together. Return the cooked steak to the skillet with the veggies. Pour in 1 tablespoon of oyster sauce and sprinkle 1 teaspoon of black pepper. Stir-fry for another 2 minutes. This ensures the steak is cooked through and the sauce coats everything well. Once done, remove it from the heat and garnish with chopped green onions. Enjoy your delicious Chinese pepper steak with onions! To get the best steak, choose flank steak. Slice it thinly against the grain. This makes the meat tender. Marinate it for at least 15 minutes. Use soy sauce and cornstarch in your marinade. The cornstarch helps keep the steak juicy. When cooking, make sure the skillet is hot. Sear the steak for 2-3 minutes. Don't overcrowd the pan; this helps it brown nicely. Add depth to your dish by using fresh ingredients. Minced garlic and ginger bring great taste. Using sesame oil gives a nice nutty flavor. For more umami, oyster sauce is a must. Feel free to mix in other veggies, like carrots or snap peas. A splash of vinegar can brighten the dish too. Don't forget to finish with chopped green onions for freshness. One mistake is not marinating long enough. This can lead to bland steak. Another error is cooking the steak too long. Overcooked meat becomes tough. Make sure to use high heat when searing. Avoid using too much oil; it can make the dish greasy. Lastly, don't skip the green onions. They add color and flavor to your meal. Pro Tips Marinate for Flavor: Allow the steak to marinate for at least 20 minutes to enhance the flavor and tenderness of the meat. High Heat for Searing: Ensure your skillet or wok is hot enough before adding the steak; this will help achieve a nice sear and lock in the juices. Veggie Crunch: Don’t overcook the vegetables; they should remain slightly crisp for the best texture and flavor contrast with the beef. Garnish for Freshness: Finish the dish with freshly chopped green onions; they add a pop of color and a fresh flavor that brightens the meal. {{image_2}} You can easily change the protein in this dish. Instead of flank steak, you can use chicken, pork, or shrimp. Each protein will bring its own flavor and texture. - Chicken: Use boneless, skinless chicken breast, cut into thin strips. Marinate it just like the steak. - Pork: Thinly slice pork tenderloin. It cooks fast and gets tender quickly. - Shrimp: Use peeled, deveined shrimp. Add them to the skillet last, cooking just until pink. If you want a meat-free meal, there are great veggie options. Tofu is a perfect choice. - Tofu: Use firm tofu for a hearty texture. Press it to remove extra moisture, then cut into cubes. Marinate like steak and follow the same cooking steps. - Mushrooms: Try using a mix of shiitake and button mushrooms for depth of flavor. Sauté them until tender. - Seitan: This wheat-based protein has a chewy texture. Slice it thin and treat it like meat in the recipe. You can adjust the flavors in this dish to fit your taste. - Spicy: Add sliced jalapeños or a dash of chili flakes for heat. - Sweet: Mix in a splash of honey or add some sliced carrots for natural sweetness. - Herbs: Fresh cilantro or basil can add a fresh touch. Sprinkle them on top just before serving. These variations keep the dish fun and exciting for everyone at your table. After you cook your Chinese pepper steak, let it cool down. Place it in an airtight container. This keeps it fresh. Store it in the fridge for up to three days. Make sure to eat it within this time for the best taste. To reheat, you can use a microwave or a skillet. If using a microwave, place the steak in a bowl. Cover it with a lid or a damp paper towel. Heat on medium power for 1-2 minutes. Stir halfway through. If using a skillet, heat it on medium heat. Add a splash of water or oil to keep it moist. Stir until it's hot. This helps keep the flavors intact. You can freeze your pepper steak if you want to save some for later. Allow it to cool completely. Place it in a freezer-safe bag or container. Squeeze out any air before sealing. It can stay in the freezer for up to three months. When ready to eat, thaw it in the fridge overnight before reheating. This keeps the taste fresh and delicious. You can serve this dish with plain white rice or fried rice. The rice soaks up the sauce well. You might also enjoy it with steamed broccoli or sautéed bok choy. If you want something different, try serving it with noodles. This adds a nice twist and extra flavor. To make this dish gluten-free, use tamari instead of soy sauce. Tamari is a great substitute that still provides the same salty flavor. You should also check your oyster sauce for gluten. Some brands offer gluten-free options. Always read the label to be sure. Yes, you can make this dish ahead of time. Cook the steak and vegetables, then cool them down. Store them in the fridge for up to three days. When you’re ready to eat, just reheat it in a skillet. This saves you time on busy days and still tastes great! This blog post covered the key steps to make Chinese Pepper Steak with Onions. We discussed ingredients, marinating and cooking methods, and tips for a perfect dish. I shared ways to customize your recipe and how to store leftovers. Remember, using fresh ingredients and avoiding common mistakes boosts flavor. Whether you're a beginner or experienced cook, you can impress with this dish. Enjoy your cooking journey and make it your own!
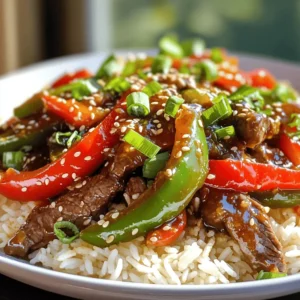
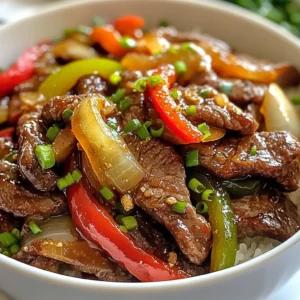
    Chinese Pepper Steak with Onions Tasty and Easy Dish
  • - 1 lb ground beef - 4 medium potatoes, peeled and diced - 1 medium onion, chopped - 3 cloves garlic, minced - 3 carrots, sliced - 2 cups beef broth - 1 cup heavy cream - 1 cup frozen corn - 1 teaspoon thyme - 1 teaspoon paprika - Salt and pepper to taste - Fresh parsley, chopped (for garnish) In this recipe, the main ingredients create a hearty base for the soup. Ground beef adds protein and flavor. The potatoes give it a creamy texture, while onions and garlic boost the taste. Carrots add sweetness and color. The frozen corn brings a pop of flavor. For the liquid, beef broth provides depth. Heavy cream makes the soup rich and smooth. Seasoning is key. Thyme and paprika add warmth, while salt and pepper bring balance. Fresh parsley on top adds a nice touch of color and freshness. You can easily adjust these ingredients to your taste. Want it spicier? Add more paprika or a dash of cayenne. Prefer a lighter soup? Try using less cream. This soup is flexible and allows for creativity. Enjoy making it your own! First, heat a skillet over medium heat. Add 1 lb of ground beef. Cook it until it turns brown, stirring occasionally. This step adds great flavor to the soup. Once fully cooked, drain the excess fat. Then, transfer the beef to your crockpot. This will be the base of your soup. Now it's time for the fun part—adding all the veggies! Chop 4 medium potatoes and 1 medium onion. Mince 3 cloves of garlic and slice 3 carrots. Toss these into the crockpot along with 1 cup of frozen corn. These ingredients add texture and taste. Next, pour in 2 cups of beef broth. Ensure all the veggies are submerged. Sprinkle in 1 teaspoon of thyme and 1 teaspoon of paprika for extra flavor. Don't forget to add salt and pepper to taste. Give everything a good stir to mix well. Cover the crockpot with the lid. Cook on low for 6 hours or high for 3 hours. This slow cooking lets the flavors blend perfectly. About 15 minutes before serving, stir in 1 cup of heavy cream. This adds creaminess and richness to your soup. Let it warm through before you serve. Enjoy the delightful aroma as it fills your kitchen! To boost flavor in your soup, try adding herbs like rosemary or basil. These herbs bring a fresh taste. You can also use spices like cumin or chili powder for a kick. When choosing beef, select ground chuck. It has the right fat content for flavor and tenderness. Avoid lean beef, as it may dry out during cooking. For a creamy texture, stir in heavy cream just before serving. This step makes the soup rich and smooth. If you desire a thicker soup, mash some of the potatoes in the pot. Cut vegetables into similar sizes. This ensures they cook evenly. Smaller pieces cook faster, while larger chunks may remain firm. Pair your soup with a simple green salad or crusty bread. These sides add crunch and balance. For special occasions, serve the soup in bread bowls for a fun twist. You can also top the soup with grated cheese or croutons. These toppings add extra flavor and texture, making each bowl delightful. {{image_2}} You can easily change the protein in this soup. Try using ground turkey or sausage instead of beef. These options add different flavors while keeping the soup hearty. For a vegan twist, swap the heavy cream for plant-based cream. This keeps the soup creamy without using dairy. This soup is great year-round. You can add seasonal vegetables for a fun twist. In spring, try adding peas or asparagus. In fall, diced butternut squash works well. These changes keep the soup fresh and exciting. Adjust the recipe based on what is in season to enhance flavors. If you like heat, add diced jalapeños or crushed red pepper flakes. Start with a small amount and taste as you go. This way, you can find the right balance. The creaminess of the soup helps cool the heat. A spicy version makes for an exciting meal! To store leftover soup, let it cool first. Pour it into a clean container with a tight lid. Place the container in the fridge within two hours of cooking. This keeps harmful bacteria away. You can enjoy the soup for up to three days. Just make sure to check it for any off smells or changes in color before eating. If you want to freeze the soup, use a freezer-safe container. Leave some space at the top for the soup to expand. You can also use freezer bags. Label them with the date so you remember when you made it. To thaw, place the soup in the fridge overnight. For a quicker method, use cold water. Just make sure the container is sealed tight to avoid water getting in. To reheat the soup, the best method is on the stove. Pour it into a pot and heat on low. Stir often to prevent sticking. If you want to use a microwave, place it in a microwave-safe bowl. Heat it in short bursts, stirring in between to keep it even. For a fresh taste, try adding a little cream or fresh parsley. This helps the soup taste just like it did when you first made it. Yes, you can use fresh herbs. Fresh herbs add bright, bold flavors. They also bring a lovely aroma to your soup. For this recipe, try using fresh thyme or parsley. Just remember, fresh herbs are more potent. Use about three times the amount of dried herbs. This way, your soup will taste fresh and vibrant. There are many options to replace heavy cream. If you want a lighter soup, try using half-and-half. It still gives creaminess but has less fat. Another good choice is coconut milk. It adds a nice taste and works for dairy-free diets. You can also use cashew cream. Blend soaked cashews with water for a smooth texture. There are a few easy ways to thicken your soup. One method is to mash some of the potatoes. This will create a creamy texture. You can also mix in cornstarch. Just combine cornstarch with a bit of cold water to make a slurry. Stir it into the soup and cook for a few minutes. Lastly, adding more vegetables, like pureed carrots, can help thicken the soup too. This recipe for hearty soup combines ground beef, fresh veggies, and creamy goodness. We covered essential ingredients, cooking techniques, and tasty variations. Remember to store leftovers properly and reheat them for the best flavor. Trying different herbs or swapping proteins can make this dish unique. Enjoy your cooking adventure and savor every bite of this warm, inviting meal!
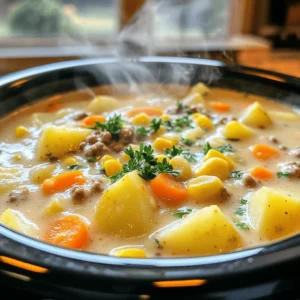
    Crockpot Creamy Potato Hamburger Soup Delightful Dish
  • - 2 cups all-purpose flour - 2 tablespoons sugar - 1 tablespoon baking powder - 1/2 teaspoon baking soda - 1/2 teaspoon salt - 2 cups buttermilk - 2 large eggs - 1/4 cup unsalted butter, melted - 1 teaspoon vanilla extract - 2 cups blueberries - Powdered sugar for dusting - Maple syrup for serving For this Blueberry Buttermilk Pancake Casserole, you need basic pantry items and fresh blueberries. The flour gives the dish its structure. Sugar adds sweetness, while baking powder and baking soda help it rise. Salt enhances all the flavors. Buttermilk makes the pancakes tender and rich. Eggs bind everything together. The melted butter adds a nice flavor and moisture. Vanilla extract gives a warm note to the dish. Blueberries are the star. They burst with juice when baked. You can add powdered sugar on top for a sweet finish. Maple syrup is perfect for drizzling when serving. This simple mix of ingredients creates a delicious breakfast treat. - Preheat oven to 350°F (175°C). - Grease a 9x13 inch baking dish with cooking spray or butter. - In a large bowl, combine 2 cups of all-purpose flour, - 2 tablespoons of sugar, 1 tablespoon of baking powder, - 1/2 teaspoon of baking soda, and 1/2 teaspoon of salt. - In another bowl, blend 2 cups of buttermilk, - 2 large eggs, 1/4 cup of melted butter, and 1 teaspoon of vanilla extract. - Whisk until well mixed. - Add the wet mixture to the dry ingredients and stir gently. - Gently fold in 2 cups of fresh or frozen blueberries. - Be careful not to mash them; you want whole berries. - Pour the pancake batter into the greased baking dish. - Spread it evenly. - Bake for 25-30 minutes until golden brown. - Once baked, let it cool for a few minutes. - Dust the top with powdered sugar just before serving. - Slice into squares and serve warm with maple syrup. To make the best Blueberry Buttermilk Pancake Casserole, you must avoid over-mixing the batter. Mix until just combined. A few lumps are okay. This keeps your pancakes fluffy. When choosing blueberries, you can use fresh or frozen. Fresh blueberries offer a burst of flavor. Frozen blueberries are convenient and work well too. If you use frozen, add them straight to the batter without thawing. You can enhance your pancake casserole with flavors like lemon zest or whipped cream. Just sprinkle lemon zest on top for a fresh kick. Whipped cream adds a creamy touch that melts in your mouth. Think about when to serve this dish. It’s great for breakfast or brunch. You can also enjoy it at family gatherings or holiday meals. Everyone will love this treat! Adding spices can elevate your pancake casserole. A pinch of cinnamon or nutmeg brings warmth and depth. These spices make your dish smell amazing and taste even better. For sweetness, consider alternative sweeteners. You can use honey or maple syrup instead of sugar. This changes the flavor profile and can make it healthier. Toppings like nuts or granola also add texture and crunch. {{image_2}} You can switch up the flavors in your blueberry buttermilk pancake casserole to keep it exciting. For a chocolatey twist, try a chocolate chip blueberry pancake casserole. Just fold in some chocolate chips with the blueberries. The rich chocolate will add a fun touch. Another great option is a banana walnut variation. Mash ripe bananas and mix them into the batter. Add chopped walnuts for crunch. This combination makes a tasty and hearty breakfast treat. If you need a gluten-free version, use gluten-free flour instead of regular flour. This exchange keeps the pancake casserole light and fluffy. You can enjoy the same great taste while staying gluten-free. For a dairy-free option, swap buttermilk for almond milk. Use coconut oil instead of butter. This way, you can still enjoy a delicious pancake casserole without dairy. Seasonal fruits can add fresh flavors to your casserole. In summer, use raspberries or strawberries. Their bright tastes make the dish even more delightful. In the fall, think pumpkin spice. Add pumpkin puree and pumpkin spice to the batter. This twist gives the casserole a cozy and warm flavor, perfect for chilly mornings. To keep your Blueberry Buttermilk Pancake Casserole fresh, store any leftovers in the fridge. Use an airtight container for the best results. This will keep the casserole moist and tasty. You can enjoy it for up to three days. When it comes to reheating, the oven is your best friend. Preheat it to 350°F (175°C). Place the casserole in an oven-safe dish, cover it with foil, and heat for about 15 minutes. This method keeps the texture nice. If you’re in a hurry, the microwave works too. Just heat in short bursts, about 30 seconds at a time, until warm. You can freeze leftover casserole for later. First, let it cool completely. Then, cut it into squares. Wrap each piece in plastic wrap, then place them in a freezer bag. This helps prevent freezer burn. To thaw, just leave it in the fridge overnight. You can reheat it as mentioned above, and it’ll taste almost as good as fresh! Yes, you can swap blueberries for other fruits. Strawberries, raspberries, or blackberries work great. Just make sure they are fresh or frozen. In summer, use seasonal fruits for the best flavor. Each fruit brings its own taste, adding variety to your dish. To prep in advance, mix the dry and wet ingredients separately. Store them in the fridge overnight. When you’re ready to bake, combine them and fold in the blueberries. This saves time in the morning! You can also bake it ahead and reheat it later. Just cover it well to keep it fresh. This casserole pairs well with crispy bacon or sausage for a hearty meal. You might also enjoy fresh fruit on the side. Greek yogurt adds creaminess and a nice contrast. Lastly, a drizzle of maple syrup enhances the flavors and makes it special. Yes, you can easily double this recipe. Just use a larger baking dish, like a 12x18 inch pan. Adjust the baking time slightly, as it may take a bit longer. Check for doneness with a toothpick. This way, everyone can enjoy a slice of this tasty casserole! This blog post shared a simple, fun recipe for blueberry buttermilk pancake casserole. You learned about key ingredients, easy steps to prepare it, and tips for perfecting your dish. Variations and storage options help you explore new flavors and keep leftovers fresh. In conclusion, this casserole is great for busy mornings or special occasions. Enjoy experimenting with flavors and serving it your way. Cooking should be fun, so dive in and savor every bite!
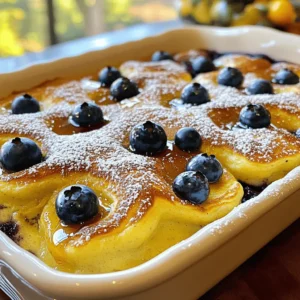
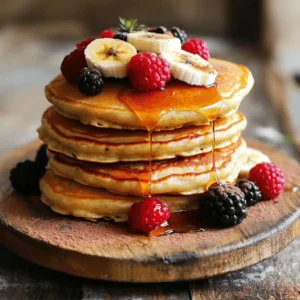
    Blueberry Buttermilk Pancake Casserole Delightful Treat
  • - 2 medium apples, peeled and diced - 1 cup all-purpose flour - 1 teaspoon baking powder - 1/2 teaspoon baking soda - 1 teaspoon ground cinnamon - 1/2 teaspoon nutmeg - 1/4 teaspoon salt - 1/2 cup brown sugar, packed - 1/4 cup granulated sugar - 1 large egg - 1/2 cup buttermilk (or milk with 1/2 teaspoon vinegar added) - 1 teaspoon vanilla extract - 1/4 cup powdered sugar (for dusting) - 1 tablespoon melted butter (for brushing) The apples are the star of this dish. I use two medium apples for their sweet and tart flavor. You can pick your favorite kind, like Granny Smith or Honeycrisp. The all-purpose flour forms the base of the fritters, giving them structure. Baking powder and baking soda help the fritters rise and stay fluffy. Ground cinnamon and nutmeg add warmth and spice. Brown sugar adds moisture and a rich taste, while granulated sugar balances the sweetness. Buttermilk keeps the fritters soft; it helps them rise. The egg binds everything together and adds richness. Finally, powdered sugar dusts the fritters for a sweet finish. You can change up the spices if you want. Try adding ginger or cloves for a different flavor. Adding nuts like walnuts or pecans can give a nice crunch. You can also mix in dried fruits like raisins or cranberries for extra sweetness. If you like more sweetness, drizzle honey or maple syrup on top. For a fun twist, you can add chocolate chips to the batter. This way, you can make the fritters your own! Start by preheating your oven to 375°F (190°C). This temperature helps the fritters bake evenly. Next, grab a baking sheet. Line it with parchment paper. This keeps the fritters from sticking and makes cleanup easy. In a medium bowl, add 1 cup of all-purpose flour. Then, add 1 teaspoon of baking powder and 1/2 teaspoon of baking soda. Sprinkle in 1 teaspoon of ground cinnamon, 1/2 teaspoon of nutmeg, and 1/4 teaspoon of salt. Whisk these dry ingredients together until they blend well. Setting this aside keeps the flavors fresh. Take a large bowl and put in 1/2 cup of packed brown sugar. Add 1/4 cup of granulated sugar next. Crack in 1 large egg. Pour in 1/2 cup of buttermilk or milk mixed with 1/2 teaspoon of vinegar. Don't forget 1 teaspoon of vanilla extract. Whisk these ingredients until they form a smooth mixture. Now it's time to bring the dry and wet mixtures together. Gradually add the dry blend into the wet mix. Stir gently until they just combine. Don’t worry if there are a few lumps; they are okay. Next, fold in 2 medium apples, peeled and diced. Make sure the apples are spread evenly in the batter. Using an ice cream scoop or a spoon, drop tablespoons of the batter onto the baking sheet. Space them about 2 inches apart for even baking. Brush the tops with 1 tablespoon of melted butter. This gives a nice golden color. Bake the fritters for 15 to 20 minutes. Check them by inserting a toothpick in the center. It should come out clean. Once baked, let them cool for a few minutes. Dust with powdered sugar before serving. Enjoy your tasty baked apple fritters! To get that perfect crispy texture, start by using cold buttermilk. This helps the dough rise well. Brush the fritters with melted butter before baking. This will give them a nice golden color. Ensure you space the fritters apart on the baking sheet. This allows hot air to circulate and crisp them up. Add more flavor by mixing in chopped nuts or dried fruits. Pecans or walnuts pair well with apples. You can also try adding a pinch of ginger or cloves for a warm spice note. Drizzling caramel sauce on top right before serving adds a sweet touch too. One common mistake is overmixing the batter. Mix until just combined for light fritters. Another error can be skipping the dusting of powdered sugar. This simple step adds sweetness and makes the fritters look great. Lastly, check your oven temperature. An oven that's too hot can burn the fritters. Always use an oven thermometer for accuracy. {{image_2}} You can switch up the apples for other fruits. Try pears or peaches for a twist. Baked fritters with berries add a burst of flavor too. Seasonal fruits make your fritters fun and fresh. You can chop them into small pieces and mix them in. This keeps the recipe exciting all year long. You can make these fritters gluten-free with a simple swap. Use a gluten-free flour blend instead of all-purpose flour. Make sure the blend has a good texture for baking. You may want to add a little extra baking powder. This helps keep them light and fluffy. Check the labels to avoid cross-contamination. You can change the spices for new tastes. Try adding cardamom or ginger for a warm kick. A splash of lemon zest brightens up the flavor. You could even add a little almond extract instead of vanilla. This gives a nutty, sweet twist. Playing with flavors keeps your fritters unique and fun! To keep your fritters fresh, place them in an airtight container. You can store them at room temperature for one day. If you want them to last longer, put them in the fridge. They will stay good for up to three days. Make sure they cool completely before storing. This helps avoid sogginess. When you want to enjoy the fritters again, you can reheat them easily. Preheat your oven to 350°F (175°C). Place the fritters on a baking sheet lined with parchment paper. Heat them for about 5 to 10 minutes, or until warm. This method keeps them crispy. You can also use a toaster oven for quick reheating. If you want to save some fritters for later, freezing is a great option. First, let them cool completely. Then, wrap each fritter in plastic wrap. After that, place them in a freezer bag. They can stay in the freezer for up to three months. When you're ready to eat, thaw them overnight in the fridge. Reheat as mentioned earlier for best results. Baked apple fritters are soft, sweet treats made with diced apples and spices. They are lighter than fried fritters but still have a lovely texture. You mix apples with flour, sugar, and spices, then bake them until golden. They are perfect for breakfast or a snack. Yes, you can use any apple you like! Sweet apples like Fuji or Honeycrisp work well. Tart apples like Granny Smith add a nice zing. Just make sure to peel and dice them before adding to the batter. To make these fritters healthier, you can use whole wheat flour instead of white flour. You can also cut down on the sugar or use a natural sweetener like honey or maple syrup. Adding oats or nuts can boost fiber and nutrients too. Serve these fritters warm for the best taste. You can dust them with powdered sugar or drizzle them with caramel sauce. Garnishing with fresh mint adds a nice touch. They also pair well with a scoop of vanilla ice cream. Baked apple fritters can last for about two days at room temperature. Store them in an airtight container to keep them fresh. If you want to keep them longer, you can freeze them for up to three months. Just reheat in the oven when you’re ready to enjoy! You learned about the essential ingredients for baked apple fritters and their uses. I shared step-by-step instructions that make the process easy. Tips and tricks help keep your fritters crispy and tasty. You can even customize with seasonal fruits or gluten-free options. Finally, proper storage keeps your fritters fresh for longer. Enjoy these fritters fresh out of the oven or saved for later. Your baking journey with these sweet treats promises joy and flavor every time.
    Baked Apple Fritters Simple and Flavorful Delight
  • - 2 cups seedless grapes - 1 cup sugar - 1 packet Kool-Aid (flavor options) - 1 tablespoon lemon juice (optional) Kool-Aid grapes are a fun and easy summer snack. You only need a few simple ingredients. First, gather your seedless grapes. You can choose red or green grapes based on your taste. Next, grab a cup of sugar. This will give the grapes their sweet flavor. Then, pick a Kool-Aid packet. You can use any flavor you like. Finally, if you want a little extra zing, get some lemon juice. It adds a nice touch to the taste. Each ingredient plays a key role. The grapes provide freshness, while the sugar and Kool-Aid give sweetness and flavor. The lemon juice is optional, but it can make the snack more exciting. These ingredients come together to create a colorful and tasty treat. - Rinse and dry grapes - Remove stems First, take your two cups of seedless grapes. Rinse them under cold water. This cleans off dirt and any pesticides. After rinsing, dry them well with a clean towel. It's important to remove the stems, so each grape is ready for coating. You want them to be clean and dry for the best flavor. - Combine sugar and Kool-Aid - Mix well until combined Next, grab a medium bowl. Add one cup of sugar and one packet of your favorite Kool-Aid flavor. You can choose anything from cherry to grape. Stir the sugar and Kool-Aid together until everything blends. This step is key. The sugar helps the Kool-Aid stick to the grapes later. - Add lemon juice (optional) - Toss grapes in Kool-Aid mixture Now it's time to coat the grapes. If you want a tangy taste, add one tablespoon of lemon juice to the grapes. This is optional but adds a nice twist. Toss the grapes into the Kool-Aid mixture. Make sure each grape gets an even coating. This will give them a burst of flavor. - Spread on baking sheet - Freeze for 1-2 hours After coating, spread the grapes out on a baking sheet lined with parchment paper. It's best to keep them in one layer. Place the baking sheet in the freezer. Let them freeze for about one to two hours. This makes them cold and frosty, perfect for a hot day. - Remove from freezer - Serve immediately When ready to serve, take the grapes out of the freezer. They should be firm and chilled. Serve them right away for the best taste. If you want, you can sprinkle a little extra Kool-Aid powder on top for more flavor. Enjoy this cool snack on a sunny day! To coat your grapes well, mix the sugar and Kool-Aid carefully. Start with a medium bowl. Add the sugar first, then sprinkle in the Kool-Aid. Stir it until the mix looks even. You want every grape to get a tasty coat! If you want a burst of flavor at serving time, sprinkle some extra Kool-Aid on top. You can use red or green grapes to make Kool-Aid grapes. Red grapes are sweeter, while green grapes are tart. Pick grapes that feel firm and look shiny. Avoid any that look wrinkled or soft. Fresh grapes will give you the best taste and texture. If you like your Kool-Aid grapes sweeter, you can add more sugar. Just remember, too much sugar can overpower the flavor. You can also try using honey or agave for a different twist. These alternatives can make your snack unique while keeping it sweet! {{image_2}} You can try many Kool-Aid flavors for this recipe. The classic cherry and grape flavors are popular choices. Lemon-lime gives a refreshing twist, while blue raspberry adds a fun color. Mixing flavors can create unique tastes. For instance, try combining strawberry and lemonade for a sweet and tangy snack. For a little zing, add lemon or lime zest to the grapes. It gives a bright flavor that pairs well with Kool-Aid. You can also mix in other fruits like diced strawberries or pineapple. Using flavored extracts, like vanilla or almond, can make the taste even richer. Just use a small amount to keep the balance. If you want a lighter option, reduce the sugar. You might try using only half a cup or substitute with a natural sweetener like honey. Another option is to skip the sugar and use just fruit. Freeze the grapes plain or with a splash of juice. They will still be tasty and refreshing! To keep your Kool-Aid grapes fresh, place them in an airtight container. Make sure they are completely frozen before storing. This helps them stay firm and tasty. Seal the container tightly to prevent freezer burn. You can store them for up to one month. After that, they may lose flavor and texture. When freezing Kool-Aid grapes, ensure they freeze in a single layer. This helps them maintain their shape and texture. If you want to refreeze them, only do so if they have not melted completely. Repeated freezing can make them mushy. For best results, enjoy them right after freezing for a crunchy, refreshing snack. Kool-Aid grapes are a fun snack made from grapes coated in flavored sugar. You take fresh grapes and toss them in a mix of sugar and Kool-Aid powder. This gives the grapes a sweet and tangy flavor. After coating, you freeze them for a cool treat. They are colorful, tasty, and perfect for hot days! Kool-Aid grapes can last about two weeks in the fridge. Store them in a sealed container to keep them fresh. If you freeze them, they last even longer. Frozen grapes can stay good for up to six months. Just remember to enjoy them before they get freezer burn. Yes, you can customize the flavors! You can choose any Kool-Aid flavor you like. Try classic flavors like cherry or grape. You can also mix two flavors for a unique taste. Experimenting with flavors makes it fun and personal. Kool-Aid grapes can be a healthy snack. Grapes are full of vitamins and antioxidants. However, the sugar adds extra calories. If you're watching your sugar intake, you can reduce the sugar or try a sugar substitute. Enjoy them in moderation for a tasty treat! You can use frozen grapes, but the texture will change. Frozen grapes may not coat well with the sugar and Kool-Aid mix. If you want to use frozen grapes, let them thaw slightly. This helps the coating stick better. Kool-Aid grapes are a fun snack you can make easily. We covered the simple steps to prepare, coat, and freeze grapes. You learned how to ensure an even coating and adjust sweetness. Plus, I shared tips on variations and storage. These tasty treats are perfect for parties or hot days. Mix flavors to find your favorite. Enjoy these fun snacks with family and friends!
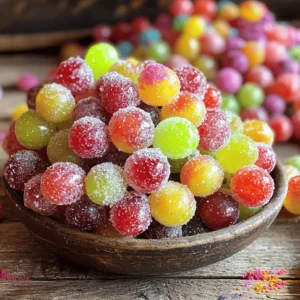
    Kool-Aid Grapes Refreshing Summer Snack Recipe
  • - Fish Varieties: For this dish, you can use cod or sea bass. Both fish have a mild flavor. They cook well and flake easily. You can also try halibut for a richer taste. - Fresh Herbs and Spices: Fresh parsley adds a bright taste. Dried oregano gives an earthy touch. You should also use garlic for depth and a hint of spice. - Vegetables and Garnishes: Cherry tomatoes are juicy and sweet. Red onion adds sweetness and crunch. Kalamata olives bring a salty flavor. Lemon slices make a great garnish and add zing. These ingredients create a perfect balance in your Mediterranean baked fish. The mix of flavors will delight your taste buds! Remember, fresh ingredients always make a big difference. First, preheat your oven to 400°F (200°C). This step is key because it helps cook the fish evenly. While the oven heats, grab a baking dish. This is where the magic happens! Now, let's make the base for our dish. Take 2 cups of halved cherry tomatoes, 1 medium sliced red onion, and 3 minced garlic cloves. Add these to the baking dish. Toss in 1/4 cup of halved Kalamata olives too. Squeeze the juice from 1 lemon over the mix and add the zest as well. Drizzle 1 tablespoon of olive oil on top. To finish, sprinkle with 1 teaspoon of dried oregano, salt, and pepper. Mix everything well, so the flavors blend. Next, it's time for the fish! Create a space in the middle of the tomato mix. Place 2 fish fillets, like cod or sea bass, right on top. Drizzle the remaining tablespoon of olive oil over the fish. This oil adds flavor and keeps the fish moist. Season it with salt and pepper to enhance the taste. Finally, sprinkle 1/4 cup of chopped fresh parsley over everything. This adds both color and flavor. Put the dish in your preheated oven. Bake for about 20 to 25 minutes. You’ll know it’s done when the fish flakes easily with a fork and the tomatoes are soft and bubbling. If you have a food thermometer, the fish should reach 145°F internally. Once it’s out of the oven, let it cool for a minute. Then, plate the fish and herbed tomatoes. Add fresh lemon slices and a sprinkle of extra parsley for a pop of color. Enjoy with crusty bread to soak up those juicy flavors! How to prevent the fish from drying out To keep your fish moist, I suggest two key steps. First, use a good amount of olive oil. This fat coats the fish and helps lock in moisture. Second, do not overcook the fish. Check it at the 20-minute mark to see if it flakes easily. If it does, it’s ready to eat! Adjusting cooking times for different fish types Different fish cook at different rates. For thicker fillets like salmon, you may need 25-30 minutes. For thinner ones like sole, 15-20 minutes is often enough. Always keep an eye on your fish so it doesn’t overcook. Using different herbs and spices You can switch up the herbs to match your taste. Try basil or thyme for a new twist. For heat, add a pinch of red pepper flakes. This can really boost the flavor of your dish! Incorporating additional vegetables or ingredients Feel free to add more veggies. Bell peppers and zucchini work well with this dish. You can also mix in some capers or artichokes for extra flavor. Just make sure to cut everything to a similar size for even cooking. {{image_2}} If you can’t find cod or sea bass, don’t worry! You can use other fish for this dish. Here are a few great options: - Tilapia: This fish has a mild taste and cooks quickly. - Snapper: It has a slightly sweet flavor and a firm texture. - Trout: This fish is rich and buttery, adding depth to the dish. These alternatives will work well with the Mediterranean flavors in this recipe. Just remember to adjust the cooking time if the fish fillets are thicker or thinner. Want to try a Mediterranean baked dish without fish? You can make a tasty veggie version! Use the same base of tomatoes and onions. Then, add these ingredients: - Zucchini: Slice it thinly for even cooking. - Bell Peppers: Use any color you like for extra crunch and sweetness. - Chickpeas: They add protein and a hearty texture. Mix the veggies with the herbs and spices, just like with the fish. Bake it until the vegetables are tender and flavor-packed. To change up the flavors, try different spices and herbs. Here are some ideas: - Cumin: Adds warmth and earthiness. - Paprika: Gives a smoky flavor and nice color. - Fresh Basil: Offers a sweet and fragrant twist. Feel free to experiment with these spices to create your own unique Mediterranean dish. You can even blend in some feta cheese for a creamy touch! To keep your Mediterranean baked fish fresh, follow these steps: - Allow the dish to cool to room temperature. - Place leftovers in an airtight container. - Refrigerate within two hours of cooking. - Store in the fridge for up to three days. - For longer storage, freeze the fish. - Wrap each fillet in plastic wrap, then place in a freezer bag. - Label the bag with the date. This helps you track freshness. To reheat your delicious baked fish, follow these tips: - Preheat your oven to 350°F (175°C). - Place the fish on a baking sheet. - Cover with foil to keep moisture in. - Heat for about 10-15 minutes. - Check if it's warm all the way through. Use a fork to test if it flakes easily. - Avoid using a microwave, as it can dry out the fish. These steps ensure your Mediterranean baked fish stays tasty and enjoyable. Yes, you can use frozen fish fillets. First, you need to thaw them. To thaw, place the frozen fish in the fridge overnight. If you’re short on time, you can also run cold water over the fish in a sealed bag for about 30 minutes. Once thawed, pat the fish dry with a paper towel. This helps the seasoning stick better. Thawing properly ensures your fish cooks evenly and tastes great. Some great sides pair well with Mediterranean Baked Fish. Consider these options: - Crusty bread: Perfect for soaking up the juices. - Steamed vegetables: Broccoli or green beans add color and nutrition. - Rice or quinoa: A light, fluffy side balances the dish well. - Greek salad: Fresh tomatoes, cucumbers, and feta enhance the meal. When plating, arrange the fish with the herbed tomatoes. Add lemon slices and a sprinkle of parsley for a bright look. This makes your dish both tasty and appealing! When you bake fish at 400°F, it usually takes about 20 to 25 minutes. The fish should flake easily with a fork when it's done. If you use thicker fillets, you might need a few extra minutes. Always check the center; it should be opaque and not translucent. Remember, cooking time can change based on the type of fish and its thickness, so keep an eye on it! Mediterranean baked fish is a tasty and healthy dish to enjoy. We explored key ingredients like fresh fish, herbs, and veggies. I shared step-by-step instructions for perfect baking. You learned tips to keep your fish moist and flavor-rich. Variations allow for swaps and vegetarian options. Store leftovers correctly, and reheating tips will help maintain their taste. With all these insights, you’re ready to bake a delicious dish that impresses. Enjoy this vibrant meal with sides to match, and create lasting memories at your table. Happy cooking!
    Mediterranean Baked Fish Flavorful Recipe Guide
  • - 1 can (15 oz) chickpeas, drained and rinsed - 1 medium onion, diced - 2 cloves garlic, minced - 1 carrot, diced - 1 red bell pepper, diced - 1 can (14 oz) diced tomatoes - 4 cups vegetable broth - 1 tablespoon olive oil - 1 teaspoon ground cumin - 1 teaspoon ground coriander - 1/2 teaspoon ground cinnamon - 1/2 teaspoon smoked paprika - 1/2 teaspoon cayenne pepper - Salt and pepper to taste - 1 cup spinach, chopped - Fresh cilantro or parsley for garnish - Lemon wedges for serving This soup is rich in flavor and packed with nutrients. Chickpeas provide protein and fiber, making it filling. The diced onion and garlic add a nice base. Carrots and red bell peppers bring sweetness and color. Diced tomatoes add acidity, balancing the dish. The spices make this soup special. Ground cumin and coriander give it warmth. Cinnamon adds a hint of sweetness, while smoked paprika gives depth. Cayenne pepper gives a kick, but you can adjust it to your taste. Fresh ingredients, like spinach and herbs, finish the soup nicely. They add color and freshness. The lemon wedges give a zesty touch. Squeeze them in just before you eat for a bright flavor. This combination of ingredients makes Moroccan Chickpea Soup a hearty and healthy meal. You can customize the spices and fresh ingredients to your liking. Enjoy making this easy dish! - Heat olive oil in a large pot. - Sauté the diced onion until translucent. In a large pot, heat one tablespoon of olive oil over medium heat. I find that olive oil gives the best flavor. Once hot, add the diced onion. Cook until it turns translucent, which should take about 3-4 minutes. This step builds a great base for our soup. - Stir in garlic, carrot, and red bell pepper. - Add spices and cook until fragrant. Next, add two cloves of minced garlic, one diced carrot, and one diced red bell pepper to the pot. Stir everything together and cook for about five minutes. The veggies will soften and release their flavors. After that, add the spices: one teaspoon of ground cumin, one teaspoon of ground coriander, half a teaspoon of ground cinnamon, half a teaspoon of smoked paprika, and half a teaspoon of cayenne pepper. Stir continuously for about one minute. This will make your kitchen smell amazing! - Pour in diced tomatoes and vegetable broth. - Add chickpeas and let simmer for 20 minutes. Now it’s time to pour in one can of diced tomatoes and four cups of vegetable broth. Bring the mixture to a boil. Once boiling, reduce the heat to a simmer. Add one can of drained and rinsed chickpeas. Let it simmer for 20 minutes. This allows all the flavors to blend together nicely. - Stir in chopped spinach and season with salt and pepper. - Serve hot with garnishes. After 20 minutes, add one cup of chopped spinach to the pot. Cook for an additional five minutes until the spinach wilts. Finally, season the soup with salt and pepper to taste. Serve hot, garnished with fresh cilantro or parsley. Don’t forget a wedge of lemon on the side for a burst of flavor! - Adjust spice levels to taste. If you love heat, add more cayenne. If you prefer milder flavors, use less. - Use fresh or canned chickpeas. Canned chickpeas save time, but fresh ones add a great texture. - Drizzle with olive oil before serving. This adds a nice sheen and rich flavor. - Garnish with fresh herbs. Cilantro or parsley brighten the soup and add a fresh taste. - Add a splash of lemon juice. This gives the soup a zesty kick that lifts the flavors. - Experiment with different greens. Try kale or Swiss chard for a new twist. {{image_2}} You can change the veggies in this soup. Try adding zucchini or sweet potatoes for more flavor. They cook well and add great texture. You could also switch to chicken or beef broth. This swap will give the soup a deeper, richer taste. Feel free to experiment with what you have on hand. Just remember to adjust the cooking time if you add more dense vegetables. Want to spice things up? Add harissa for a nice kick. This chili paste brings heat and a unique flavor. You can also try using different dried herbs. Herbs like thyme or oregano can change the soup's taste. This gives you a chance to explore various flavors. Don't be afraid to mix and match until you find what you like best. Make this soup fit your diet. You can easily make it gluten-free by checking the broth. Use a gluten-free broth to keep it safe. If you want a vegan option, skip the chicken or beef broth. Stick with vegetable broth and all the veggies. You can also replace any allergens with safe alternatives. This way, everyone can enjoy the soup without worry. To store leftover soup in the fridge, let it cool first. Then, pour the soup into an airtight container. Seal it well to keep out air. Your soup will stay fresh for about 3 to 4 days. When you want to reheat it, pour it into a pot over low heat. Stir it often until it’s warm. You can also use a microwave. Just heat it in short bursts, stirring in between. This keeps the soup from getting too hot in one spot. Freezing Moroccan Chickpea Soup is easy. First, let the soup cool completely. Then, use freezer-safe containers or heavy-duty freezer bags. If using bags, squeeze out the air before sealing. You can also divide the soup into single servings for easy thawing later. This soup can last in the freezer for up to 3 months. When you are ready to eat, thaw it overnight in the fridge. You can reheat it on the stove or in the microwave as mentioned before. Moroccan Chickpea Soup lasts about 3 to 4 days in the fridge. In the freezer, it stays good for about 3 months. Look out for signs that your soup has gone bad. If you see any mold, or if it smells off, it’s best to toss it. Another sign is a change in texture; if it looks too thick or grainy, don’t eat it. Always trust your senses to keep your meals safe. Moroccan Chickpea Soup is a warm, savory dish made with chickpeas and spices. It's rich in flavor and nutrients. The soup features tomatoes, carrots, and bell peppers, making it a hearty meal. It’s easy to prepare and perfect for any time of year. Yes, you can make Moroccan Chickpea Soup ahead of time. It tastes even better the next day as the flavors meld. To prepare it in advance, follow these steps: - Cook the soup completely. - Let it cool to room temperature. - Store it in an airtight container in the fridge for up to three days. - Reheat the soup on the stove and enjoy! You can easily adjust the spice level to suit your taste. If you prefer a milder soup, use less cayenne pepper. Start with a pinch and add more if needed. For more heat, consider adding: - A splash of hot sauce. - A teaspoon of harissa paste. - Extra cayenne pepper as you cook. Moroccan Chickpea Soup pairs well with several side dishes. Here are some tasty options: - Warm crusty bread or pita. - A simple green salad with lemon dressing. - Couscous or rice for a filling meal. - Lemon wedges for extra flavor. Moroccan Chickpea Soup is a warm and tasty dish made from simple ingredients. You begin with chickpeas, onions, vegetables, and spices, all simmered together. By adding fresh greens and lemon, you boost both flavor and health. This soup is easy to customize, so feel free to swap ingredients or adjust spices as you like. In every bowl, you'll find comfort and nutrition. Enjoy your cooking adventure and share this recipe with friends!
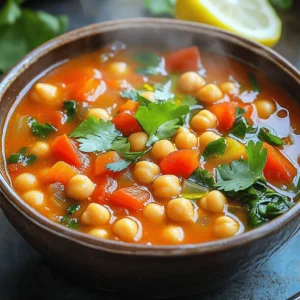
    Moroccan Chickpea Soup Flavorful and Healthy Meal
  • To make creamy carrot potato soup, you need simple but flavorful ingredients. Here’s what you will need: - 4 large carrots, peeled and chopped - 2 medium potatoes, peeled and diced - 1 medium onion, chopped - 2 cloves garlic, minced - 4 cups vegetable broth - 1 cup coconut milk - 2 tablespoons olive oil - 1 teaspoon ground cumin - 1 teaspoon smoked paprika - Salt and pepper to taste Each ingredient plays a key role in building the soup's rich flavor. The carrots and potatoes give it a sweet and earthy base. The onion and garlic add depth and aroma. Vegetable broth keeps it light, while coconut milk adds creaminess and a hint of sweetness. To make your soup even better, consider these optional garnishes: - Fresh parsley - Coconut cream - Croutons Fresh parsley adds a bright color and flavor. Coconut cream can boost creaminess, while croutons give a nice crunch. Feel free to mix and match these toppings to find your favorite combination. - Sautéing the Onion and Garlic Start by heating olive oil in a large pot over medium heat. Add the chopped onion and minced garlic. Sauté these for about 3-4 minutes. The onion should turn soft and clear. This step adds a great base flavor to your soup. - Adding Carrots and Potatoes Next, add the peeled and chopped carrots along with the diced potatoes. Stir everything together well. Sauté for another 5 minutes. This softens the vegetables slightly and prepares them for cooking. - Incorporating Spices Now, sprinkle in the ground cumin and smoked paprika. Stir well to coat the veggies with the spices. This gives your soup a warm, inviting flavor that is hard to resist. - Simmering the Soup Pour in the vegetable broth and bring the pot to a boil. Once it bubbles, reduce the heat. Let it simmer for about 20 minutes. The carrots and potatoes should become fork-tender. This ensures your soup is nice and smooth when blended. - Blending to Creamy Consistency After simmering, use an immersion blender to blend the soup until creamy. If you don’t have one, carefully transfer the soup to a regular blender in batches. Just be careful with the hot liquid, as it can splatter. - Adding Coconut Milk Once blended, stir in the coconut milk. This adds richness and a hint of sweetness to your soup. It makes every spoonful comforting and creamy. - Adjusting Seasoning Finally, taste your soup and adjust the seasoning. Add salt and pepper as needed. Let it simmer for another 5 minutes to ensure it’s hot. This step elevates the flavors and makes your soup even more delicious. How to Achieve the Best Flavor To make this soup shine, use fresh veggies. Fresh carrots and potatoes give the best taste. Sautéing them in olive oil adds depth. Don't rush this step. Let the onion and garlic cook until soft. This builds a rich base for your soup. Importance of Sautéing Vegetables First Sautéing vegetables first makes a big difference. It helps release their natural sugars. This adds sweetness and flavor to the soup. Aim to cook the onion and garlic until soft. Then, add the carrots and potatoes. This method makes every bite flavorful. Using an Immersion Blender vs. Regular Blender I love using an immersion blender for this soup. It’s easy and saves time. You blend right in the pot, so there's less mess. If you use a regular blender, be careful. Hot soup can splash. Blend in small batches, and let it cool a bit first. Achieving Desired Texture For a creamy soup, blend until smooth. If you like some texture, blend less. You can leave some small chunks of carrots or potatoes. This gives your soup a rustic feel. Adjust the blending to match your taste. Boosting Nutritional Value You can boost nutrition easily. Add leafy greens like spinach or kale. They blend well and add vitamins. You could also toss in some cooked lentils. This makes the soup heartier and adds protein. Substituting Ingredients Feel free to swap ingredients for your needs. If you want a different flavor, use sweet potatoes instead of regular ones. For creaminess, almond milk is a great choice. You can also skip coconut milk if it’s not your thing. Just adjust the seasoning to keep the taste balanced. {{image_2}} You can make this soup even better by switching ingredients. Try using sweet potatoes instead of regular potatoes. Sweet potatoes add a nice sweetness and a vibrant color. You can also use butternut squash for a creamy texture. Both options taste wonderful. For a dairy-free option, almond milk or cashew cream works great. Almond milk keeps it light, while cashew cream adds richness. Both choices keep the soup smooth and tasty. Want to spice things up? Add red pepper flakes for a kick. The heat balances the sweet carrots. Use just a pinch to start. You can always add more if you like it spicier. Fresh herbs like thyme or basil can brighten the taste. Adding herbs gives the soup a fresh layer of flavor. Stir them in at the end for the best aroma. This soup pairs perfectly with a slice of crusty bread or a fresh salad. The bread is great for dipping, while the salad adds crunch. Try a simple green salad with a lemon vinaigrette. You can also pair the soup with proteins like chicken or tofu. Cooked chicken adds heartiness, while tofu keeps it light and vegetarian. Both options make this dish filling and satisfying. To store leftovers of creamy carrot potato soup, let it cool first. Once cool, pour the soup into airtight containers. This helps keep the soup fresh and tasty. Use glass or BPA-free plastic containers for best results. Label each container with a date to track freshness. If you want to freeze the soup, use a freezer-safe container. Leave some space at the top for the soup to expand as it freezes. You can also use freezer bags for easy storage. Squeeze out excess air before sealing. When you’re ready to eat, thaw the soup overnight in the fridge. To reheat, warm it in a pot over low heat, stirring often until hot. In the fridge, the soup lasts up to five days. If you freeze it, it can remain safe for three months. Always check for signs of spoilage before eating. If it smells off or has changed color, it’s best to throw it away. Can I make this soup in a slow cooker? Yes, you can make this soup in a slow cooker. Start by sautéing the onion and garlic in olive oil. After that, add the carrots, potatoes, spices, and broth to the slow cooker. Cook on low for 6 to 8 hours or on high for 3 to 4 hours. Blend as directed later. What can I use instead of coconut milk? If you want to swap coconut milk, try almond milk or cashew cream. Both options add a nice creaminess. You can also use regular milk if you are not vegan. Is this soup vegan and gluten-free? Yes, this soup is both vegan and gluten-free. It has no animal products or gluten ingredients. This makes it a great choice for many diets. How many calories are in a serving of creamy carrot potato soup? A serving of this soup has about 200 calories. This can vary based on portion size and added ingredients. It remains a hearty yet light option for a meal. What to serve with creamy carrot potato soup? This soup pairs well with crusty bread or a fresh salad. You can also enjoy it with grilled cheese for a fun twist. These options complement the soup's creamy texture and rich flavor. How to make it a complete meal? To create a full meal, add a protein source like grilled chicken or chickpeas. You can also serve it with a side of quinoa or brown rice. These additions make the meal balanced and satisfying. This blog post covered how to make creamy carrot and potato soup. You learned about key ingredients, cooking steps, and tips for the best flavor. Variations let you customize the soup to your taste. Proper storage methods help keep leftovers fresh. In closing, enjoy experimenting with this recipe. It’s simple but packed with flavor. You can share it with family and friends for a wholesome meal. Happy cooking!
    Creamy Carrot Potato Soup Comforting and Cozy Dish
  • - 1 lb boneless, skinless chicken breasts - 6 cups chicken broth (low-sodium) - 1/2 cup cream cheese, softened - 1 cup shredded cheddar cheese - 1/2 cup cooked, crumbled turkey bacon (or regular bacon) - 1/2 cup green onions, chopped - 1 tablespoon garlic powder - 1 tablespoon onion powder - 1 teaspoon dried Italian herbs (oregano, thyme, basil) - Salt and pepper, to taste - 1 cup spinach, roughly chopped (optional) - 1 tablespoon olive oil One serving of Keto Crack Chicken Soup has about 400 calories. It also packs 30 grams of fat and 30 grams of protein. This meal is low in carbs, fitting perfectly into a keto diet. You’ll get vitamins from the spinach and green onions too. You can boost the flavor with these extras: - Fresh herbs, like parsley or cilantro, for a fresh touch. - A splash of lemon juice to brighten the taste. - Red pepper flakes for a spicy kick. - Additional veggies, such as bell peppers or zucchini, for more texture. These options can make your soup even more tasty. Feel free to mix and match based on what you like! {{ingredient_image_1}} First, gather your ingredients. You need one pound of boneless, skinless chicken breasts. Season the chicken with salt, pepper, garlic powder, onion powder, and dried Italian herbs. Heat one tablespoon of olive oil in a large pot over medium heat. Add the chicken breasts and cook for about five minutes on each side. Look for a nice golden brown color. This step locks in flavor. Once the chicken is browned, pour in six cups of low-sodium chicken broth. Bring this mixture to a simmer. Cover the pot and let it cook for about 20 minutes. You want the chicken to be fully cooked and tender. After 20 minutes, carefully remove the chicken from the pot. Use two forks to shred the chicken into bite-sized pieces. Return the shredded chicken back into the pot. Next, add half a cup of softened cream cheese to your soup. Stir well until it melts and blends in. Then, toss in one cup of shredded cheddar cheese and half a cup of cooked, crumbled turkey bacon. Mix everything until the cheese is melted and creamy. If you like, stir in one cup of roughly chopped spinach during the last few minutes of cooking. Finally, taste the soup and adjust the salt and pepper as needed. For a fresh touch, garnish with chopped green onions before serving. Enjoy your creamy and comforting meal! To make your chicken tender, start with good quality meat. Use boneless, skinless chicken breasts. Season them well with salt and pepper. Sear the chicken in olive oil for five minutes on each side. This step adds great flavor. Cook it in chicken broth to keep it moist. Always check that the chicken is fully cooked before shredding. For a creamy soup, use cream cheese. Soften it before adding to the pot. Stir it in slowly until it melts completely. Add shredded cheddar cheese after the cream cheese. This creates a rich, velvety texture. If you want it even creamier, use more cream cheese or cheese. The secret is to mix well. Enhance your soup with spices and herbs. Garlic powder and onion powder add depth. Dried Italian herbs bring a nice touch. For more flavor, consider adding fresh herbs like basil or thyme. Crumbled bacon adds a crunchy, smoky element. Toss in some chopped spinach for extra nutrition. Adjust salt and pepper to your taste. Pro Tips Use Quality Chicken: Opt for organic, free-range chicken breasts for better flavor and texture in your soup. Adjust Creaminess: If you prefer a creamier soup, add more cream cheese or a splash of heavy cream at the end. Cook Bacon Crispy: For the best flavor, cook your bacon until crispy before adding it to the soup to enhance the overall taste. Vegetable Variations: Feel free to add other low-carb vegetables like zucchini or bell peppers for extra nutrition and flavor. {{image_2}} You can change the meat in this soup. For a twist, use shredded rotisserie chicken. You can also swap in cooked shredded turkey or even pork. If you want a vegetarian version, try using tofu or tempeh. These swaps keep the flavors rich while fitting your taste. To add more veggies, consider using cauliflower or zucchini. Both are low in carbs and add great texture. You can also include bell peppers or mushrooms. Spinach is a fantastic option too, as it wilts nicely and adds nutrients. Feel free to mix and match these veggies to make it your own. Serve your soup with a side salad for a light meal. You can also add a dollop of sour cream on top for extra creaminess. Some people enjoy it with fresh herbs, like parsley or cilantro, sprinkled on top. If you like crunch, try adding crispy bacon bits or toasted nuts for texture. Enjoy this soup hot for a cozy feel! To store your Keto Crack Chicken Soup, let it cool first. Transfer it to an airtight container. Make sure to seal it tightly. You can keep it in the fridge for up to four days. This soup tastes even better on the second day! If you want to freeze the soup, use freezer-safe containers. Leave some space at the top for expansion. You can freeze it for up to three months. When you're ready to eat, thaw it overnight in the fridge. To reheat, pour the soup into a pot over medium heat. Stir it well as it warms. You can also use a microwave, but make sure to cover the bowl. Heat in short bursts, stirring in between. This soup should be hot but not boiling. Enjoy your creamy, comforting meal! Keto Crack Chicken Soup is a rich and creamy dish. It features tender chicken, cheese, and bacon. This soup is low in carbs, making it great for keto diets. You can enjoy it as a meal or a snack. Each spoonful offers warmth and comfort. It’s a perfect choice for cold days or when you want something hearty. To make Keto Crack Chicken Soup dairy-free, swap the cream cheese and cheddar cheese. Use cashew cream or coconut cream instead. These options add creaminess without dairy. For cheese flavor, try nutritional yeast. It enhances the taste without adding dairy. Always check labels to avoid hidden dairy in ingredients. Yes, you can use bone broth instead of chicken broth. Bone broth adds a rich flavor and more nutrients. It is great for your gut health and gives depth to the soup. Just make sure it is low-sodium if you are watching your salt intake. This switch can make your soup even more nourishing. Keto Crack Chicken Soup lasts up to four days in the fridge. Store it in an airtight container. Make sure it cools before sealing. If you want to keep it longer, consider freezing it. In the freezer, it can last up to three months. Always reheat until hot before serving. In this post, we covered how to make Keto Crack Chicken Soup. We explored the best ingredients, cooking steps, and tips to enhance flavor. You learned about ingredient swaps and how to store any leftovers properly. Remember, cooking is fun and creative. Feel free to experiment. Whether you stick to the recipe or make changes, enjoy every warm bowl of soup. It's a tasty way to stay on track with your health goals.
    Keto Crack Chicken Soup Creamy and Comforting Meal
  • Main Ingredients List - 2 medium zucchinis - 1 cup breadcrumbs (panko preferred for extra crunch) - 1/2 cup grated Parmesan cheese - 2 cloves garlic, minced - 1/4 cup fresh basil, chopped - 1 large egg, beaten To make crispy garlic zucchini balls, you need fresh zucchinis. Grate them and let them sit with salt. This helps draw out extra moisture. The breadcrumbs add crunch and texture. I always prefer panko for the best crispiness. Parmesan cheese gives a rich flavor. Garlic and basil add that lovely aroma and taste. Finally, the egg binds everything together. Seasonings - 1 teaspoon salt - 1 teaspoon black pepper - 1/2 teaspoon onion powder Seasonings play a key role in flavor. Salt enhances the taste of all ingredients. Black pepper adds a nice kick. Onion powder gives depth without overpowering the dish. This mix creates a tasty balance. Optional Ingredients - Olive oil spray - Dipping sauces Olive oil spray helps achieve the crispy texture we all love. It’s a simple way to boost crunch without extra calories. You can also serve these balls with dipping sauces. Marinara or yogurt dips are great choices. They add freshness and a new flavor layer. First, you need to grate the zucchinis. Use a box grater or food processor for this. Grating makes the zucchinis easier to mix and form into balls. Next, place the grated zucchinis in a colander. Sprinkle them with 1 teaspoon of salt. Let them sit for 15 to 20 minutes. This step helps to drain excess moisture, which is key to making crispy zucchini balls. After the time is up, grab a clean kitchen towel or paper towels. Squeeze the grated zucchini to remove as much moisture as you can. In a large mixing bowl, combine the drained zucchinis, 1 cup of breadcrumbs, 1/2 cup of grated Parmesan cheese, and 2 cloves of minced garlic. Add 1/4 cup of chopped fresh basil, 1 beaten egg, 1 teaspoon of black pepper, and 1/2 teaspoon of onion powder. Mix all the ingredients well. Use your hands for a good mix. This ensures that every bite is packed with flavor. Once mixed, it's time to form the zucchini balls. Grab small portions, about 1 inch in diameter, and roll them into balls. Place each ball on a prepared baking sheet. Before baking, preheat your oven to 400°F (200°C). Line a baking sheet with parchment paper to prevent sticking. Once the oven is hot, lightly spray the tops of your zucchini balls with olive oil spray. This helps them crisp up while baking. Bake the balls for 20 to 25 minutes, flipping them halfway through. This ensures even cooking. You know they are done when they turn golden brown and crispy. Remove them from the oven and let them cool for a few minutes before serving. Enjoy your crispy garlic zucchini balls! To make your zucchini balls crispy, start by draining moisture. Grating the zucchinis releases water. Sprinkle salt on them and let them sit for 15-20 minutes. This step is key. Afterward, use a towel to squeeze out any extra moisture. The drier the zucchini, the crispier the balls will be. Next, use panko breadcrumbs. They are light and airy. Panko adds a great crunch that regular breadcrumbs can’t match. Mix them in well with the other ingredients. This ensures that every bite is crispy and yummy. For a beautiful presentation, serve the crispy garlic zucchini balls on a nice platter. Garnish with fresh basil leaves. This adds color and freshness. You can also include a small bowl of marinara sauce. It makes a great dip and adds flavor. Yogurt dip is another tasty option. It’s cool and creamy, perfect for pairing. One common mistake is over or undercooking the balls. Make sure to bake them for 20-25 minutes. They should be golden brown. Use a timer to help keep track. Another mistake is not compressing the mixture enough. When forming the balls, press them firmly. This helps them hold their shape while baking. If they are too loose, they may fall apart. {{image_2}} You can easily change the flavor of these zucchini balls. Adding spices or herbs can make a big difference. Try oregano or thyme for a fresh twist. If you want a cheesy flavor, consider cheese alternatives. Nutritional yeast can provide a cheesy taste without dairy. You can also use different cheeses like feta or goat cheese for a unique touch. If you want to make these balls healthier, consider baking instead of frying. Baking gives you that crispy texture without extra oil. You can also make gluten-free zucchini balls. Use gluten-free breadcrumbs instead of regular ones. This way, everyone can enjoy them. Serving these zucchini balls with dips adds extra flavor. Marinara sauce is a classic choice. It pairs well with the garlic taste. You can also try a yogurt dip for a creamy contrast. Hummus is another great option. It brings a smooth texture that complements the crispy balls. After making crispy garlic zucchini balls, you can store them in the fridge. Let them cool down first. Place them in an airtight container. This keeps them fresh and prevents odors. - Use a glass or plastic container with a tight lid. - Line the container with paper towels to absorb moisture. - They will stay good for up to 3 days in the fridge. If you want to keep zucchini balls longer, freezing is a great option. First, let them cool completely. Then, arrange them on a baking sheet. Place them in the freezer for about an hour. This helps them freeze individually. - Once frozen, transfer them to a freezer-safe bag. - Be sure to remove as much air as possible from the bag. - They can last up to 3 months in the freezer. To reheat, simply bake them straight from the freezer. Set your oven to 400°F (200°C) and bake for about 15-20 minutes. For the best taste, enjoy your zucchini balls within 3 days if refrigerated. If frozen, aim to eat them within 3 months. Signs of spoilage include: - A sour smell - A slimy texture - Any visible mold If you notice any of these signs, it's best to toss them out. Keeping an eye on freshness ensures a tasty snack every time! Yes, you can. Prepare the zucchini balls and freeze them. Lay them on a tray first. Once they are frozen, transfer them to a freezer bag. They will stay fresh for up to three months. When you want to cook them, bake directly from the freezer. Just add a few extra minutes to the cooking time. This makes meal prep easy and quick! If you need a substitute, try yellow squash or eggplant. Both work well and have similar textures. For a low-carb option, use cauliflower. Just pulse it in a food processor until finely chopped. This will give you a nice base for the balls. Always adjust seasonings to match your substitute. Look for a golden brown color. The zucchini balls should be firm to the touch. You can also insert a toothpick into the center. If it comes out clean, they are ready. Let them cool slightly before serving. This helps improve the taste and texture! In this post, we explored zucchini balls, from ingredients to baking tips. We covered each step, including mixing, baking, and serving suggestions. Remember, draining moisture helps achieve that perfect crisp. Using the right seasonings and optional dips can enhance flavors. Don't forget to store leftovers correctly, whether in the fridge or freezer. With these tips, you can enjoy delicious zucchini balls at any time. Keep experimenting with flavors and variations to make this dish your own! Enjoy your cooking journey!
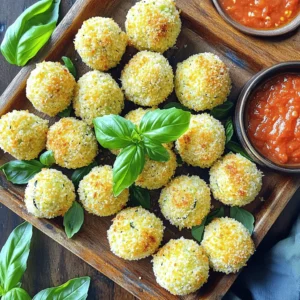
    Crispy Garlic Zucchini Balls Flavorful and Easy Recipe
  • When making edible Greek yogurt cookie dough, you need simple and tasty ingredients. Here’s what you will need: - 1 cup Greek yogurt (plain, full-fat or low-fat) - 1/2 cup almond flour (or any nut flour) - 1/4 cup rolled oats - 1/4 cup maple syrup (or honey) - 1/4 cup chocolate chips (dark or milk) - 1 teaspoon vanilla extract - A pinch of salt These ingredients come together to create a yummy and safe treat. Greek yogurt gives the dough a creamy texture. Almond flour adds a nutty taste, while oats provide fiber. Sweeteners like maple syrup or honey make it delightful. Chocolate chips bring sweetness and fun! You can also swap any ingredient. Use a different nut flour if you prefer. If you like honey, use that instead of maple syrup. This flexibility makes the recipe easy for everyone. Enjoy getting creative with your mix! 1. Mixing Greek yogurt and sweetener Start by taking a mixing bowl. Add 1 cup of plain Greek yogurt. Then, pour in 1/4 cup of maple syrup or honey. Stir well until the mix is smooth and creamy. This step makes the base for your cookie dough. 2. Incorporating flavors with vanilla and salt Next, add 1 teaspoon of vanilla extract to the bowl. Sprinkle in a pinch of salt. Mix again until the flavors blend in well. This adds depth to your dough and improves the taste. 3. Gradual addition of dry ingredients Slowly add 1/2 cup of almond flour and 1/4 cup of rolled oats. Stir the mixture as you add the dry ingredients. Keep mixing until a dough starts to form. This creates the right texture for your edible cookie dough. 4. Folding in chocolate chips Now, fold in 1/4 cup of chocolate chips. You can use dark or milk chocolate, based on your taste. Ensure they are evenly spread throughout the dough. This step adds the sweet, chocolatey goodness we all love. 5. Chilling the dough for optimal texture Taste your dough. If it needs more sweetness, add a bit more maple syrup or honey. Once you’re happy with the flavor, chill the dough in the fridge for about 30 minutes. This helps it firm up slightly for a better bite. Enjoy your delicious edible Greek yogurt cookie dough straight from the bowl or scoop it into small portions for easy treats! - Adjusting sweetness to taste You can make the dough sweeter by adding more maple syrup or honey. Start with a small amount and taste it. This way, you control how sweet you want it. - Choosing the right yogurt and flour Use plain Greek yogurt for the best texture. Full-fat or low-fat yogurt both work well. For flour, almond flour gives a nice nutty flavor. You can also use any nut flour you like. - Preventing the dough from becoming too sticky If your dough feels too sticky, add a bit more almond flour. Mix in small amounts until you get the right consistency. This helps the dough hold its shape. - Enjoying as bite-sized treats Scoop the cookie dough into small bites. This makes a fun, easy snack. You can eat them straight from the bowl or place them on a plate for sharing. - Pairing with fruit or yogurt To make it even better, try pairing the dough with fresh fruit. Slices of banana or strawberries add a nice touch. You can also serve it with a dollop of yogurt for added creaminess. {{image_2}} You can switch out maple syrup with agave syrup or stevia. Agave syrup has a mild taste. This makes it a great choice for a sweeter dough. Stevia is a zero-calorie option. It gives a sweet kick without sugar. Both options keep your cookie dough light and tasty. Adding nuts or dried fruits can change the game. Walnuts, pecans, or almonds offer crunch. Dried cranberries or apricots add a sweet twist. You can also try different types of chocolate. Dark chocolate gives a rich flavor. Milk chocolate is sweet and creamy. Mix and match to find your perfect combo. If you need a gluten-free dough, substitute almond flour. You can use coconut flour or a gluten-free blend. Coconut flour has a unique taste and absorbs moisture well. However, you might need less of it. Start with half the amount and adjust as needed. This way, you can enjoy the dough without worry. To keep your cookie dough fresh, place it in an airtight container. This keeps moisture out and stops odors from mixing. If you want to chill it, store it in the fridge for up to a week. Before using, let it sit at room temperature for a few minutes. This makes it easier to scoop and enjoy. If you have leftovers, freezing is a great option. Scoop the dough into small balls and place them on a baking sheet. Freeze them for about an hour. Once frozen, transfer the cookie dough balls to a freezer-safe bag. They will stay good for about three months. Just pull out a few whenever you crave a treat! In the fridge, your cookie dough lasts about 5 to 7 days. Keep an eye on it to ensure it stays fresh. If the dough changes color or develops a strange smell, it’s time to toss it. Signs of spoilage include a sour smell, a change in texture, or mold. If you notice any of these, it’s better to be safe and not eat it. Always trust your senses! Yes, you can use flavored Greek yogurt. It adds a fun twist to your cookie dough. Just remember, flavored yogurt can change the sweetness. Adjust the maple syrup or honey based on your taste. Yes, this recipe is safe to eat raw. We use Greek yogurt instead of eggs, which makes it safer. Plus, the almond flour is heat-treated, reducing any risk. You can replace almond flour with regular flour. However, this may change the texture. Almond flour keeps it soft and chewy. If using regular flour, you may need less. To make this cookie dough vegan, use a plant-based yogurt. Substitute maple syrup for honey. This keeps it tasty while fitting a vegan diet. If you have leftovers, store them in the fridge. They last for about three days. You can also freeze the cookie dough for up to three months. Enjoy it later as a quick treat! You learned how to make a simple, tasty cookie dough. We covered the key ingredients and showed how to mix them well. You now have tips for perfecting your dough and fun ways to serve it. Don’t forget the many variations you can try, like using different sweeteners and flavors. Store your cookie dough right, and it will last longer. Remember, you can enjoy this as a snack or dessert. Experiment and have fun with your creations!
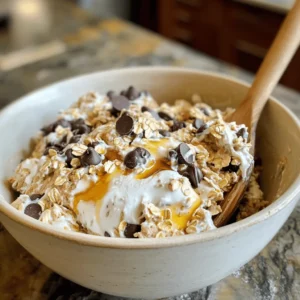
    Edible Greek Yogurt Cookie Dough Tasty and Simple Treat
  • - Cottage cheese (1 cup) - Eggs (3 large) - Vanilla extract (1/2 teaspoon) - Baking powder (1/4 teaspoon) - Cinnamon (1/4 teaspoon, optional) - Salt (pinch) - Cooking fat (coconut oil or butter) The main ingredient in these pancakes is cottage cheese. It gives the pancakes a rich and creamy texture. I often use low-fat cottage cheese to keep things light. Eggs play a key role too. They bind everything together and add fluffiness. You will need vanilla extract for flavor. It adds a lovely sweetness without extra sugar. Baking powder helps the pancakes rise. A pinch of salt enhances the flavors. If you like, add cinnamon. It gives a warm taste that pairs well with maple syrup. For cooking, I prefer coconut oil. It adds a nice flavor and has a high smoke point. You can use butter if you prefer that taste. - Fresh fruits (berries, bananas) - Maple syrup or honey Toppings make these pancakes even better. Fresh fruits like berries or banana slices add color and nutrition. They also bring natural sweetness. I love drizzling my pancakes with maple syrup. Honey is a great choice too. It adds a floral note that complements the cottage cheese. These toppings transform a simple pancake into a gourmet treat! - In a mixing bowl, combine 1 cup of cottage cheese, 3 large eggs, 1/2 teaspoon of vanilla extract, 1/4 teaspoon of baking powder, a pinch of salt, and 1/4 teaspoon of cinnamon if you like it. - Blend the mixture with an immersion or standard blender until smooth. This step is key for a light texture. - Heat a non-stick skillet on medium heat. Add a small amount of coconut oil or butter to coat the pan. - Once the skillet is hot, pour about 1/4 cup of batter for each pancake. - Cook for 2-3 minutes until bubbles form on the surface. Carefully flip them and cook for another 2 minutes until golden brown. - Repeat with the remaining batter, adding more oil or butter as needed. - Serve pancakes warm. Top them with fresh fruits like berries or banana slices. Drizzle maple syrup or honey over the top for extra flavor. To make your pancakes fluffy, blend the mixture until smooth. A smooth batter traps air, creating a light texture. I use an immersion blender for ease. This step is key to good pancakes. Next, cook at medium heat. If the pan is too hot, the pancakes burn. If the pan is too cool, they won't cook well. So, find that sweet spot. Use the right amount of oil or butter for cooking. A small amount is enough to coat the pan. This helps prevent sticking and adds flavor. Watch for bubbles on the surface of the pancakes. When you see them, it's time to flip! Flip gently to keep the pancake whole. Cook until golden brown on both sides. This timing gives you the best results. Enjoy your fluffy pancakes warm! {{image_2}} You can make these pancakes even better with fun flavors. Start by adding fruits right into the batter. You can mix in mashed bananas or berries. This gives a sweet taste and yummy texture. Fruits also add vitamins and make the pancakes colorful. You can also play with spices. Try adding a pinch of nutmeg or a dash of vanilla. These spices can brighten the flavor. Just a little will make a big difference. If you need gluten-free options, these pancakes are a great choice! They use cottage cheese and eggs, which are naturally gluten-free. You can also try using almond flour instead of any flour. For a low-carb version, keep the recipe as is. The cottage cheese and eggs keep the carbs low. If you want to make these pancakes dairy-free, you can use a vegan cottage cheese. There are many brands available now. You can also try silken tofu for a similar texture. This way, everyone can enjoy these tasty pancakes! Cottage cheese is a great source of protein. One cup has about 28 grams. Protein helps build and repair muscles. It also keeps you full longer. This can help with weight control. Low-fat cottage cheese is a smart choice. It has fewer calories than regular cheese. This means you can enjoy tasty pancakes without guilt. A serving of low-fat cottage cheese is low in calories. This makes it a healthy option for breakfast. One serving of these pancakes is about three pancakes. This serving has around 200 calories. Each serving gives you: - Protein: 28 grams - Fat: 6 grams - Carbohydrates: 12 grams These pancakes pack a punch with protein. They are low in carbs, making them a balanced meal. Enjoy them with fresh fruit for added vitamins and fiber. Yes, you can freeze these pancakes. Just let them cool first. Place them in a single layer on a baking sheet. Once they freeze, move them to an airtight bag. They will last up to two months. When you want to eat them, just reheat in the microwave or toaster. Absolutely! You can use Greek yogurt instead of cottage cheese. This will change the flavor slightly but keep it tasty. For eggs, try using flaxseed meal or chia seeds mixed with water for a vegan option. You can also swap vanilla extract for almond or lemon extract for a new flavor. These pancakes stay good in the fridge for about three days. Store them in an airtight container to keep them fresh. If you want them warm, just reheat in a skillet or microwave. Yes, these pancakes are great for many diets. They are high in protein and low in carbs. They work well for gluten-free diets since there is no flour. If you choose low-fat cottage cheese, they can fit into a low-calorie diet too. These flourless cottage cheese pancakes are easy to make and tasty. You need just a few simple ingredients, like cottage cheese, eggs, and vanilla. Mixing them well ensures fluffiness. Cook them in a skillet with your choice of oil for best results. Top with fresh fruits or syrup for extra flavor. You can even adjust the recipe to fit different diets. Overall, these pancakes are a smart choice for a healthy breakfast. So grab your ingredients and start cooking! Enjoy a delicious way to fuel your day!
    Flourless Cottage Cheese Pancakes Tasty and Healthy Dish
  • - Apples: I recommend using Granny Smith or Honeycrisp apples. These varieties offer a great balance of sweet and tart flavors. Make sure to peel, core, and dice them into small pieces for even distribution in the batter. - Dry Ingredients: You will need: - 1 cup all-purpose flour - 1/2 cup granulated sugar - 1/2 teaspoon baking powder - 1/2 teaspoon baking soda - 1 teaspoon ground cinnamon - 1/2 teaspoon nutmeg - 1/4 teaspoon salt Mix these well. This blend gives the donuts their structure and flavor. - Wet Ingredients: For the wet mix, use: - 1/2 cup buttermilk - 2 large eggs - 1/4 cup unsalted butter, melted - 1 teaspoon vanilla extract Combine these in a bowl. The buttermilk adds moisture and a slight tang. The eggs act as a binder, while butter gives richness and flavor. This combination makes for a delicious and easy apple fritter waffle donut. Enjoy the process of mixing and baking! First, preheat your waffle maker. Each model is different, so check your manual. A hot waffle maker gives a nice crisp. Lightly grease it with cooking spray or butter. This step helps prevent sticking and makes cleanup easier. In a large bowl, add the flour, sugar, baking powder, baking soda, cinnamon, nutmeg, and salt. Use a whisk to mix them well. This helps spread the baking powder and spices evenly. Make sure there are no lumps for a smooth batter. In another bowl, combine the buttermilk, eggs, melted butter, and vanilla extract. Whisk until smooth and creamy. Gradually add this mixture to the dry ingredients. Stir gently until just combined. Be careful not to overmix, as this can make the donuts tough. Pour the batter into the preheated waffle maker, filling each section halfway. Close the lid and cook for about 4 to 5 minutes. Timing may vary based on your waffle maker. Check for a golden brown color. If they look crispy, they are ready to come out! While the donuts cool slightly, prepare the glaze. In a small bowl, mix the powdered sugar with 1 to 2 tablespoons of milk. Whisk until you reach your desired glaze thickness. Dip the top of each waffle donut into the glaze. Let it set for a minute before serving. These steps will help you create delicious apple fritter waffle donuts at home! To get crispy Apple Fritter Waffle Donuts, focus on a few key techniques: - Do not overmix: When combining wet and dry ingredients, mix just until you see no dry flour. This keeps the texture light. - Preheat your waffle maker: Make sure your waffle maker is hot before pouring in the batter. This helps create a nice crust. - Use cooking spray: Lightly grease the waffle maker. It helps prevent sticking and gives a nice crisp finish. You can boost the flavor of your waffle donuts with these optional ingredients: - Chopped nuts: Walnuts or pecans add a lovely crunch. - Dried fruit: Adding raisins or cranberries can give a sweet twist. - Extra spices: Try adding a pinch of cloves or allspice for more warmth. Serving your waffle donuts well can make them even more appealing: - Decorative plate: Place your donuts on a colorful or patterned plate. - Drizzle glaze: Drizzle extra glaze over the top for a sweet finish. - Garnish: Add thin apple slices and a sprinkle of cinnamon for a beautiful touch. {{image_2}} You can change up the flavor of your Apple Fritter Waffle Donuts by using different apple types. Each variety brings its own taste and texture. For a sweet and tart flavor, try Honeycrisp apples. They add a nice crunch. If you want a softer texture, go for Fuji apples. They have a sweet, juicy bite. You can even mix apples. Combine Granny Smith with Gala apples for a fun twist. Use what you have, and enjoy the unique flavors. To make a lighter version, swap some ingredients. Use whole wheat flour instead of all-purpose flour. This adds fiber and nutrients. You can also cut down the sugar. Try using only 1/4 cup of granulated sugar or substitute with honey or maple syrup. For a dairy-free option, use almond milk instead of buttermilk. These changes keep the flavor while making it healthier. You can enjoy your treats guilt-free! Want to jazz up your donuts? Add-ins can make a big difference. Chopped nuts like walnuts or pecans add a nice crunch. For a sweet touch, fold in chocolate chips or caramel bits. You can also add a pinch of ginger for a spicy kick. Don’t be afraid to get creative! Mix and match your favorites to make your Apple Fritter Waffle Donuts special. Each bite can surprise you with new flavors. To keep your apple fritter waffle donuts fresh, store them in an airtight container. Line the bottom of the container with parchment paper. This helps absorb extra moisture. Place a layer of donuts and add another sheet of parchment between layers. Keep them at room temperature for up to two days. If you want to store them longer, refrigerate for up to a week. To enjoy your leftover donuts, you can reheat them in a toaster oven or regular oven. Preheat the oven to 350°F (175°C). Place the donuts on a baking sheet and heat for about 5-7 minutes. This method keeps them crispy. If you use a microwave, heat them for 10-15 seconds. However, this may make them soft. If you want to save some for later, freezing is a great option. Wrap each donut tightly in plastic wrap. Then place them in a freezer bag or container. Make sure to label the bag with the date. They can be frozen for up to three months. To thaw, leave them in the fridge overnight. Reheat them in the oven for the best results. Enjoy future deliciousness! Yes, you can make these donuts ahead. First, cook them and let them cool. Store them in an airtight container. They last up to two days at room temperature. For longer storage, freeze them. Place them in a freezer bag and store for up to a month. When ready to eat, thaw them and reheat in the oven. They will taste fresh and yummy! A Belgian waffle maker works great for these donuts. It makes thicker waffles with deep pockets. This helps hold more glaze and toppings. Look for one with a non-stick surface. It makes removal easy and cleanup simple. Also, choose a waffle maker with an indicator light. This way, you know when it's ready to use. To adjust the glaze, change the milk amount. For a thicker glaze, use less milk. Start with one tablespoon and mix until combined. For a thinner glaze, add more milk. A teaspoon at a time helps you control the consistency. Whisk well after each addition, and taste as you go. This way, you can get the perfect glaze for your waffle donuts! In this post, we explored how to make delicious apple fritter waffle donuts. We covered the ingredients, from choosing the right apples to mixing wet and dry components. The step-by-step instructions helped set up your waffle maker, mix without overdoing it, and achieve perfect cooking results. I shared tips for texture, flavor enhancements, and serving ideas. With storage and reheating instructions, you can enjoy these treats later. Remember, experimenting with variations can bring fun and new tastes. Try it yourself and elevate your snack game!
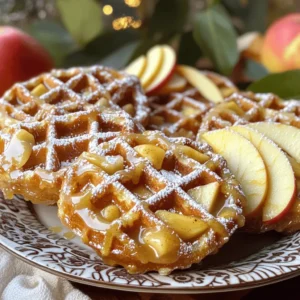
    Irresistible Apple Fritter Waffle Donuts Recipe
  • To make a warm bowl of Creamy Reuben Soup, gather these simple ingredients: - 1 tablespoon olive oil - 1 medium onion, finely chopped - 2 cloves garlic, minced - 1 large carrot, diced - 3 cups vegetable broth - 2 cups sauerkraut, drained and rinsed - 1 cup cooked corned beef, shredded - 1 teaspoon dried thyme - 1 teaspoon smoked paprika - 1 cup heavy cream - 1 cup shredded Swiss cheese - Salt and pepper to taste - Fresh parsley, chopped for garnish Each ingredient adds its own flavor. The olive oil starts the cooking, while the onion and garlic give a nice base. The carrot adds a touch of sweetness. Sauerkraut brings tanginess, and corned beef gives heartiness. The spices, heavy cream, and Swiss cheese create a creamy and rich soup. Don't forget to add salt and pepper to enhance the taste! Finally, fresh parsley adds a pop of color and freshness. Preparing these ingredients takes just a few minutes. You can chop, rinse, and measure everything ahead of time. This not only speeds up the cooking but also makes the process enjoyable. Now you’re ready to create a delightful soup that warms the soul. - Sautéing the onion and garlic Start by heating one tablespoon of olive oil in a large pot over medium heat. Add the finely chopped onion. Sauté it for about five minutes, or until it turns translucent. Then, stir in two minced garlic cloves. Cook them together for one more minute. This step builds a tasty base for your soup. - Cooking the carrot Next, add one large diced carrot to the pot. Cook it for three to four minutes. This adds sweetness and texture to the soup. Make sure to stir often so it doesn’t stick. - Bringing the broth to a boil Pour in three cups of vegetable broth. Raise the heat and bring the mixture to a boil. This step is key to melding the flavors together. Keep an eye on it as it heats up. - Adding sauerkraut and corned beef Once boiling, stir in two cups of drained and rinsed sauerkraut and one cup of cooked, shredded corned beef. Add one teaspoon of dried thyme and one teaspoon of smoked paprika for extra flavor. Lower the heat to simmer and let it cook for about fifteen minutes. - Incorporating cream and cheese After fifteen minutes, stir in one cup of heavy cream and one cup of shredded Swiss cheese. Mix until the cheese melts and the soup becomes creamy. This is where the magic happens! - Final seasoning and serving Taste your soup and season it with salt and pepper as needed. This final step allows you to adjust the flavors. When ready, serve it hot. Garnish with chopped fresh parsley for color and a fresh touch. Enjoy each spoonful of your creamy Reuben soup! - How to achieve the perfect creaminess To get a rich, creamy texture, add the heavy cream slowly. Stir well as you pour. This helps blend it smoothly into the soup. You want to let it simmer gently after adding the cream. This allows the flavors to meld without boiling. - Best practices for seasoning Start with a pinch of salt and pepper. Taste as you go. The sauerkraut adds saltiness, so be careful not to over-season. Dried thyme and smoked paprika bring depth to the soup. Adjust these spices to your liking for the best taste. - Preventing curdling of the cream To stop the cream from curdling, avoid boiling the soup after adding it. Keep the heat low. If you're worried, you can temper the cream first. Mix a bit of hot soup with the cream before adding it back into the pot. - Ideal sides to pair with Reuben soup Crusty bread or rye bread makes a great side. A light salad can balance the richness of the soup. Try pairing it with potato chips for a fun crunch. - Garnishing tips for presentation Fresh parsley adds a nice color contrast. Chop it finely and sprinkle it on top right before serving. You can also add a swirl of cream for a fancy touch. A few slices of rye bread on the side can make the plate look inviting. {{image_2}} - Alternative meats for corned beef: If you want to skip corned beef, use turkey or chicken. Smoked meats add a nice flavor. You can also try plant-based meats for a vegetarian twist. - Dairy-free options for cream and cheese: For a dairy-free version, use coconut cream or cashew cream. Vegan cheese can replace Swiss cheese. These swaps keep the creamy texture without dairy. - Adding vegetables for extra nutrition: You can add more veggies like spinach, bell peppers, or mushrooms. They boost nutrition and add unique flavors. Just chop them small so they cook well in the soup. - Spices to elevate the soup's taste: To give your soup a kick, try adding a bit of cayenne pepper or black pepper. A dash of Worcestershire sauce can also deepen the flavor profile. - Using different cheese varieties: While Swiss cheese is classic, you can mix in cheddar for a sharper taste. Gouda or Gruyère can add a nice twist, too. They melt well and blend into the creamy texture. To keep your creamy Reuben soup fresh, follow these steps: - Let the soup cool to room temperature. - Transfer it into an airtight container. - Store in the fridge for up to 3 days. For long-term storage: - Freeze the soup in a freezer-safe container. - Leave space at the top for expansion. - It can last up to 3 months in the freezer. When you’re ready to enjoy your leftovers, reheating is key: - Use a saucepan for stovetop reheating. - Heat on medium, stirring gently until hot. - Alternatively, use a microwave-safe bowl. - Heat in 30-second intervals, stirring in between. This way, you keep the soup creamy and delicious! To make Creamy Reuben Soup vegetarian, skip the corned beef. Instead, use extra vegetables like mushrooms or tempeh for texture. You can also add more sauerkraut for flavor. Yes, you can make this soup in a slow cooker. Just sauté the onion and garlic first. Then put all the other ingredients in the slow cooker. Cook on low for 4 to 6 hours. If you need a substitute for Swiss cheese, try Gruyère or mozzarella. Both will melt well and add a nice flavor. You can also use vegan cheese for a dairy-free option. Creamy Reuben Soup lasts about 3 to 4 days in the fridge. Store it in an airtight container. Just reheat it on the stove when you want to enjoy it again. You can make this soup ahead of time. It tastes even better the next day! Just cool it down and store it in the fridge. Reheat gently before serving. This blog post covered how to make a delicious Creamy Reuben Soup. We discussed the key ingredients, preparation steps, and helpful tips. You learned about variations and how to store leftovers safely. You can create this warm meal easily. With creative twists, you can enjoy new flavors while keeping it simple. Try it out and make it your own. You’ll impress friends and family with your cooking skills and a tasty dish.
    Creamy Reuben Soup Simple and Flavorful Recipe
  • - 12 oz spaghetti - 4 tablespoons unsalted butter - 6 cloves garlic, minced - 1 teaspoon red pepper flakes - 1 cup grated Parmesan cheese - 1/4 cup fresh parsley, chopped - Salt and black pepper to taste - Zest and juice of 1 lemon - 1/4 cup toasted pine nuts (optional) Fresh garlic is key for great flavor. It gives a strong and bright taste. When you chop garlic, make sure it smells good. If it smells bland, it may be old. Choose the right Parmesan cheese. Look for real Parmesan, not the powdered stuff. Real cheese melts better and has a deeper taste. Grate it fresh for the best results. This will make your dish shine! First, we need to cook the spaghetti. Fill a large pot with salted water and bring it to a boil. Add 12 ounces of spaghetti and cook it until it's al dente. This means it should be firm, not mushy. I like to check the package instructions for timing. Once the spaghetti is cooked, reserve one cup of that pasta water. This water is full of starch and helps our sauce stick. Then, drain the rest of the water from the spaghetti. Now, let’s make the sauce. In a large skillet, melt four tablespoons of unsalted butter over medium heat. Next, add six cloves of minced garlic and one teaspoon of red pepper flakes. Cook this mixture for about two to three minutes. You want the garlic to smell nice and turn a light golden color. If you like more spice, feel free to add more red pepper flakes. I always say, "Start small and adjust as you go!" With the sauce ready, it’s time to add the spaghetti. Lower the heat and toss the drained spaghetti into the skillet with the garlic butter. Mix it well to coat the spaghetti with the sauce. Next, slowly pour in the reserved pasta water. Toss the spaghetti while you do this. This step lets the noodles soak up all that garlic flavor. After that, add one cup of grated Parmesan cheese. Stir it in until it melts and coats the spaghetti nicely. If the sauce seems too thick, add more pasta water until you reach your desired creaminess. Lastly, season with salt, black pepper, lemon zest, and the juice of one lemon. Toss in the chopped parsley for a fresh touch. If you like, you can add toasted pine nuts for extra crunch. To make Garlic Parmesan Spaghetti even better, add fresh herbs. Basil or thyme can give it a new twist. You can also play with spices. Try using smoked paprika or Italian seasoning for extra depth. Lemon juice is your friend here too. A splash brightens the dish. It balances the cheese's richness and adds zing. Don't skip the lemon zest, as it adds flavor without the acidity. Pair this dish with side dishes for a full meal. A simple green salad works well. Roasted veggies or garlic bread can also be great choices. For a nice presentation, use a large bowl. Twirl the spaghetti into a nest shape. Top it with more cheese and parsley. This makes the dish look inviting. To boost the creaminess, use the reserved pasta water. This starchy water helps the sauce cling to the noodles. Add it slowly until you reach your desired creaminess. You can also try different cheeses. Pecorino Romano gives a sharp taste. Cream cheese or mascarpone can add extra richness. Just mix in small amounts until you find the right flavor. {{image_2}} You can make Garlic Parmesan Spaghetti heartier with protein. Adding cooked chicken or shrimp works nicely. Simply sauté the protein in the skillet before adding garlic. Cook until golden, then follow the recipe. This change adds flavor and makes it a filling meal. For a vegetarian twist, add fresh vegetables. Spinach or cherry tomatoes fit well. Toss them in with the garlic. Cook until the spinach wilts or tomatoes soften. This adds color and nutrition to your dish. Plus, it makes the meal more vibrant and tasty. Don't hesitate to experiment with flavors. Different cheeses can change the taste. Try Pecorino Romano or goat cheese for a new spin. If you have nut allergies, swap toasted pine nuts for seeds. Pumpkin or sunflower seeds give a nice crunch without nuts. These changes can keep your dish fresh and exciting. To keep Garlic Parmesan Spaghetti fresh in the fridge, place it in an airtight container. Make sure to cool the dish completely before sealing. This helps prevent moisture buildup, which can make it soggy. You can store it for up to three days. When you want to reheat it, a skillet works best. Add a splash of water or broth to keep it moist. Heat it over medium-low heat, stirring often. This ensures even warming and keeps the flavor intact. To freeze Garlic Parmesan Spaghetti, allow it to cool fully. Transfer it to a freezer-safe bag or container. Squeeze out as much air as possible. This prevents freezer burn. You can freeze it for up to three months. When you're ready to eat, thaw the spaghetti in the fridge overnight. For reheating, use a skillet again. Add a little water or broth to help it rehydrate. Heat over medium-low, stirring frequently, until warmed through. Enjoy your tasty dish even after freezing! Garlic Parmesan Spaghetti is a simple yet tasty dish. It features spaghetti noodles tossed in a buttery garlic sauce. I love how the Parmesan cheese melts into the pasta. The dish gets a kick from red pepper flakes and a fresh touch from lemon juice. Fresh parsley adds color and flavor, making it eye-catching. You can also add toasted pine nuts for a crunchy finish. This dish is great for a quick dinner or a fancy meal! Yes, you can make Garlic Parmesan Spaghetti gluten-free. Just swap regular spaghetti for gluten-free pasta. Many brands offer good options that taste great. Cook it the same way as regular spaghetti. The sauce stays the same, so you still get all those yummy flavors. Just check that your Parmesan cheese is gluten-free too. This way, everyone can enjoy this dish. To make your Garlic Parmesan Spaghetti creamy, use reserved pasta water. After cooking, save about a cup of the water. Slowly add it to the skillet as you mix the dish. This will help the sauce cling to the spaghetti. You can also add extra Parmesan cheese for more richness. If you want an even creamier texture, try adding a splash of heavy cream. This blog post covers how to make Garlic Parmesan Spaghetti. You learned about key ingredients, cooking steps, and tips for flavor. I shared variations for different diets and ways to store leftovers. Experiment with herbs and cheeses to make it your own. Remember, cooking should be fun and simple! Enjoy a hearty meal that can fit any taste or need. With a few tweaks, you can make this dish truly yours.
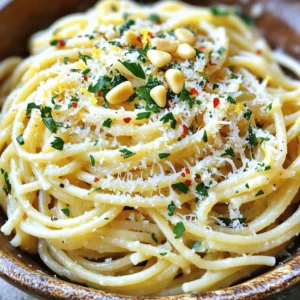
    Garlic Parmesan Spaghetti Flavorful and Simple Dish

Posts pagination

← Newer 1 … 7 8 9 10 11 … 33 Older →

Footer

↑ back to top

More information

  • Dinner
  • Drinks
  • Appetizers
  • Dessert
  • About
  • Contact Us

    Our Policies

    • Privacy Policy
    • Cookie Policy
    • Copyright Policy
    • Disclaimer
    • GDPR Policy
    • Terms Of Us

    Copyright © 2024 My Saved Recipe