My Saved Recipe

  • Home
  • Recipes
    • Dinner
    • Dessert
    • Appetizers
    • Drinks
  • About
  • Contact Us
  • Privacy Policy
menu icon
go to homepage
  • Home
  • Recipes
    • Dinner
    • Dessert
    • Appetizers
    • Drinks
  • About
  • Contact Us
  • Privacy Policy
search icon
Homepage link
  • Home
  • Recipes
    • Dinner
    • Dessert
    • Appetizers
    • Drinks
  • About
  • Contact Us
  • Privacy Policy
×

Dinner

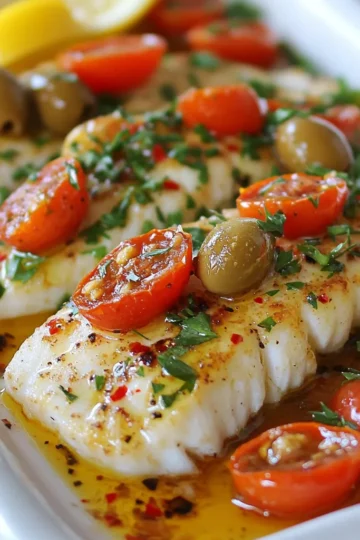
  • Mediterranean Baked Fish Tasty and Healthy Delight
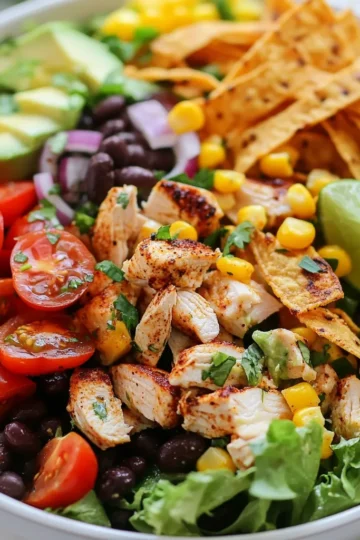
  • Zesty Southwest Chicken Salad Bowl Fresh and Healthy Meal
  • Slow Cooker Street Corn Chicken Flavorful Delight
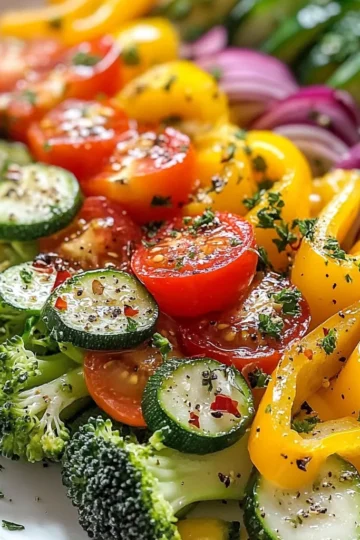
  • Healthy Sautéed Vegetables Quick and Nutritious Dish
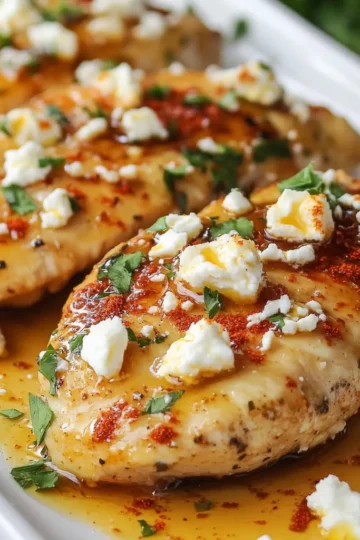
  • Hot Honey Feta Chicken Flavorful and Simple Recipe
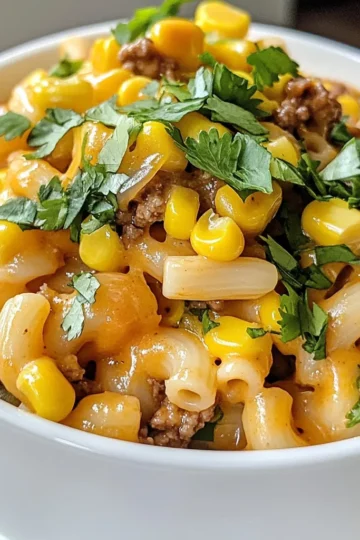
  • Cheesy Taco Pasta Flavorful and Easy Weeknight Meal
  • Korean Spicy Chicken Stir Fry Flavorful Easy Recipe
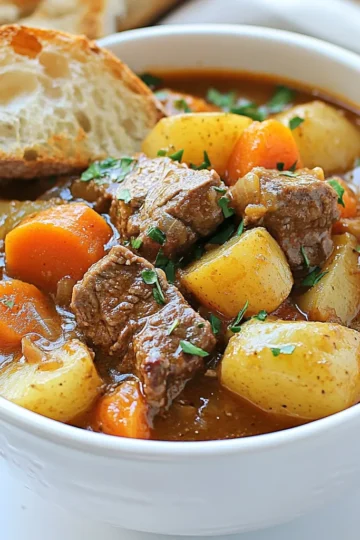
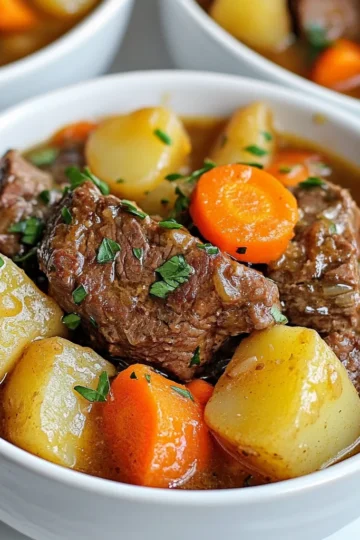
  • Ultimate Beef Stew Hearty Comfort Meal in One Pot
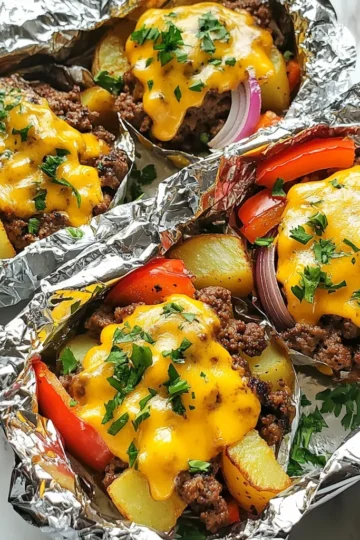
  • Burger Dinner Foil Packets Simple and Tasty Meal
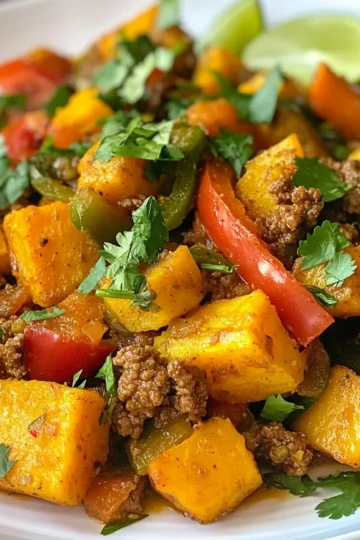
  • Southwest Beef and Sweet Potato Skillet Delight
  • Shredded Chicken with Gravy Simple and Tasty Meal
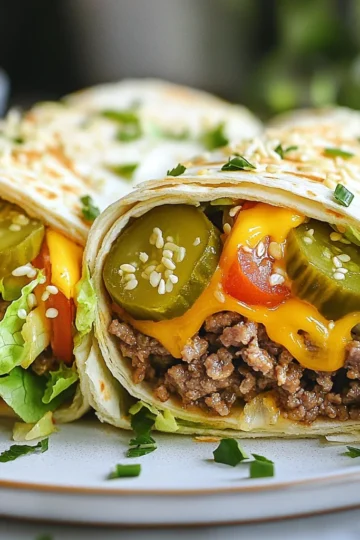
  • Big Mac Wraps Flavorful Meal Prep for Easy Eating
  • Fiesta Crockpot Chicken Flavorful and Simple Recipe
  • Tuscan Chickpea Soup Hearty and Flavorful Meal
  • Indian Chicken Curry Flavorful and Easy Recipe Guide
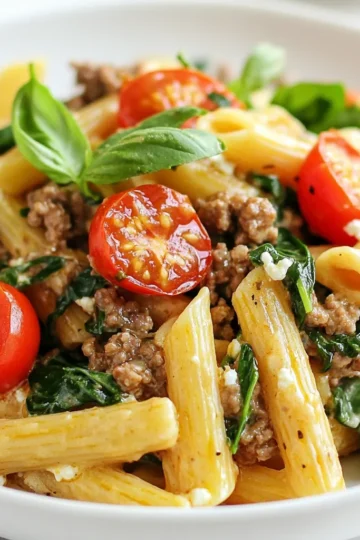
  • High Protein Creamy Beef Pasta Recipe for Dinner
  • Parmesan Sausage Soup Hearty and Flavorful Delight
  • Slow Cooker Beef Ragu Flavorful and Easy Meal
  • Marry Me Shrimp Pasta Irresistible Creamy Delight
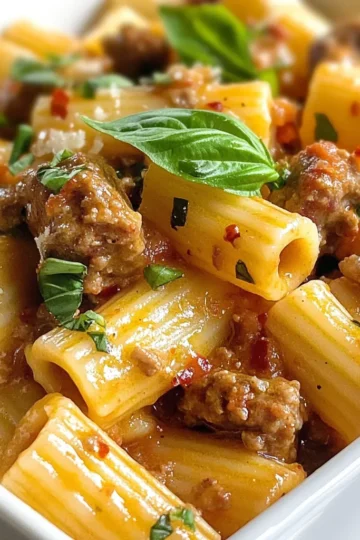
  • Creamy Italian Sausage Rigatoni Flavorful Dinner Idea
  • Easy Stuffed Bell Peppers Quick and Flavorful Recipe
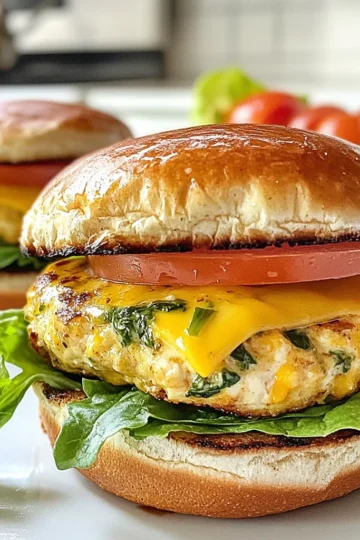
  • White Cheddar Spinach Chicken Burgers Flavorful Recipe
  • Classic Crockpot Beef Stew Comforting and Hearty Meal
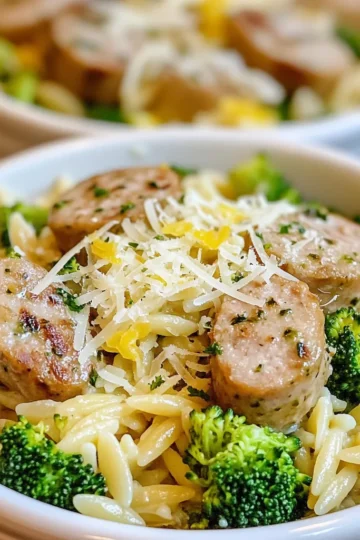
  • Chicken Sausage Broccoli Orzo Tasty Dinner Recipe
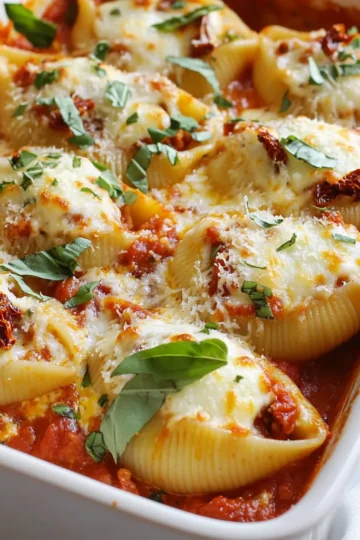
  • Sun Dried Tomato Ricotta Stuffed Shells Savory Dish
  • Grilled Shrimp Avocado Corn Bowls Fresh and Tasty Meal
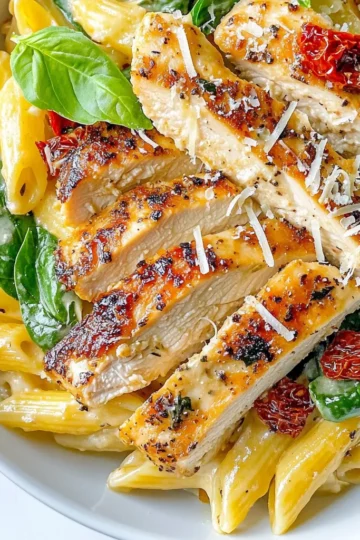
  • Marry Me Chicken Pasta Irresistible Dinner Delight
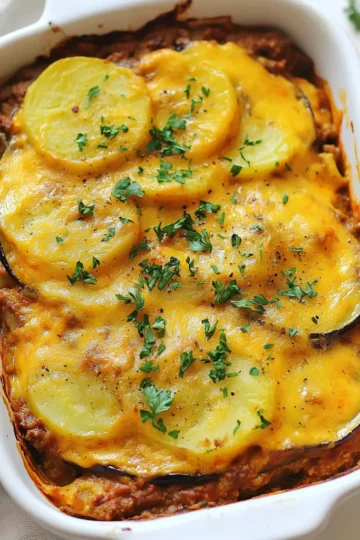
  • Classic Greek Moussaka Flavorful and Hearty Dish
  • Spicy Butternut Squash Sweet Potato Soup Delight
  • Savory Slow Cooker Chicken Enchilada Soup Recipe
  • Minute Coconut Chicken Rice Bowl Flavorful and Quick
  • Hot Honey Feta Chicken Flavorful and Easy Recipe
  • Air Fryer Parmesan Crusted Chicken Crunchy Delight
  • Crispy Baked Ground Beef Tacos Simple and Tasty Meal
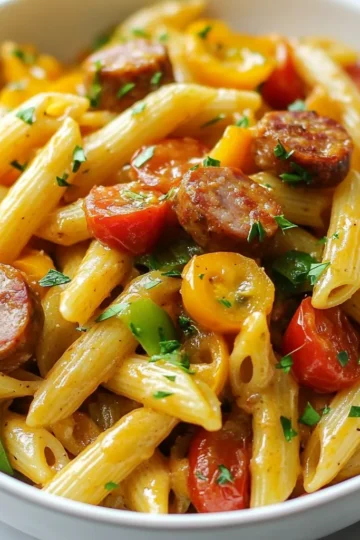
  • One-Pot Creamy Cajun Sausage Pasta Delight Recipe
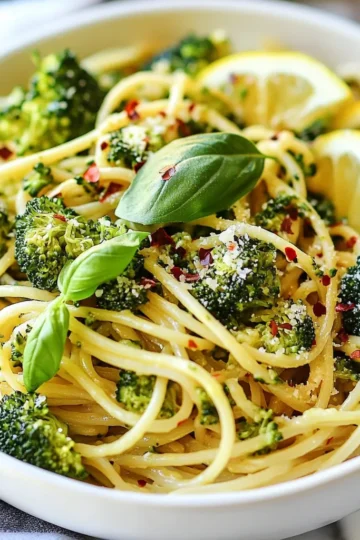
  • Healthy Broccoli Pasta Flavorful and Easy Recipe
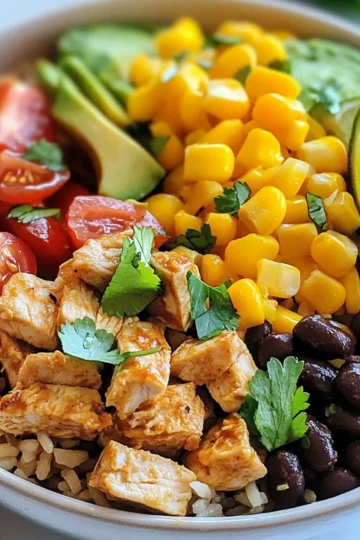
  • Chicken Burrito Bowl Flavorful and Easy Recipe
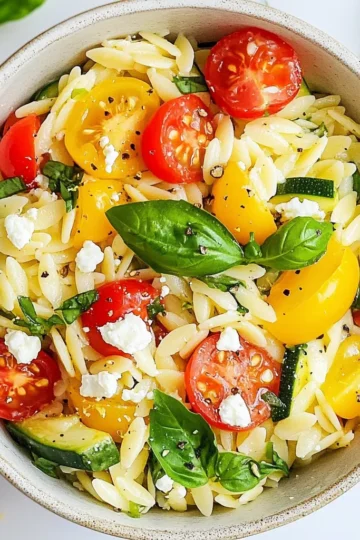
  • Weeknight Orzo Dinner Simple and Satisfying Meal
  • Steak Queso Rice Skillet Flavorful and Easy Recipe
  • Keto Philly Cheesesteak Rolls Packed with Flavor
  • High Protein Veggie Cottage Cheese Bake Recipe Delight
  • Easy Homemade Butter Chicken Delightful and Simple Recipe

Posts pagination

Previous page 1 2 3 4 … 17 Next page

Hi I’m Savanna

Cooking is my love language, and I’m thrilled to share these dishes with you. May each bite bring comfort and joy let’s enjoy this flavorful journey together!

More about me

Recent Desserts

  • - 20 jumbo pasta shells - 1 pound ground beef - 1 pound Italian sausage, casings removed - 1 cup ricotta cheese - 1 egg - 1 teaspoon garlic powder - 1 teaspoon onion powder - 1 teaspoon Italian seasoning - Salt and pepper to taste - 3 cups marinara sauce - 1 cup shredded mozzarella cheese - Fresh basil or parsley for garnish To make meaty stuffed shells, start with jumbo pasta shells. They hold the filling well. Use one pound of ground beef and one pound of Italian sausage for rich flavor. Mixing these meats gives a great taste and texture. You need ricotta cheese for a creamy filling. An egg helps bind everything together. Garlic powder, onion powder, and Italian seasoning give it that classic Italian flavor. Always add salt and pepper to taste. Marinara sauce is key to keep the shells moist. You’ll need three cups to pour over and under the shells. Finally, topping with shredded mozzarella makes it cheesy and delicious. Garnish with fresh basil or parsley for a pop of color and flavor. - Vegetables for stuffing - Additional cheeses - Herbs and spices You can get creative with add-ins! Chopped spinach or mushrooms can boost flavor and nutrition. You might want to mix in some bell peppers or zucchini for extra texture. Consider adding different cheeses too. Parmesan can add a nutty kick. You could also try provolone for a smoky taste. Fresh herbs like thyme or oregano can elevate the dish even more. - Side salad options - Bread suggestions - Wine pairings Pair your stuffed shells with a fresh side salad. A simple mix of greens, tomatoes, and a light vinaigrette works well. Garlic bread is also a tasty choice. It’s perfect for soaking up any extra sauce. For drinks, a nice red wine like Chianti or a light white wine like Pinot Grigio complements the flavors beautifully. You can also go for sparkling water with lemon for a refreshing non-alcoholic option. {{ingredient_image_1}} - Preheat the oven to 375°F (190°C). - Boil the jumbo pasta shells until they are al dente. Follow the package instructions. Drain the shells and set them aside to cool a bit. - In a large skillet, brown the ground beef and Italian sausage over medium heat. Cook until they are no longer pink. Drain any excess fat. - In a bowl, combine the cooked meat with ricotta cheese, one egg, garlic powder, onion powder, Italian seasoning, salt, and pepper. Mix until everything is well blended. - Carefully fill each pasta shell with the meat and cheese mixture. Do this gently to avoid tearing the shells. Set the stuffed shells aside. - In a baking dish, pour a thin layer of marinara sauce at the bottom. This helps prevent sticking. Place the stuffed shells on top of the sauce. Cover them with the remaining marinara sauce. - Cover the baking dish with aluminum foil. Bake for 25 minutes. - After that, remove the foil and bake for another 10-15 minutes. Look for the cheese to be bubbly and golden. - Once done, take it out of the oven and let it cool for a few minutes. Garnish with fresh basil or parsley before serving. - Avoid overstuffing: Fill each shell with just enough mixture. Overstuffing makes it hard to cook evenly. - Use a spoon or piping bag: A spoon works well, but a piping bag gives you more control. It helps to fill each shell neatly and quickly. - Beyond mozzarella: best cheese options: Try ricotta or provolone for rich flavor. You can also use fontina for a nutty taste. - Melting tips for best texture: For a creamy melt, mix cheeses. Grate them finely and spread them evenly for smooth melting. - Cooking the pasta too long: Cook the shells until just al dente. They will soften more in the oven. - Not letting the dish rest: Let the dish sit for a few minutes after baking. This helps the layers set and makes serving easier. Pro Tips Cook Shells Al Dente: Cooking the pasta shells until al dente ensures they hold their shape and don’t become mushy during baking. Use Fresh Herbs: Garnishing with fresh basil or parsley adds a burst of flavor and color to your dish, making it more appetizing. Make Ahead: You can prepare the stuffed shells in advance and store them in the refrigerator or freezer. Just adjust the baking time if cooking from frozen. Experiment with Cheese: Feel free to mix different cheeses like Parmesan or provolone into the filling for added depth of flavor. {{image_2}} You can make meaty stuffed shells healthier by changing a few ingredients. Instead of ground beef and Italian sausage, try turkey or chicken. These meats have less fat but still taste great. For cheese, consider low-fat options like cottage cheese or low-fat ricotta. These choices keep the flavor but are lighter on calories. If you want a vegetarian dish, swap out the meat for plant-based proteins. Crumbled tofu or lentils work well in the filling. You can also add chopped spinach, zucchini, or mushrooms for extra flavor and nutrients. These veggies boost the dish while keeping it hearty. To spice things up, add chili flakes or diced jalapeños to your filling. This will add a kick to each bite. You can also try different marinara sauces, like spicy arrabbiata or a rich roasted garlic sauce. Each sauce will change the taste and keep your meals exciting. To keep your meaty stuffed shells fresh, use airtight containers. Glass or plastic containers work well. Make sure to let the shells cool down before sealing. Store them in the fridge for up to 3 days. When you are ready to eat, just heat them up! If you want to save some for later, freezing works great. First, let the stuffed shells cool completely. Then, wrap each shell in plastic or place them in a freezer-safe container. They can last up to 3 months in the freezer. For reheating, thaw them overnight in the fridge. Place them in the oven at 350°F (175°C) until hot. In the fridge, meaty stuffed shells last about 3 days. If you see mold or notice a strange smell, it's time to toss them. Always trust your senses. If the shells are dry or hard, they are no longer good to eat. Yes, you can use ground turkey or chicken instead of beef and sausage. These options offer a lighter taste. Ground turkey is leaner, while chicken provides a mild flavor. Both will still give you a great dish. To make Meaty Stuffed Shells gluten-free, choose gluten-free pasta alternatives. Many brands offer gluten-free jumbo shells. You can also use zucchini noodles for a fresh twist. Just ensure the other ingredients are gluten-free too. Yes, you can prep the shells a day before. Cook the pasta and prepare the filling. Stuff the shells, then cover and refrigerate. Bake them the next day. Just add a few extra minutes to the baking time. Leftover filling can be used in many ways. Mix it into scrambled eggs for a tasty breakfast. You can also use it in stuffed peppers or as a topping for baked potatoes. There are so many options! To add spice, mix in crushed red pepper flakes or diced jalapeños. You can also use a spicy sausage. A dash of hot sauce in the filling adds heat without altering the flavor. Experiment to find your perfect spice level! Meaty stuffed shells are a hearty dish made from jumbo pasta filled with meat and cheese. You can customize them with vegetables and different cheeses. Serve them with a fresh salad or crusty bread for a complete meal. Remember the key tips for stuffing and baking to avoid common mistakes. Explore variations like lighter options or vegetarian choices to fit your taste. Follow these steps, and you’ll impress everyone with this delicious, comforting dish!
    Meaty Stuffed Shells Flavorful Dinner Delight
  • - 8 oz pasta (penne or fusilli) - 4 cups broccoli florets - 2 cups vegetable broth - 1 cup heavy cream - Coconut cream for dairy-free option - 1 tablespoon olive oil - 3 cloves garlic (minced) - Seasoning options: onion powder and Italian herbs To make One-Pot Creamy Broccoli Pasta, you need simple ingredients. First, select your pasta. Penne and fusilli are great choices. They hold sauce well and cook evenly. Next, you need fresh broccoli florets. The vibrant green adds nutrition and color to the dish. Vegetable broth is key. It infuses flavor into the pasta. Heavy cream adds richness. For a dairy-free option, coconut cream gives a nice twist. You cannot forget seasonings! Olive oil brings depth. Minced garlic adds a punch of flavor. Onion powder and Italian herbs enhance the taste. Salt and pepper are must-haves to round out the dish. With these ingredients, you set the stage for a creamy, delicious meal. Each element plays a role, making it easy to create a fantastic dish everyone will love! {{ingredient_image_1}} 1. In a large pot, heat 1 tablespoon of olive oil over medium heat. 2. Add 3 cloves of minced garlic and sauté for about 1 minute. Make sure it smells nice but does not burn. 3. Next, add 8 oz of uncooked pasta, 2 cups of vegetable broth, 1 teaspoon of onion powder, and 1 teaspoon of dried Italian herbs to the pot. Mix everything well. 1. Bring the mixture to a boil. Once boiling, reduce the heat and let it simmer. 2. Cook uncovered for about 10 minutes. Stir occasionally until the pasta is al dente and most liquid is gone. 3. Now, add 4 cups of broccoli florets to the pot. Gently stir them in. 4. Pour in 1 cup of heavy cream (or coconut cream for a dairy-free option) and mix to combine. 1. Cook for another 3 to 4 minutes. You want the broccoli to be tender and the sauce to thicken a bit. 2. Remove the pot from heat. Stir in ½ cup of grated Parmesan cheese until it melts and becomes creamy. 3. Season with salt and pepper to taste. 4. If you like some heat, sprinkle red pepper flakes on top before serving. To cook pasta just right, avoid overcooking. Start with a large pot of boiling water. Add salt for flavor. Cook the pasta until it's al dente, which means it should still have a slight bite. Stir the pasta often to keep it from sticking. This helps it cook evenly. To boost the taste, try adding spices like garlic powder or red pepper flakes. You can also mix in extra veggies like spinach or peas. Fresh herbs, like basil or parsley, add bright flavors. Dried herbs work too, but fresh herbs give the best taste. For a great plate presentation, serve the pasta in shallow bowls. Top with extra Parmesan cheese and a sprinkle of fresh herbs. Add a lemon wedge on the side for a fresh taste. Pair it with a light salad or a glass of white wine for a complete meal. Pro Tips Use Fresh Broccoli: Fresh broccoli not only adds vibrant color but also enhances the flavor and texture of the dish. Look for firm, bright green florets for the best quality. Cook Pasta Al Dente: Cooking pasta until it's al dente allows it to maintain a slight bite, which helps it hold up better in the creamy sauce and prevents it from becoming mushy. Customize the Creaminess: Adjust the amount of cream or coconut cream to your preference. For a lighter dish, use less cream, or try adding a splash of vegetable broth to thin it out. Add Protein: Consider adding cooked chicken, shrimp, or chickpeas to transform this pasta into a heartier meal, perfect for a satisfying lunch or dinner. {{image_2}} You can easily make this dish vegan. Just swap the Parmesan cheese for nutritional yeast. Nutritional yeast gives a cheesy flavor without any dairy. For a gluten-free option, choose gluten-free pasta. There are many brands available that taste great. Feel free to add other vegetables to your pasta. Peas, spinach, or bell peppers mix well with broccoli. You can also get creative with herbs and spices. Try using fresh basil or a pinch of smoked paprika for a new taste. Want to make it heartier? Add cooked chicken, shrimp, or beans. Chicken gives a nice protein boost and pairs well with the creamy sauce. Shrimp cooks fast and adds a seafood twist. Beans like chickpeas or white beans offer a plant-based protein option. Adding protein can turn this dish into a filling meal. After enjoying your one-pot creamy broccoli pasta, store any leftovers in the fridge. Use airtight containers to keep it fresh. Glass or BPA-free plastic containers work best. Make sure to let the pasta cool before sealing. This helps avoid moisture buildup. If you want to keep it longer, consider freezing. Divide the pasta into portions before freezing. Use freezer-safe bags or containers. Label them with the date for easy tracking. When it's time to enjoy your leftovers, you have two main options: microwave or stovetop. The microwave is quick but can make the pasta dry. To keep it creamy, add a splash of water or broth before reheating. Stir halfway through to heat evenly. The stovetop method is slower but gives better results. Heat a pan over low heat and add the pasta. Stir in a little cream or broth to maintain creaminess. Heat until warm, stirring often. In the fridge, your creamy broccoli pasta lasts about 3 to 4 days. Always check for signs of spoilage. If it smells sour or looks off, it's best to toss it. Look for any changes in texture or color too. If you notice mold, throw it away. Keeping an eye on your leftovers helps you enjoy them safely. This dish is quick! It takes about 10 minutes to prep and 15 minutes to cook. In total, you'll spend about 25 minutes from start to finish. That means you can whip up a tasty meal in no time. Yes, you can! Feel free to mix in your favorite veggies. Here are some great options: - Spinach - Peas - Zucchini - Bell peppers These choices add color and flavor. You can even use frozen vegetables if you're short on fresh ones. Absolutely! This pasta is great for meal prep. To store it, let it cool first. Then, place it in an airtight container. It will last in the fridge for up to three days. When you want to eat it, just reheat in the microwave or on the stove. Add a splash of broth or cream to keep it creamy. If you want a lighter sauce, you can swap heavy cream with: - Coconut cream - Cashew cream - Almond milk These options keep the dish tasty while cutting down on fat. This blog post gives you a clear guide to making creamy broccoli pasta. You learned about the key ingredients, cooking steps, and storage tips. With simple techniques and tasty variations, you can make this dish suit your taste. Remember, cooking is fun and allows you to be creative. Don’t hesitate to customize the recipe and share it with friends. Enjoy your cooking journey!
    One-Pot Creamy Broccoli Pasta Easy and Tasty Meal
  • - 2 pounds beef stew meat - 1 onion, diced - 3 cloves garlic, minced - 1 cup beef broth - 1 cup cream of mushroom soup - 2 tablespoons Worcestershire sauce - 2 teaspoons dried thyme - 1 teaspoon paprika - Salt and pepper to taste - 4 tablespoons cornstarch - 1/4 cup water In this recipe, the beef stew meat forms the heart of the dish. I use 2 pounds of tender beef. I cut it into 1-inch cubes for even cooking. The onion adds sweetness and depth. Dice it well to blend into the dish. I also add 3 cloves of minced garlic for a robust flavor. For the sauce, I choose 1 cup of beef broth. This gives a rich base. I add 1 cup of cream of mushroom soup. It brings creaminess and umami. Worcestershire sauce adds a tangy kick with just 2 tablespoons. For seasoning, I use dried thyme and paprika. Each adds its own unique touch. I sprinkle salt and pepper to taste, so you can adjust it as needed. To thicken the gravy, I mix 4 tablespoons of cornstarch with 1/4 cup of water. This slurry gives the sauce a nice consistency. Gather these ingredients and get ready for a hearty dinner delight! {{ingredient_image_1}} Searing the beef First, heat a large skillet over medium-high heat. Add one tablespoon of olive oil. Once hot, add 2 pounds of beef stew meat. Sear the beef for about 5 to 7 minutes. Make sure to brown all sides. This step gives the beef a rich flavor. After browning, transfer the beef to the crock pot. Sautéing aromatics In the same skillet, add 1 diced onion and 3 minced garlic cloves. Sauté for 2 to 3 minutes. Cook until the onions look soft and slightly clear. This adds a nice depth of flavor to the dish. Creating the sauce In a bowl, mix together 1 cup of beef broth, 1 cup of cream of mushroom soup, and 2 tablespoons of Worcestershire sauce. Add 2 teaspoons of dried thyme, 1 teaspoon of paprika, salt, and pepper to taste. Stir well. Pour this mixture over the seared beef in the crock pot. Cooking the beef tips Cover the crock pot. Cook on low for 6 to 8 hours or on high for 3 to 4 hours. The beef should become tender during this time. Thickening the gravy In the last 30 minutes, mix 4 tablespoons of cornstarch with 1/4 cup of water. This creates a slurry. Stir the slurry into the gravy in the crock pot. This will help thicken the sauce nicely. Final touches before serving Once the beef is tender, taste the gravy. Adjust seasonings if needed. Stir gently to coat the beef in the thick gravy. You are now ready to serve your hearty dish! Why is searing important? Searing beef adds a rich flavor and color. It locks in juices, making your beef tender. This step helps create a mouthwatering crust, making each bite more enjoyable. If you're short on time, skip searing. You can place the raw beef directly in the Crock Pot. It will still cook well, but you miss the deep flavors that searing brings. To elevate your dish, consider adding more seasonings. You might try garlic powder, onion powder, or even black pepper. Each will add depth to the gravy. Always taste during cooking. Adjust seasonings as needed. If you find it needs a little more kick, add some hot sauce or red pepper flakes. Remember, it's all about personal taste. What should you serve with beef tips and gravy? Mashed potatoes or rice are great choices. They soak up the tasty gravy perfectly. You could also try egg noodles or polenta for something different. Present your meal nicely by garnishing with fresh parsley. Even a sprinkle of black pepper can add a nice touch. Creating a beautiful plate makes your meal feel special. Pro Tips Pat the Beef Dry: Before searing, make sure to pat the beef cubes dry with paper towels. This helps achieve a better sear, enhancing the flavor. Use Quality Beef Broth: Opt for a low-sodium beef broth or homemade broth for a richer flavor. This will elevate the overall taste of your gravy. Add Vegetables: Consider adding carrots or mushrooms to the crock pot for additional flavor and nutrition. They complement the beef perfectly. Let it Rest: After cooking, let the beef tips rest for about 10 minutes before serving. This allows the juices to redistribute for a more tender bite. {{image_2}} If you want to switch things up, consider using different cuts of beef. Chuck roast is a great choice if you can't find stew meat. It is tender and full of flavor. You can also try using venison for a unique twist. For those who need a dairy-free option, use a dairy-free cream of mushroom soup. You can find many brands that offer this. Alternatively, you can make your own by blending sautéed mushrooms with coconut milk. If you prefer using an Instant Pot, you can cook this dish much quicker. Sear the beef as usual, then add all ingredients. Cook on high pressure for about 35 minutes. Let the pressure release naturally for best results. For stovetop cooking, use a heavy pot. Cook the beef on medium heat for about 1-1.5 hours. Keep an eye on it, and stir often to prevent sticking. Adjust the cooking time based on how tender you like your beef. Different slow cooker models may have varying heat levels. If your slow cooker runs hot, check the beef after 4 hours on low. You want it tender but not overcooked. You can easily change up the flavor of your beef tips. For an Asian-inspired twist, add soy sauce, ginger, and sesame oil. You can also throw in some broccoli or bell peppers for extra color and taste. If you like bold flavors, try adding cumin, chili powder, or smoked paprika for a Southwestern flair. You can even toss in some black beans and corn for a full meal. Each variation allows you to make this dish your own while keeping it delicious. Enjoy experimenting with these ideas! To store leftovers in the fridge, let the beef tips cool. Place the beef and gravy in an airtight container. This keeps the dish fresh and tasty. You can store it for up to three days. If you want to enjoy it later, remember to label the container with the date. For freezing portions, use freezer-safe bags or containers. Make sure to remove as much air as possible. This helps prevent freezer burn. You can freeze the beef tips for up to three months. When you’re ready to eat, thaw it in the fridge overnight before reheating. You can reheat beef tips on the stovetop or in the microwave. On the stovetop, heat it gently over low heat. Stir often to keep it from sticking. In the microwave, use a microwave-safe dish and cover it loosely. Heat in short bursts to avoid overcooking. To keep the flavor and texture, add a splash of beef broth if it seems dry. Enjoy your delicious meal! Cooking beef tips in a Crock Pot takes about 6-8 hours on low and 3-4 hours on high. The low setting gives a more tender result since the beef cooks slowly. If you are short on time, the high setting can work too. Yes, you can skip searing the beef. However, searing adds a nice flavor and color. When you sear, you lock in the juices. The meat also develops a deeper taste. If you don't sear, the dish may taste milder. You can serve beef tips and gravy with many sides. Traditional options include mashed potatoes or rice. These absorb the gravy well. For a twist, try egg noodles or bread. You can also add a side of steamed veggies or a fresh salad for balance. This blog post offers a guide to making delicious beef tips and gravy. We covered key ingredients, including beef stew meat, broth, and seasonings. The step-by-step instructions detail preparation and cooking methods. I shared helpful tips for enhancing flavor and variations to try. Additionally, I provided storage advice to keep leftovers fresh. In the end, exploring this recipe can bring warmth and flavor to your meals. Enjoy the process and make it your own!
    Crock Pot Beef Tips and Gravy Hearty Dinner Delight
  • To make Slow Cooker Sweet Tangy Orange Chicken, you need these key ingredients: - 1.5 lbs boneless, skinless chicken thighs - 1 cup fresh orange juice - 1/4 cup soy sauce - 1/4 cup honey - 2 tablespoons rice vinegar - 2 cloves garlic, minced - 1 tablespoon ginger, grated - 1 teaspoon sesame oil - 1 tablespoon cornstarch mixed with 2 tablespoons water (for thickening) - Cooked rice (for serving) You can add some optional ingredients to boost flavor: - 1/2 teaspoon red pepper flakes for heat - 2 green onions, sliced for garnish To prepare this dish, you will need: - A slow cooker to cook the chicken - A mixing bowl to combine the sauce ingredients - A whisk for mixing the sauce - Two forks for shredding the chicken after cooking {{ingredient_image_1}} To start, place the chicken thighs at the bottom of your slow cooker. This helps the meat soak in all the tasty sauce. Make sure the chicken pieces do not overlap. This way, they cook evenly. You want every bite to be juicy and full of flavor. Next, grab a mixing bowl. In it, whisk together these ingredients: - 1 cup fresh orange juice - 1/4 cup soy sauce - 1/4 cup honey - 2 tablespoons rice vinegar - 2 cloves garlic, minced - 1 tablespoon ginger, grated - 1 teaspoon sesame oil - 1/2 teaspoon red pepper flakes (optional) Mix until everything blends well. This sauce is what makes your chicken sweet and tangy. Pour this mixture over the chicken. Ensure the chicken is fully covered with the sauce. This step is crucial for the best taste. Now, cover your slow cooker. Set it to cook on low for 6-8 hours. If you’re short on time, you can set it on high for 3-4 hours. The chicken will become tender and easy to shred. When the time is up, check that the chicken is fully cooked. It should shred easily with two forks. This means it is ready for the next steps. To adjust the sweetness of your orange chicken, add more honey. If you want it sweeter, go for an extra tablespoon. For a spicier kick, mix in more red pepper flakes. Start with a pinch and taste the sauce. You can always add more, but you can't take it out! If the dish becomes too sweet, balance it with a splash of rice vinegar. After cooking, let the chicken sit for a few minutes. This cooling helps it stay moist. Use two forks to shred the chicken. Hold one fork in each hand and pull apart the meat. Shredding is easy and quick this way. If you find it hard, try using your hands to pull the chicken apart. For a thicker sauce, use cornstarch mixed with water. First, mix one tablespoon of cornstarch with two tablespoons of water. Stir this slurry into the sauce in your slow cooker. Let it cook for 15 to 20 minutes on high. This will make the sauce nice and thick. Always taste the sauce after thickening. Adjust the flavor if needed! Pro Tips Use Fresh Ingredients: Freshly squeezed orange juice and fresh ginger will enhance the flavor of your dish significantly compared to bottled alternatives. Chicken Thighs for Tenderness: Boneless, skinless chicken thighs are ideal for slow cooking as they remain juicy and tender, making shredding easy. Adjusting Spice Levels: If you prefer a milder dish, reduce or omit the red pepper flakes. Conversely, for extra heat, consider adding a pinch of cayenne pepper. Thickening the Sauce: If you prefer a thicker sauce, let it simmer uncovered for a few minutes after adding the cornstarch slurry, stirring occasionally to prevent sticking. {{image_2}} You can switch out chicken thighs for other proteins. Chicken breasts work well too. They are leaner and still tasty. If you want a plant-based option, try tofu. Use firm tofu and press it first. This will help it absorb flavors better. You can also use shrimp or pork if you prefer. To change the flavor, try different citrus fruits. Instead of orange juice, use lime or lemon juice. Each will give a fresh twist. You can also add spices like cumin or coriander for a warm taste. If you like sweet heat, try adding more red pepper flakes. The mix of flavors can make this dish even more fun. You can cook this dish in an Instant Pot too. Just set it to cook on high for 10 minutes. Release the pressure and follow the same steps for thickening the sauce. If you prefer using the stovetop, sear the chicken first in a pan. Then, add the sauce and let it simmer for about 20 minutes until the chicken is tender. This method is faster but still gives great results. To store leftovers safely, wait until the orange chicken cools. Place it in an airtight container. Store it in the fridge for up to four days. Make sure to seal it tightly to keep out air and moisture. If you want to freeze the dish, let it cool completely first. Use a freezer-safe container or bag to store it. Squeeze out any air before sealing. The chicken can last for up to three months in the freezer. When you're ready to eat, thaw it overnight in the fridge. Reheat in a pan over low heat or in the microwave until hot. The sweet tangy orange chicken lasts about four days in the fridge. In the freezer, it remains good for three months. Always check for any off smells or discoloration before eating. If in doubt, throw it out. Yes, you can use chicken breasts. They will cook well in the slow cooker. Chicken breasts are leaner than thighs. This might change the texture and taste a bit. Thighs stay moist and tender, while breasts cook faster and can dry out. If you choose breasts, adjust cooking time to avoid dryness. Cook them for about 4-6 hours on low or 2-3 hours on high. You can serve this dish with several sides. Here are some tasty ideas: - Steamed rice: It soaks up the delicious sauce. - Stir-fried veggies: Keep it colorful and healthy. - Quinoa: A nutty flavor that pairs nicely with the chicken. - Salad: A fresh side to balance the flavors. - Egg noodles: They add a fun twist to the meal. These sides make a complete meal that everyone will love. To change the heat level, you can modify the red pepper flakes. If you want it mild, skip them altogether. For some heat, start with a pinch and taste. You can always add more later. If you want more spice, consider adding fresh chili or hot sauce. Just add these in small amounts to keep it balanced. Remember to taste as you go! This blog post outlined how to make Sweet Tangy Orange Chicken in a slow cooker. We covered required ingredients, necessary equipment, and step-by-step cooking instructions. You learned tips for flavor enhancement and how to shred chicken perfectly. We also explored variations and storage tips. In conclusion, this dish is easy to customize. You can adjust flavors or try new proteins. Whether you follow the recipe or make it your own, enjoy a tasty meal!
    Slow Cooker Sweet Tangy Orange Chicken Delight

Recent Drinks

  • To make whipped hot chocolate, you will need: - 2 cups whole milk - 1/2 cup heavy cream - 1/4 cup unsweetened cocoa powder - 1/2 cup semi-sweet chocolate chips - 1/4 cup granulated sugar - 1 teaspoon vanilla extract - A pinch of salt - Whipped cream (for topping) - Chocolate shavings or cocoa powder (for garnish) When I choose ingredients, I focus on quality. Here are my tips: - Milk: Use whole milk for a rich taste. Look for milk that is fresh. - Cream: Heavy cream creates a thick and fluffy topping. Check the fat content. - Cocoa Powder: Unsweetened cocoa gives depth. Opt for Dutch-processed for smoother flavor. - Chocolate Chips: Semi-sweet chips add sweetness and richness. Choose high-quality brands. - Sugar: Granulated sugar is best. You can use raw sugar for a unique flavor. - Vanilla Extract: Pure vanilla has great taste. Avoid artificial flavoring when possible. Not everyone can use the same ingredients. Here are some swaps: - Milk Alternatives: Almond milk or oat milk can replace whole milk for a dairy-free option. - Cream Alternatives: Coconut cream gives a rich texture without dairy. - Sugar Alternatives: Try maple syrup or honey instead of granulated sugar. - Cocoa Powder: Carob powder can replace cocoa for a caffeine-free option. - Chocolate Chips: Use dark chocolate or dairy-free chips for a vegan version. To make whipped hot chocolate, start with the milk. Pour 2 cups of whole milk into a small saucepan. Heat it over medium heat until it steams. Make sure the milk does not boil. This step helps keep the chocolate smooth. Next, remove the saucepan from the heat. Add in the following ingredients: - 1/4 cup unsweetened cocoa powder - 1/2 cup semi-sweet chocolate chips - 1/4 cup granulated sugar - 1 teaspoon vanilla extract - A pinch of salt Whisk all these ingredients well. Keep whisking until everything blends into a smooth mix. This part is key for rich flavor. Now, take a separate bowl. Pour in 1/2 cup of heavy cream. Use a hand mixer to whip it. Keep going until soft peaks form. Once the cream is ready, fold half of it into the hot chocolate mixture. This gives the drink a lighter feel. Pour your whipped hot chocolate into mugs. Leave some space at the top. Top each mug with a generous dollop of the remaining whipped cream. Finally, add some fun touches. Sprinkle chocolate shavings or a dusting of cocoa powder on top. This makes each cup look special and tasty. Whisking is all about speed and technique. Use a whisk or a hand mixer for best results. Make sure to whisk in the cocoa and chocolate chips well. This ensures no clumps remain. When folding in the whipped cream, be gentle. Use a spatula and move from the bottom to the top. This keeps the air in the cream and keeps it fluffy. Seeing is believing! Check out videos online that show how to make whipped hot chocolate. Visual guides help you understand each step better. You can find many demos on popular cooking websites or platforms like YouTube. Watching someone else makes it easier to follow along. Enjoy making this delightful treat! To make great whipped cream, start with cold heavy cream. Use a chilled bowl for best results. Whip the cream with a hand mixer on medium speed. Stop when you see soft peaks form. This means the cream holds its shape but is not too stiff. For extra flavor, add a bit of vanilla extract while whipping. One mistake is using warm cream. Warm cream won’t whip up well. Another mistake is over-whipping. If you whip too long, the cream turns into butter. Watch it closely. Lastly, don't skip the sugar. It helps balance the cream's taste and adds a nice sweetness to your whipped hot chocolate. You can make your whipped hot chocolate even more fun! Try adding flavored syrups, like peppermint or caramel. A sprinkle of cinnamon or nutmeg can give it a warm spice. You can also mix in a bit of instant coffee for a mocha twist. Get creative and find your favorite flavor combo! {{image_2}} You can add fun flavors to your whipped hot chocolate. Here are some ideas: - Peppermint: Add a few drops of peppermint extract. Top with crushed candy canes. - Caramel: Stir in caramel sauce before serving. Drizzle more on top for a treat. - Hazelnut: Use hazelnut spread in the mix for a nutty twist. - Spicy: Add a dash of cayenne pepper for a kick. These flavors make your drink unique and exciting. If you want a dairy-free whipped hot chocolate, try these swaps: - Milk: Use almond milk, coconut milk, or oat milk instead of whole milk. - Cream: Substitute heavy cream with coconut cream or a dairy-free version. - Chocolate: Choose dairy-free chocolate chips for a rich taste. These options help everyone enjoy this treat. Change your whipped hot chocolate with seasonal flavors. Here are some fun ideas: - Pumpkin Spice: Add pumpkin puree and pumpkin spice for fall. - Eggnog: Use eggnog instead of milk for a holiday vibe. - S'mores: Mix in marshmallow fluff and graham cracker crumbs for summer fun. These twists keep your whipped hot chocolate fresh and exciting all year long. To store leftover whipped hot chocolate, transfer it to an airtight container. Cover tightly to keep it fresh. Avoid mixing the whipped cream with the drink. This keeps the cream fluffy. Store it in the fridge for up to three days. When you want to enjoy your whipped hot chocolate, heat it gently in a saucepan. Use low heat to avoid burning. Stir frequently to mix well. If the whipped cream has deflated, you can whip up more. Add this fresh cream on top for a great finish. The ingredients in your whipped hot chocolate have different shelf lives. Whole milk lasts about five to seven days after opening. Heavy cream stays fresh for about a week. Cocoa powder can last for years if stored in a cool, dry place. Keep chocolate chips for about a year if sealed well. Whipped hot chocolate is a rich drink that combines hot cocoa and whipped cream. I love how the creamy texture makes it feel special. You start with a warm chocolate base. Then, you fold in whipped cream for extra fluff. This creates a delightful drink that feels like dessert in a cup. You can top it with more whipped cream and chocolate shavings. It’s a cozy treat perfect for chilly days. Yes, you can prepare the hot chocolate base ahead of time. Just follow the recipe steps to make your hot chocolate. Once it cools, store it in the fridge. When you're ready to enjoy, reheat it gently on the stove. Whip fresh cream to top it right before serving. This keeps the fluffiness and taste fresh. It’s a great way to save time on busy days. You can easily customize your whipped hot chocolate with a few fun twists. Here are some ideas: - Flavorings: Add peppermint extract for a minty taste. - Spices: A dash of cinnamon or nutmeg adds warmth. - Milk alternatives: Use almond or oat milk for a different flavor. - Chocolate: Try dark chocolate chips for a richer taste. - Toppings: Experiment with sprinkles, caramel drizzle, or flavored whipped cream. Mix and match these ideas to create your own version of whipped hot chocolate! We covered the essential ingredients, tips for choosing quality items, and swaps for diets. I shared step-by-step instructions, helpful whisking tips, and visuals to guide you. We explored tricks to make perfect whipped cream and avoid common mistakes. I also provided tasty flavor options and fun variations for every season. Lastly, I included storage tips to keep leftovers fresh. Enjoy your whipped hot chocolate adventure! Customize it to fit your taste and have fun experimenting.
    Whipped Hot Chocolate Delightful and Creamy Treat
  • - 1 cup brewed espresso or strong coffee - 1 cup milk (dairy or non-dairy) - 2 tablespoons pure maple syrup - 1/2 teaspoon ground cinnamon - 1/4 teaspoon vanilla extract - Whipped cream - Extra ground cinnamon for garnish - Extra maple syrup for drizzle You can use any milk you like. I enjoy whole milk for rich taste. Almond milk adds a nice nutty flavor. Oat milk makes it creamy and smooth. If you prefer non-dairy, soy milk is a great choice too. Each milk brings a unique twist to your latte. Try different types to find your favorite! Start by brewing one cup of strong coffee or espresso. Use your favorite method, like a French press or coffee maker. If you want it to be extra rich, espresso is the best choice. The coffee should be hot and ready for the next steps. This drink shines with a bold flavor that pairs well with maple and cinnamon. Next, pour one cup of milk into a small saucepan. Heat it on medium-low until it is warm, but do not let it boil. Boiling milk can ruin the texture. Once warm, use a whisk or a milk frother to froth the milk. Aim for a creamy texture with some bubbles. This frothy milk will add a lovely touch to your latte. In a separate bowl, mix the brewed coffee, two tablespoons of pure maple syrup, half a teaspoon of ground cinnamon, and a quarter teaspoon of vanilla extract. Stir this mixture well to combine all the flavors. Slowly pour the frothed milk into the coffee mixture. Use a spoon to hold back the foam at first. After pouring, spoon the foam on top of the latte. For a beautiful finish, drizzle some extra maple syrup over the foam and sprinkle a pinch of ground cinnamon. Enjoy this warm drink right away! To get the best froth, start with cold milk. You can use dairy or non-dairy milk. Whole milk gives the best foam, but almond or oat milk works too. Heat your milk gently until warm, but don’t let it boil. Use a whisk or a milk frother. Whisk quickly to add air and create a light foam. The foam should be creamy and have small bubbles. This froth adds a nice touch to your latte. Taste is personal, so adjust the sweetness and spice to your liking. Start with 2 tablespoons of maple syrup. If you want it sweeter, add more syrup a little at a time. For spice, 1/2 teaspoon of ground cinnamon is perfect. If you want more flavor, add a pinch more. You can even try nutmeg for a different taste. Always mix well after each addition to get the right balance. Presentation makes your drink special. Use clear glass mugs to show off the layers. After pouring the latte, add whipped cream on top for a treat. Drizzle extra maple syrup over the cream. This looks nice and adds flavor. Sprinkle a little ground cinnamon or cocoa on top for color. Serve your latte with a small spoon for stirring. Enjoy your cozy drink with a warm blanket and a good book! {{image_2}} You can easily make this latte dairy-free. Use plant-based milk like almond, oat, or coconut. Each milk adds a unique taste. Almond milk offers a nutty flavor, while oat milk is creamy. Coconut milk gives a tropical twist. Choose what you love most! Want to mix it up? Try adding new flavors! For a pumpkin spice latte, mix in 1 tablespoon of pumpkin puree and a pinch of nutmeg. For a mocha twist, add 1 tablespoon of cocoa powder to your espresso blend. It gives a rich, chocolatey taste. You can also try flavors like caramel or hazelnut for a fun twist. Feeling warm? Make a cold version! Brew your coffee, then chill it in the fridge. For the milk, use cold milk and froth it if you can. Combine the chilled coffee with milk and maple syrup. Serve it over ice for a refreshing treat. Drizzle with maple syrup and sprinkle cinnamon on top. It’s perfect for hot days! If you have any leftover milk, keep it in the fridge. Use an airtight container to keep it fresh. For opened maple syrup, store it in a cool, dark place. If you want it to last longer, keep it in the fridge. Ground cinnamon can stay in your pantry. Just make sure it is in a sealed jar. To reheat your Maple Cinnamon Latte, pour it into a small saucepan. Heat it gently over low heat. Stir often to keep it from burning. You can also use a microwave. Heat it for 30 seconds, then stir. Repeat until it's warm, but do not let it boil. To keep your coffee fresh, store it in a dark, cool place. Use an airtight container to keep air out. Buy whole beans instead of ground coffee. Grind them just before brewing for the best taste. Use your coffee within two weeks for the best flavor. I recommend using brewed espresso or strong coffee for the best flavor. Espresso gives a rich base. If you prefer drip coffee, just brew it stronger than usual. The key is to balance the coffee with the sweet maple syrup and warm milk. This balance gives the drink its cozy taste. Yes, you can prepare parts of the latte ahead. Brew the coffee and store it in the fridge. You can also froth the milk before serving. Just warm it up again when you’re ready. However, I suggest making it fresh for the best taste. The flavors are at their peak when served right away. Maple syrup offers natural sweetness without refined sugar. It has antioxidants that help your body. These compounds can fight inflammation and support your immune system. Plus, maple syrup contains minerals like manganese and zinc. This makes it a better choice than regular sugar. Enjoying it in your latte adds a tasty touch with health perks. We explored how to create a Maple Cinnamon Latte from start to finish. First, we covered essential ingredients, optional toppings, and the best milk choices. Next, we detailed each step: brewing coffee, frothing milk, and combining flavors. I shared tips for perfect froth, sweetness adjustments, and serving ideas. You can even try fun variations or store leftovers for later. In the end, making this latte is easy and rewarding. Enjoy the warm flavors and make it your own!
    Maple Cinnamon Latte Cozy and Warm Beverage Delight
  • To make pumpkin spice hot chocolate, gather these simple ingredients. They create a warm, cozy drink you’ll love. - 2 cups milk (or non-dairy alternative) - 2 tablespoons cocoa powder - 2 tablespoons pumpkin puree - 2 tablespoons sugar (adjust to taste) - 1/2 teaspoon pumpkin spice mix (or a mix of cinnamon, nutmeg, and ginger) - 1/4 teaspoon vanilla extract - Whipped cream for topping - Additional pumpkin spice and chocolate shavings for garnish Milk is key for a creamy texture. You can use dairy milk or try almond, oat, or soy milk for a non-dairy choice. The cocoa powder adds rich chocolate flavor. Sugar balances the taste, so adjust it to your liking. Pumpkin puree brings a smooth texture and pumpkin flavor. The pumpkin spice mix gives that warm, fall taste. If you don’t have pumpkin spice, mix cinnamon, nutmeg, and ginger for a similar effect. Finally, whipped cream makes the drink feel special. Top it with a sprinkle of more pumpkin spice and chocolate shavings for a lovely finish. Enjoy making your pumpkin spice hot chocolate! 1. Start by heating 2 cups of milk in a medium saucepan. Keep the heat on medium-low. You want it warm but not boiling. 2. Whisk in 2 tablespoons of cocoa powder, 2 tablespoons of pumpkin puree, and 2 tablespoons of sugar. Mix until it's smooth. 3. Stir the mixture gently as it heats. Wait until it steams and is hot enough to serve. 4. Add 1/2 teaspoon of pumpkin spice mix and 1/4 teaspoon of vanilla extract. Whisk again until it all blends well. 5. Once ready, remove the saucepan from the heat. Pour the hot chocolate into your favorite mugs. 6. Top each mug with whipped cream. For fun, sprinkle extra pumpkin spice and chocolate shavings on top. Tips for Achieving the Perfect Blend: - Whisk well to avoid any lumps. - Make sure the milk does not boil to keep it creamy. - Taste and adjust the sugar as you like. Serving the hot chocolate in mugs makes it warm and cozy. Enjoy your delicious drink on a chilly day! How to adjust sweetness to taste Start by adding sugar slowly. This way, you can check the taste as you go. I usually use two tablespoons, but you can add more or less. If you want it sweeter, try using a sugar alternative, like honey or maple syrup. Just remember, each sweetener has its own flavor. Recommendations for the best cocoa powder For rich flavor, use high-quality cocoa powder. I recommend brands like Dutch-processed cocoa. It gives a deeper taste and pairs well with pumpkin. Always sift your cocoa powder to avoid lumps. This makes your drink smooth and creamy. Tips for the creamiest texture To get the creamiest hot chocolate, use whole milk or a full-fat non-dairy option. Almond milk or oat milk also works well. Heat your milk slowly and whisk often. This adds air and helps create a nice foam. If you want an even richer drink, add a splash of cream or use half-and-half. {{image_2}} You can easily make this drink dairy-free. Use almond, soy, or oat milk instead of regular milk. Each choice gives a unique taste. For a creamier texture, try coconut milk. It adds a rich flavor that pairs well with pumpkin. When it comes to whipped cream, look for vegan brands made from coconut or almond. You can also make your own by blending coconut cream with a bit of sugar and vanilla. This gives you a light and fluffy topping without dairy. Want to spice it up? Add a dash of peppermint extract. It adds a fresh twist that brightens the drink. You can also mix in other spices like cardamom or allspice for a different flavor profile. For chocolate lovers, try using dark chocolate instead of cocoa powder. It brings a deeper taste that complements pumpkin well. If you’re feeling adventurous, white chocolate can add a sweet creaminess. Simply melt it into your hot chocolate as you mix. Each option lets you create a new cozy drink! To keep your leftover pumpkin spice hot chocolate fresh, follow these tips: - Cool it down: Let the hot chocolate reach room temperature before storing. - Use an airtight container: This prevents any odd smells from other foods in your fridge. - Refrigerate: Store it in the fridge for up to three days. When you are ready to enjoy your pumpkin spice hot chocolate again, reheating is simple: - Stovetop method: Pour your cold hot chocolate into a saucepan. Heat over low heat. Stir often to avoid sticking. - Microwave method: Use a microwave-safe mug. Heat in short bursts, about 30 seconds. Stir in between to ensure even heating. For the best taste, do not overheat your hot chocolate. It should be warm and comforting, not boiling. You can also add a little more pumpkin spice or sugar for extra flavor during reheating. Enjoy your cozy treat again! Can I use no sugar alternatives? Yes, you can use no sugar alternatives like stevia or monk fruit. These sweeteners add flavor without the calories. Adjust the amount to fit your taste. How can I make this drink spicy? To add spice, try more pumpkin spice mix or a dash of cayenne. A little heat can balance the sweet taste. You can also add a pinch of chili powder for a fun twist. Where can I find or buy pre-made Pumpkin Spice Hot Chocolate? You can find pre-made mixes at most grocery stores. Look for brands like Starbucks or Land O’Lakes. Online retailers also offer many options, making it easy to enjoy without making it yourself. What are the health benefits of the ingredients used? The main ingredients each offer benefits: - Pumpkin puree is high in vitamins A and C. - Cocoa powder is rich in antioxidants. - Milk provides calcium and protein, supporting bone health. This drink can be a tasty treat that also nourishes your body. To make the perfect Pumpkin Spice Hot Chocolate, start with quality ingredients. Choose your milk, cocoa, and spices wisely. Follow the steps to blend flavors well, ensuring a rich taste. Don’t shy away from personalizing your drink with toppings or variations. Store any leftovers properly, and reheating is easy. Explore FAQs for extra tips to enhance your drink. Enjoy making this cozy treat anytime you crave warmth and flavor. Happy sipping!
    Pumpkin Spice Hot Chocolate Delightful Cozy Treat
  • To make a tasty pumpkin spice protein smoothie, you need a few key ingredients: - 1 cup unsweetened almond milk - 1/2 cup canned pumpkin puree - 1 ripe banana - 1 scoop vanilla protein powder - 1 teaspoon pumpkin pie spice - 1/2 teaspoon vanilla extract - 1/4 cup Greek yogurt These main ingredients create a creamy texture and a rich flavor. The almond milk provides a smooth base. Canned pumpkin adds nutrition and a lovely orange color. The ripe banana sweetens the mix naturally. You can add a few optional items to make your smoothie special: - 1 tablespoon maple syrup (for extra sweetness) - Ice cubes (for a cold, refreshing drink) If you like sweeter smoothies, the maple syrup is a great choice. Ice cubes will chill the drink and give it a frosty feel. Let’s break down the health perks of these ingredients: - Almond milk: Low in calories and a good source of vitamin E. - Pumpkin puree: High in fiber and packed with vitamins A and C. - Banana: Great for potassium and natural sweetness. - Vanilla protein powder: Helps build and repair muscles. - Pumpkin pie spice: Adds flavor and may boost your metabolism. - Greek yogurt: Full of protein and good for gut health. Each ingredient plays a role in making this smoothie not just tasty but also nutritious. Enjoy the rich flavors and health benefits all in one glass! To make the pumpkin spice protein smoothie, start by gathering your ingredients. You need: - 1 cup unsweetened almond milk - 1/2 cup canned pumpkin puree - 1 ripe banana - 1 scoop vanilla protein powder - 1 teaspoon pumpkin pie spice - 1 tablespoon maple syrup (optional) - 1/2 teaspoon vanilla extract - 1/4 cup Greek yogurt - Ice cubes (optional) Now, take a blender and add the almond milk first. This helps the other ingredients blend smoothly. Next, add the canned pumpkin puree and ripe banana. Then, spoon in the Greek yogurt. This gives your smoothie a nice creamy texture. Next, sprinkle in the vanilla protein powder and pumpkin pie spice. If you like it sweeter, pour in the maple syrup and add the vanilla extract. Blend on high speed until everything is smooth and creamy. If you want it cold, toss in some ice cubes and blend again. To get the right consistency, consider the following tips: - Start with less almond milk. You can always add more if needed. - If your smoothie is too thick, add a splash more milk. - For a thicker smoothie, use more Greek yogurt or less milk. You can customize your smoothie based on what you like. If you want more spice, add a little extra pumpkin pie spice. If you prefer more sweetness, add more maple syrup. Just taste the smoothie as you blend. Adjust until it’s just right for you! To make a great smoothie, start with your liquid base. Use almond milk, as it adds creaminess. Next, layer in your pumpkin puree and banana. They create a rich, smooth texture. Add your Greek yogurt for protein and thickness. Blend on high speed. This helps mix all ingredients well. If you want it chilled, toss in ice cubes before blending. Blend until everything is smooth and creamy. You can boost your smoothie’s nutrition easily. Add a handful of spinach for extra vitamins. Chia seeds are another great choice. They add fiber and omega-3s. Try replacing some almond milk with Greek yogurt. This will up your protein content. If you need more sweetness, use honey instead of maple syrup. Just a small amount can make a big difference. Watch out for using too much liquid. This can make your smoothie too thin. Also, skip the overripe fruits. They can alter the taste. Don’t forget to measure your spices. Too much pumpkin pie spice can overpower the other flavors. Lastly, avoid blending too long. This can heat your smoothie and change its texture. Keep it simple, and enjoy your tasty treat! {{image_2}} You can easily make this smoothie vegan. Swap the Greek yogurt for a plant-based yogurt. Use a vegan protein powder too. Almond milk is already dairy-free, so you’re all set there. If you want, try coconut yogurt. It adds a nice creaminess and flavor. Want to spice it up? Add a pinch of nutmeg or cinnamon for more warmth. A scoop of almond butter can add a nutty taste. You can also toss in some spinach. It’s a great way to sneak in greens without changing the flavor much. If you don’t have protein powder, no worries! You can replace it with chia seeds or hemp seeds. These options boost protein and add healthy fats. Silken tofu is another great choice. It makes the smoothie creamy and packs a protein punch. If you have leftover smoothie, store it in an airtight container. Glass jars work well. Seal it tight to keep air out. This helps the smoothie stay fresh. You can keep it in the fridge for up to 24 hours. Shake it well before drinking. The ingredients may separate a bit. Freezing smoothie ingredients is smart and easy. Prepare your ingredients in advance. Use small containers or freezer bags. Measure out the almond milk, pumpkin puree, banana, and yogurt. You can freeze them in portions. When you want a smoothie, just blend the frozen mix with fresh almond milk. This makes for a quick and tasty treat. If you have a smoothie you don't want to drink, don't waste it. Use it in different ways. Pour it over oatmeal for a tasty breakfast. You can add it to pancakes for extra flavor. You can even freeze it into popsicles for a fun snack. There are many ways to enjoy your smoothie! Yes, you can use fresh pumpkin. Start by cooking the pumpkin until soft. Then, scoop it out and mash it. Use about half a cup of fresh pumpkin in your smoothie. It adds a nice, fresh flavor. However, canned pumpkin is easier and quicker. To make this smoothie dairy-free, you can skip the Greek yogurt. Use more almond milk instead. You can also add a dairy-free yogurt. Look for one made from almond or coconut. Both options keep it creamy and tasty. You can add many flavors to your smoothie! Try a pinch of nutmeg for warmth. Add a handful of spinach for extra nutrients. You can also mix in some peanut butter for protein. Each ingredient can change the taste and make it even better! You now know how to make a delicious pumpkin spice protein smoothie. We discussed key ingredients and their benefits. I shared step-by-step blending tips for the right mix. Remember to customize flavors and avoid common mistakes. You can also explore variations with vegan options and freezer methods for storage. This smoothie can boost your nutrition and taste great. Enjoy making it your own!
    Pumpkin Spice Protein Smoothie Tasty and Healthy Treat

Footer

↑ back to top

More information

  • Dinner
  • Drinks
  • Appetizers
  • Dessert
  • About
  • Contact Us

    Our Policies

    • Privacy Policy
    • Cookie Policy
    • Copyright Policy
    • Disclaimer
    • GDPR Policy
    • Terms Of Us

    Copyright © 2024 My Saved Recipe